Magical Triangle Christmas Ornaments: Perfect Tags for Gift Giving – Making the Cut


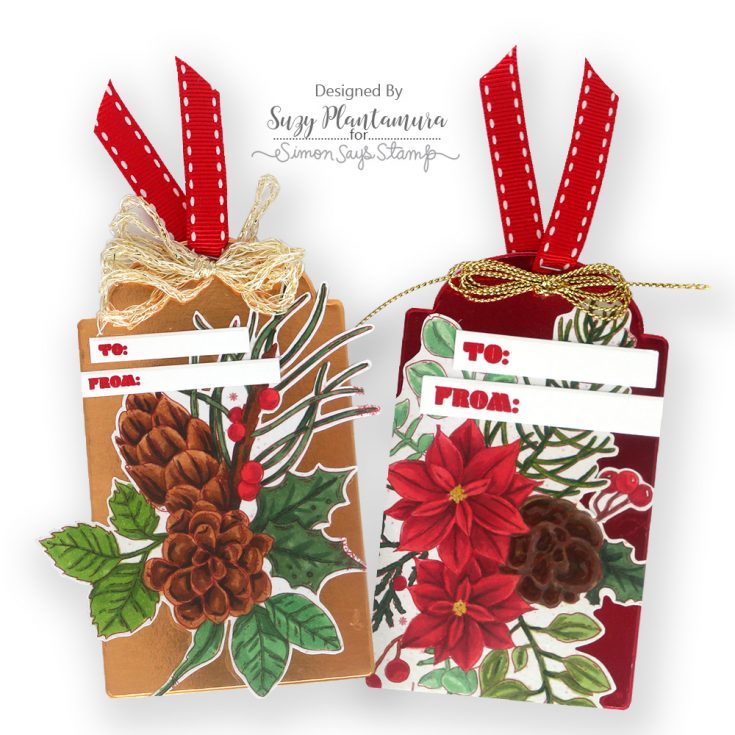
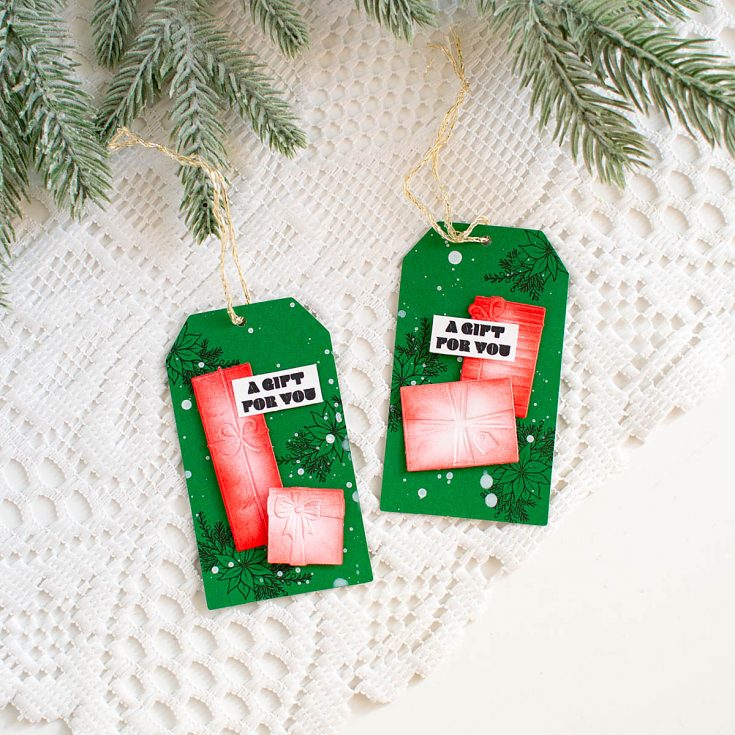
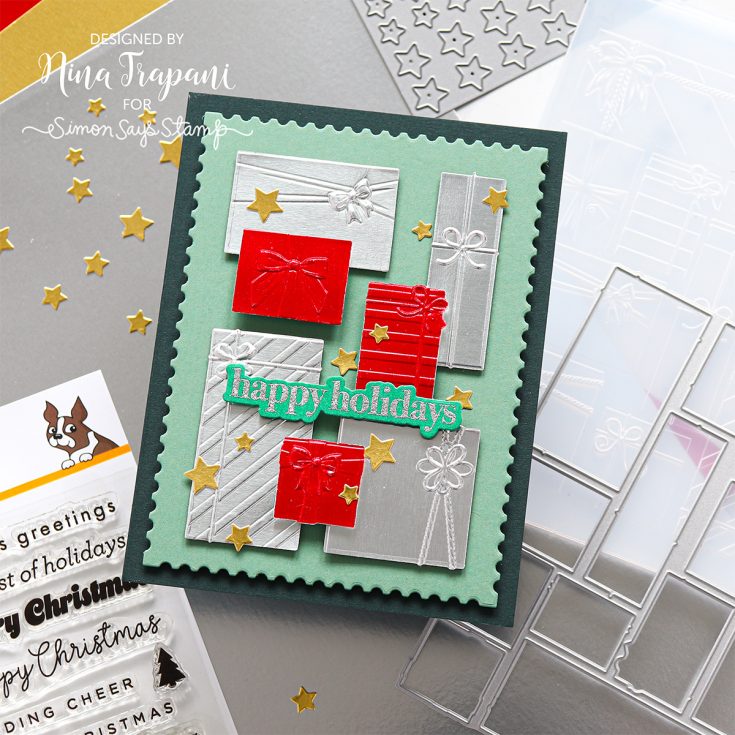
Hi friends! Happy Wednesday! Please join me in welcoming special guest Nichol Spohr to our blog back in our monthly installment of Making the Cut – our monthly blog series that celebrates the love of all things die cutting! Nichol is showcasing some darling new products JUST released in our exclusive And Everything Nice collection including our Holiday Triangle Bundle, Rounded Tags, and our Festive Merriment stamp set! Plus! How sweet of an addition is it to add the pom poms to the top? Read on to learn more and enjoy!


WATCH THE VIDEO:

SUPPLIES:
|


A big thank you to YOU, our reader — and to Nichol for being our guest!
Wrap ALL of your Gifts with Love this Year – with the help of our Limited Edition Kit!
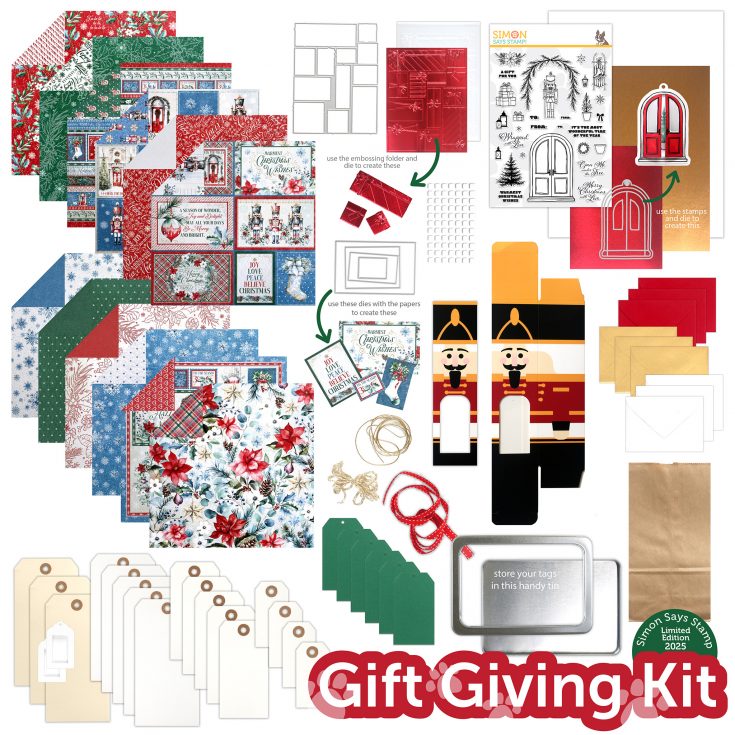
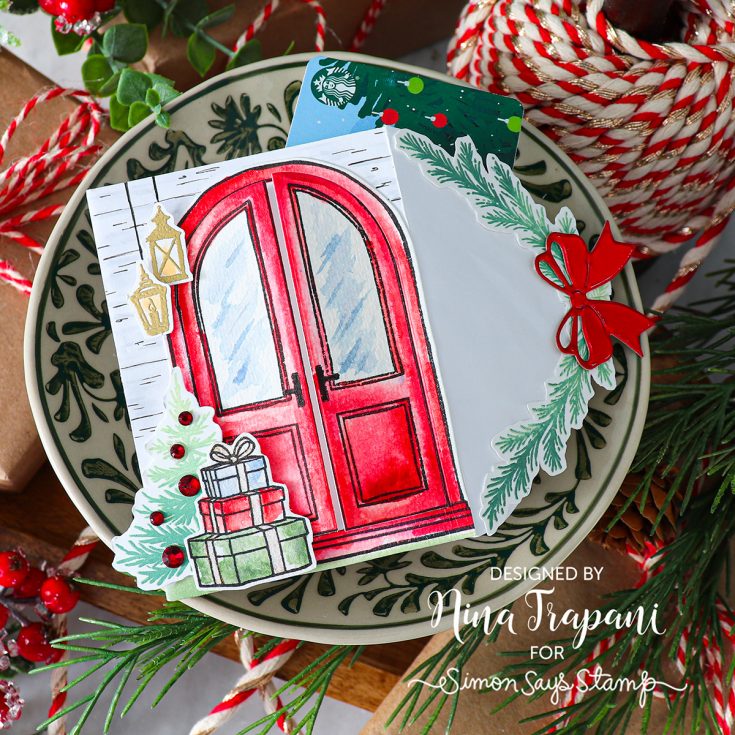
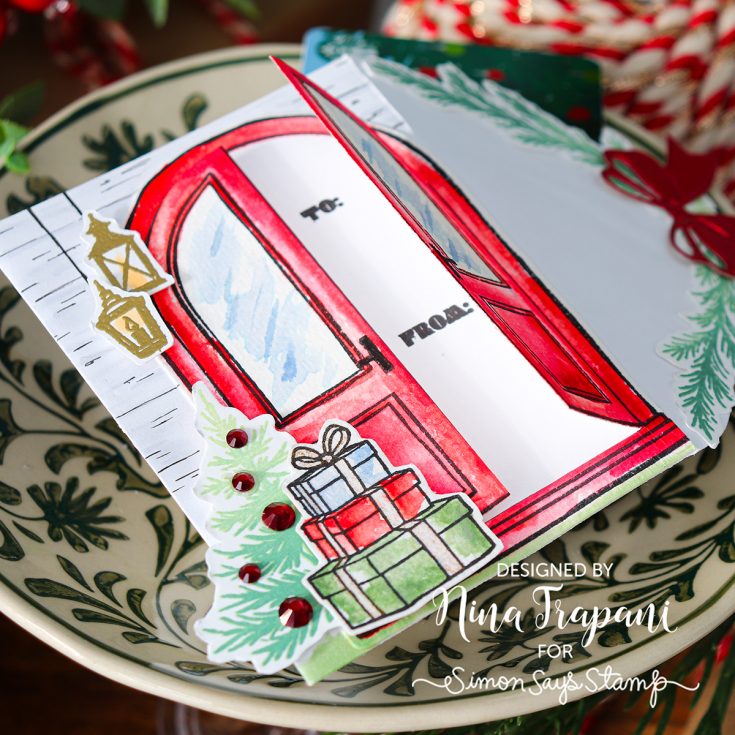
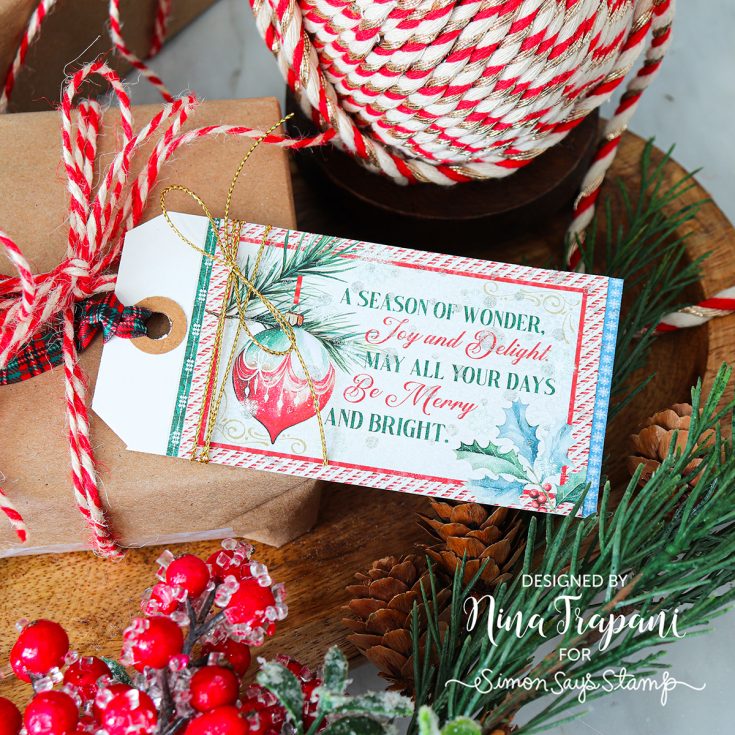
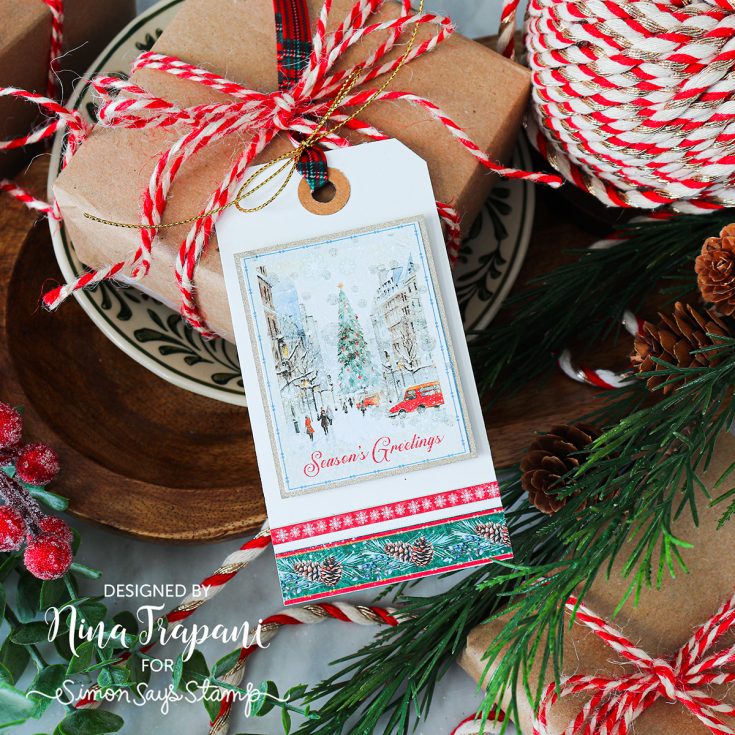
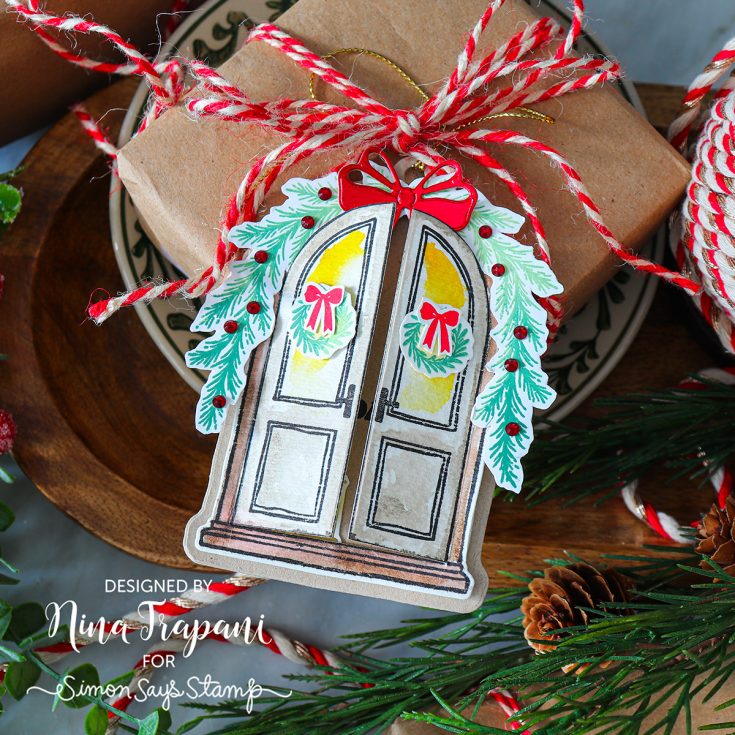
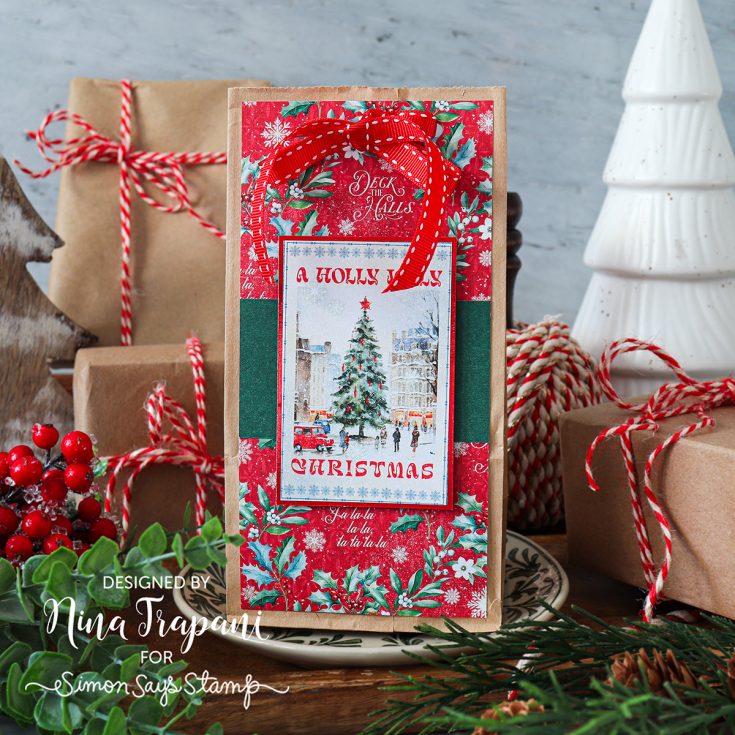
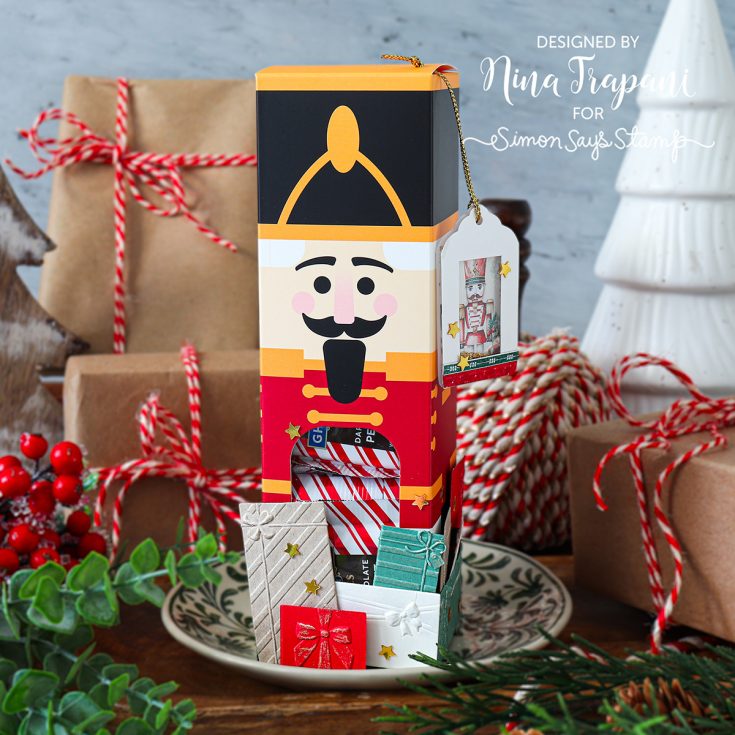
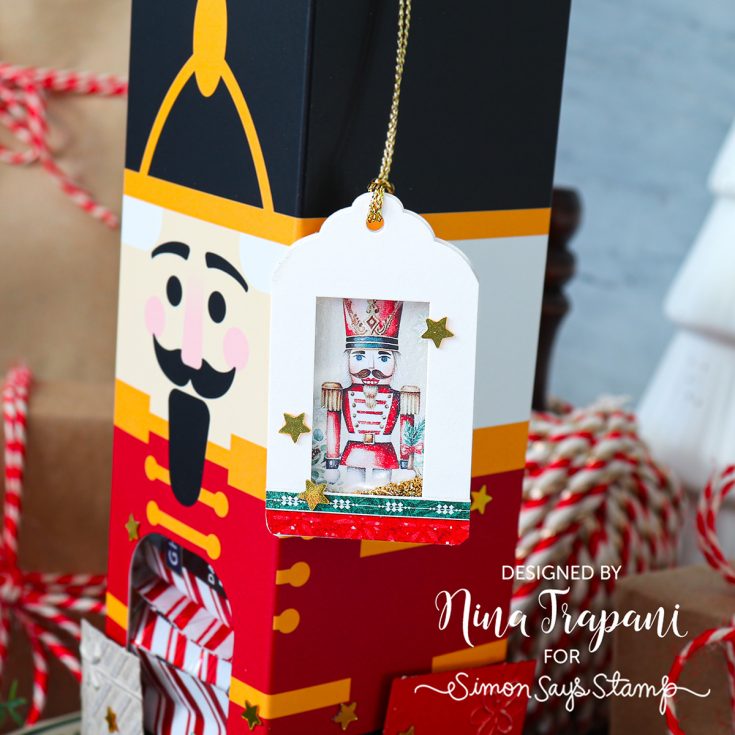
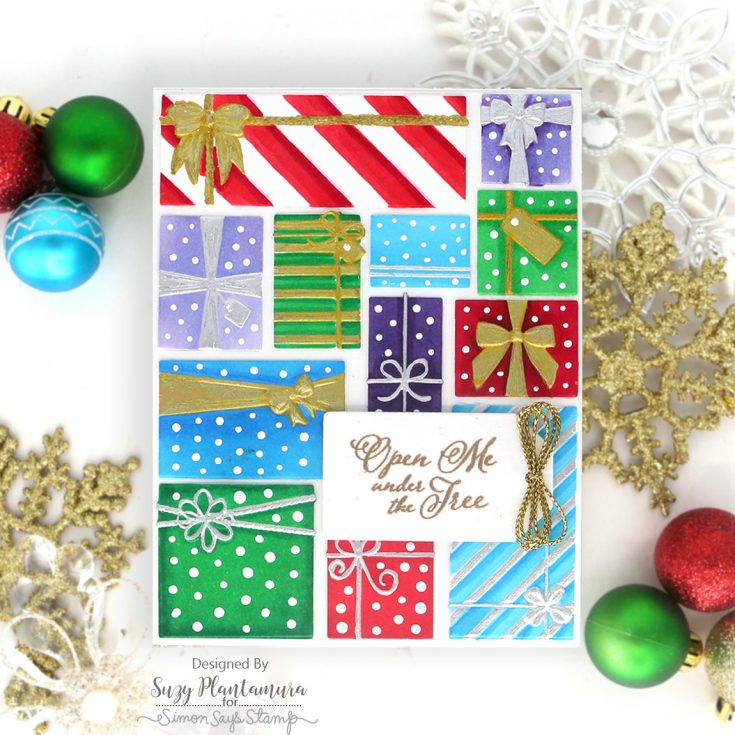
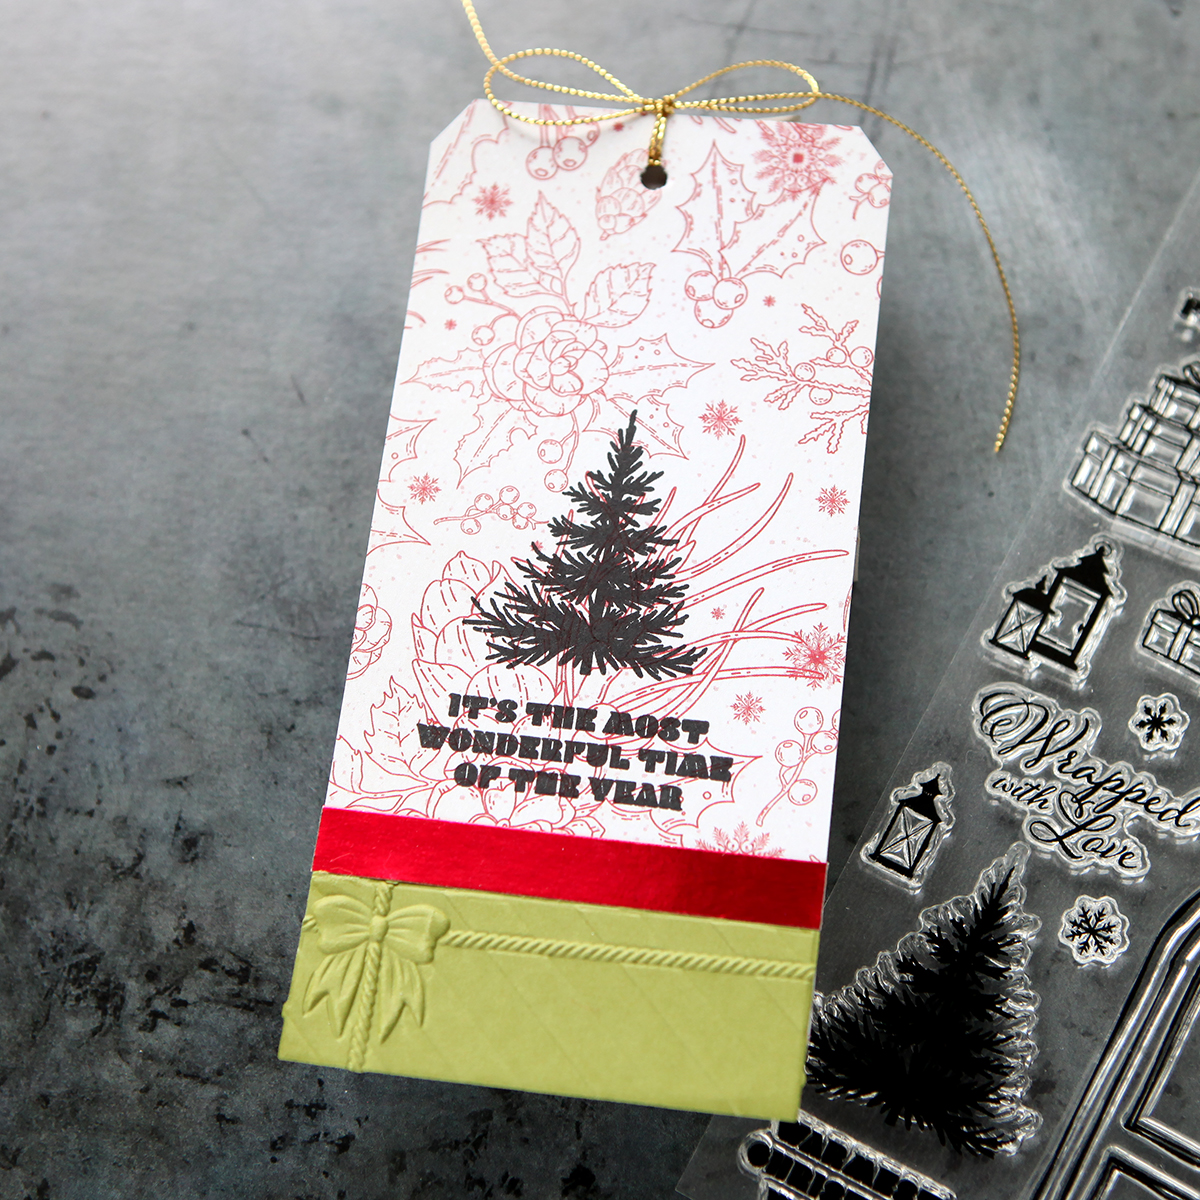
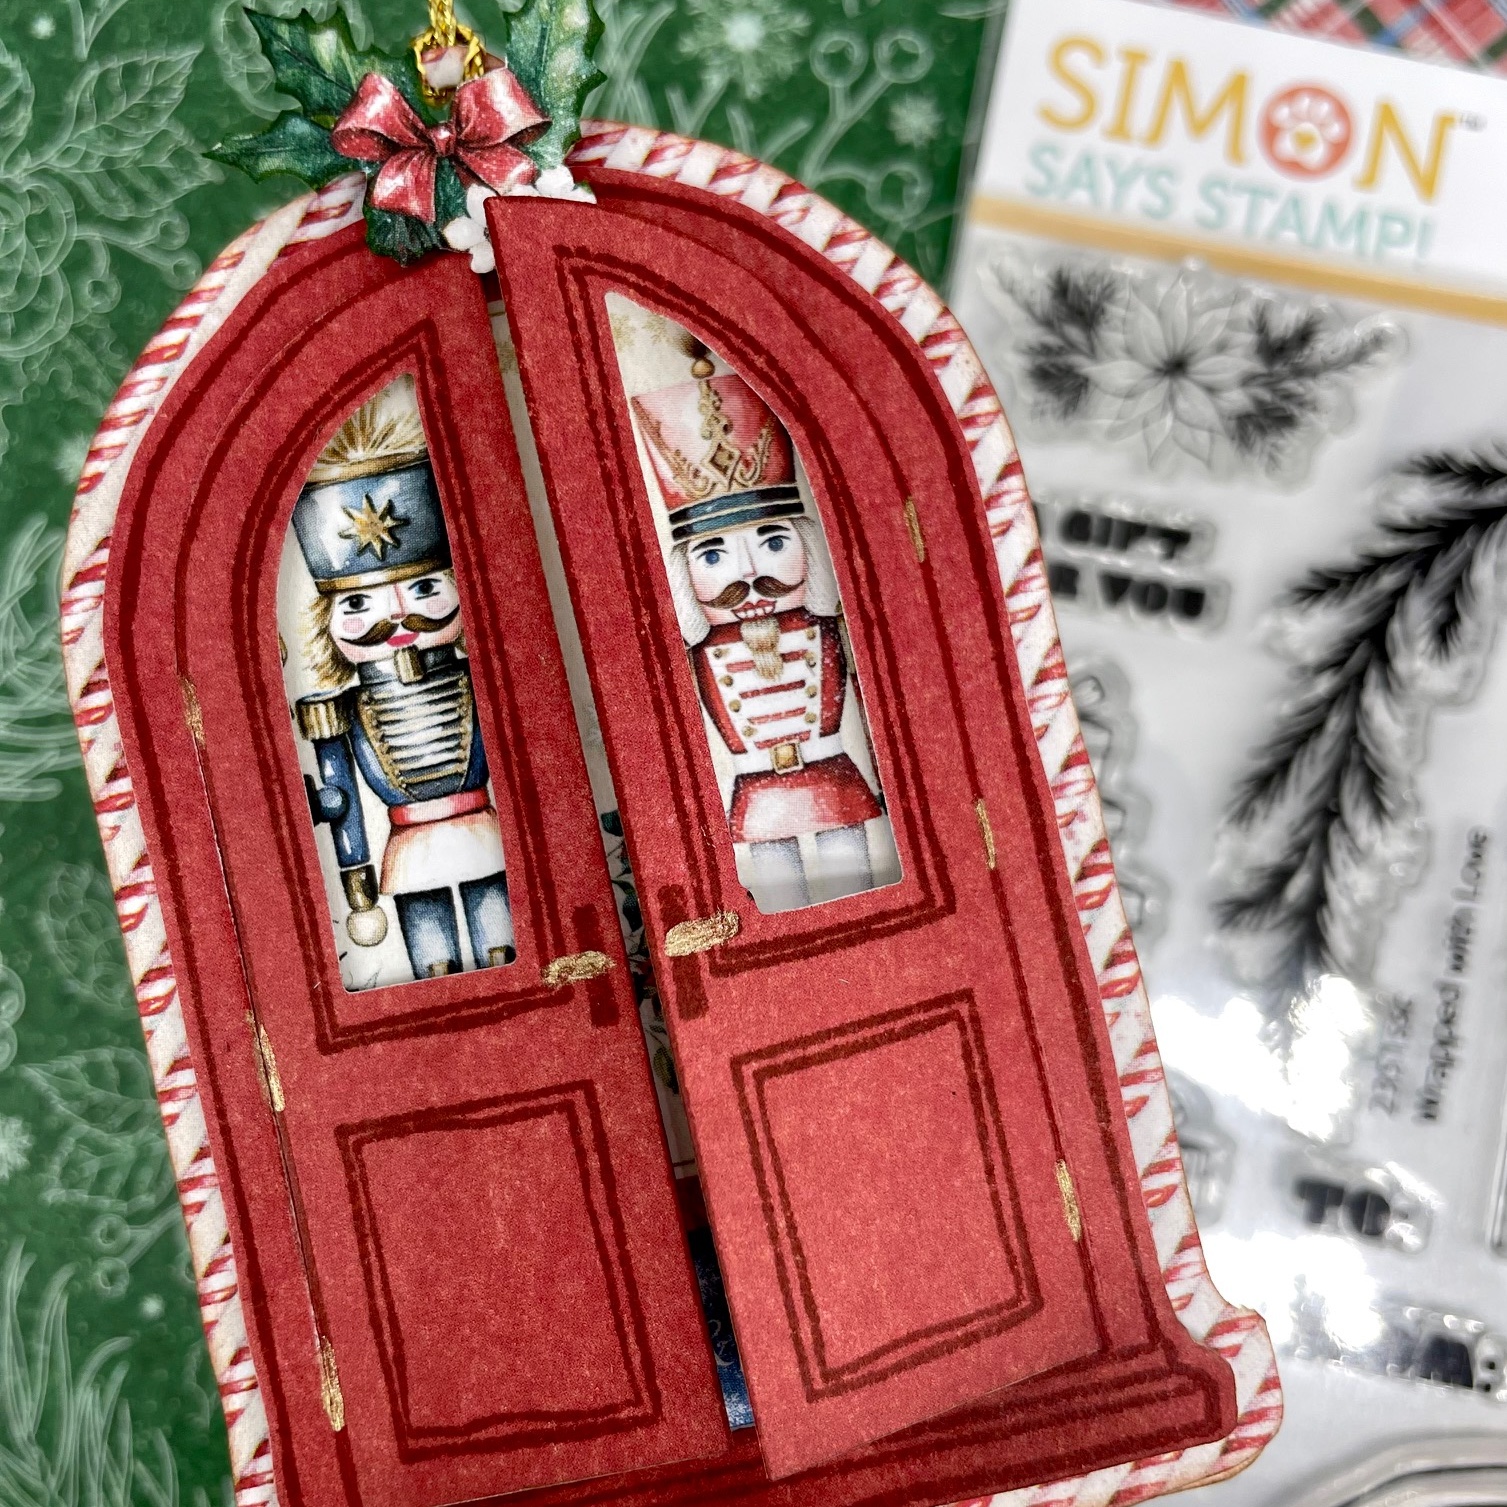
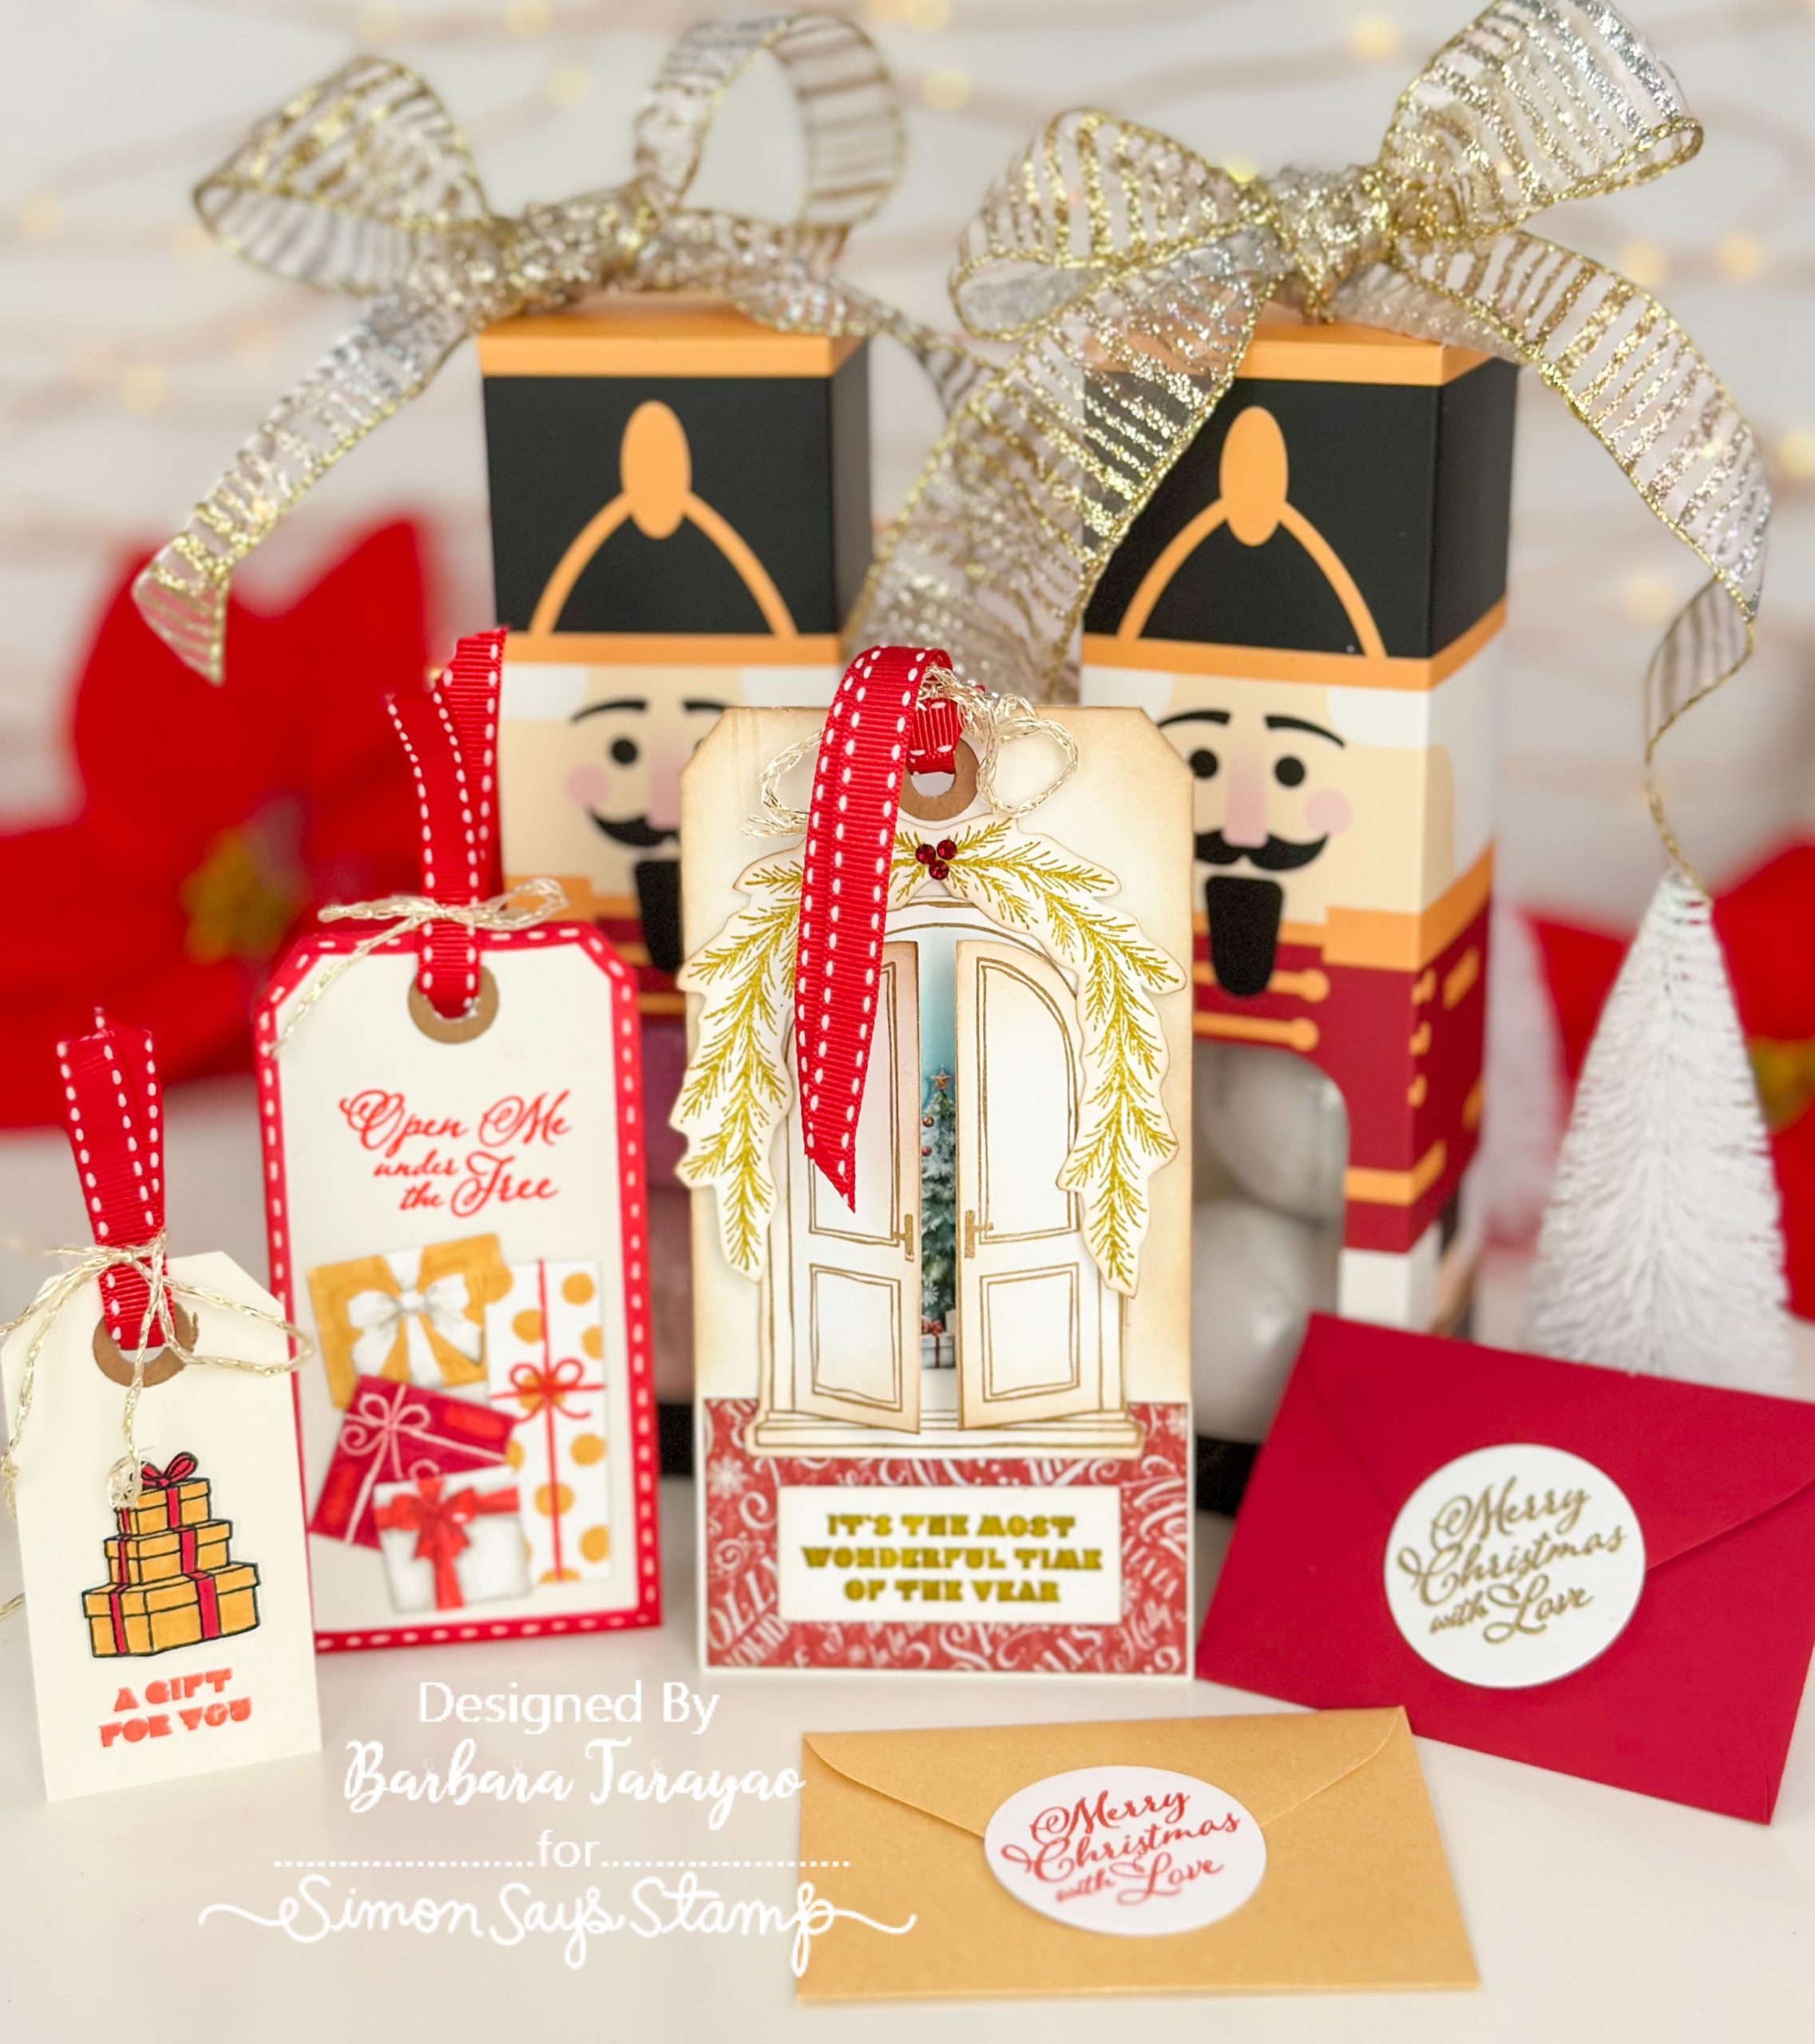
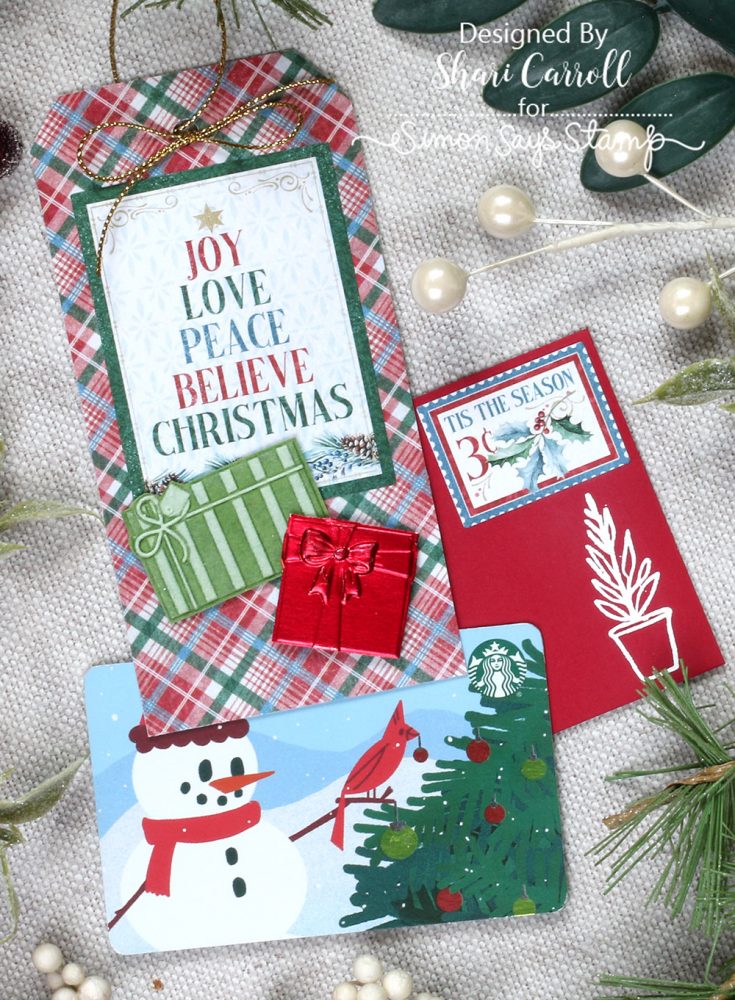
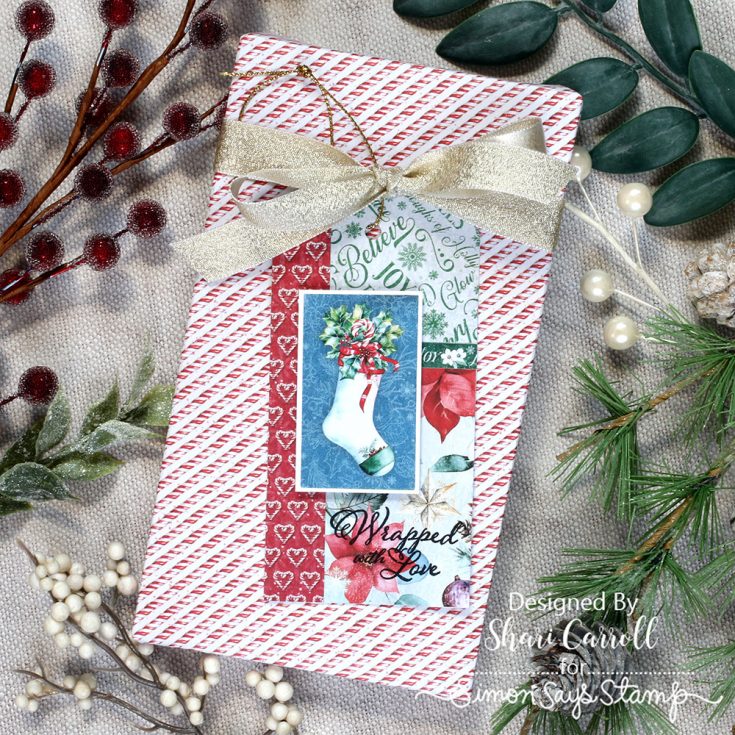
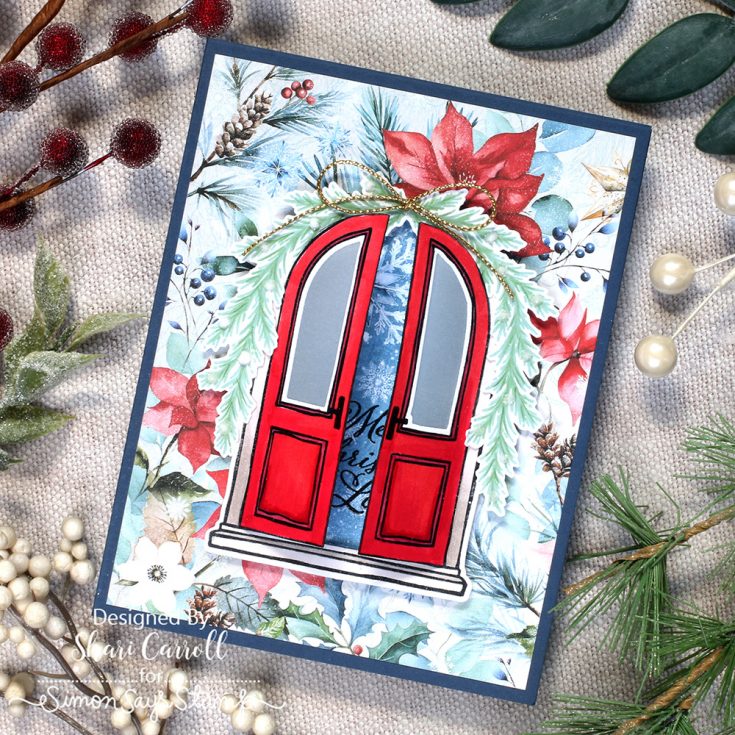
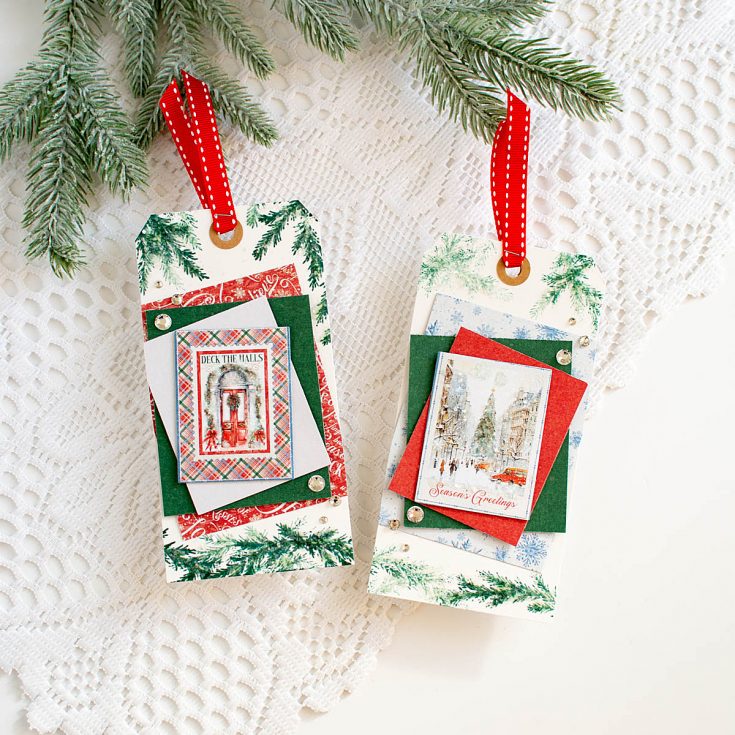
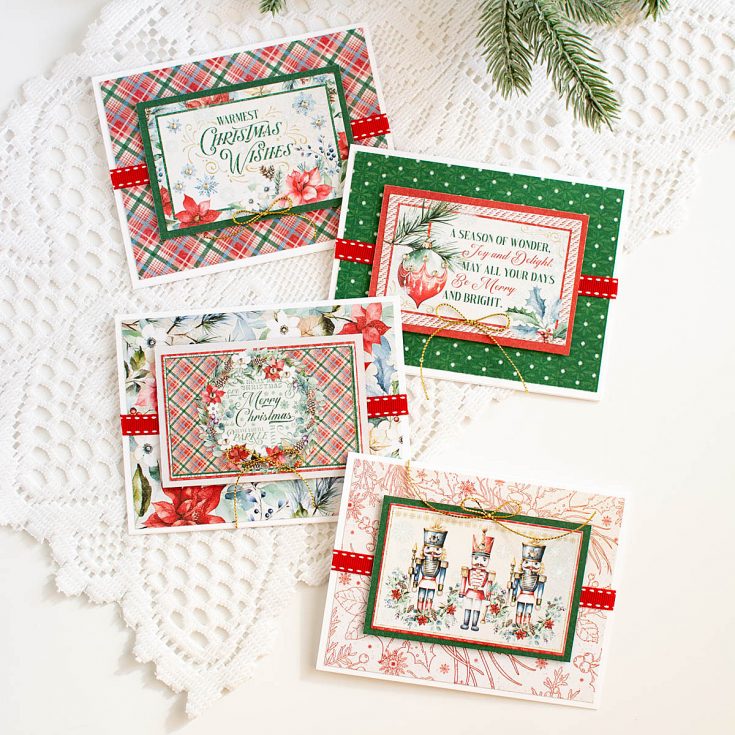
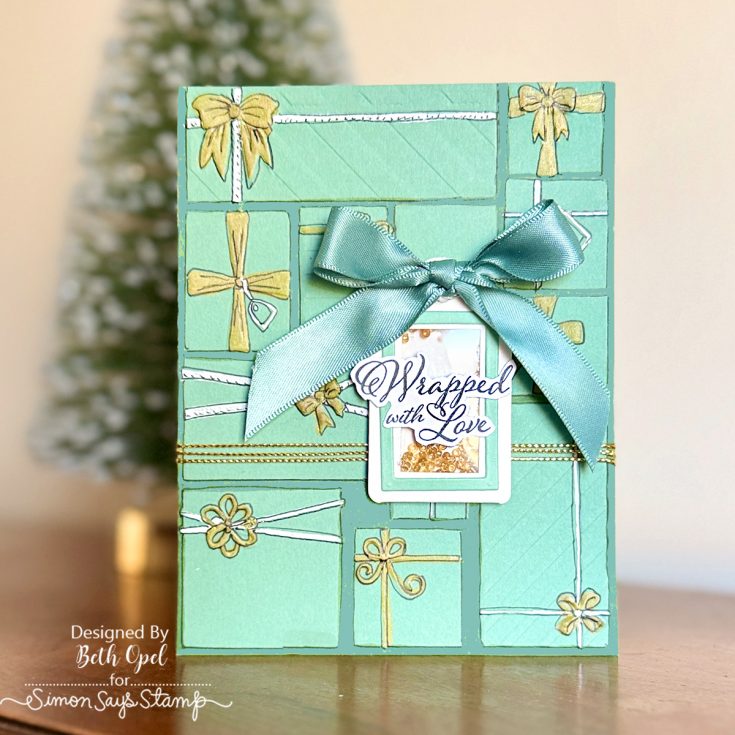
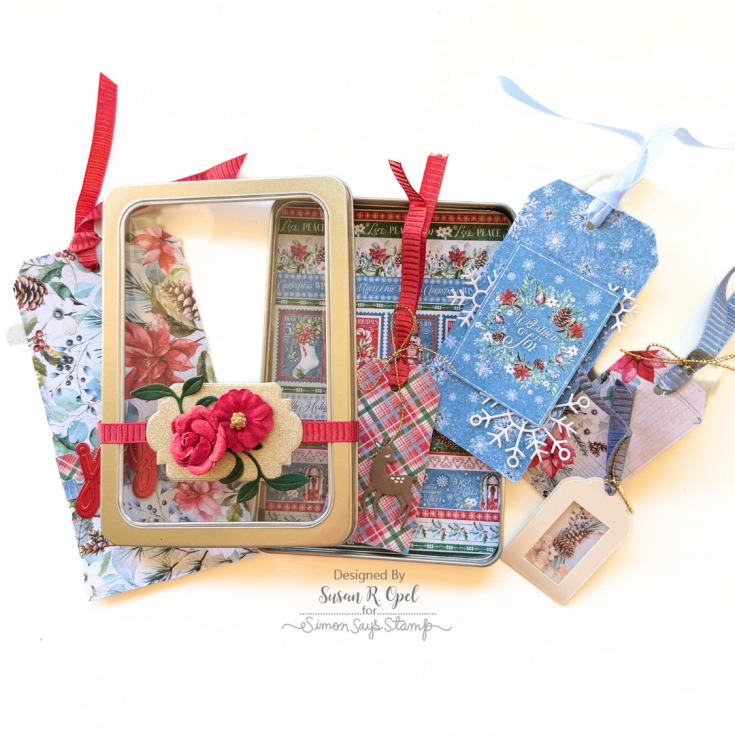
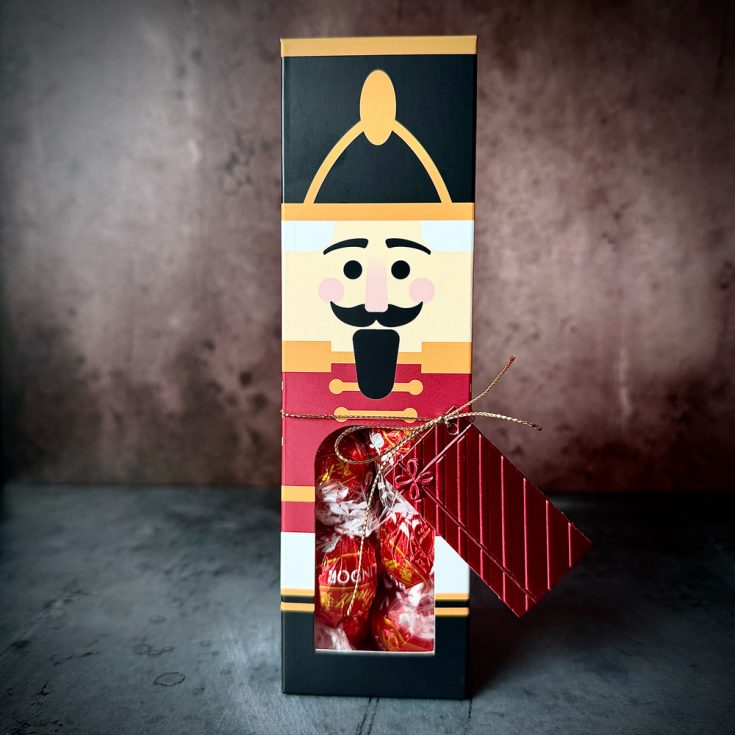
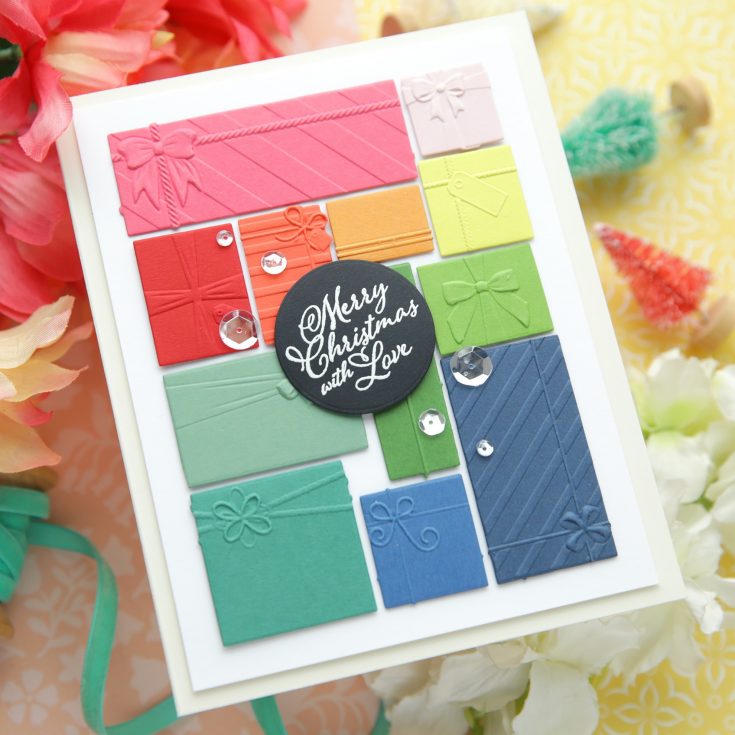
The Simon Says Stamp Limited Edition Gift Giving Kit delivers classic Christmas charm with a curated collection of five brand-new, exclusive products you won’t find anywhere else. Inspired by Graphic 45’s Deck the Halls, this festive kit features rich reds, elegant greens, timeless patterns, and playful elements like Nutcracker gift boxes and a coordinating door-shaped tag and stamp set. Valued at just under $100 (and can be yours for $59.99!) and available only while supplies last, it’s your go-to kit for creating beautifully handmade holiday tags, packaging, and gifting moments.
WATCH THE VIDEO:

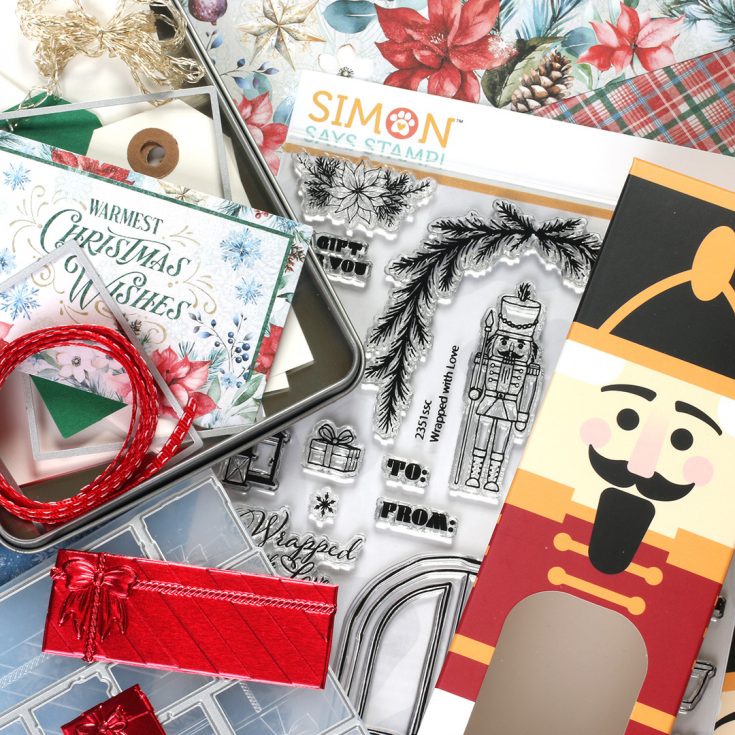
The contents of this kit include:
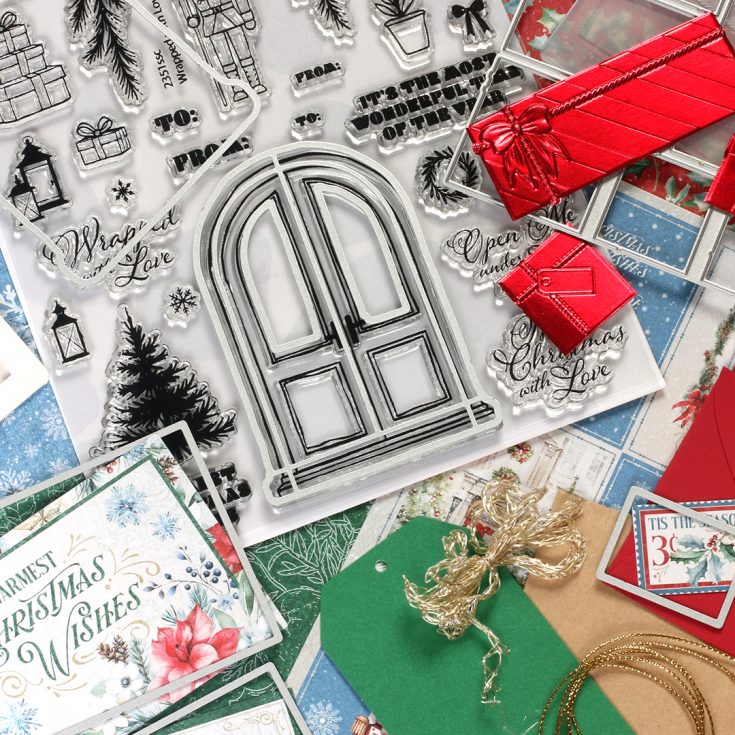
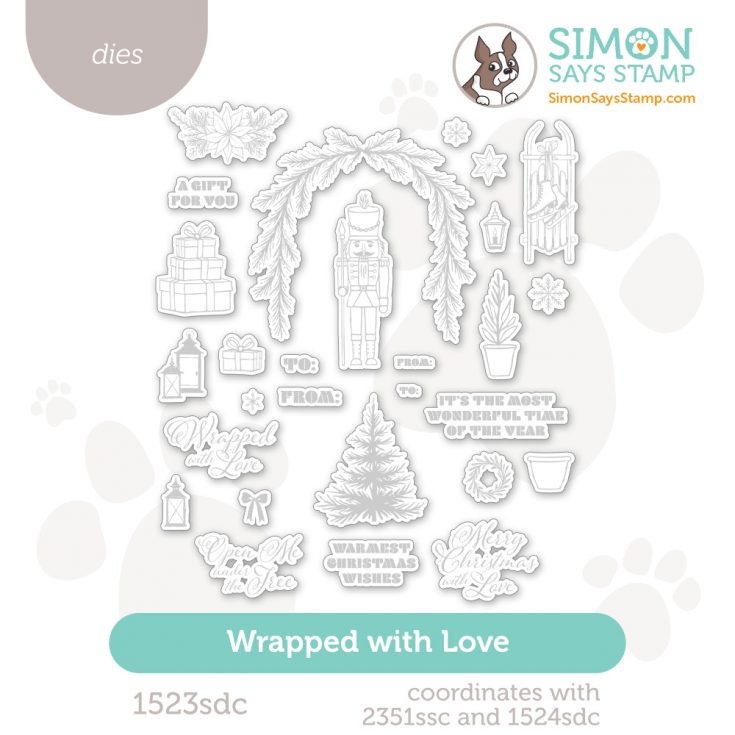
- NEW and Exclusive Wrapped with Love 6×8 Inch Clear Stamp Set
- NEW and Exclusive Wrapped with Love Door Die
- NEW and Exclusive All Wrapped Up Embossing Folder
- NEW and Exclusive All Wrapped Up Coordinating Dies (die cut each individual present and create a dimensional scene on a card or make tiny and darling tags!)
- NEW and Exclusive Collaging Tiles Dies (designed to perfectly cut components of the Graphic 45 Deck the Halls papers for easy collaging and layering, but also versatile to use for many other projects too!)
- 1 sheet of each design from the Graphic 45 Deck the Halls 8×8 inch paper pad
- 2 Nutcracker Paper Boxes
- 1 yard of May Arts Metallic Gold String
- 1 yard of May Arts Red and White Stitch Classic Grosgrain Ribbon
- 1 Kraft Bag (perfect for decorating and gifting treats or as a luminary)
- ½ sheet of White Foam Squares (perfect for stacking the Wrapped Up Gifts)
- ½ sheet of Tim Holtz idea-ology Kraft Stock Metallic in Red (great for using with Wrapped Up Embossing Folder)
- 1 sheet of Tim Holtz idea-ology Kraft Stock Metallic in Copper (great for using with Wrapped Up Embossing Folder)
- 3 #8 manilla tags
- 5 #8 white tags
- 5 #5 white tags
- 4 #2 white tags
- 2 Scalloped White mini tags (approximately 1.38 x 1.38 inches)
- 1 package of 6 American Crafts Green 2 x 3.5 inch tags with twine
- One Silver Empty Flat Tin (perfect for storing or gifting tags)
- 3 Simon Says Stamp Gift Card Envelopes in Schoolhouse Red
- 3 Simon Says Stamp Gift Card Envelopes in Gold
- 3 Simon Says Stamp Gift Card Envelopes in White
- One Sheet of Neenah Solar White 110 LB 8.5 x 11 Inch Cardstock
Enhance your kit!
Did you know? The coordinating dies with the stamp set featured in the card kit are available for separate purchase!
Get INSPIRED!


Psst!
Want even MORE inspiration or to share what you made with this kit? Check out our galleries!
The Perfect Thanksgiving Invitation or Host Card: Amore Laurafadora

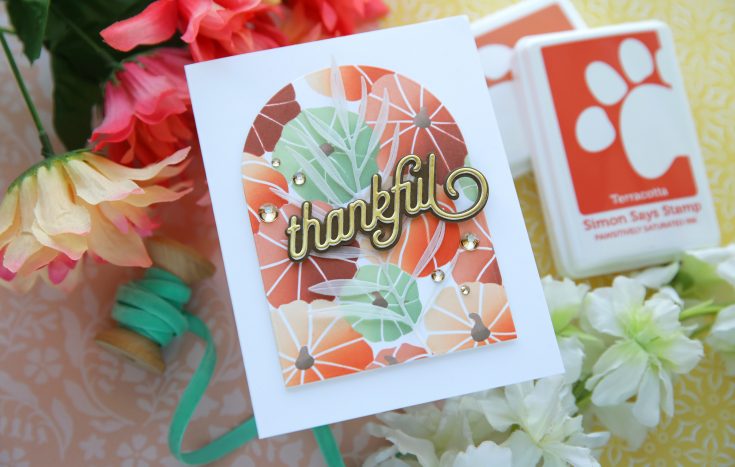
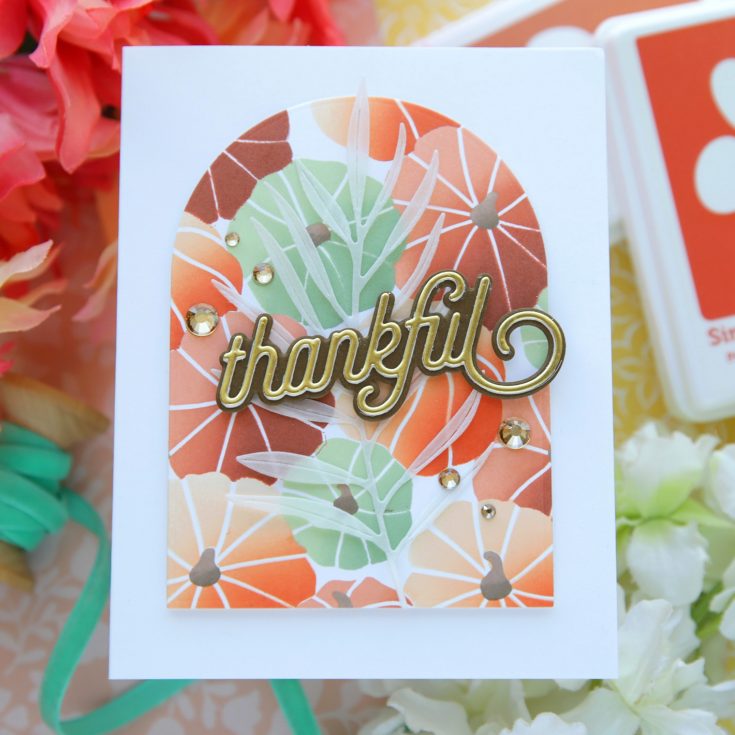
Hi friends! Happy Monday! Please join me in welcoming back special guest Laura Bassen to showcase this gorgeous stenciled and ink blended beauty showcasing our newly released Pumpkin Patch stencil as well as our CZ Design Thankful die, a pretty soft overlay with our Etched Delicate Frond die, and a lot of interest by using the Nested Domed Arches Frames dies! To learn more, be sure to watch the video and enjoy!
WATCH THE VIDEO:

SUPPLIES:
|


A big thank you to YOU, our reader — and to Laura Bassen for being our guest!


