Memory Box Sale!

Hi friends! Happy Monday! In celebration of DieCember® we’re spotlighting some of our favorite primarily die brands with some fun pop-up sales! Please enjoy 15% off all in-stock Memory Box branded items NOW through December 11th!
Art Journaling with Shari Carroll: Merry and Bright
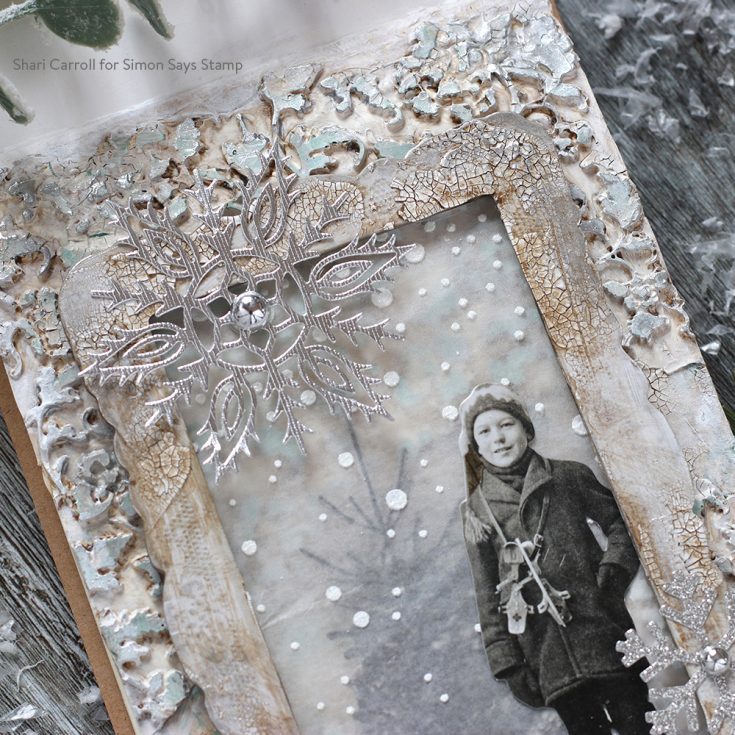
Welcome and Happy Sunday!! It’s Shari Carroll here with an art journal that features texture upon texture!!
I’ve tried out something new to me; a Stamperia texture impression mold!! I’ve used the Ramage Flowers and Leaves mold for the base of this journal page. Once it dries, it’s amazingly flexible and lightweight, perfect for mixed medium projects and journals!!
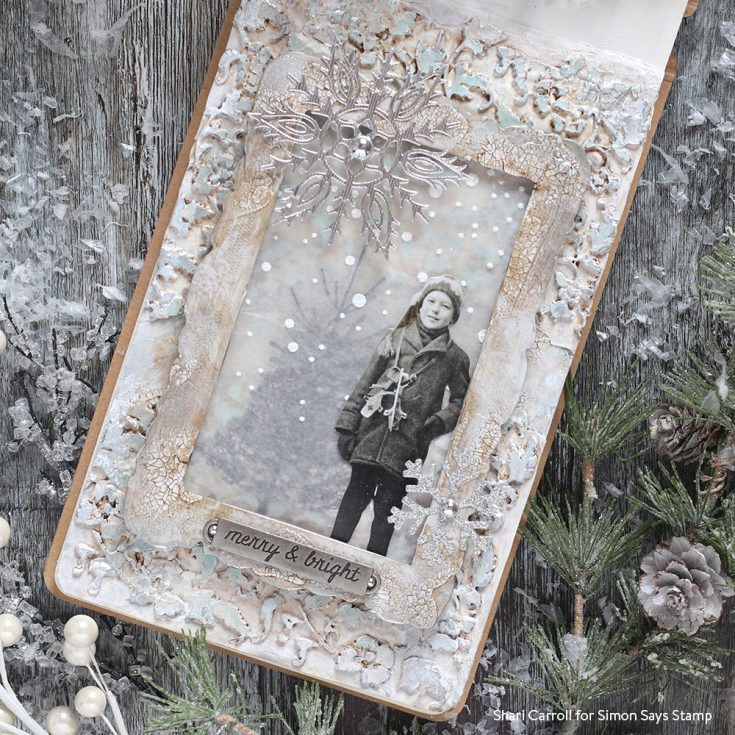
By using a mixture of paints, crackle paste, and glaze, I was able to get the effects of a Shabby Chic wintery feel.
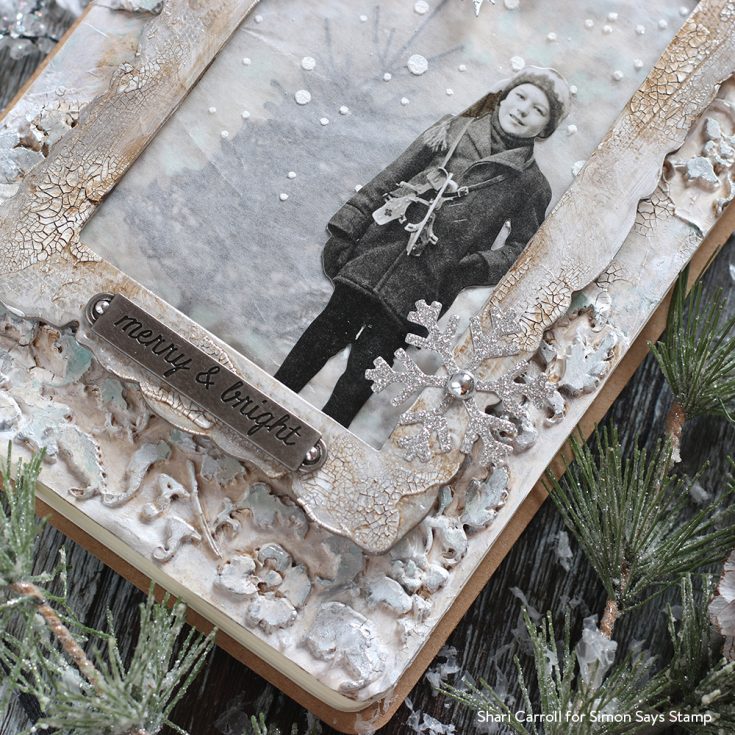
To finish this page, I’ve added a Tim Holtz word adornment, a couple die cut snowflakes, and silver metallic droplets.

Blog Candy Alert!! Follow our blog via email and comment on this post for a chance to win special blog candy!
|


Yippee for Yana: Modern Christmas Cards

Hi friends! Happy Saturday! Please join me in welcoming special guest Yana Smakula in our bi-monthly Yippee for Yana blog series! Read on to learn more about this gorgeous design and enjoy!
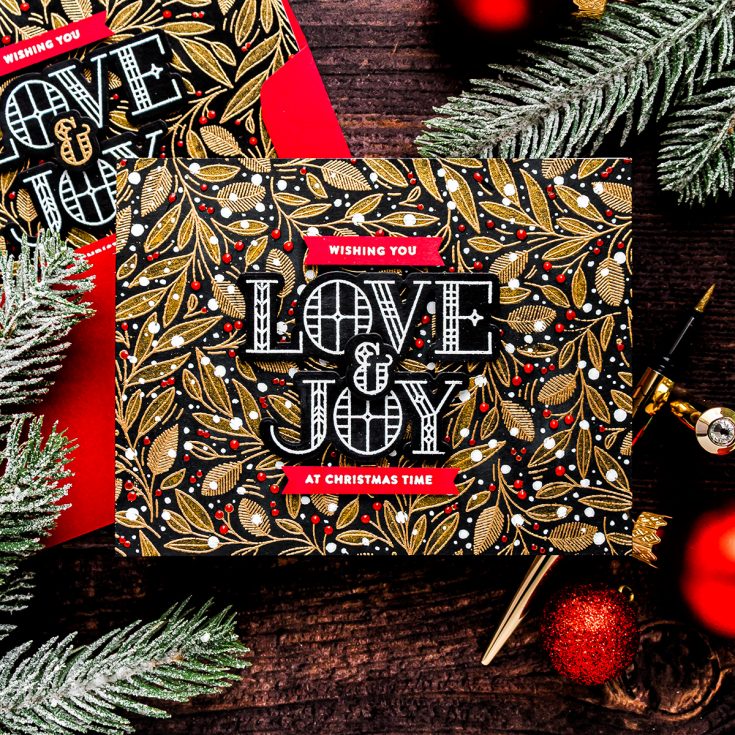
Hi everyone, this is Yana Smakula, welcome back for another Yippee For Yana video! In this episode, I have 2 elegant Christmas card ideas to share using some of my new and old favorite products from Simon. Chances are you already have these supplies in your stash and should be able to re-create these cards easily. And I do encourage you too.
I love all things modern and also elegant in home decor, in clothing and accessories and thus this is the style I tend to choose when I make my handmade cards. Today’s video shows how to use black cardstock, a lot of gold in both heat embossing and pen forms as well as subtle hints of red to create beautiful Christmas cards. If you are not a fan of black cardstock, I know not everybody likes that color you can try to substitute it for dark blue, or even dark green and still use the same design.
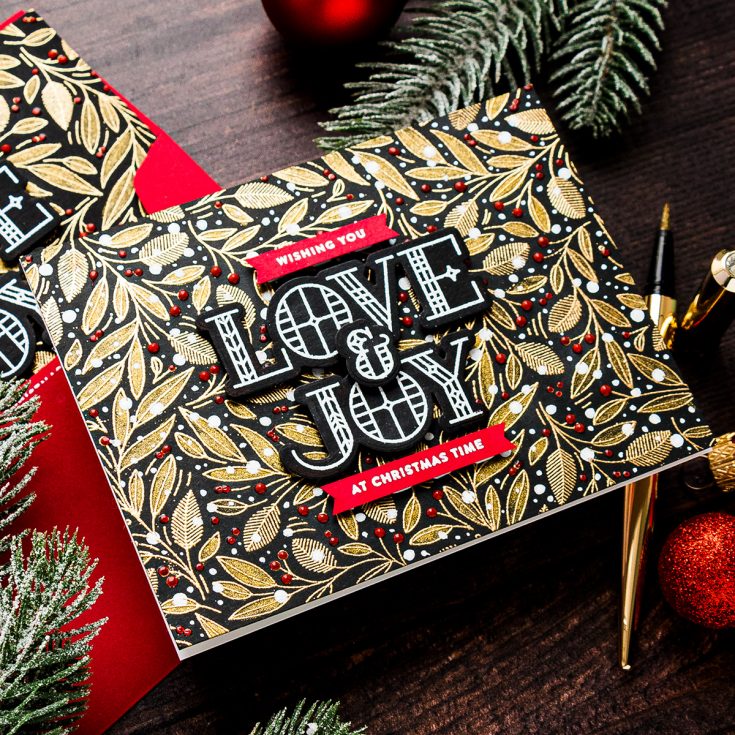
I started to work on my card by creating a small sticky handle inside my MISTI stamping tool to affix the paper in place. Next, I treated a panel of black cardstock using anti-static powder to eliminate and static of grease I might have had on the paper.
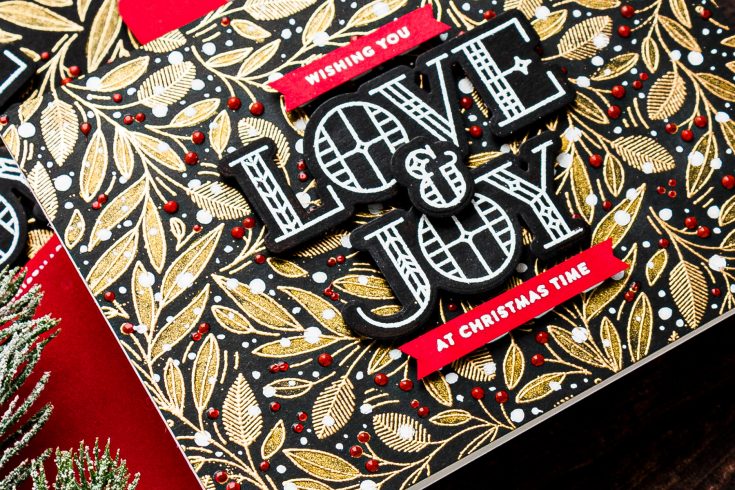
Next, I mounted a Leaves and Berries background stamp on the door of my MISTI tool. It is one of my favorites this Holiday Season, I inked it up using clear embossing ink and stamped. After stamping the background I removed the panel from MISTI and poured Antique Gold embossing powder covering the entire background. With the powder applied I used my heat tool and heat set the powder to melt it. This background, when embossed, looks absolutely spectacular – I just love the fine lines of the leaves and berries and also the dashed lines on some of the leaves, it is very classy in my opinion.
This background can also be enhanced, it can be colored. I decided to go all out and add some shimmer using a gold shimmer pen. There are a lot of shimmer pen products on the market, there are gold and clear shimmer pens from Tonic Studios, I love using those, there are also gold and silver shimmer pens from Jane Davenport for Spellbinders that give beautiful results and a lot of other similar products on the market. I used a Jane Davenport Gold Shimmer pen in color Golden Age and colored all of the open leaves gold. I did a double layer of shimmer coloring over all of the outline leave twice with this pen to make sure they were really shimmery. I love the result!
With the leaves colored I also decided to color the berries. You can’t use your traditional coloring mediums here, I mean alcohol or watercolor markers, you’ll need to use something that is opaque. I decided to use Nuvo Drops in Red Berry to not only color the berries red but also to add dimensional accents to the background. I added various size berries following the heat embossed berries on the background and set this aside to dry for about 30 minutes. The Nuvo Dots weren’t too big, in fact, they were rather small, so they dried very quickly.

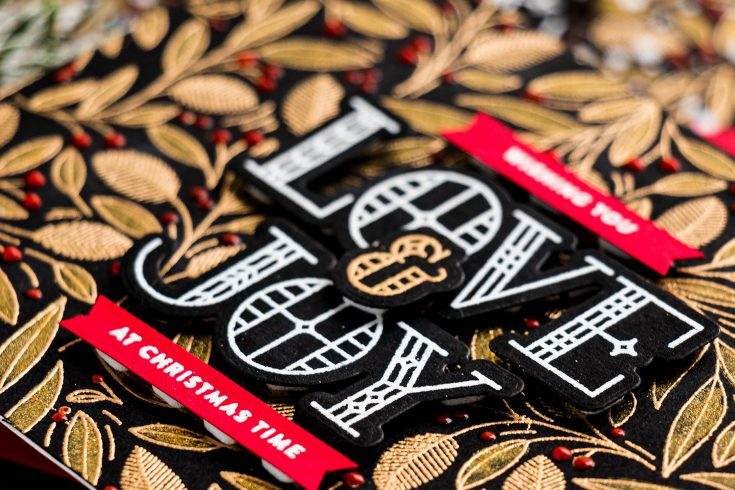
This background looked stunning once finished. To create a sentiment for this card I decided to use another favorite set of mine from Simon – the Stained Glass Greetings set. It is such a timeless and classic font stamp set – I find myself reaching for it every year I make holiday cards.
I opted for a lightly longer sentiment that reads “Wishing You Love & Joy at Christmas Time”. I heat embossed larger words in white on black cardstock to better blend with the background and the sentiment strips were embossed in white on red cardstock, trimmed into V-shape banners and also foam mounted on the card. I didn’t add any other embellishments here as I felt this design was already busy enough and any additional sequins or gems would just get lost here.
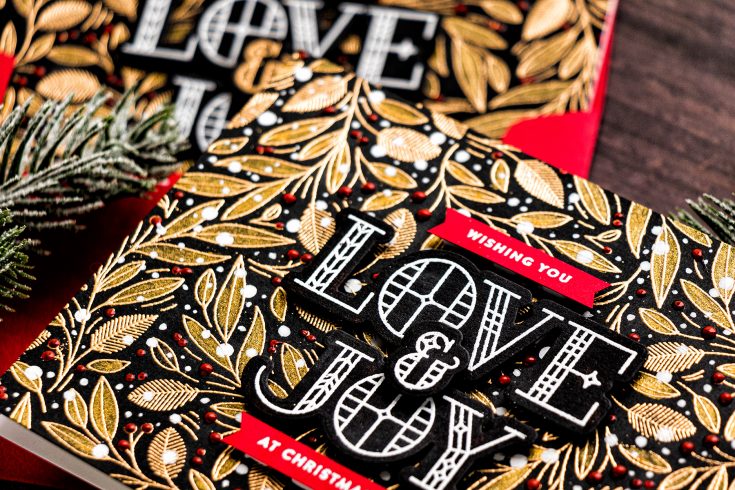
I also made another, nearly identical card. I wanted to try adding snow to the background of my project, so I made another background and tested adding various size snow dots all over it.
I used several products to add the dots starting with the Storytime Paint Pens by Jane Davenport in Snow White. I first used the largest pen to add large size dots all over the background, next moved to use the small size pen to add medium size dots and finally finished the blizzard with Sakura pen in size 8 and 10.
Here’s what the finished card looks like – I really like the one with the added snow, although I think they both turned out beautifully. I’d love to know which card you like best.
Have fun stamping!
SUPPLIES:
|


Thanks so much for stopping by and thanks to Yana for being our guest!

Blog Candy Alert!! Follow our blog via email and comment on this post for a chance to win special blog candy!


