Tulip Field Heroscape Card
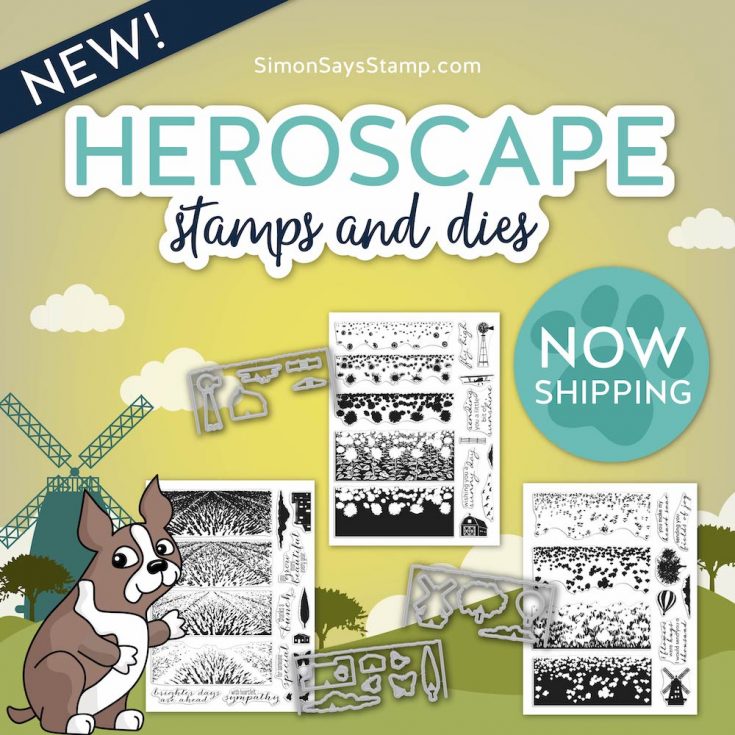
Hi friends! Happy Tuesday! Have you seen the new HeroScape Hero Arts stamps and dies from Hero Arts? They were definitely a BUZZworthy item at last month’s Creativation show, and we’re excited to share a project with you featuring these new stamps and dies with special guest Channin Pelletier! Read on and enjoy!
Hello, friends! It’s Channin here with a video and card featuring the incredible Tulip Field Heroscape Stamp Set by Hero Arts!! This layering stamp set is so cool! It makes creating this detailed landscape so quick and easy and the exclusive mini ink cube set takes all the guesswork out of picking your colors!!
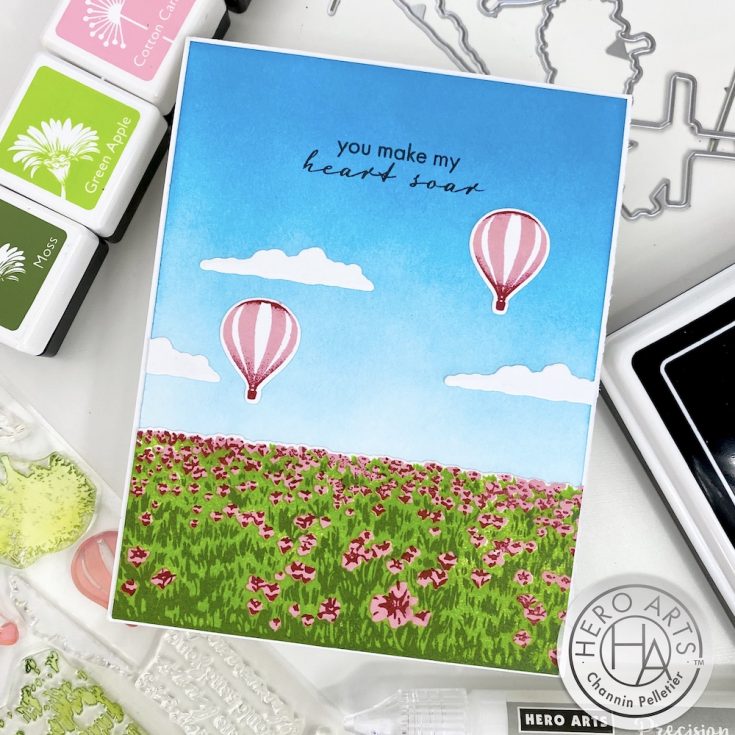
I started by stamping the first layer of the Tulip Field stamp set in Green Apple Bold ink onto white cardstock. I then positioned the detail layer for the stems and leaves and stamped it in Moss. Next, I positioned the first layer for the flowers and stamped it in Cotton Candy. I then finished the tulip field by stamping the last layer in Crimson.
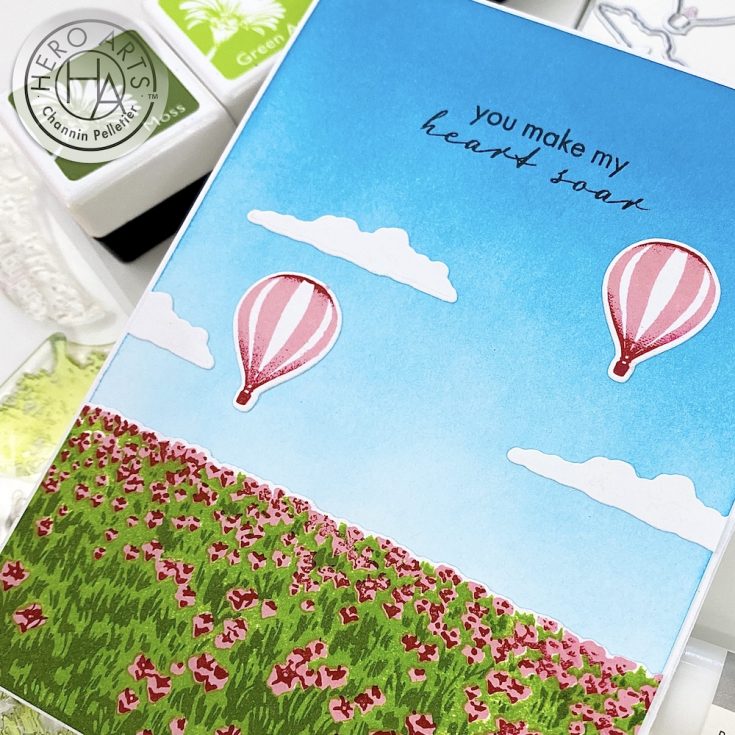
Next, with my MISTI, I stamped a hot air balloon in Cotton Candy. I then stamped the balloon again but this time I partially inked it up with Crimson which creates a gradation over the balloon giving it the appearance of roundness. I repeated this process once more to create a second balloon. With my images now all stamped I then die cut them out as well as three clouds with the Tulip Field Frame Cuts. I then trimmed the landscape image down a 0.25” and removed the remaining white cardstock at the bottom.
Finally, I created the sky background by ink blending with Splash Reactive ink over a 4” x 5.25” panel. Once I finished the background I then adhered all the die cuts to the panel and then adhered the panel onto an A2 top-folding card base. I then finished the card by stamping a sentiment in black.
I hope enjoyed today’s card and video! Thanks so much for checking it out!
~Channin
SUPPLIES:
|


Thanks so much for stopping by and to Channin for being our guest!
Studio Monday with Nina-Marie: Featuring NEW Greeting Farm!

Hello crafty friend, it’s Nina-Marie Trapani with you today! There are some adorable new stamps and dies from the Greeting Farm and I couldn’t wait to create a card with some of them!
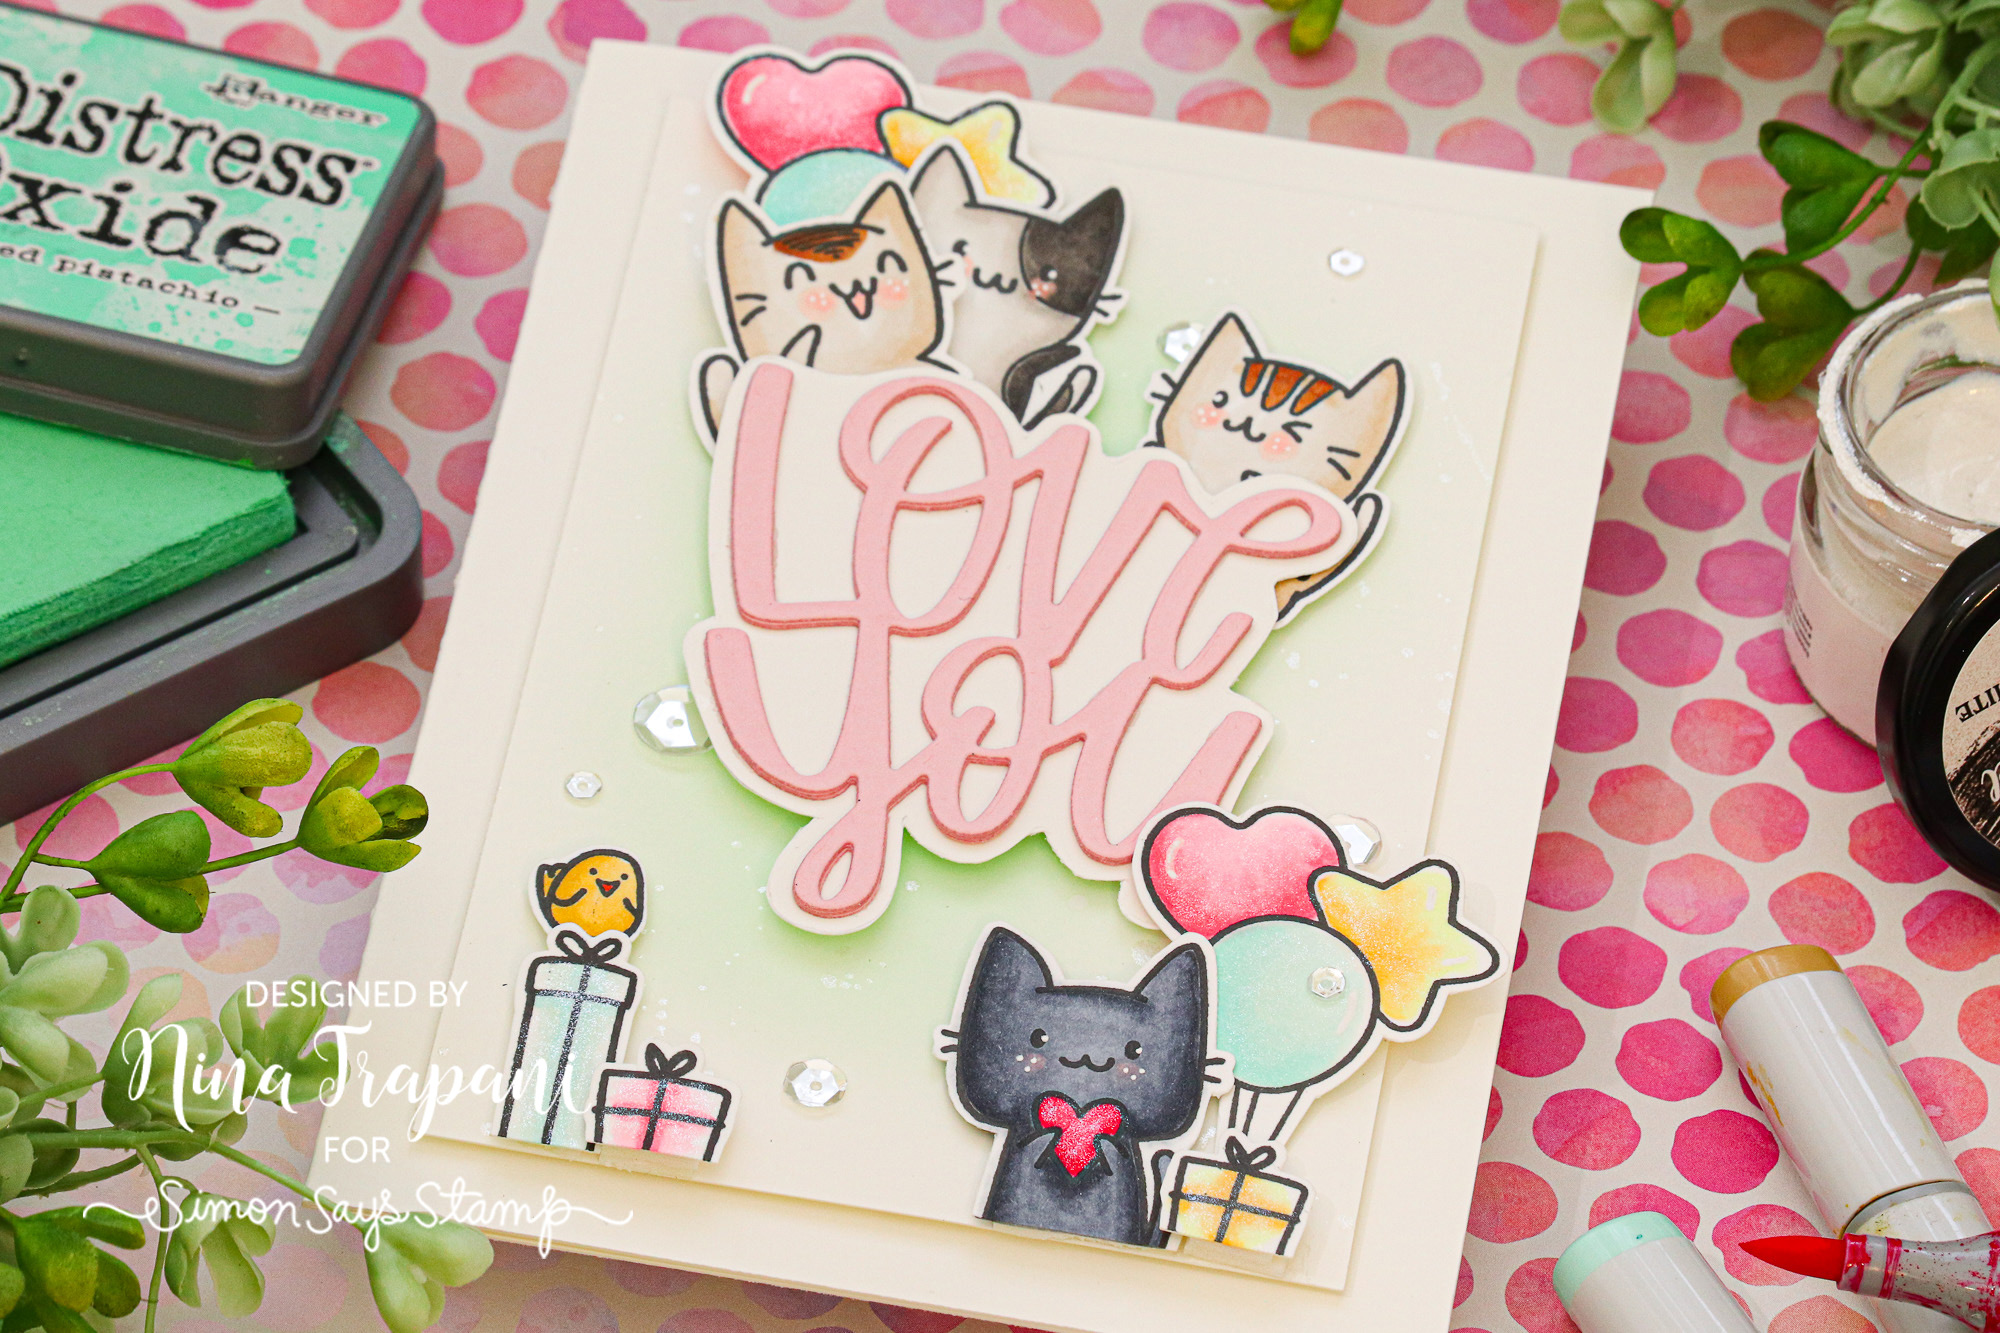
Today’s project features the new Cute Kitties stamps and Love You die set, and I will be showing you how to create this playful scene using these products.
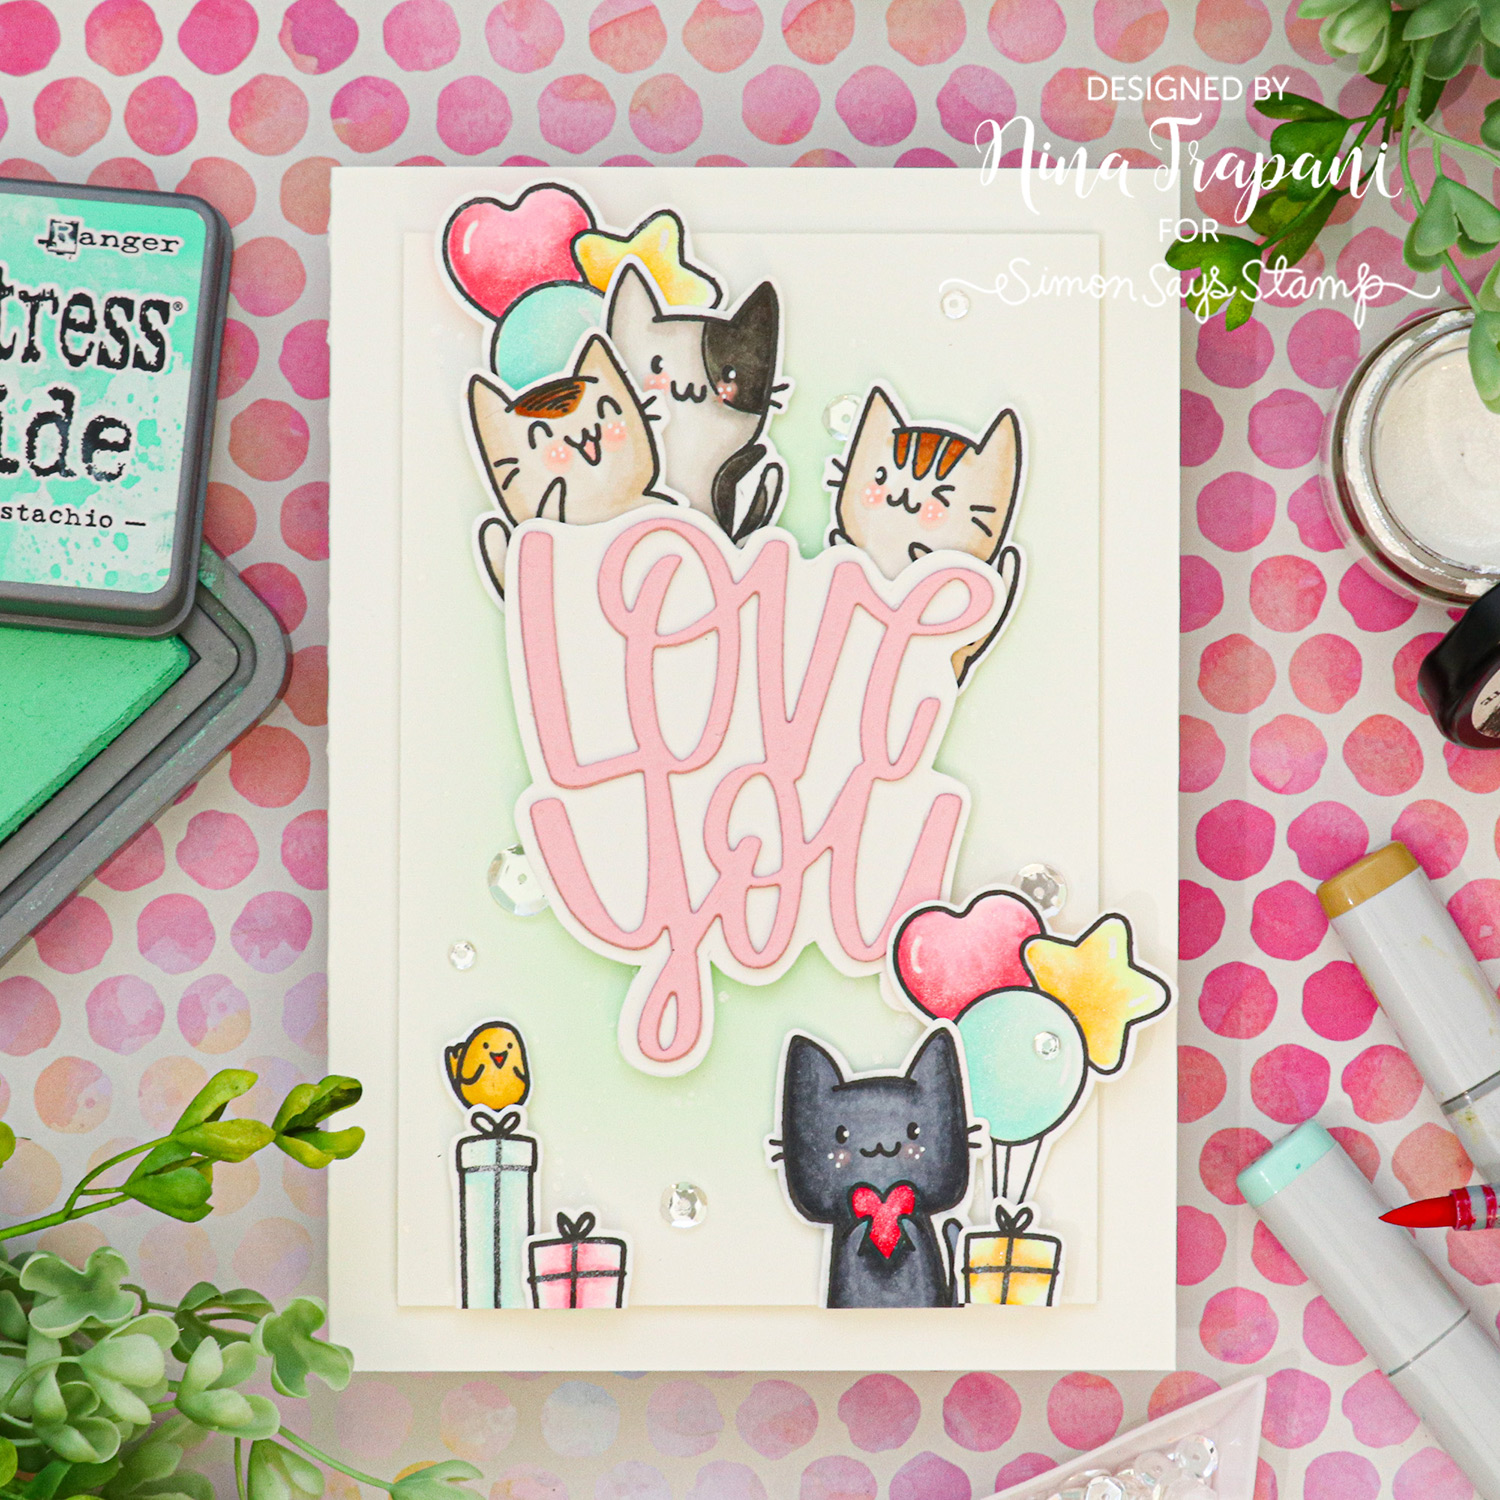
The kitties are so much fun to color; I used Copics today in my project and used my own four kittens as inspiration for their coloring! If you don’t have cats and are sending this card to someone who is a cat parent, you could use their kitties as inspiration for the colors. Searching for cat types online is another great resource for ideas too.
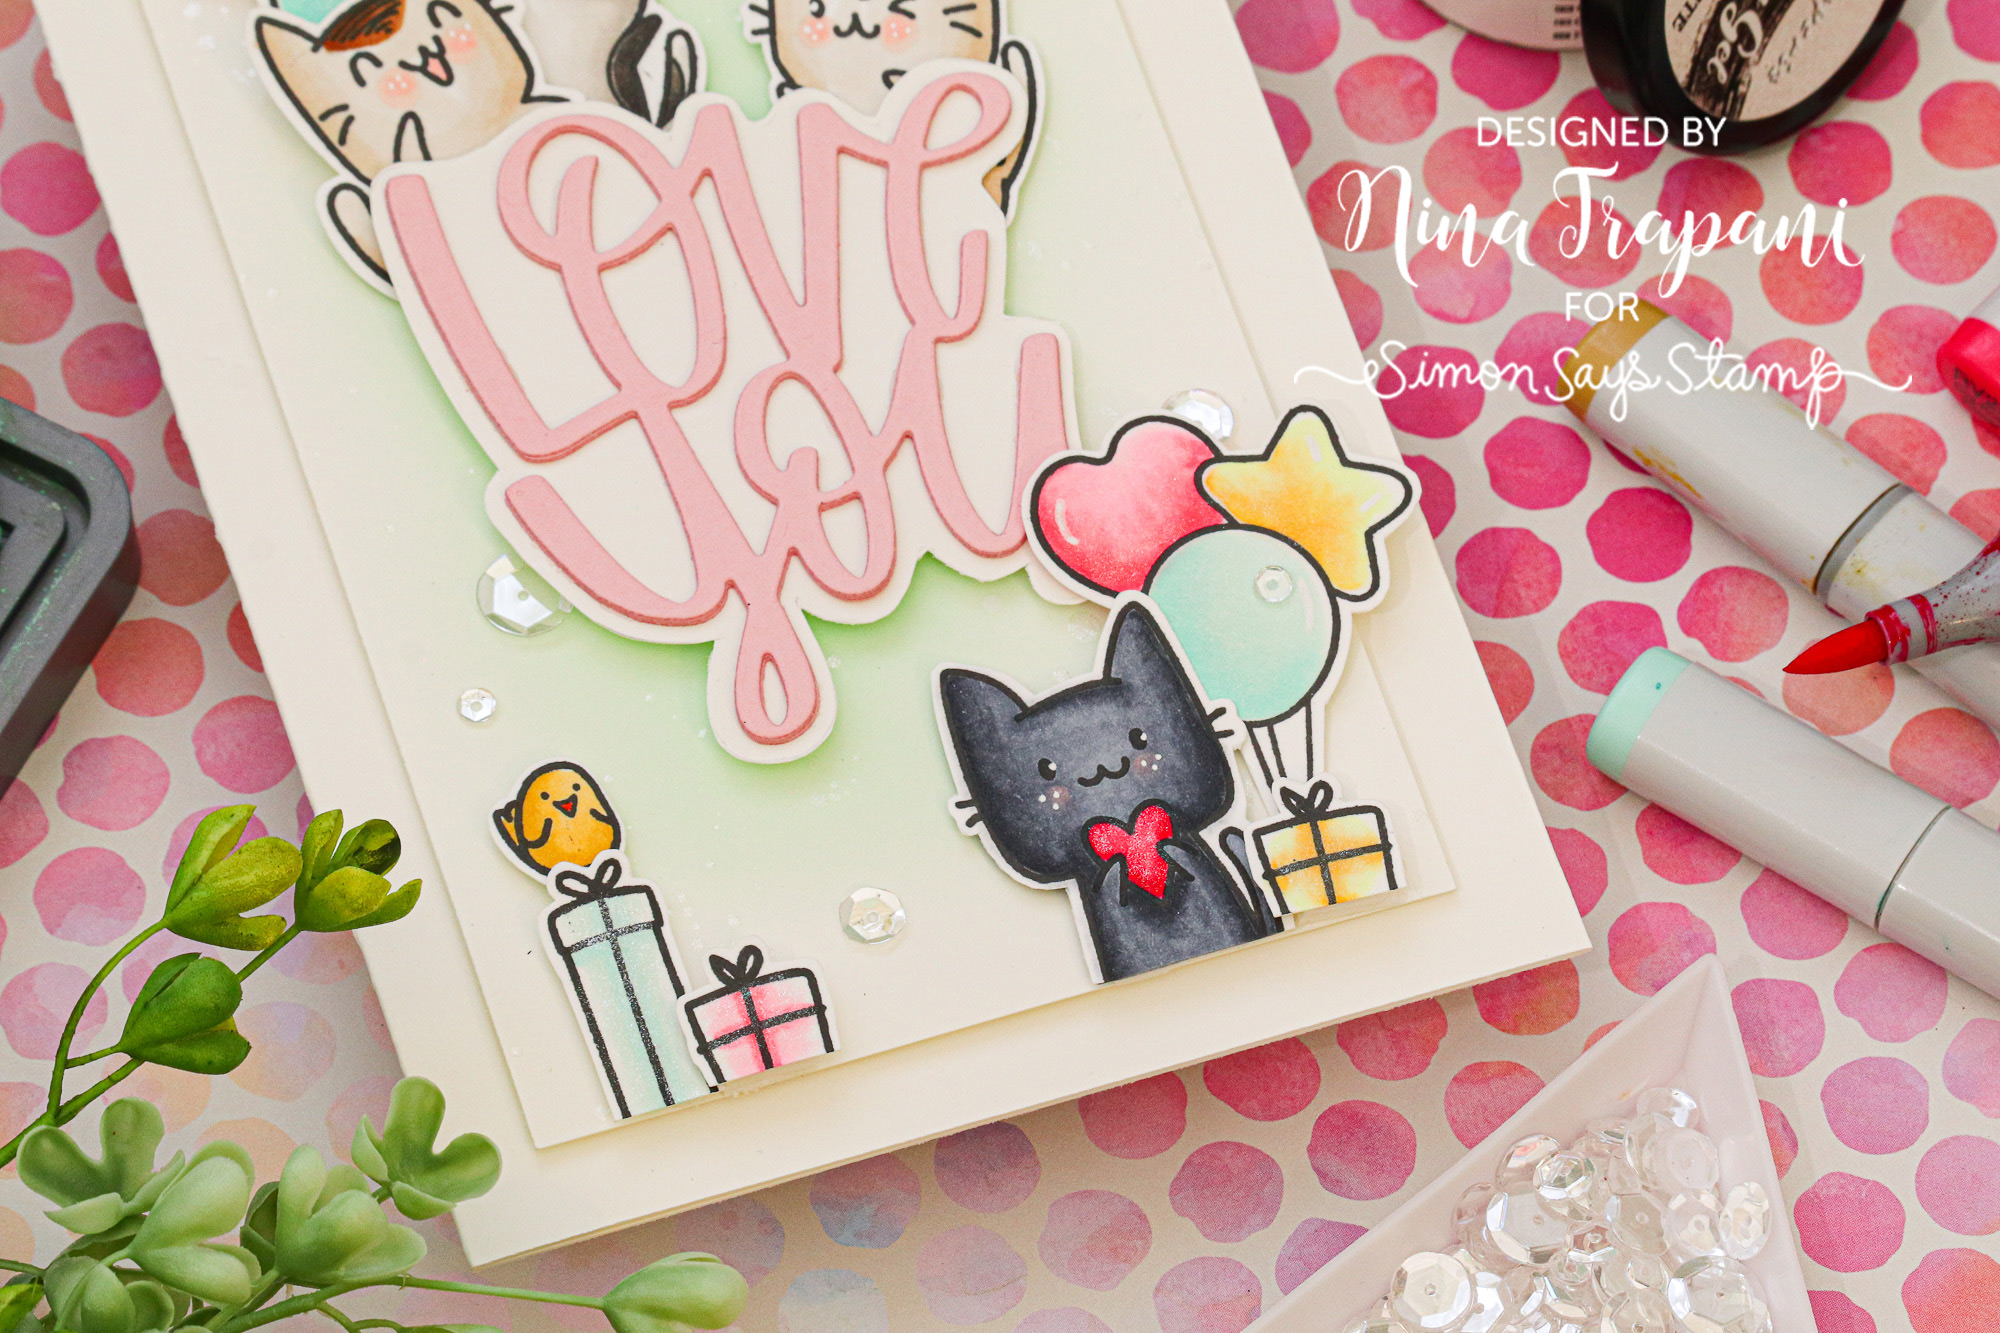
Using Cracked Pistachio Distress Oxide ink, I blended some color into the background, which gives great depth for the sentiment.
All the cats and accessories from the Cute Kitties set are popped up on the card with foam tape and I’ve embellished areas with Nuvo Aqua Shimmer and white gel pen details. There are some sequins tucked in certain areas for extra sparkle.
I hope today’s card has inspired you to create with these new products from the Greeting Farm!
WATCH THE VIDEO
SUPPLIES
|


Super Simple with CZ: Miss You Two Ways
Hi friends! Happy Sunday! Have a friend that is close in heart but far in distance? We have two fabulous card ideas for you by Cathy Zielske to make and send! Read on and enjoy!
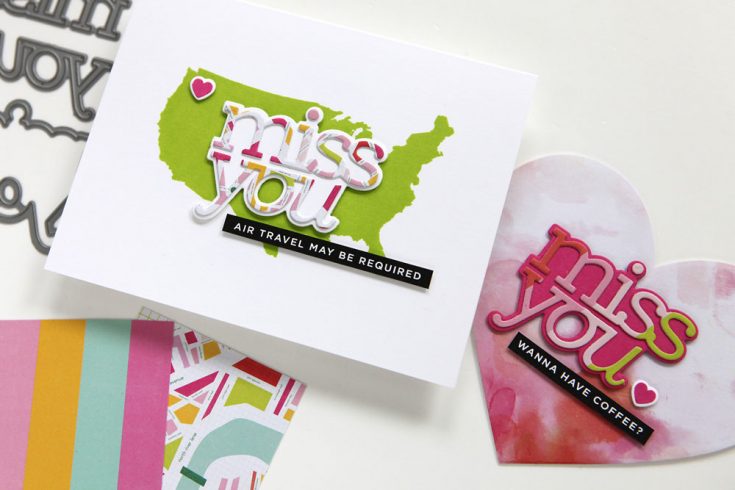
Hi everyone! It’s Cathy Z. here and I’m so happy to be back on the Simon Says Stamp blog with another installment of Super Simple with me, Cathy Z.! Today’s card projects feature very simple ways to add color to your die cuts by simply using patterned paper.
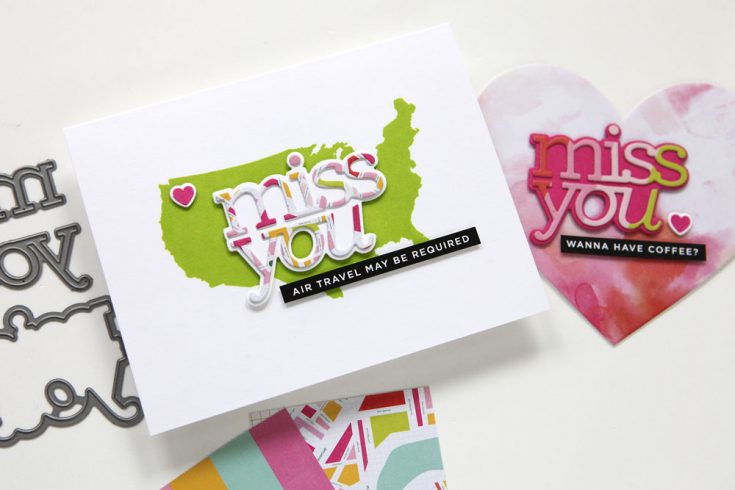
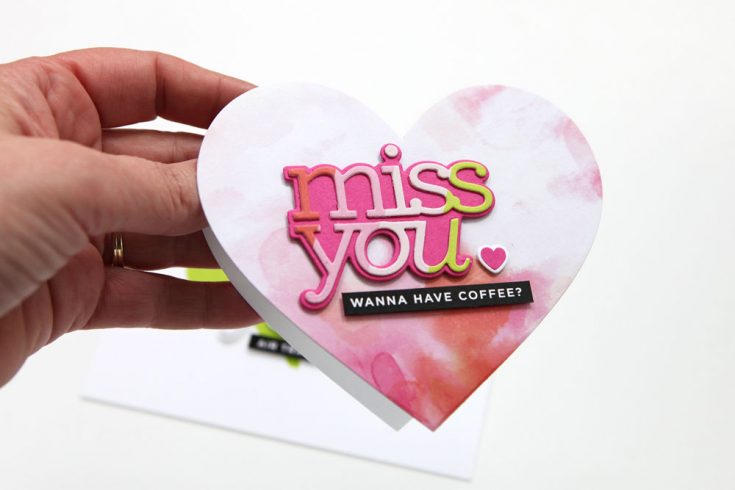
All those lovely 6 x 6 pads in your stash are perfect for using with word and shadow die combos. Just cut the words from your favorite patterned paper and use matching solid colors for the shadow layer. I really love this paper from Heidi Swapp and thought it would work well for my miss you themed cards.
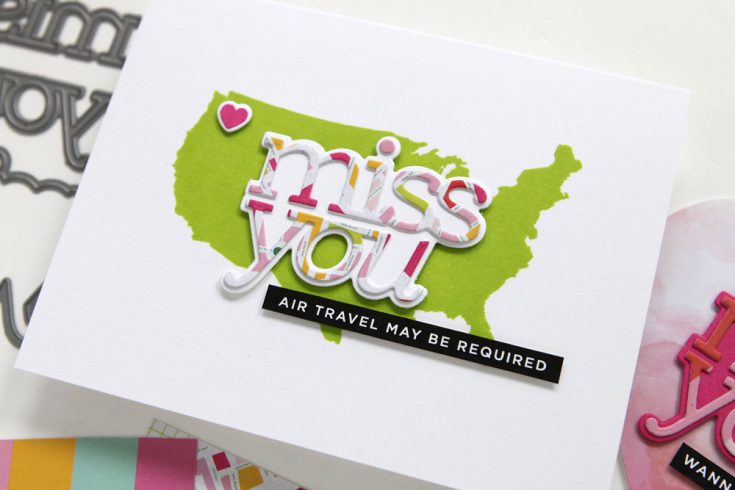
I stamped a big solid US map from my Miss You Missy clear stamp set directly onto my card base for a nice one-layer design.
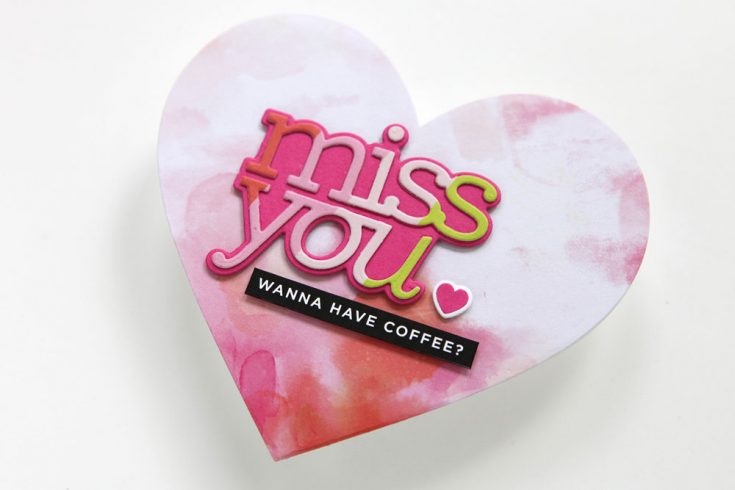
For my second card project, I did a partial die cut heart shape using Simon Says Stamp’s Nested Heart Dies, and then covered the card panel with more of the Heidi Swapp paper, and finishing it off with my alternate die cut combo. Both cards feature preprinted Reverse Sentiment strips.
Here is the video showing you how I created these cards!
Thanks so much for stopping by and I’ll see you next time!
SUPPLIES:
|


Thanks so much for stopping by and thanks to Cathy for being our guest!


