Super Simple with CZ: Miss You Two Ways
Hi friends! Happy Sunday! Have a friend that is close in heart but far in distance? We have two fabulous card ideas for you by Cathy Zielske to make and send! Read on and enjoy!
Hi everyone! It’s Cathy Z. here and I’m so happy to be back on the Simon Says Stamp blog with another installment of Super Simple with me, Cathy Z.! Today’s card projects feature very simple ways to add color to your die cuts by simply using patterned paper.
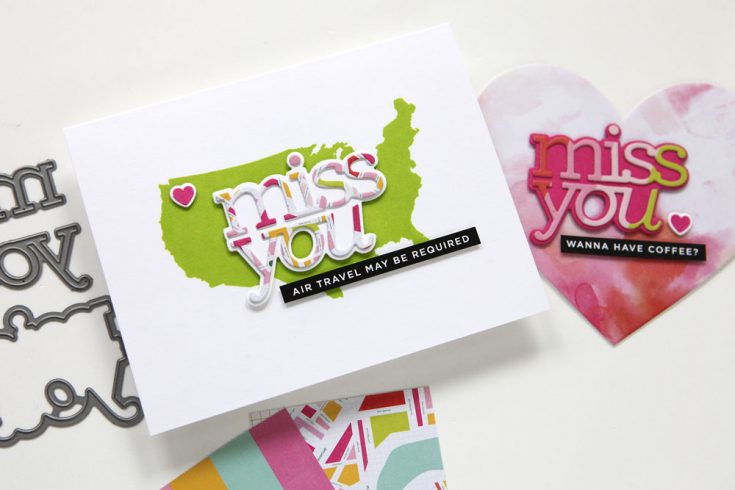
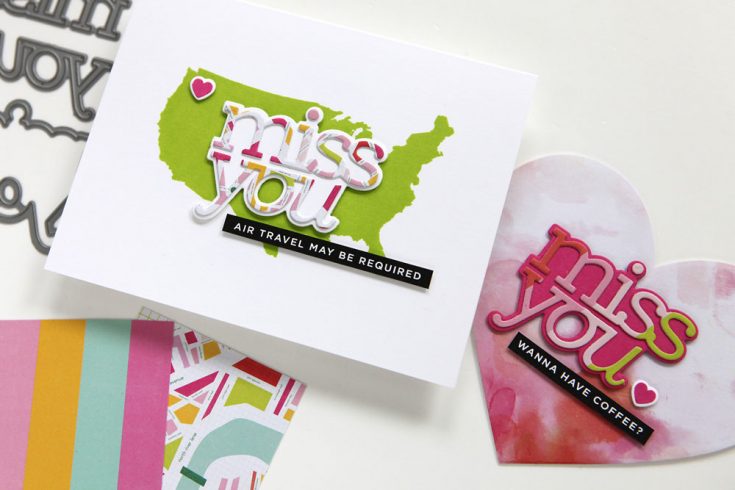
All those lovely 6 x 6 pads in your stash are perfect for using with word and shadow die combos. Just cut the words from your favorite patterned paper and use matching solid colors for the shadow layer. I really love this paper from Heidi Swapp and thought it would work well for my miss you themed cards.

I stamped a big solid US map from my Miss You Missy clear stamp set directly onto my card base for a nice one-layer design.

For my second card project, I did a partial die cut heart shape using Simon Says Stamp’s Nested Heart Dies, and then covered the card panel with more of the Heidi Swapp paper, and finishing it off with my alternate die cut combo. Both cards feature preprinted Reverse Sentiment strips.

Here is the video showing you how I created these cards!
Thanks so much for stopping by and I’ll see you next time!
SUPPLIES:
|


Thanks so much for stopping by and thanks to Cathy for being our guest!
Yippee for Yana: Peony Bouquet Ink Blended Card

Hi friends! Happy Saturday! I’m always delighted to share Yana Smakula‘s bi-monthly Yippee for Yana card series on our blog, as I just love her style and variety of tips and tricks! Read on and be sure to watch the video to learn more! Enjoy!
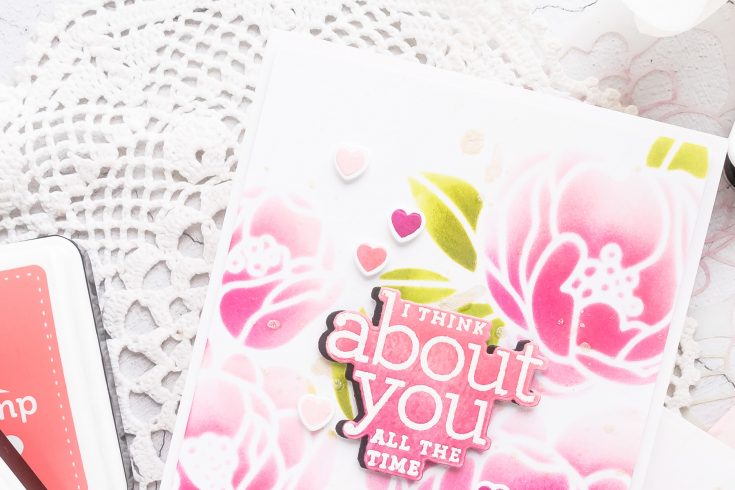
Hi everyone, this is Yana Smakula, welcome back for another Yippee For Yana video! In this episode, I have a Clean & Simple floral card featuring some ink blending using a stencil.
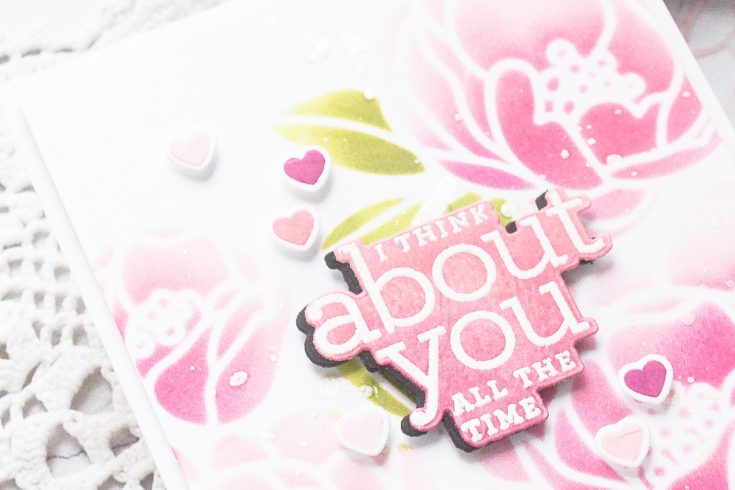
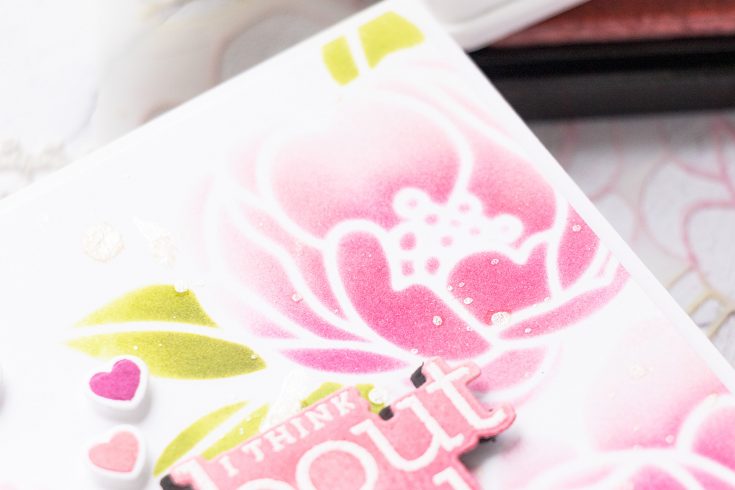
I simply adore the new stencil design from Simon – the big beautiful flowers from the Peony Bouquet stencil. I’m going to ink blend the flowers in various colors of ink on white cardstock. For this, I taped the stencil in place using low tack tape to the panel to prevent the paper from moving during the ink blending process.
I picked several colors of ink for this project – 3 shades of each color. I have Magnolia, Teeny Bikini and Twirling Tutu for the flowers as well as Forever Green, this is the only ink color from Hero Arts, the rest are from Simon, next I have Willow and Jellybean for the leaves.
I started by ink blending the flowers. For this, I masked off the leaves so that I didn’t accidentally blend the ink over the leaf areas. I did this with small bits of washi tape and it is very easy to do.
I first blended the lightest ink color just to the tips of the petals. I used the edge of the ink blending tool a lot to get into smaller areas and make sure I didn’t over apply this ink.
Next, I’ve blended the medium color extending it a bit further down into the petals and adding more color. You can go very detailed with this stencil and even use your pencils or markers to enhance the look of each petal and add detail. I like to keep my cards simple for the most part, so I’m going for a speedy color application method which is ink blending in this case and I think it works really well.
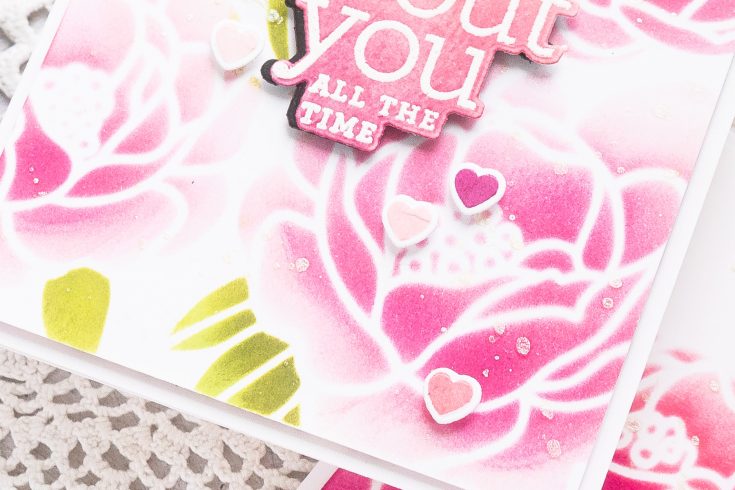
Finally, I switched to the darkest color and added it just to the center of the peonies. This helps darken the flowers and brings them to life. You can have a similar look by using just one ink pad and varying the pressure with which you apply the ink. Go very light-handed on the edges of the petals and heavy-handed in the center.
With the flowers ink blended l blended the leaves. I removed the tape that was masking the leaves and used fresh pieces of tape to mask the flowers. I needed to do that so that no green ink would get on the beautiful ink blended petals we just created.
With the masking done, although I did miss one spot I started ink blending the leaves. For this, I used a smaller ink bending tool from my craft room and again started with the lightest color first, added medium color halfway and darkest color to the base of the leaves.
Next, I removed the stencil and added some ink splatter over the flowers using Hero Arts White Iridescent Shimmer Spray – I love using this product for adding some extra sparkle and shine to my projects.
Next, I worked on a sentiment. For this, I used using Miss You Missy stamp set by Cathy Z and heat embossed a sentiment that reads “I Think About You All The Time” in white embossing powder on white cardstock. Having heat set the powder I added some ink blending using the same colors of ink I used to ink blend the peonies.
This stamp set also has a tiny heart image, I stamped it in all 3 colors of ink and cut it and the sentiment out using a coordinating die and use the hearts as tiny embellishments for this card. I also die cut a shadow layer from black cardstock.
I trimmed the panel to 4 x 5 1/4” and foam mounted it to an A2 white card base. Next, I used foam adhesive squares to foam mount the sentiment and also using half of the small squares to foam mount the tiny pink hearts – I scattered them going diagonally on the panel. And that finished this simple card. It was easy and quick to make and it is also one that would be easy to mass-produce should you need to do so. Have fun stamping!
SUPPLIES:
|


Thanks so much for stopping by, and thanks to Yana for being our guest!
Funny Fridays: Hoppy Birthday
T.G.I.F!!! Welcome everyone!! I’m having some fun on this Friday with these hilarious Frogs from Art Impressions. The guy on the left cracks me up as he got the hang of blowing the party favor.
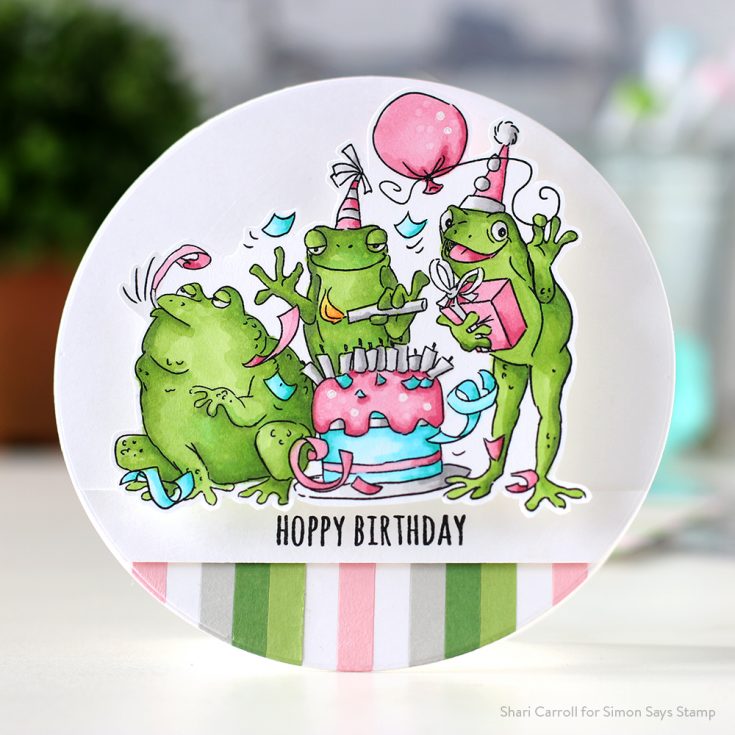
To shake things up a bit, I thought a circle card was in order with nicely trimmed strips of cardstock colors at the bottom. By using pinks mixed with the brightly colored frogs I think I’ve effectively created a girl card.
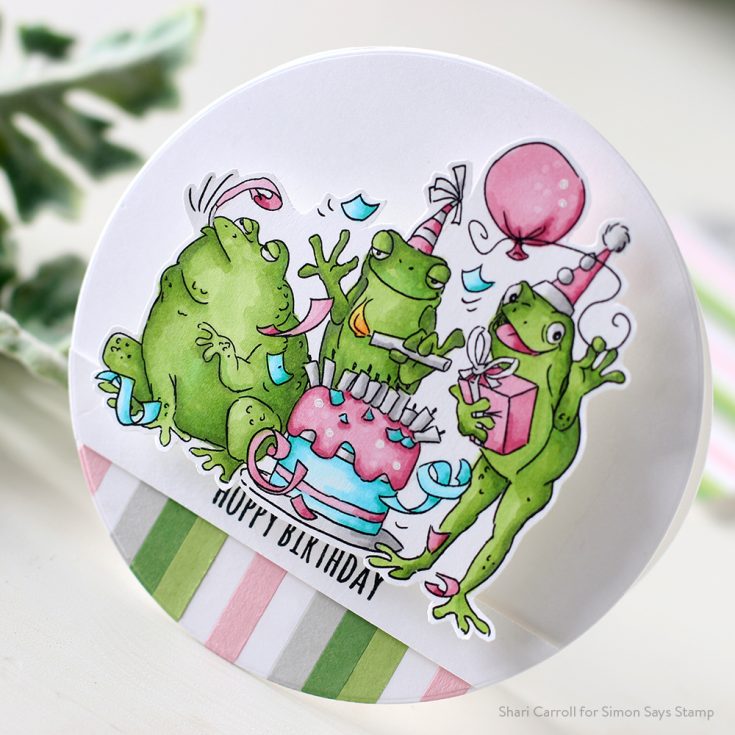
The stamped image was cut out as one big piece and mounted to the circle card base using an Action Wobble Springs for some playful interaction.

Thanks for stopping by today, I hope you have a fabulous weekend!!
|


