Glitter Paste Over Colored Ink Blending
Hello crafty friends, it’s Nina-Marie Trapani here with you today, sharing a beautiful ink blending technique that is bursting with color and sparkle!
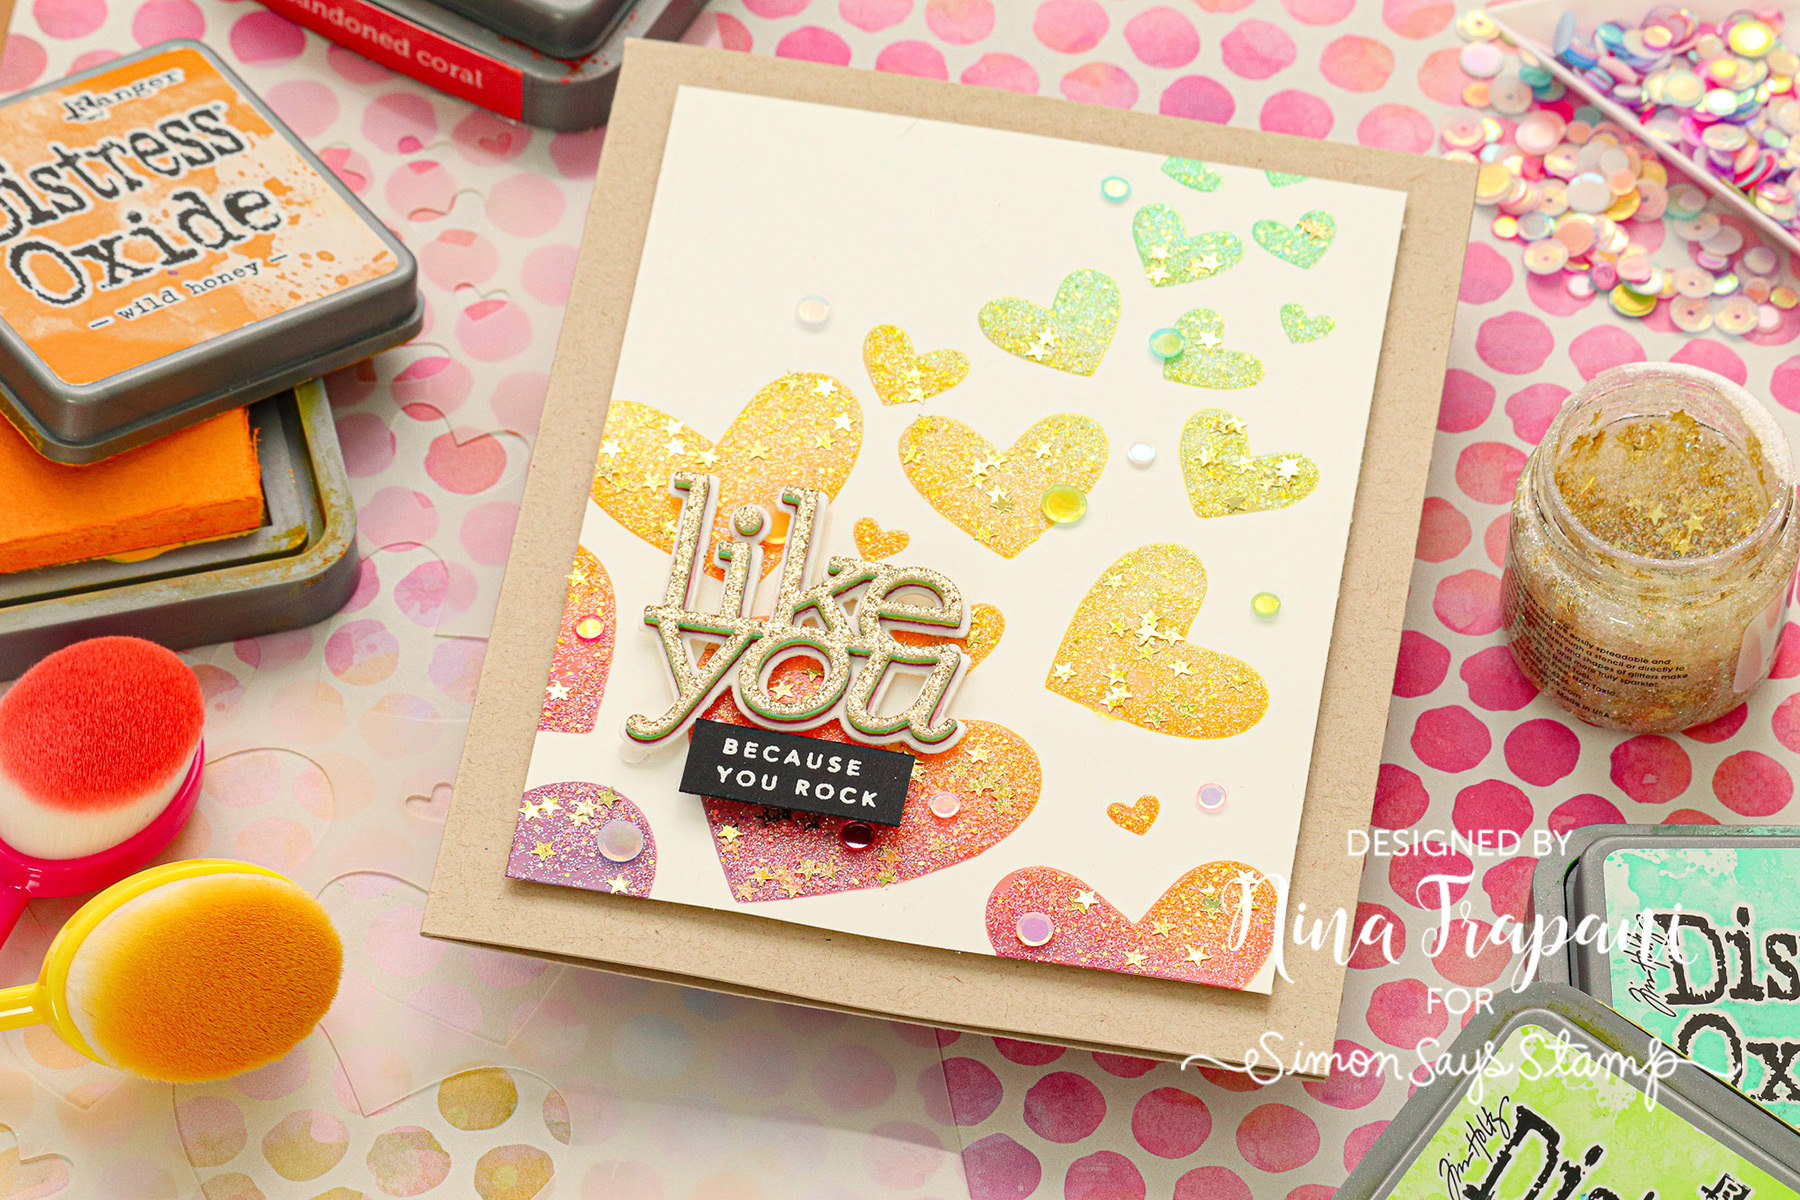
The new Ranger Stickles Glitter Gels are a stunning, sparkly gel paste that can be used on their own, or with inking techniques for an iridescent and shimmery finish.
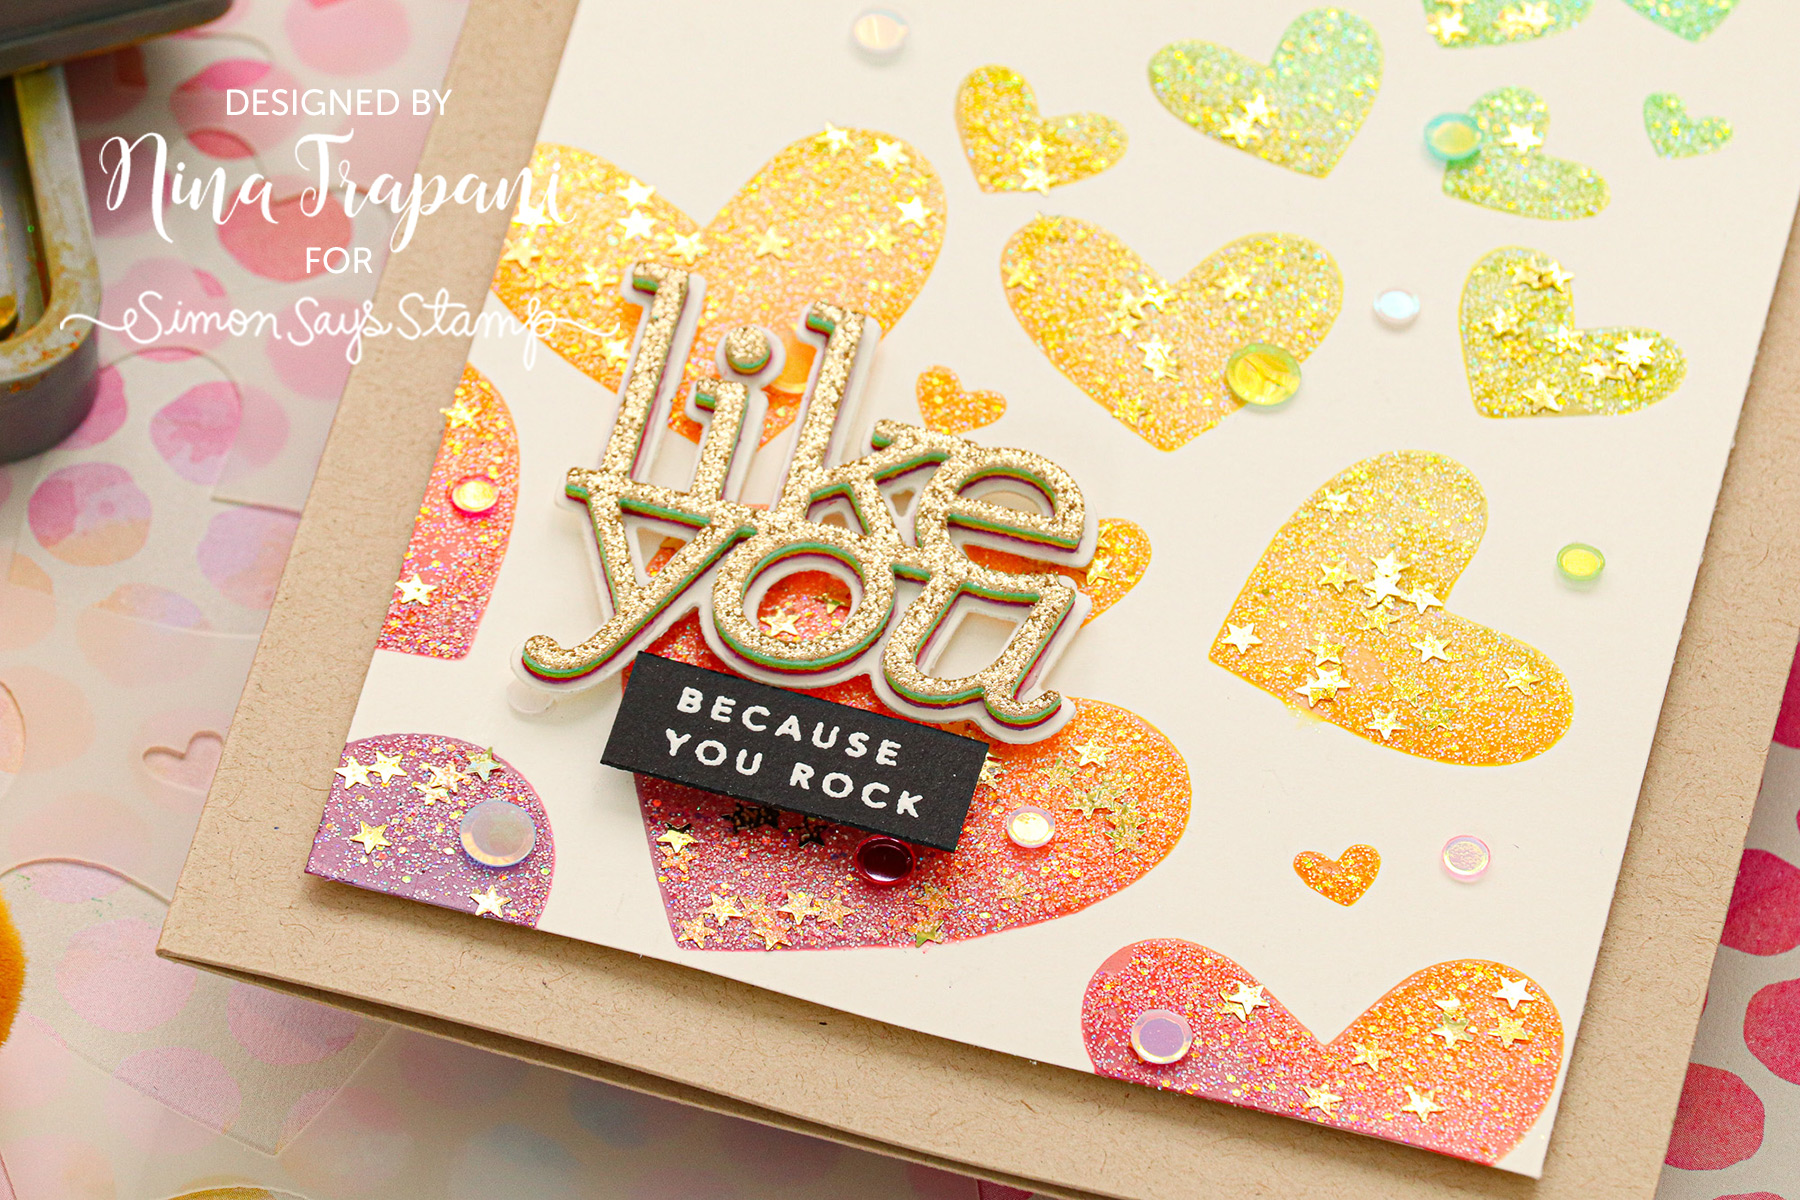
I started my card by ink blending Distress Oxide inks through our new Simon Says Stamp Bursting Hearts stencil. Before removing the stencil, I applied a layer of the Nebula Stickles Glitter Gel over the ink blending. This resulted in a vibrant, shimmery finish over the rainbow of hearts cascading across my card.
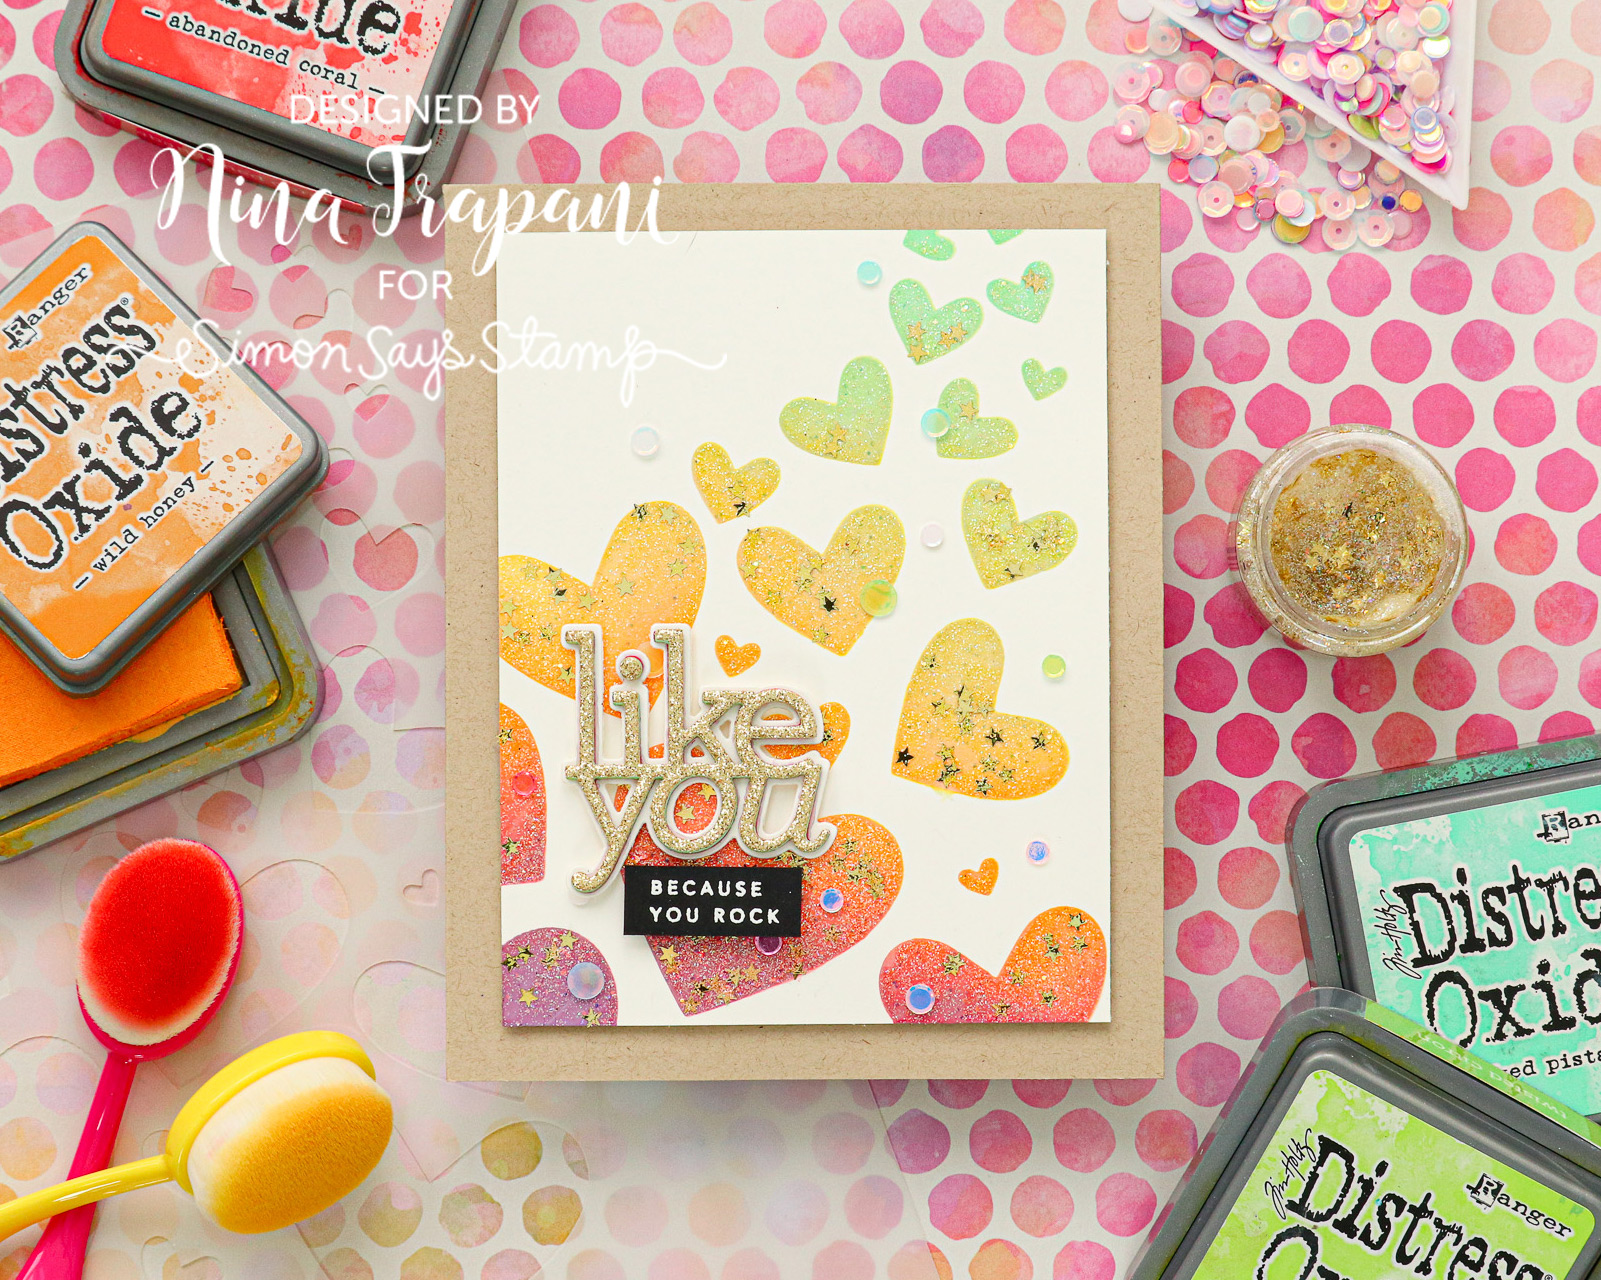
For sentiments, I chose the new CZ Design Like You stamp and die set – be sure to watch the video to see how I created this unique, rainbow effect on the sentiment, which coordinates with the colors in my background.
This blended background is so easy and fun to create. I hope you are inspired to try this technique out for yourself!
WATCH THE VIDEO
SUPPLIES
|


Watercolor Pencils & No-line Coloring – March 2020 Card Kit Inspiration with Kristina Werner
Hello, all! Kristina Werner here. I’m back with some card kit inspiration! The March 2020 Card Kit has some fun supplies! I decided to do a bit of creative watercoloring with the watercolor pencils and the stamp set in the kit.
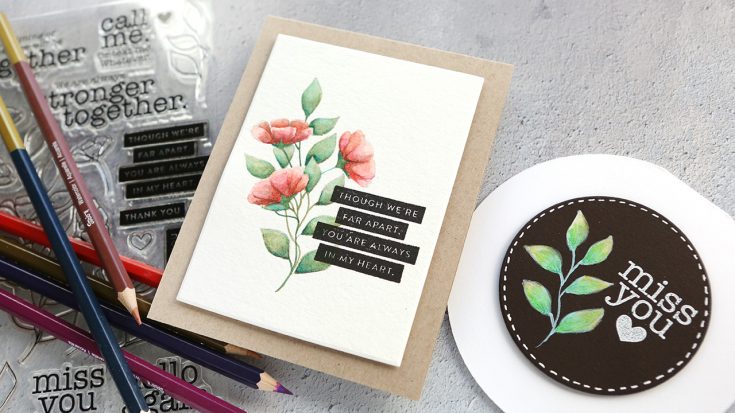
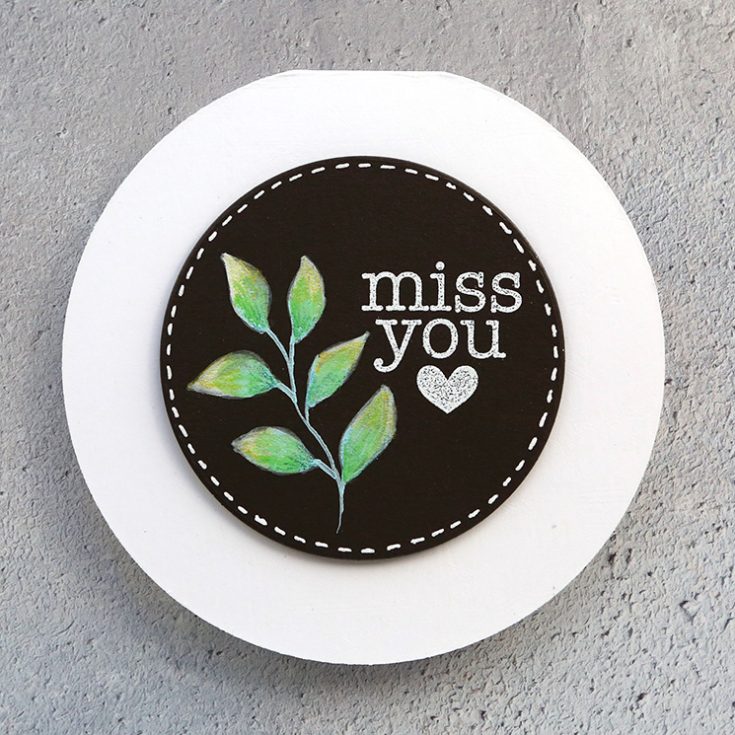
On my first card, I added the pigment from the watercolor pencils to white gouache so I could paint on top of a dark surface! I stamped one the leaves stamps from the Stronger Together stamp set on Dark Chocolate cardstock and then painted leaves with the gouache mixture. Super fun!
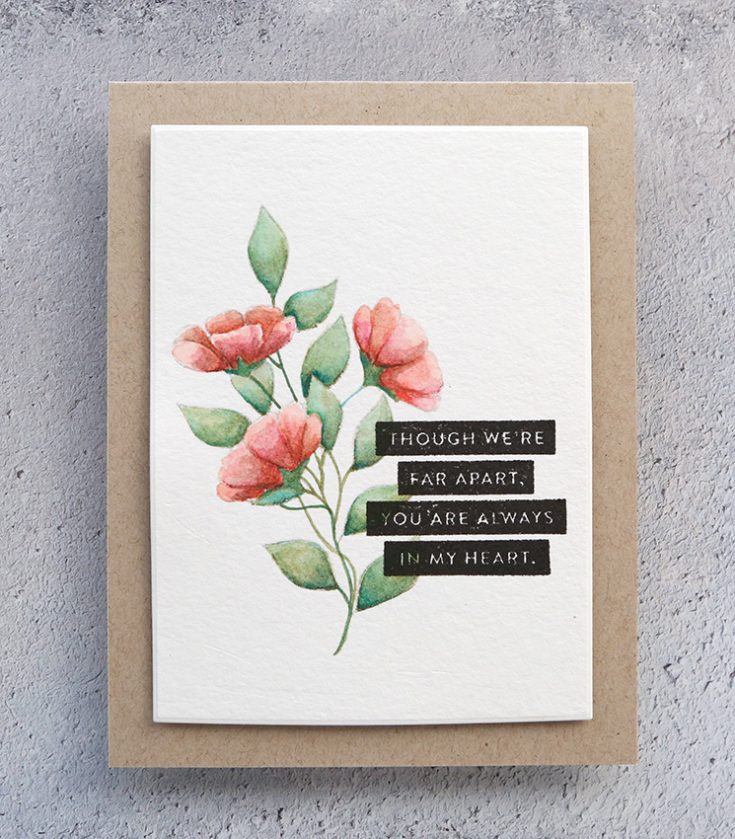
For my other card, I stamped the large floral cluster from the stamp set on watercolor paper in Barely Beige ink so that I could do a no-line watercolor look. Then I painted the flowers by coloring directly onto the paper with the pencils and spreading the color with a damp brush, and also by picking up the color from the tip of the pencil.
Thanks for stopping by today! You can get the March 2020 Card Kit HERE, or subscribe to receive this kit and future kits HERE!
Supplies
|


Retro Type Vignette Tray
Hi friends! Happy Sunday! Please join me in welcoming back special guest Emma Williams as a guest on our blog today! Her creativity continues to inspire me on a daily basis! How cool is this project?! Read on to learn more and enjoy!
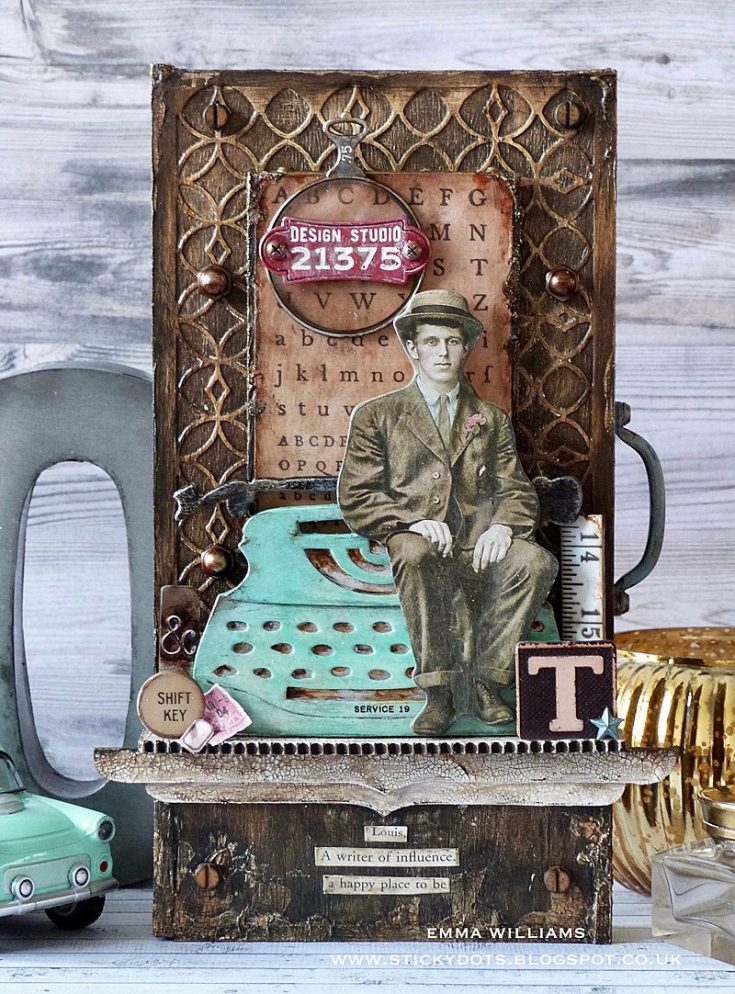
Happy Sunday everyone, it’s Emma here and I’m so pleased to be back on the Simon Says Stamp blog to share my latest project with you all! This is a mixed media piece using products from Tim Holtz and Sizzix and is perfect for those men in our lives, so whether you choose to create cards, scrapbook layouts or home decor pieces just like this ~ I’ve packed this project full of ideas and inspiration.
I used the back of the smallest vignette tray in the set of 2 for this project and created a textured background using one of the two dies in the Sizzix Pattern Repeat Die Set by Tim Holtz to die cut a panel of Mixed Media card, approx 4.5” x 7” to fit the front of the tray.
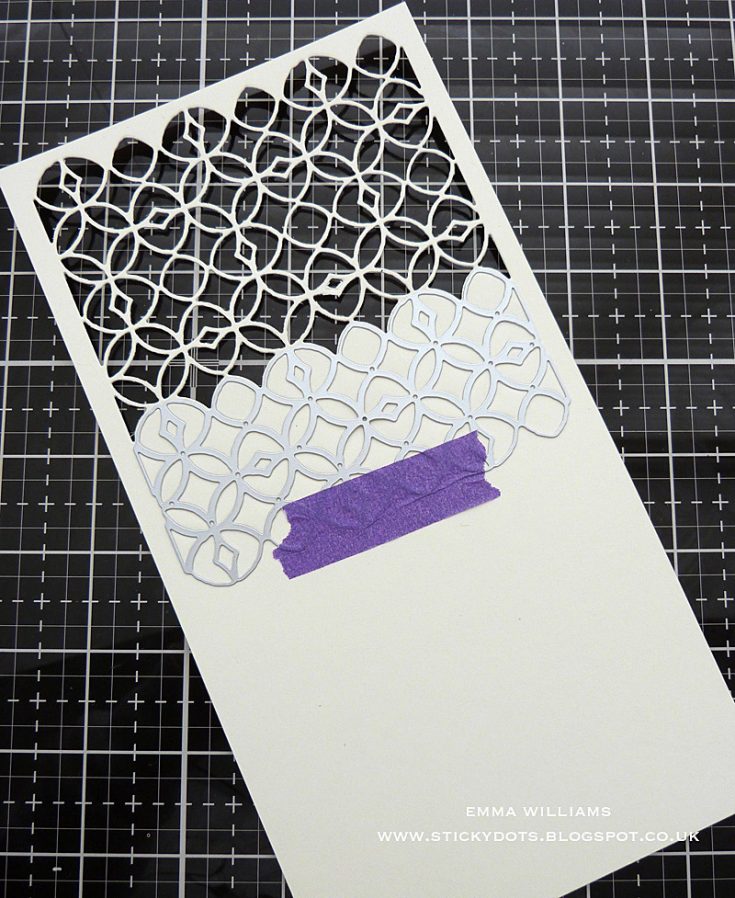
Place the die at the top of the card panel, attaching it with some low tack tape to prevent it from moving. When you look at the repeat dies, you will notice that one side of the die is flat with no cutting blades which enables you to align the die and cut a repeat pattern. Run the card through a die cutting machine.
Once you remove the die and pop out all the excess pieces with a pick, place the flat side of the die directly over the bottom edge of the cut section to enable you to continue the die cut pattern. Attach the die with the low tack tape and once again, run through the machine. Repeat until you have die cut a pattern onto the entire card panel.
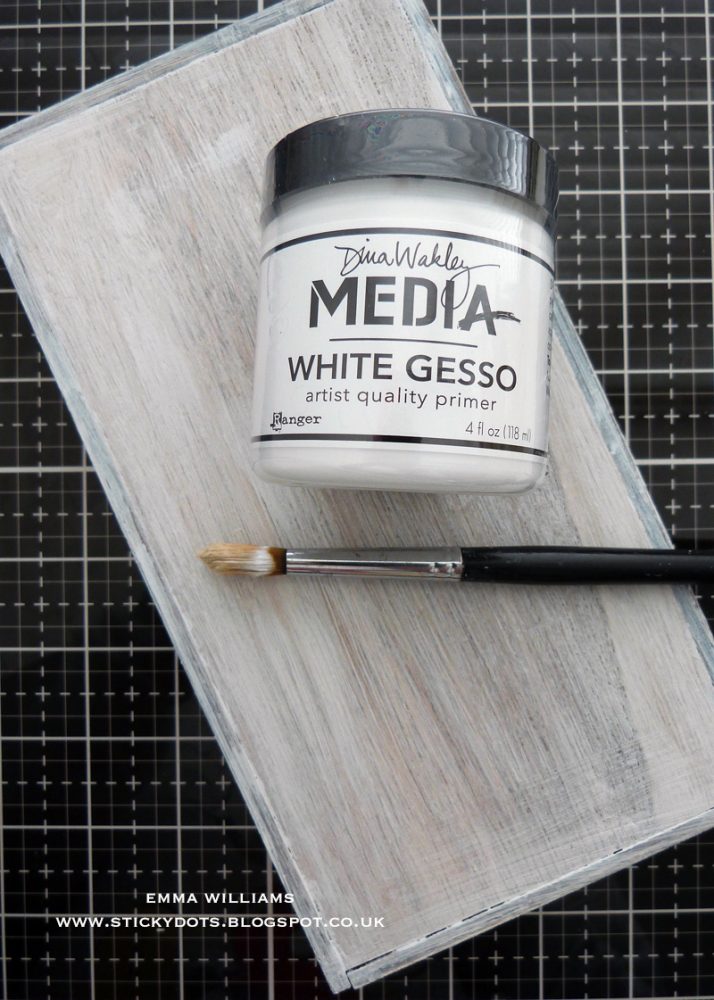
Apply a layer of gesso to the surface of the tray.
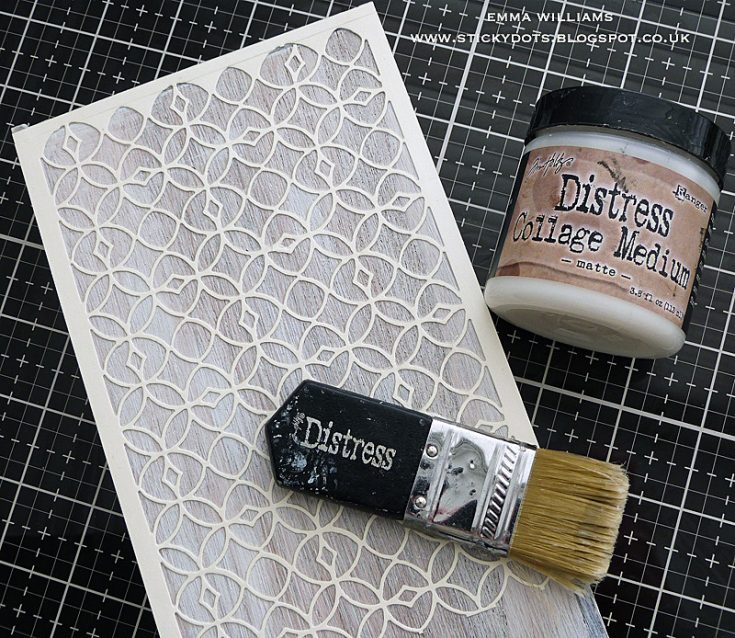
When the paint is dry, place the die cut panel at the top of the tray and adhere using Matte Collage Medium and a Collage Brush. The design will cover the top 2/3rds of the tray.
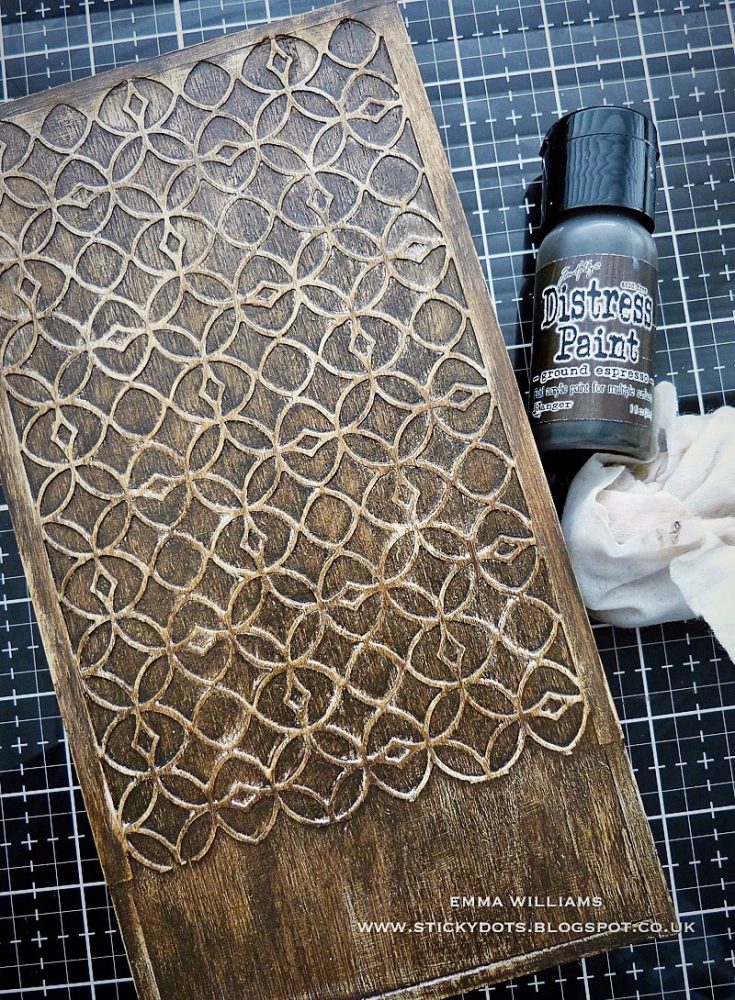
Allow for the medium to dry and then apply a coat of Ground Espresso Distress Paint over the front and sides of the box. Leave the paint for a couple of minutes to become slightly tacky but still damp and then concentrating on the raised die cut area of the tray, use a semi dry baby wipe to wipe gently over the surface to remove some of the paint, revealing the pattern. If you remove too much paint, just apply a little more in the areas you’re not happy with. Gently heat dry the painted surface.
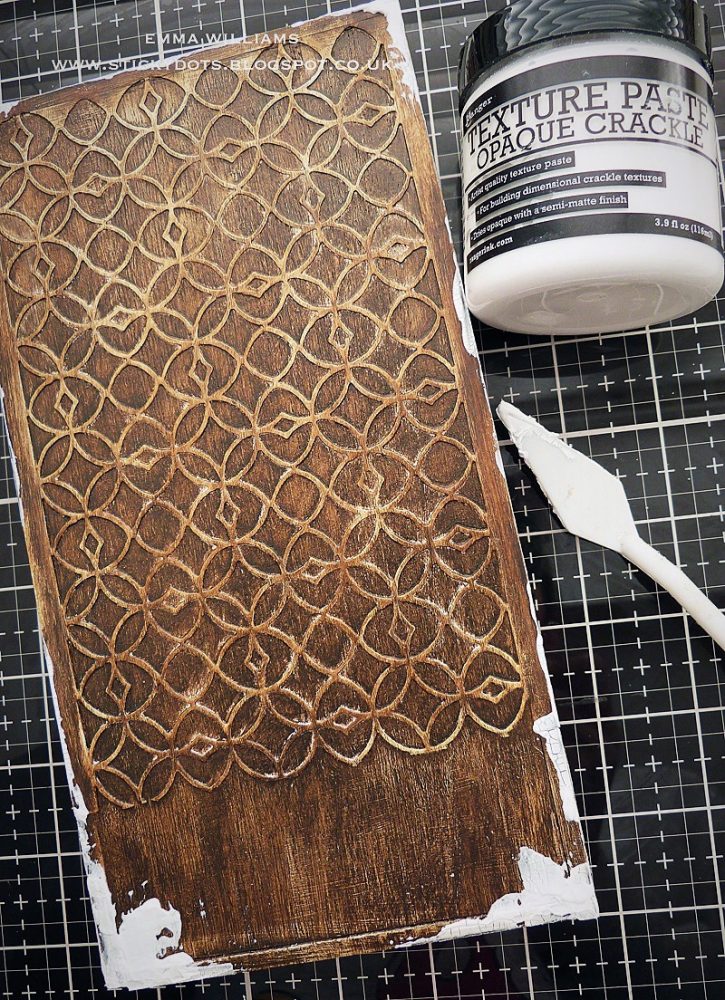
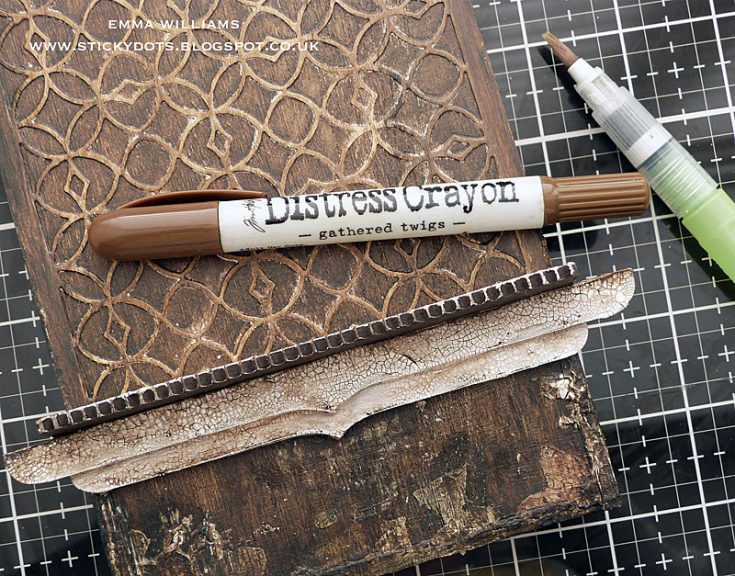
Apply small amounts of Crackle Paste to the edges and sides of the box. Set aside to dry and for the crackles to appear.
To add colour to the paste and accentuate the crackles, apply Gathered Twigs and Walnut Stain Distress Crayons over the surface and using a damp fingertip or a waterbrush, blend the colour over the top of the paste allowing the crayon to sink into the crackles. Keep repeating the process to cover the pasted areas.
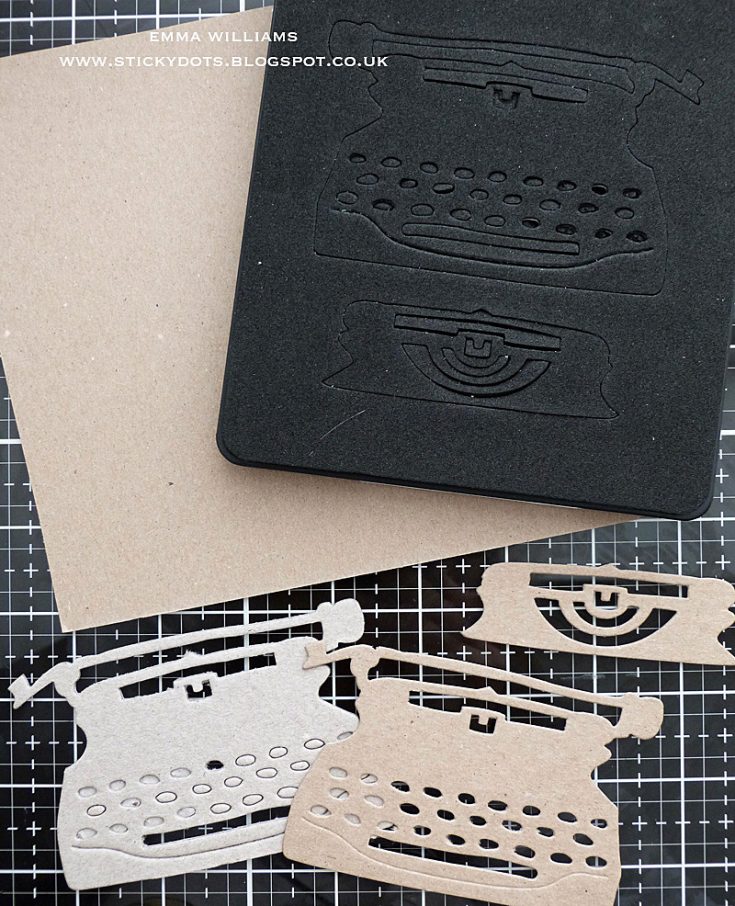
To create the typewriter, I used one of my favourite dies from Tim Holtz’s Chapter 1 Sizzix release, the Retro Type die. This die is a Bigz die which means you can cut through most substrates and because I wanted to make this piece fairly substantial so that it would be able to stand up and not bend or warp, I used thick chipboard and cut two pieces of the body of the typewriter and one top section.
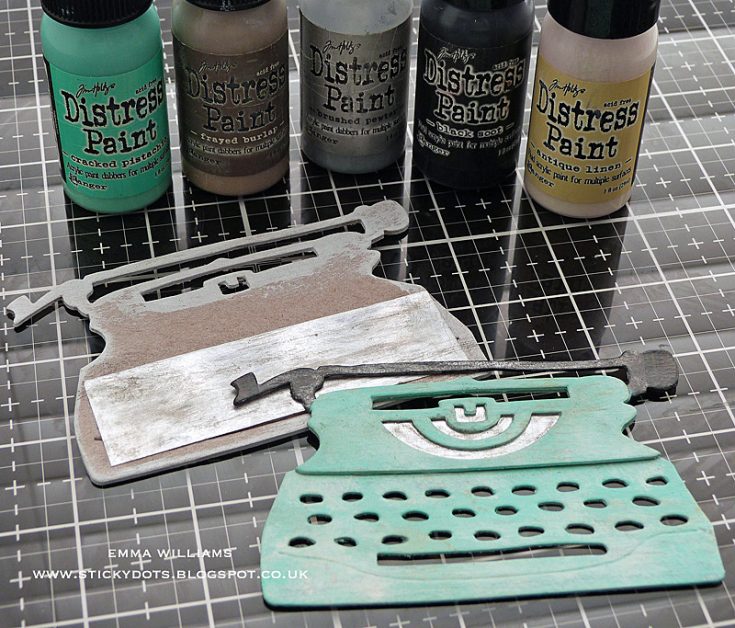
Gesso all three pieces of chipboard and once dry, take one of the main body pieces, together with the top section and start to add colour to both pieces. I applied a solid coat of Cracked Pistachio Distress Paint to the main body of the typewriter, before applying a small amount of Antique Linen and a touch of Frayed Burlap and using a paintbrush to dry brush the paint over the surface, allowing the paint to kiss the surface of the die cut and not add too much colour ~ you want to just create a vintage feel to the image. TIP: Always dry each paint layer between applications so that the paint doesn’t become muddy in appearance. I painted the paper bar on the typewriter with a combination of Black Soot and Brushed Pewter Distress Paint. Once dry, add a piece of silver metallic kraft stash over the key section of the remaining unpainted die cut before layering all the pieces together to create one solid chipboard die cut.
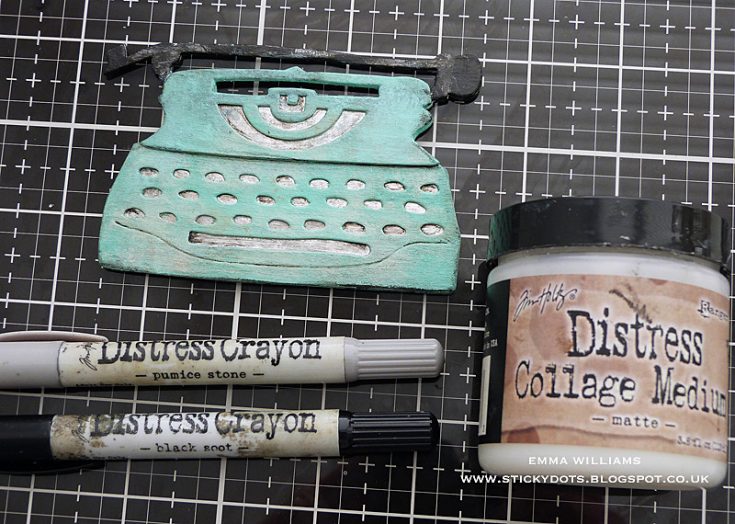
Apply a coat of Matte Collage Medium over the top, allow to dry before using the Pumice Stone and Black Soot Distress Crayons to add a vintage touch and accentuate the edges of the die cut, softening any harsh lines with your fingertip.
Apply a Specimens Remnant Rub, ‘service 19’ to the typewriter.
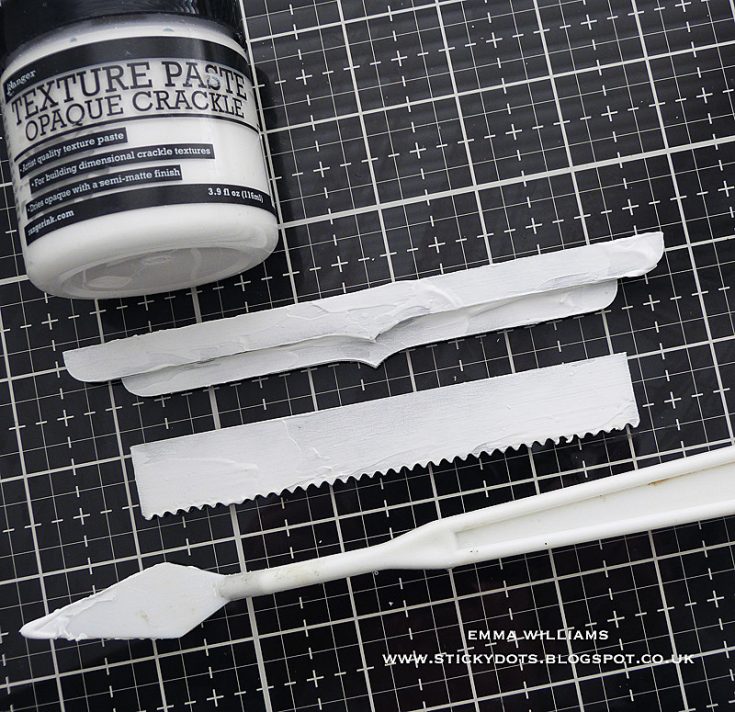
Using two various lengths of Bracket Etcetera Trims and one Pinked Etcetera Trim, paint the surface with Antique Linen and allow to dry before applying a layer of Crackle Paste over the top. When the paste has dried and crackles appear, apply Gathered Twigs Distress crayon over the top and use a water brush to blend the crayon into the crackles.
Attach the trims to the front of the tray as shown in photo below, to create a ledge.
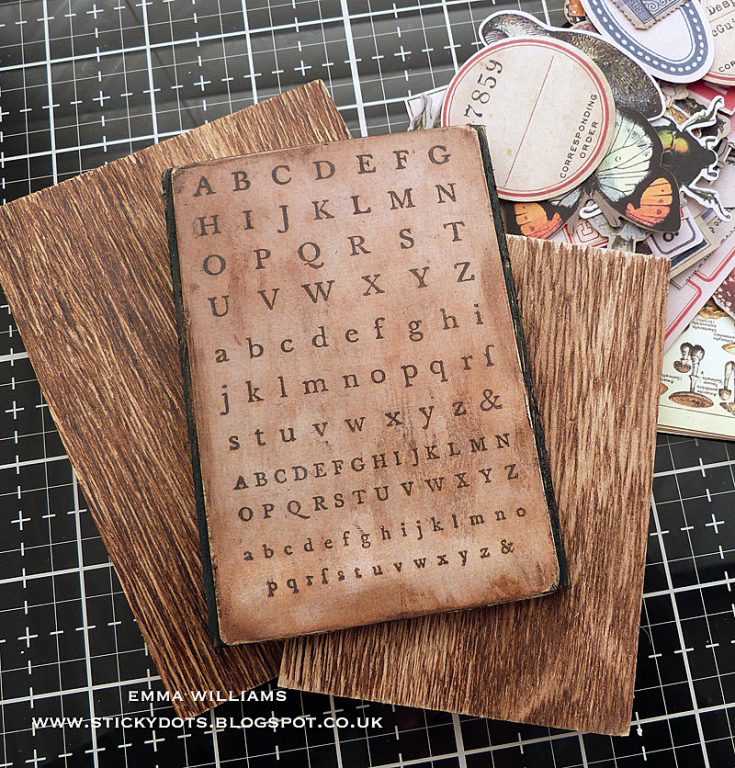
For the alpha panel that sits at the back of the typewriter, I used an ephemera piece from the Field Notes set, which I slightly trimmed down in size. Adhere the ephemera piece to a Vignette Panel.
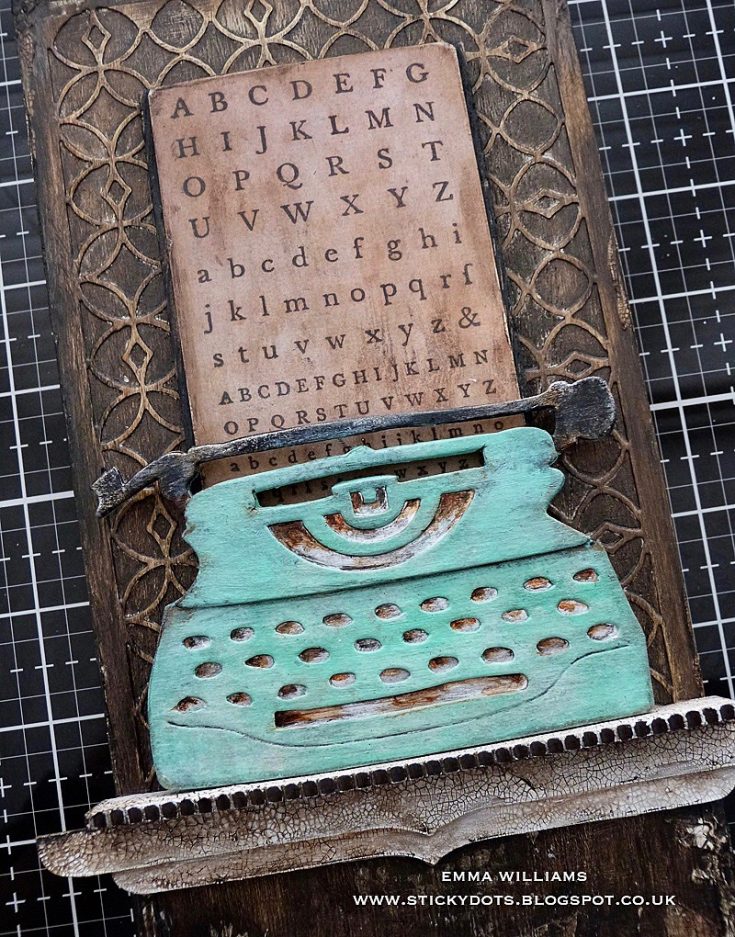
Use Matte Collage Medium to attach the panel to the tray and using foam pads, attach the typewriter onto the ledge.
Apply a layer of Collage Medium over the top, gently heat dry and then apply Grit Paste around the edges and dry, before colouring the pasted areas with Ground Espresso Distress Paint. Highlight the paste with a small amount of Vintage Gold Alchemy Wax.
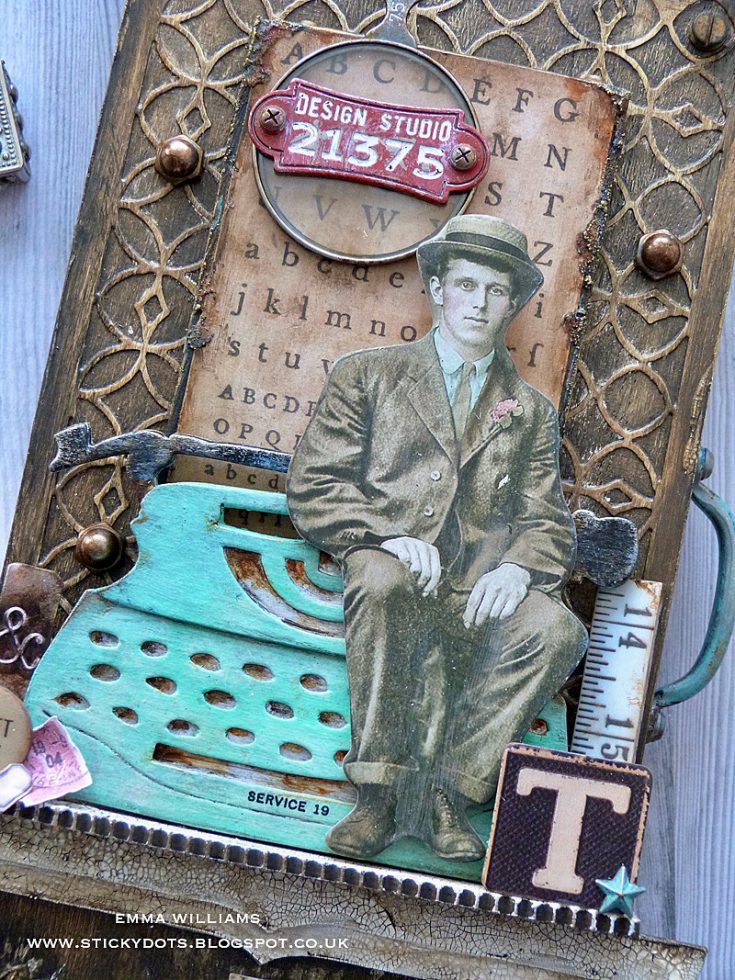
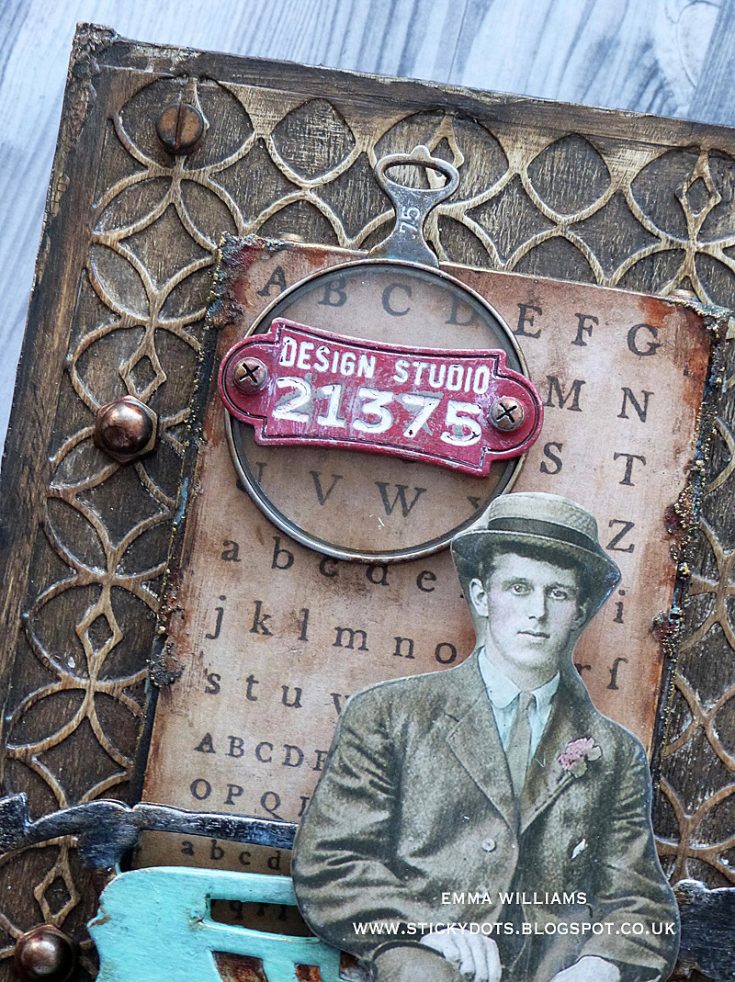
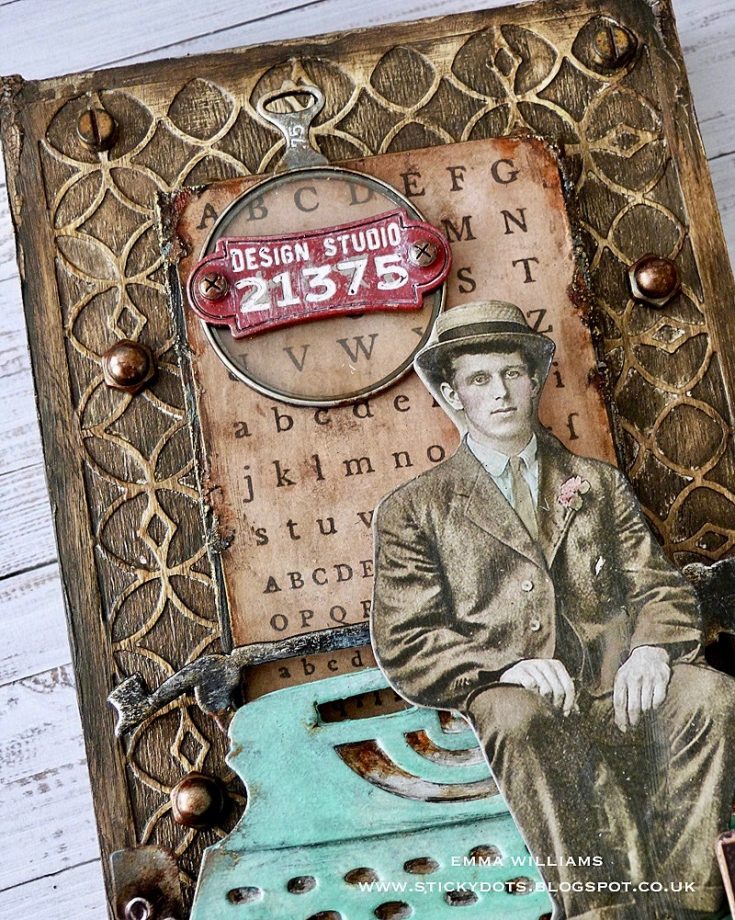
Colour tint the Baseboard Doll using Distress Marker Pens and attach him, so that he sits on the typewriter.
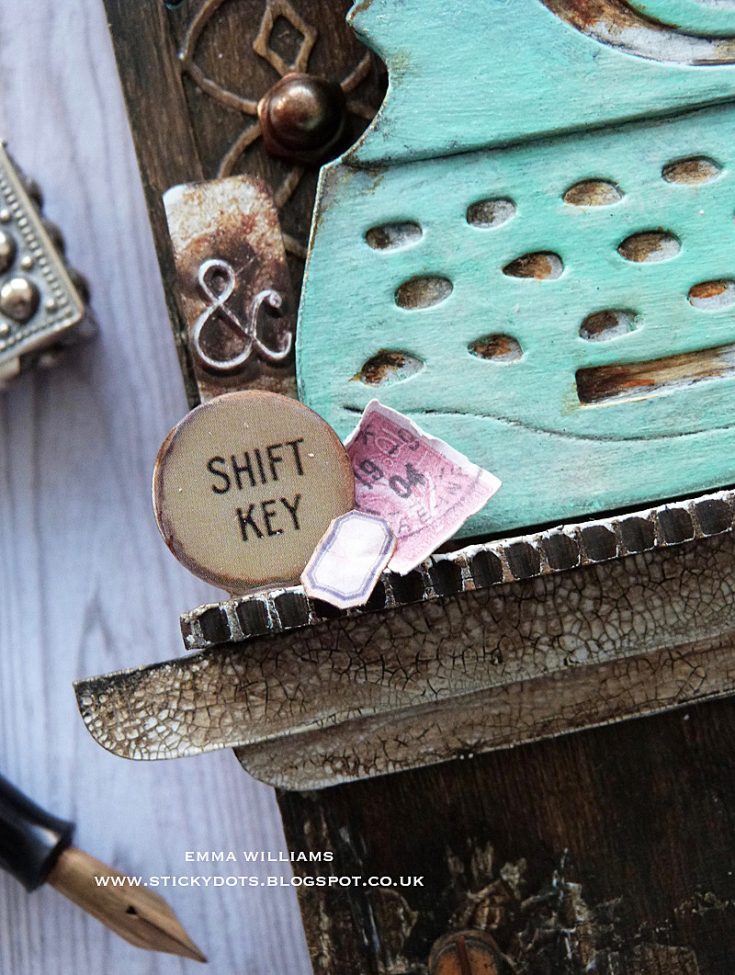
I adhered some fun pieces of ephemera to the ledge ~ a ruler, the letter ’T’, and the shift key piece from the brand new Junk Drawer Baseboard pack, together with some Field Notes Snippet Ephemera and a Type Chip…all these new products are available to pre-order. I also added a small Star Adornment painted with Evergreen Bough Distress Paint onto the letter ’T’.
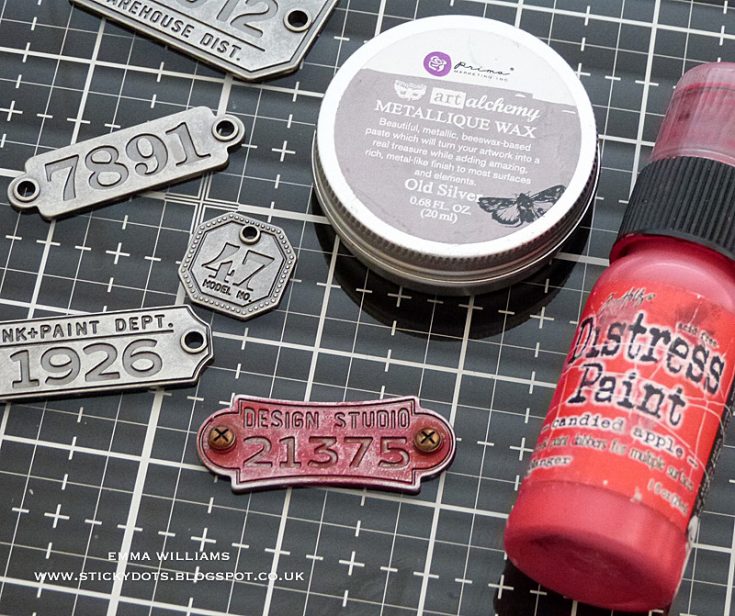
At the top of the alpha panel, I added one of Tim’s brand new idea-ology pieces, the Optical Lens, together with one of the Factory Tags that I painted red using Candied Apple Distress Paint. After allowing the paint to dry, I applied a small amount of Old Silver Alchemy Wax and then added a coat of Matte Collage Medium to seal the painted embellishment. Once the medium is dry, use the Picket Fence Distress Crayon over the wording, pressing it into the debossed areas. Wipe away the excess crayon to reveal the Design Studio lettering and numbers.
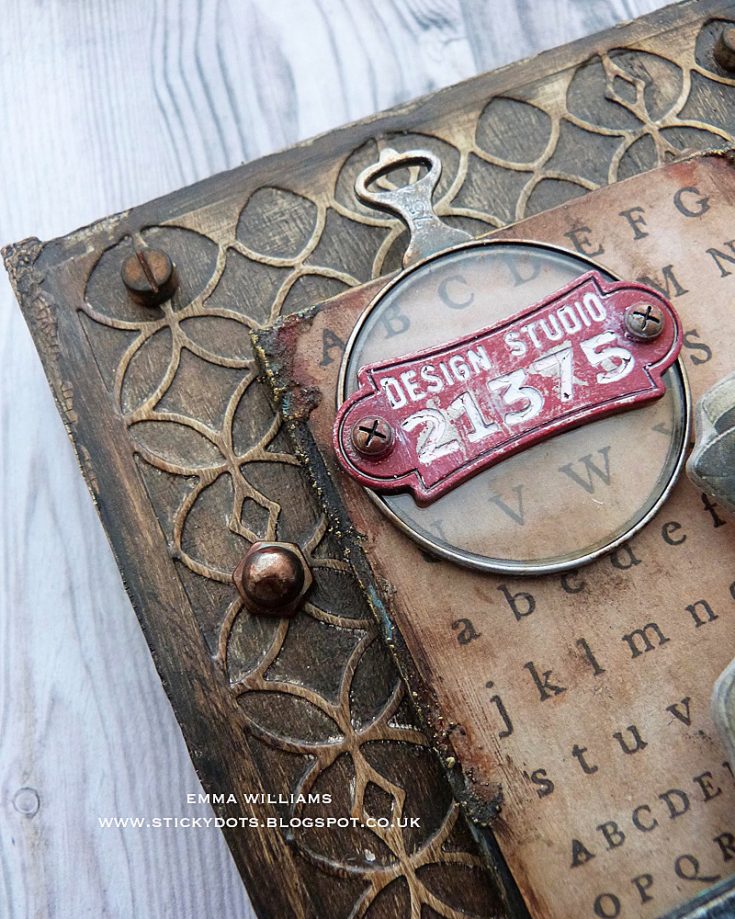
Attach two hardware heads to either side of the tag and adhere the factory tag centrally over the top of the Optical Lens.
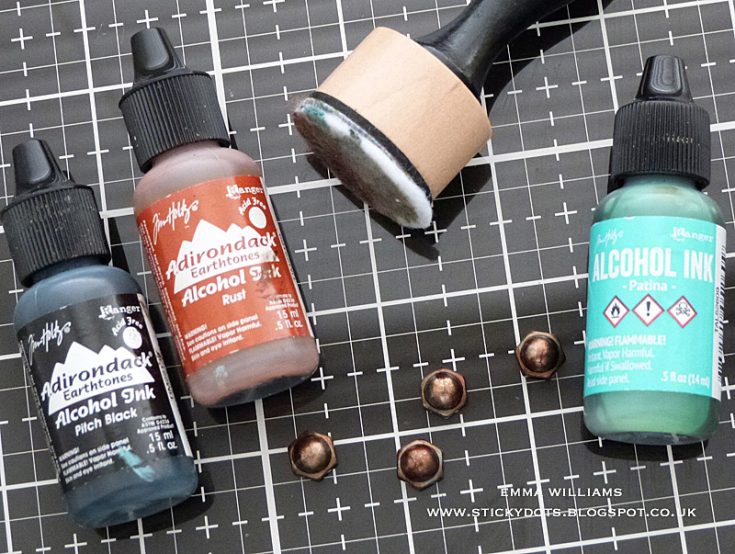
Attach a selection of Prima Marketing Mini Hardware studs down either side of the tray, using an alcohol ink applicator tool to ink the silver hardware studs with Rust, Patina and Pitch Black Alcohol Inks to create a more vintage look to the metal.
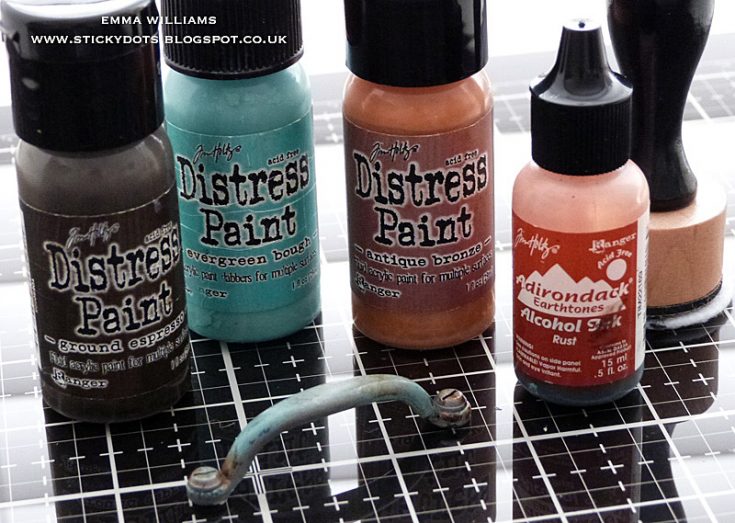
On the side of the tray, I added a handle from the Mini Hardware Pulls set. Paint the handle with a layer of Evergreen Bough, heat dry and then add small amounts of Ground Espresso and Antiqued Bronze paint to add a rusty finish to the piece.
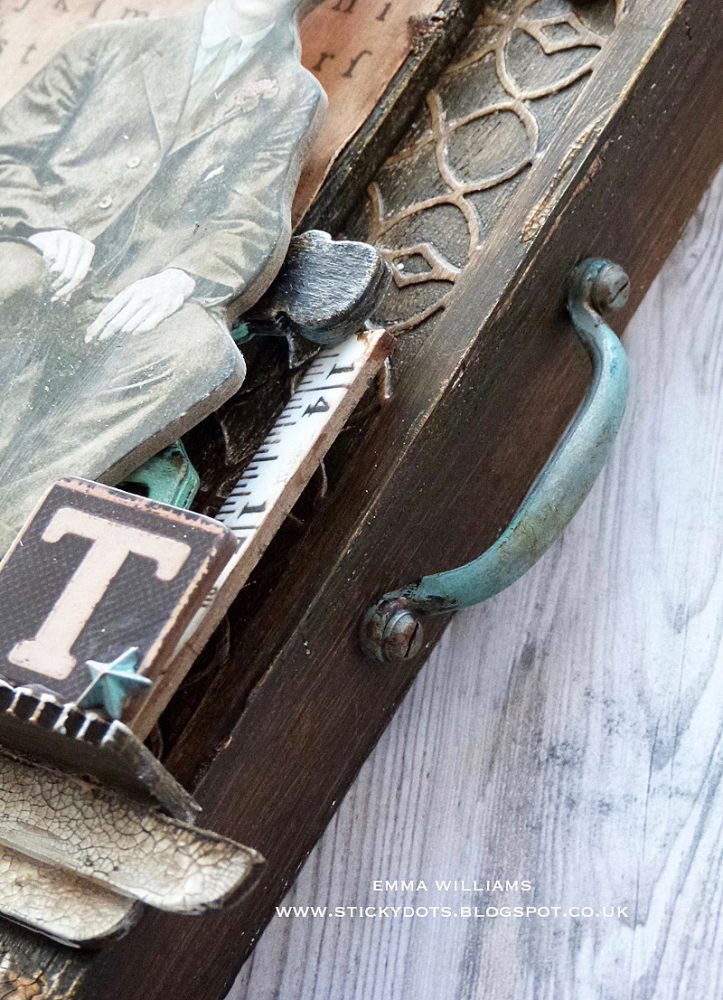
Ink two Hardware Heads with Rust Alcohol Ink and attach to the handle before adhering the completed handle to the side of the tray.
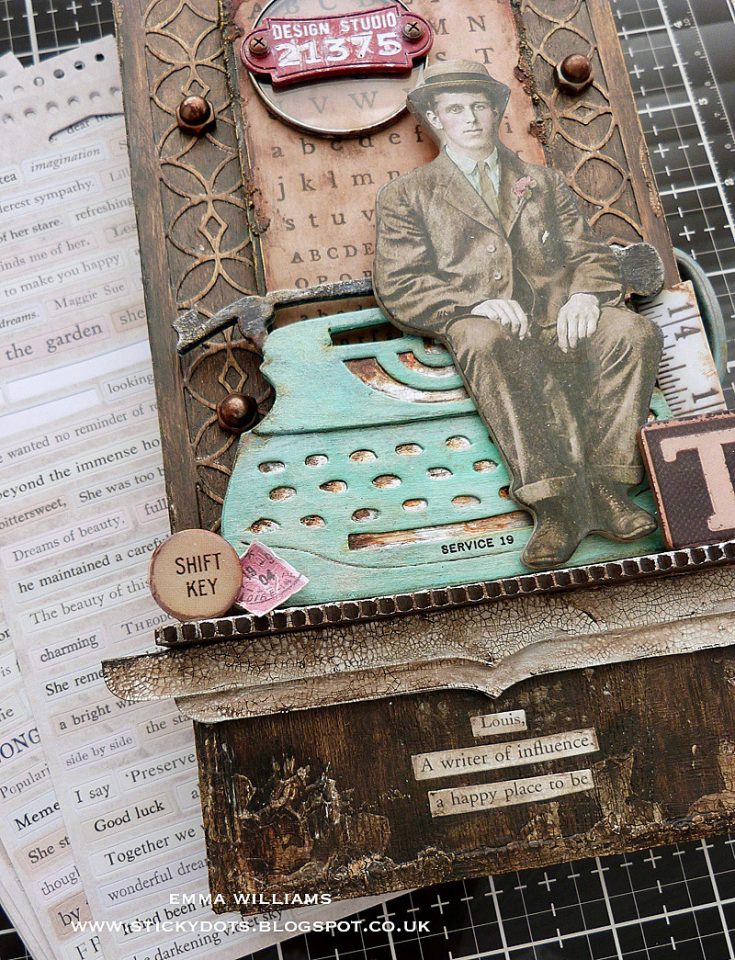
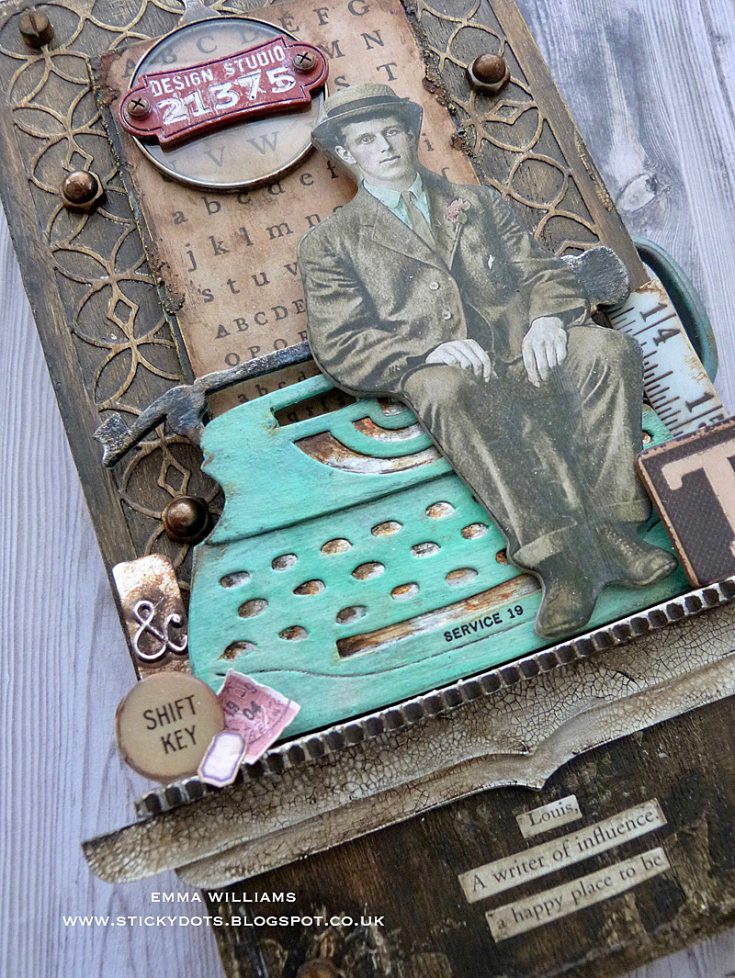
Finally, add the Clippings Sticker beneath the ledge, “Louis, A writer of influence, a happy place to be”.
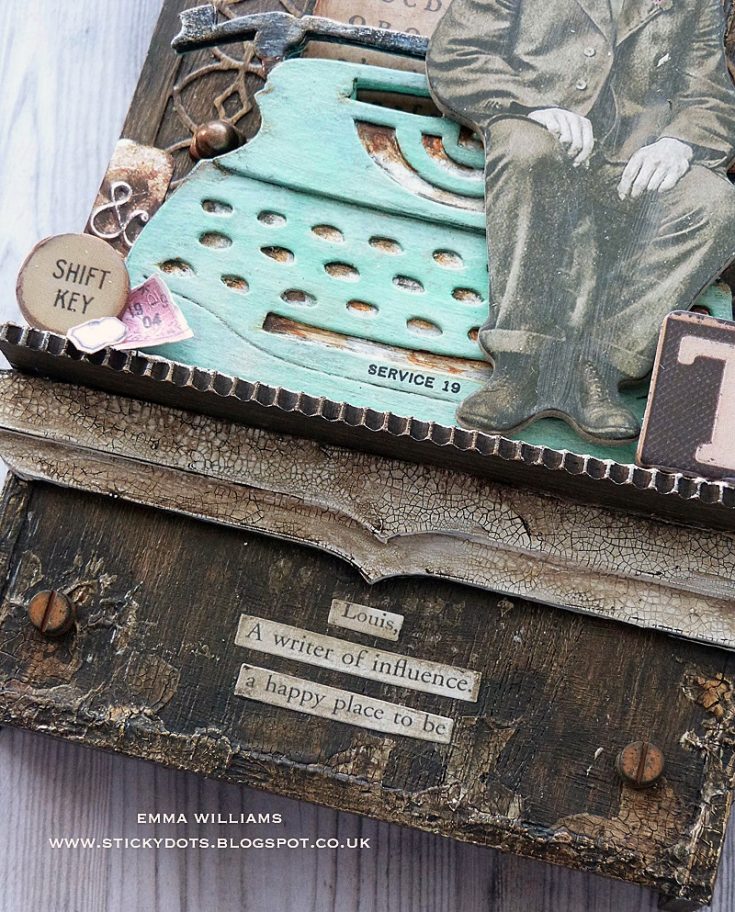
Adhere the stickers with collage medium, and once the medium is dry…age the stickers by applying a light touch of Walnut Stain Distress Crayon over the top, blending the colour out with your fingertip.

Thank you so much for stopping by today ~ it’s been fun taking you through the creative process of this project and I hope I’ve given you some tricks and techniques that will inspire you with some ideas of your own! -Emma x
SUPPLIES:
|


Thanks so much for stopping by, and thanks to Emma for being our guest!


