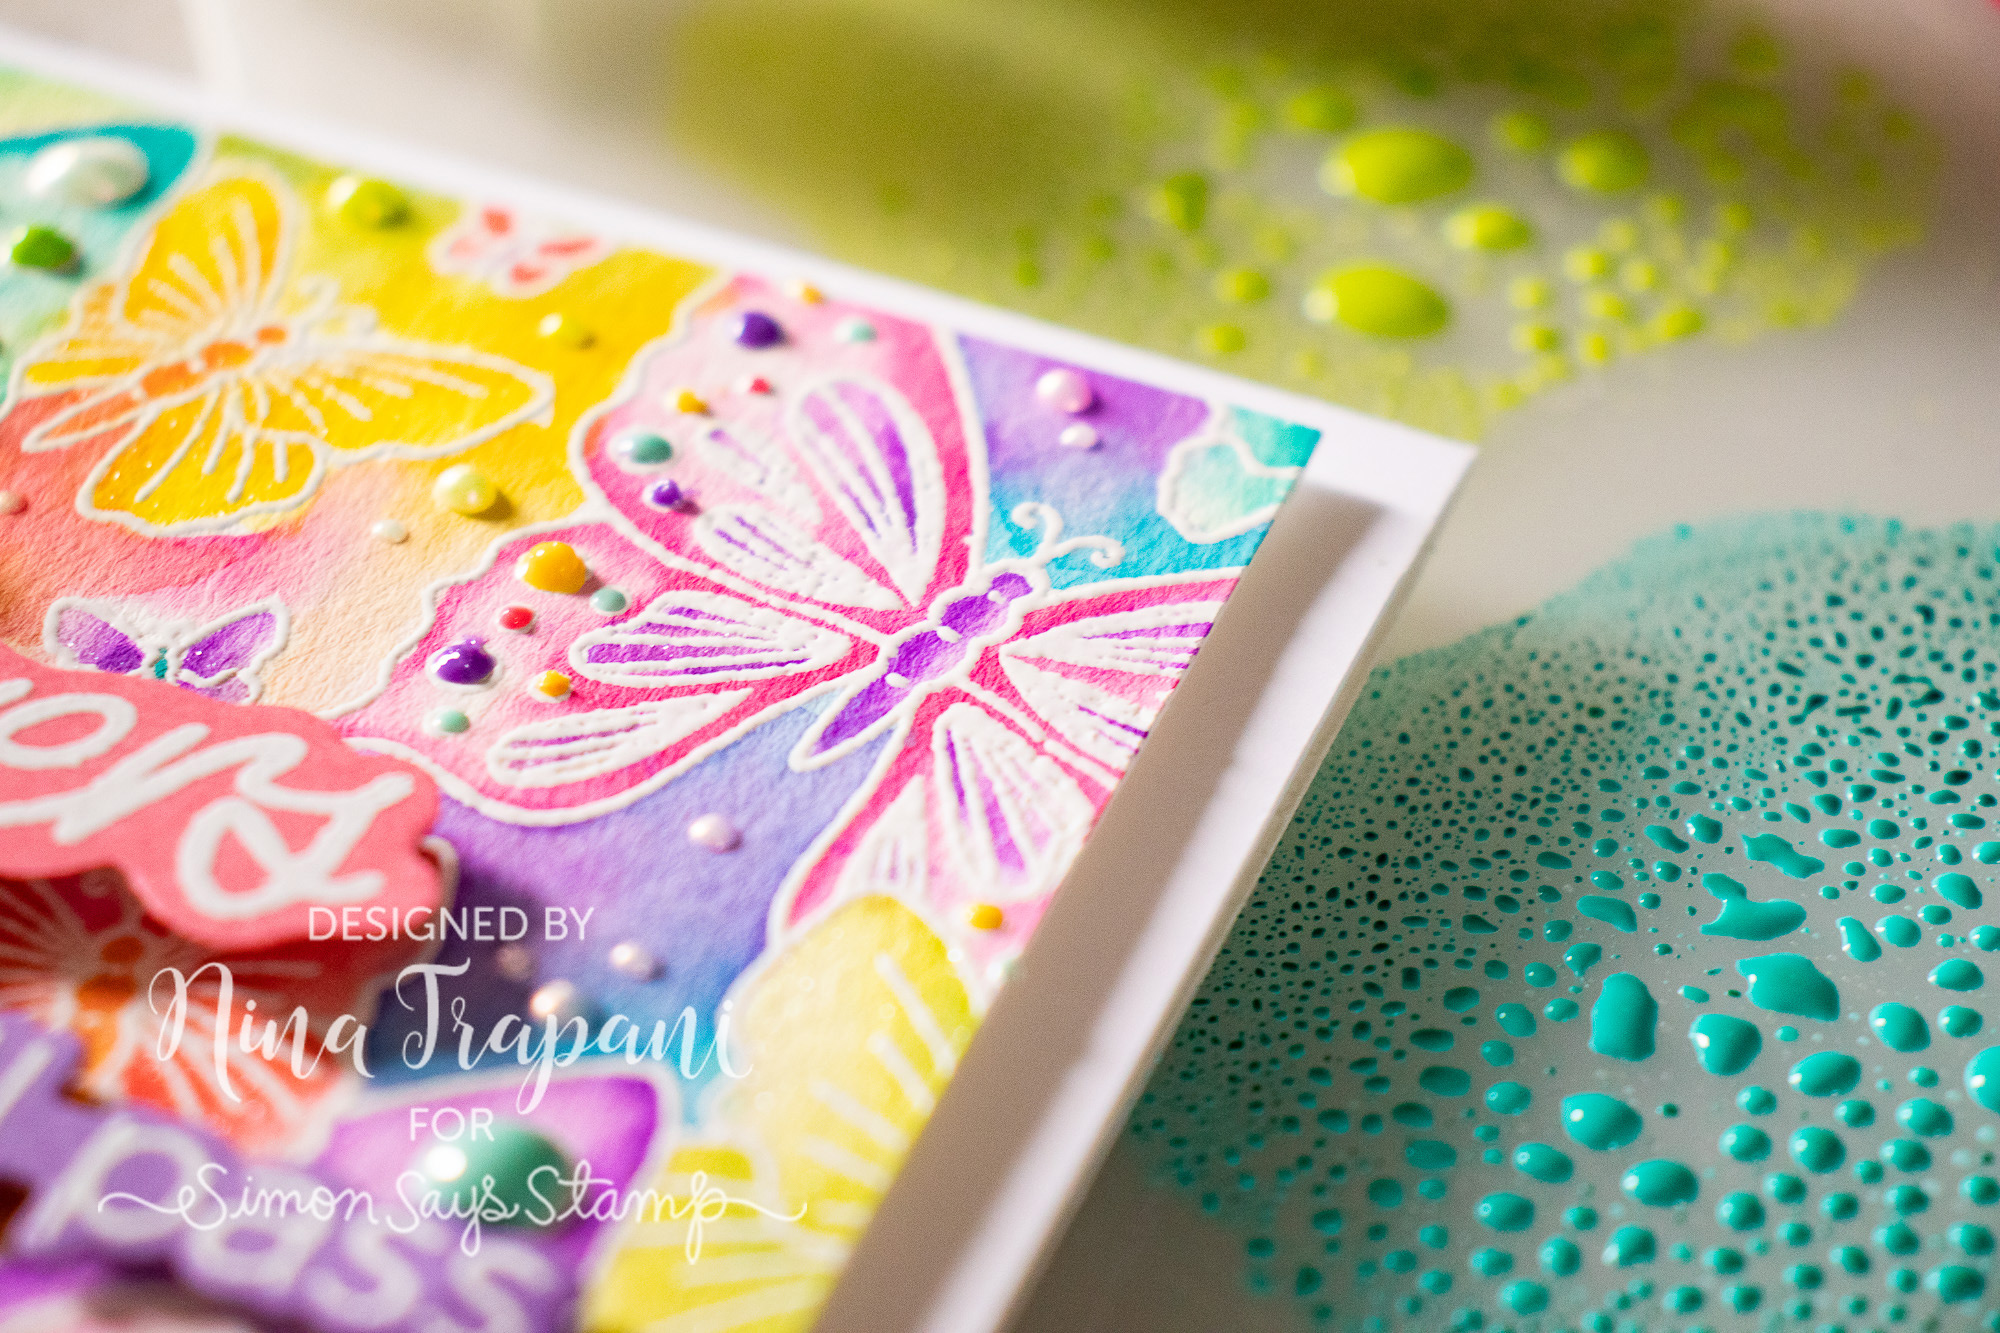
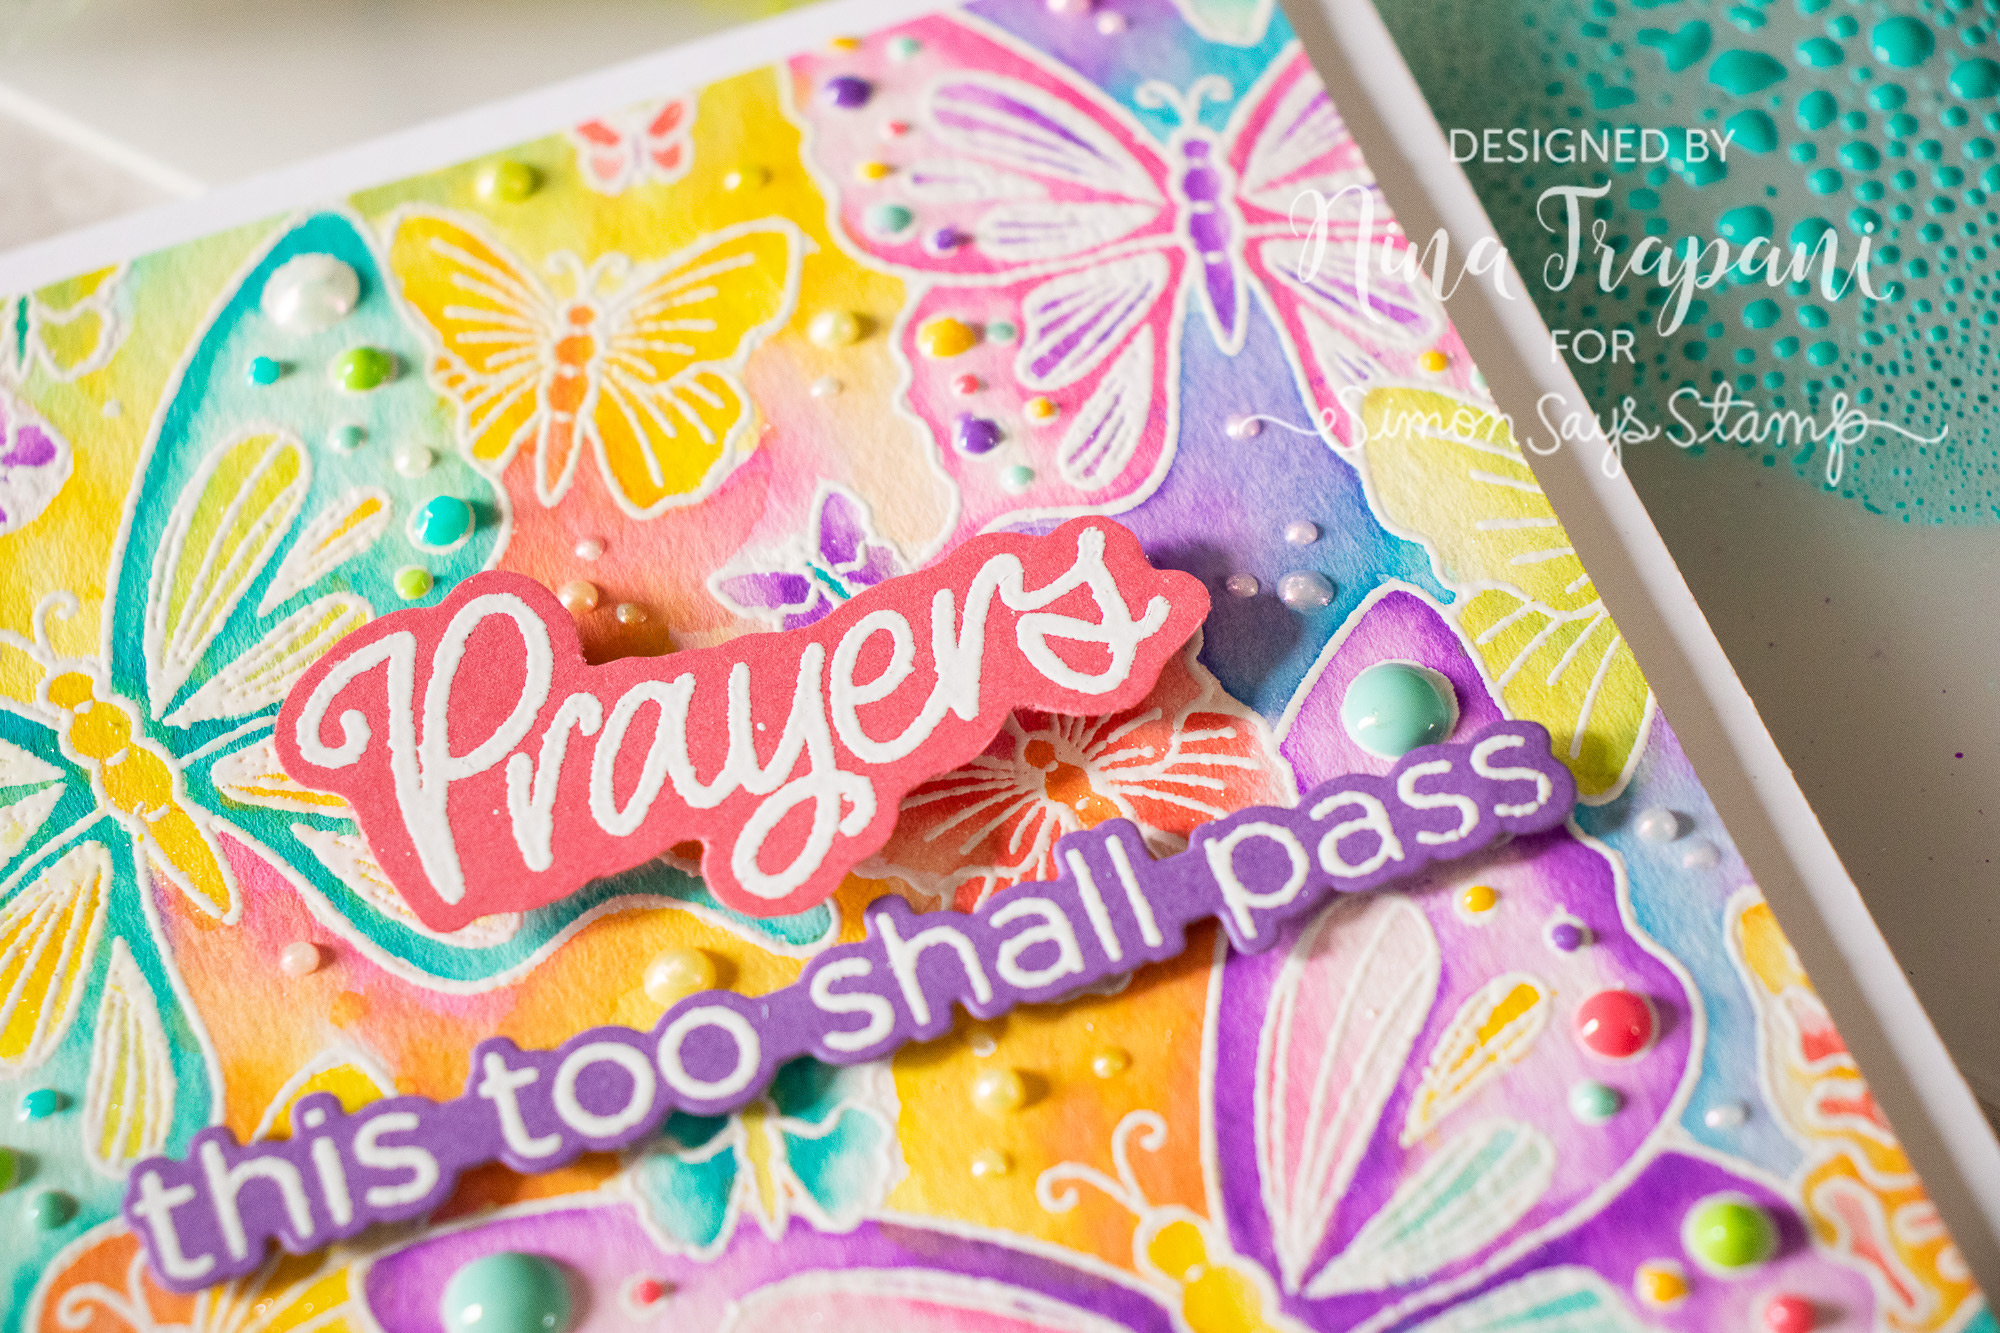
Distress Oxide Watercoloring Encouragement Card
Hello friends, its Nina-Marie here with you today sharing inspiration using our Simon exclusive Outline Butterflies background, along with some additional exclusives that we released in our Blossoms and Butterflies collection! This is such a great time to make and share encouragement cards.
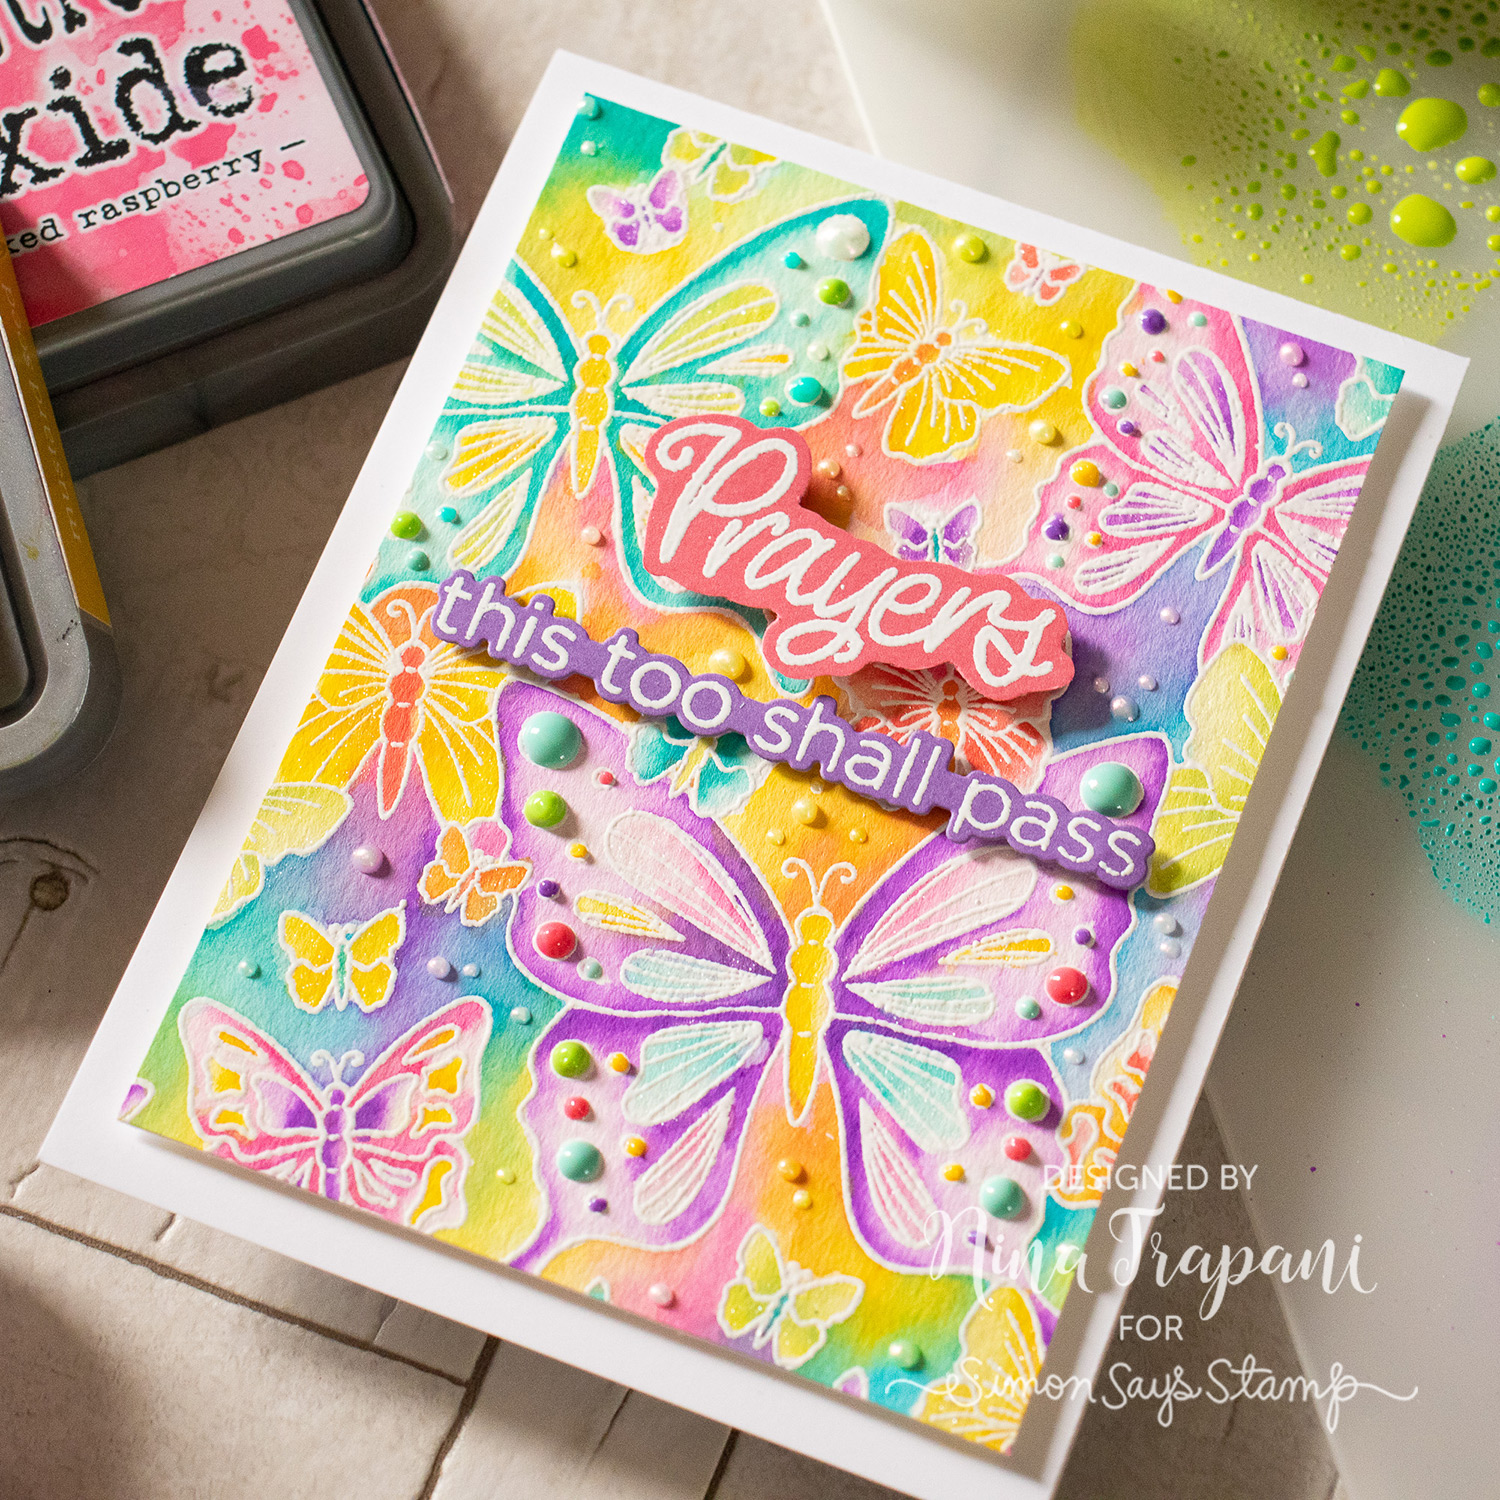
The card is watercolored with Distress Oxides; not only are these inks amazing to ink blend with, but the rich colors also make for gorgeous watercoloring.
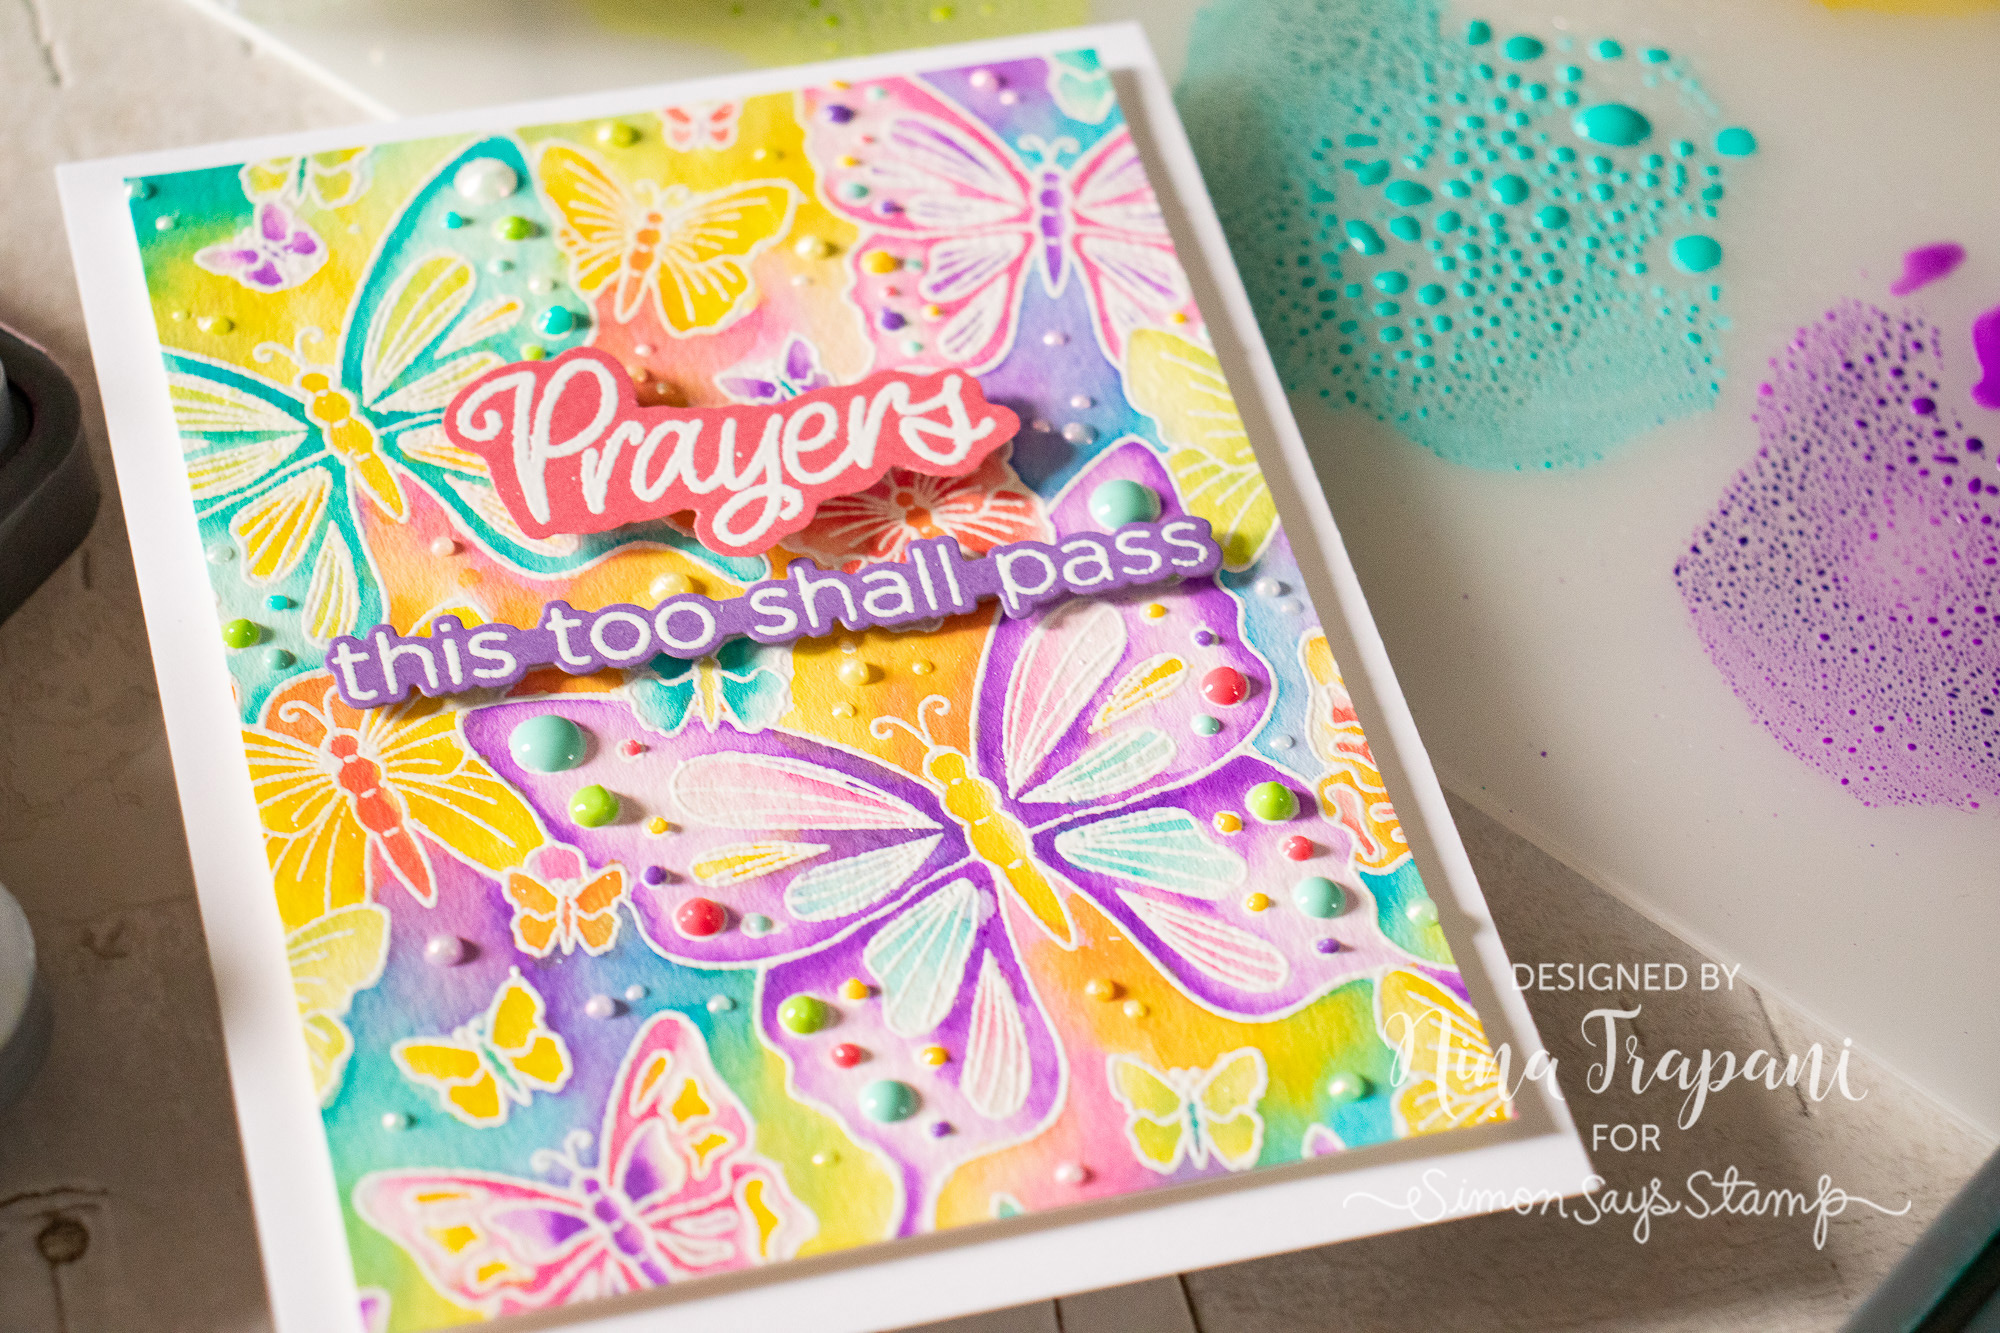
I was going for an ethereal style with this card, so not only did I use a myriad of colors for the butterflies, but also in the background of the card itself. Mixing Oxide inks is extremely easy, so even if you are a beginner at watercoloring, I think you’ll find this Oxide ink watercolor technique super easy and also fun!

To enhance the colors of the butterflies, I used a rainbow of Nuvo Gloss Drops on their wings, and also in the background. For sentiments, I used greetings in both the You Got This CZ Design and our Comfort and Prayers set.
Want to see how I created this colorful encouragement card? Be sure to watch the video below!
WATCH THE VIDEO
SUPPLIES
|


Thanks so much for stopping by today!
Waffle Flower Crafts Easy Cloud Background & Beach Scene
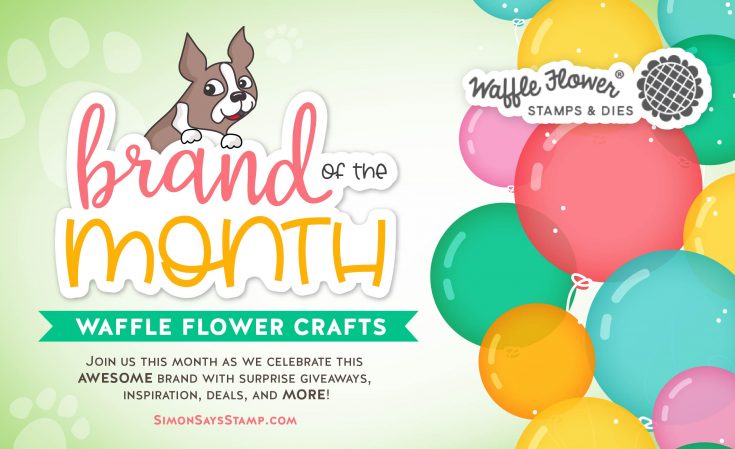
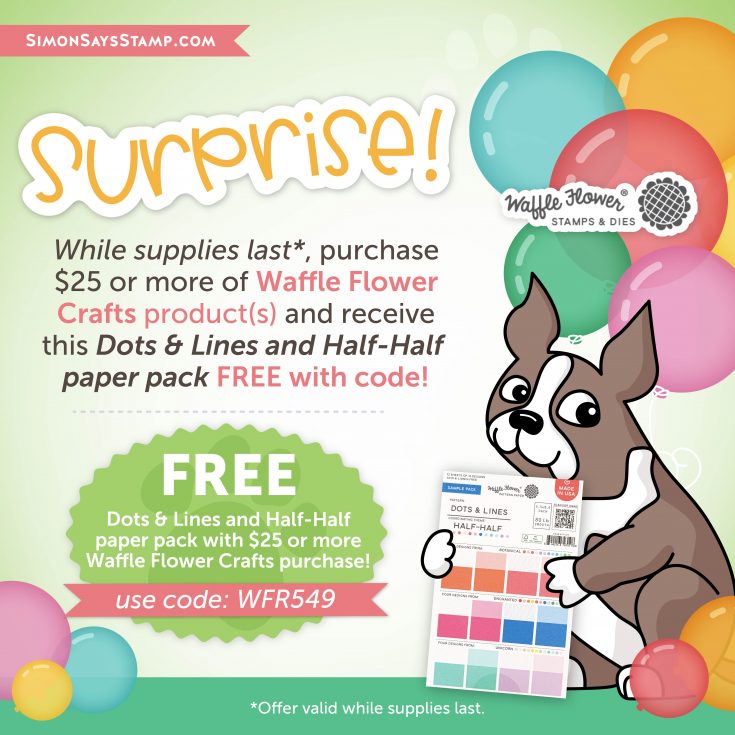
Hi friends! Happy Friday! Did you know we are showcasing Waffle Flower Crafts all April 2020 long as our Simon Says Stamp Brand of the Month?!
Please join me in welcoming back special guest Rebecca Keppel who is sharing a special summery project reprising some sweet summer Waffle Flower products! Be sure to watch the video for more info and enjoy!
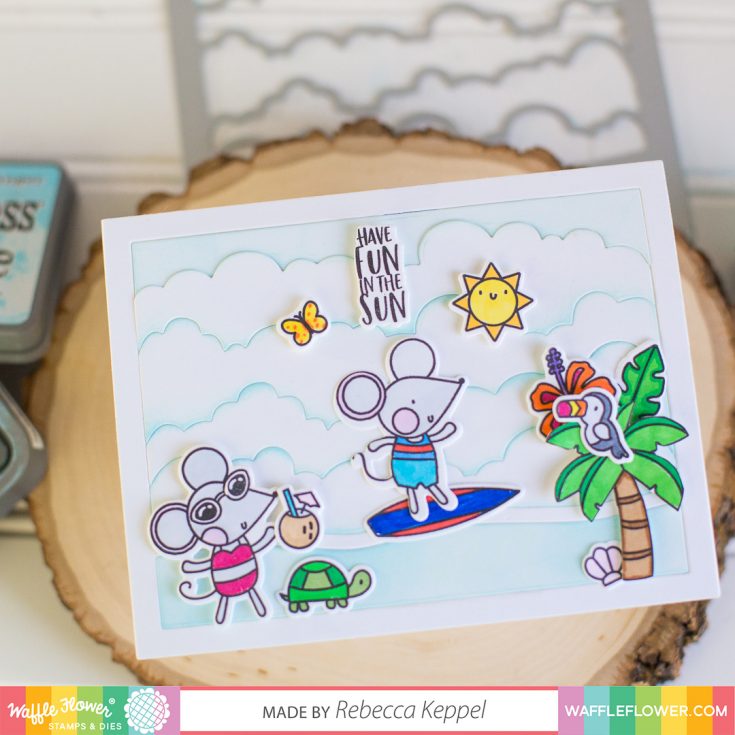
Hi everybody! I’m Rebecca with Waffle Flower Crafts and I’m super excited to be here on the Simon Says Stamp blog today sharing a card video featuring some new stamps and dies from Waffle Flower’s July Release. In this video, I am sharing a quick and easy way to create a fabulous puffy cloud background, perfect for a fun beach scene.
The Cloudscape Panel Die cuts a 5.5 x 4.25 frame and cuts out cloud layers on the inside. You could cut this out of white and blue cardstock and alternate the colors to create a cloudy sky. I decided to cut out Strathmore Bristol Smooth White Cardstock and ink blend with Distress Oxide ink on the edges of the cloud pieces.
When you put all the pieces back together like a puzzle you end up with a really pretty sky background that was SO fast to create. I like covering the bottom piece of the die cut with blue ink to mimic water.
Next, I stamped, colored and die cut all the images from the Fun in the Sun Combo (also from the July release). These little mice and beach accessories are so fun to move around and it’s easy to combine a bunch of them to create a cute scene.
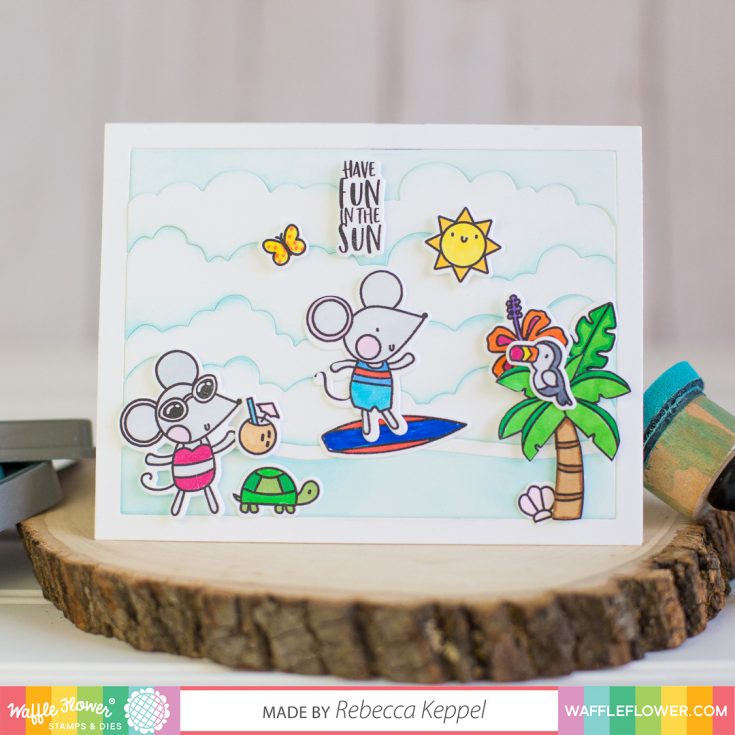
Alternate dimensional adhesive and tape runner so that some of the characters appear closer or further away. Add your sentiment and you’re done! Using the Cloudscape Panel Die is the easiest way I’ve found to create that awesome puffy cloud background and I will be using it for MANY of my card scenes in the future!
Thank you so much for stopping by! -Rebecca
SUPPLIES:
|


Thanks so much for stopping by and thanks to Rebecca for being our guest!
Oxide Ink Easter Egg Cards
Hi friends! Happy Thursday! Thanks for stopping by the blog today! With the Easter holiday right around the corner, we’re re-sharing these clever cards by special guest designer Heather Ruwe a few years ago. She did some very cool and clever outside-of-the-box thinking using oxide inks! Be sure to read on to learn how to create this cool concept for yourself and enjoy!
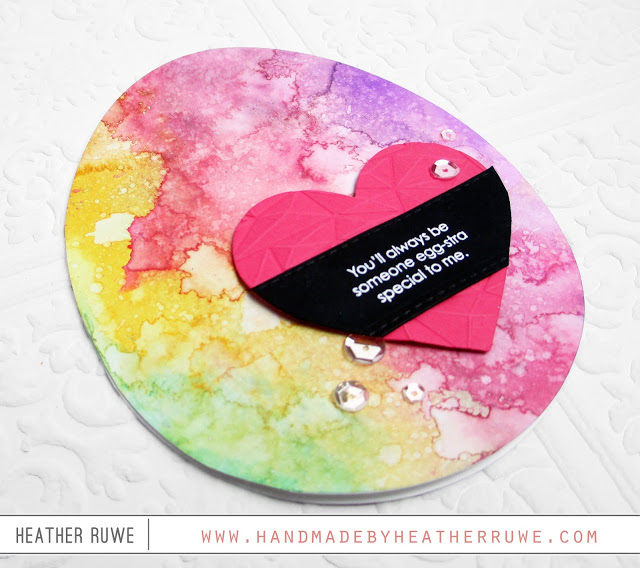
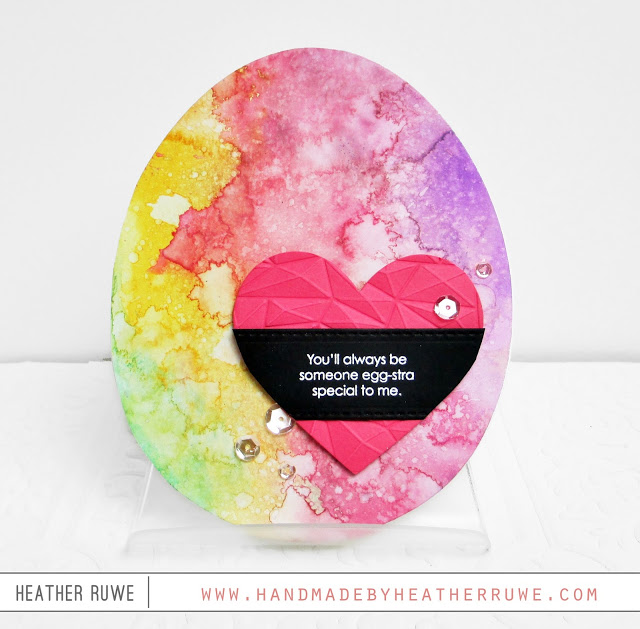
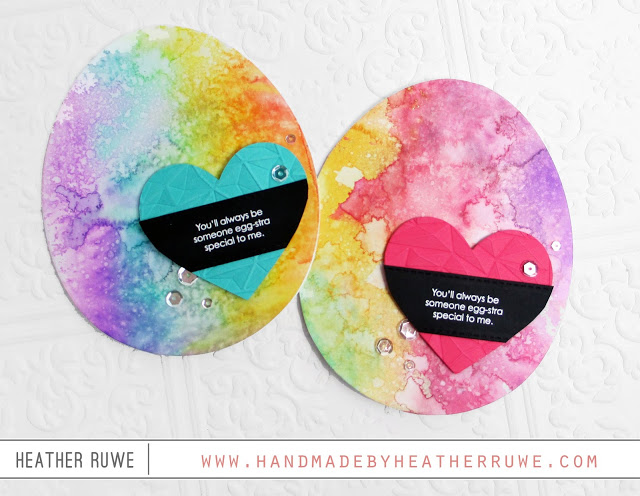
Hello and welcome. I’ve been having so much fun playing with Distress Oxide Inks. I’ve been experimenting and creating many backgrounds. The finished look reminded me of Easter eggs after they have been color dyed, which inspired these cards…
I applied the ink to a craft sheet and then sprayed with water. I swiped a piece of watercolor cardstock through the ink and dried it with my heat gun, spraying with water as it dries.
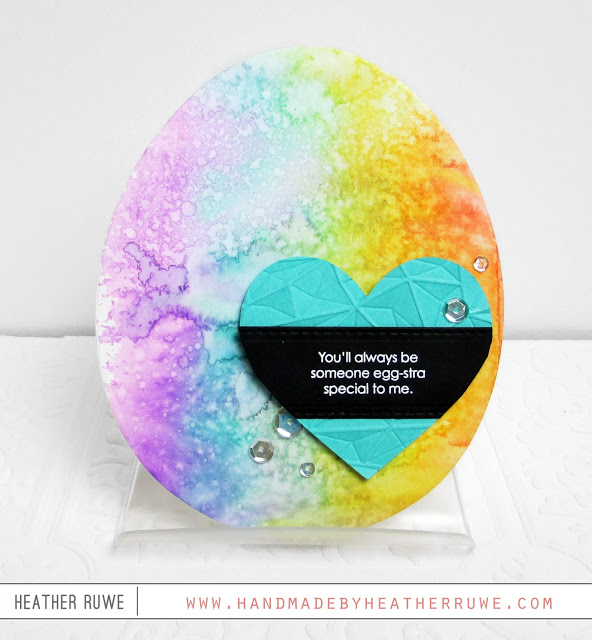
I wanted to make an egg shaped card but didn’t have a large egg die, so I used the largest balloon of the Simon Says Stamp’s balloon die set. After die-cutting the backgrounds, I trimmed off the end piece off the bottom of the balloon and turned it upside down, creating an egg shape!
I white heat embossed a sentiment from the Easter Greetings stamp set on to a strip of black cardstock cut with the stitched banner die. I also die-cut some hearts and dry embossed them with an embossing folder. I finished the cards with a sprinkling of clear sequins.
Supplies:
 |
 |
 |
 |
 |
 |
 |
 |
 |
 |
 |
 |
 |
 |
 |
 |
 |
 |
 |
 |
Thanks for reading today, and thanks to Heather for being our guest!


