Have You Seen the Fall 2025 Collection from Lawn Fawn? + NEW idea to inspire!
Hip, hip, hooray! The Autumn 2025 Lawn Fawn collection is here—bursting with darling designs and the irresistible puns you’ve come to love from this fabulous brand! You won’t want to miss their latest interactive die set, Knock, Knock Who’s There!! Plus, enjoy playful new additions to fan-favorite series like the Build-A-Drink Mug Add-On, gorgeous fall-themed papers, and so much more!

——————————————————————————————————–
Also! Join me in a big welcome to special guest Audrey Tokach with an adorable card using new release items! Take it away, Audrey!
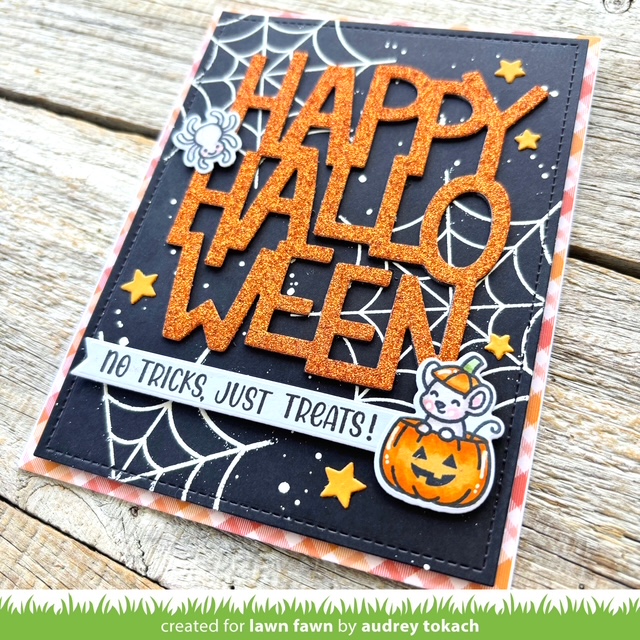
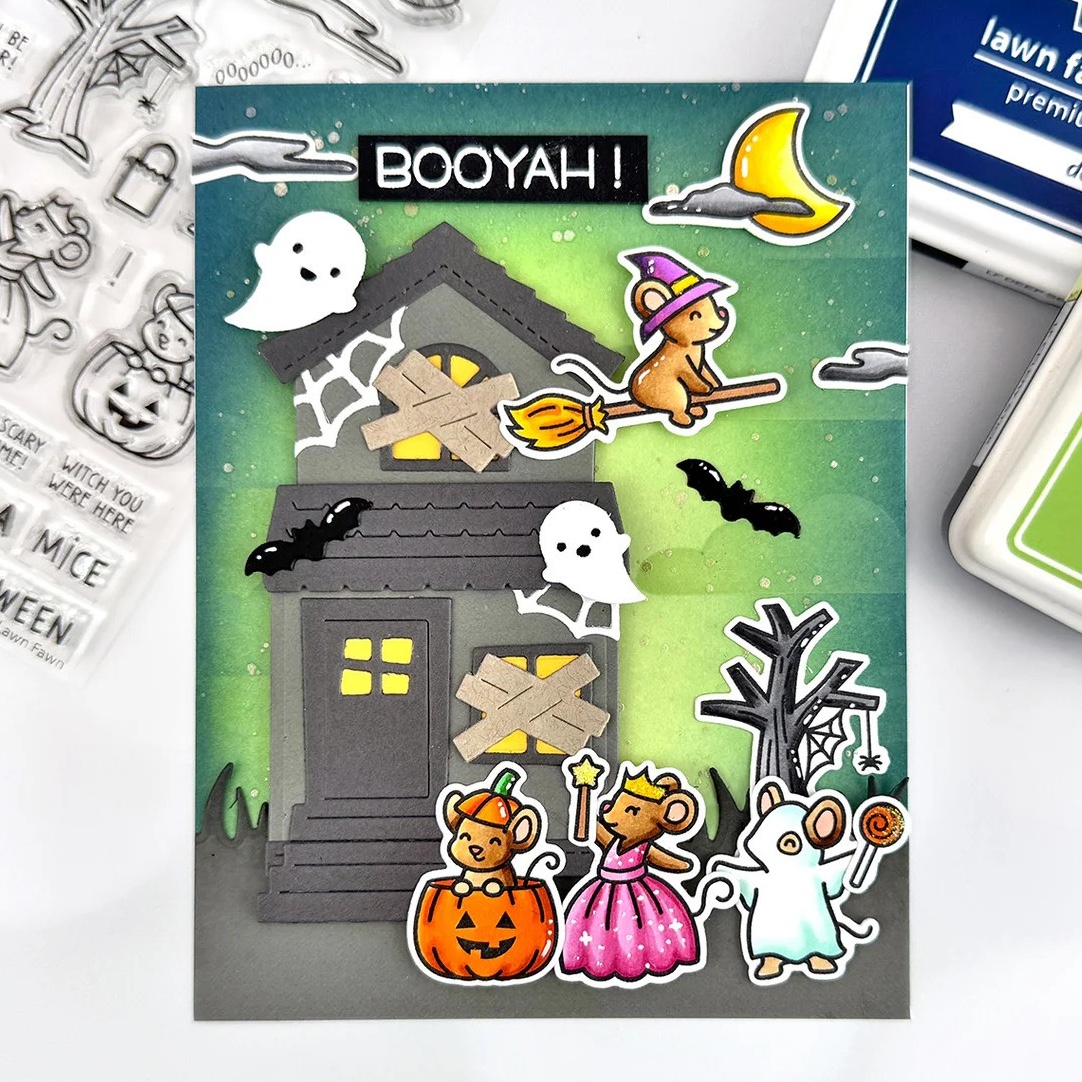
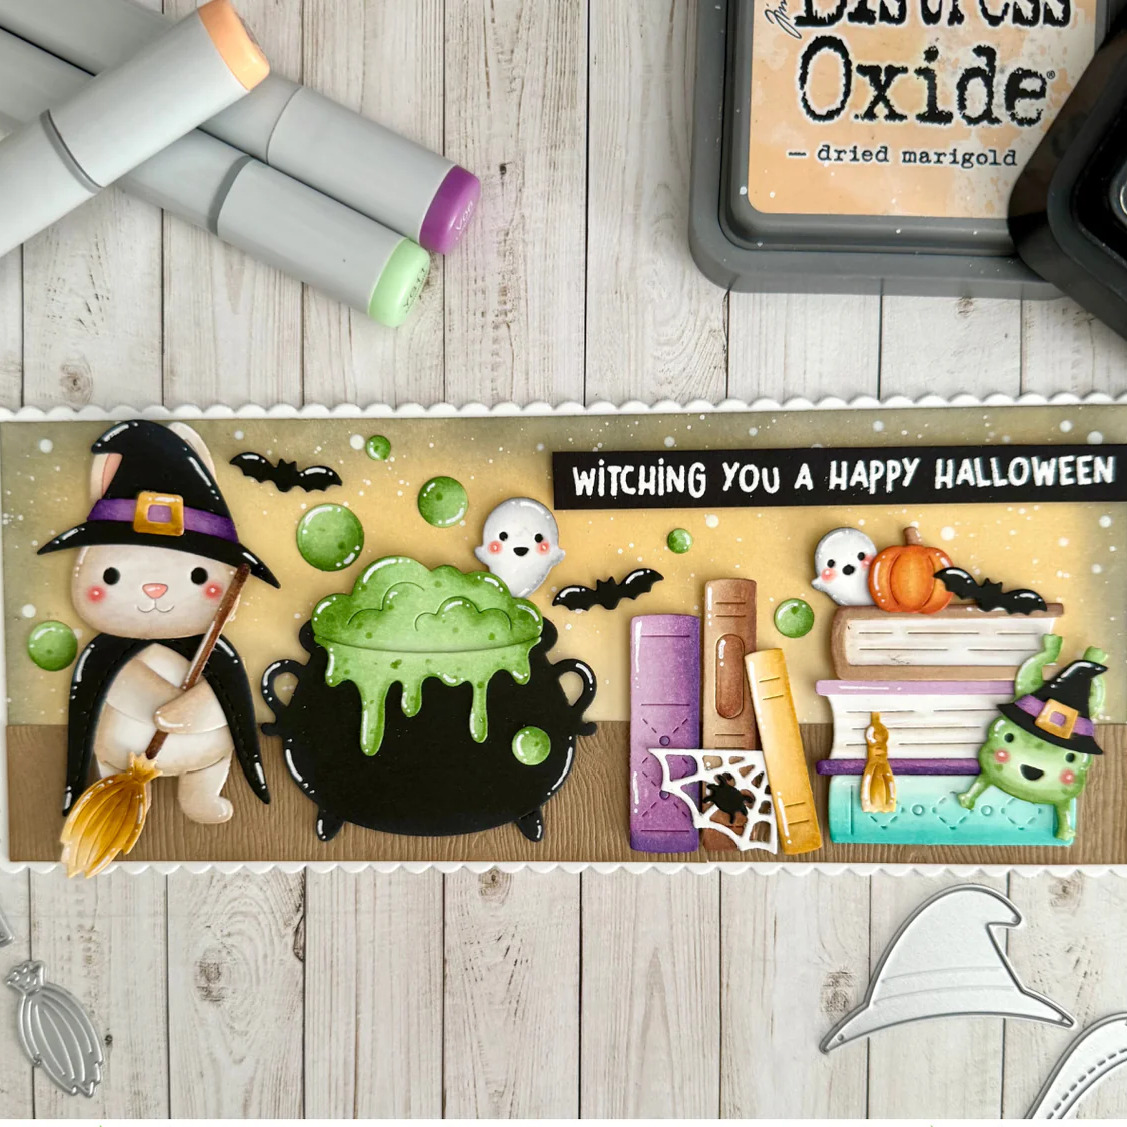
Hello Friends! Audrey here with a fun Halloween card using products from the new Lawn Fawn Fall 2025 release! To create my card, I started off by die cutting the largest rectangle from the Stitched Rectangles die set from black card stock. I heat embossed the spider webs from the previously released Sweet Spiders stamp set in a visual triangle using Lawn Fawn Embossing ink and white embossing powder. When everything was smooth and melted, I splattered the panel with white acrylic paint.
Then I diecut the new Happy Halloween Portrait sentiment from the orange glitter paper from the Autumn Sparkle paper pack. I diecut it again twice more from black card stock and glued them together for some extra dimension. I stamped and colored a tiny spider from the Sweet Spiders stamp set, and an adorable mouse from the brand new Halloween Mice stamp set and then die cut them with their coordinating dies.

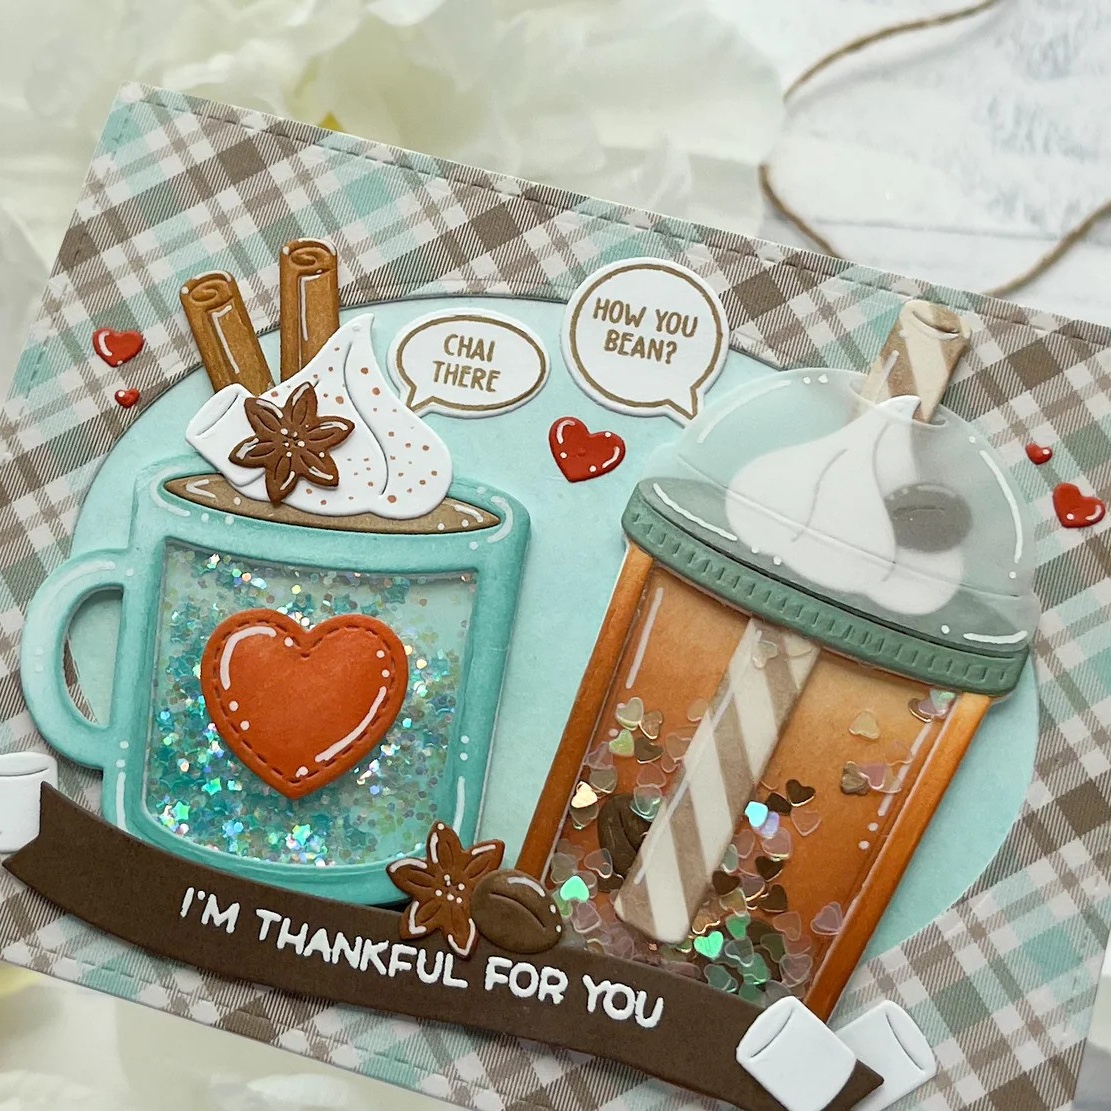
Then, I stamped a sub-sentiment using the new Henry’s Build-A-Sentiment Fall stamp set onto an Everyday Sentiment Banners die cut and popped it up under the larger sentiment using foam tape. Finally, I added a scattering of stars using the Hearts and Stars Skinny Tag die set, and popped the panel up onto an A2 card base which I layered with a piece of the new paper collection, Favorite Flannel Fall 6×6 petite paper pack. Thanks all for me today! I hope you’ll go check out the new fall release, available now! Thanks for stopping by! :)
SUPPLIES:
|


Thanks so much for stopping by, and thanks to Audrey for being our guest!
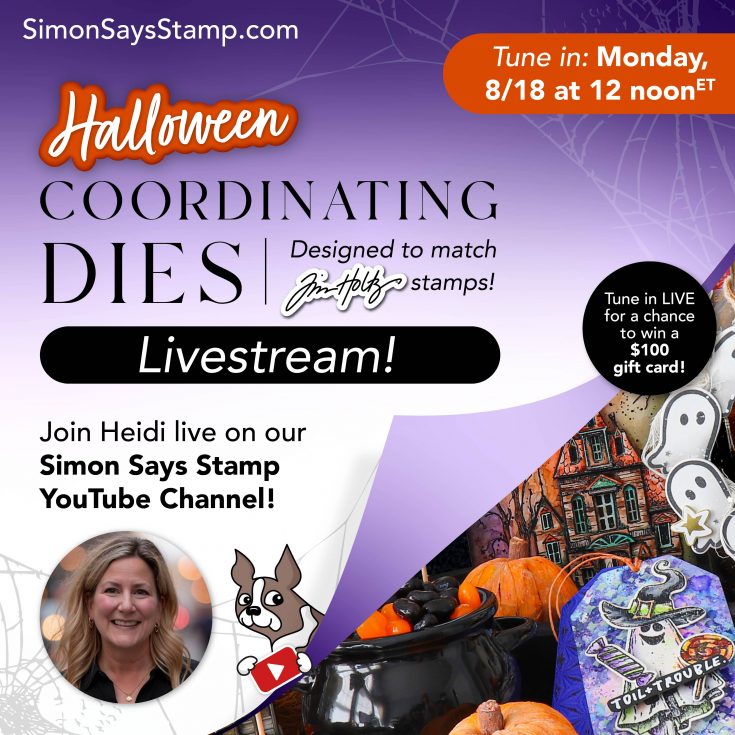
Join us LIVE on Monday, August 18th at 12 NOON ET for something WICKED fun!
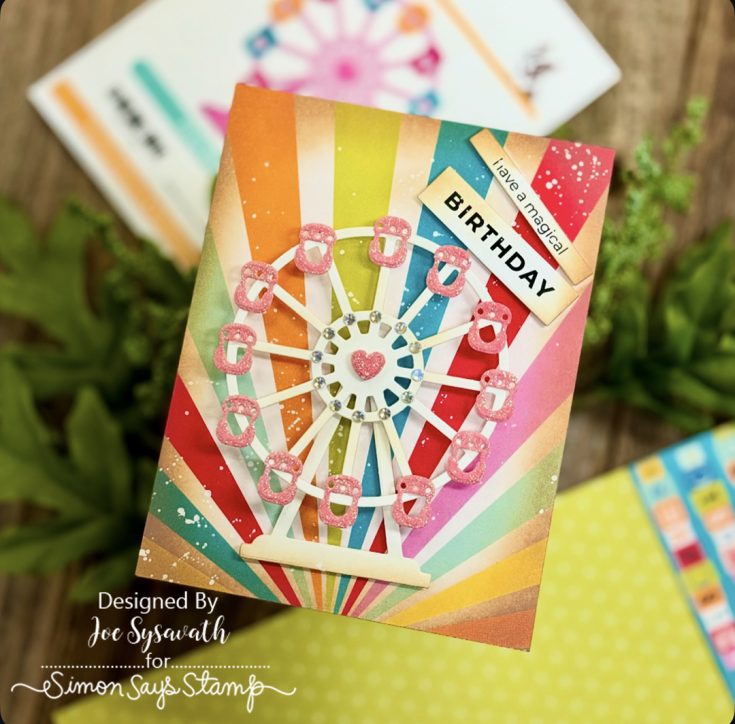
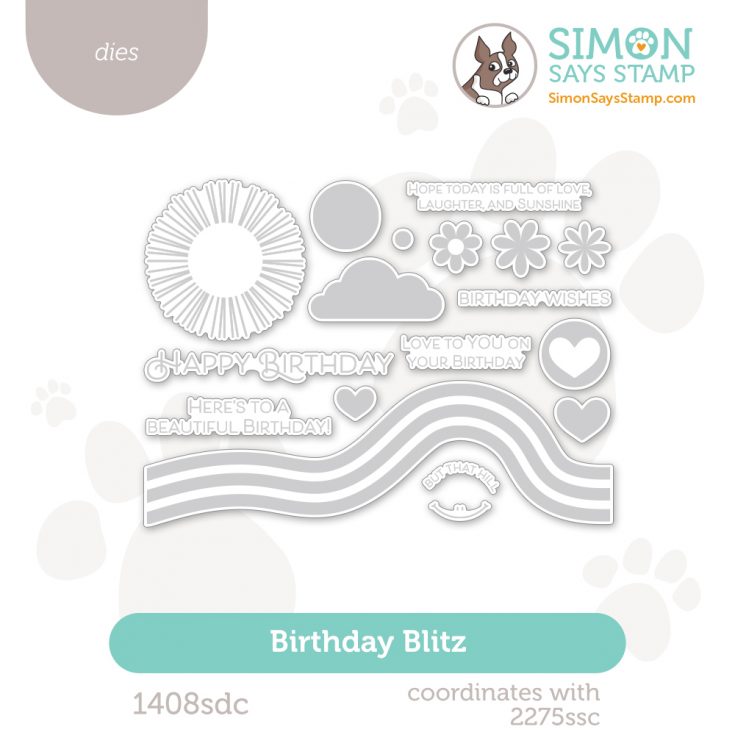
Card Kit Reveal and Inspiration: Birthday Blitz!

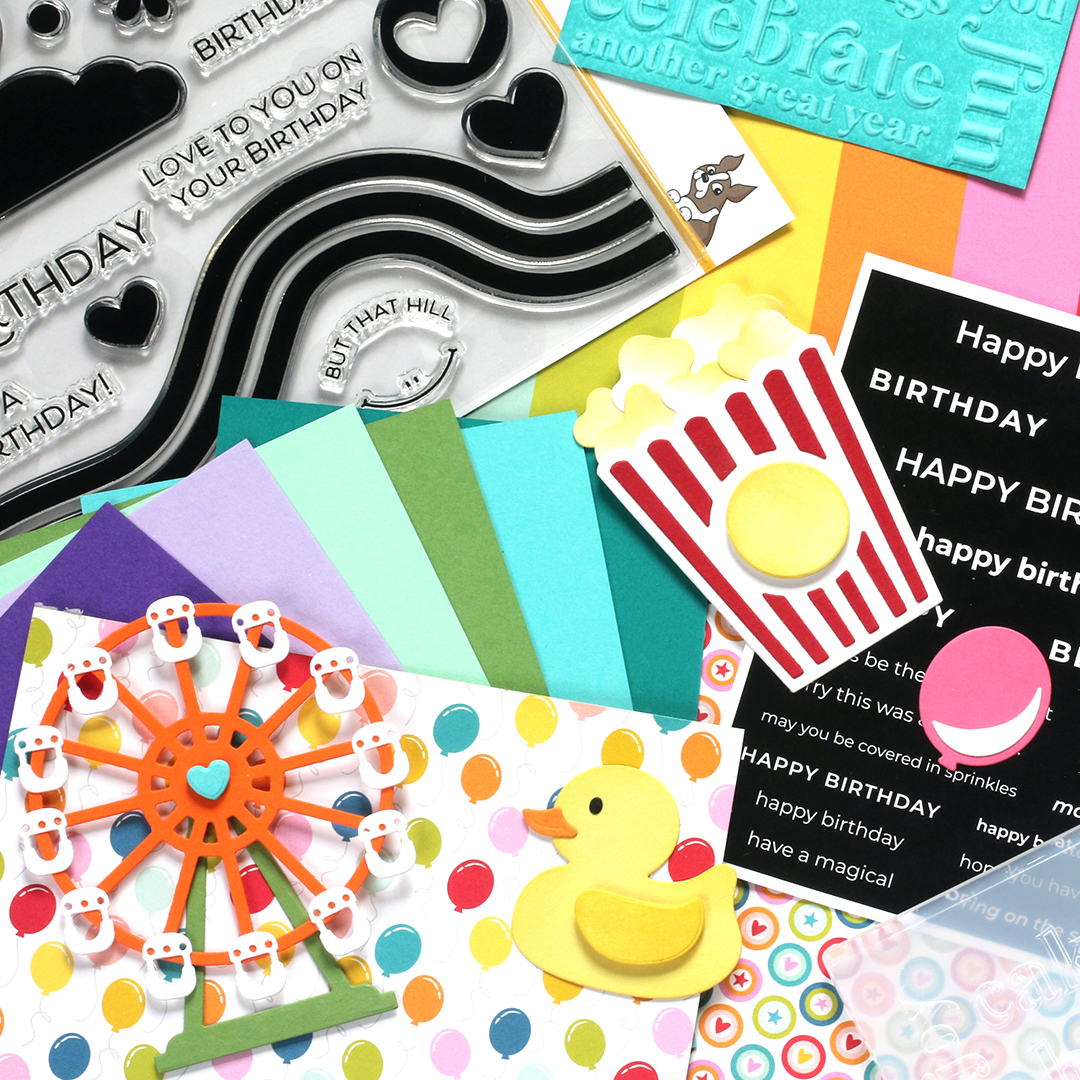
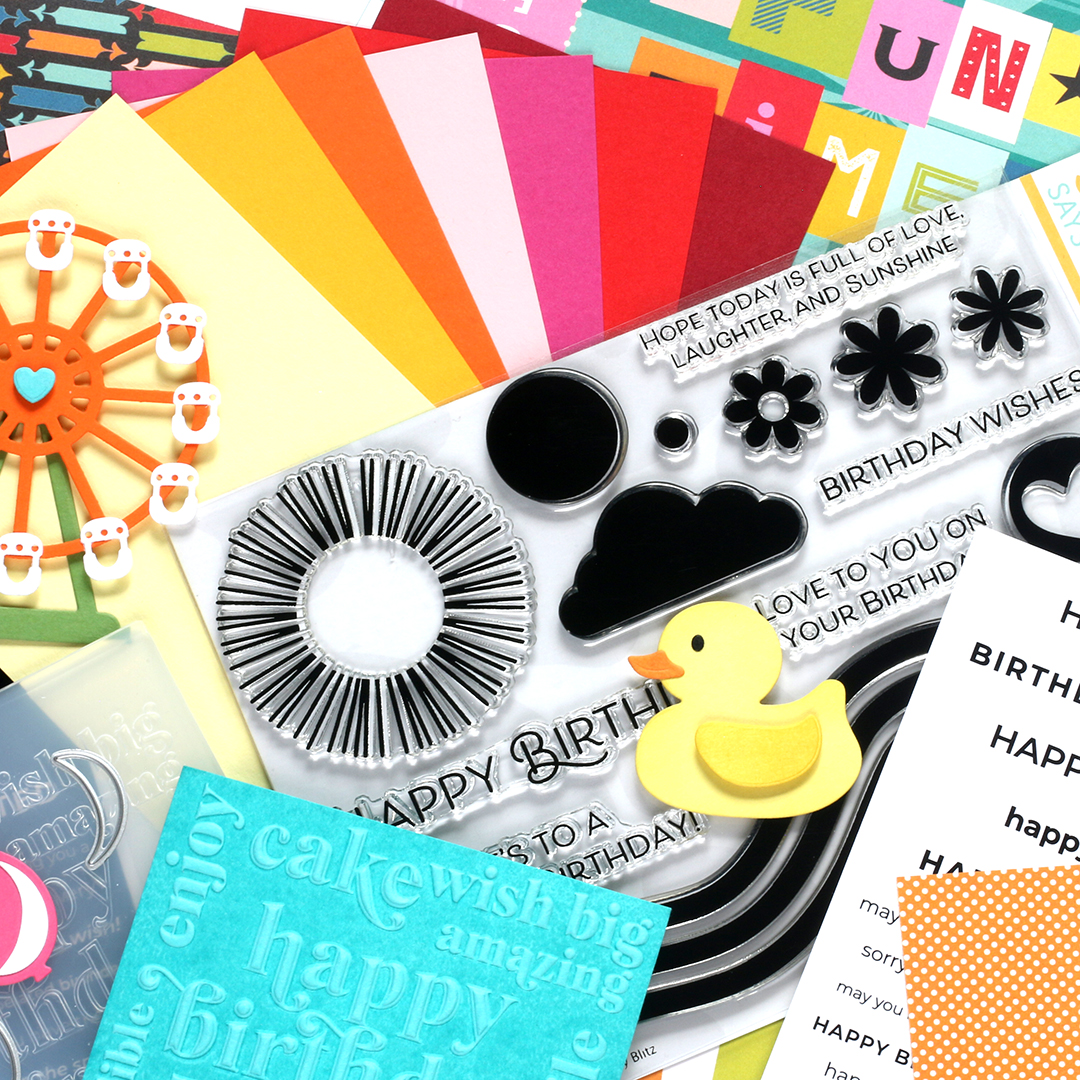
Let’s celebrate our September 2025 Card Kit—Birthday Blitz!
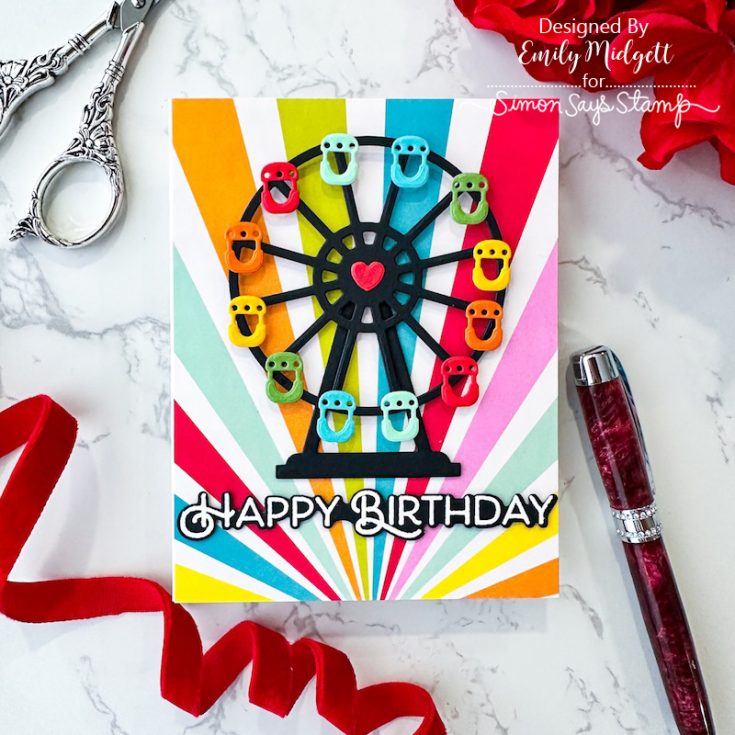
We pulled out all the stops curating this kit with you in mind, and it includes SEVEN awesome NEW exclusive products from Simon Says Stamp: Birthday Blitz 6×8 stamp set, Ferris Wheel, Party Balloon, Rubber Ducky, and Poppin Corn dies, Birthday Sentiments embossing folder, and 2 sheets of Birthday EZ Sentiment Strips! Holy WOW!
We’ve included 12 double-sided sheets of fair-themed Simple Stories patterned papers as well as 1 pack of assorted Simon Says Stamp card panel fronts, 1 sheet of Holographic Rainbow Diagonal cardstock, and a ¼ sheet of white adhesive foam strips.
This colorful kit will make you want to celebrate like a kid at the county fair!
WATCH THE VIDEO:

Ideas to INSPIRE!
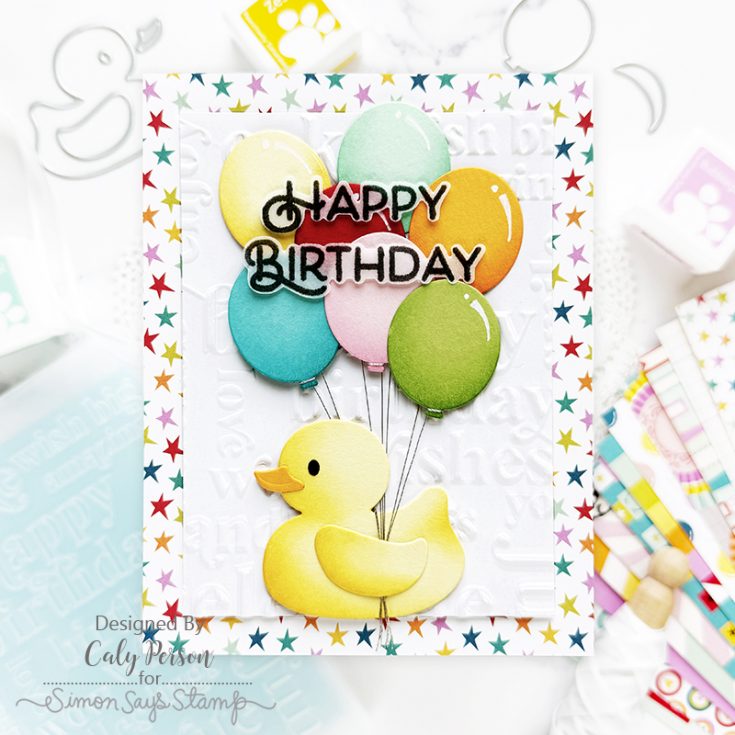
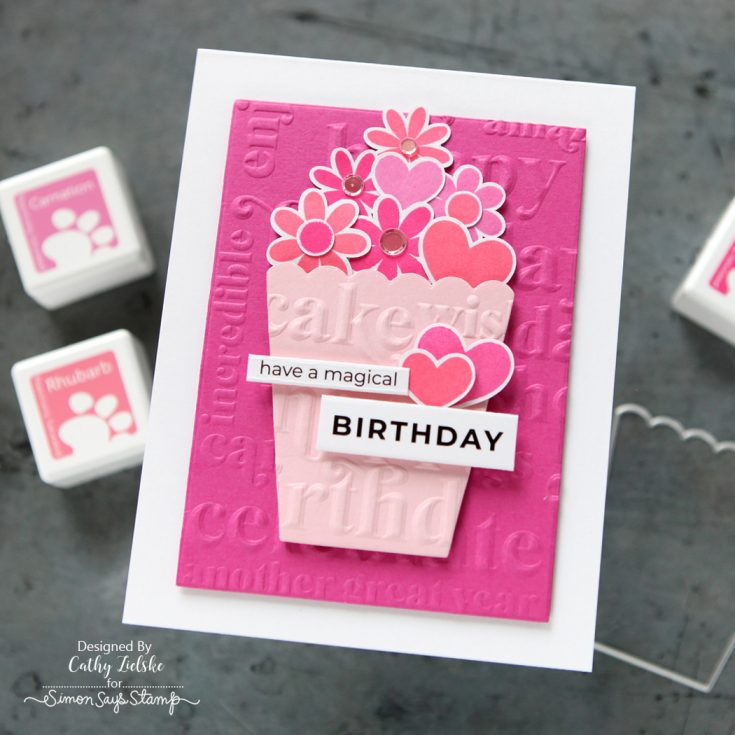
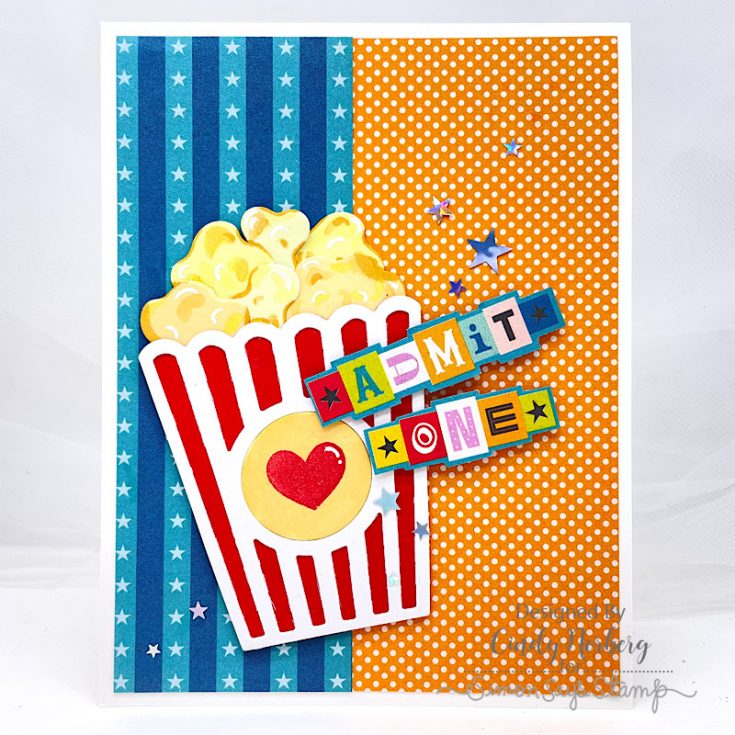
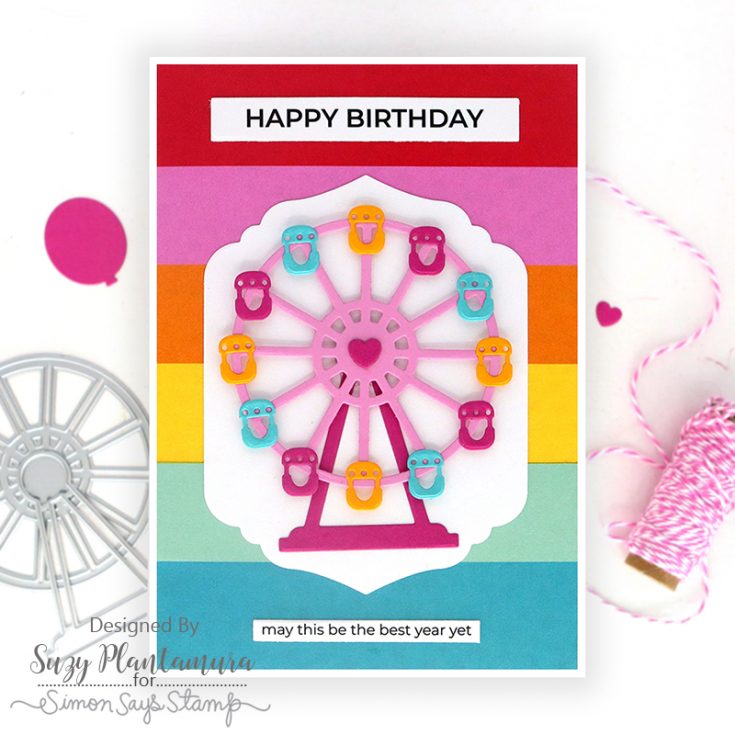
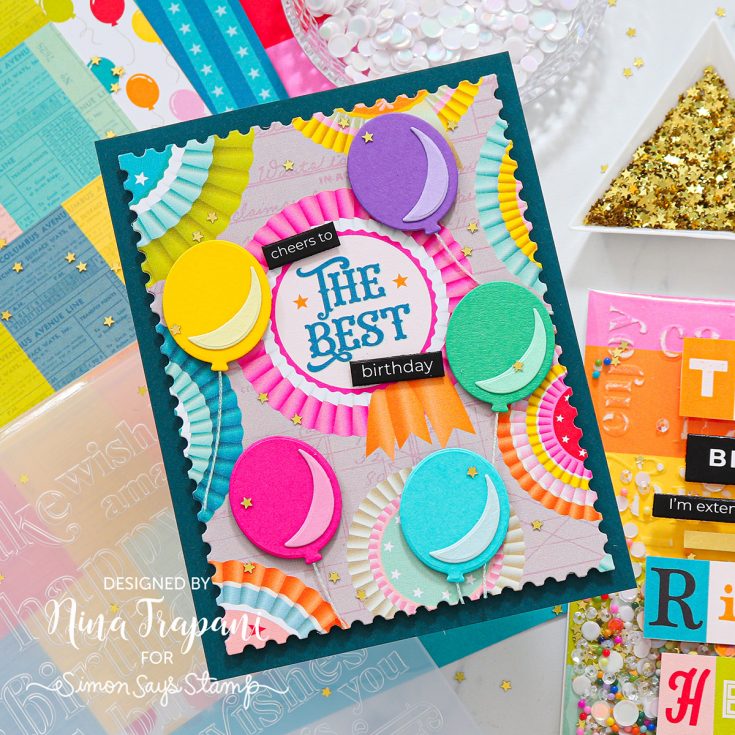
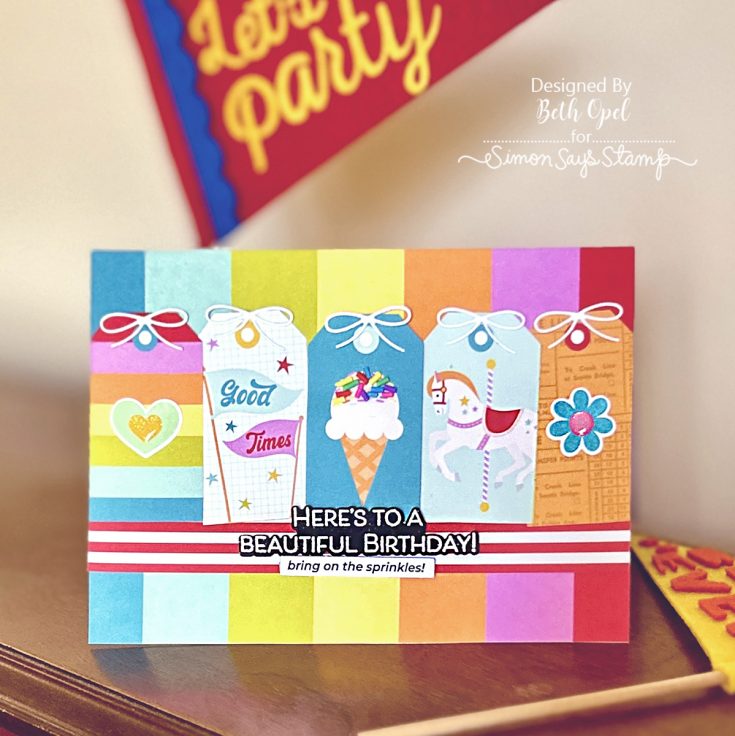
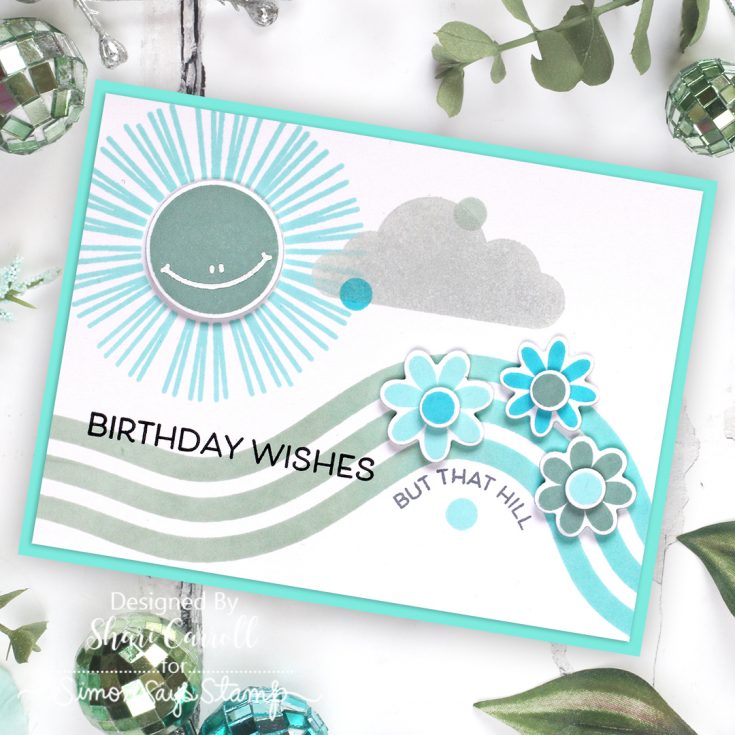
Enhance your kit with the coordinating die set (sold separately!)
Did you know?! We’ve made our card kit subscription BETTER THAN EVER!


Here’s what makes our new service a crafting paradise:
Exciting new perk! USA Subscribers can get free shipping on their recurring subscriptions!
Free or Discounted Shipping Opportunity: Love Free Shipping? Us too!! Valued subscribers have a chance each month to receive free USA Shipping on a card kit subscription purchase! Simply login to your account, click “manage subscriptions” and add additional products to your subscription shipment so the order total is $100 or more before 11 PM ET on the 15th of the month. International customers will receive $7.99 off their cost of shipping – no code required! (Existing subscribers only)
Exclusive Access: As a subscriber, you get first dibs! Each month, you’ll get an exclusive sneak peek at our new kit, with the option to add more coordinating items to your cart, including handy replenishable supplies, all shipped together for your convenience.
Hassle-Free Payments: Say goodbye to monthly billings! Our automated system smoothly charges your preferred card, ensuring an uninterrupted flow of crafty goodness – unless you decide to pause, of course!
$5 Off Magic: Enjoy a special $5 discount off our kit’s retail price, exclusive to our beloved subscribers – no codes needed, just automatic savings!
Crafting Inspirations: Dive into a sea of creative ideas monthly, all tailored around your kit, to keep your inspiration flowing endlessly.
Flexibility First: Fear of commitment? Not here! Our subscription is as flexible as it gets – pause or cancel anytime, no strings attached.
Why wait? Step into the realm of our NEW Simon Says Stamp Monthly Card Kit service. Welcome a box full of crafting marvels, right to your doorstep. Craft with ease and let creativity come to you!
Ready to elevate your craft? Subscribe Now and open the doors to boundless creativity!
We’re thrilled to have you in our crafting community and can’t wait to embark on this renewed creative adventure together!
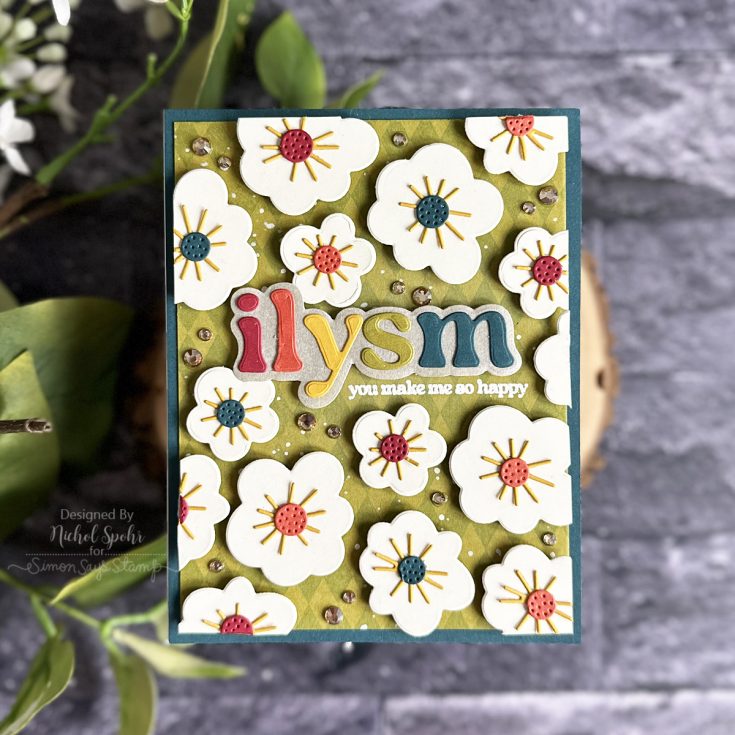
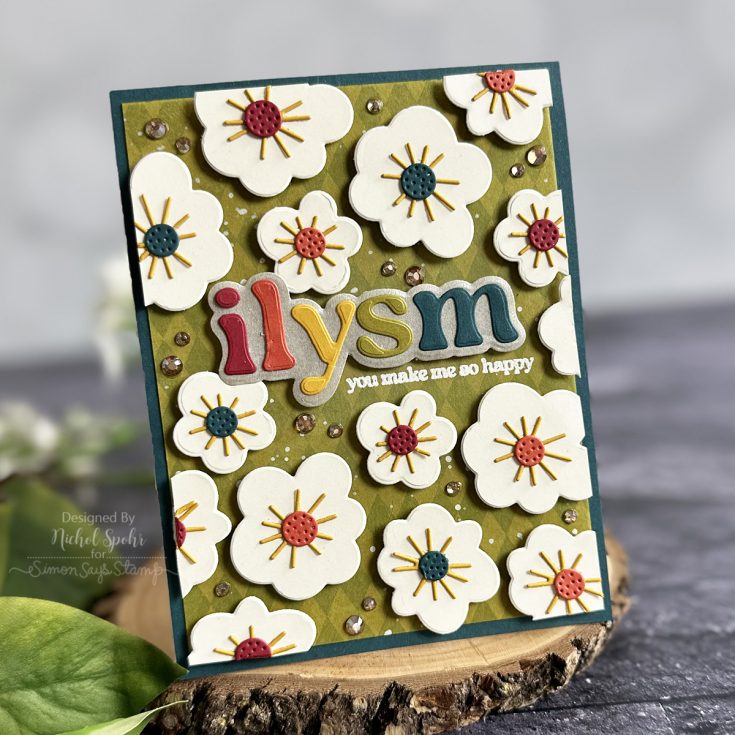
Create EASY Flower Backgrounds with Die Cuts: Making the Cut

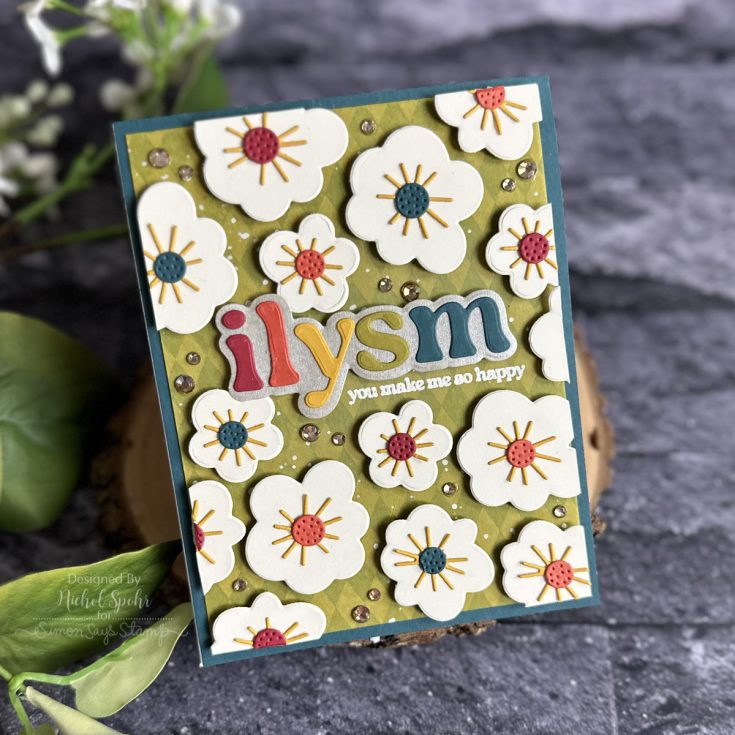
Hi friends! Happy Wednesday! Please join me in welcoming special guest Nichol Spohr to our blog back in our monthly installment of Making the Cut – our monthly blog series that celebrates the love of all things die cutting! Nichol is showcasing some fun new released items from our Happy Camper collection including our NEW Groovy Flowers dies, ILYSM stamp and die set, and a prior released Pepita Background stamp! Be sure to watch the video for all of the details, and enjoy!
WATCH THE VIDEO:

SUPPLIES:
|


Thanks so much for stopping by, and thanks to Nichol for being our guest!


