June 2020 Card Kit Inspiration with Kristina Werner
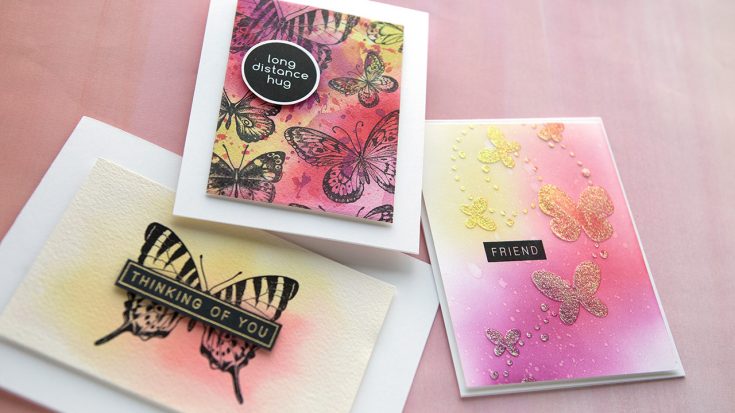
Hello, all! Kristina here with some more card inspiration using supplies from the June 2020 Card Kit! This card kit is packed with fun things to use when creating cards! I couldn’t make just one card–I just had to make three!
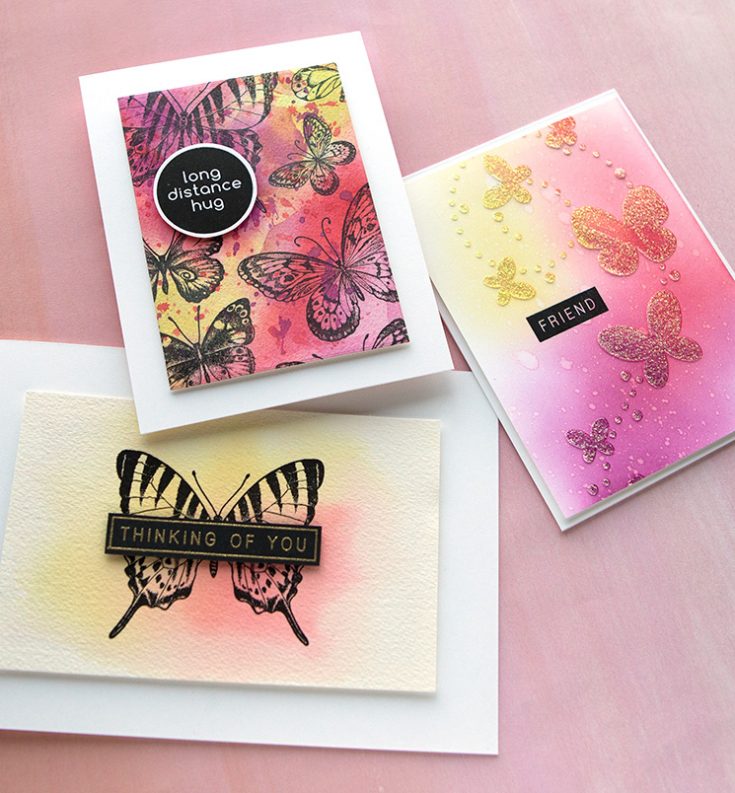
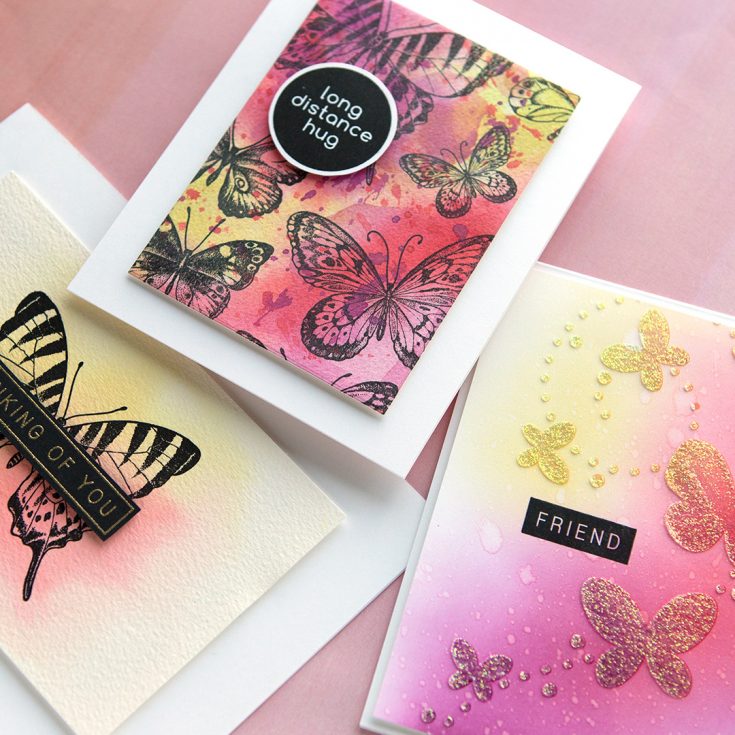
All three cards used Distress Oxide Inks in different ways. I used five colors of ink: Scattered Straw, Abandoned Coral, Festive Berries, Seedless Preserves, and a bit of Peeled Paint. These colors were inspired by the patterned papers included in the kit!
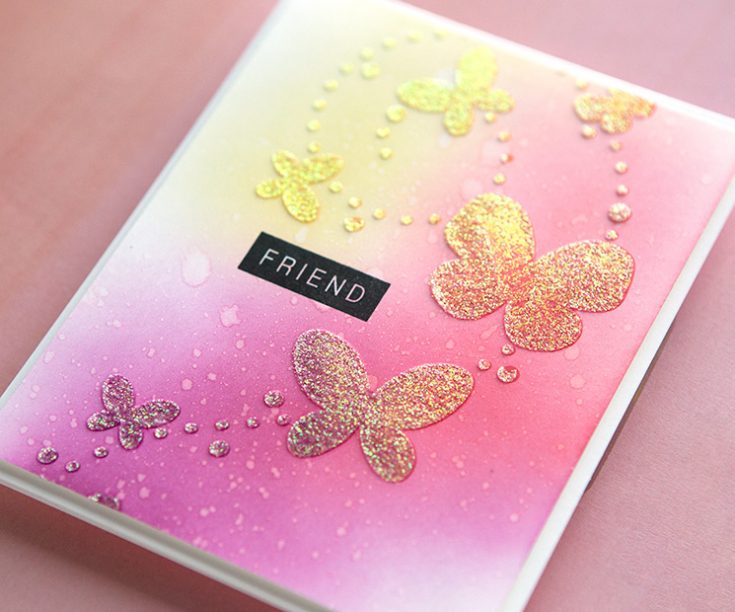
For my first card, I used the Butterfly Trails stencil to first do some ink blending. I used blender brushes to get a soft blend. Then I placed the stencil over the butterflies again and applied the Gina K Designs Iridescent Glitter Glitz Gel. To finish the card, I stamped the “Friend” sentiment from the Beautiful Butterflies stamp set included in the kit.
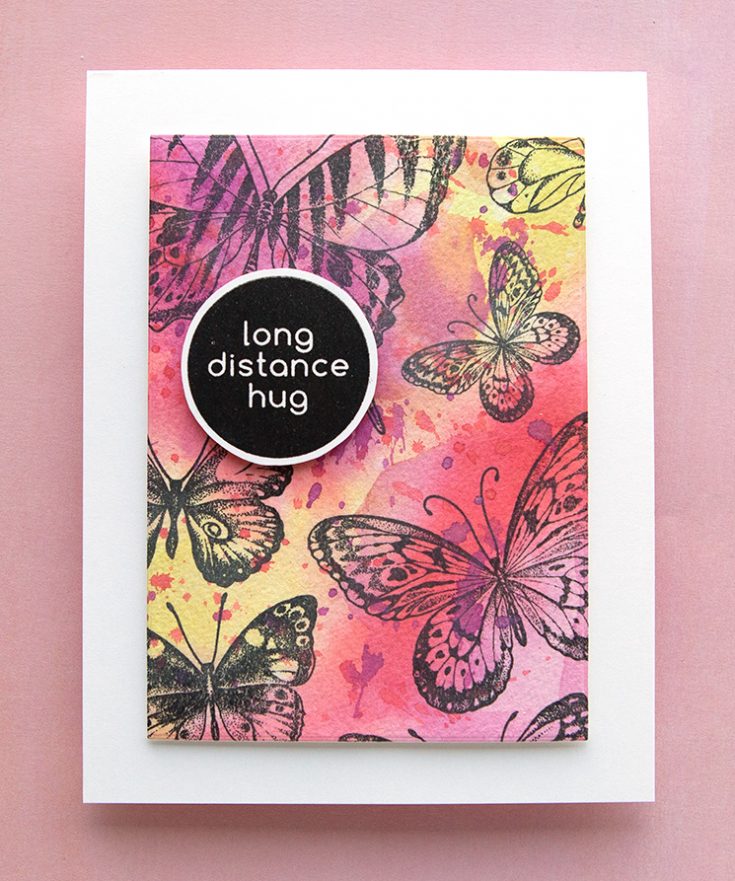
The second card started with stamping all of the butterflies from the kit stamp set on Arches cold pressed watercolor paper in black ink. Then I smooshed the Distress Oxide Inks on a palette and painted with the inks. I did layers of colors, and finished the card by stamping the “long distance hug” circle stamp for the greeting and adhering it to the card.
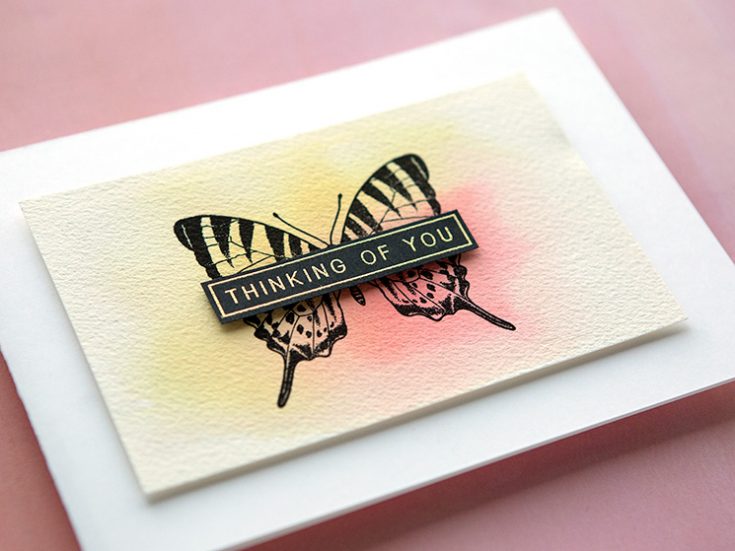
My third and final card is the most simple. This 7×5 card was created by first creating a soft watercolor background and then stamping the largest butterfly in black ink. For the greeting, I stamped the “Thinking of You” greeting from the Beautiful Butterflies stamp set in VersaMark Ink on black cardstock and applied gold embossing powder.
Thanks for stopping by today! You can buy the June 2020 Card Kit HERE, or subscribe to receive this kit and future kits HERE.
Supplies
|


Layered Florals with New Mama Elephant
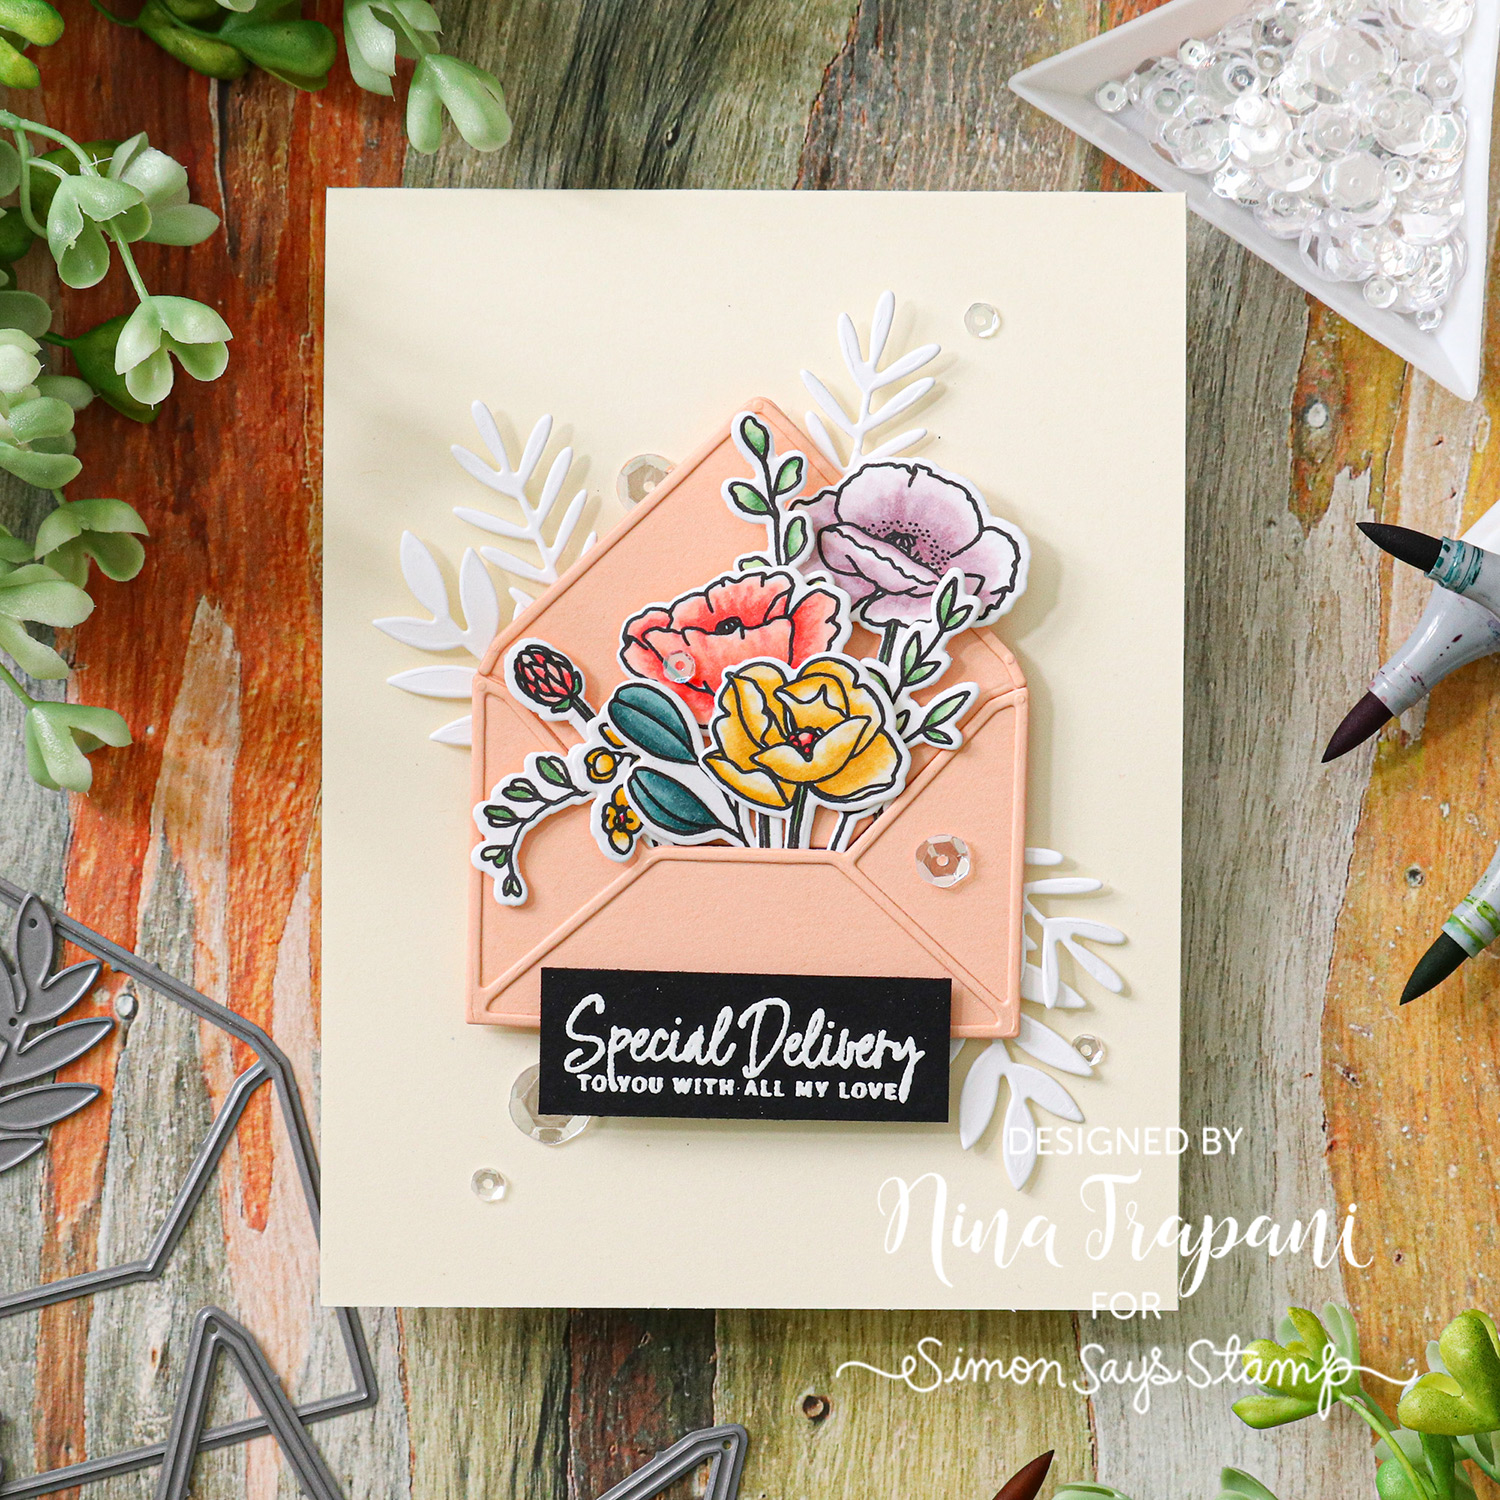
Hello friends, it’s Nina-Marie Trapani here with you today! I’m sharing a project with you that I created using new stamps and dies from Mama Elephant! Did you know that Mama Elephant is our May 2020 Brand of the Month?
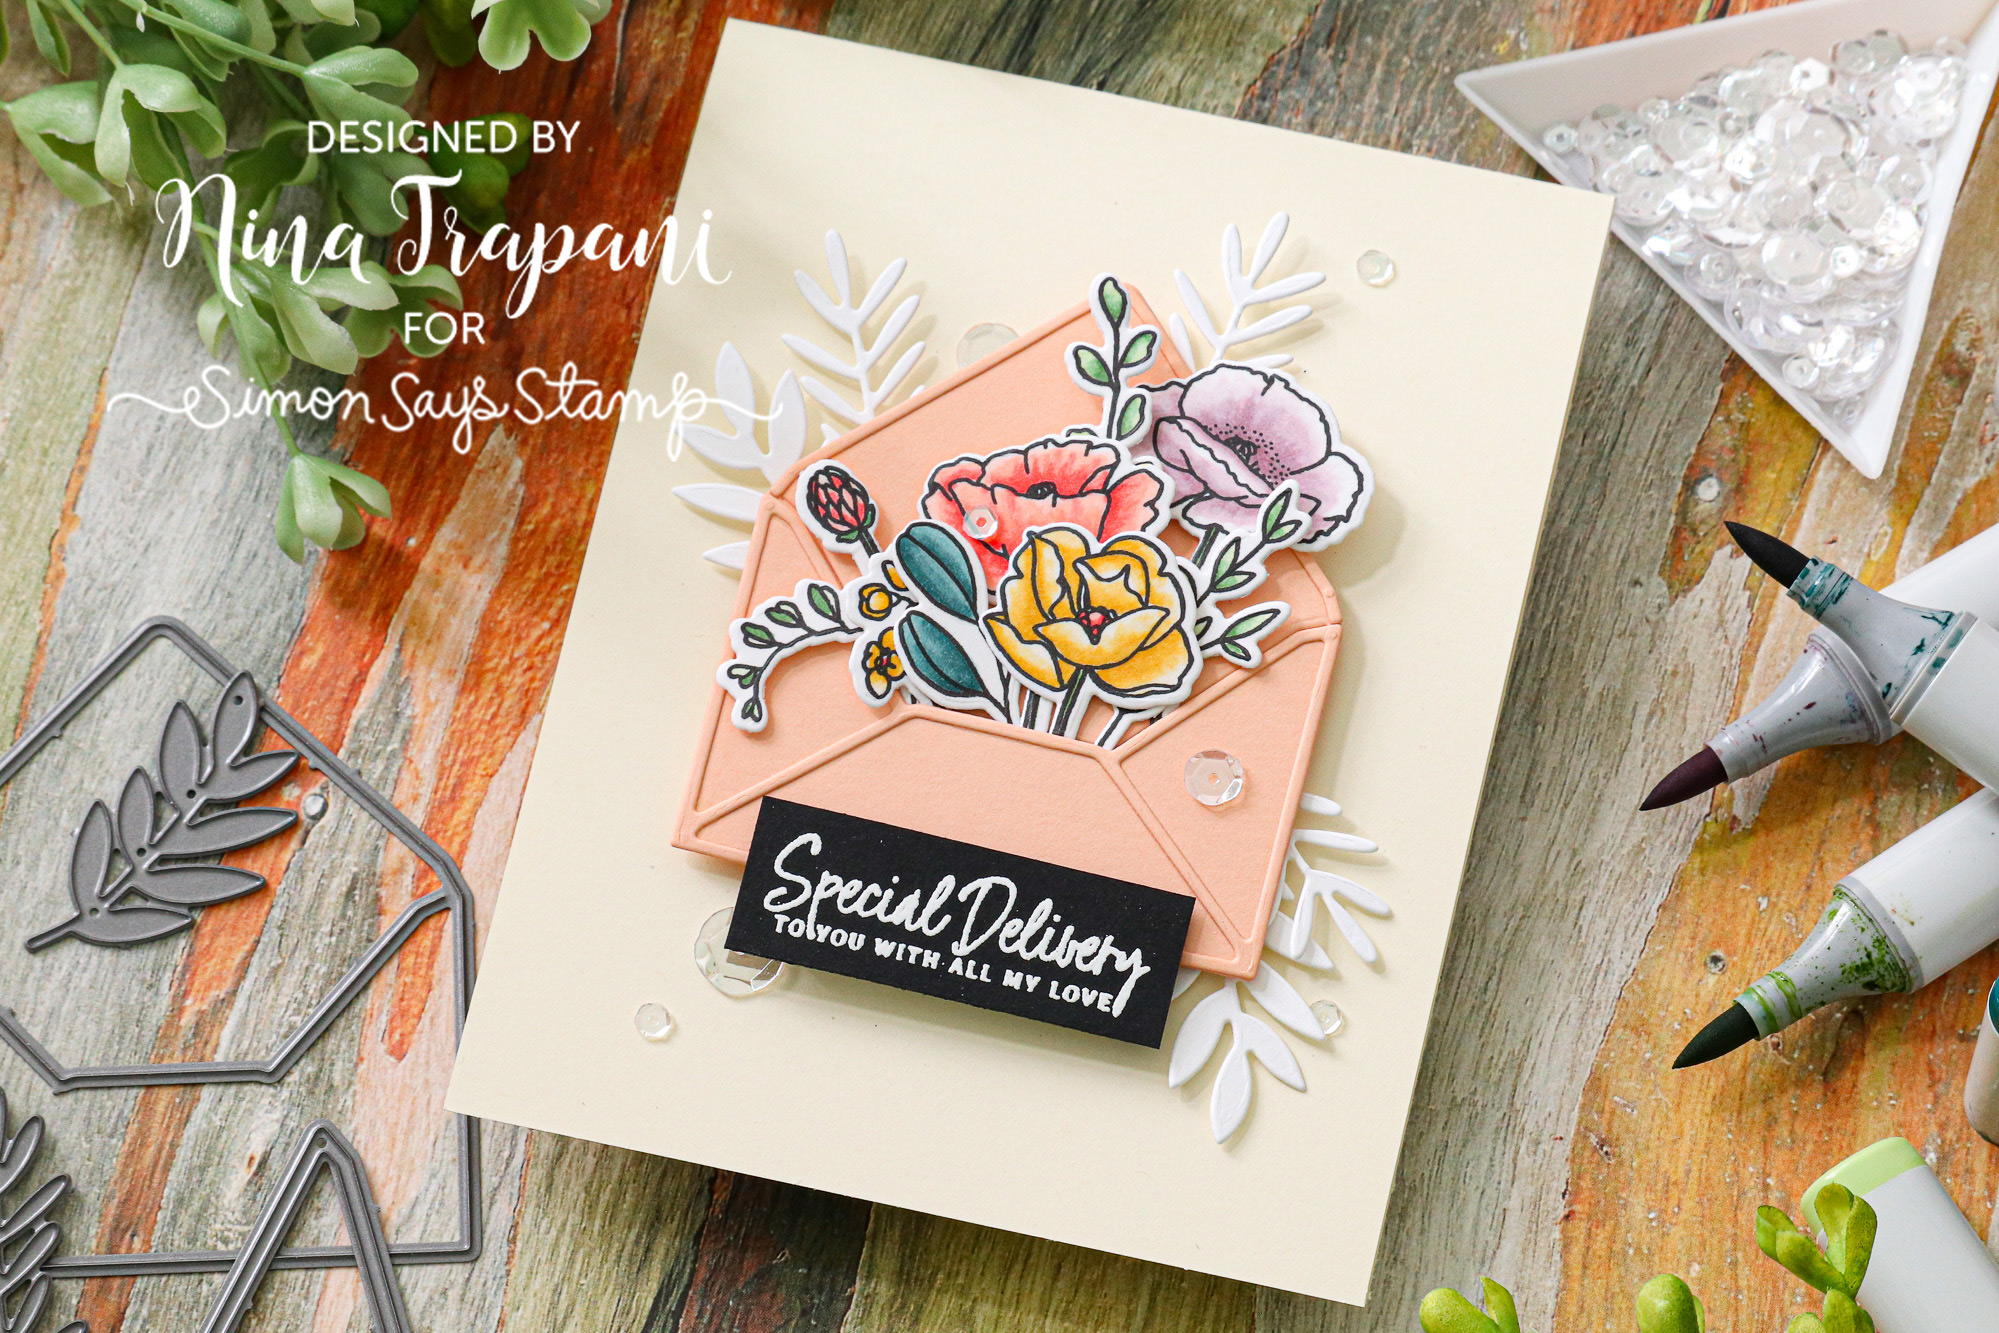
I paired a couple of beautiful sets together to create my card; the Stems and Springs stamp and die set, as well as the Botanic Envelope die set.
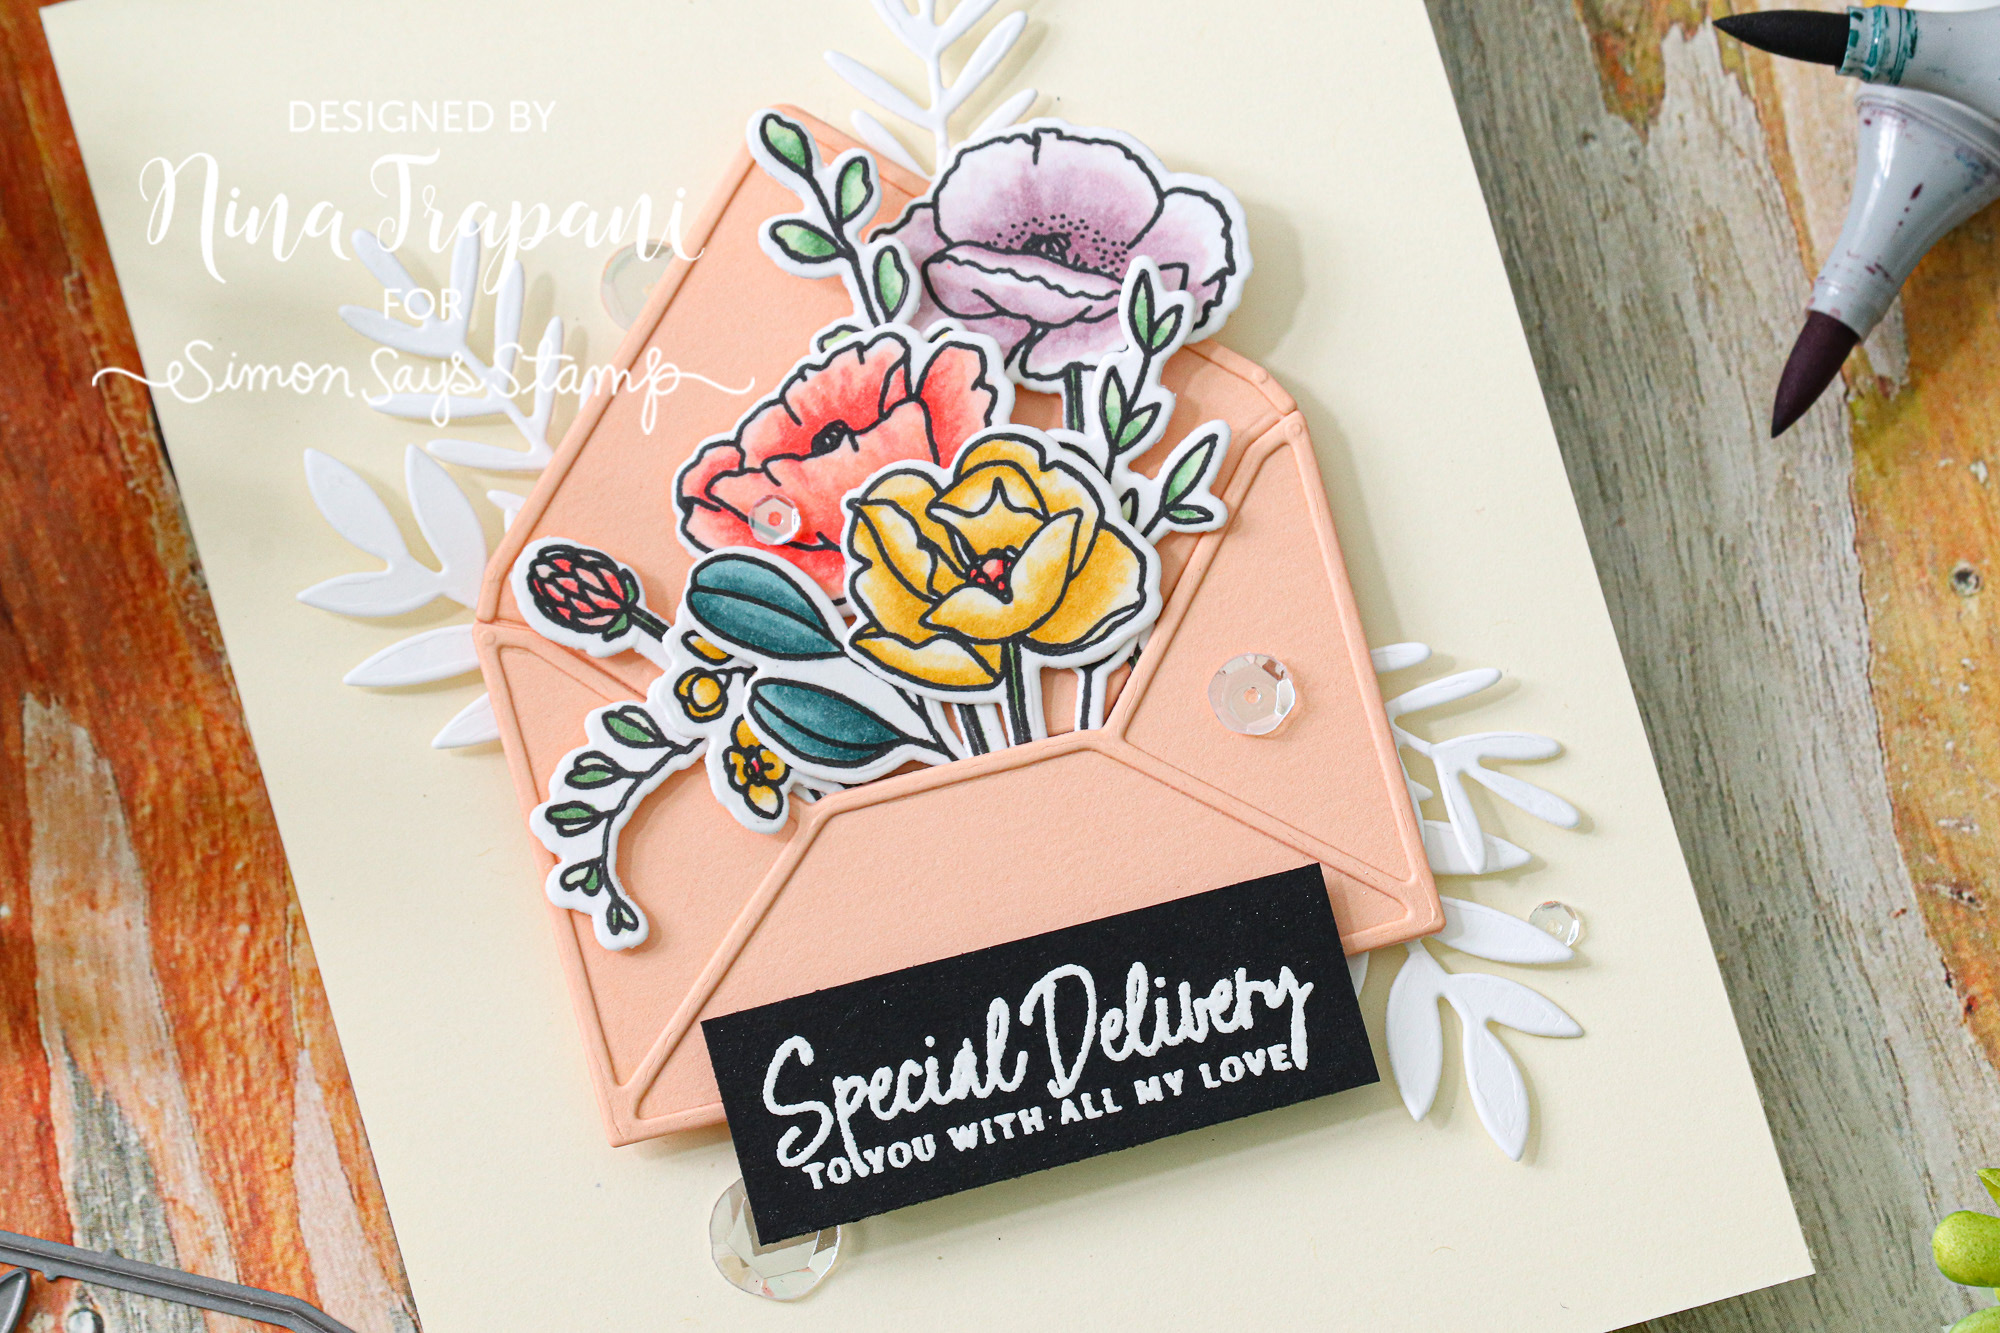
Want to see how I made this sweet design? Be sure to watch the video below and see all the details!
WATCH THE VIDEO
SUPPLIES
|


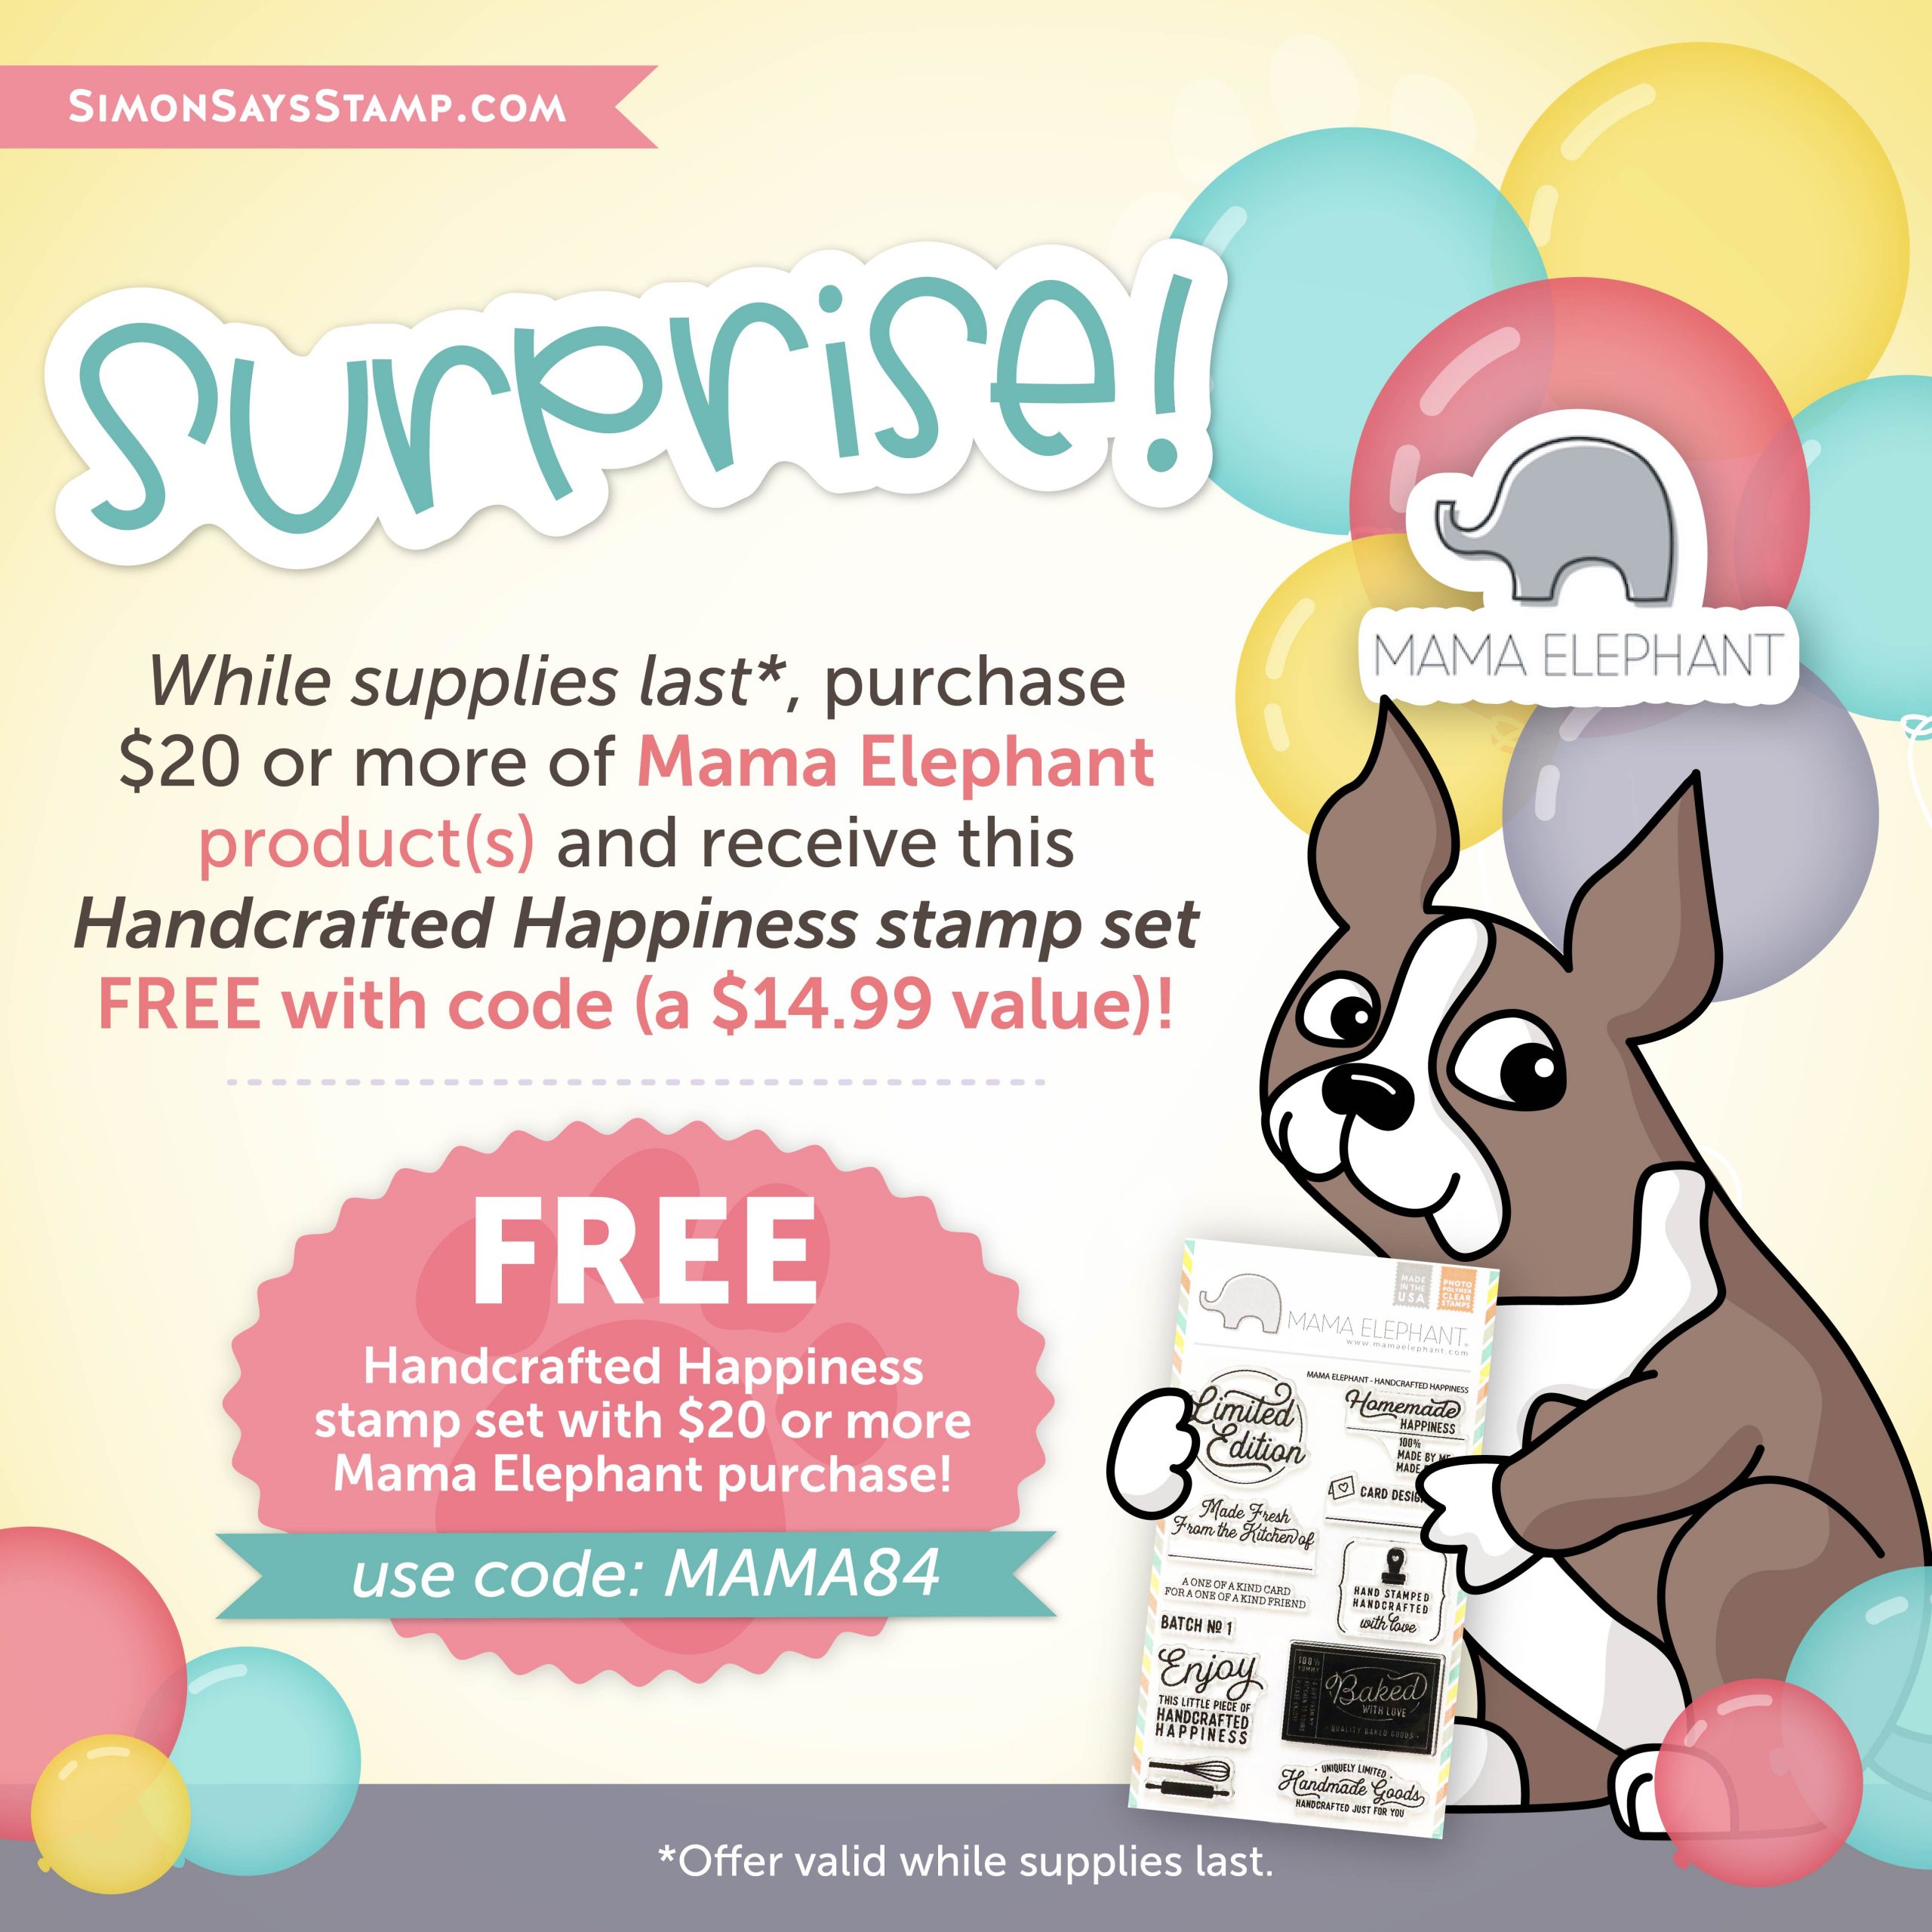
Because Mama Elephant is our Brand of the Month, we’re celebrating them by giving away this AWESOME 4×6 inch Handcrafted Happiness clear stamp set! Simply purchase $20 or more of Mama Elephant products and use code MAMA84 at checkout!
Oh Happy Day + Mama Elephant Brand of the Month Sale!
Hi friends! Happy Friday! As you’ve seen, we are celebrating all that is FABULOUS in Mama Elephant as our Brand of the Month! Scroll on for a CODE for special savings!
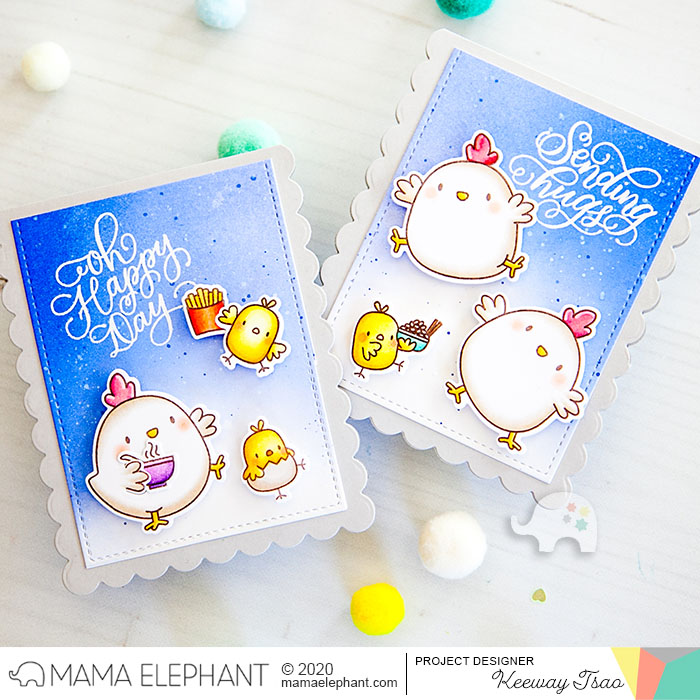
Also! Please join me in welcoming back special guest Keeway Tsao as our special guest with some super sweet inspiration!
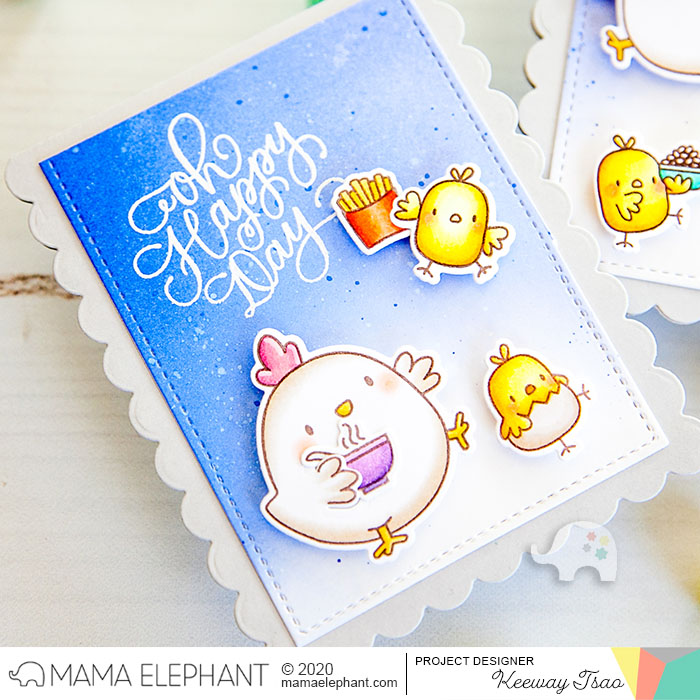
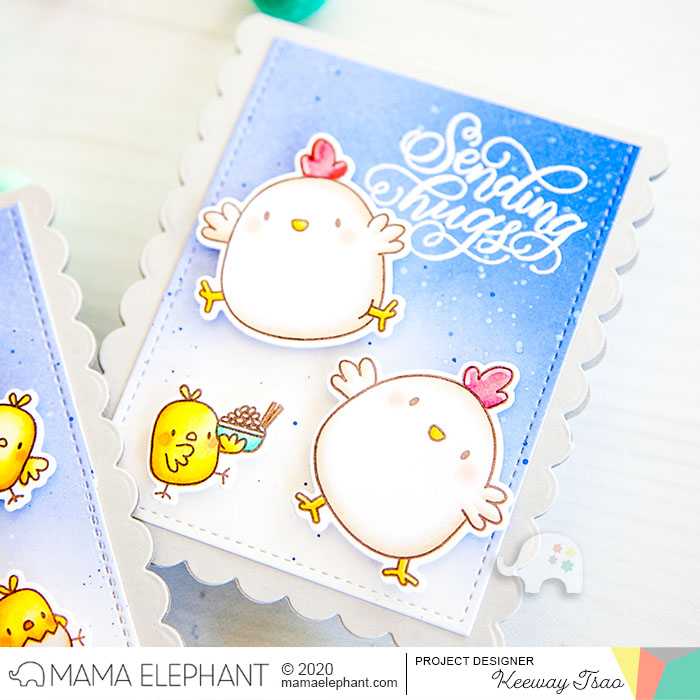
The Mama Elephant Slim Card Basics die is not only a great set for creating slim sized cards, but also perfect for creating cute mini sized cards! I was inspired by my teammate Vera’s use of these dies during our release that I knew I wanted to share more projects with her creative use of these dies. When the slim line card is folded is half, you can create small cards of 4.25” by 3.5”. I found these to be the perfect to size to leave a small note and even sandwich in a gift card in. To showcase this use, I have paired the Slim Card Basics with the Zodiac Rooster, Little Chickie Agenda, and Paola’s Wishes stamp sets.
I started by stamping several images from Zodiac Rooster and Little Chickie Agenda in Milk Chocolate hybrid ink and colored up the images with copic markers. I then used their coordinating dies to die cut each image out.
I created a soft ink blended background with Blueprint Sketch and Shaded Lilac distress oxide inks on Bristol paper, and then die cut this piece out with the stitched rectangle from Slim Card Basics. This was cut in half, approximately at the 4” mark. On each piece, I heat embossed a sentiment from Paola’s Wishes in white.
For the base of the card, I used the scallop frame from Slim Card Basics out of grey card stock and folded this in half. I added my ink blended stitched background onto each of these with liquid adhesive, then followed by the images popped up with foam tape. And this completes both of my mini cards!
SUPPLIES:
|


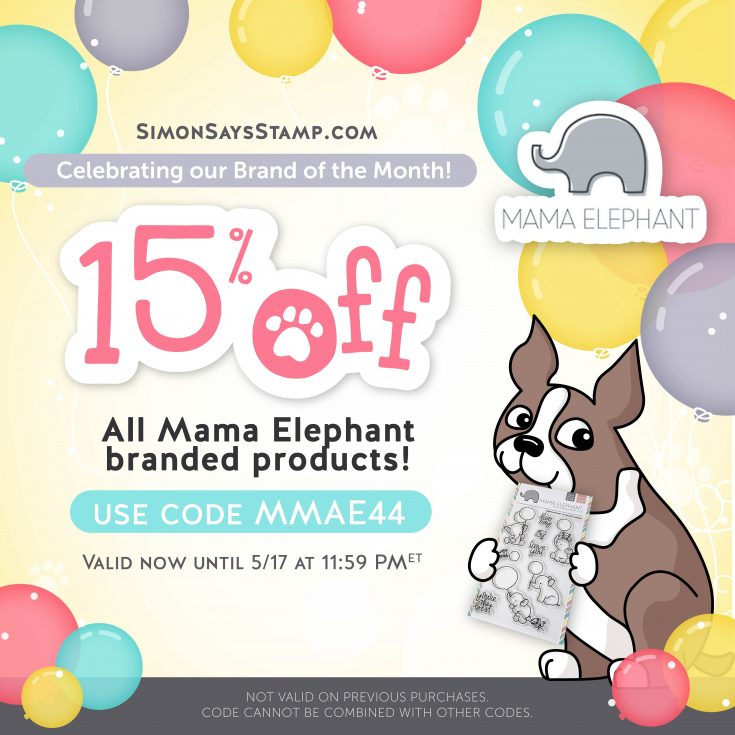
To continue the celebration, we’re having a 15% off sale with code MMAE44 at checkout on all of their awesome in-stock products! Shop early for the best selection, and enjoy!
A BIG thanks to Keeway for the inspiration today!


