Throwback Thursday – Fabulous Projects You Might Have Missed!
Welcome to another edition of Throwback Thursday—a trip back in time! For each throwback, we’ll be spotlighting fantastic cards and projects using products from previous releases. The new stuff is always SO fun, but think about all of those great products you’ve collected and set aside. They are STILL AWESOME! And we want to inspire you with fantastic inspiration from our creative archives.
A new exclusive Simon brand release is just around the corner, but today we’d like to take a look back at a couple of collections that made an appearance last year. You might remember some pretty spectacular products from our Blossoms & Butterflies and Celebrate You releases. Below you’ll find four inspiring cards created with goodies from these fantastic product collections from Simon Says Stamp!
First off is this beautiful floral card by Suzy Plantamura:
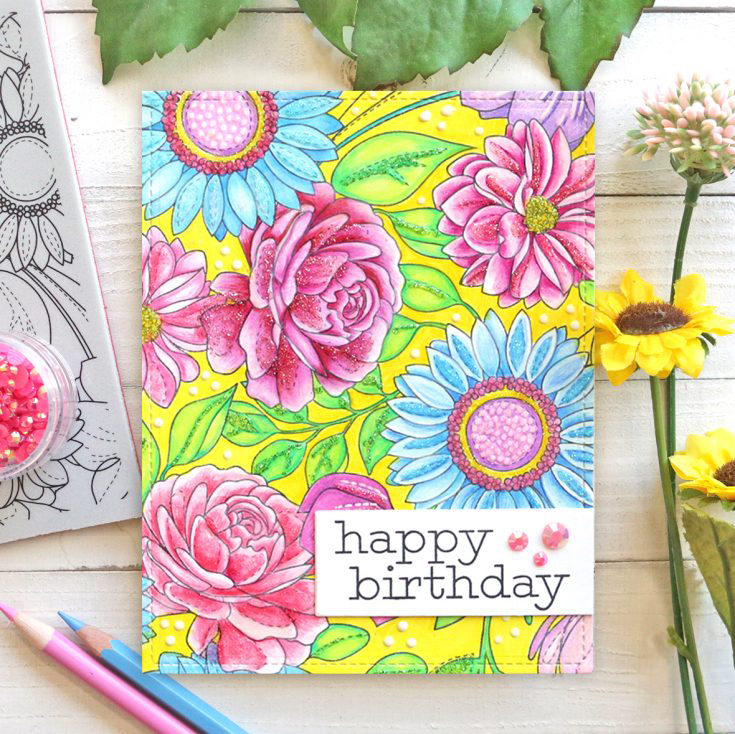
The Floral Mix background stamp made its debut with the Blossoms and Butterflies release, and it includes a mix of some of your favorite floral clear stamp sets from Simon Says Stamp. You can see this card by Suzy and four others on our blog HERE. You’ll love seeing this background used in many different ways!
Suzy’s supplies

Next, let’s throw it back to this pretty design by Sidnie Des Jardins:
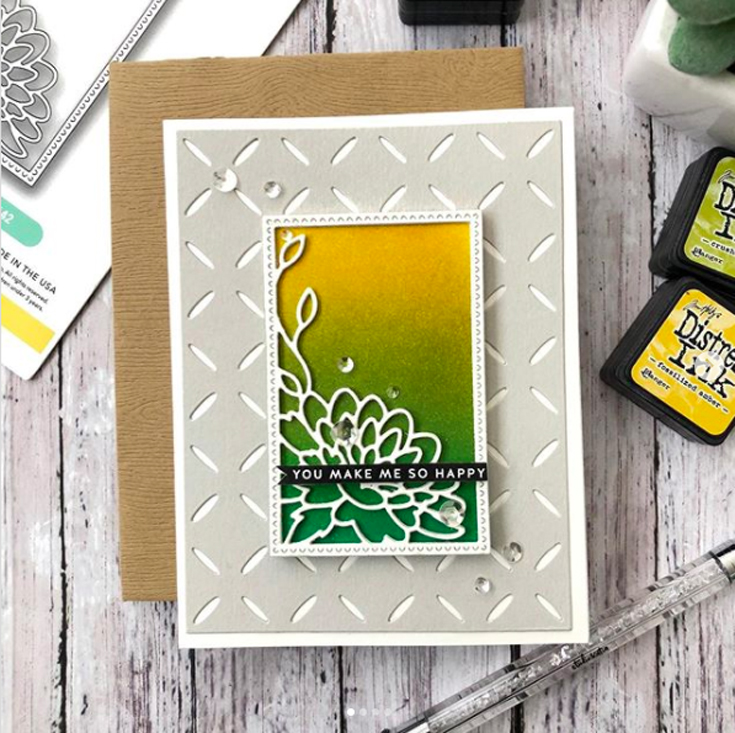
Sidnie has a knack of combining products old and new, and here she features the Dahlia Corner Frame die from the Blossoms & Butterflies release with the previously released Diamond Pattern die. And that ink blending. WOW! Sidnie shared this card HERE on Instagram.
Sidnie’s supplies

And let’s not forget this party in card form designed by Nina-Marie Trapani:
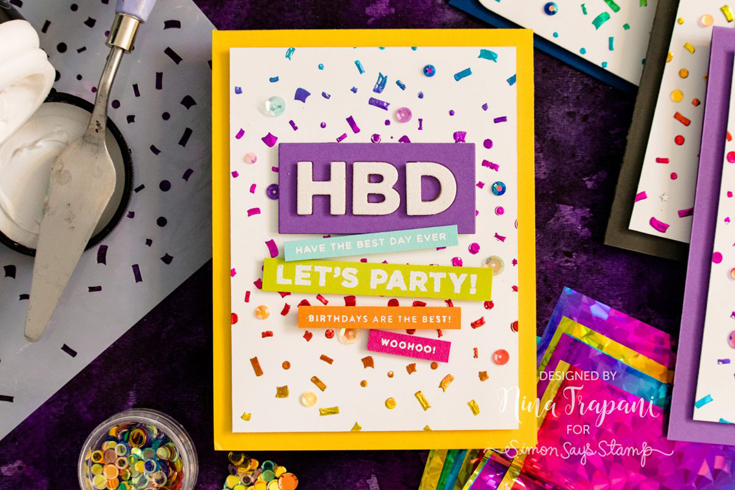
The Celebrate You release included lots of birthday-themed items. Nina-Marie created this colorful celebration of a card with the Stop Drop Party stamp set and the Confetti stencil. You can see Nina-Marie’s original post on her blog HERE (and see three more cards, too!), and you won’t want to miss her video tutorial that can be found on YouTube HERE.
Nina-Marie’s supplies

And finally this fun and cute card by Kim Hamilton:
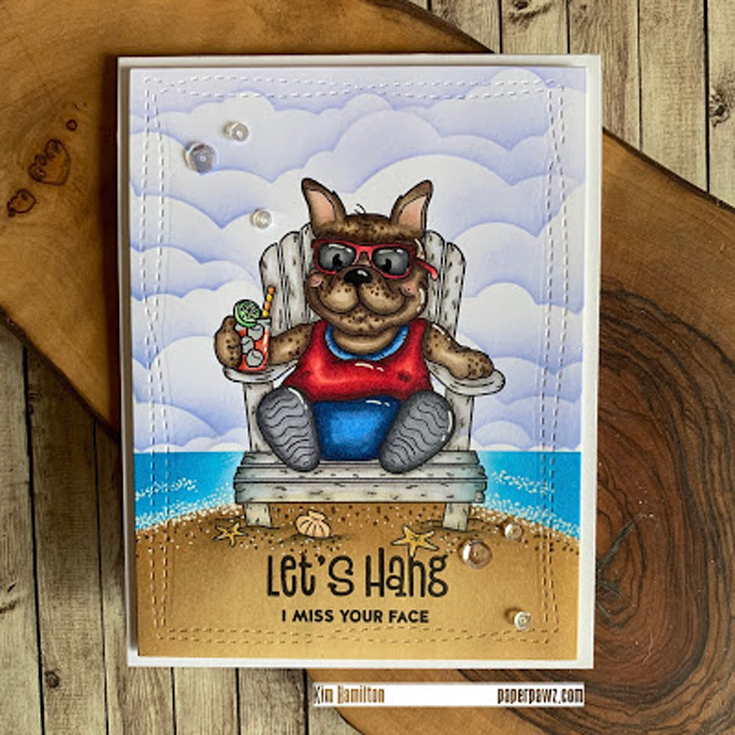
The Chillin Frenchies stamp set is sure to put a smile on your face! This fun stamp set was part of the Celebrate You release, and this design by Kim is such a treat! How amazing are those clouds and the water and the beach? You can check out her original blog post HERE.
Kim’s supplies

Did you know that we have inspiration galleries on our website showcasing project ideas for all of our releases and card kits? It’s a veritable treasure-trove of terrific ideas just waiting to inspire you, and you are invited to share your projects, too! You can find all of the Simon release galleries HERE and galleries for our monthly card kits can be found HERE. Scroll through today, and maybe you’ll find one of YOUR projects linked there!
Thanks for throwing it back with us and checking out these cool projects from four talented ladies!
A new Witty Wednesday featuring Riley & Co!
Hi friends! If you’re like most of us, you’re looking for some happy news or just something silly to chuckle about. We really enjoy the wit of the author of these Riley & Co stamps, and hope spotlighting in our latest Witty Wednesday feature a few of our recent favorites might give you a laugh! Enjoy!


Thanks so much for stopping by! We’d love it if you share YOUR favorite quote in a stamp in the comments! :)
Yippee for Yana: Floral Background with Masking
Hi friends! Happy Tuesday! Please join me in welcoming the super talented Yana Smakula in our bi-monthly Yippee for Yana blog series! Read on for more info and enjoy!

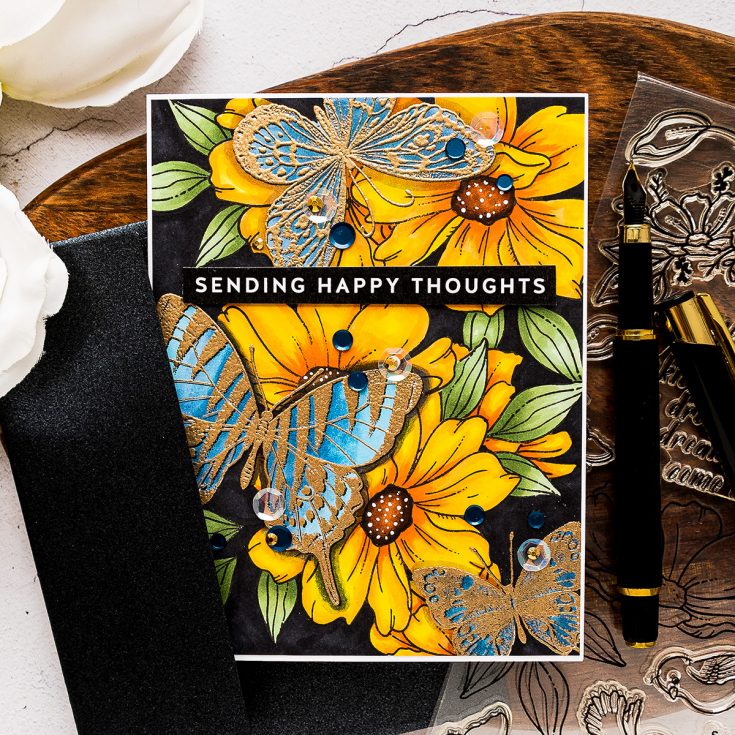
Hi everyone, this is Yana Smakula, welcome back for another Yippee For Yana video! In this episode, I’ll show you how to combine images from different stamp sets to create a beautiful stamped pattern. I’ll also show you how you can make the colors pop on your card by simply changing the color of the background.
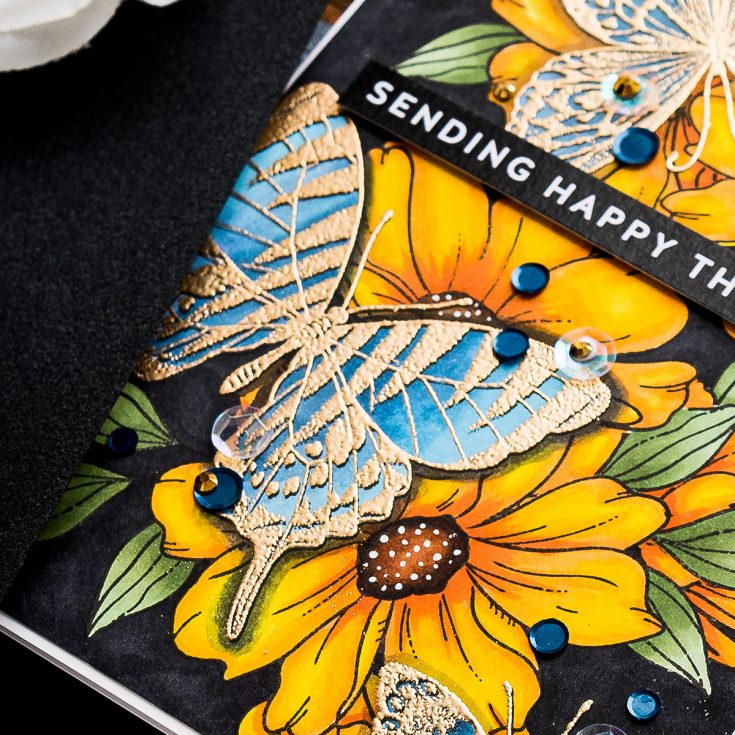
You’ll need the following products to make this card: Look For the Rainbows stamp set or any other stamp set with large outline flowers and leaves; we will use these images to build the background floral pattern. Another set we will need is the Beautiful Butterflies. Or again, any other set with large outline butterflies. We will also need masking paper as we will be doing quite a bit of masking to create the background. Of course, you’ll need a good pair of scissors you are comfortable using to cut the masks out. I like to use Spring-Cut scissors from Tonic Studios. You will also need an ink pad that works with your coloring medium of choice. I will be coloring today’s background with Copic markers and so I picked Simon’s Intense Black ink pad as this ink is Copic Marker friendly. Lastly, you’ll need a coloring medium. I prefer Copic markers these days, so this is the medium I’ll be using.
Be sure to watch my video tutorial to learn how to stamp this pattern and also for tips regarding Copic coloring and heat embossing.
I used the following Copic marker colors:
G21, YG63, G94 to color leaves
YR18, YR14, Y38, Y15, Y08 to color flowers
E79, E37, E33 to color flower centers
C9 to color the background
B97, B34 to color the butterflies
C5, C7 to create the butterfly shadows
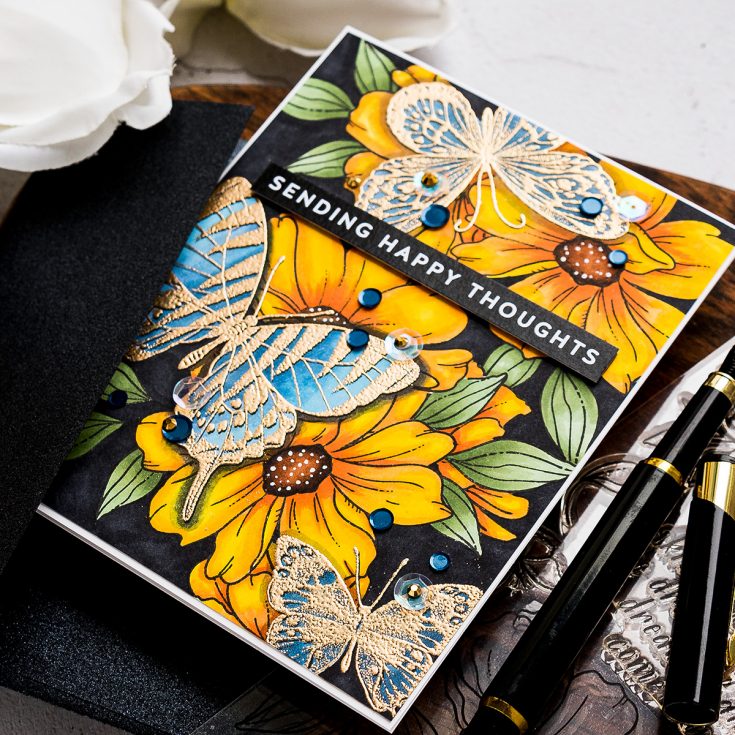
I added a simple Sending Happy Thoughts sentiment to this card, this comes from Simon’s All Things Happy Sentiment strips. I also trimmed my panel down just slightly and adhered to the A2 white side folding card base.
I quite like the way it turned out, but I’m curious if you like it as well. Let me know in the comments below.
WATCH THE VIDEO:
SUPPLIES:
|


Thanks so much for stopping by, and to Yana for being our guest!


