NEW + LIMITED! Exclusive Halloween Curio Class Kit + FREE CLASS taught by Tim Holtz!
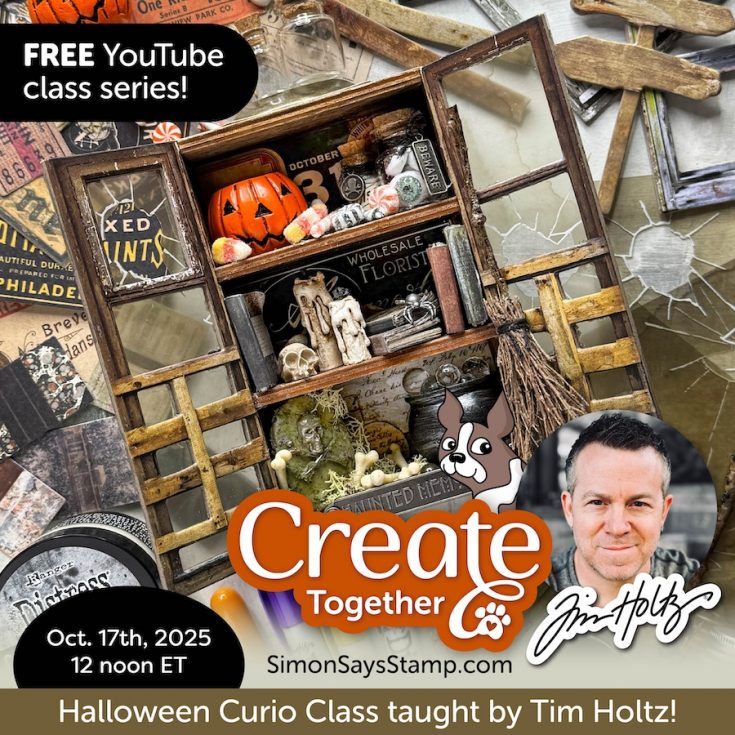
Exclusive Launch! Limited Edition Tim Holtz Halloween Curio Class Kit!
Join Tim Holtz and Heidi LIVE from his studio on October 17, 2025, for a frightfully fun virtual class streaming on the Simon Says Stamp YouTube Channel!
Get ready for an incredibly spooktacular creative experience with Tim Holtz by purchasing this limited class kit! Simon Says Stamp founder and craft enthusiast, Heidi, will be joining the fun from Tim’s studio to learn – techniques, tips, and tricks with you for creating a Halloween decor piece!
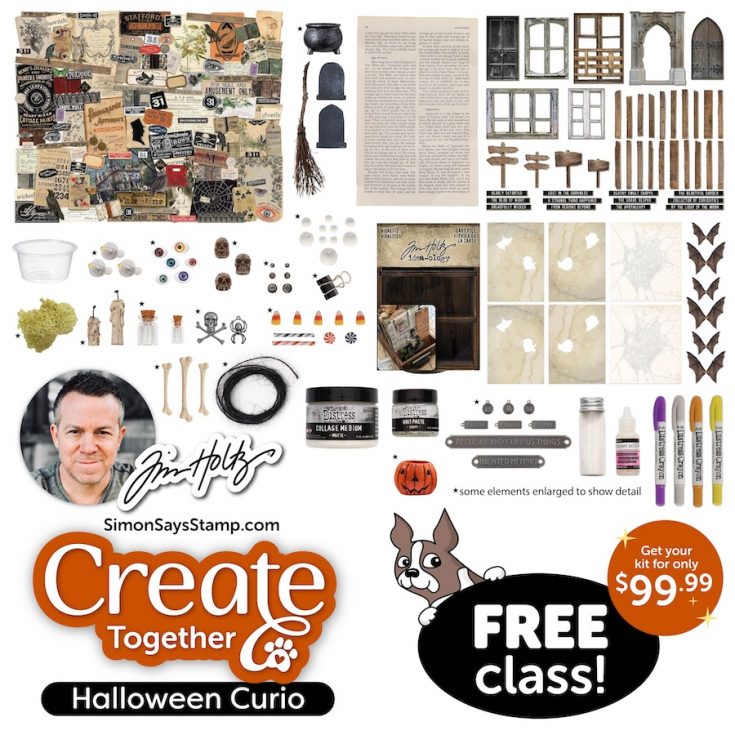
What’s Included:
Your kit is value-packed with all of the Halloween supplies you’ll need to make one delightfully frightful décor piece that any Halloween enthusiast will treasure.
Shipping Info:
Kits will begin shipping late September.
Class Details:
- Date: Friday, October 17th, 2025
- Time: 12 PM ET
- Where: Simon Says Stamp YouTube Channel
- Can’t make it live? No problem! The full class will remain available on YouTube to watch, rewatch, pause, and play back whenever you’d like.
- Class is FREE whether you purchase a kit or not, we’d love you to JOIN the fun!
Kit contents included:
- 1 Tim Holtz idea-ology Vignette Card File
- 1 pack Tim Holtz idea-ology Halloween Baseboards (2024 edition)
- 1 pack Tim Holtz idea-ology Halloween Transparencies (2024 edition)
- 1 pack Tim Holtz idea-ology Halloween Ephemera (2024 edition)
- 1 pack Tim Holtz idea-ology Halloween Plaques and Tags (2024 edition)
- 1 pack Tim Holtz idea-ology Graveyard
- An assortment of Tim Holtz idea-ology Bubbles
- 1 Crossbone and 1 Spider from Tim Holtz idea-ology Halloween Adornments (new for 2025)
- An assortment of 3 Tim Holtz idea-ology Boneyard
- An assortment of 3 Tim Holtz idea-ology Skulls
- An assortment of 2 Tim Holtz idea-ology Drippy Candles
- An assortment of 7 Tim Holtz idea-ology Halloween Confections
- 1 Tim Holtz idea-ology Jack o’ Lantern (new for 2025)
- An assortment of 6 Tim Holtz idea-ology Creepy Eyes
- An assortment of 6 Tim Holtz idea-ology Screw Heads
- 1 Tim Holtz Ranger Distress Collage Medium
- 1 Tim Holtz Ranger Mini Distress Crypt Paste
- 1 Ranger Mini Glossy Accents
- 1 *SPECIAL VIAL* of Tim Holtz Ranger Rock Candy Glitter
- 1 Tim Holtz Ranger Distress Crayon in Crushed Olive
- 1 Tim Holtz Ranger Distress Crayon in Wilted Violet
- 1 Tim Holtz Ranger Distress Crayon in Rusty Hinge
- 1 Tim Holtz Ranger Distress Crayon in Pumice Stone
- 2 Glass Vials
- 3 Mini Lights
- 1 yard Black Twine
- Clump of Moss
- 1 page of Book Paper
- 1 Mini Binder Clip
- 1 Portion Cup
Due to the custom nature of many of the products in this kit, all sales are final.
Missed our live announcement? Catch the rewatch below:

Trick or Treat? Something FRIGHTFULLY fun is coming SOON!
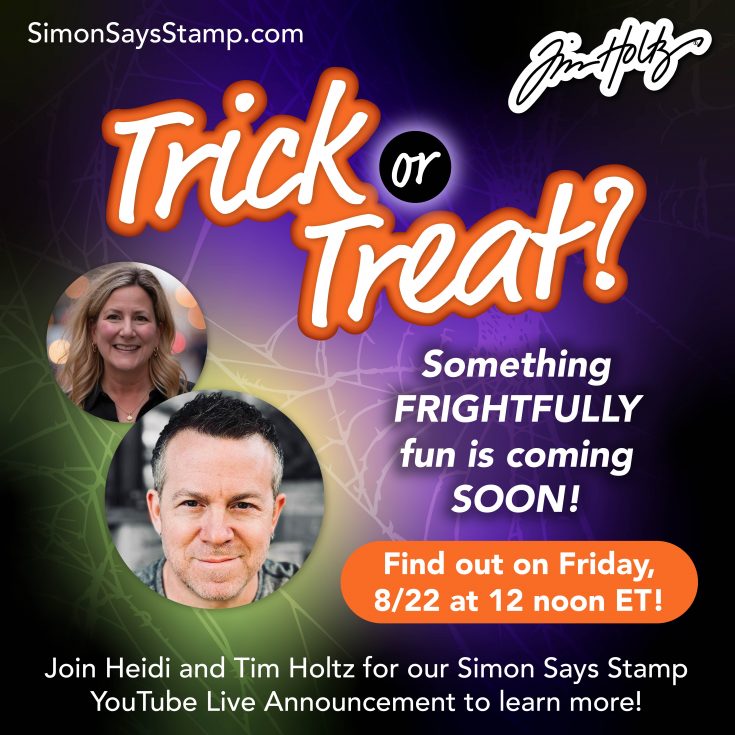
Find out what it is on our Simon Says Stamp YouTube channel August 22nd, 2025 at 12 PM ET!
Click or tap the Bell next to words “Notify Me” to get an email right to your inbox when all of the fun begins so you don’t miss a second of the news!

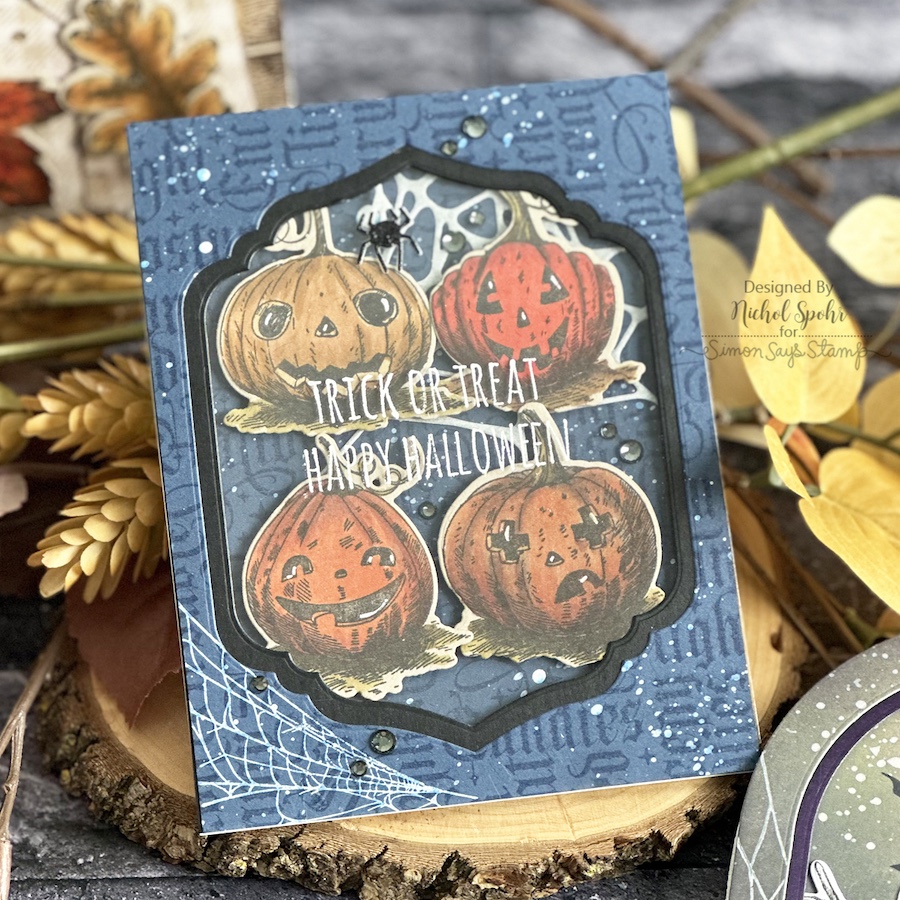
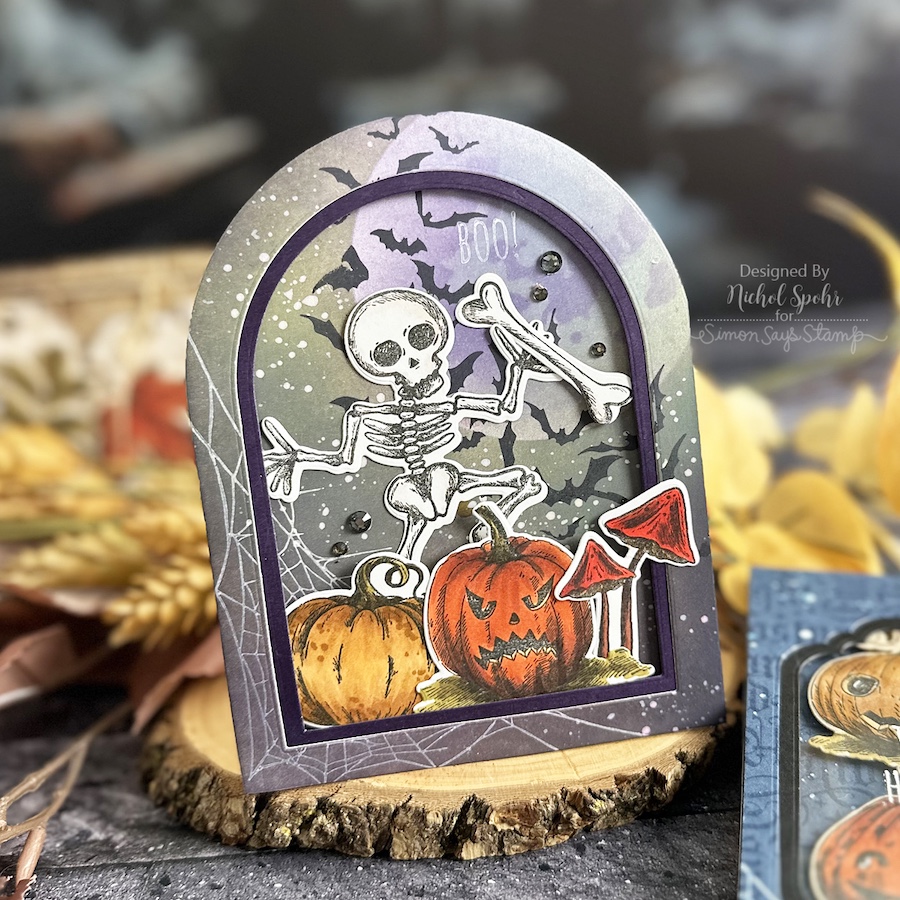
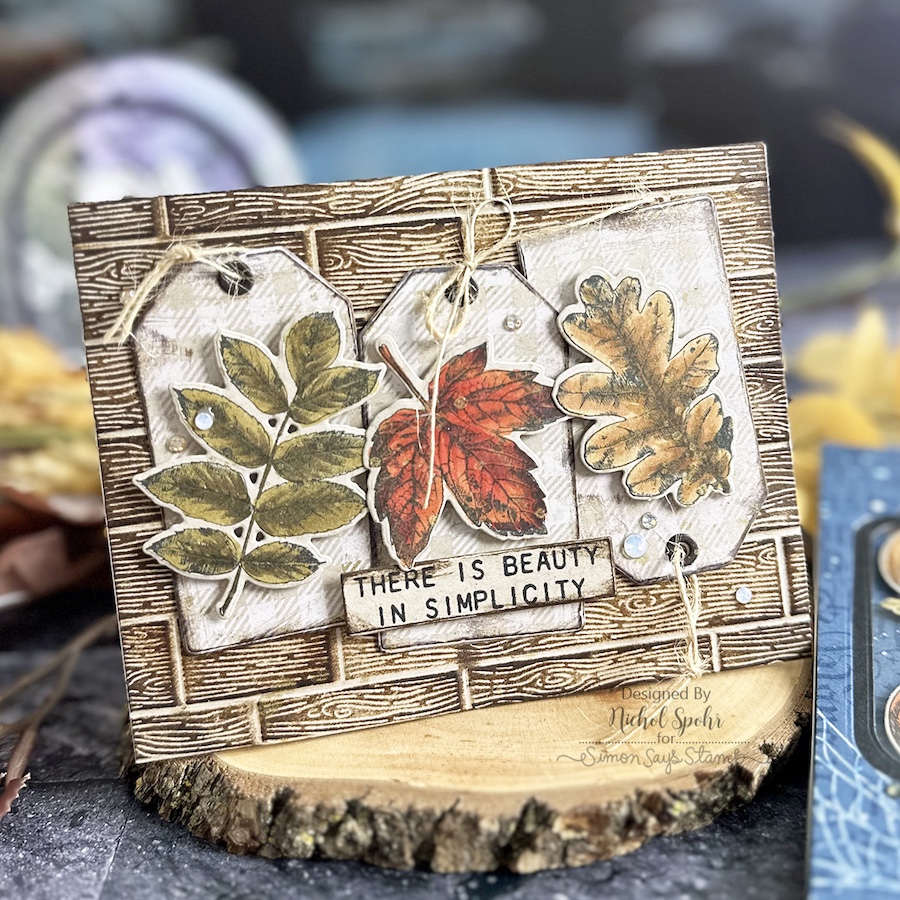
NEW Simon Says Stamp Coordinating Dies for Tim Holtz Halloween Stamps -in action by Nichol Spohr!

Hi friends! Happy Thursday! The Halloween fun CONTINUES this week with special guest Nichol Spohr who’s showcasing three FABULOUS new card designs showcasing BRAND NEW Simon Says Stamp coordinating dies designed to match Tim Holtz Stamps in Pumpkin Head, Nature’s Wonder, and Halloween Doodles! Be sure to watch the video for all the details, and enjoy!
WATCH THE VIDEO:

SUPPLIES:
|


Thanks so much for stopping by, and thanks to Nichol for being our guest!


