Making the Cut: Christmas in July Santa Pup

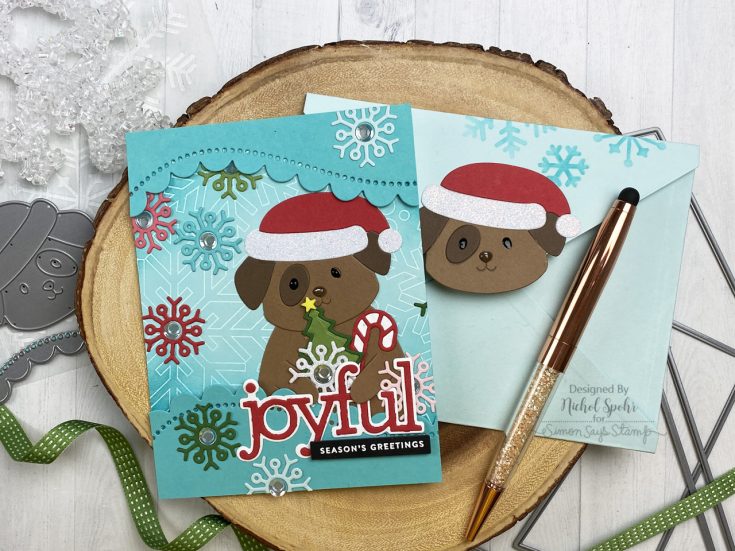
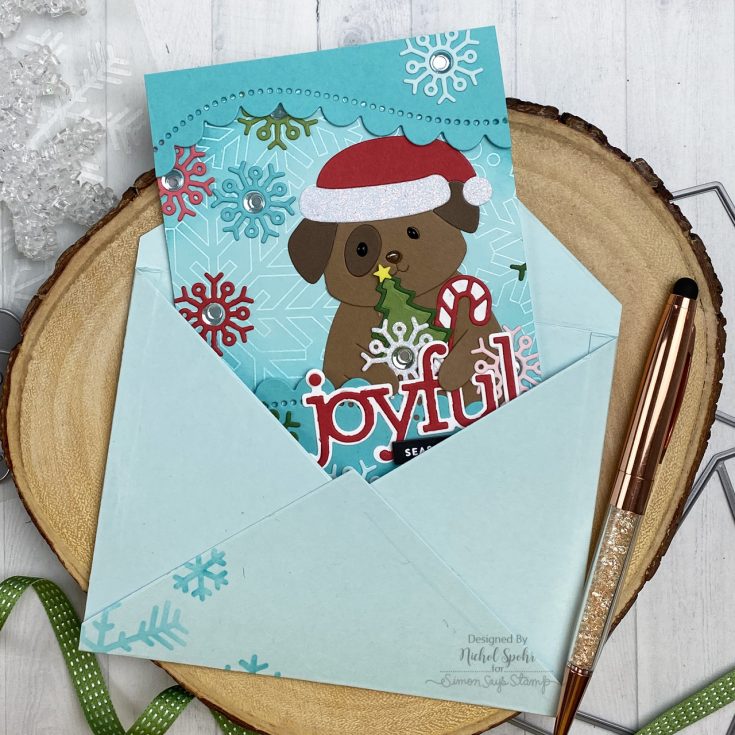
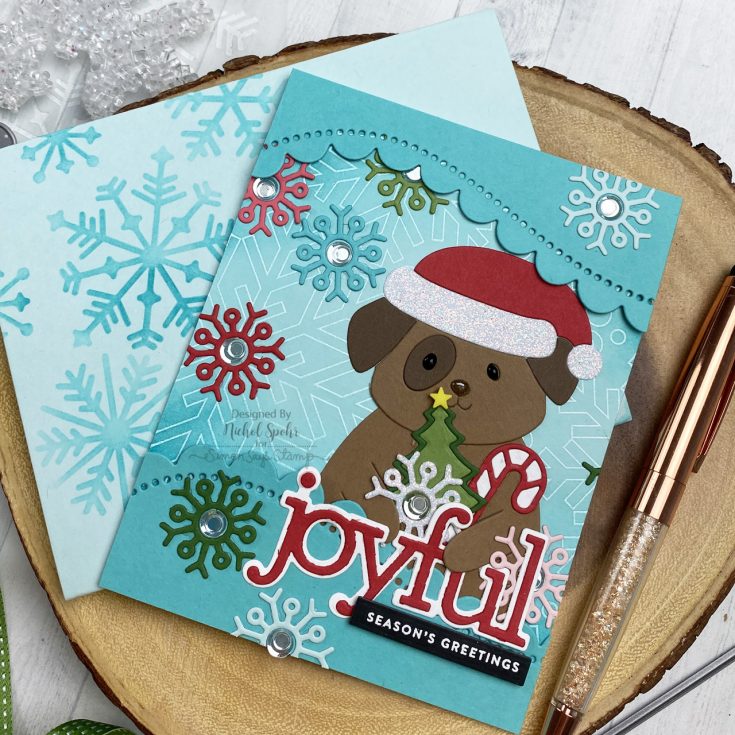
Hi friends! Happy Wednesday! Please join me in welcoming back special guest Nichol Spohr for our monthly installment of Making the Cut, a blog series showcasing the love of wafer thin die cutting! This adorable card and matching envelope features the Big Picture Book Santa Pup, Christmas Icons, and our Joyful sentiment die!
Be sure to watch the video for more information, and enjoy!
WATCH THE VIDEO:
SUPPLIES:
|


Thanks so much for stopping by, and thanks to Nichol for being our guest!
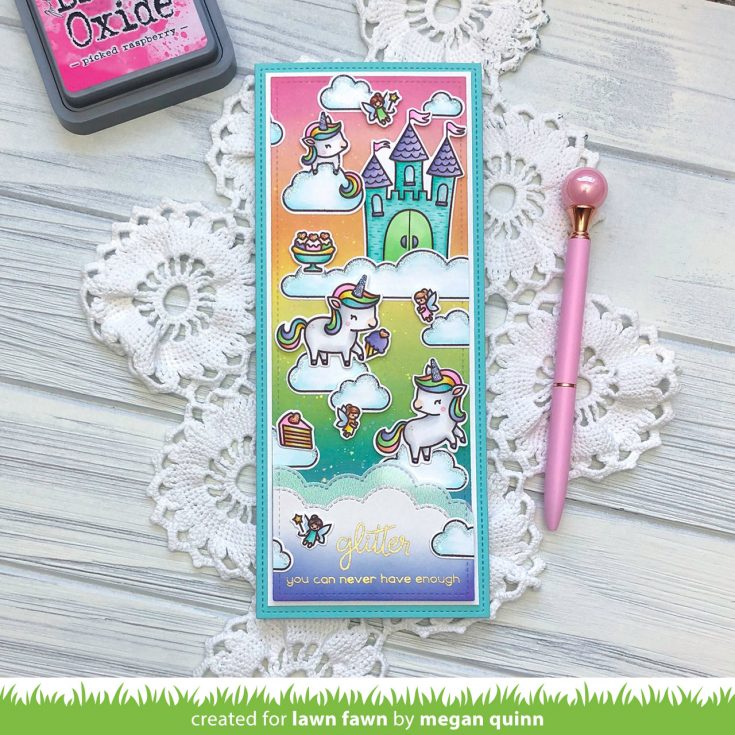
GLITTER: You can never have enough
Hi friends! I’m delighted to welcome back special guest Megan Quinn to our blog today showcasing some brand new Lawn Fawn products from the Summer 2020 release!

Hello friends! This is Megan from the Lawn Fawn Design Team and I am delighted to be on the Simon Says Stamp Blog today. I am sharing a card using some amazing new products from the Lawn Fawn Summer Release! The whole release has such a whimsical and fairy tale feel to it and I love it all so much!
Lately, I have really enjoyed making slim line cards. This style allows even more room to add images to your card designs and Lawn Fawn recently released three awesome Slimline Die Sets. These sets add a beautiful stitching detail to the edges of the panels and make creating this style even easier.
For my card today, I used the new Unicorn Picnic and All The Clouds Stamp Sets. (A picnic with unicorns?! Yes, please!) These sets are packed full of images to create fun scenes. The only limit is your imagination! I also added in the previously released Critters Ever After Stamp Set to round off my scene.
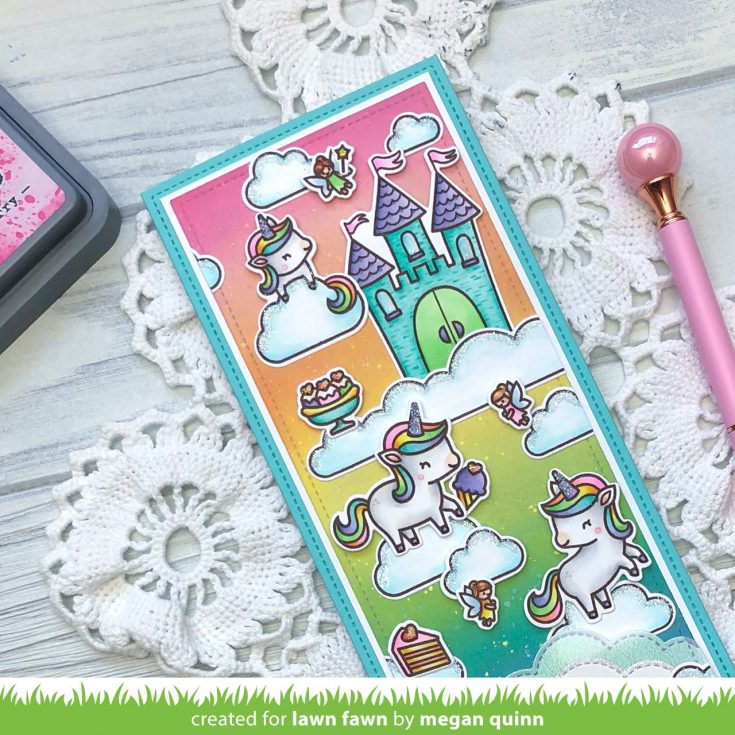
To create my unicorn card, I started by stamping my images out and coloring them with Copic Markers. I then die cut them out using the coordinating dies.
Next, I die cut a piece of Bristol Smooth Cardstock using the stitched rectangle die from the Small Slimline with Lift the Flaps Die Set to make the focal panel. I then ink blended the panel using Distress Oxide Inks with a blending brush in the following order from top to bottom: Picked Raspberry, Spun Sugar, Spiced Marmalade, Squeezed Lemonade, Twisted Citron, Peacock Feathers, Tumbled Glass. To add some fun gold speckles, I water down a little metallic gold watercolor from the Kuretake Gansai Tambi Starry Colors set and flicked it over the panel.
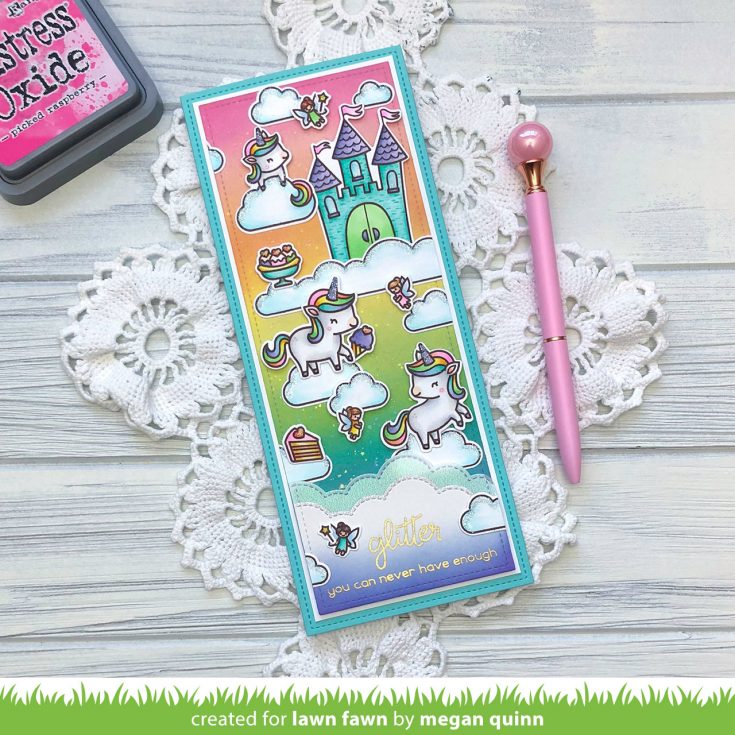
I then die cut a second rectangle from Bristol Smooth Cardstock and a piece of Lawn Fawn Pearlescent Vellum using the same die. I used the largest die from the Cloudy Hillside Pop-Up Add-On to die cut both of those to create the clouds at the bottom of the design. I ink blended Blueprint Sketch and Wilted Violet at the bottom of the Bristol cloud panel to finish the rainbow ombre inking. Then, I stamped the sentiment using Lawn Fawn Clear Ink and heat set Lawn Fawn Gold Embossing Powder over the top. Next, I adhered the two cloud layers together and used foam tape to pop them up on the bottom of the card front.
I used a mixture of Lawn Fawn Glue Tube, glue dots, and foam tape to adhere my images to the front. I then popped the front panel onto a piece of Lawn Fawn White Cardstock that I trimmed to slightly less than 8 1/4″ x 3 1/4″ and adhered that to a die cut panel of Lawn Fawn Mermaid Cardstock.
Thank you so much for joining me today! Please be sure to check out all of these amazing products from Lawn Fawn. I hope that you have a wonderful day!
SUPPLIES:
|


Thanks so much for stopping by, and thanks to Megan for being our guest!
Studio Monday with Nina-Marie Reprise: 5 Ways to Use Freezer Paper
 Hi everyone! Have you ever utilized freezer paper in your crafting projects? Originally meant for storing food in the freezer (hence the name!), this versatile tool has since become a staple tool within the crafting industry. If you are a quilter, odds are you’ve used it for transferring patterns onto fabric. :) Additionally, freezer paper can be helpful to papercrafters too! I have used it in the past for various techniques and today we are going to look at 5 of my favorite ways to use freezer paper.
Favorite Freezer Paper Tip #1: Protecting Your Work Surface
 If you are a crafter that loves to get messy with like me, the benefits of having your surface covered with freezer paper are endless. Freezer paper has both a coated and uncoated surface, depending on which side you have it flipped to. When you have the freezer paper with the coated-side up, you instantly have a non-stick surface covering your work table (similar to a craft sheet). Any medium can be applied onto the freezer paper and most easily wipe off; this means you can reuse the sheet over and over and over… you get the idea! ;) Even liquid adhesives can be easily wiped off.
Favorite Freezer Paper Tip #2: Perfect with Alcohol Inks
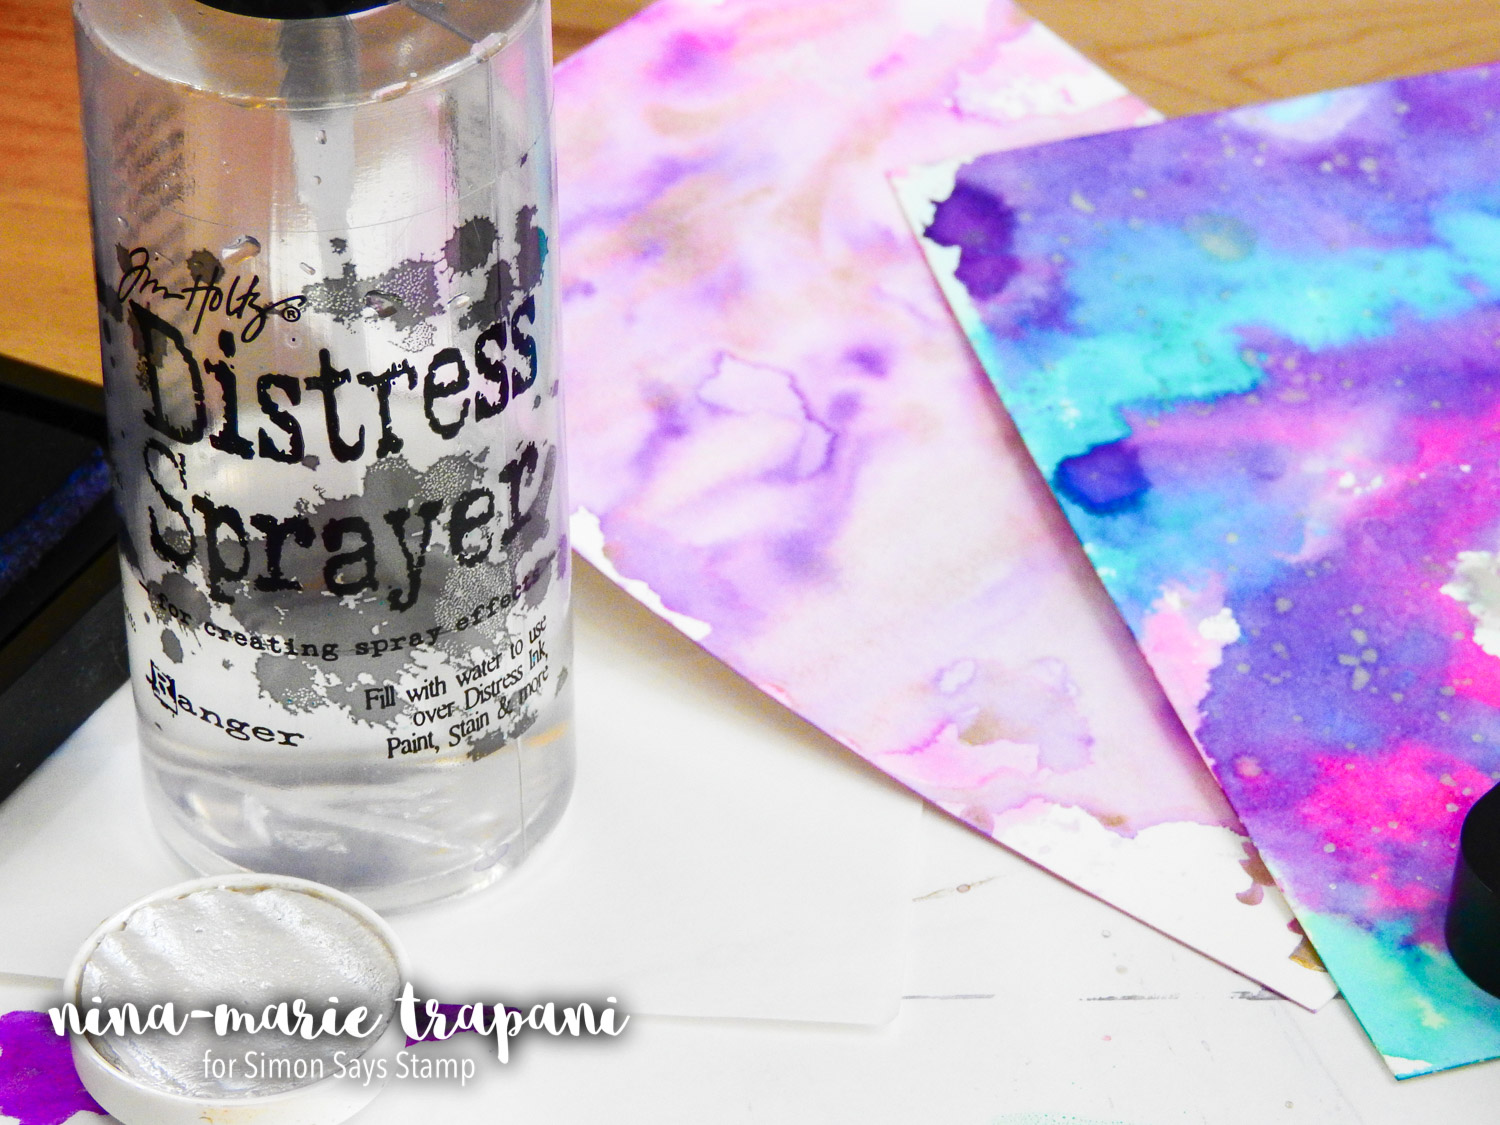
 I’m sure most of you have seen that alcohol inks are all the rage at the moment; freezer paper is a great surface to work with alcohol inks on. It is especially fun to do alcohol ink smooshing on too! The slick surface of the paper allows the alcohol inks to be reactivated and re-smooshed almost limitlessly. They also clean up easily on the freezer paper; or you can simply throw the sheet of freezer paper out when you are done with the inks, making clean up a breeze.
Favorite Freezer Paper Tip #3: Distress Ink Smooshing
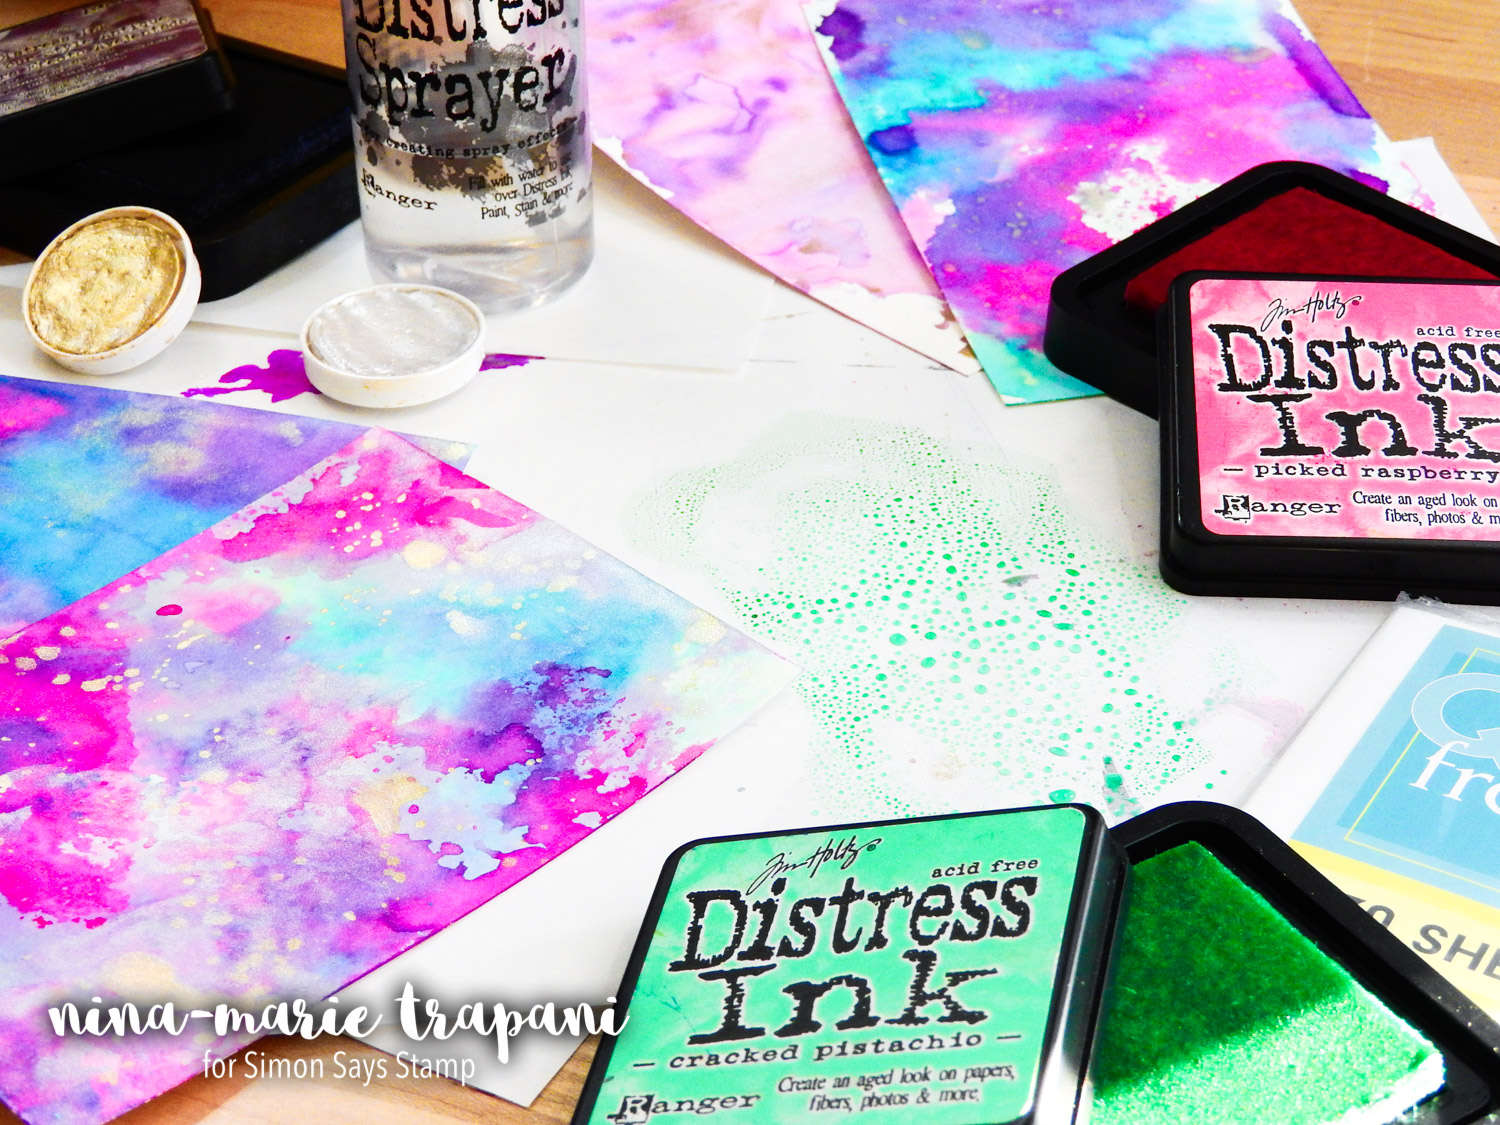 Speaking of smooshing, Distress Ink smooshing is equally as fun and easy with freezer paper! In the same way that alcohol inks can be reactivated, the coated surface allows Distress Inks to be reactivated also. You can make stunning backgrounds and textures with the ink smooshing! And because the Distress Inks are a water-based medium, they wipe away effortlessly, again letting you reuse the freezer paper over again!
Favorite Freezer Paper Tip #4: Using as a Watercolor Palette
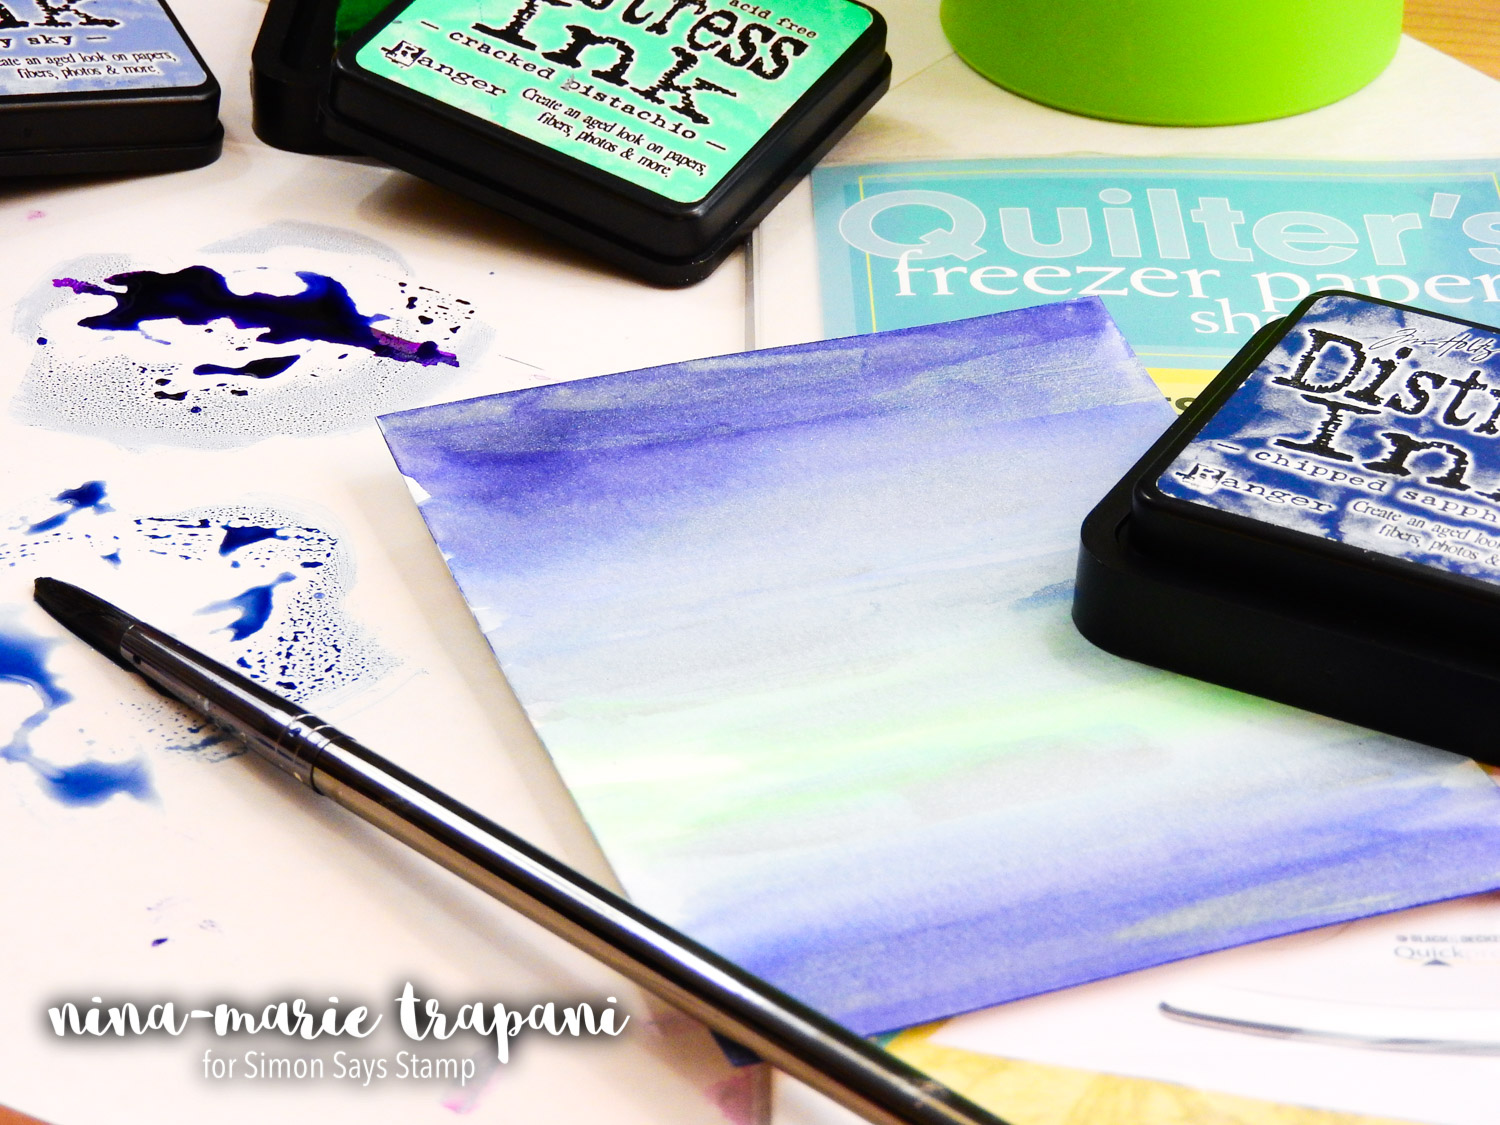 If watercolor is your thing, freezer paper could be a very useful tool for you, especially if you like to place your watercolors on a palette. Watercoloring on freezer paper not only protects your work surface underneath, but you also have a “palette” to work from too! One of my favorite reasons for using freezer paper as a palette is the fact that it is white, allowing me to see the colors in their true form.
Favorite Freezer Paper Tip #5: Perfect for Masking and Stenciling
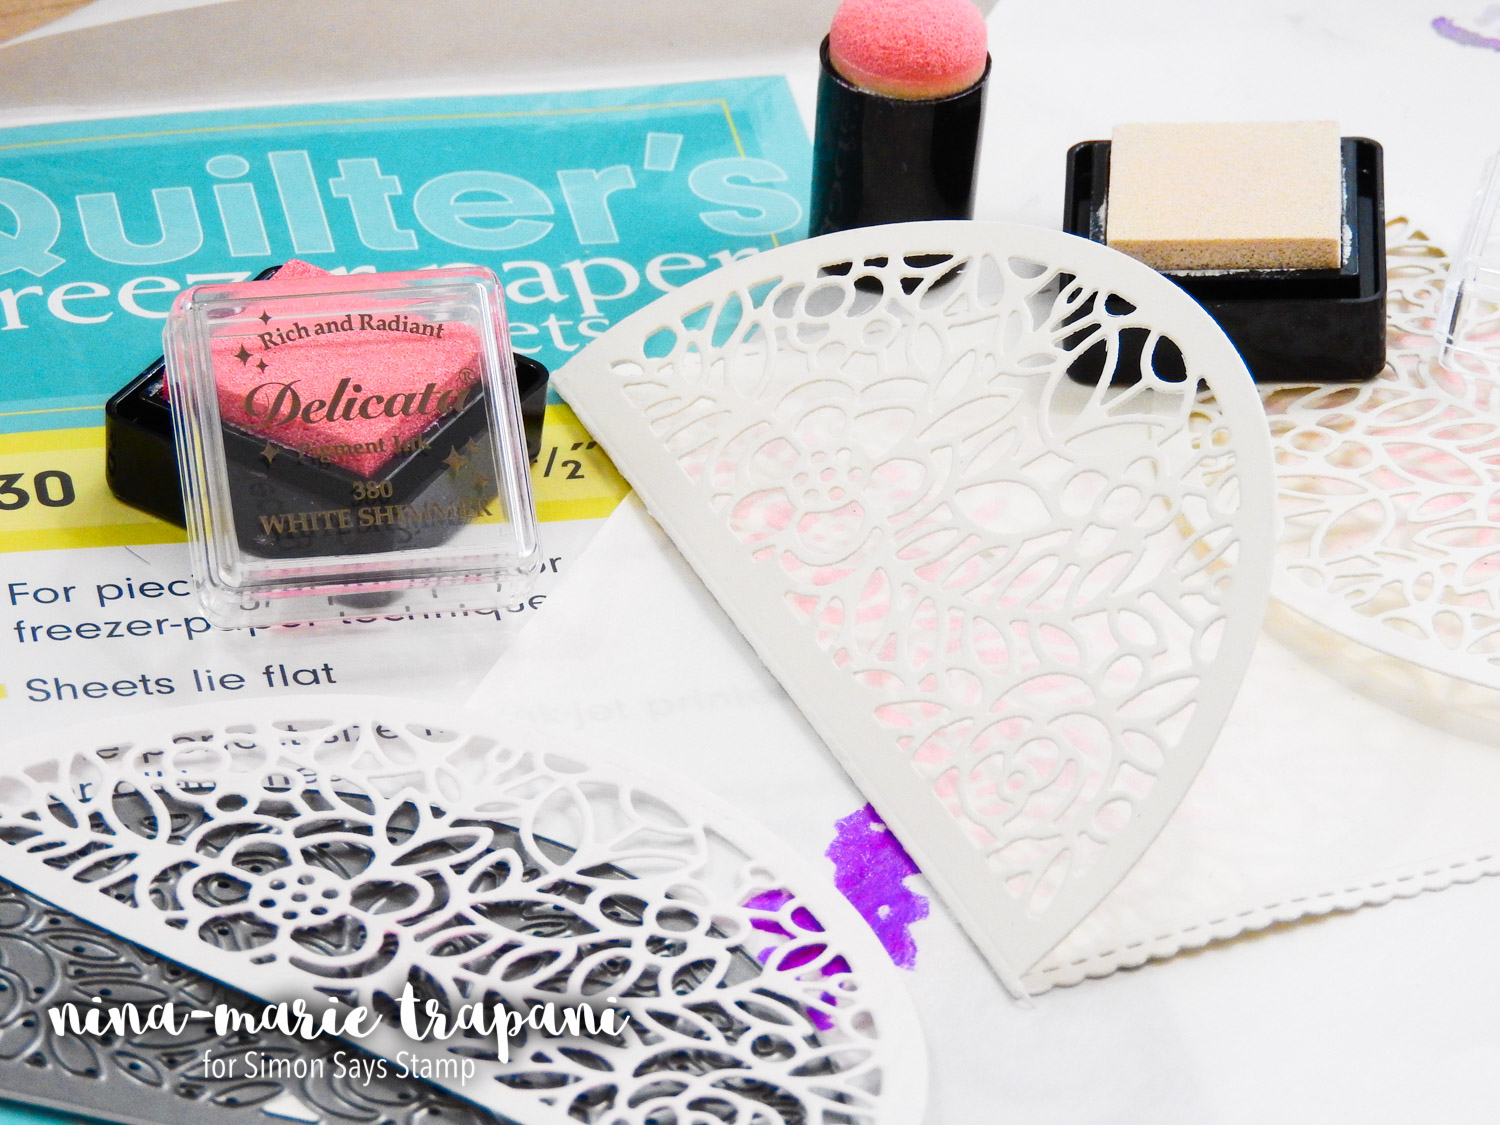
Do you like to create stencils with your dies, but find that your “stencils” wear out quickly? Freezer paper is a perfect remedy to that situation! Again, we’ve got that awesome, slick surface to use to our advantage. I adhere the uncoated side of the freezer paper to a sheet of printer paper (making the paper a bit more sturdy) and then cut the entire piece with my die of choice. Once cut, I am left with a non-stick “stencil” that has multiple benefits to a paper version: 1. it will resist the ink applied over it, 2. you can wipe it clean with a damp cloth when finished, and 3. it can be used over and over again! 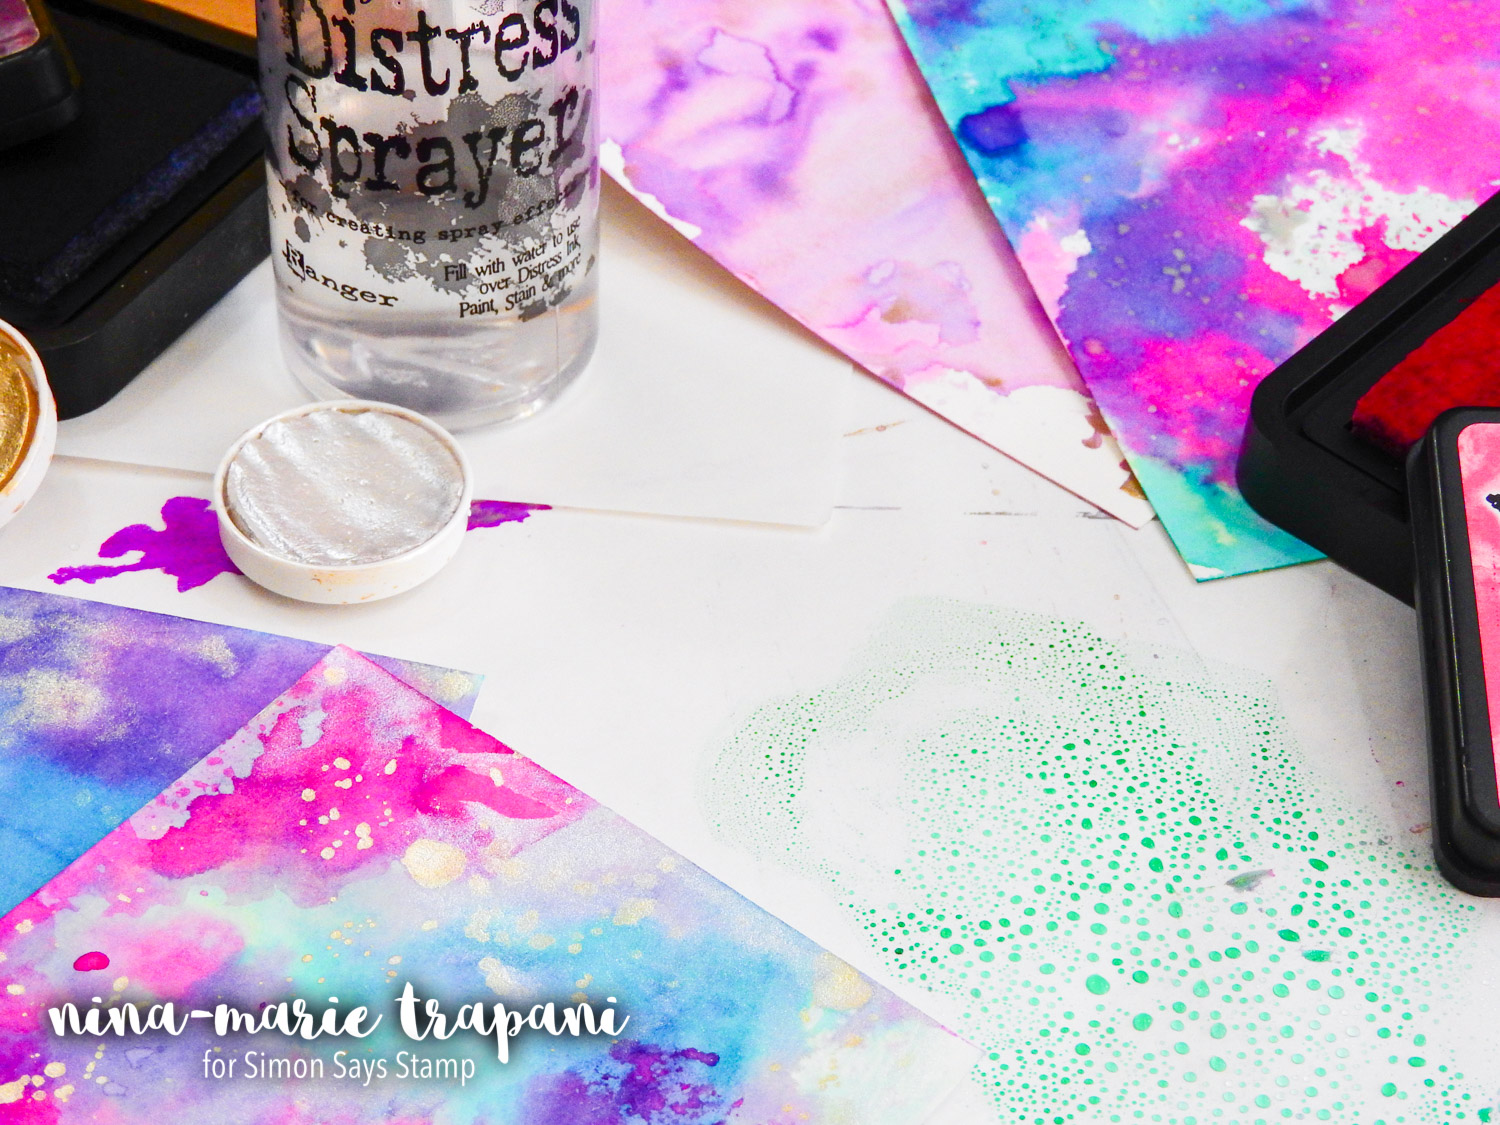 I encourage you to check out the video below to see all these ideas demonstrated. I think you will find that freezer paper could be a very versatile tool in your crafty projects too! As a side note: all of the designs and techniques you’ll see during the video will be featured in upcoming videos on my personal blog for Simon, along with finished cards! Today’s tutorial was about the freezer paper itself; so stay tuned! You’ll see those tutorials coming up later this month! Thank you so much for visiting with me today; don’t forget to subscribe to our blog and YouTube channel, as we post crafty inspiration for you daily! See you soon!
WATCH THE VIDEO
SUPPLIES
|


Thanks so much for stopping by!


