One Stamp Five Ways: Poppies Background
Hi friends! Happy Friday! Can you believe it’s the last day of the year?! Join me in welcoming special guest Suzy Plantamura! Read on and enjoy!
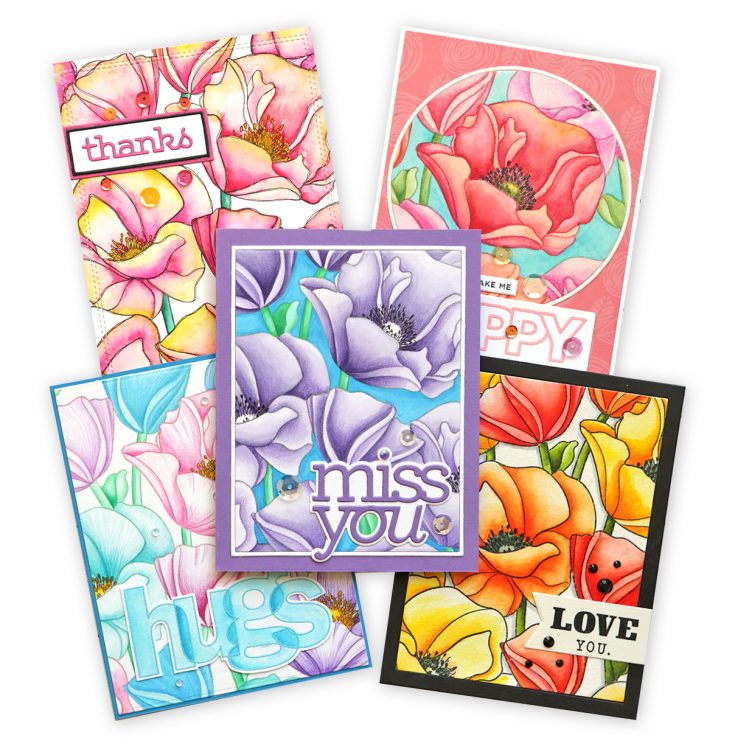
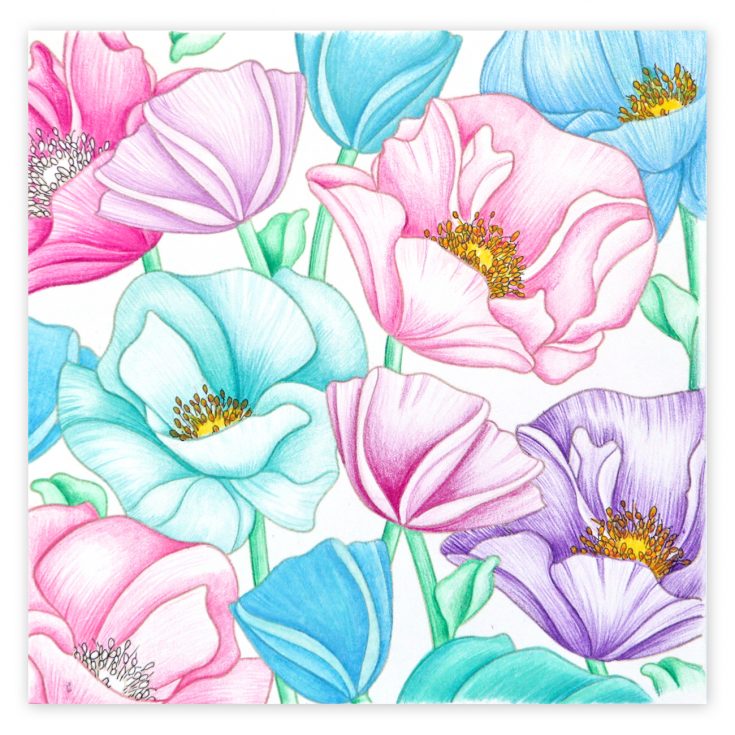
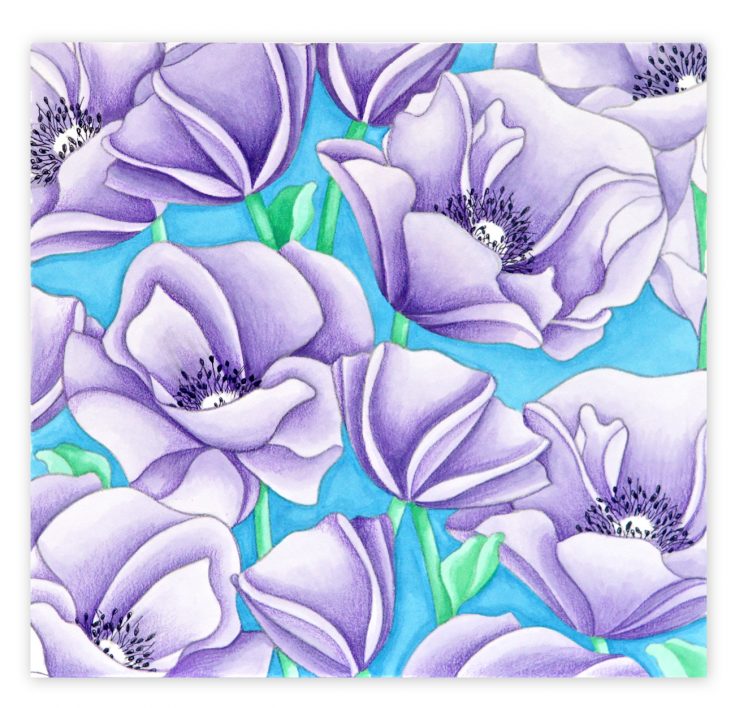
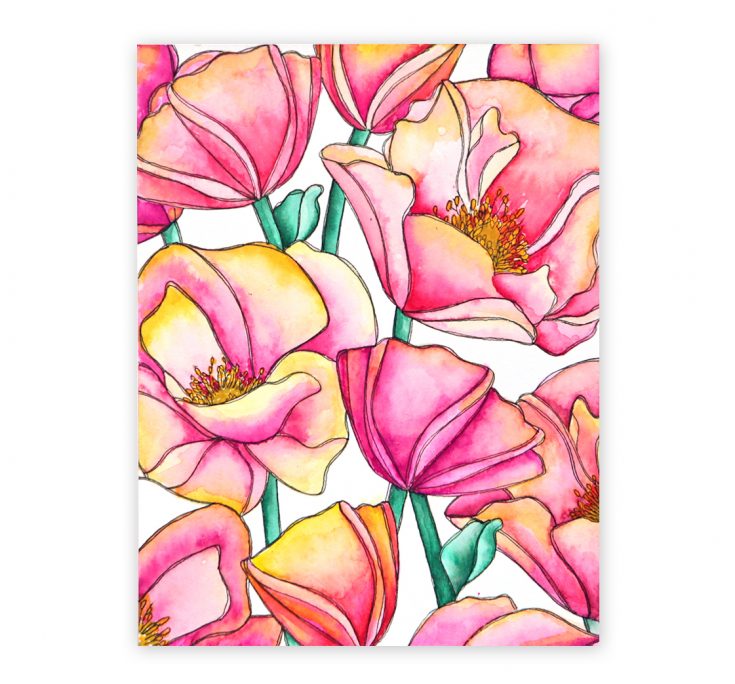
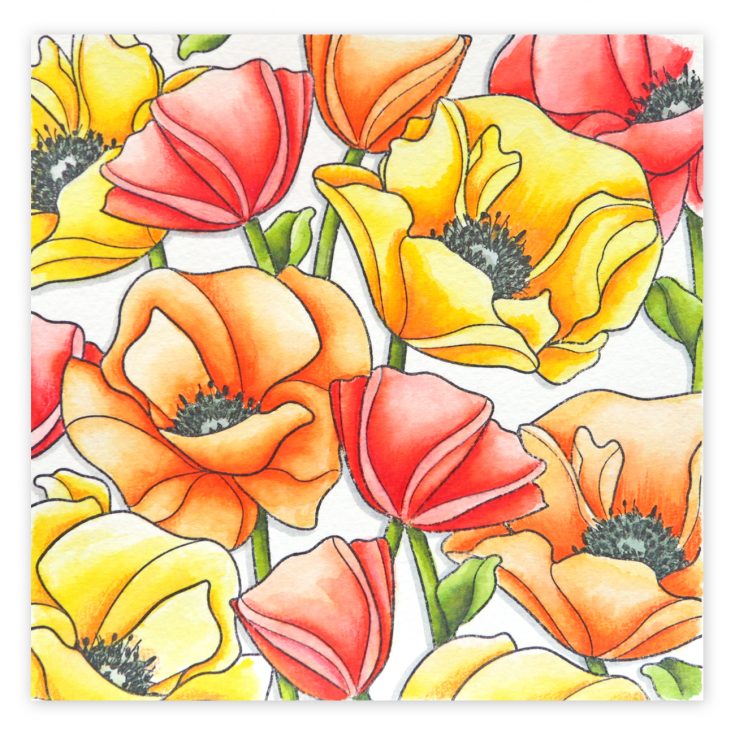
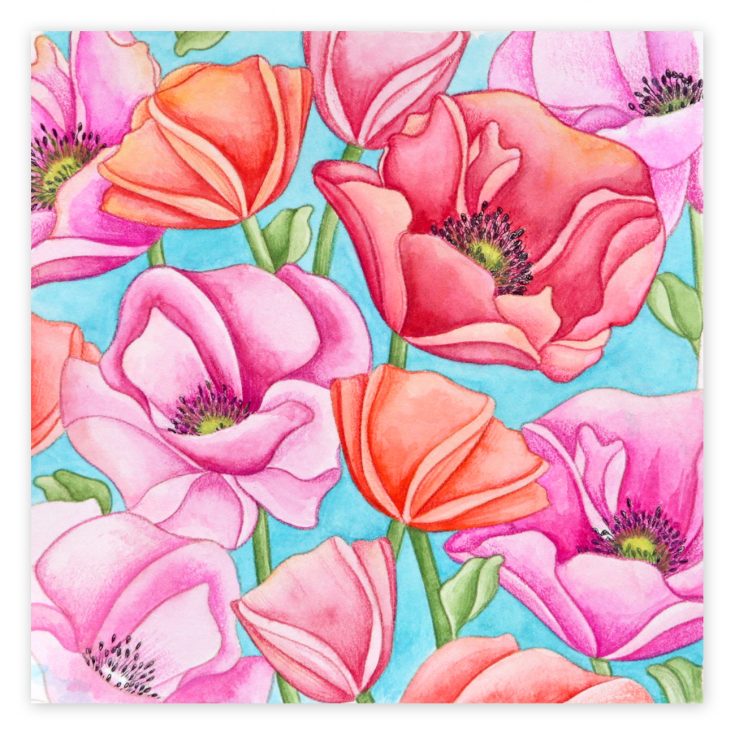
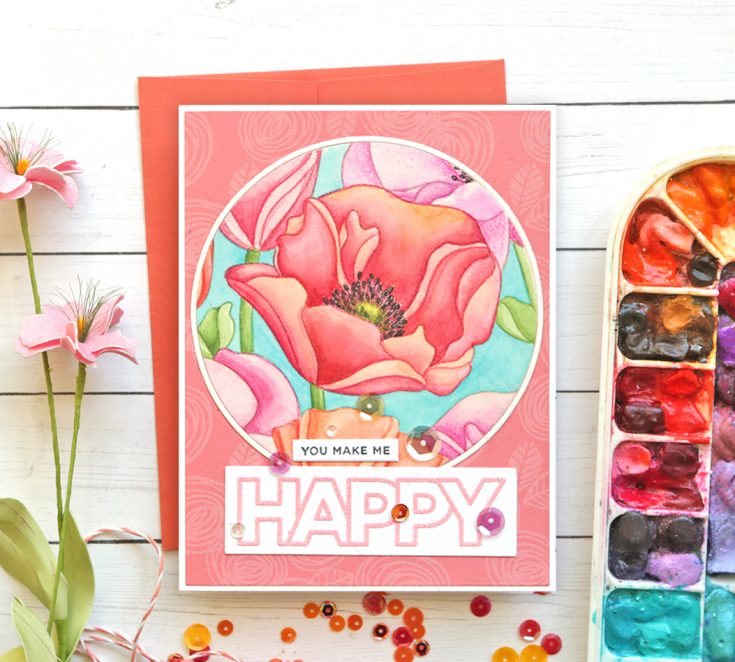
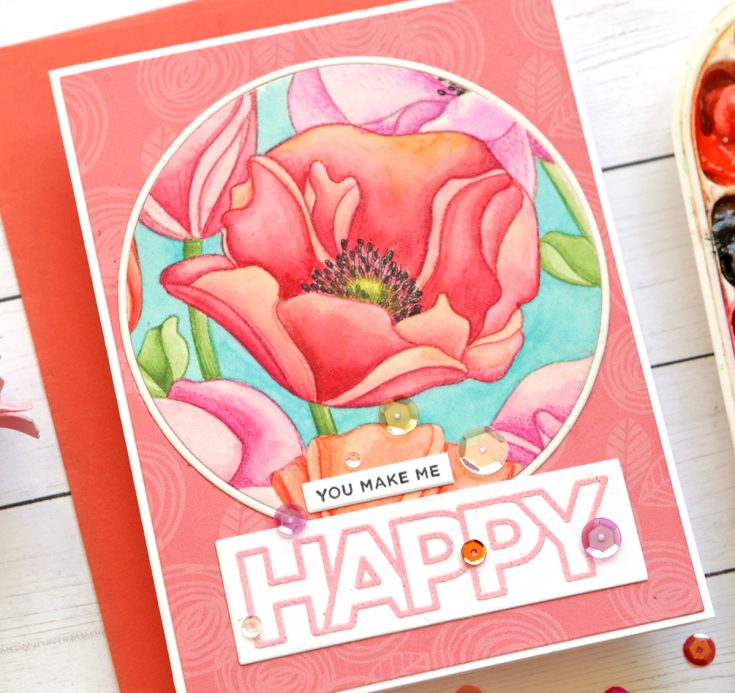
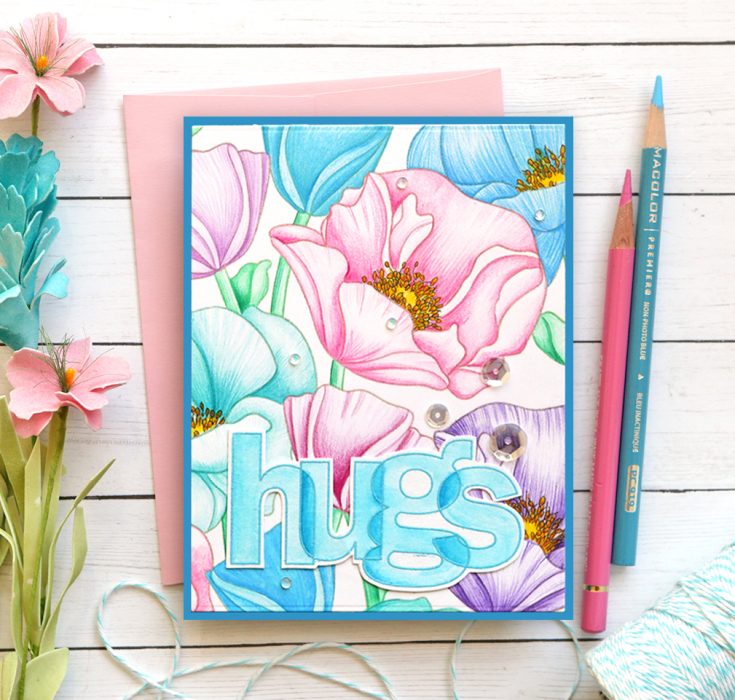
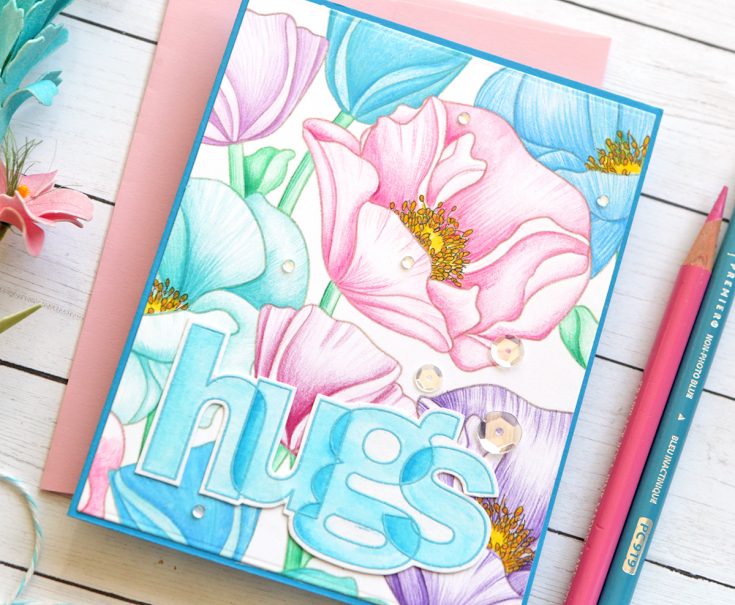
Hi friends! I love making my “one stamp, five ways” guest posts once a month for Simon Says Stamp. I think about what stamp set I want to use that will inspire others and entertain me! Today I used the new Poppies Background stamp which should be back in stock now (it sold very well and ran out for a while!). I loved these large blooms so much that I colored the full 6×6” stamp set 5 times. I’ll start by showing you those colored images first.
SUPPLIES:
|


SUPPLIES:
|

SUPPLIES:
|


SUPPLIES:
|

SUPPLIES:
|

Now I will use these five colored images to make cards. I had a lot of “waste” I had spent time coloring (since a card front is smaller than the 6×6” stamp). I made some tags out of these leftover pieces that I’ll show at the end.
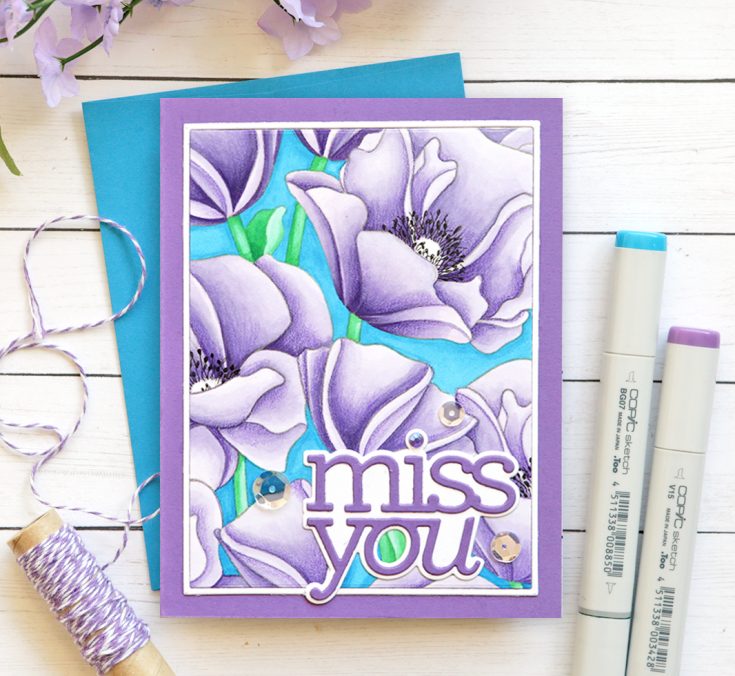
As stated above, I stamped this on Neenah white cardstock with MFT Natural Ink for a no-line coloring look. I don’t often use my Copics, so I challenged myself to color one of these with them. And if you look close, you will see that I ended up going in and adding some shading with my colored pencils. It’s an addiction I tell ya! I used a fine tip black marker for the flower centers and I forgot to color the insides of them. I die-cut the original colored image using the SSS A2 Frame Dies. I then die-cut the frame again from white cardstock. I adhered it to a purple cardstock base.
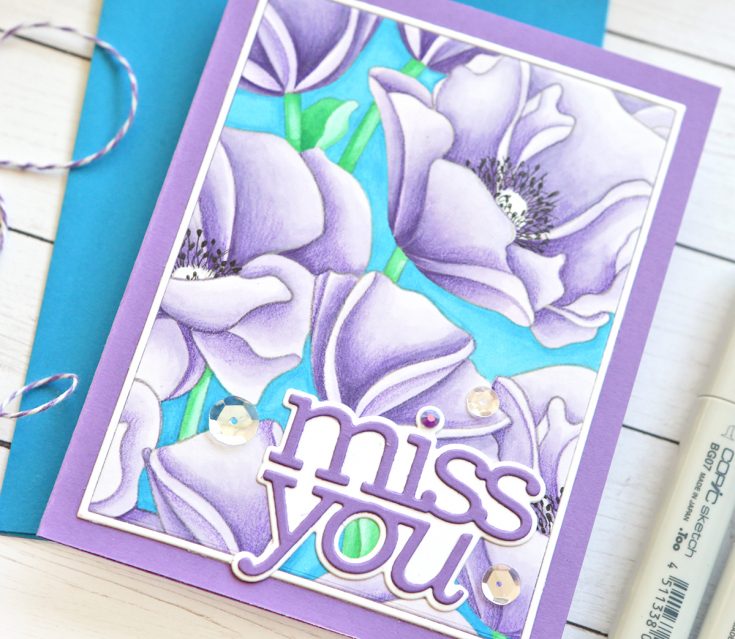
I used the SSS Miss You die by CZ (love ALL her greeting dies!). I die-cut it from white and the same purple and layered that along the bottom of the card. YES, it was hard cutting off and covering much of my colored image! I used a PPP Amethyst jewel over the I and I used some PPP Sparkling Clear Sequins around the sentiment.
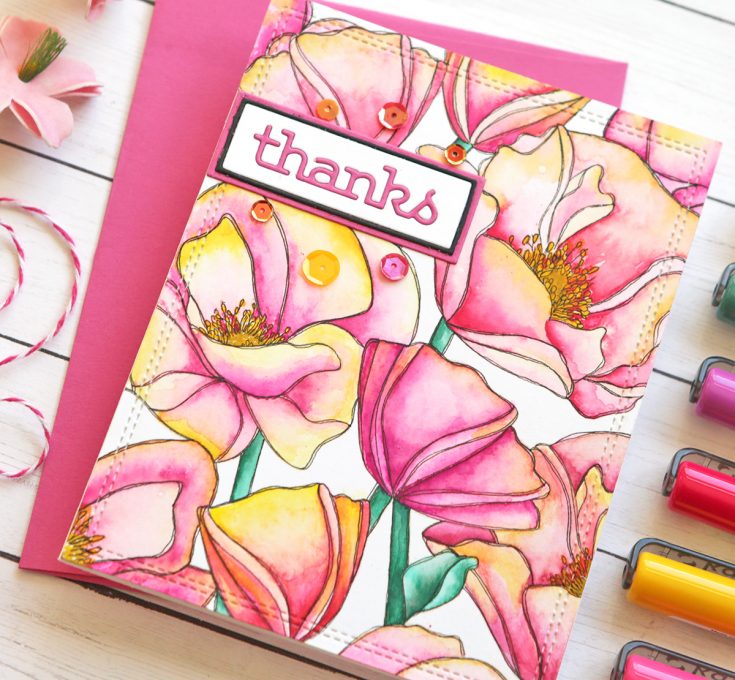
I recently bought myself a set of Karin Brushmarkers and I was excited to try them out. I tried using them on all of my watercolor papers and for me they worked best on Ranger Watercolor Paper and Watercolor Paper. I had trouble with them on my expensive Arches and Fabriano Paper as they stained the paper and the color wouldn’t move when you used them directly on the paper. I stamped the Poppies with black ink and then used the markers to color them in. I just love the intensity of the color of these markers!
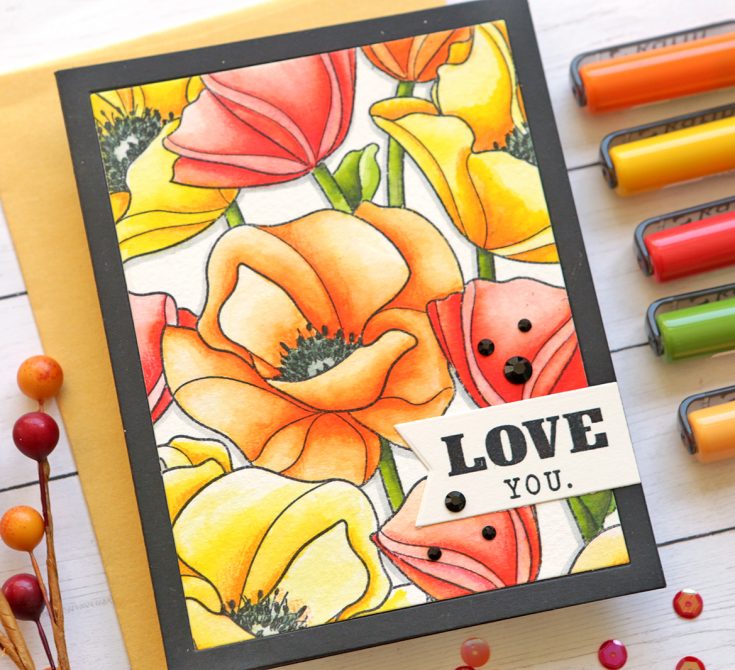
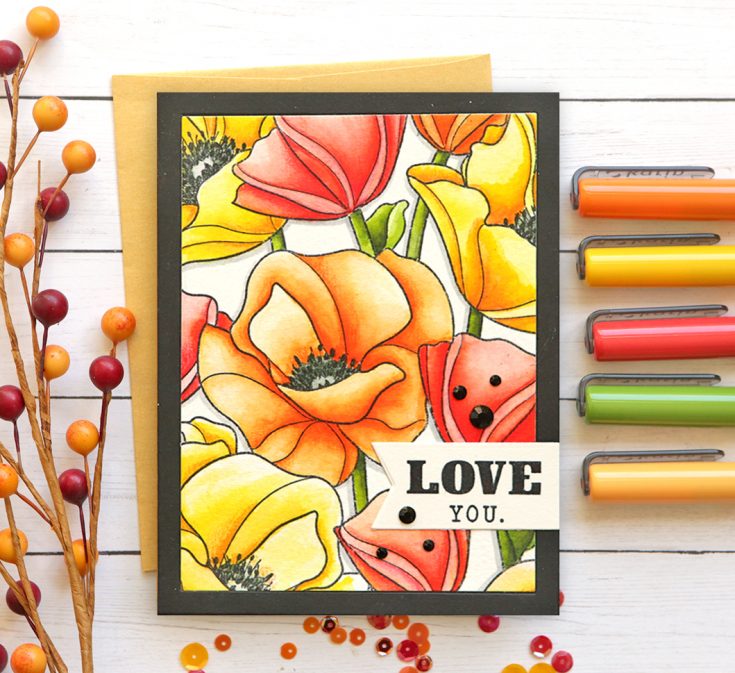
I die-cut a frame using the MFT A2 Rectangle Frame Set out of black cardstock. I attached that over the colored image. I die-cut a banner using the SSS Word Mix 2 Wafer Dies and I stamped the sentiment using two stamp sets and black ink. I added some PPP Black Jewels around the sentiment.

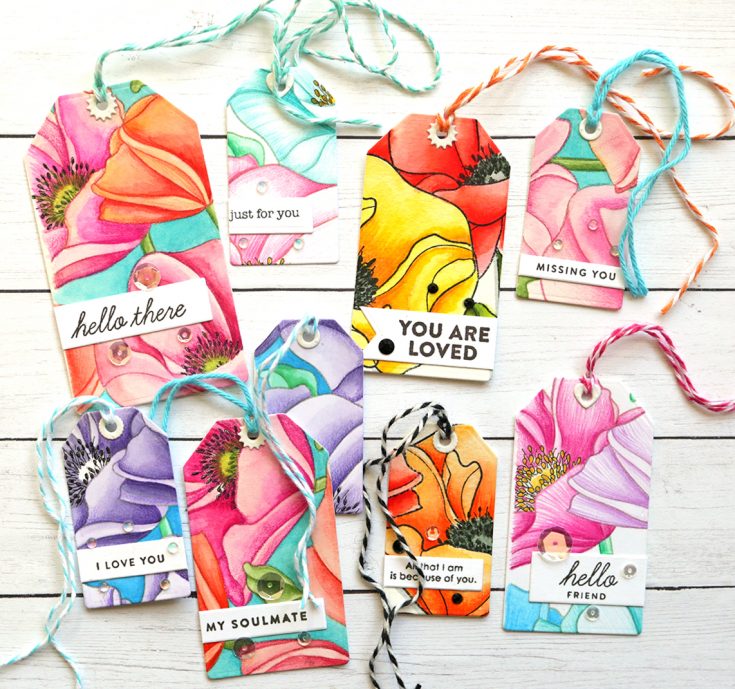
I used the CZ Nested Tag dies (3 smallest) on all of my leftover colored flowers. I tried to die-cut each card piece above from one side so I had more leftover area to use for tags. I decorated them with different stamped greetings I had from the past, but hadn’t used. I added some sequins and twine to each. They are perfect to add to a gift bag and they took very little extra work!
SUPPLIES:
|


Thanks so much to Suzy for this gorgeous inspiration and thanks for stopping by!
15% off SITEWIDE SALE!

Hi friends! This weekend only– please enjoy a special discount with code SVBG84 when shopping!
Yippee for Yana Reprise: Sea Party Birthday

Hi friends! Happy Thursday! We wanted to re-share this Summery Birthday card edition of Yippee For Yana with the fantastic Yana Smakula! Be sure to watch the video for more information, and enjoy!
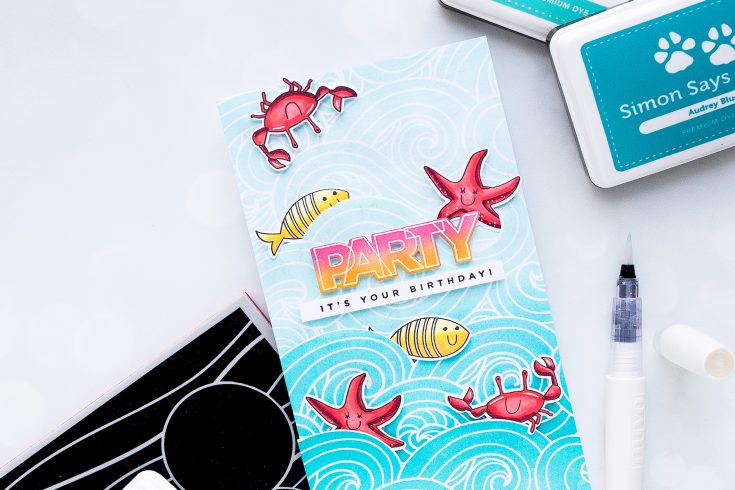
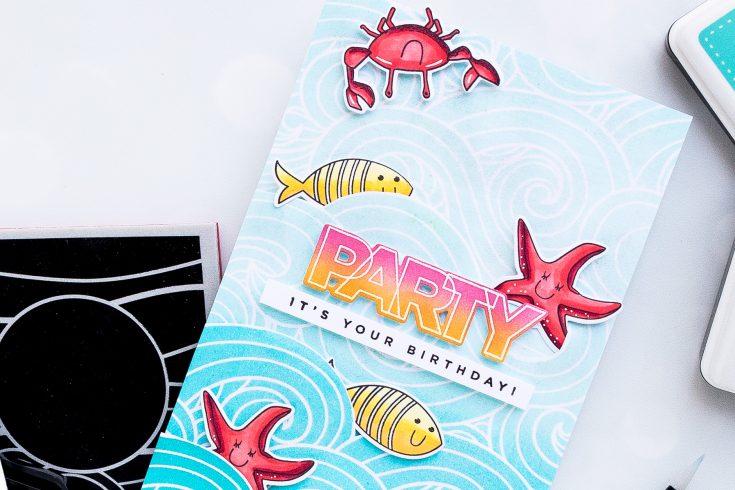
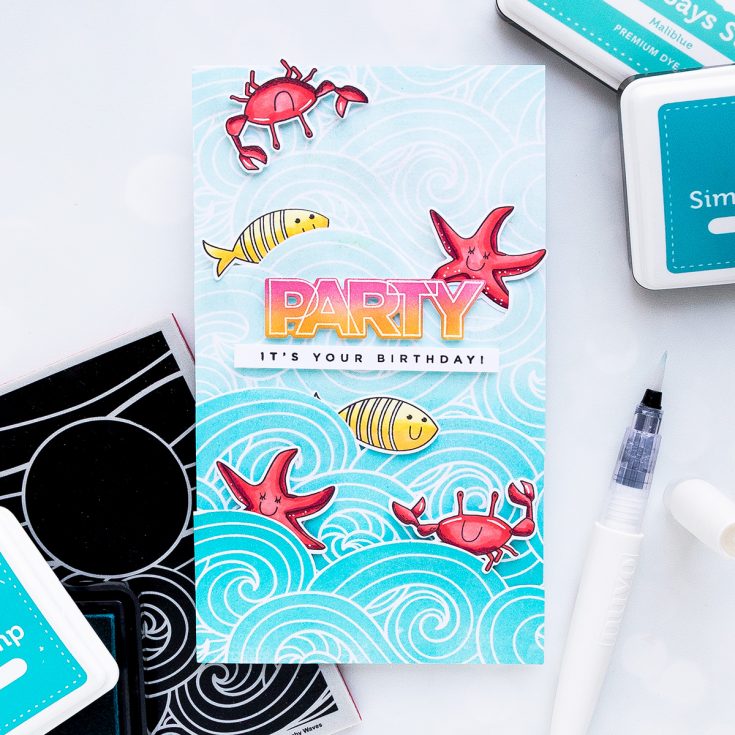
Hello friends, this is Yana and welcome back to another Yippee For Yana video! I love the Beachy Waves background stamp from Simon’s Recent release and I’ve been wanting to use it for some cards. I’m going to show you how you can use just a portion of the background and extend it cover the front of an A2 or even bigger card.
I’m using Simon’s Dye inks in delicious Summer colors – High Dive, Audrey Blue and Maliblue colors; these are just the most perfect shades of blue and are oh so so awesome for Summer stamping or ink blending. I have a serious crush on the Maliblue color – I’ve been using it a ton this Summer.
The trick here is to stamp the portion of the Beach Waves background (the waves portion) onto separate pieces of paper multiple times and piece each portion together with the others to create a continuous background for a card.
I want my background to have a gradient to it, the bottom portion of my waves is going to be darkest, and the top – lightest so I’m using multiple shades of blue when inking the stamp for each portion. Starting with High Dive and Audrey Blue for the bottom, Audrey Blue and Maliblue for the middle and Maliblue for the top.
To simplify this you can totally ink up one section with High Dive, one using Audrey Blue and one using Maliblue.
To help me piece these layers together I used scissors and cut along the wave lines. At first, I wanted to make an A2 card, but later seeing how I had a ton of background space I decide to make a taller card. I am always inspired by Kristina Werner and how she makes these super fun tall cards and I decided to give one a try. My card ended up being 4 1/4 wide by 7 3/4” tall.
Next, I stamped critters from Under The Sea Animals stamp set. I used Simon’s Intense Black ink and stamped 2 of each – crab, fish, and starfish. I used Copic markers in R39, R24, R22, Y35, Y15, and Y11 to do the simple coloring. Later, I added white pen details to crab and starfish.
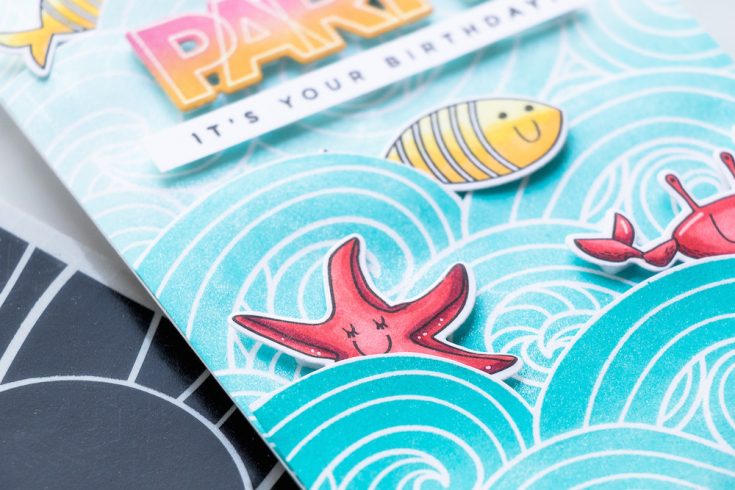
I also need a sentiment and for this, I white heat embossed “Party” from Cathy’s Birthday Palooza stamp set. I used Sunshine and Hollyhock inks from Simon for some emboss resist ink bleeding. Using coordinating dies I cut these out and arranged on my card with the help of foam adhesive. I also stamped “It’s Your Birthday” and foam mounted it under the “Party”. Lastly, I used my Tonic Studio shimmer pen and coated my entire background with this shimmer.
Have fun stamping!
WATCH THE VIDEO:
SUPPLIES:
|


Thanks so much for stopping by and thanks to Yana for being our guest!


