August 2020 Brand of the Month: Memory Box!

It’s the first day of August, and that means the reveal of our next Brand of the Month: Memory Box!

This month, we’re celebrating Memory Box with a special giveaway! With any Memory Box, Birch Press Designs or Poppy Stamps purchase, you can get this Petite Leaf Frame die set FREE with code MEMB48! Use code at checkout. :)
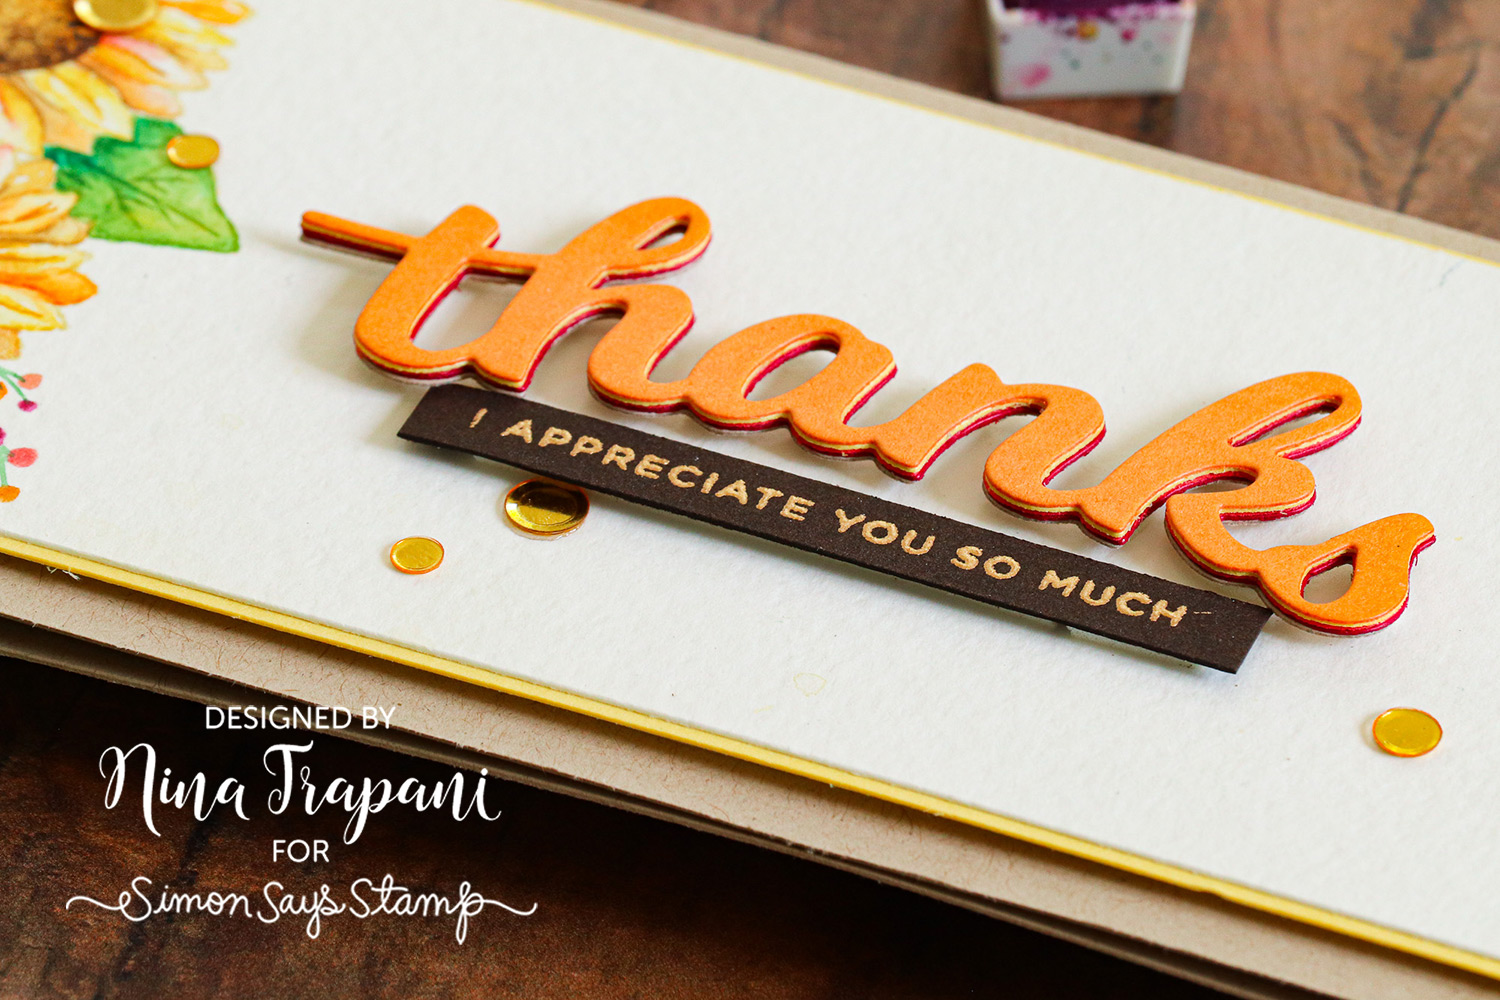
I also have some inspiration to share with you today using Memory Box products; their Sunflower Wreath stamp set and the Birch Press Designs’ Thanks Honey Script die.
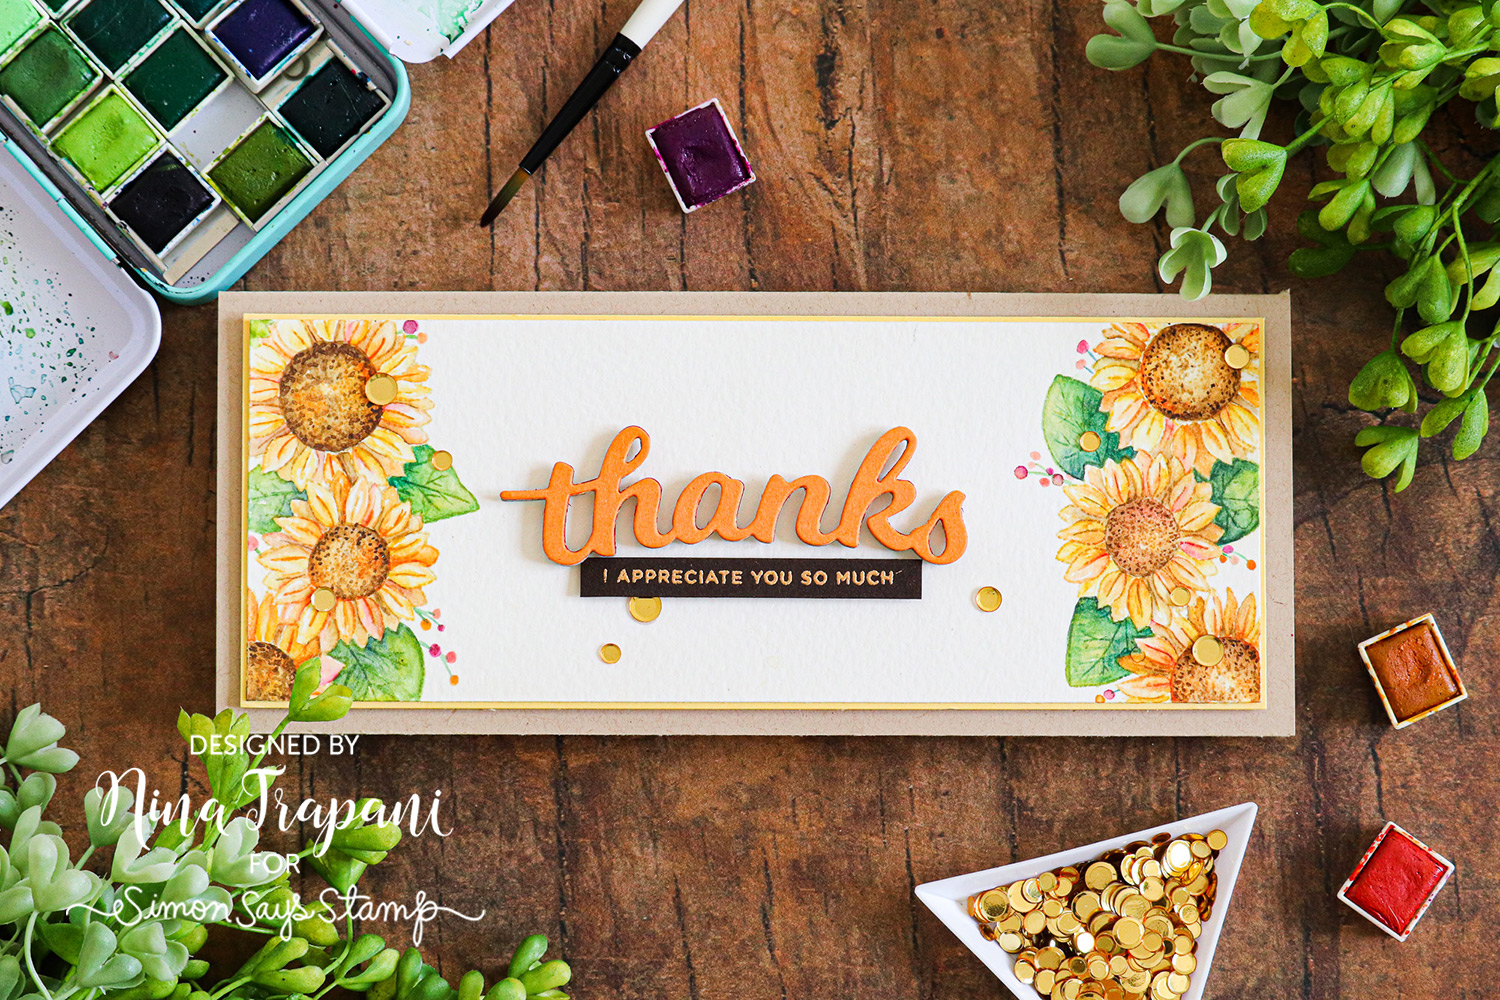
The Sunflower Wreath stamp set may be often used as the full frame of flowers, but I thought it would be fun to partially stamp the wreath on the edges of a slimline card panel. This gives a new look to a stamp set – I love the framing the edge stamping gives my sentiment.
In the video below, I also feature a fun die cutting technique using the Thanks Honey Script die. I cut it from multiple Autumn-colored cardstocks and the stacked die cuts create a complimenting greeting for this card.
Be sure to watch the video below to see how I created this Fall-inspired card!
WATCH THE VIDEO
SUPPLIES
|


Stay tuned…. August 2020 Brand of the Month!

Stay tuned! We have a BRAND NEW Brand of the Month to reveal tomorrow with lots of fun surprises included! Any guesses? :)
One Stamp Five Ways: Poppies Background
Hi friends! Happy Friday! Can you believe it’s the last day of the year?! Join me in welcoming special guest Suzy Plantamura! Read on and enjoy!
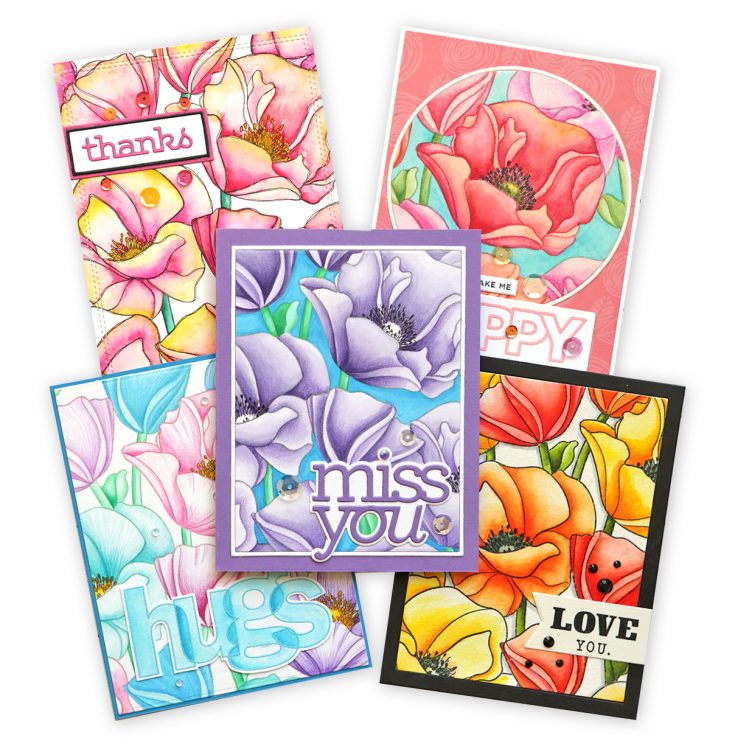
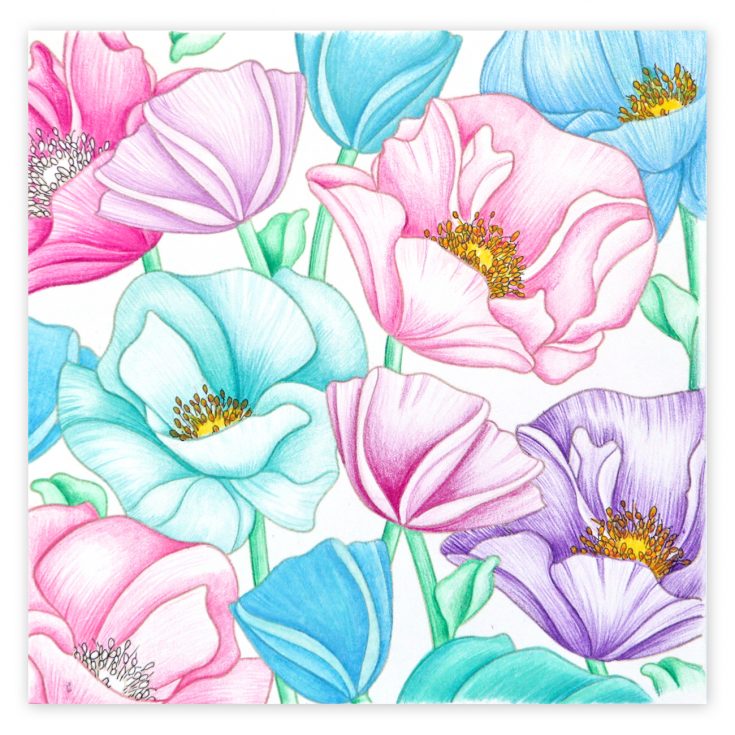
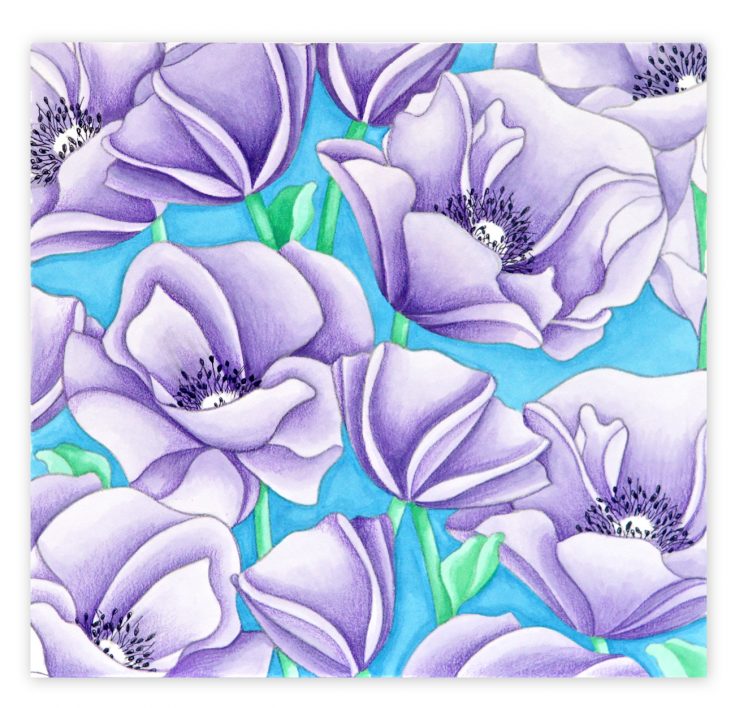
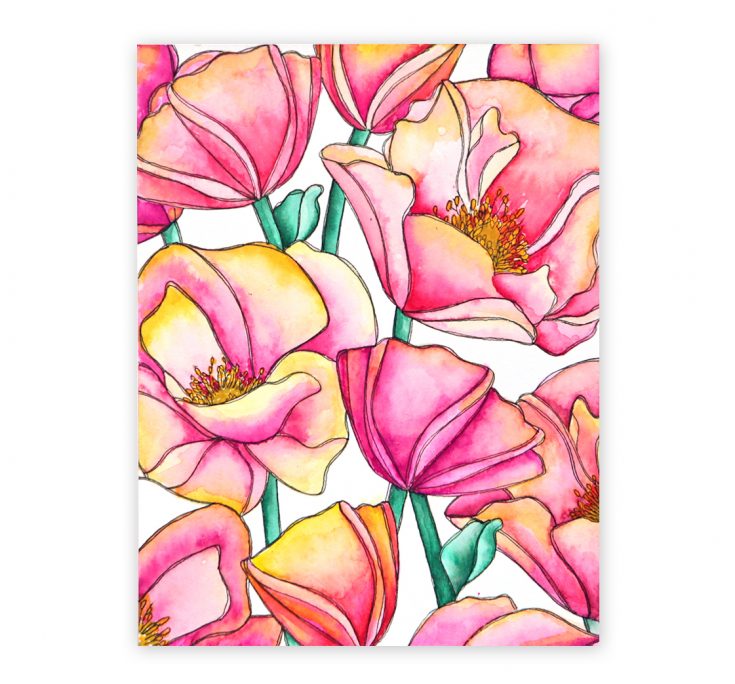
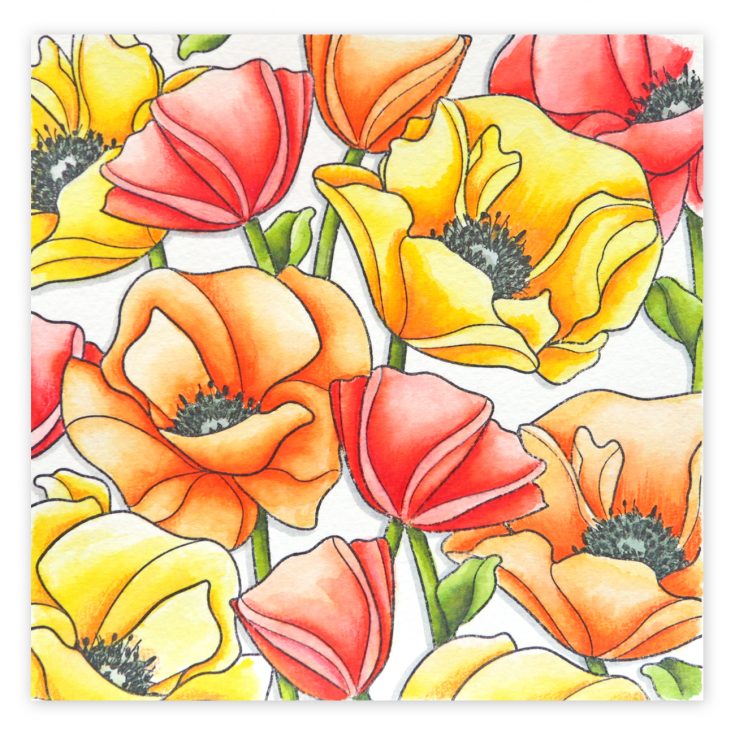
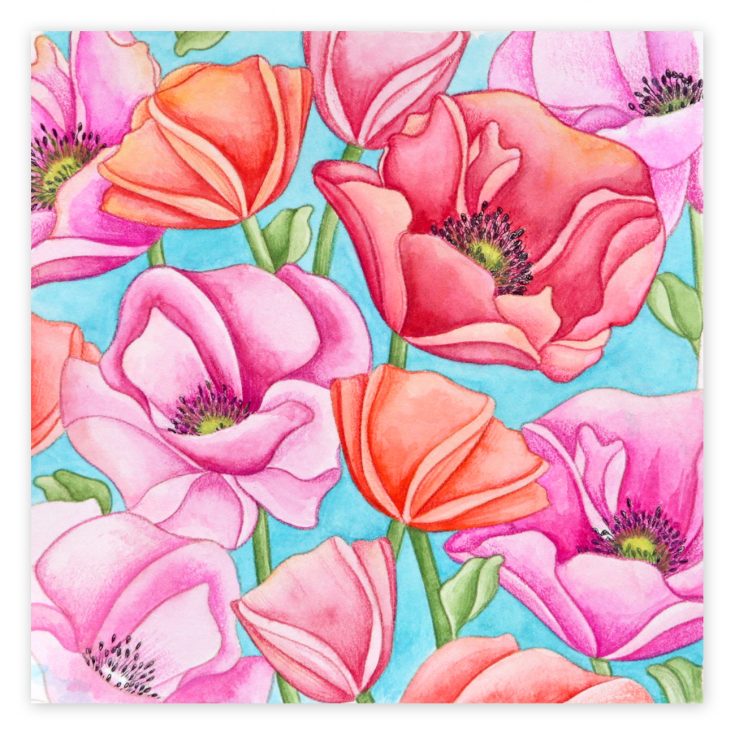
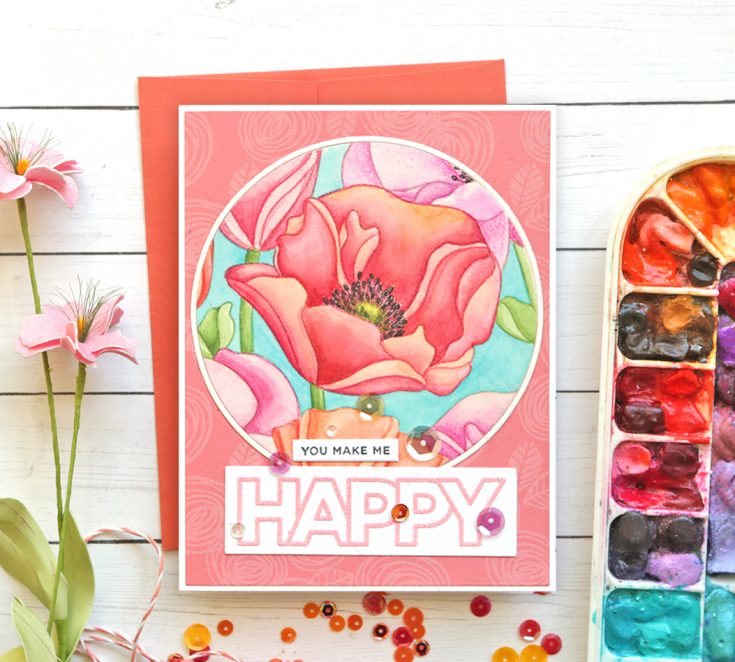
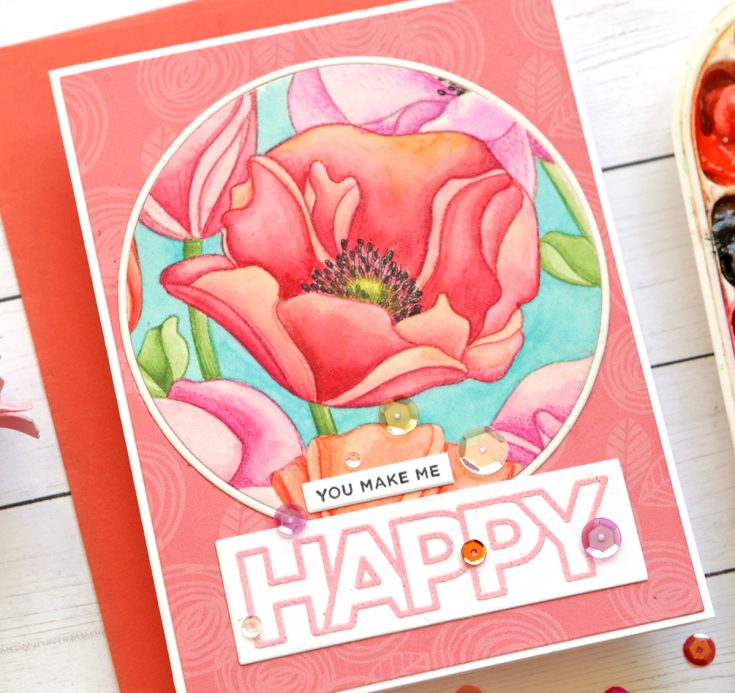
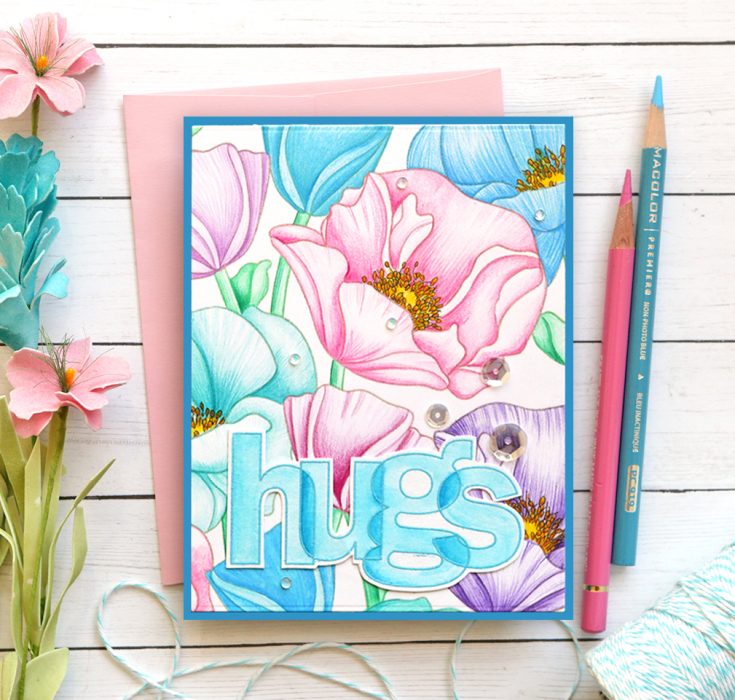
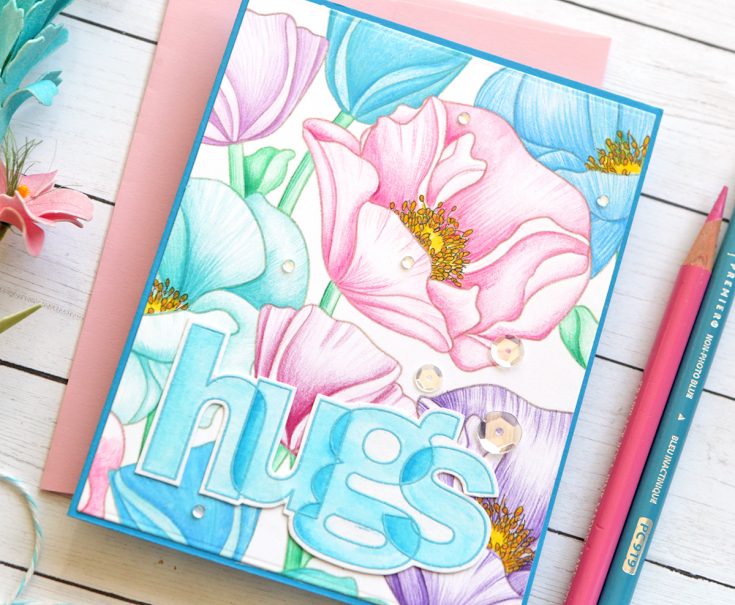
Hi friends! I love making my “one stamp, five ways” guest posts once a month for Simon Says Stamp. I think about what stamp set I want to use that will inspire others and entertain me! Today I used the new Poppies Background stamp which should be back in stock now (it sold very well and ran out for a while!). I loved these large blooms so much that I colored the full 6×6” stamp set 5 times. I’ll start by showing you those colored images first.
SUPPLIES:
|


SUPPLIES:
|

SUPPLIES:
|


SUPPLIES:
|

SUPPLIES:
|

Now I will use these five colored images to make cards. I had a lot of “waste” I had spent time coloring (since a card front is smaller than the 6×6” stamp). I made some tags out of these leftover pieces that I’ll show at the end.
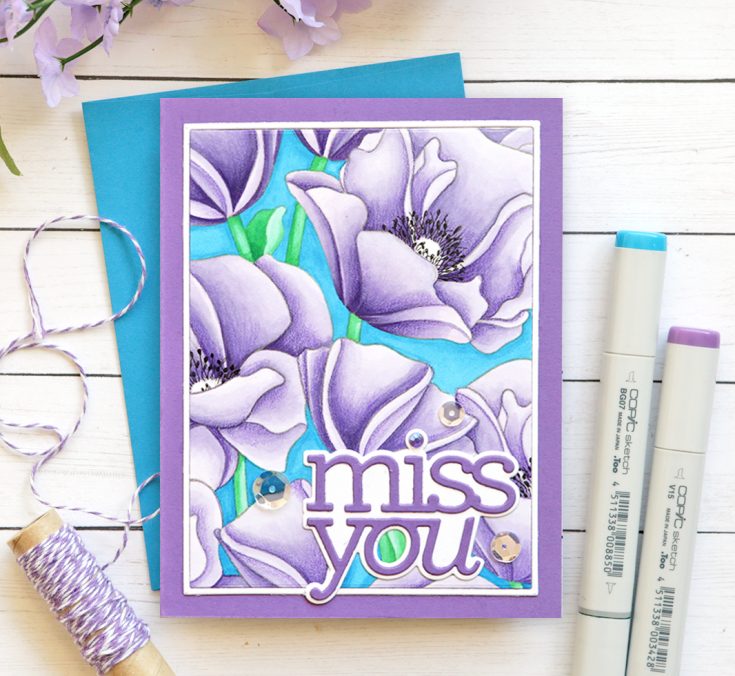
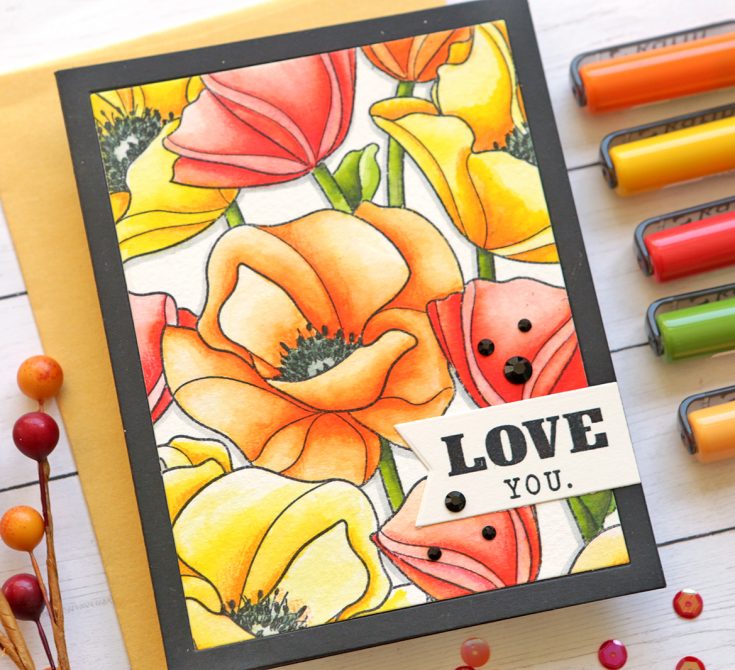
As stated above, I stamped this on Neenah white cardstock with MFT Natural Ink for a no-line coloring look. I don’t often use my Copics, so I challenged myself to color one of these with them. And if you look close, you will see that I ended up going in and adding some shading with my colored pencils. It’s an addiction I tell ya! I used a fine tip black marker for the flower centers and I forgot to color the insides of them. I die-cut the original colored image using the SSS A2 Frame Dies. I then die-cut the frame again from white cardstock. I adhered it to a purple cardstock base.
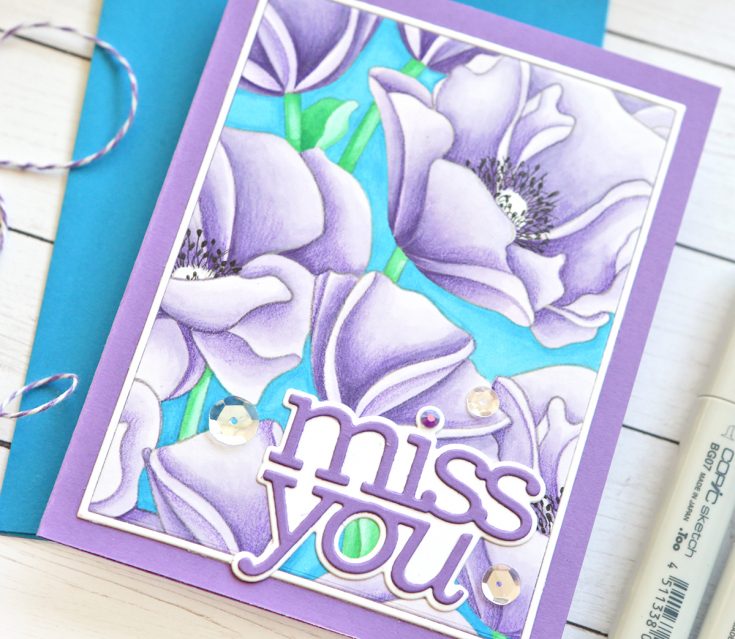
I used the SSS Miss You die by CZ (love ALL her greeting dies!). I die-cut it from white and the same purple and layered that along the bottom of the card. YES, it was hard cutting off and covering much of my colored image! I used a PPP Amethyst jewel over the I and I used some PPP Sparkling Clear Sequins around the sentiment.
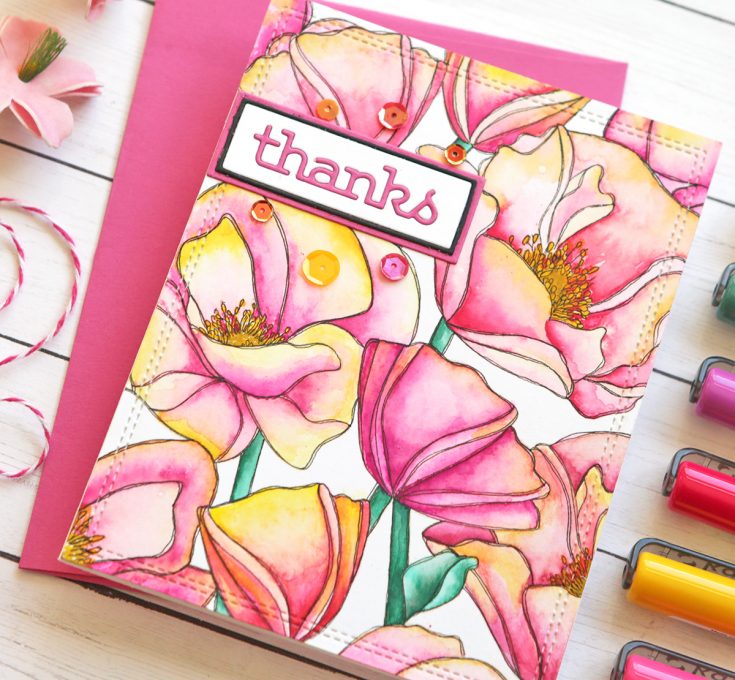
I recently bought myself a set of Karin Brushmarkers and I was excited to try them out. I tried using them on all of my watercolor papers and for me they worked best on Ranger Watercolor Paper and Watercolor Paper. I had trouble with them on my expensive Arches and Fabriano Paper as they stained the paper and the color wouldn’t move when you used them directly on the paper. I stamped the Poppies with black ink and then used the markers to color them in. I just love the intensity of the color of these markers!
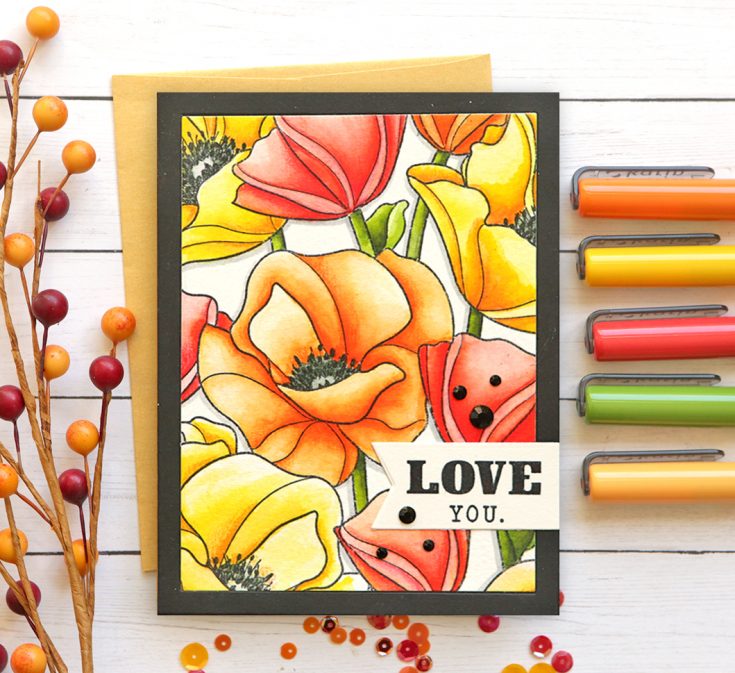
I die-cut a frame using the MFT A2 Rectangle Frame Set out of black cardstock. I attached that over the colored image. I die-cut a banner using the SSS Word Mix 2 Wafer Dies and I stamped the sentiment using two stamp sets and black ink. I added some PPP Black Jewels around the sentiment.

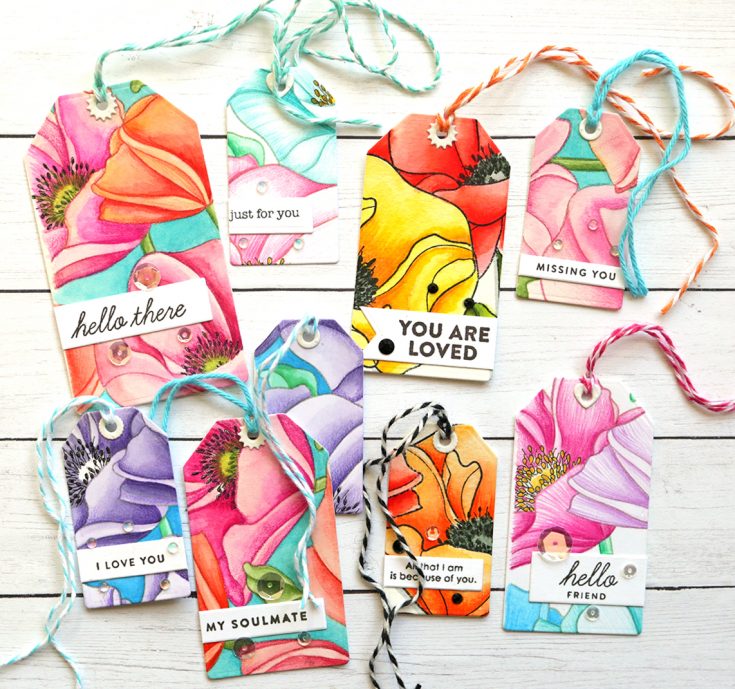
I used the CZ Nested Tag dies (3 smallest) on all of my leftover colored flowers. I tried to die-cut each card piece above from one side so I had more leftover area to use for tags. I decorated them with different stamped greetings I had from the past, but hadn’t used. I added some sequins and twine to each. They are perfect to add to a gift bag and they took very little extra work!
SUPPLIES:
|


Thanks so much to Suzy for this gorgeous inspiration and thanks for stopping by!


