Easy Watercolor Background for Outline Stamps with Kristina Werner
Hello, all! Kristina here. Today I have a quick and easy card for you using outline stamps! Often times we assume we’ll need to color in outline stamps, but there are other ways to use them, too! Sometimes creating a colorful background for the stamps is all they need!
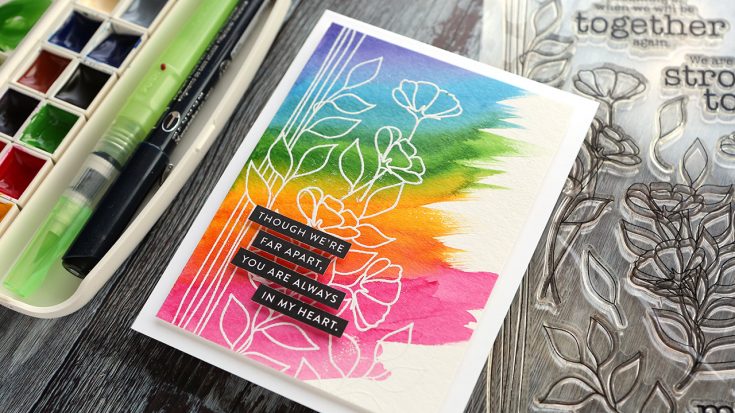
I started out by painting a simple, organic rainbow background with sweeping brush strokes in a diagonal pattern. I used Canson XL Watercolor Paper and the Kuretake Zig Gansai Tambi travel watercolor set.
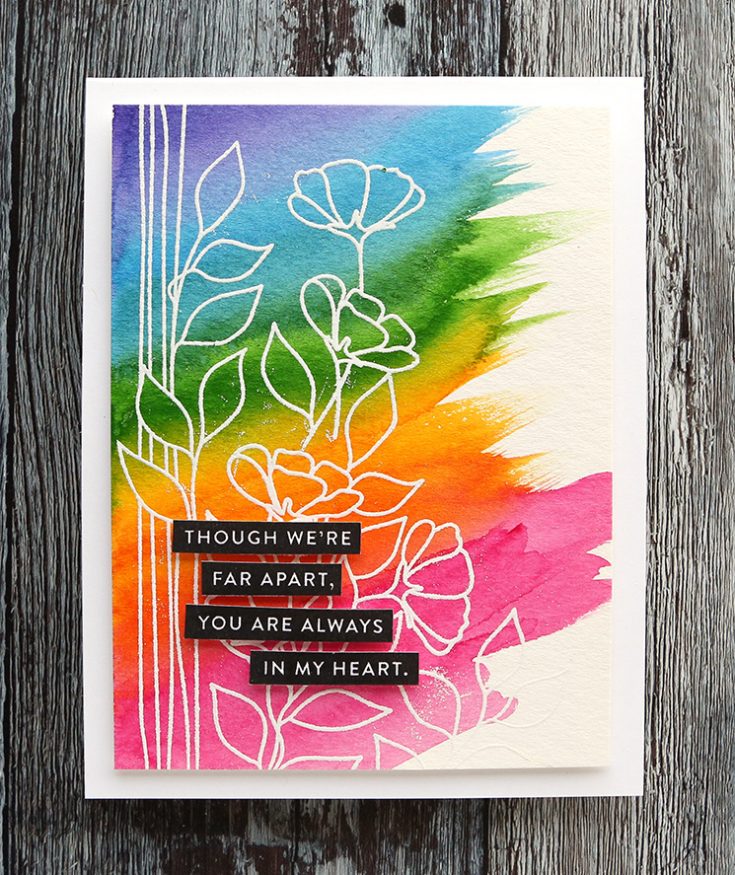
After the watercolor background was dry, I stamped the outline flowers and stems from the Stronger Together stamp set in clear embossing ink. I applied white embossing powder to the stamped images and heat set it until melted.
The last thing to do was to add a greeting. I stamped one of the greetings from the stamp set in black ink on white cardstock and trimmed out the blocked words. The words were adhered to the card using foam tape.
Super easy! Thanks for stopping by today! Simple watercolor backgrounds like this are great with all sorts of colors, too. Give it a try! :)
Supplies
|


Art Journaling: Layers of White
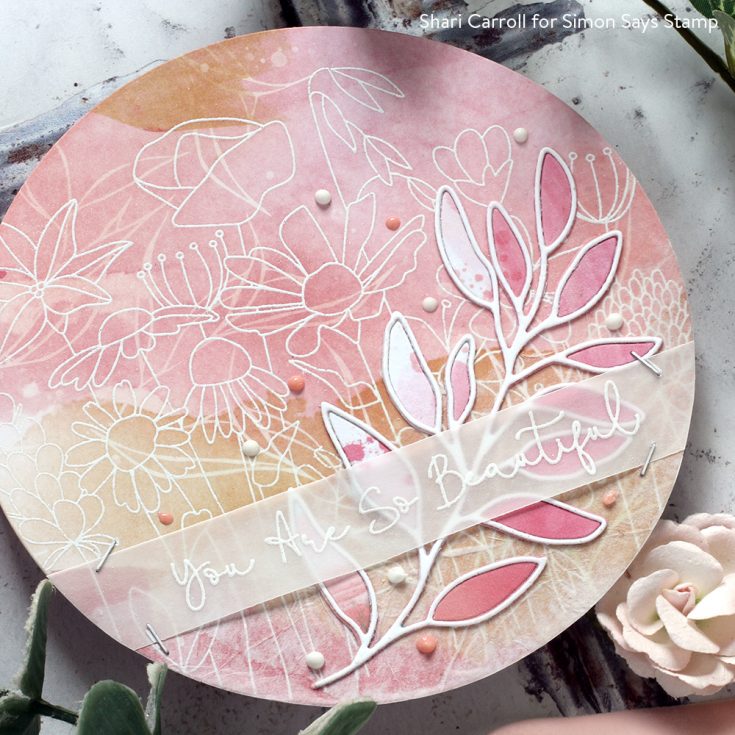
Welcome, everyone!!! It’s Shari here with another Art Journal page for you!
I was very inspired by the colors of this paper to do some layering with white stamping, a die-cut, and tissue paper. If you know me, it’s not often that I use pink, but this paper is GORGEOUS!
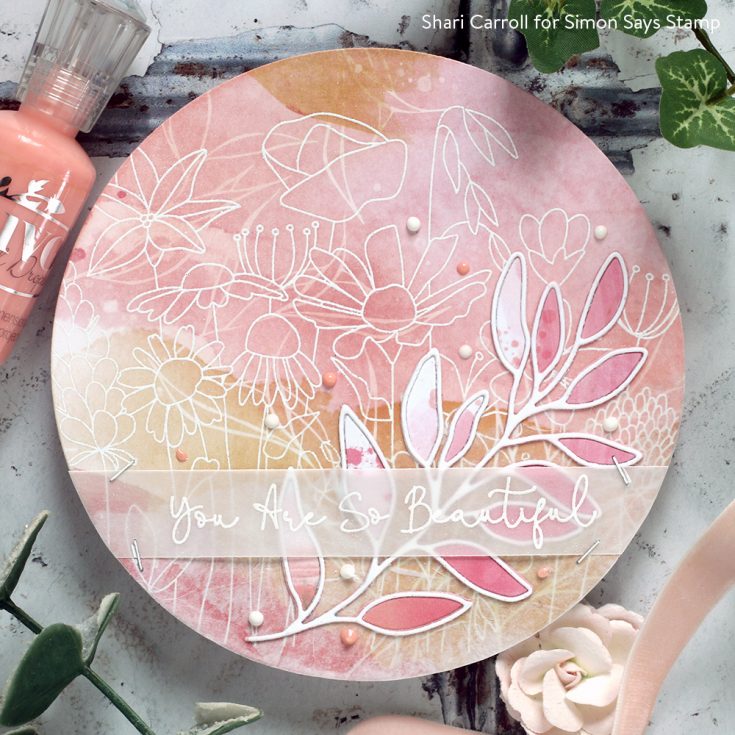
To start out I chose a sheet that had a white leaf print and die cut it 5.5″ x5.5″ using the Simon Says Stamp Nested Circle dies. Next, I white embossed the So Beautiful cling stamp on top. I blended in a few shades of Distress Ink to tone down the leaves and help the embossed flowers to pop out.
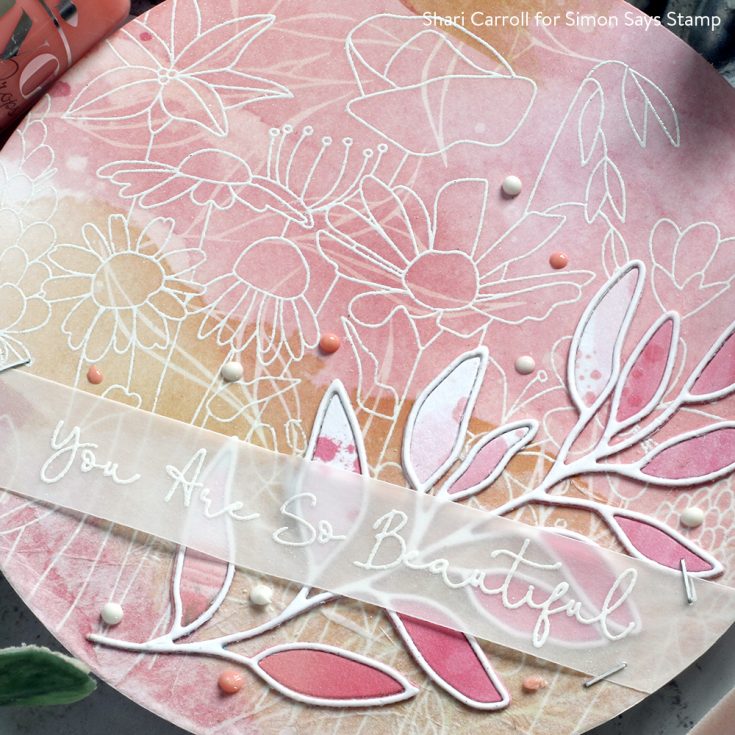
I did a little layering with white tissue paper to fade out the stamping and added a die-cut of the Leafy Branch (including the centers) from pattern paper. I added a second leafy branch (just the outline) cut from white cardstock. To finish I white embossed “You Are So Beautiful” onto a strip of vellum and used the Tim Holtz Tiny Attacher to hold it in place.
Thanks for stopping by today, I hope I’ve inspired you to pull out some pattern papers and create some layers in white. Enjoy!!
SUPPLIES:
|


Studio Monday with Nina-Marie: August 2020 Card Kit Inspiration!

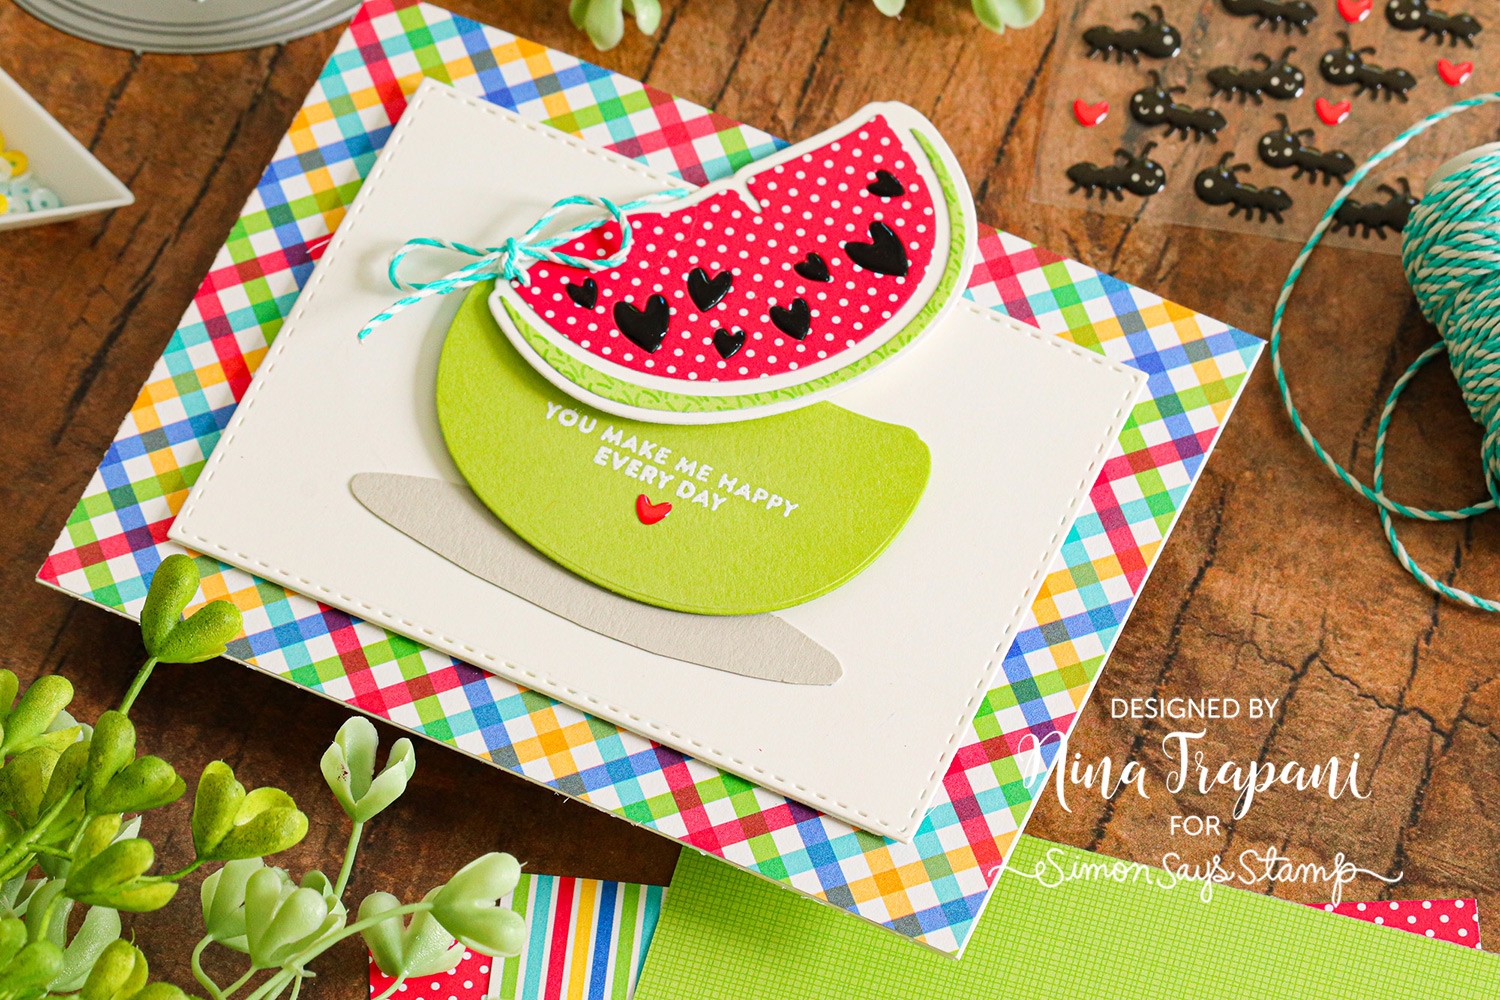
Hello friends, it’s Nina-Marie Trapani here with you today sharing an interactive card I’ve created with our August 2020 Card Kit, Picnic Parade!
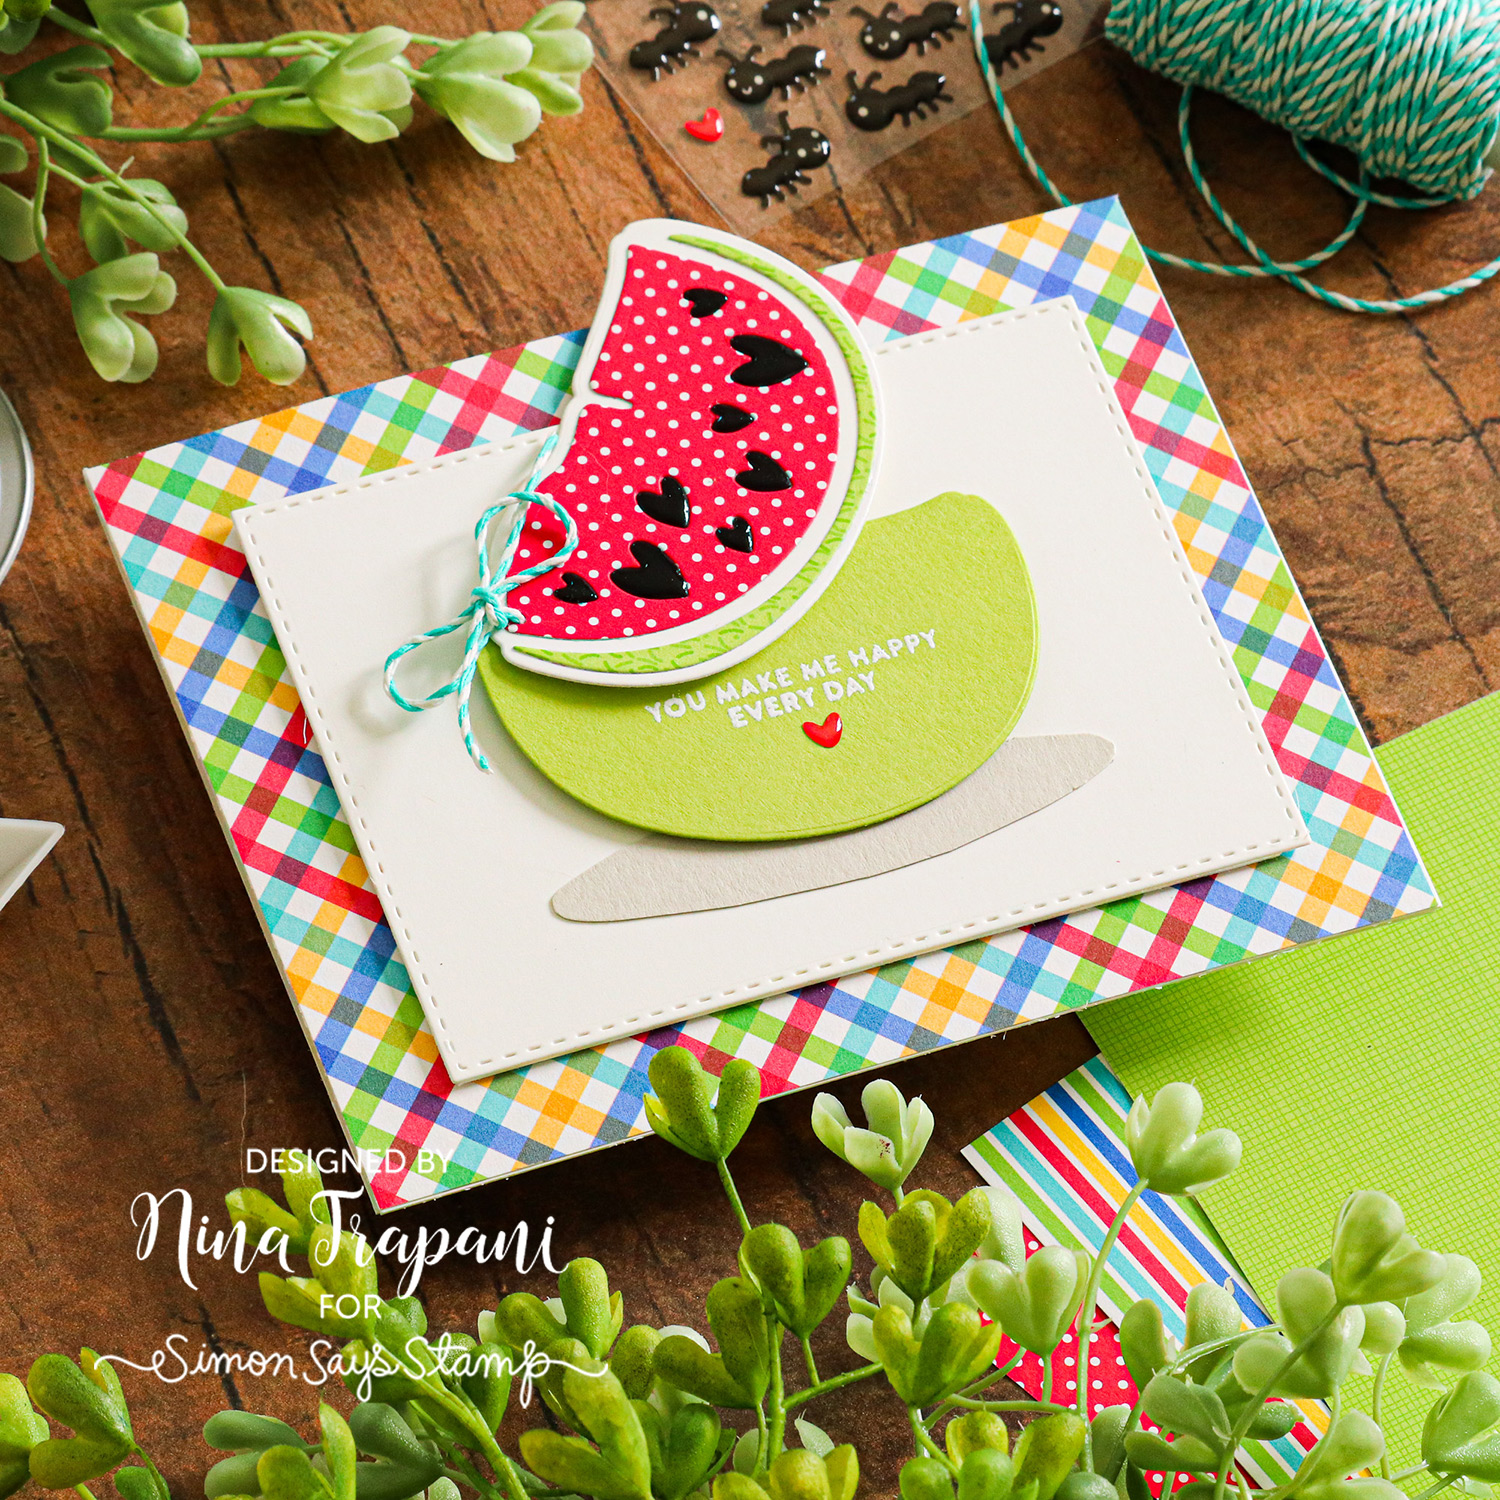
This fun card design doesn’t require any special tools or products! Simply cut any die from the pattern paper in the kit and tie the two together with a bit of string or twine. I’ll show you exactly how I did this in the video below.
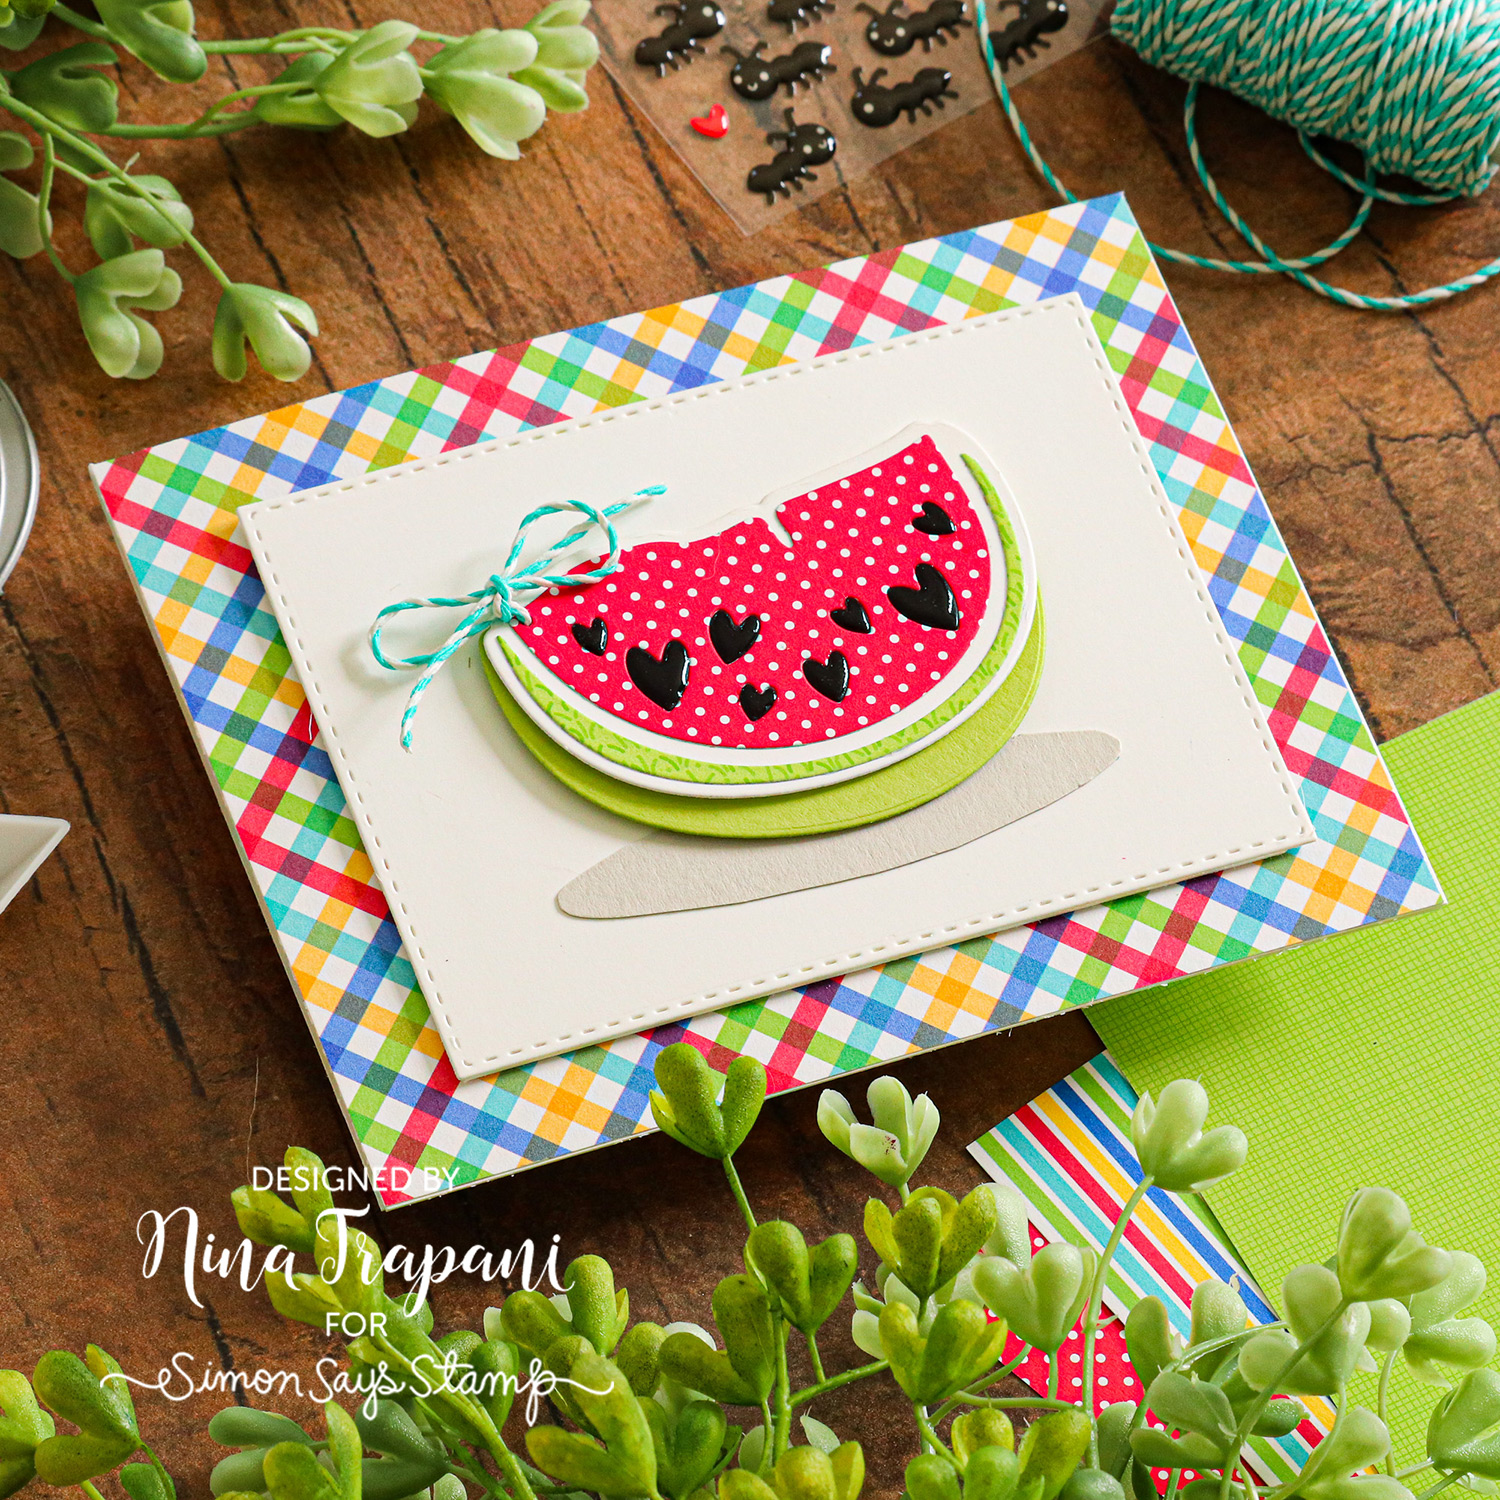
The die cut I used was our Simon exclusive Watermelon die (sold separately from the kit). The Bar-B-Cute papers included in the Picnic Parade kit worked perfectly for “coloring” the die cut. I stamped a greeting from the Hello Sunshine stamp set (also included in the kit) inside the interactive, pivoting watermelon.
Be sure to watch the video to see exactly how I made this cute, pivot reveal card!
WATCH THE VIDEO
SUPPLIES
|


