EZ with CZ: Simple Inlaid Gift Tag
Hi friends! Happy Sunday! We’re approaching the gift giving season! The always fun and inspiring Cathy Zielske is showing us how to make this DARLING tag in the latest edition of our EZ with CZ blog series!
The star of the show is that super cute Chunky Merry die set and Nested Tag die set! Add a special message on the back with our new Let’s Make a Tag stamp set! Be sure to watch the video and enjoy!
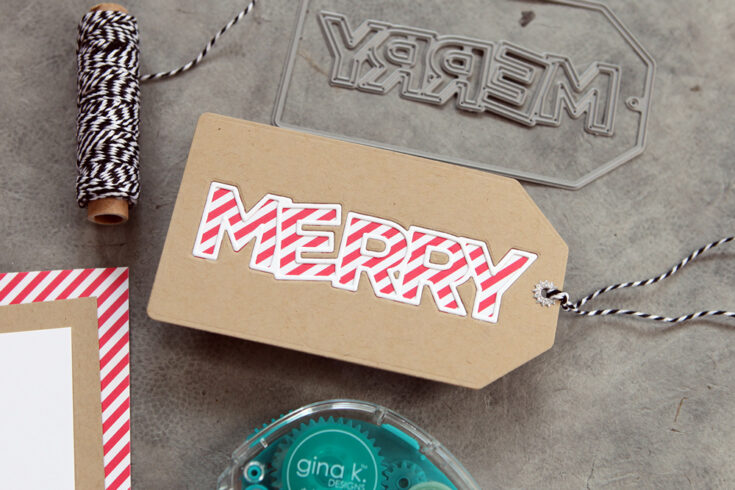
Hey everyone, Cathy Z. here with a simple little holiday tag project for you! All you need is a tag and a word die and you can created a fun inlaid look using your favorite holiday paper.
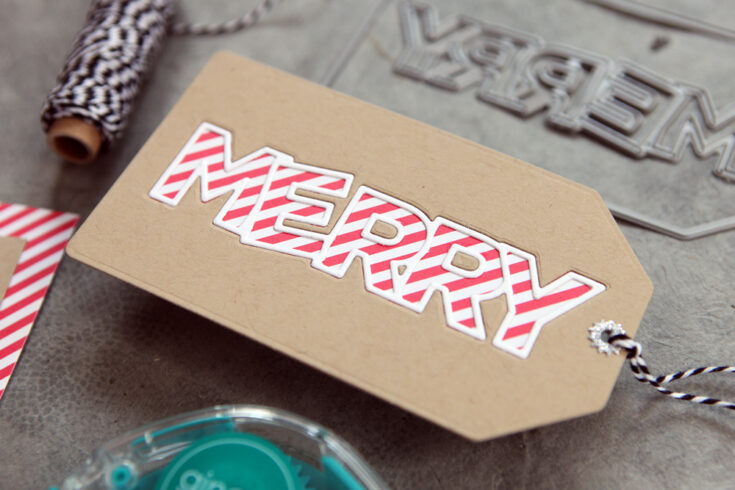
I love making holiday gift tags as much as I love making cards, so this is a fun way to stretch your supplies into the packaging realm. Here’s a video showing you how to create an inlaid die cut tag:
WATCH THE VIDEO:
Thanks so much for stopping by today and give this tag technique a try! If you do, tag me on social media with #sssezwithcz so I can see what you are creating!
SUPPLIES:
|


Thanks so much for stopping by, and thanks to CZ for being our guest! : )
How about a BONUS $10 Gift Card?!
Hi friends! Happy Sunday! For a limited time please enjoy a FREE $10 Bonus Gift Card with any Gift Card purchase of $75 or more! It’s a great way to purchase a gift and get a little treat for yourself too!

Yippee for Yana: Christmas Foiling Made Easy!
Hi friends! Happy Saturday! Please join me in welcoming back the super inspiring Yana Smakula back for another edition of our Yippee for Yana bi-monthly blog series! Read on, don’t miss the video, and enjoy!

Hi everyone, this is Yana Smakula, welcome back for another Yippee For Yana video! In this video, I wanted to show you a handmade Christmas card that combines hot foiling with stamping. There are many tricks to foiling, little nuances, and I attempted to cover as many of them as possible in today’s video.
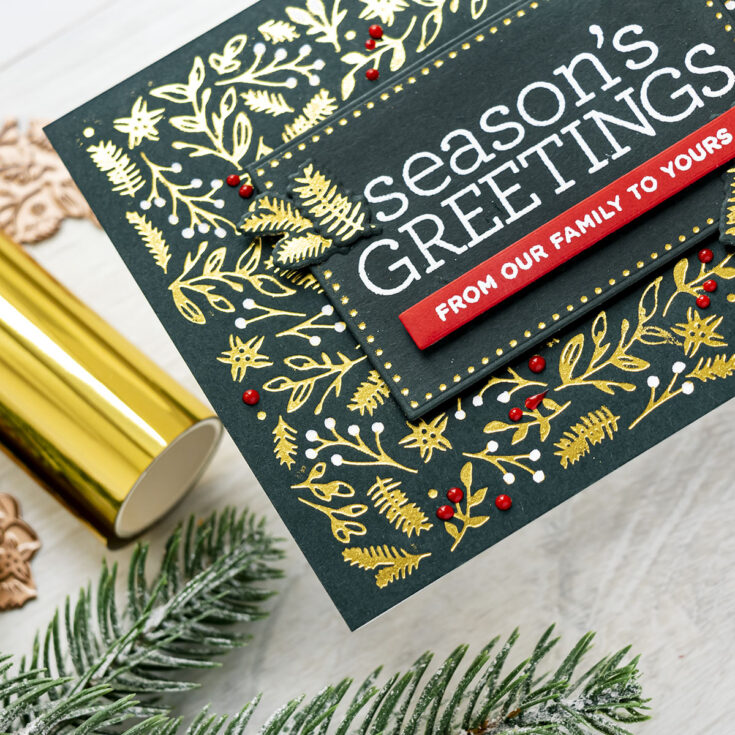
I’ve picked the Christmas Foliage glimmer plate from Spellbinders to create this card, it is from my Christmas Glimmer 2020 collection. It is a half plate and designed to be foiled twice to create an A2 card background. You foil it once, then you flip it and foil it once more to cover the entire card front. Be sure to watch my video for the how-to. It is an easy to use glimmer plate and, provided you use the right type of cardstock, you’ll get perfect foiled results in no-time!
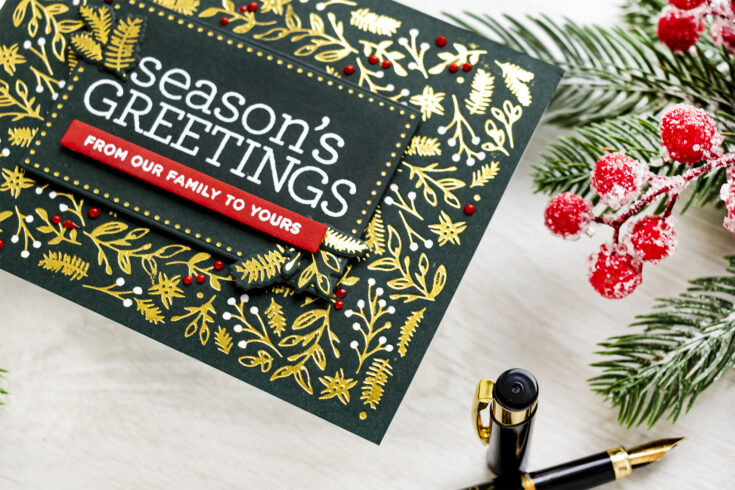
Follow these instructions step-by-step to re-create this card:
- Foil Christmas Foliage background glimmer plate twice in gold foil on Simon Says Stamp Midnight-Green cardstock. Use the “hinge method” as described HERE for precise placement when foiling.
- Adhere foiled background to A2 white top folding card base
- Foil a dotted frame using Spellbinders Essential Glimmer Rectangle glimmer plate on the same cardstock using the same foil. Cut out using a rectangle die.
- Heat emboss a sentiment from the Good Cheer stamp set in white embossing powder. Heat emboss sub sentiment in white embossing powder on red cardstock, cut out. Foam mount both onto the card.
- Foil additional foliage pieces using the Christmas Foliage Circle Border plate. Adhere to card.
- “Color” the background by adding red berries using Nuvo Drops in Red Berry and white dots using Sakura White #10 pen.
- Let dry and enjoy!
Have fun stamping!
WATCH THE VIDEO:
SUPPLIES:
|


Thanks so much for stopping by, and thanks to Yana for being our guest!


