Crafty with Caly: Watercoloring on 3D Embossing Folder Peony Bundle
Hi friends! Happy Wednesday, and welcome to the latest edition of Crafty with Caly with the awesome and talented Caly Person! Read on and be sure to watch the video to learn more about this beautiful card below! Enjoy!
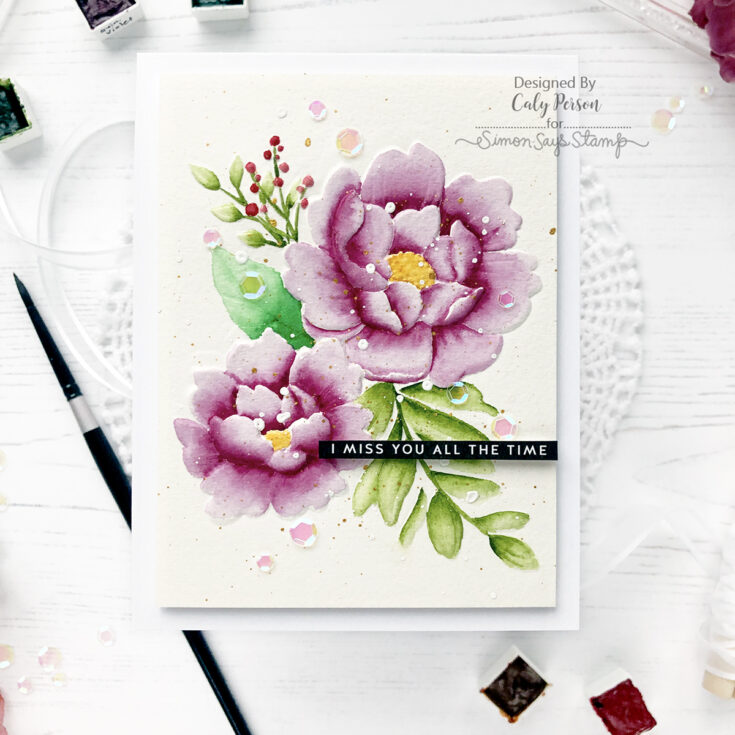
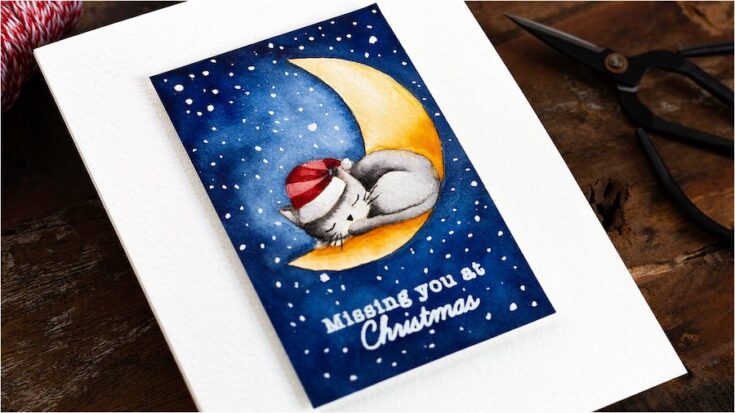
Hi Friends! Do you like embossing folders? I’ll be honest – I get intimidated by them. I don’t know what to do with them to make them “me.” The new 3D embossing folders from the Simon Says Stamp Holly Jolly release are GORGEOUS and I made a point to use them for a project to share with you today.
I’m using Daniel Smith watercolors to watercolor my 3D image from the Peony Bundle embossing folder. After embossing a watercolor panel, I watercolored over the embossed image and painted on colors to give them depth. Be sure to check out the video to see the process!
WATCH THE VIDEO:
The embossed image naturally draws pigment into the crevices where darker shades should be so I felt like that was super helpful! However, I do need to say that I noticed the water moved differently over watercolor cardstock that has been pressed in an embossing folder.
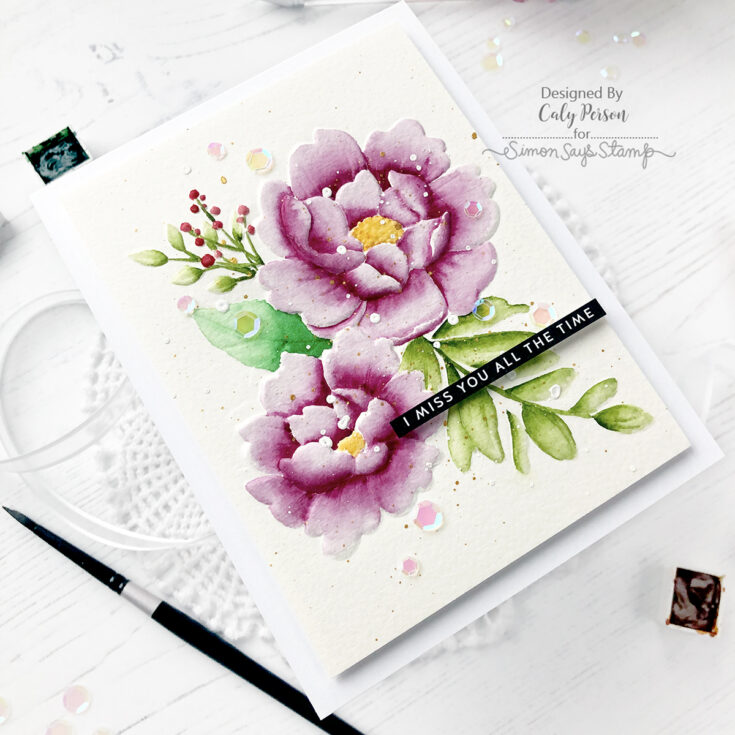
When I was done watercoloring, I trimmed and splattered my panel with gold and white paint. Gives it more texture and interest. Since it dries quickly, I set it aside while I trimmed a sentiment from the Thinking of You Sentiment Strips.
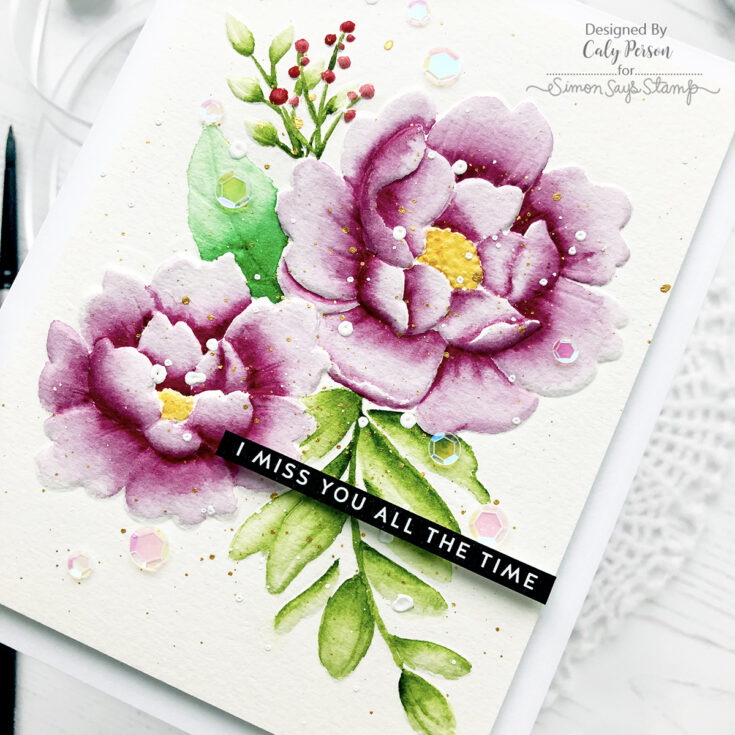
To finish my card, I added some iridescent sequins and mounted my card over a card base using layer of craft foam for dimension. I hope you enjoyed this project! Thanks so much for stopping by today! ~Caly
SUPPLIES:
|


Thank you SO much for stopping by, and a big thanks to Caly for being our guest!!
Doodling with Debby: From Sketch To Finished Card
Hi friends! Please join me in welcoming back the always inspiring Debby Hughes in the latest edition of our monthly blog series of Doodling with Debby! Be sure to watch the video and enjoy!

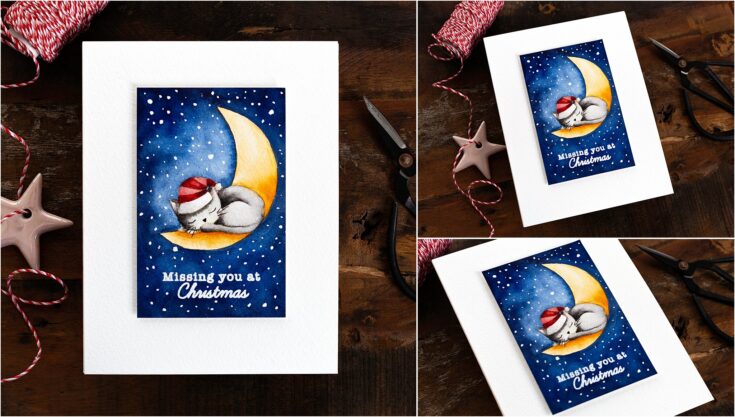
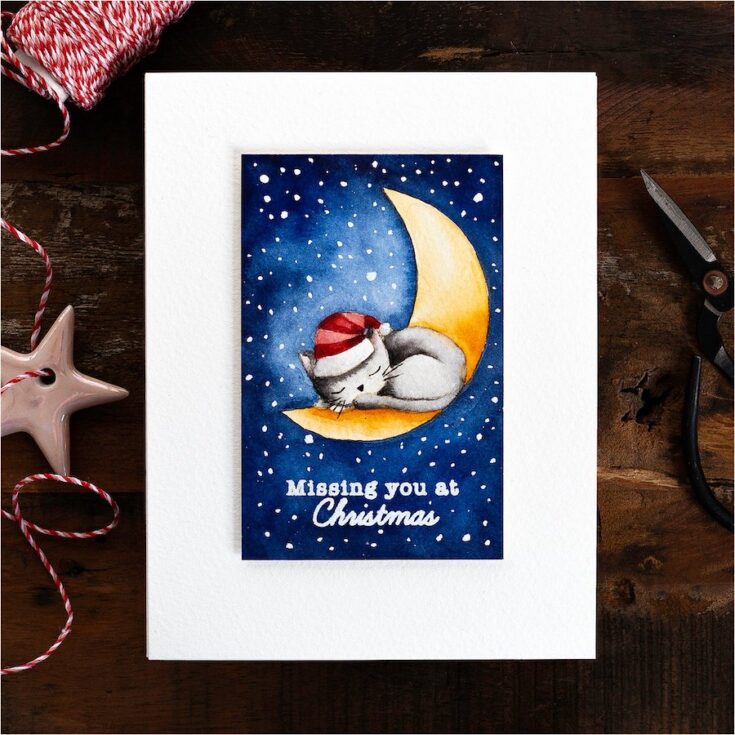
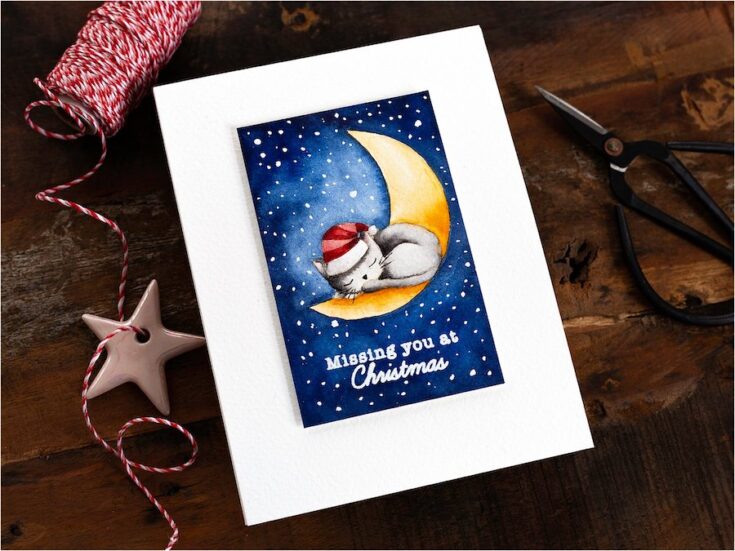
Hello, Debby Hughes here. In today’s video, I’m taking a very rough sketch, filling it out into a plan and taking it to a finished card using the Christmas Kitties set from Simon Says Stamp.
STEP BY STEP INSTRUCTIONS
- Create a rough sketch in a notebook/on the corner of a piece of paper/whatever is to hand at the time.
- Cut a piece of scratch paper to size and expand the sketch. Planning out in pencil and a light ink the placement of elements.
- Cut a piece of watercolour card to size and pencil a border around the edges.
- Stack the plan on top of the card and place in a Misti.
- Align the cat stamp according to the sketch. Lift the sketch paper and stamp the cat in Antique Linen Distress Ink.
- Use a Nested Circle die to draw in pencil a crescent moon according to the placement planned out in the sketch.
- Tape the card to a board and fully cover the wide border.
- Watercolour. I used Daniel Smith paints.
- Lift the Painter’s Tape and place the card back in the Misti.
- Treat with Anti-Static Powder and stamp a greeting in Versamark ink before heat embossing Simon Says Stamp White Embossing Powder.
- If the edges of the paint have bled, trim the panel and attach to another piece of watercolour card with foam tape.
- Use a Faber Castell Polychromo pencil to deepen the shadows.
- Use white gouache and a paintbrush to add stars randomly over the background.
- Attach the panel to a card base cut and scored from Ivory card.
Well, that’s me for this month. I hope you enjoyed this tutorial. Thanks for joining me and I hope to see you next time for Doodling With Debby.
WATCH THE VIDEO:
Watch below or in HD on YouTube.
SUPPLIES:
|


Thanks so much for stopping by, and thanks to Debby for being our guest!
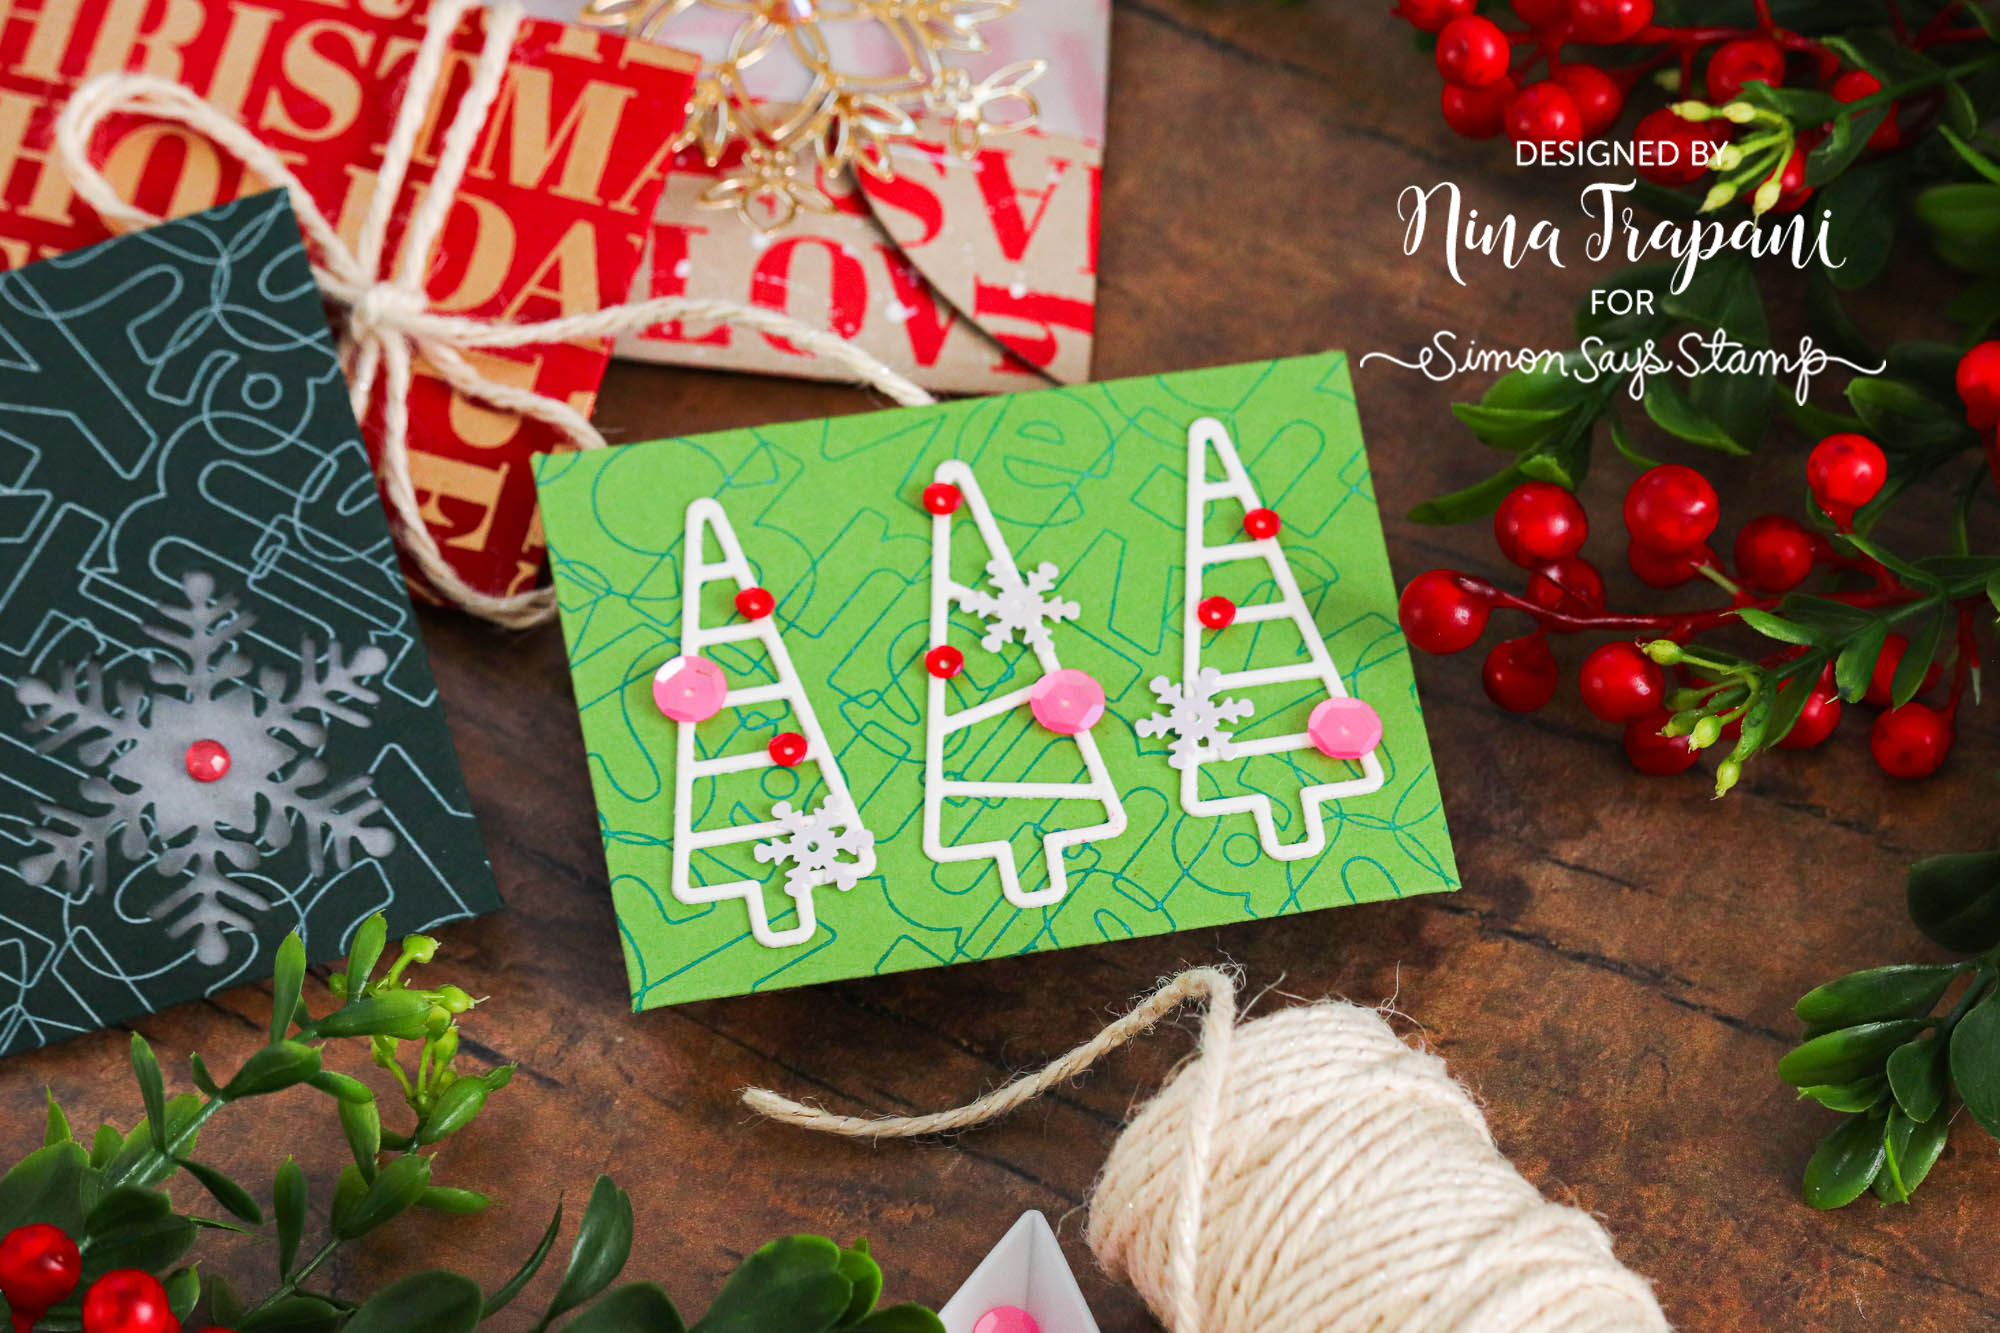
Studio Monday with Nina-Marie: Holiday Gift Card Pockets!

Hello friends, it’s Nina-Marie Trapani with you today and I have some fun holiday inspiration for you today! We’re going to make some festive gift card pockets using some of the new products in our Holly Jolly release, along with our Petal Envelope die!
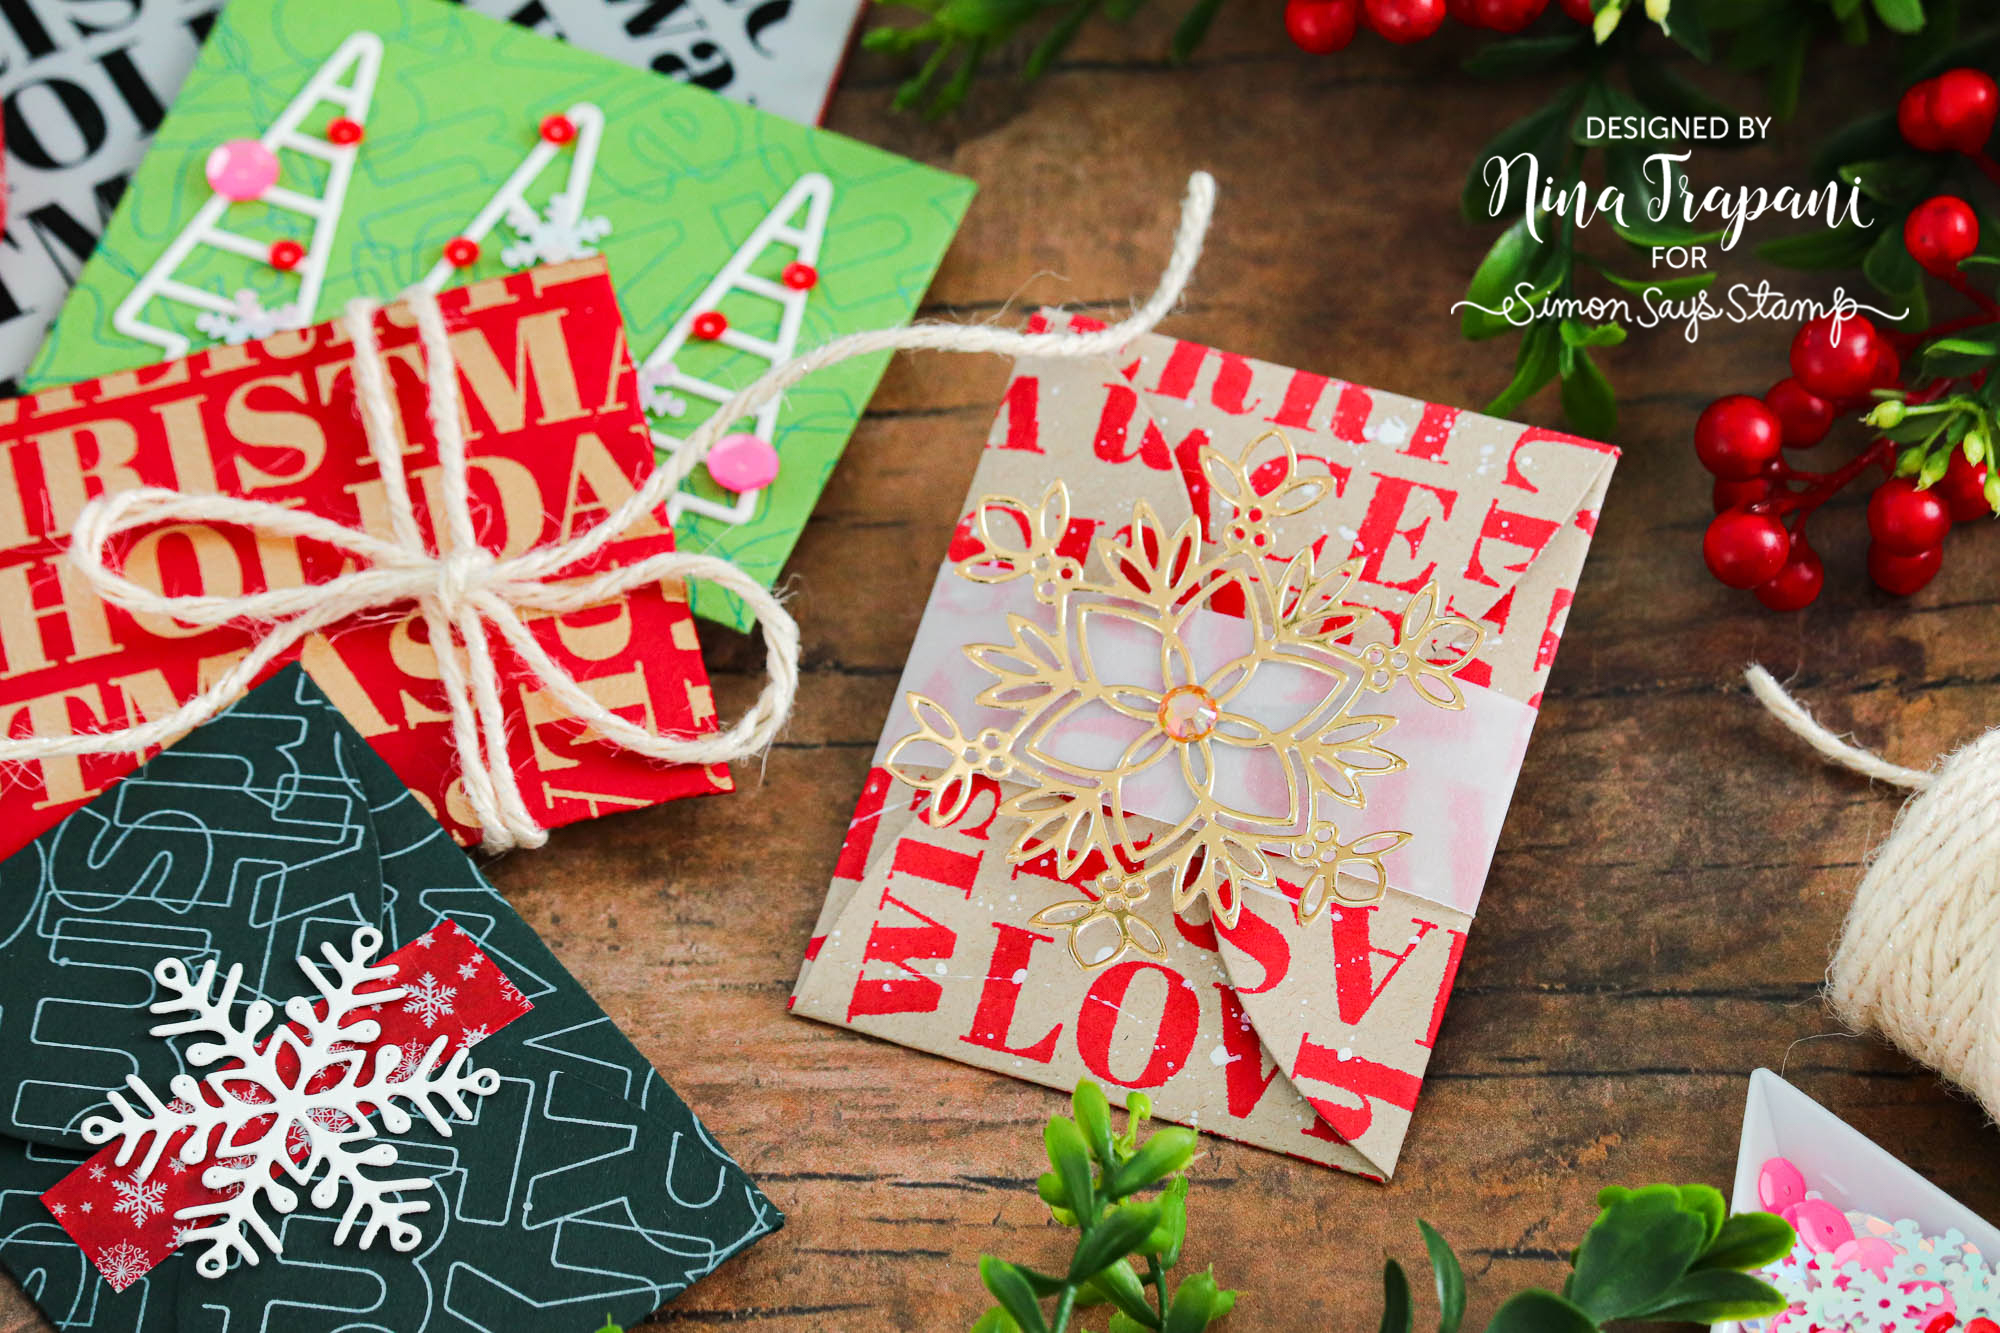
With the holidays coming up fast, these cute gift card pockets are perfect for placing under the tree, tucking into stockings or popping in the mail to someone special!
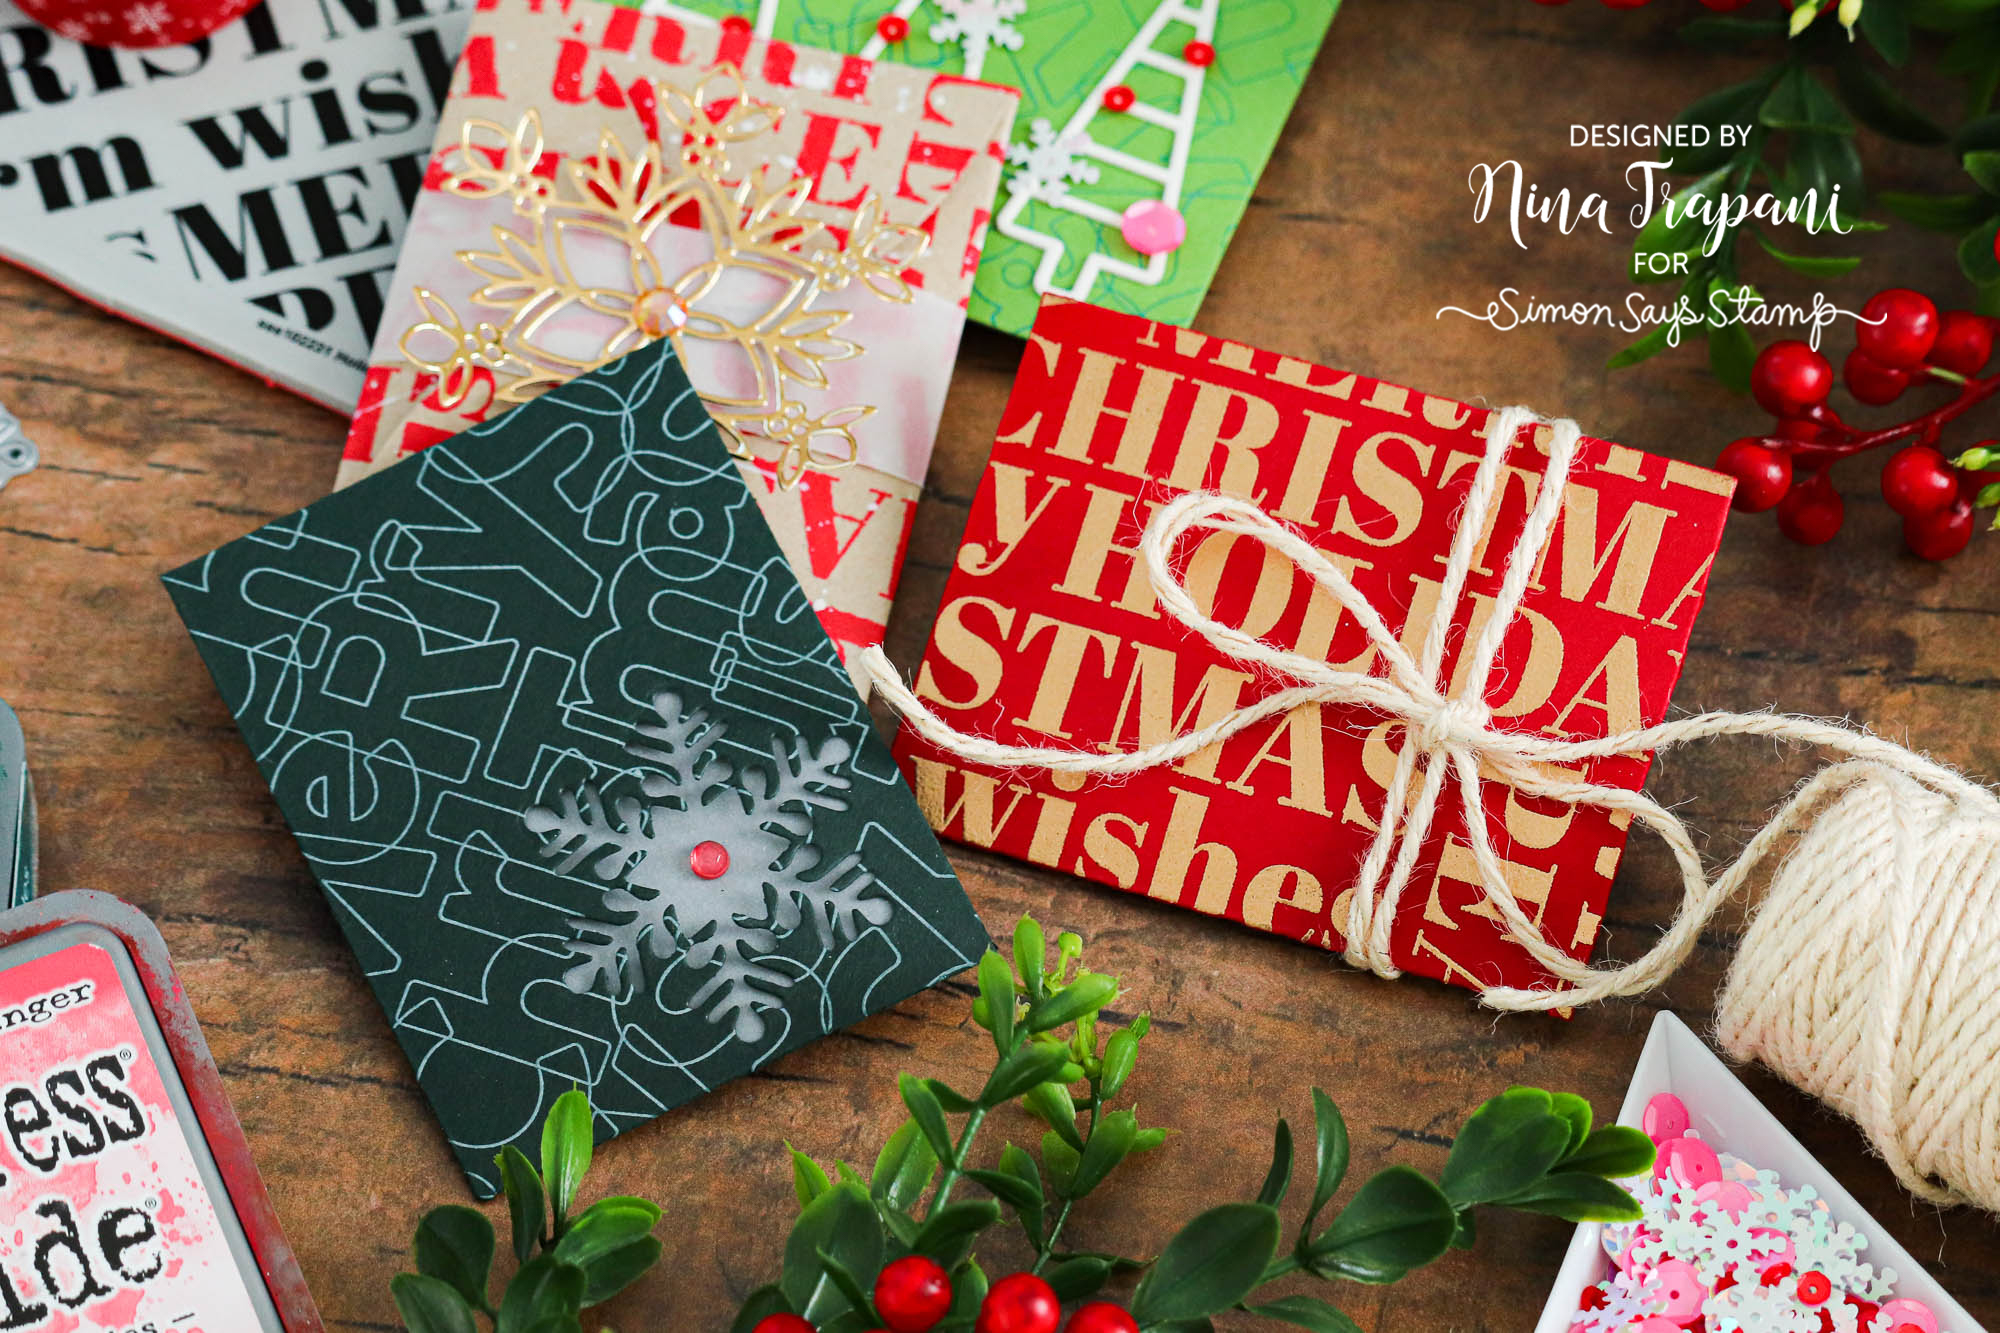
I’ve stamped the envelopes with our Holiday Words and Outline Merry Christmas background clings. Each gift card holder is decorated with a variety of die cuts, embellishments, and twine. Some of the new dies I used were the Chunky Trees and Holly and Sophie snowflakes. I even cut a window into one of the envelopes with an old favorite – the Rina snowflake die!
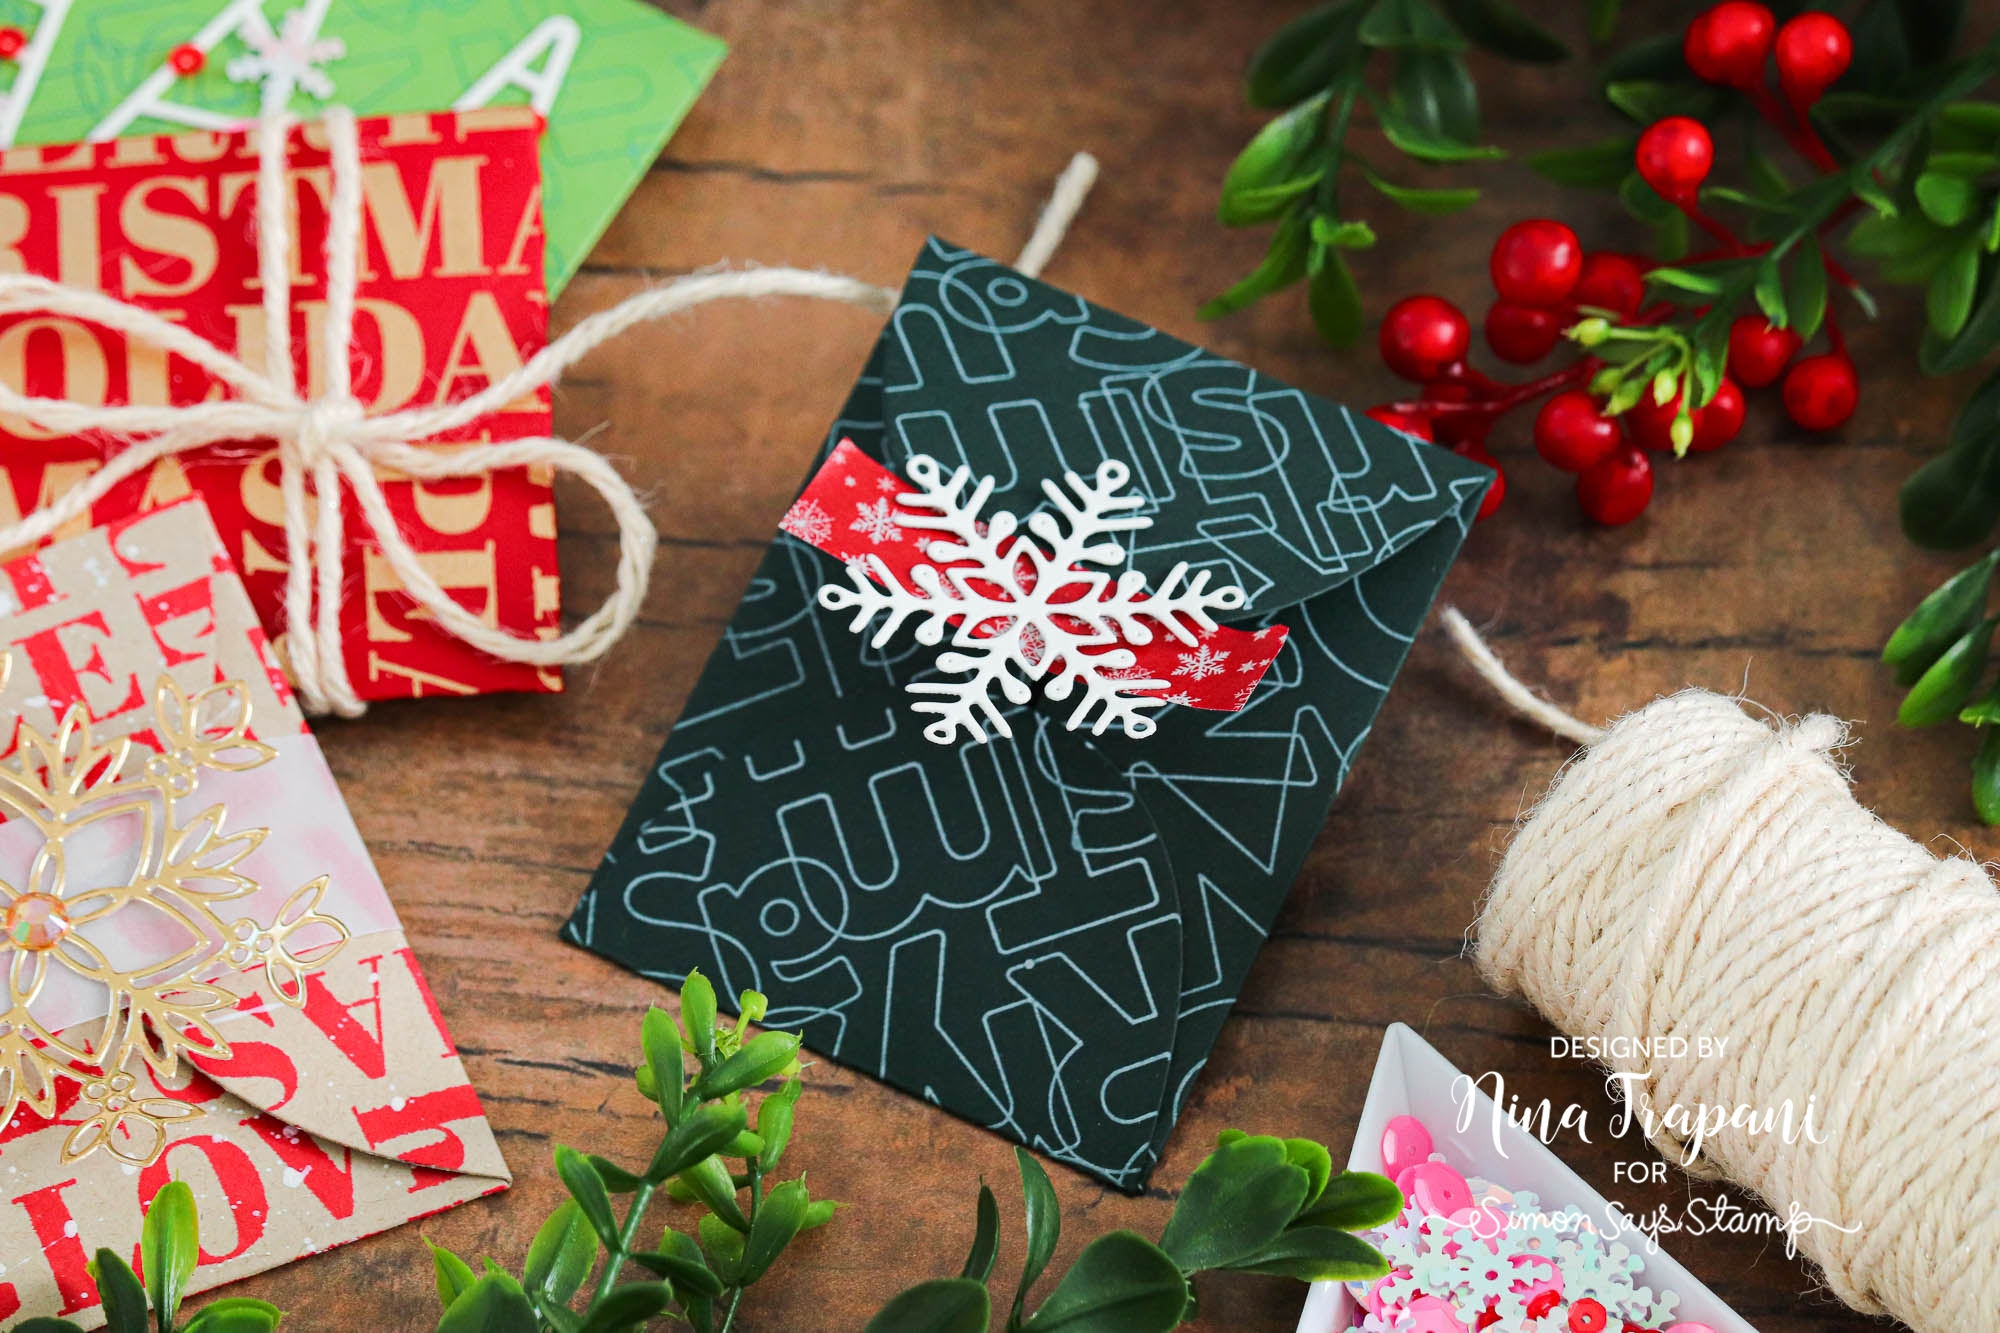
The best part is that these are SUPER easy to whip up – you’ll have many little pockets in no time, which makes mass producing easy-peasy. I hope you will watch the video below to see how I made these adorable little gift card envelopes!
WATCH THE VIDEO
SUPPLIES
|


