Studio Monday with Nina-Marie: Pantone’s Colors of the Year

Hello crafty friends, it’s Nina-Marie Trapani here! We are just inside of 2021 and Pantone’s Color of the Year has been revealed – this year is actually 2 colors, Ultimate Gray and Illuminating yellow. I’ll be incorporating both colors into today’s project and I encourage you to try this color palette out for yourself – it’s so refreshing!
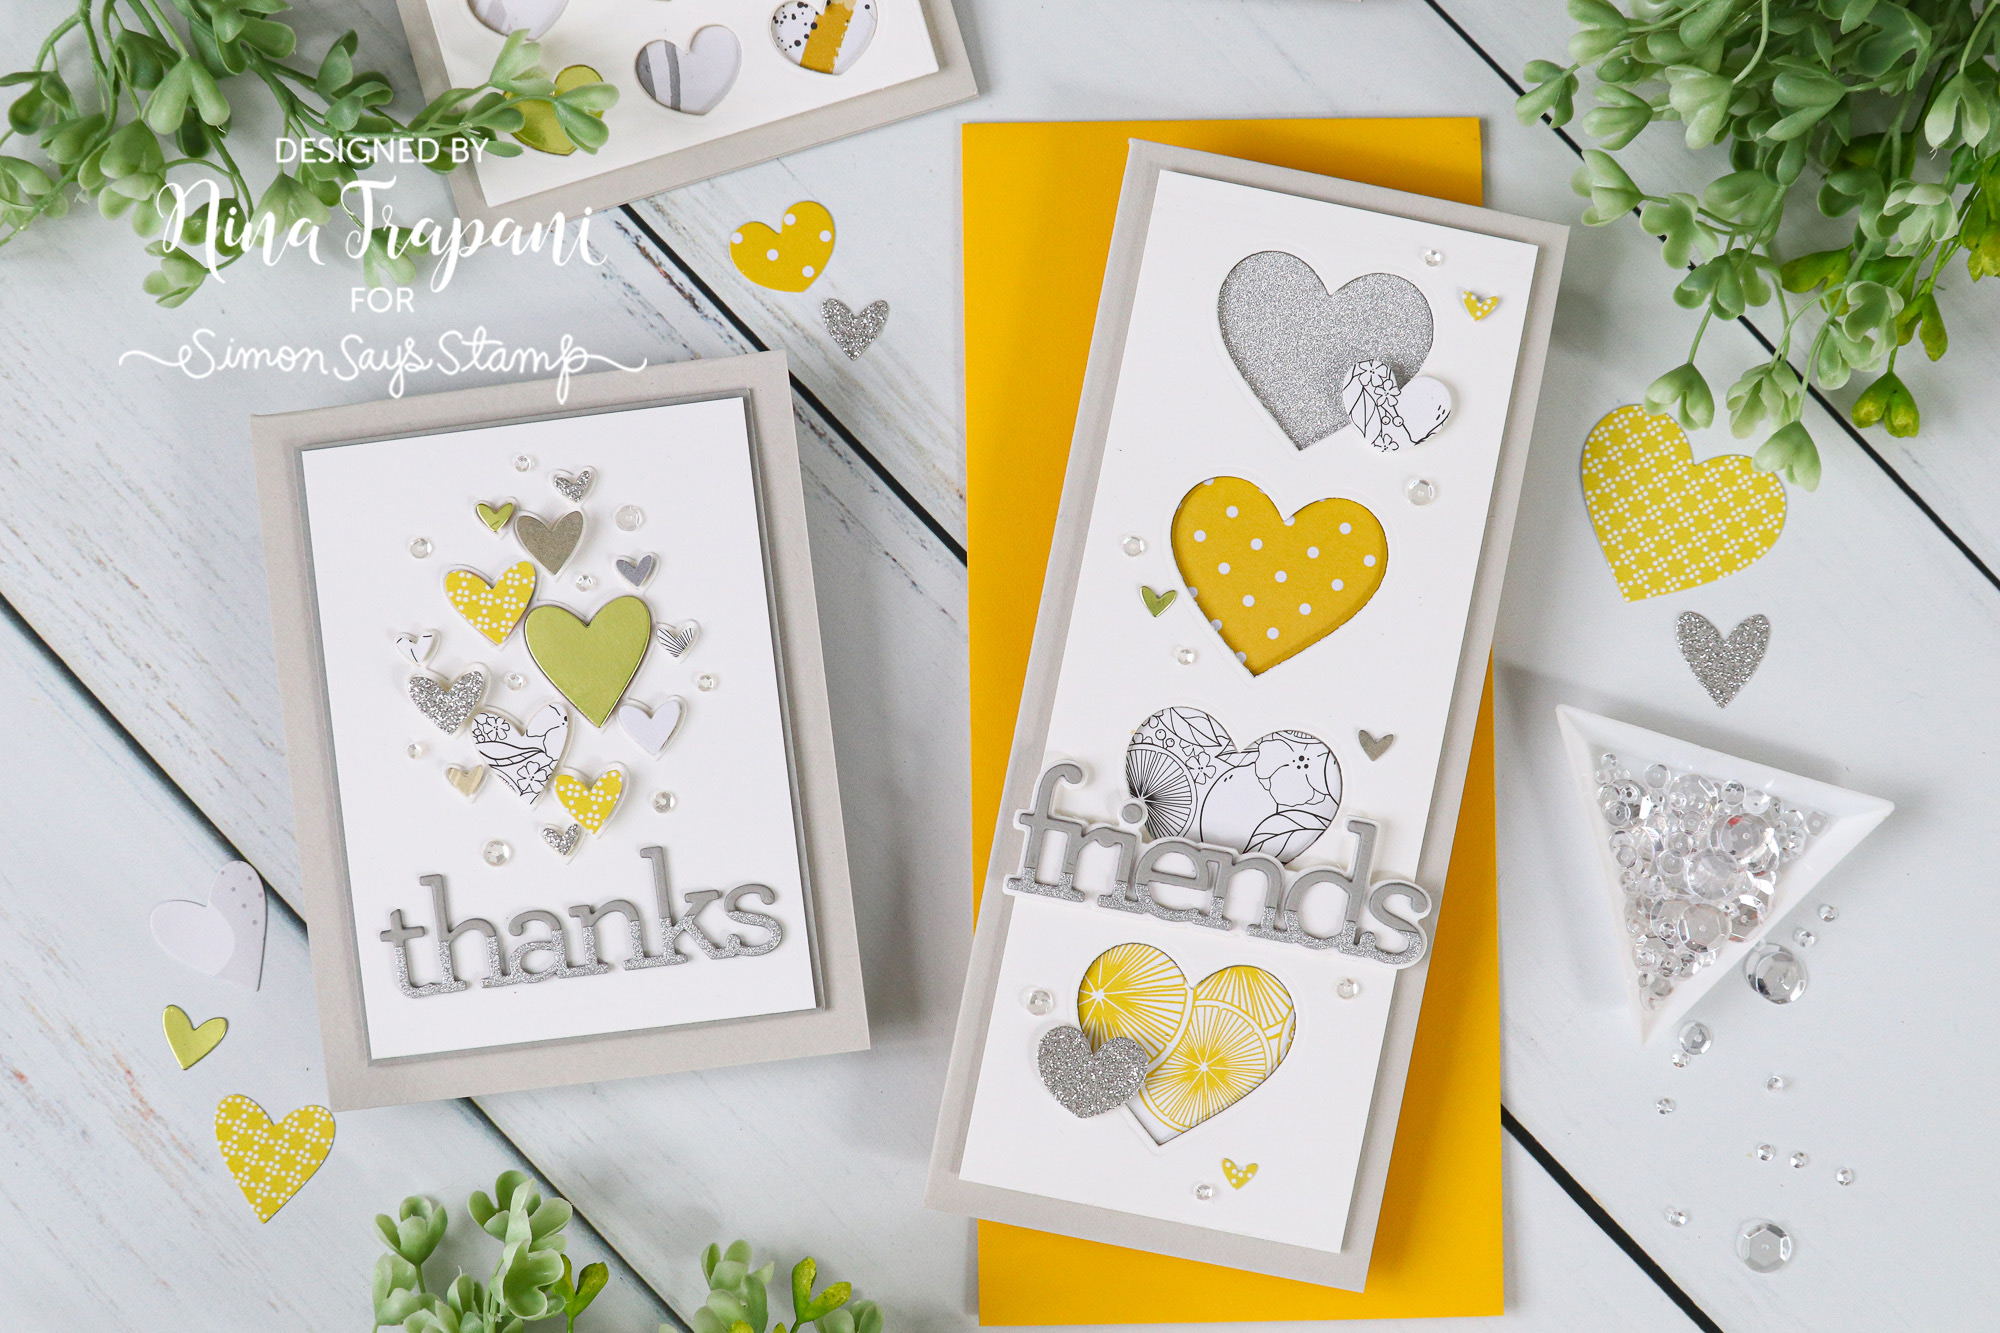
I die cut both our Simon Says Stamp Nested Hearts and Clipping Heart dies from many different sheets of pattern paper, glitter and foil cardstocks. The varying shades of gray and yellow paper creates a beautiful pattern!
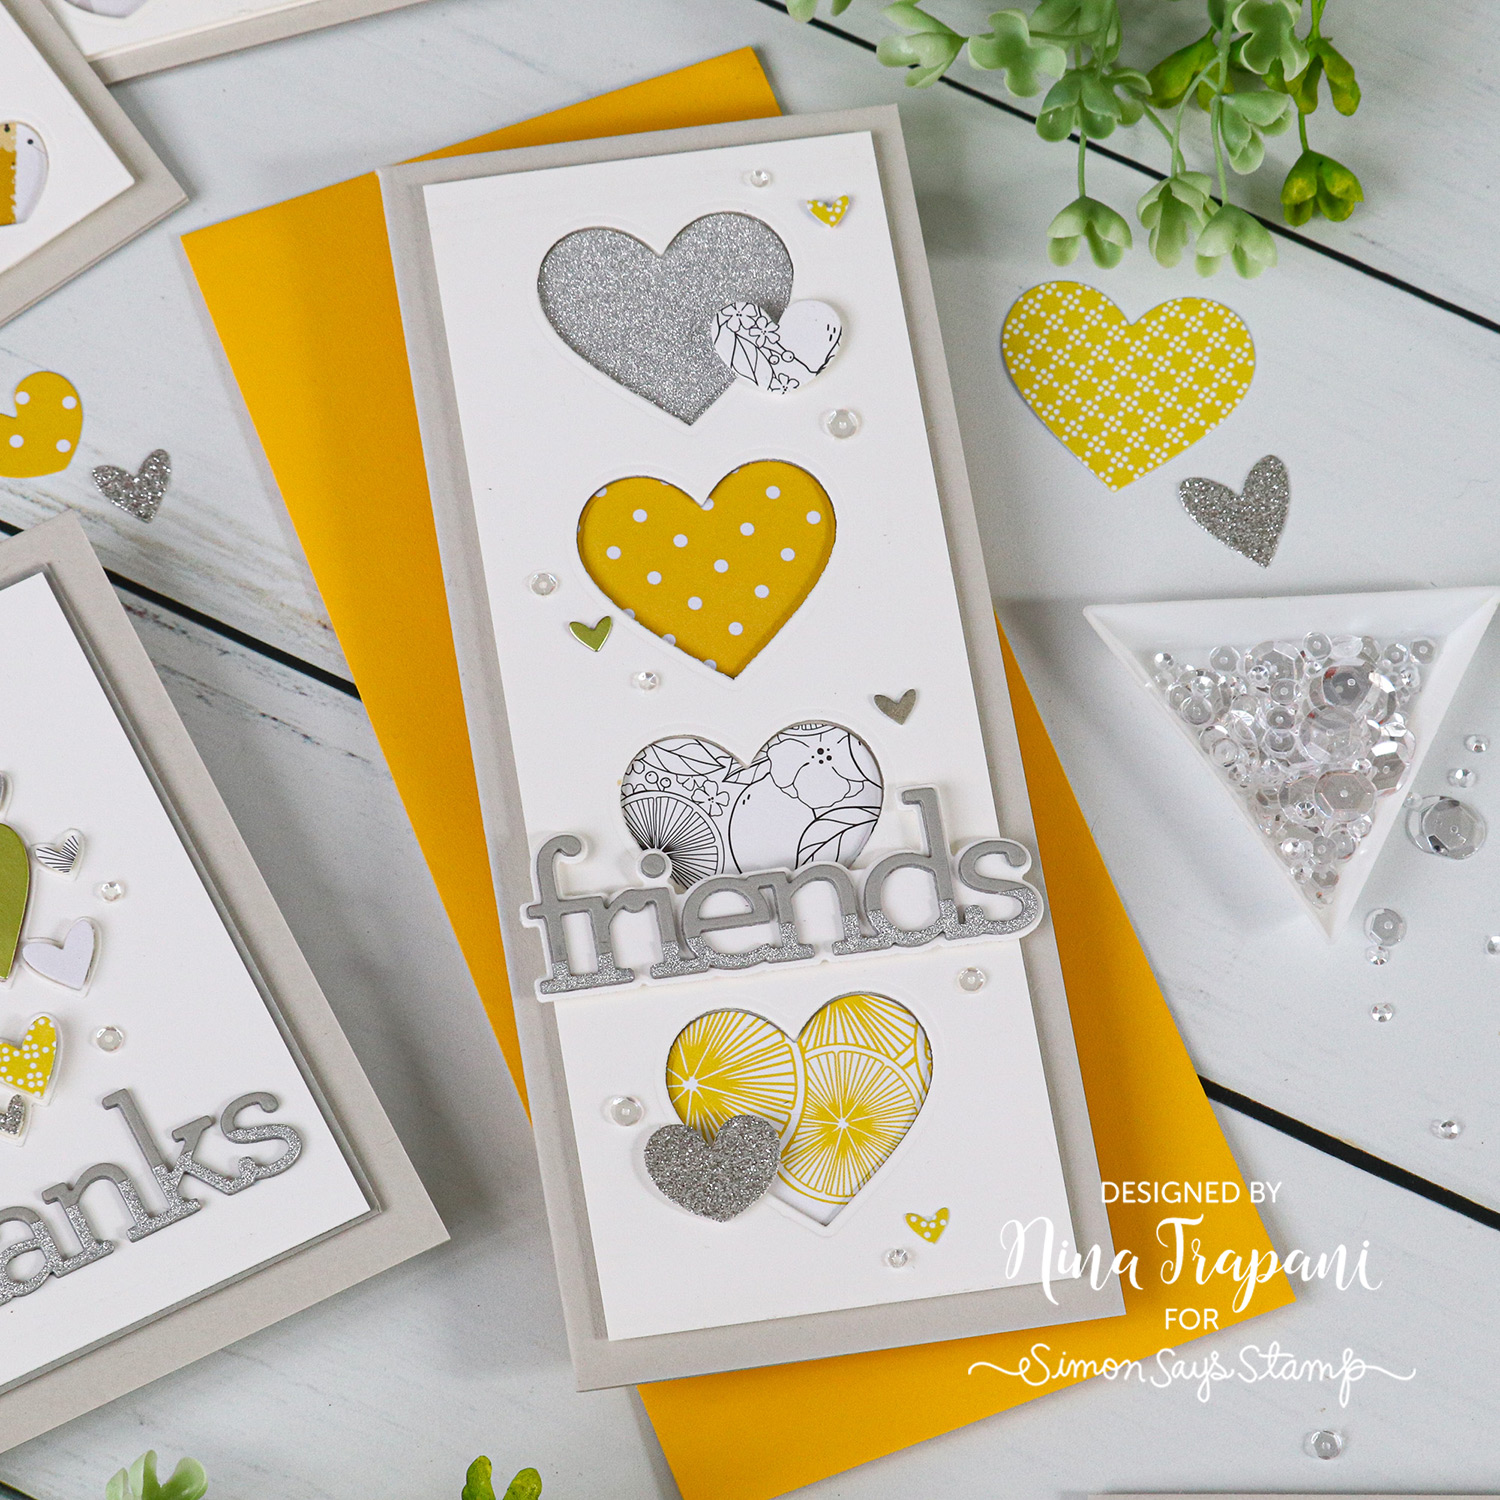
For a sentiment I went simple and used our CZ Design Friends and Thanks word and shadow dies. You’ll notice I cut the sentiment from both Smoke cardstock and silver glitter paper; the dip-dye effect is trendy and compliments the glitter texture sprinkled throughout the card.
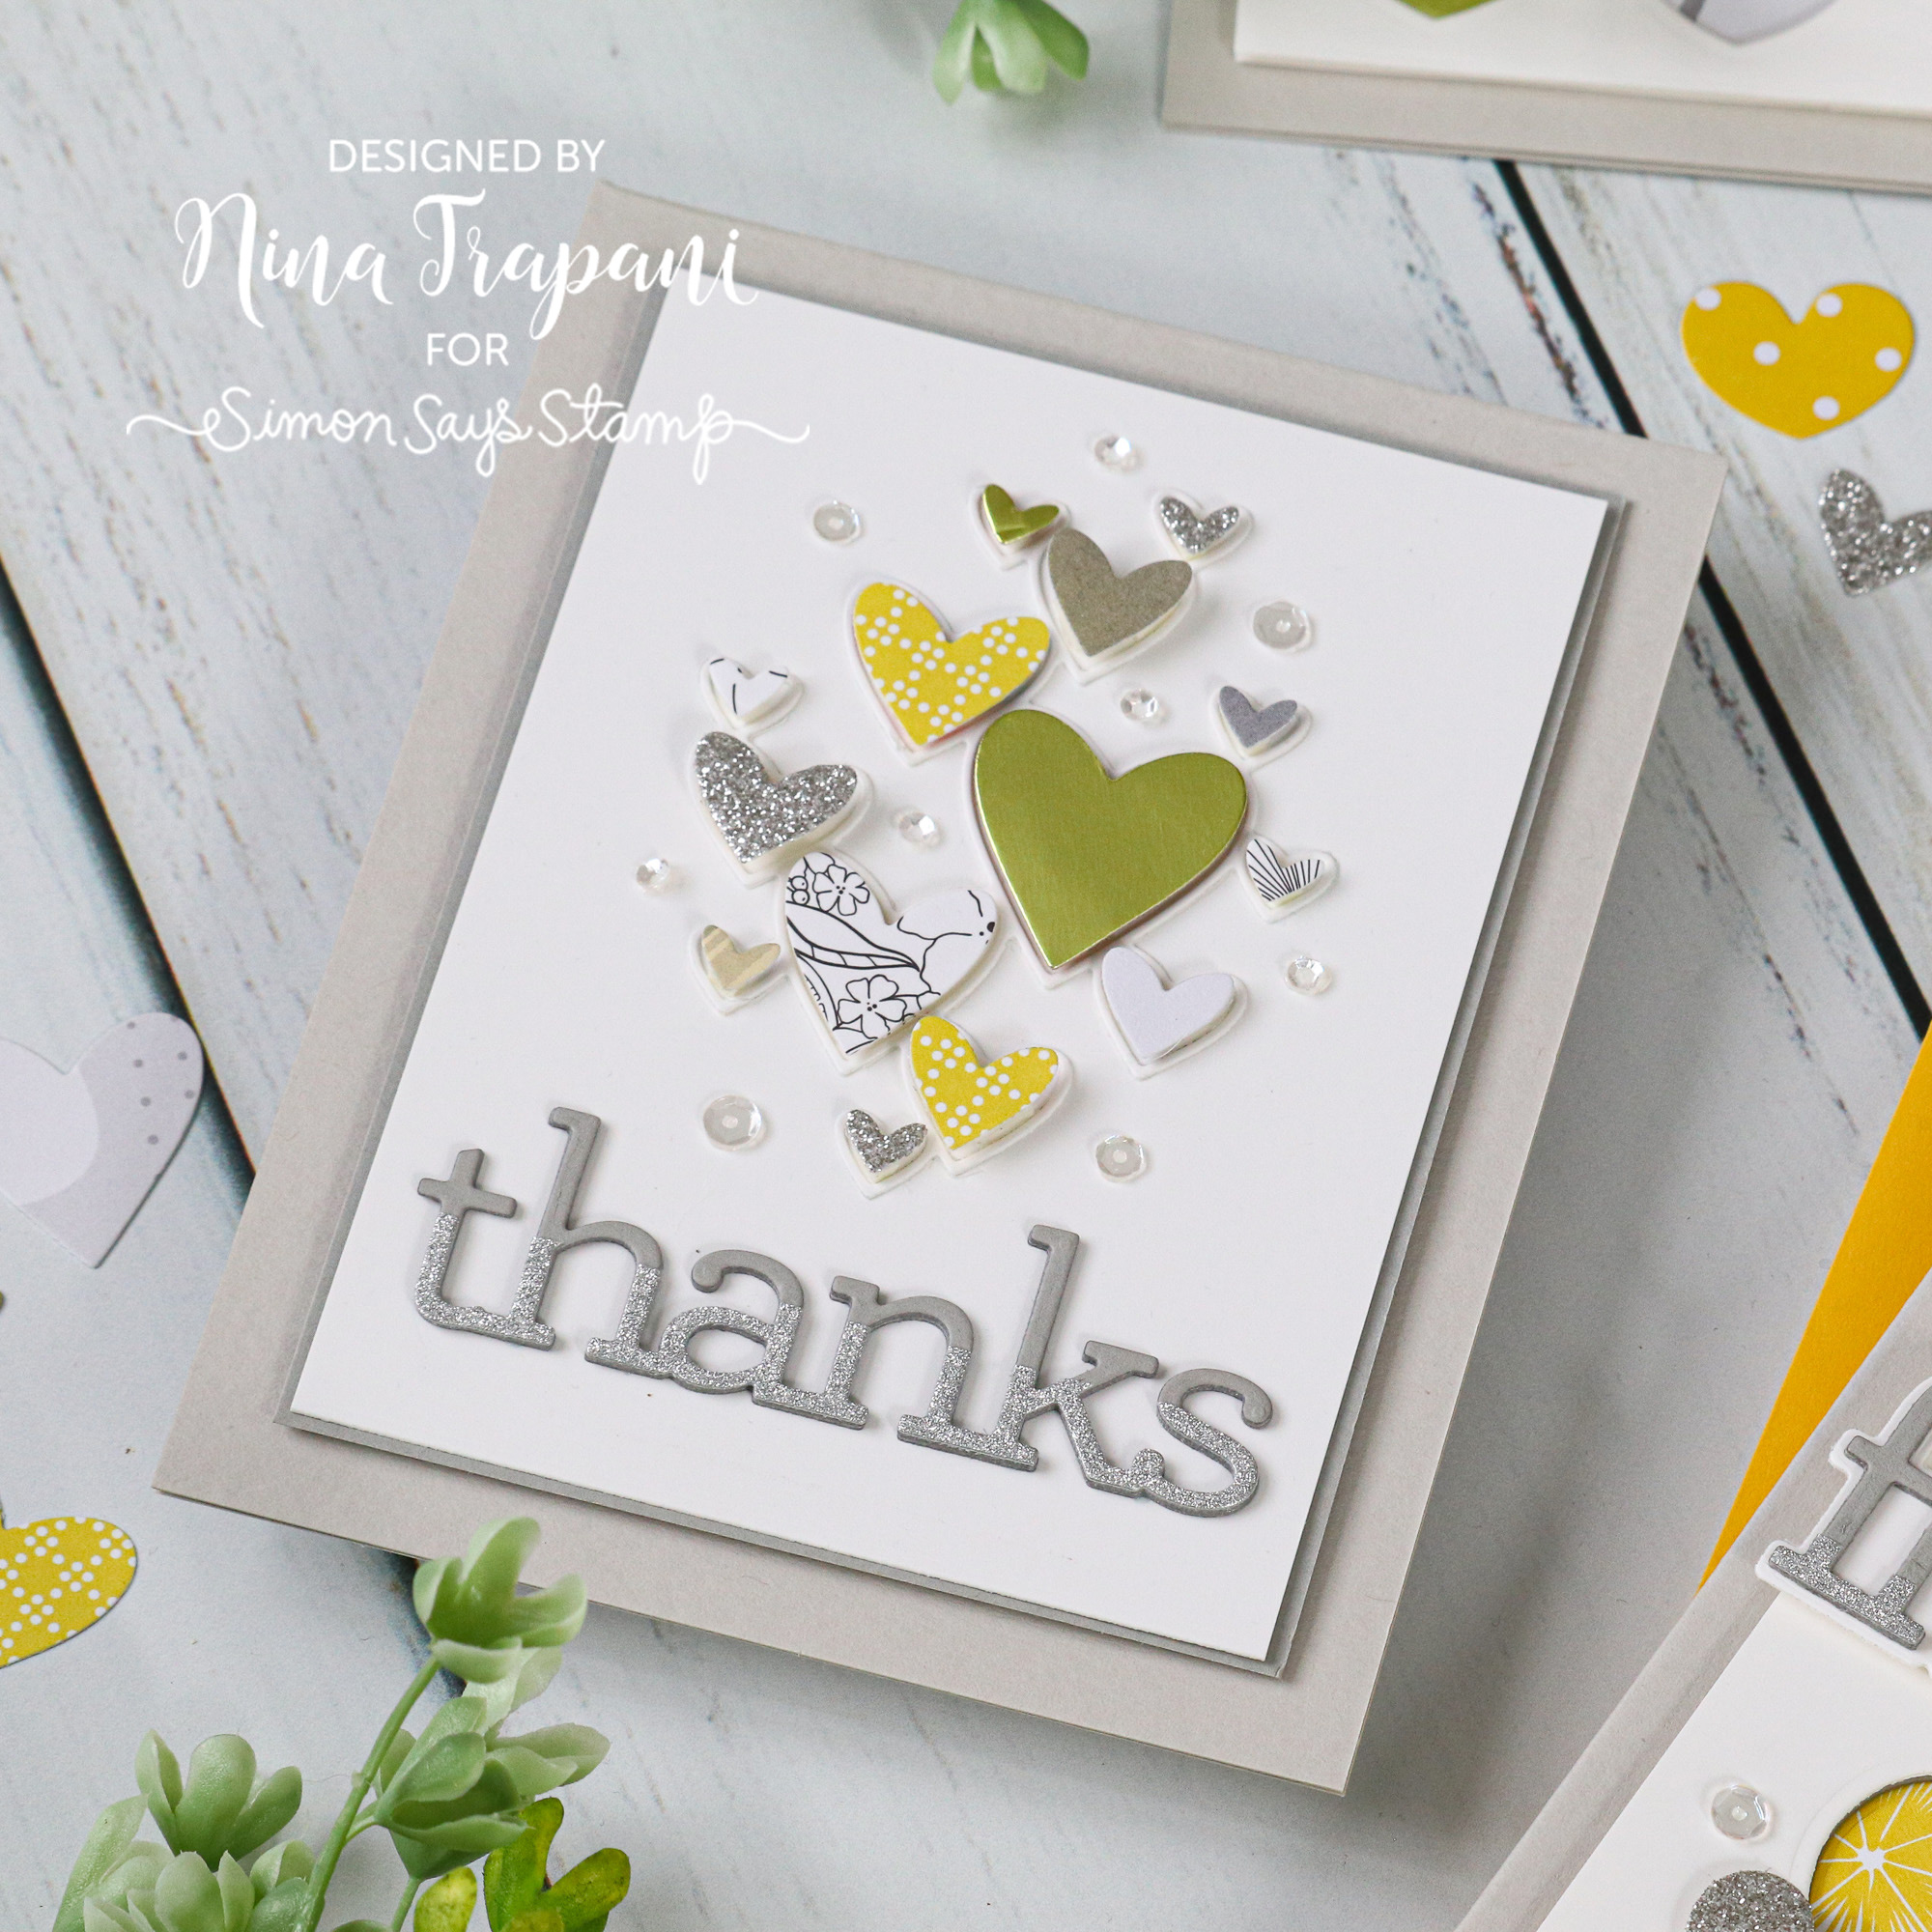
I then matted the panels onto cards created from Fog cardstock. The light gray base provides a perfect balance to the darker grays of the hearts and sentiment.
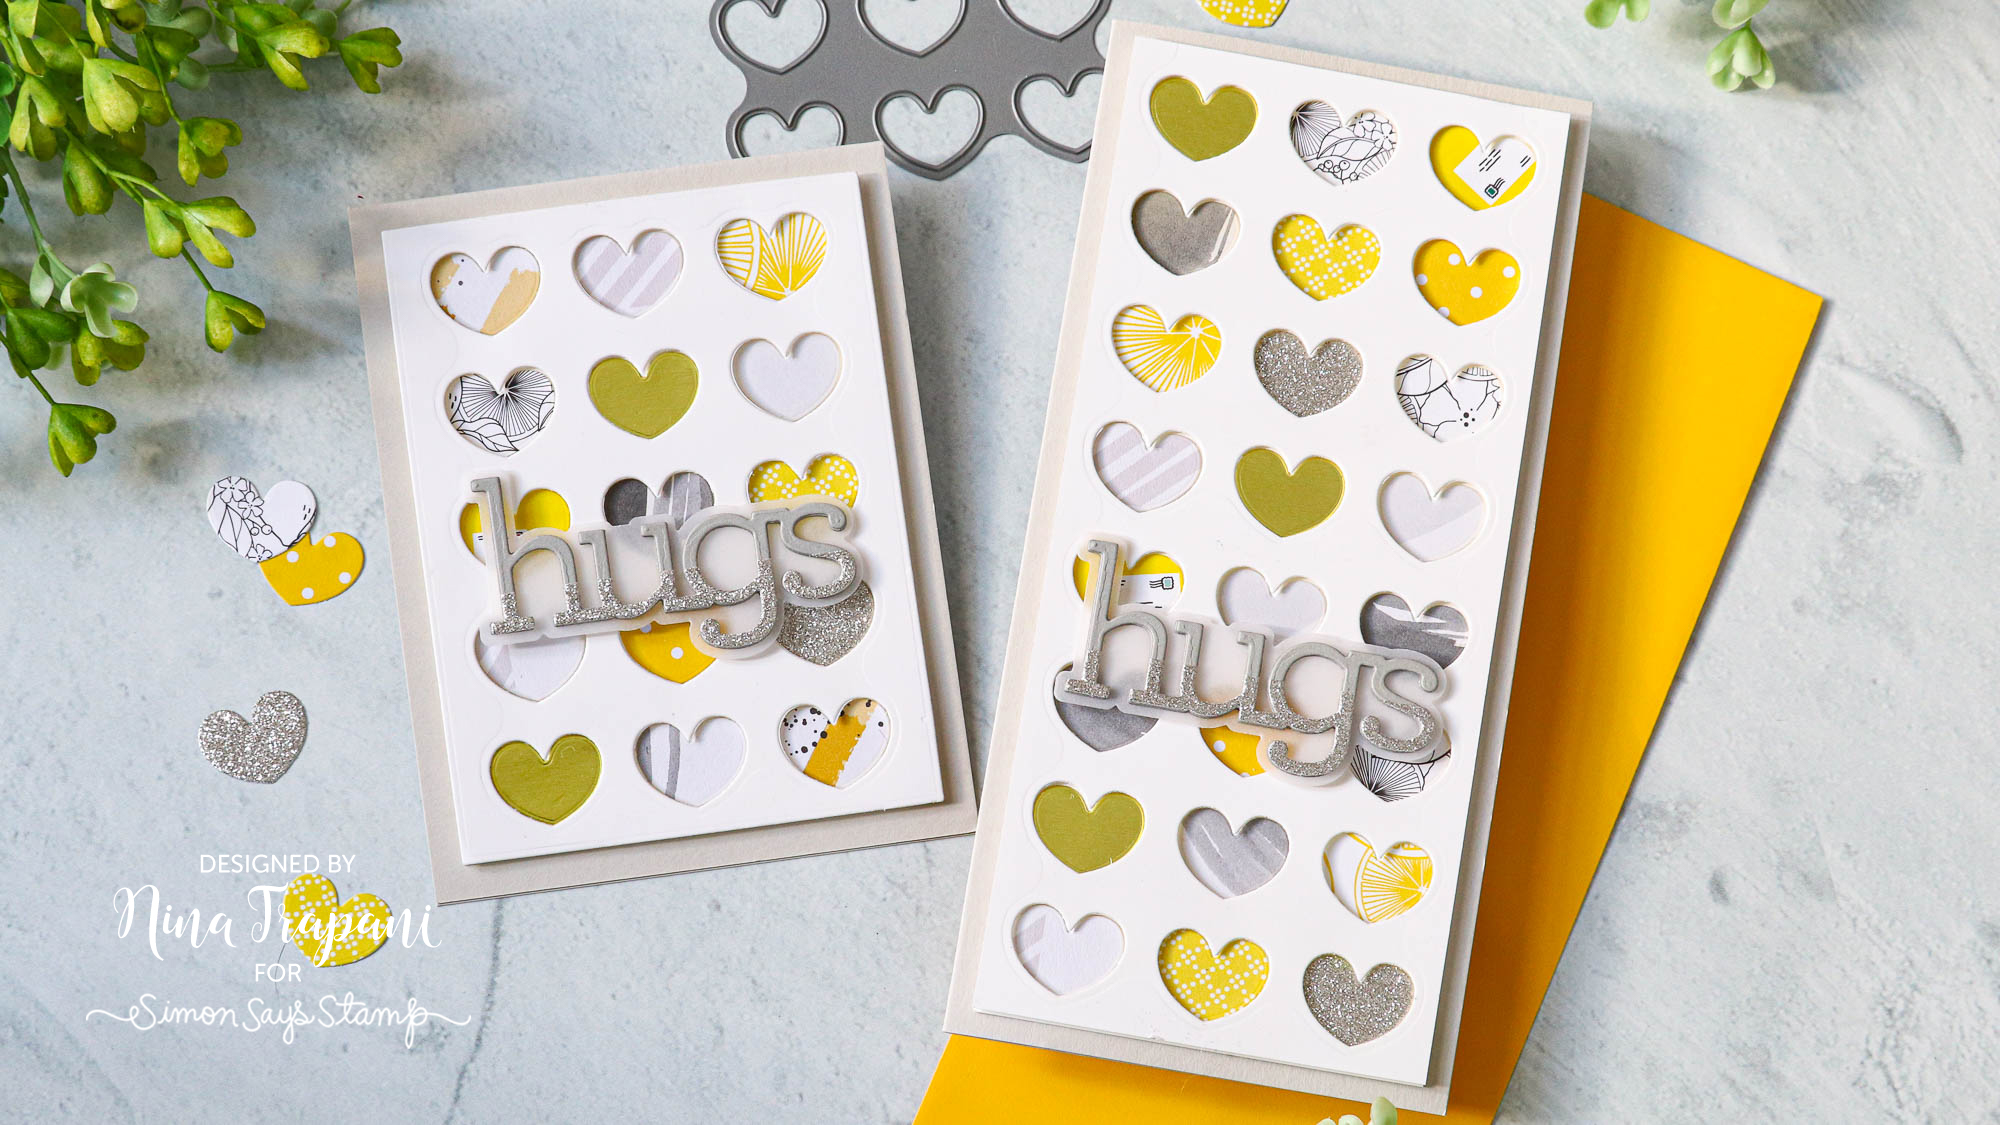
I had so much fun making these cards I also tried it with our Chunky Hearts Panel die on both a slimline and A2 card. You could try this technique with many other heart or other shaped dies!
Want to see how I made these refreshing cards? Be sure to watch the video below! These would be perfect as non-traditional Valentines or even as a more masculine love card!
WATCH THE VIDEO
SUPPLIES
|


Crafty with Caly: Love Birds

Hi friends! Happy Sunday! We hope your 2021 has started off wonderfully so far! Please join me in welcoming back special guest Caly Person in the first edition of Crafty with Caly for 2021! Be sure to watch the video for more information and enjoy!
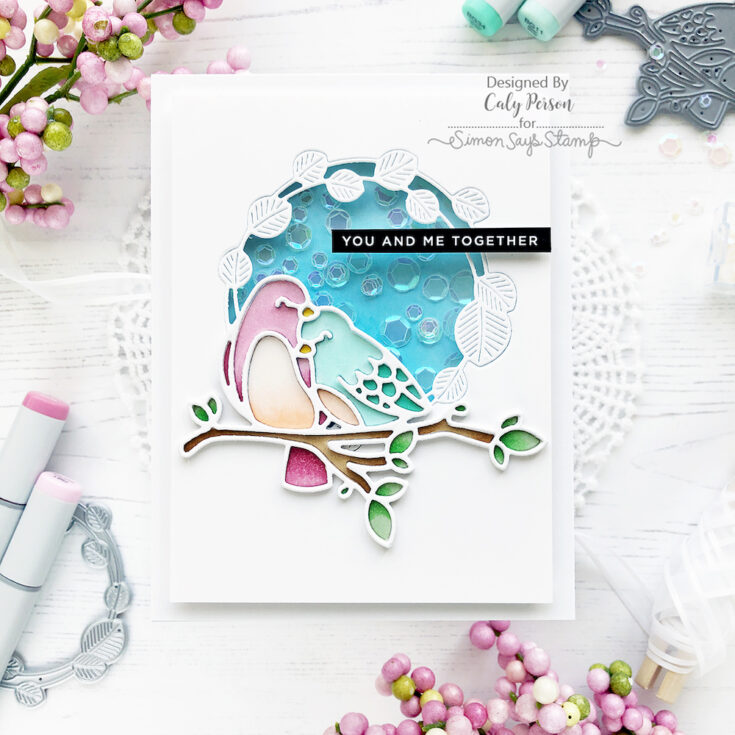
Hello, Friends! I’m sharing a shaker card using in-lay techniques with die-cut images today. The focus of my card is the Love Birds and I made it more interest by creating a shaker window framed with the Etched Eucalyptus Wreath.
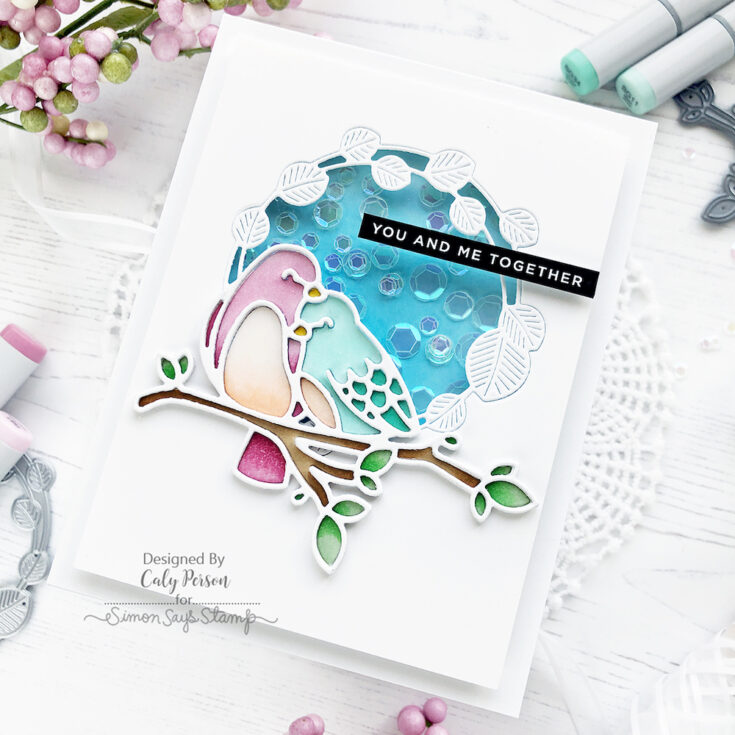
I created my shaker window first by die-cutting the Etched Eucalyptus Wreath over a white panel and attaching acetate to the die-cut window. I in-lay the die-cut wreath back in over the acetate once it’s adhered in place.
Be sure to watch the video to see how I create this card!
WATCH THE VIDEO:
Next, I die-cut the Love Birds die. Before lifting my die from the cutting plate, I popped all the pieces out – keeping them in their place on the cutting plate so that I can use Glad Press’n Seal to hold all the pieces together. I flipped it over and adhered the backside with office tape, pulled back the Press’n Seal and colored the front of the die-cut image with Copic markers. This will make more sense if you watch the video above.
After coloring, I die-cut the Love Bird die 3 more times in white and adhered them together. I adhered this stacked image over my colored one to give it lots of dimension.
Copics:
Pinks: R81, R85
Teals: BG11, BG34
Peach: YR0000, YR00
Yellow: Y15
Browns: E31, E35
Greens: G21, YG09
Black: 110
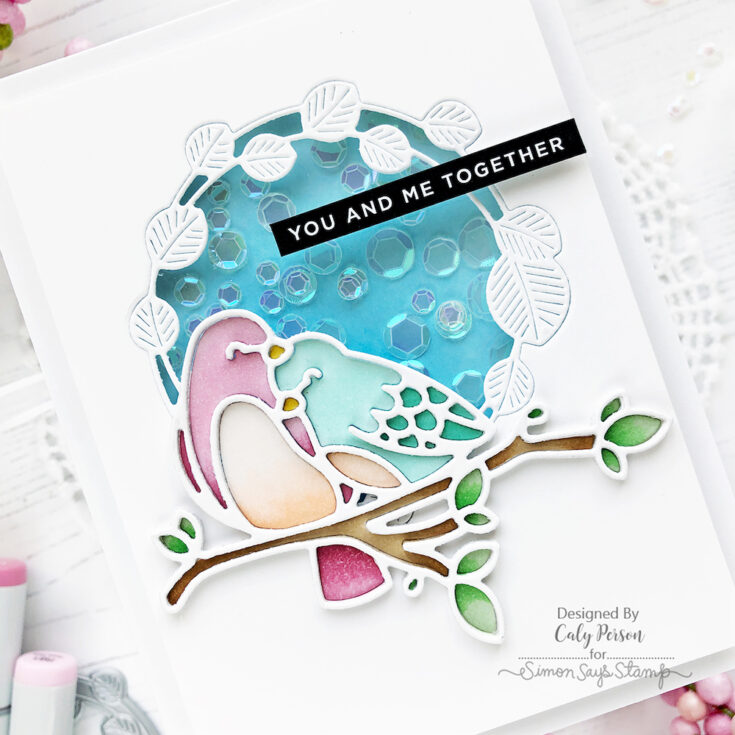
To finish, I ink-blended some Mermaid Lagoon ink over the center of a cardbase to add color to my shaker window. I added sequins to my cardbase and sealed my shaker panel using two layers of foam adhesive to give my sequins lots of room to move around.
I hope you enjoyed this project! Thanks so much for joining me today! ~Caly
SUPPLIES:
|


Thanks so much for stopping by, and thanks to Caly for being our guest!
Ink Blended Stencil + Dry Glitter Paste Scraping with Kristina Werner
Hello, all! Kristina Werner here with some card inspiration! And this card was a journey to create!
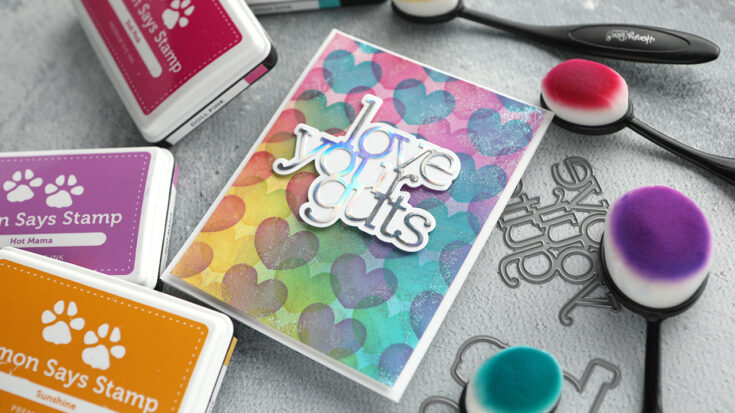
I first started by ink blending onto white cardstock. I used the Layering Hearts stencil set and four colors of Simon ink: Doll Pink, Hot Mama, Sunshine, and High Dive.
After ink blending, I applied some Cosmic Shimmer Paste in Aurora Sparkle and Iridescent Glitz Glitter Gel from Gina K Designs on top. I wanted to apply a thin layer of the glitter pastes, however both were a bit drier than usual. I thought I had ruined my project and started to scrape off the glitter pastes. However, that’s when the magic happened!
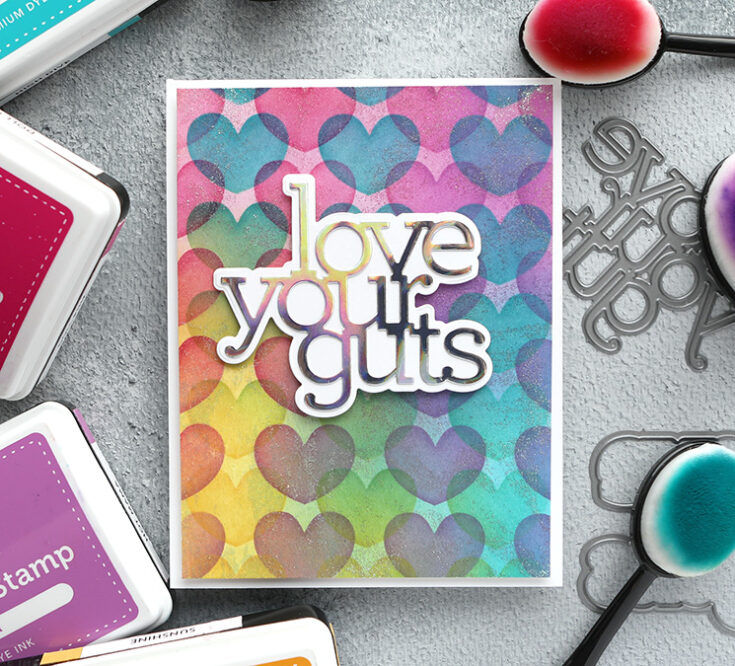
When I scraped the drier glitter paste off the surface of the cardstock with the palette knife, it left behind awesome distressed glitter areas. The texture and sparkle was unexpected and beautiful! I decided right then and there to continue with my card!
This surprise technique could be replicated with regular glitter paste by applying a thin layer and letting it dry just a few minutes. Then scrape some of the paste off with the edge of a palette knife (or whatever you’ve used for spreading out the glitter paste).
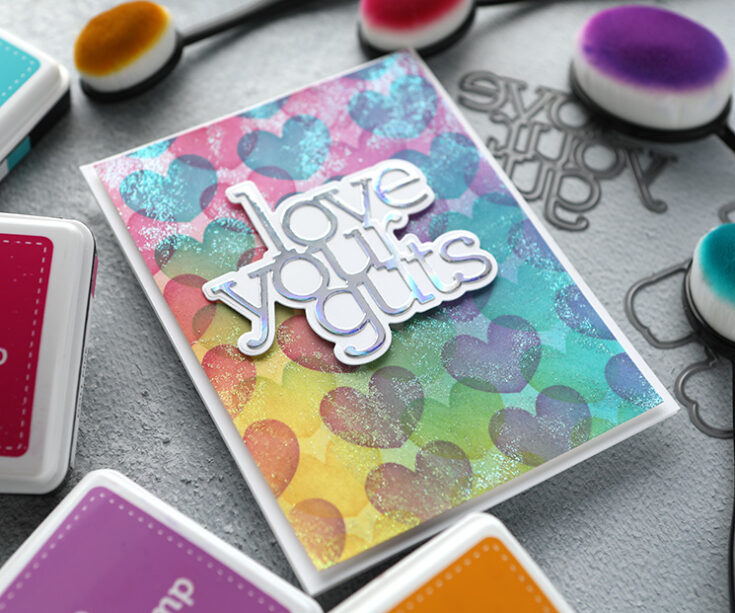
To finish off the card, I diecut the Love Your Guts dies from CZ Design with holographic cardstock and white cardstock. I then adhered the greeting to the front of the card.
Thanks for stopping by! You can grab all of the supplies I used today on this card at Simon Says Stamp!
Supplies
|


