Newton’s Nook STAMPtember® 2025 Exclusive Collaboration!

WATCH THE VIDEO:

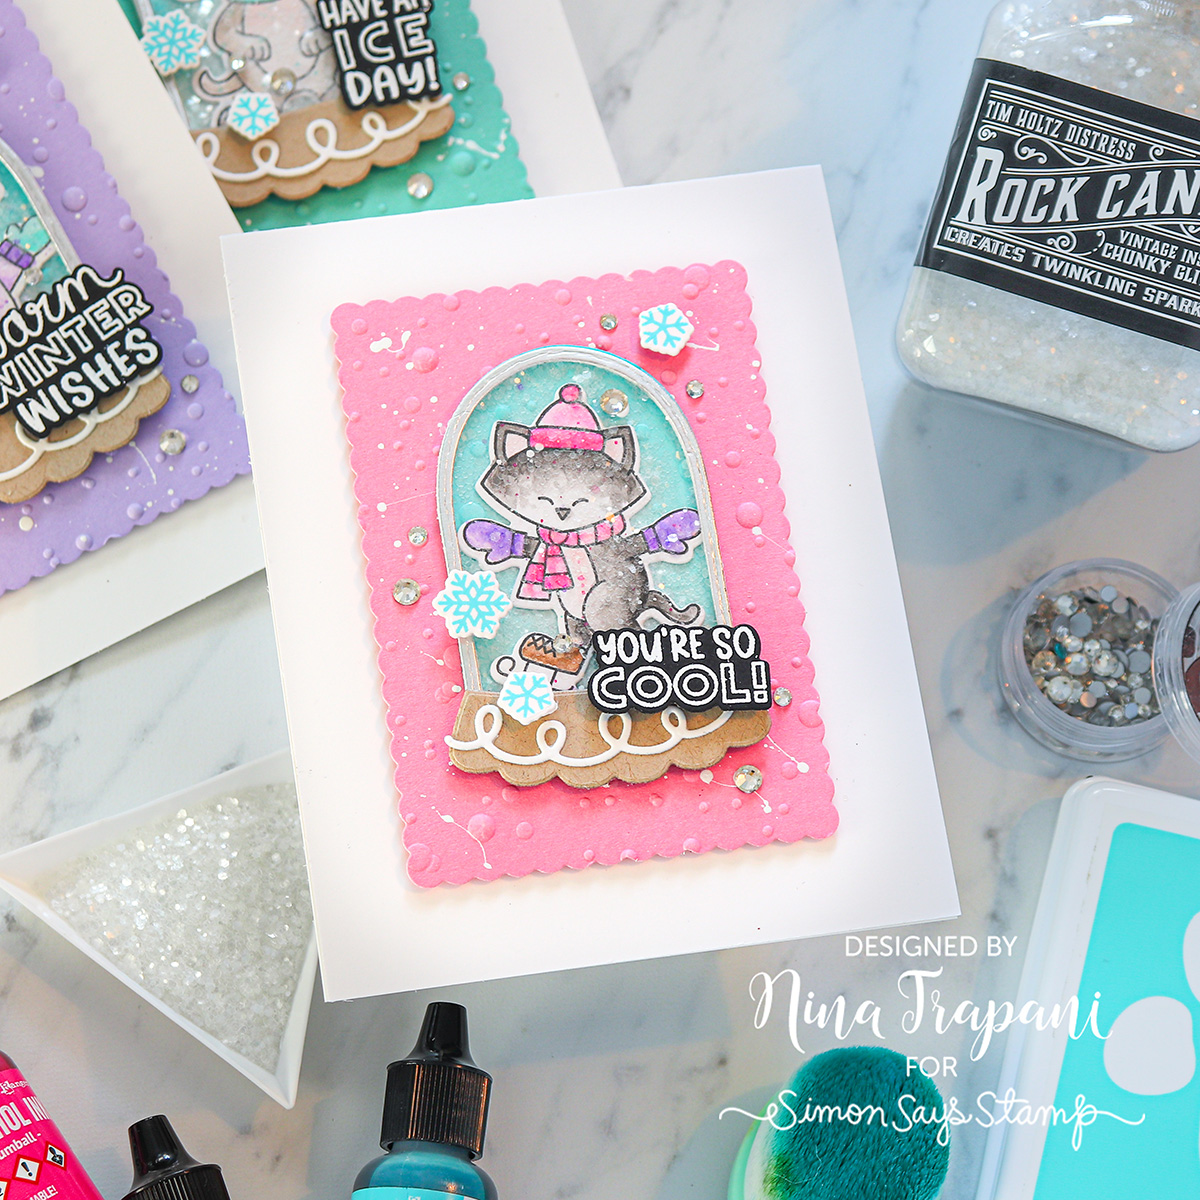
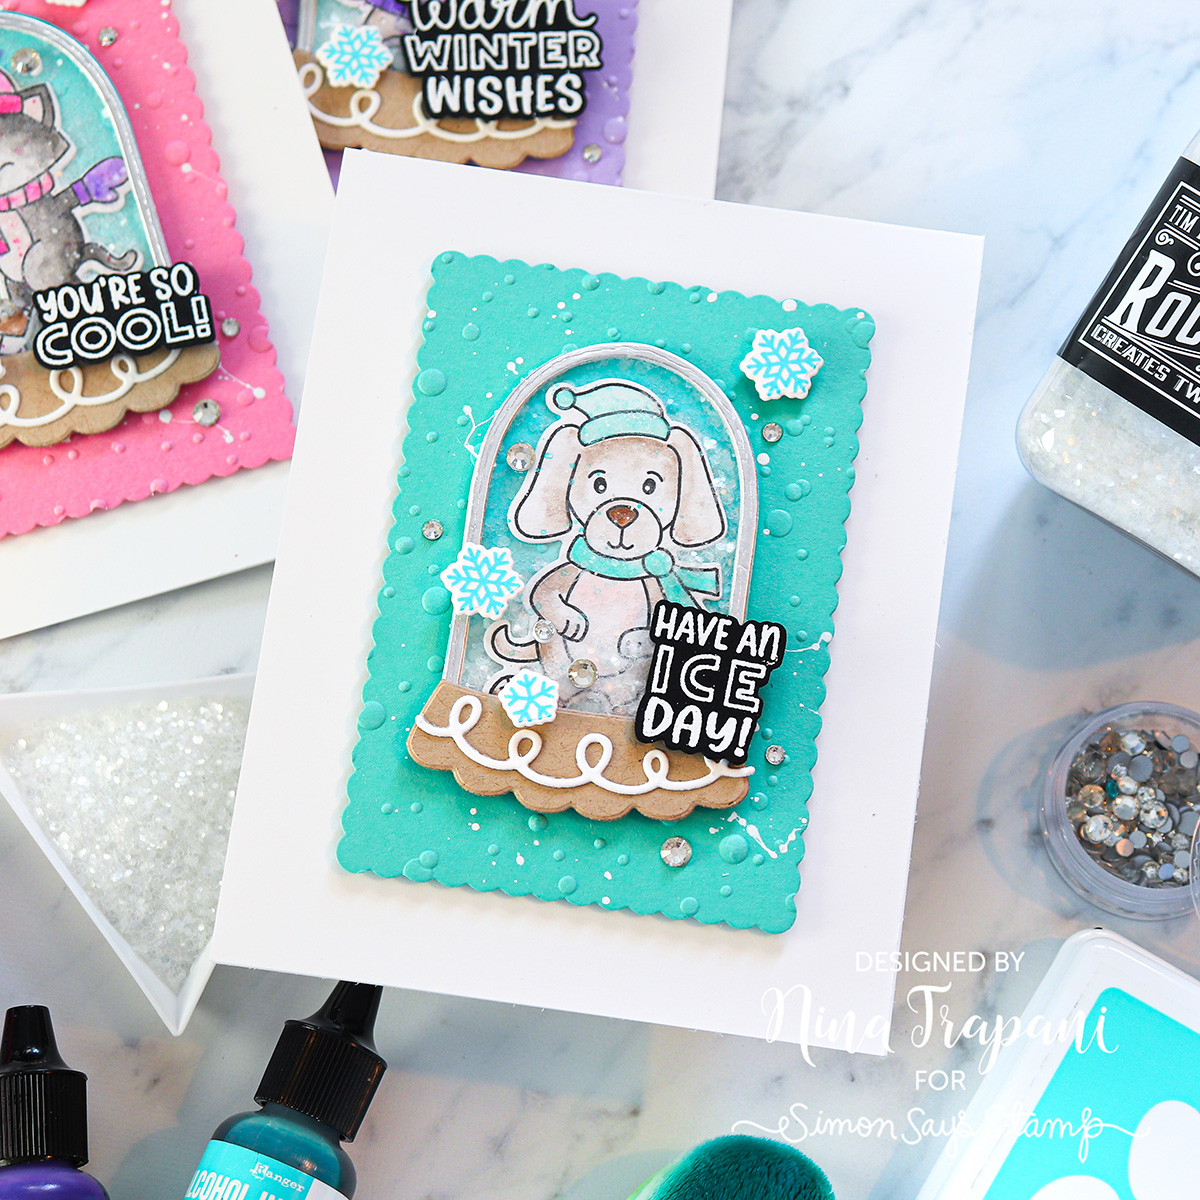
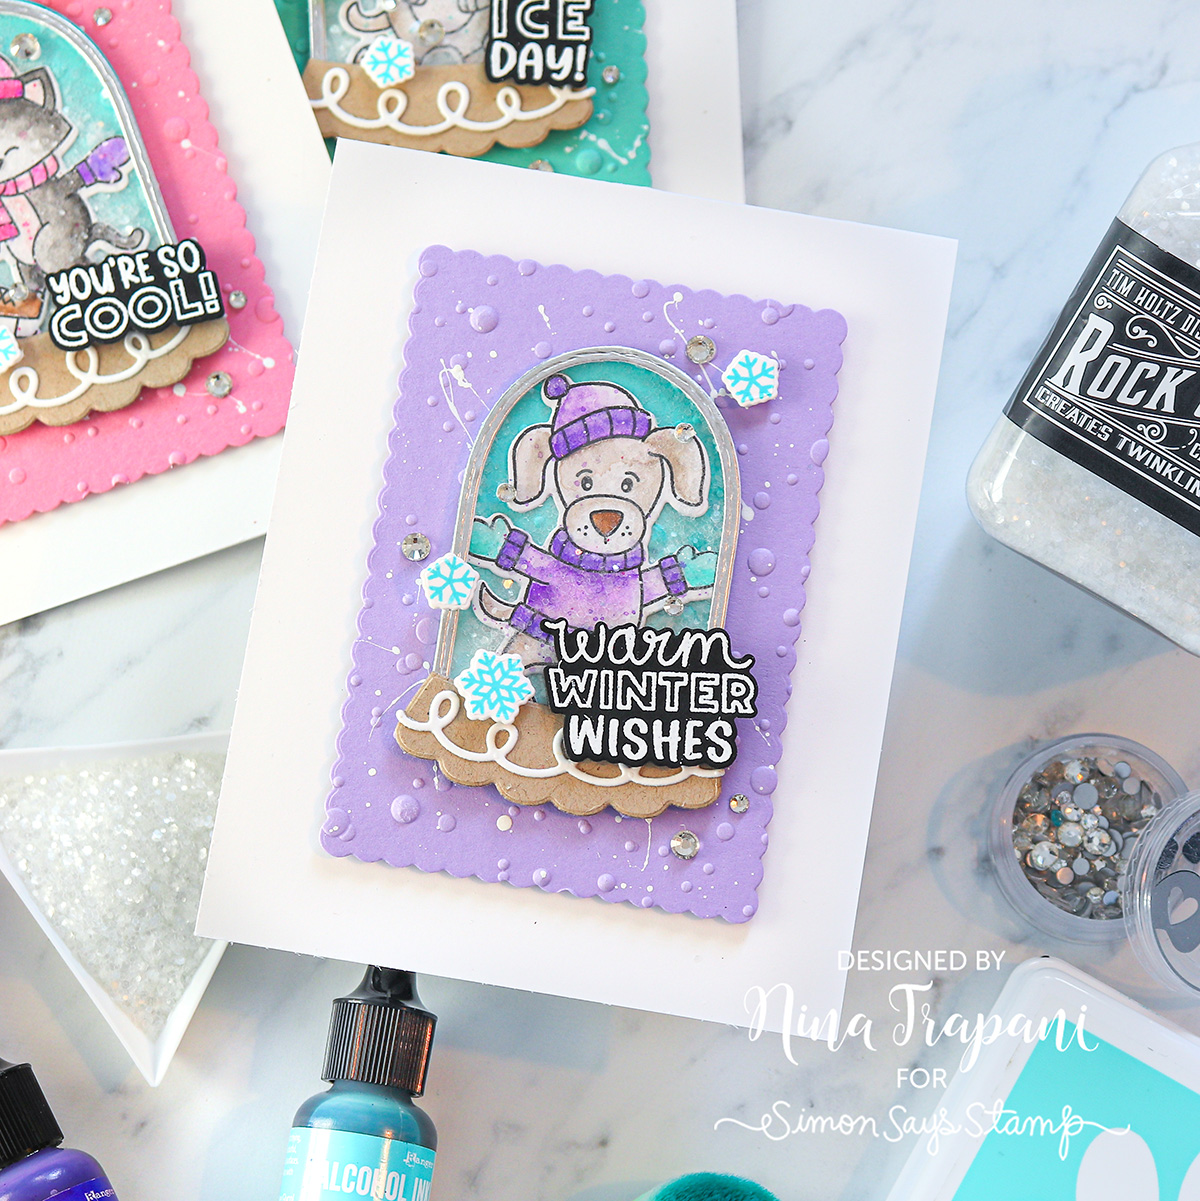
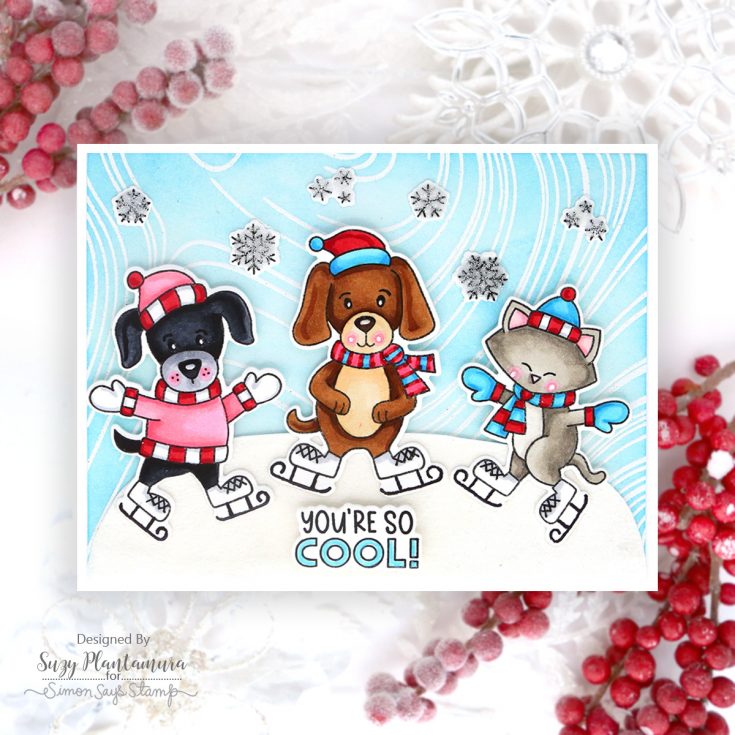
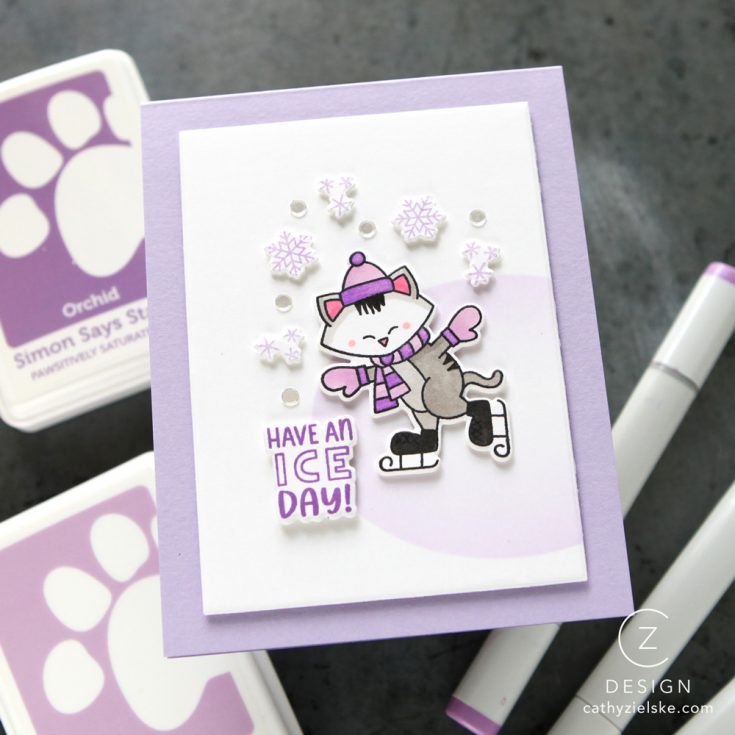
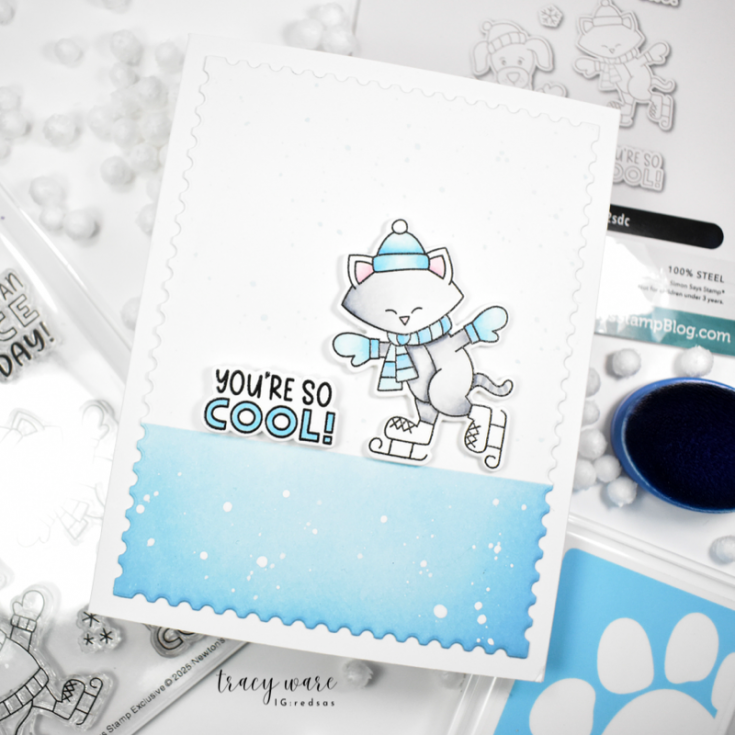
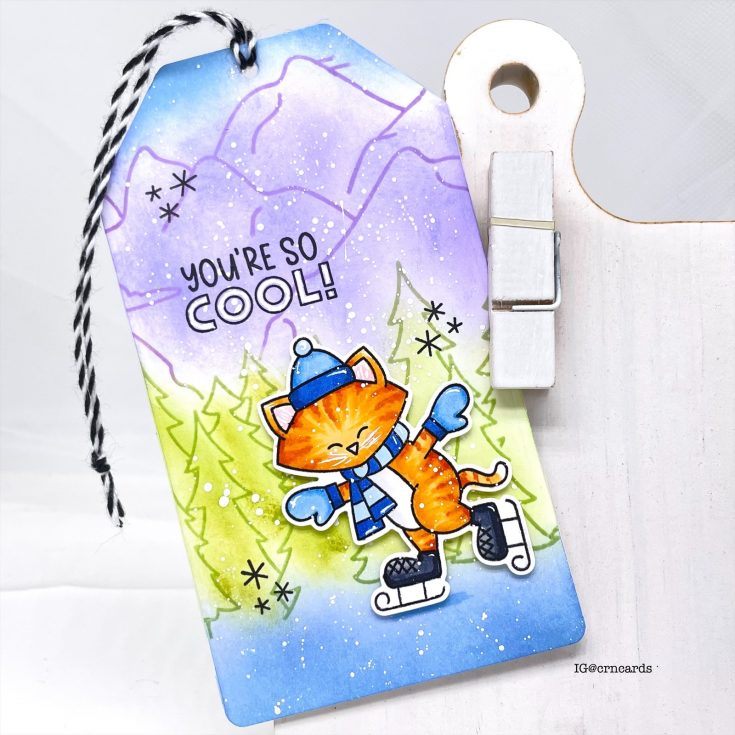
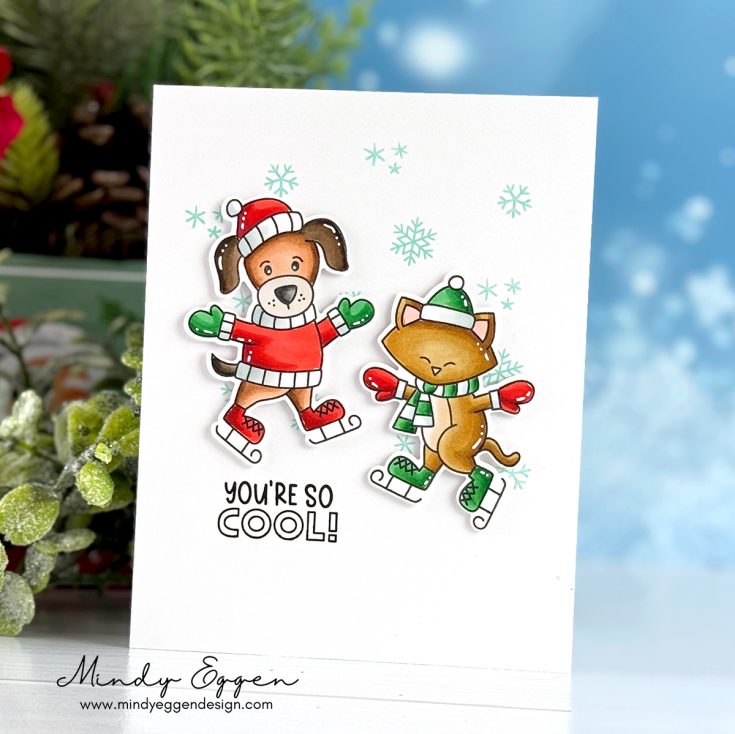
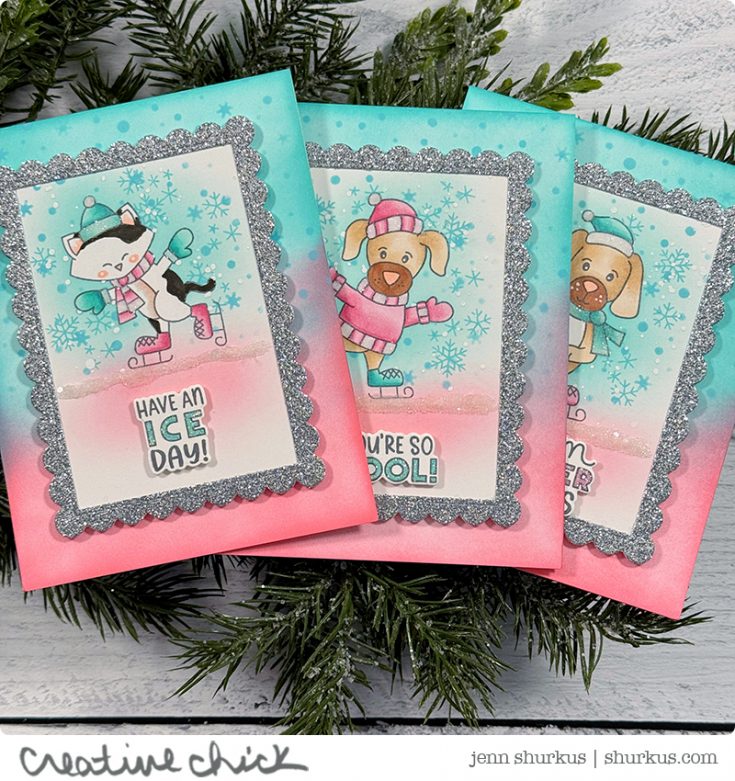
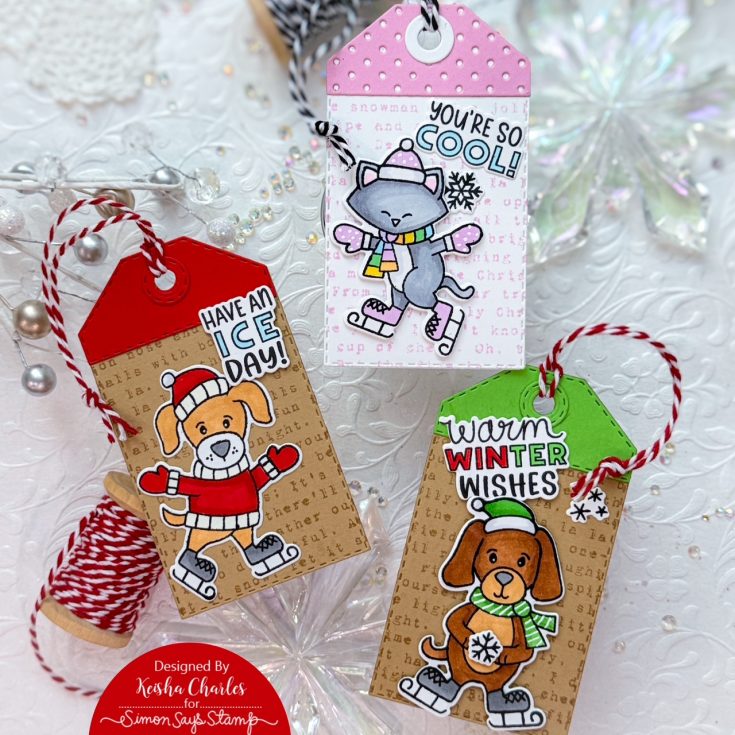
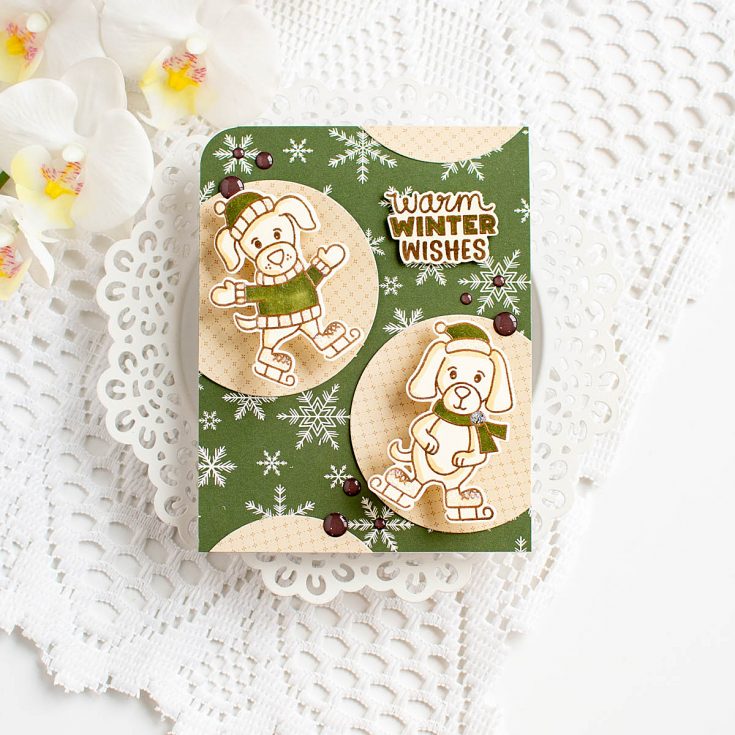
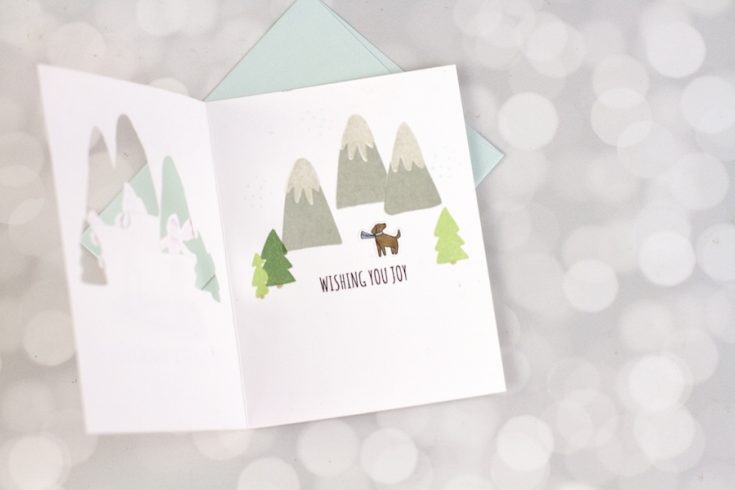
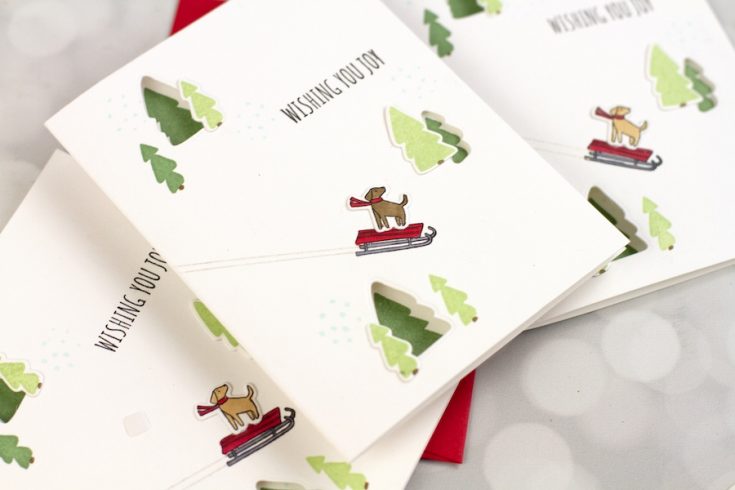
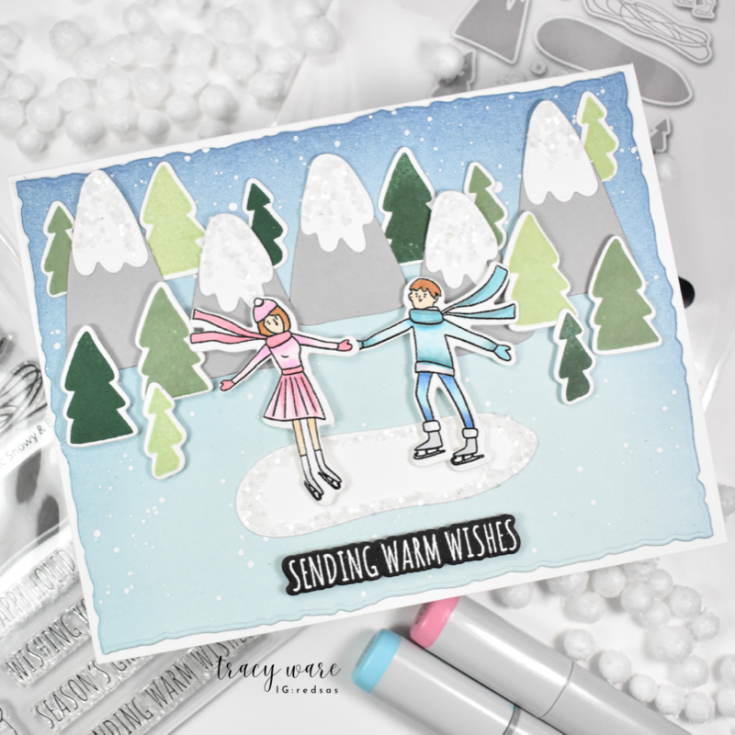
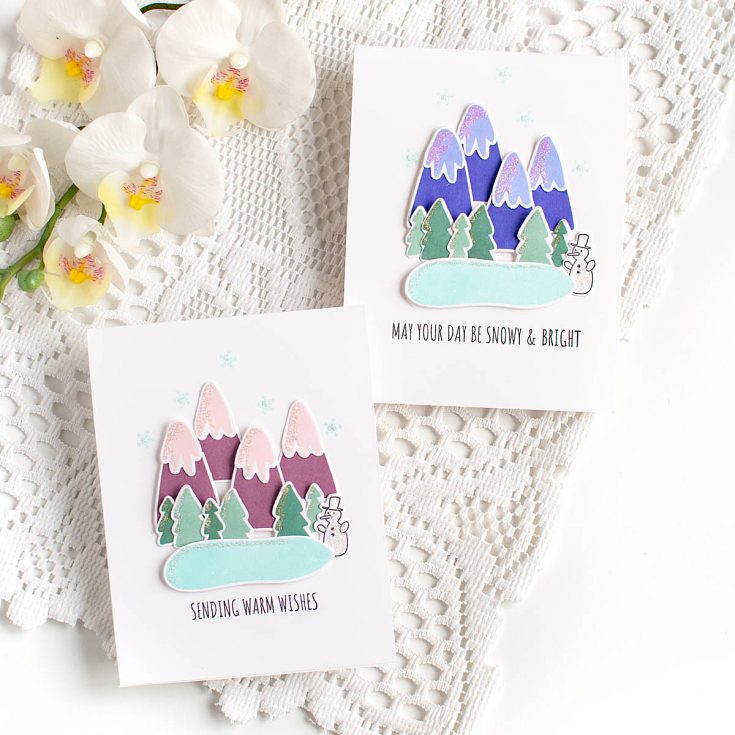
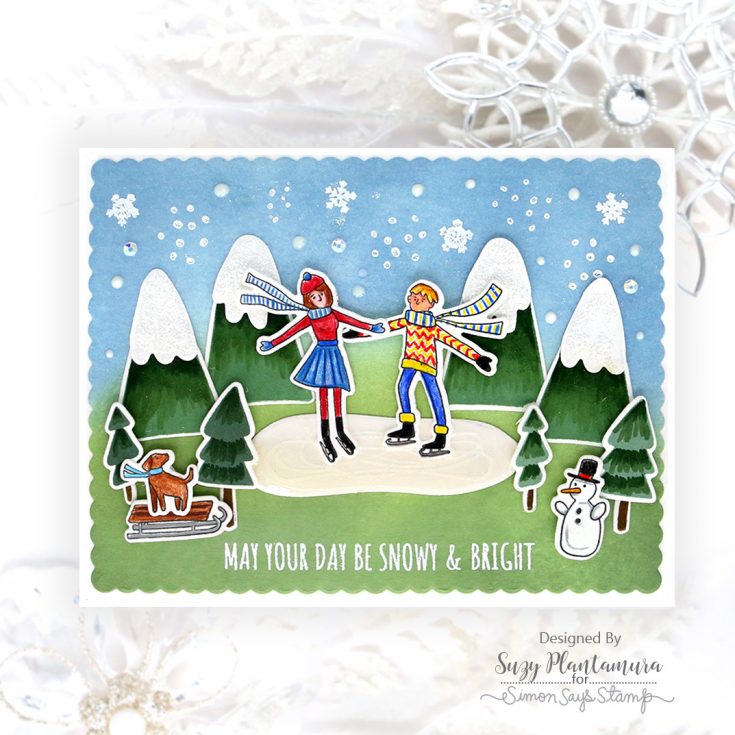
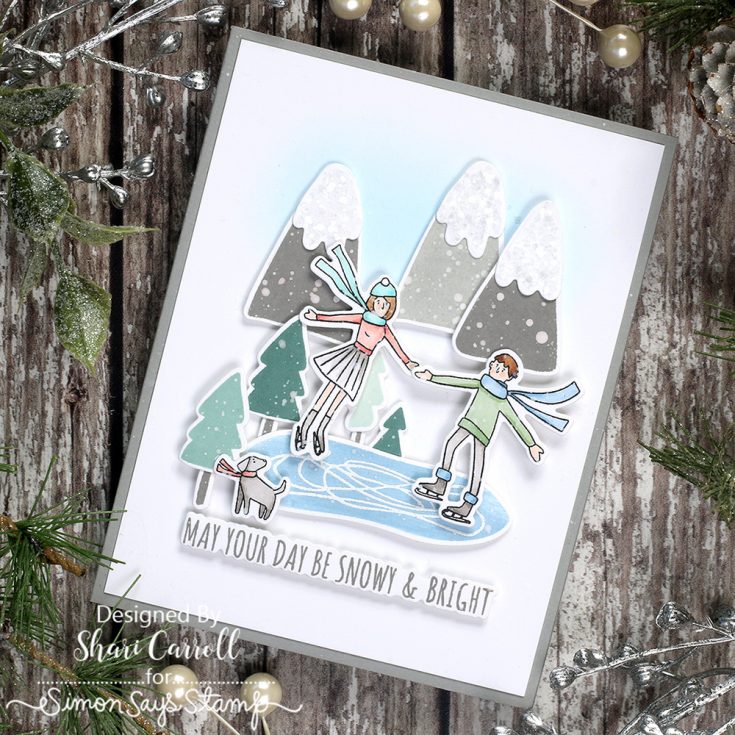
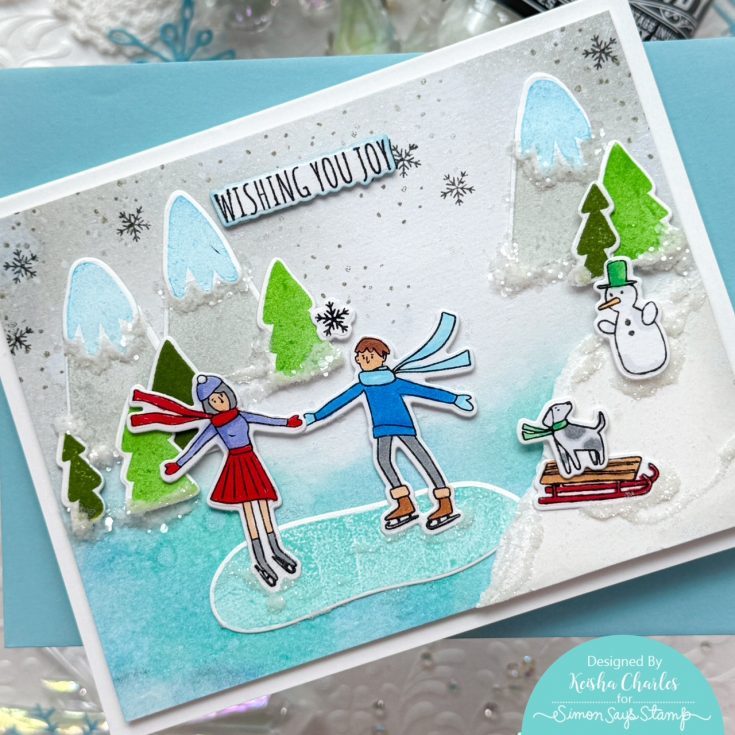
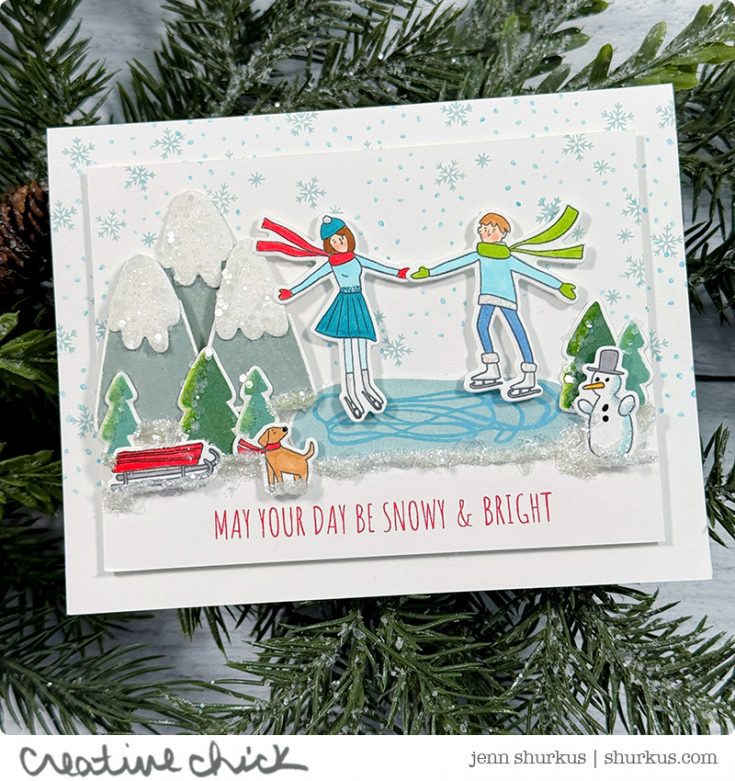
Additional ideas to INSPIRE!


Newton’s Nook also has TONS of great products available every day! Go check them out!
But WAIT, there’s MORE!


Hero Arts STAMPtember® 2025 Exclusive Collaboration!

WATCH THE VIDEO:

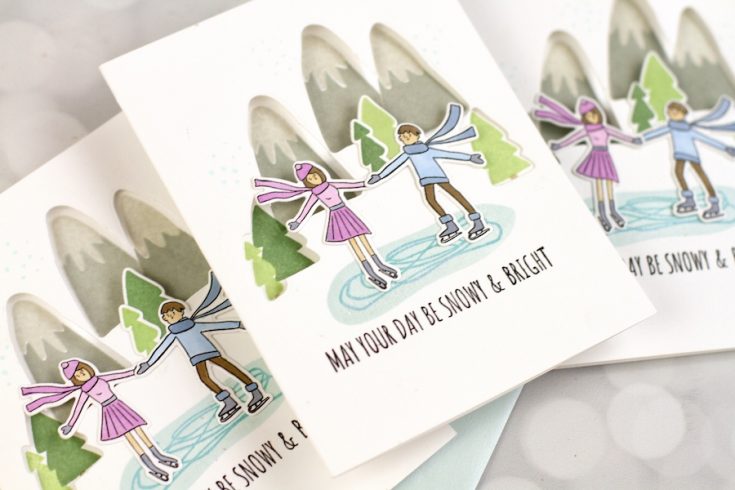
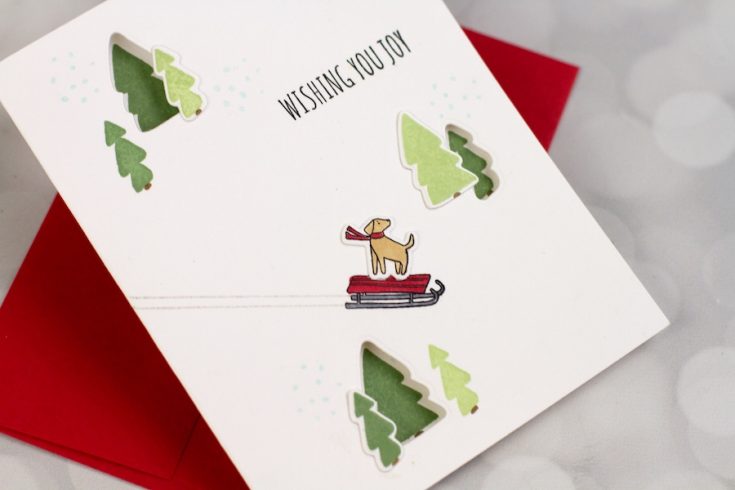
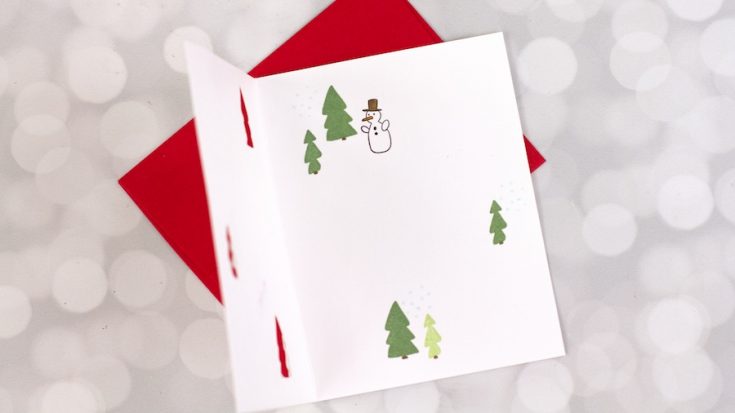

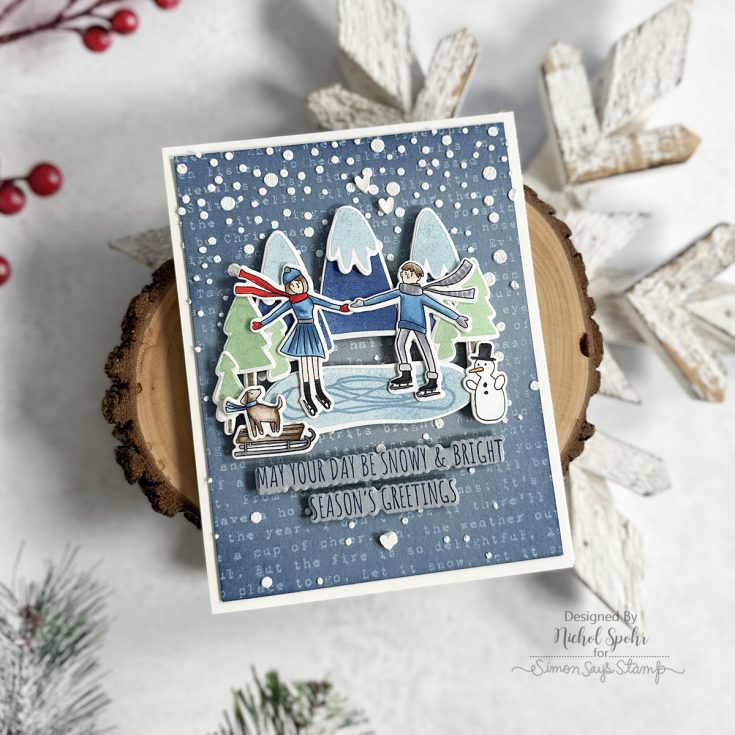
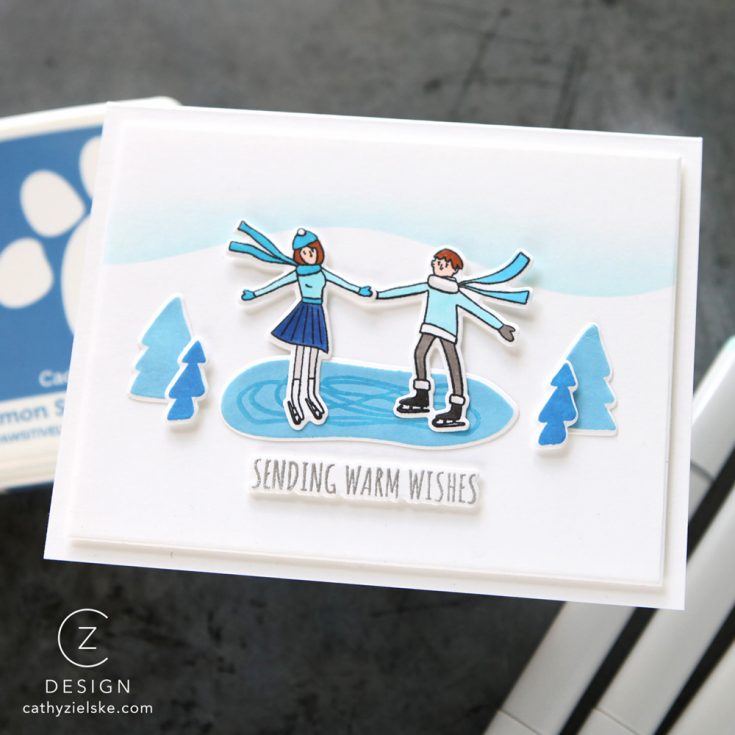
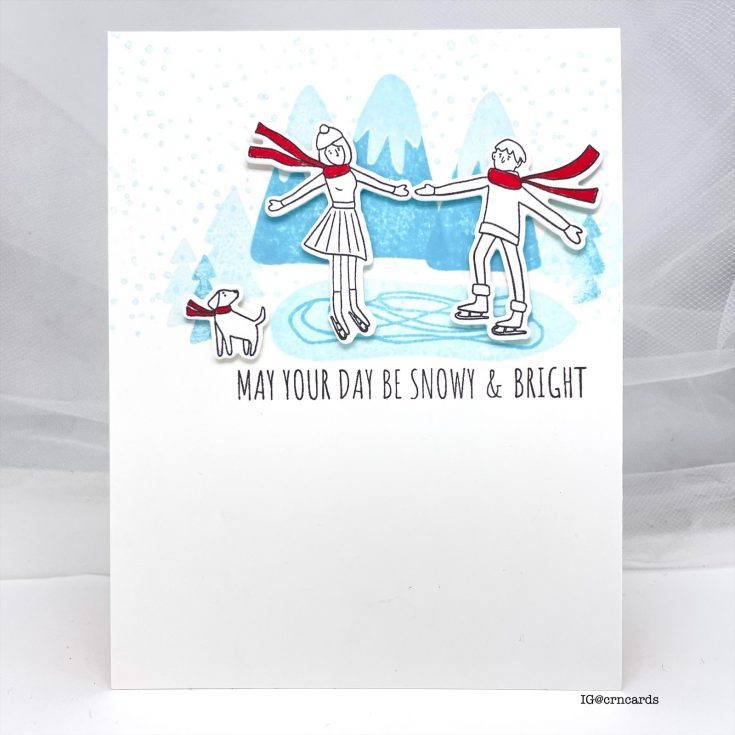
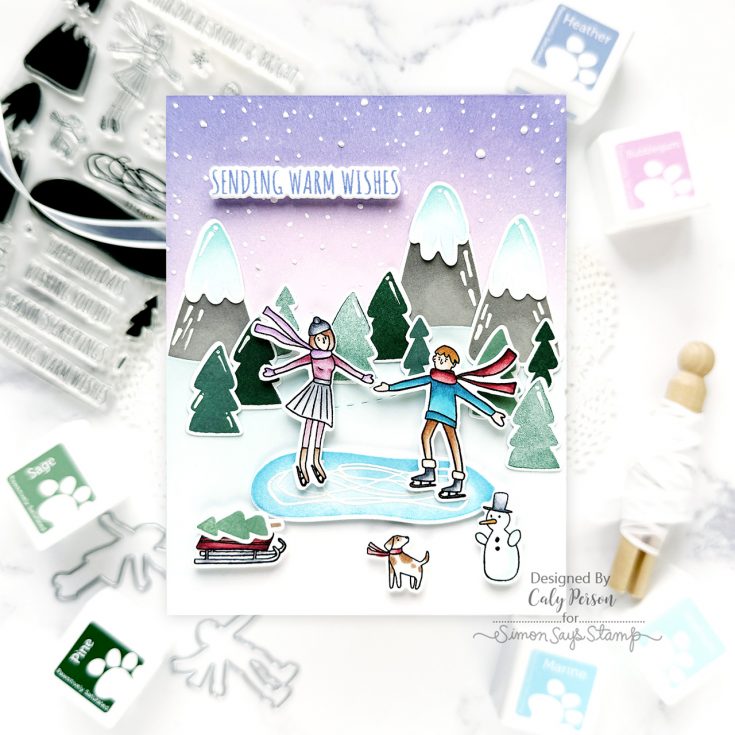
Additional ideas to INSPIRE!
Hero Arts also has TONS of great products available every day! Go check them out!
But WAIT, there’s MORE!
STAMPtember® 2025 Exclusive Surprise with Tim Holtz!
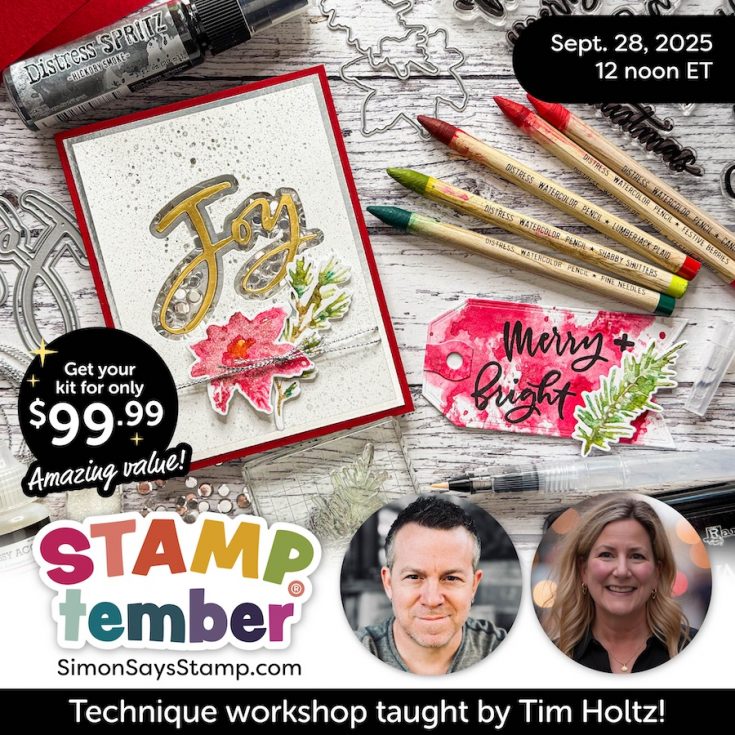
Brand NEW + never-before-seen in STAMPtember®!
We’re beyond excited to share today’s launch—it’s truly something special!
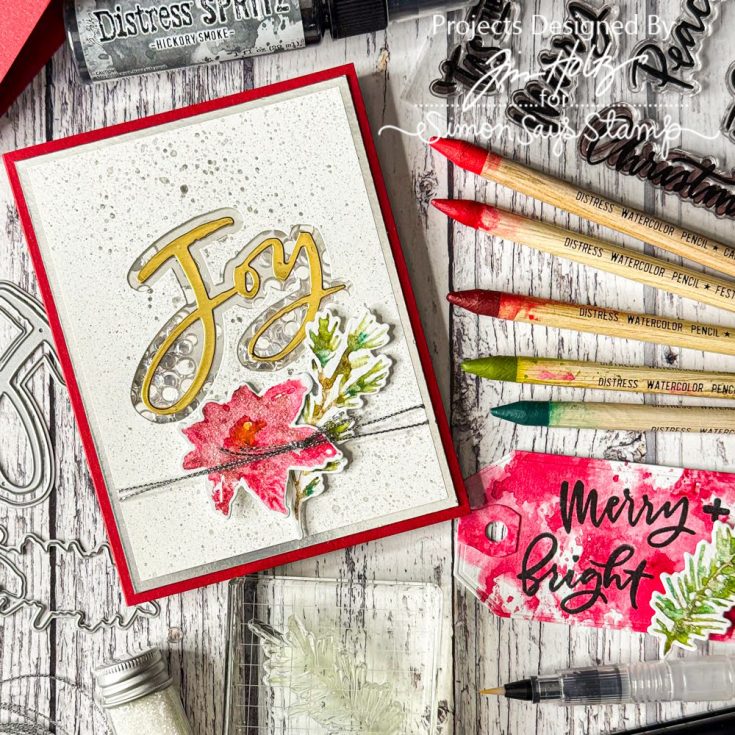
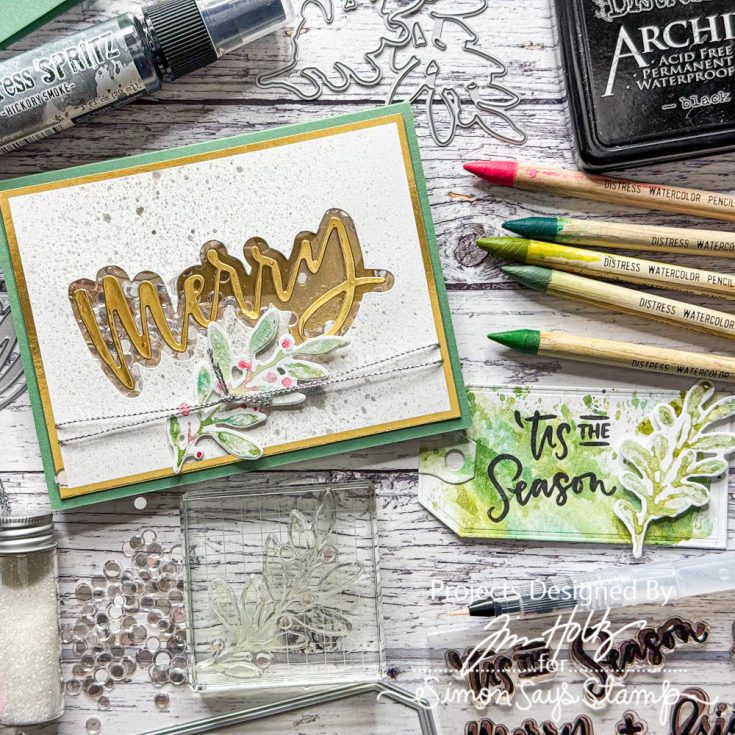
For the first time ever, we’re unveiling SIX brand-new Simon Says Stamp exclusive stamps + dies (available individually) OR a VERY special MEGA Value Kit—all designed to be the foundation of an unforgettable Technique Workshop with the one and only Tim Holtz! How amazing is that?!
Join the Fun!
Tim Holtz and Simon Says Stamp founder, Heidi, are teaming up LIVE from Tim’s studio on Sunday, September 28th, 2025 at 12 PM ET on our YouTube channel! This lively, interactive class will be packed with techniques, tips, and inspiration straight from the master himself.
Heidi will be right there in the studio—learning, crafting, and sharing the experience alongside YOU as Tim guides us through every element in the kit. This exclusive set was truly curated for the creative at heart.
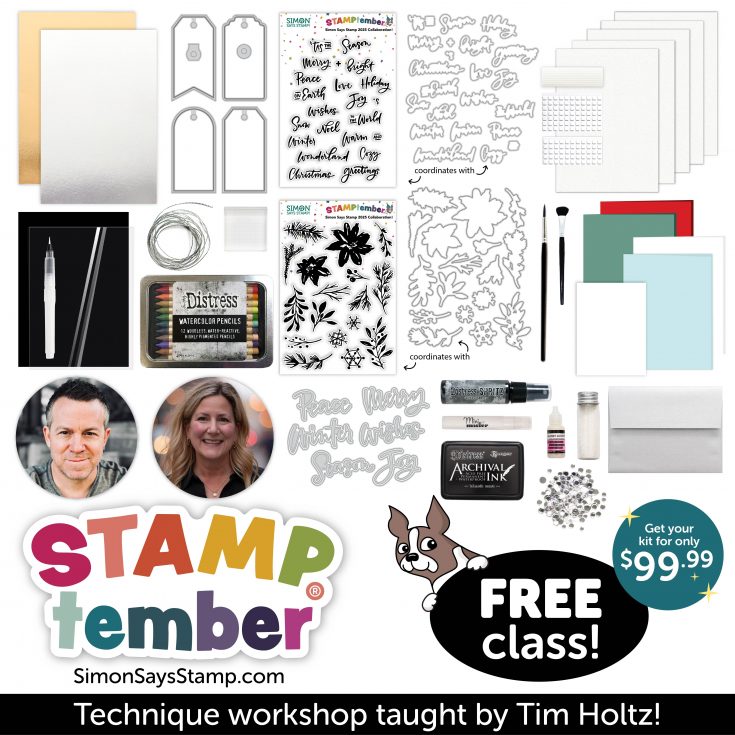
What’s Included:
Your kit is value-packed with supplies to complete finished projects AND leave room for playful experimentation during this unique technique workshop!
Shipping Info:
Kits start shipping NOW!
Class Details:
- Date: Sunday, September 28th, 2025
- Time: 12 PM ET
- Where: Simon Says Stamp YouTube Channel
Can’t make it live? No worries! The full class will be available on YouTube to pause, rewatch, and replay anytime.
And the best part? The class is FREE for everyone—whether you purchase a kit or not, we’d LOVE for you to join the fun!
Kit contents included:
Kit contents:
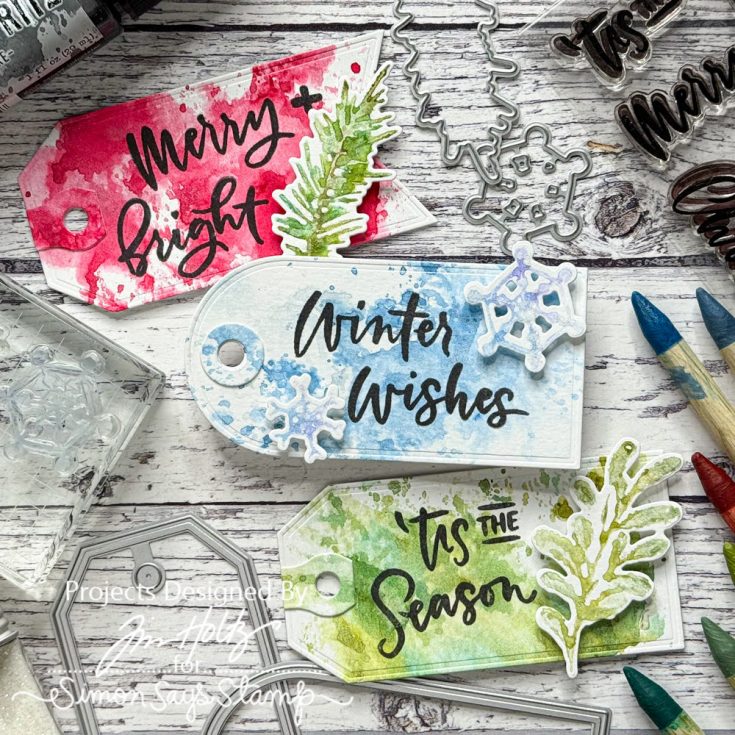
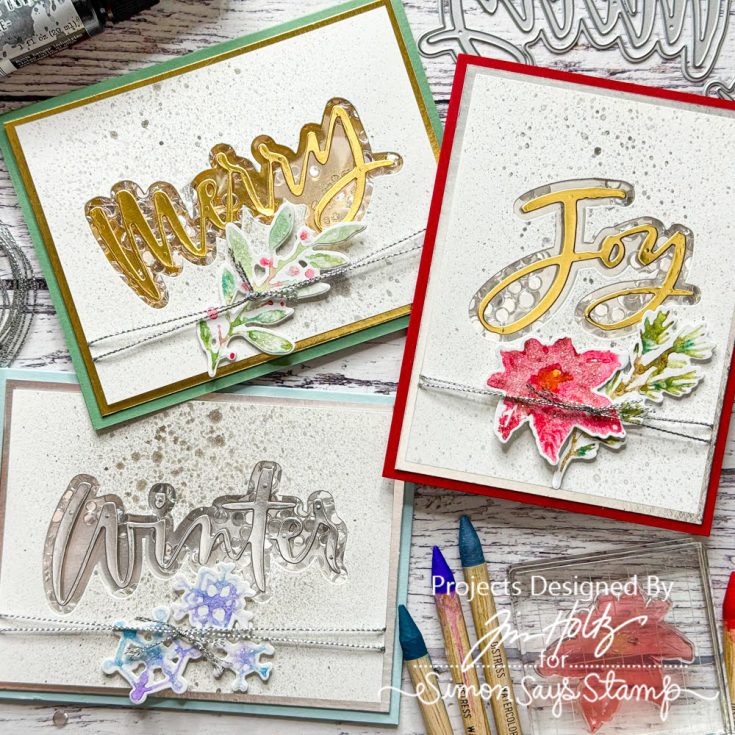
- Simon Says Stamp STAMPtember® Limited Edition Festive Watercolor Stamps
- Simon Says Stamp STAMPtember® Limited Edition Festive Watercolor Coordinating Dies
- Simon Says Stamp STAMPtember® Limited Edition Festive Sentiments Stamps
- Simon Says Stamp STAMPtember® Limited Edition Festive Sentiments Coordinating Dies
- Simon Says Stamp STAMPtember® Limited Edition Festive Tags Dies
- Simon Says Stamp STAMPtember® Limited Edition Festive Words Dies
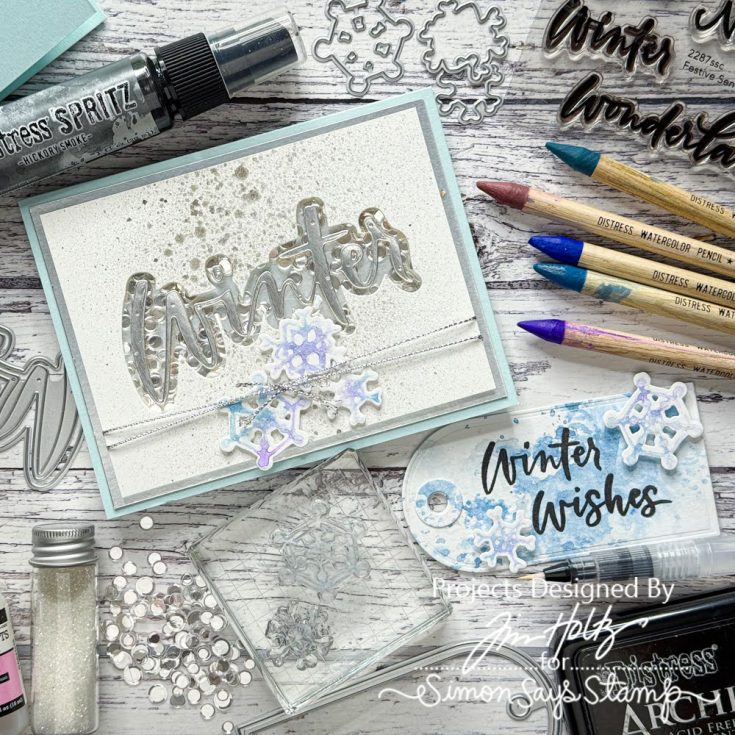
- 1 Full Set of Tim Holtz Distress Watercolor Pencils (sets will vary)
- 1 bottle mini glossy accents
- 1 SPECIAL vial of Ranger Tim Holtz Rock Candy Glitter
- 1 Glitter Fat Brush
- 1 Glitter Glue Brush
- 1 Tim Holtz Ranger Distress Black Soot Archival Ink Pad
- 5 Sheets of Ranger Distress Watercolor 8.5 x 5.5 Inch Cardstock
- 1 Sheet of Neenah 110 LB 3.75 x 5 Inch Cardstock
- 1 bottle of Tim Holtz Ranger Distress Spritz in Hickory Smoke
- 1 Simon Says Stamp Sea Glass A2 Notecard
- 1 Simon Says Stamp Sage A2 Notecard
- 1 Simon Says Stamp Schoolhouse Red A2 Notecard
- 1 Simon Says Stamp A2 Metallic Silver Envelope
- 1 Gina K Designs 2.5 x 2.5 Inch Acrylic Block
- 1 6×10 Inch sheet of Tim Holtz idea-ology Kraft Metallic Cardstock in Gold Foil
- 1 6×10 Inch sheet of Tim Holtz idea-ology Kraft Metallic Cardstock in Silver Foil
- 1 Small Ranger Spray Bottle
- 1/4 sheet of Simon Says Stamp Foam Adhesive Strips
- 1/2 sheet of Simon Says Stamp Foam Thin Squares
- 1/3 sheet of Simon Says Stamp Foam Squares
- 72 inches of Simon Says Stamp Silver Metallic Cord
- 1 sheet of Tim Holtz Distress Black Heavystock 5×7 Inch Cardstock
- Simon Says Stamp Starshine Embellishments
- 1 Simon Says Stamp Fine Tip Waterbrush
- 1/2 sheet Simon Says Stamp Acetate
Missed our live announcement? Catch the rewatch below:


