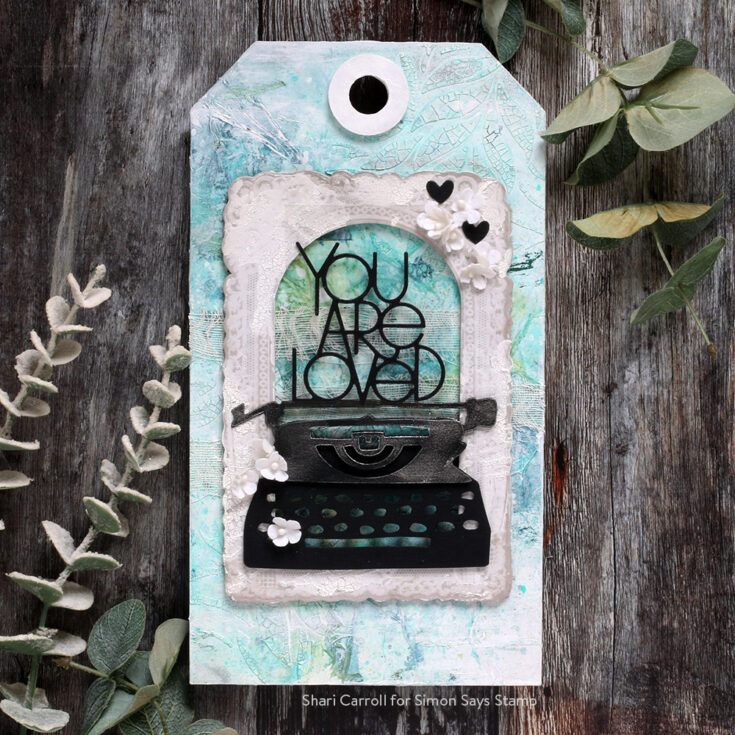
Art Journaling with Shari Carroll: Friendship

Welcome everyone and happy February!!! It’s Shari here with an art journal page that I’m adding to my Tim Holtz Travel Folio.
If you’d like to catch up on what I’m doing with this folio, you can check out my post HERE where I decorated the outside and inner flaps.
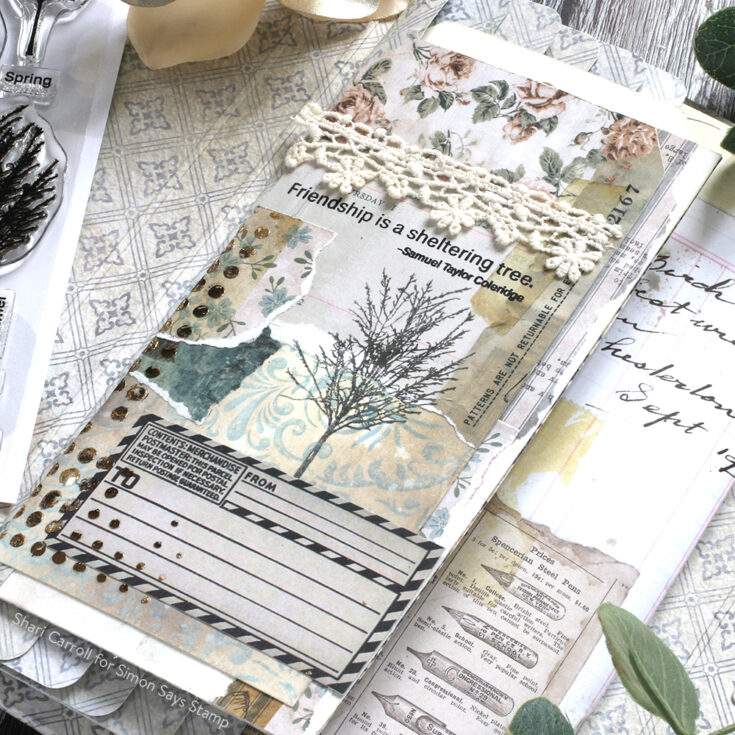
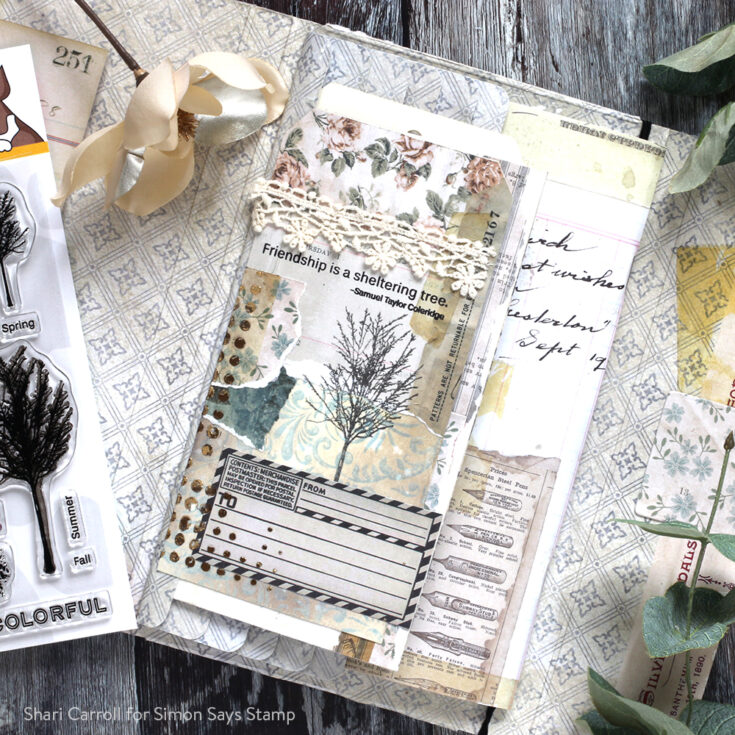
This first page in my folio uses a #8 tag and a NEW Simon Says Stamp Mini Slimline envelope as a journaling pocket. I’m continuing with a shabby chic look by incorporating papers, paint, light stamping, simple collage, and easy foiling.
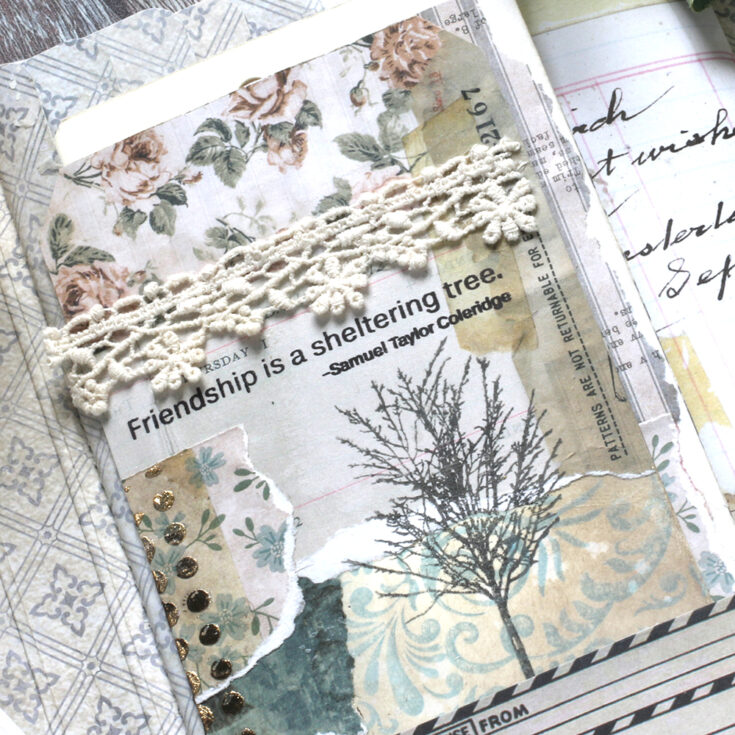
I’m loving this folio with the waterfall-type spine that allows me to add whatever I want to complete my journal.
SUPPLIES:
|


One Stamp Five Ways: Best Friend Ever

Hi friends! We’re one month into 2021 already! Wow! Please join me in welcoming special guest Suzy Plantamura back for her monthly installment of One Stamp Five Ways. Read on to learn more and enjoy!
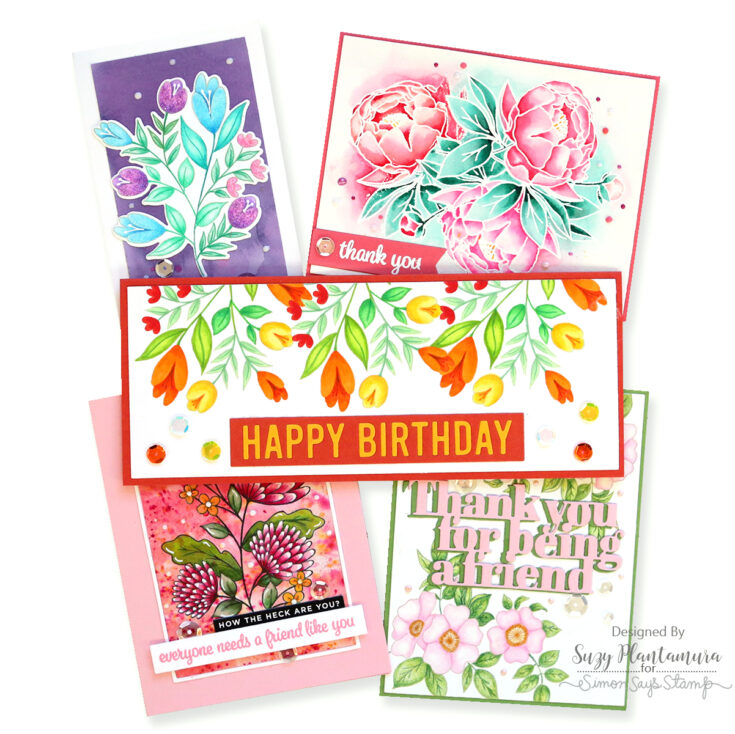
Today I have a “one stamp, five ways” post to share with you using the Best Friend Ever stamp set from the Love You, Too release. I picked this set because I love flowers and I liked that it had four different type of flower groupings. Between all the different flowers and 5 different sentiments, I knew it would be easy to make 5 cards with it. I tried to use different techniques on each one.
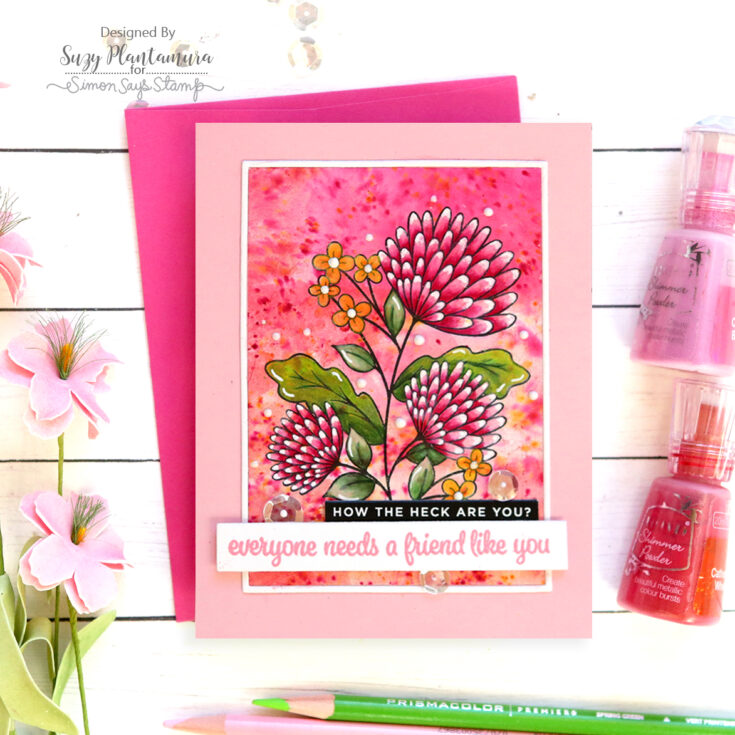
This card made me “think out of the box” as it was the last one I made. I recently had my 5 year old granddaughter over for a painting playdate! I pulled out all my Nuvo Shimmer Powders first and we painted lots of mixes of colors. They are the best painting supply ever to use with kids. They just wet the paper and shake the bottle over it and little splotches come out and burst into colorful fire-works! I use these opportunities to make card backgrounds. I had a piece where I used Catherine Wheel and Cherry Bomb which always work well together. I die-cut a SSS Thin Frame Die from that piece and from white cardstock.
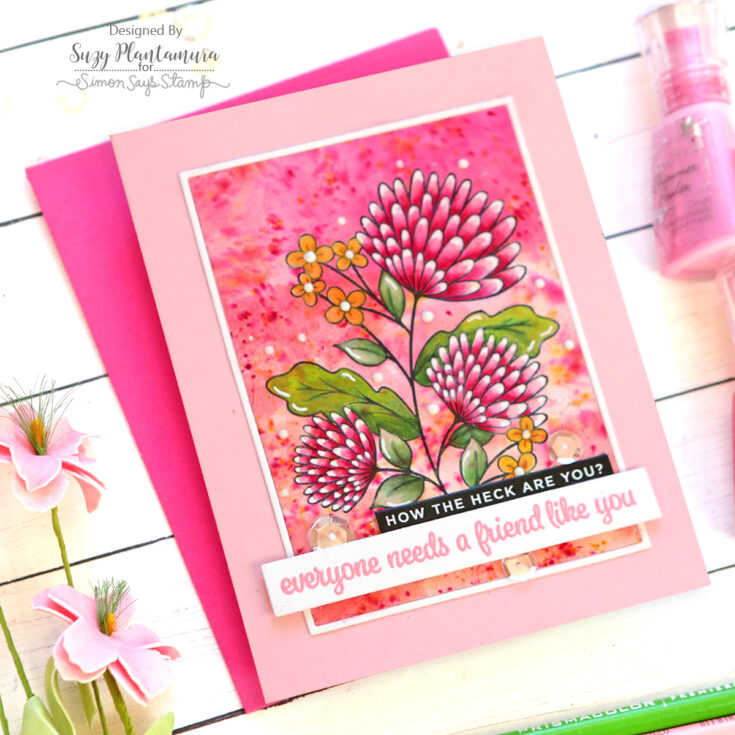
I stamped one of the flowers on this piece with Intense Black Ink. I then colored it in with colored pencils. Although I use a mix of many different brands, the waxier pencils work the best at coloring over colored papers. I stuck to Prismacolors as they are really waxy. I use a white one to blend and lighten the colors. I attached this piece to a light pink card base with a white thin frame around it. I embossed one of the sentiments in the set on a white cardstock Sentiment Label Die with Pink Peony embossing powder. I attached that to the bottom of the design and added a pre-printed Sentiment Strip above it. I also added some sparkling clear sequins.
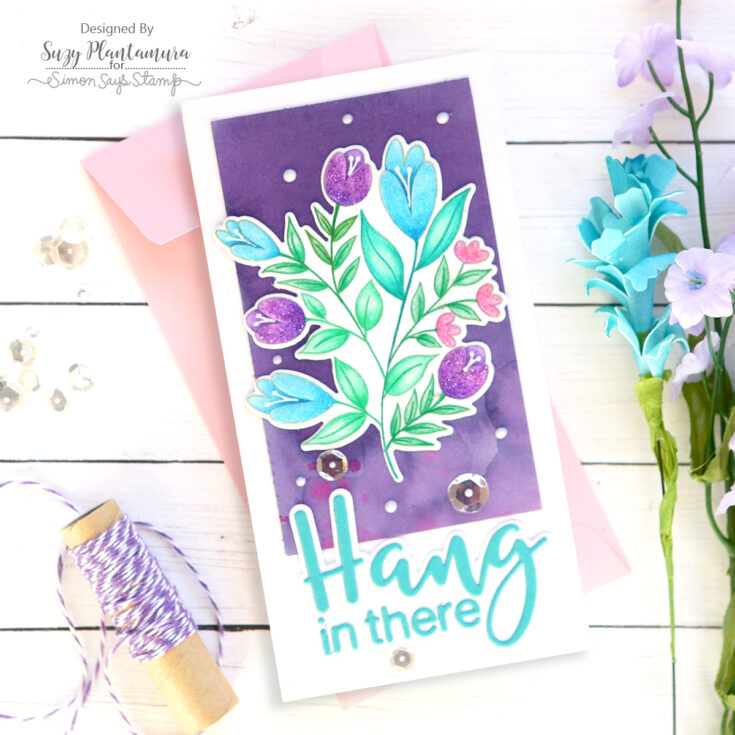
I decided to try one of the new smaller slimline cards. I was so excited to see that Simon came out with a smaller envelope for this size. I made a white cardstock base that is 6.25” x 3.25”. I used a piece of my watercolored paper using Violet Brocade Shimmer Powder for the background. I attached that piece to the top of the card.
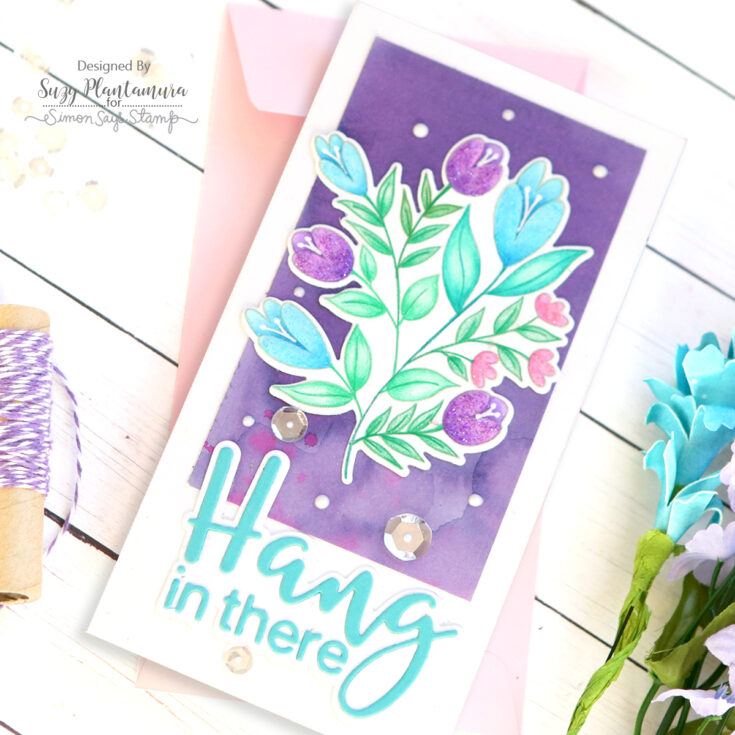
I stamped one of the floral designs with MFT Natural Ink and I colored it with colored pencils. I then die-cut it with the matching die. I attached it over the watercolored piece. I then die-cut the Hang In There die with white cardstock and Audrey Blue cardstock and attached the blue letters to the white frame. I attached that below the floral piece. I added some Glossy White Nuvo Drops and some sparkling clear sequins. I also added some Nuvo Glitter Drops over the flowers.
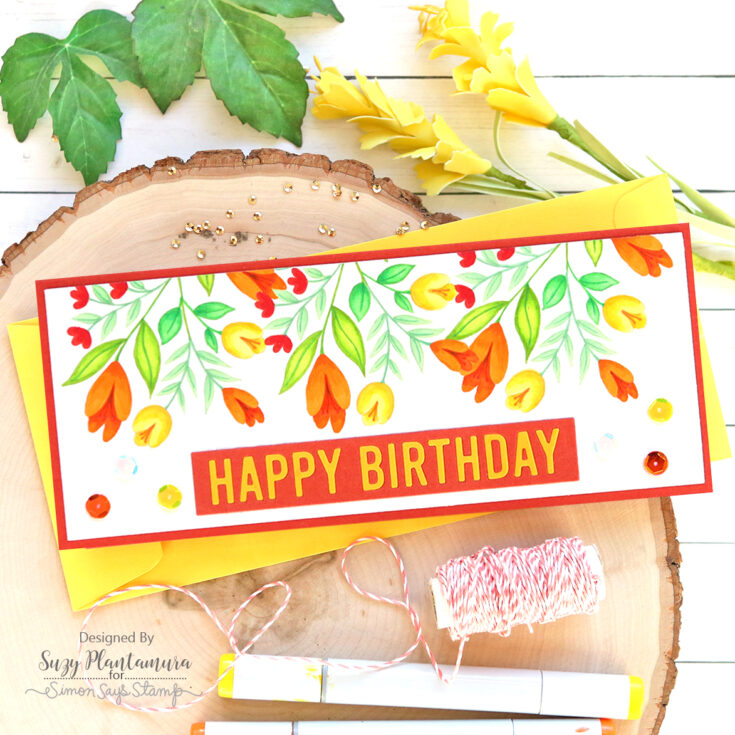
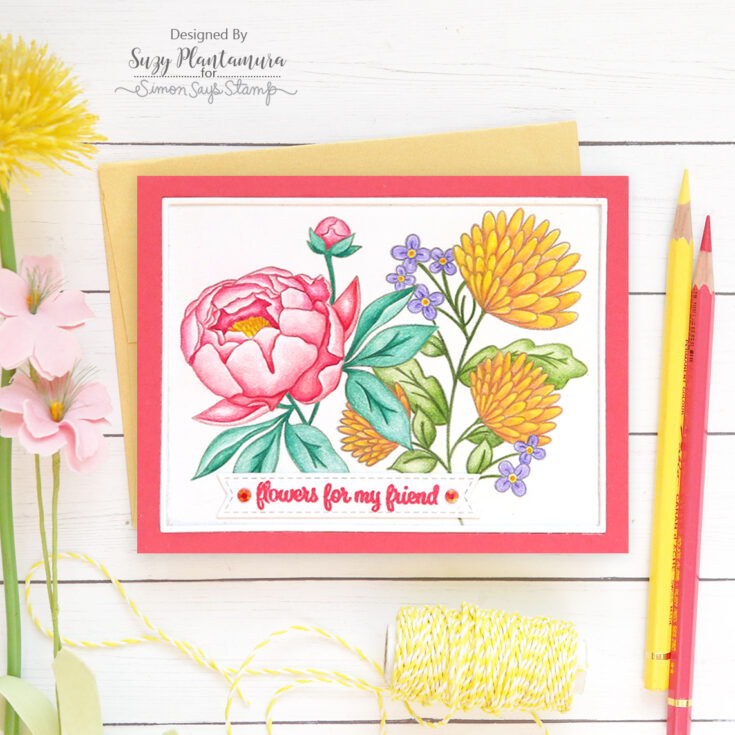
Now I went for the full size slimline card. I die-cut a piece of white cardstock with the largest Nested Rectangle die. I then stamped the floral stamp on masking paper and cut it out. I stamped the flower on the top of the white cardtsock rectangle 3 times using the masking paper where they overlapped. I colored the designs in with Copic marekrs. I added a little bit of shading with colored pencils.
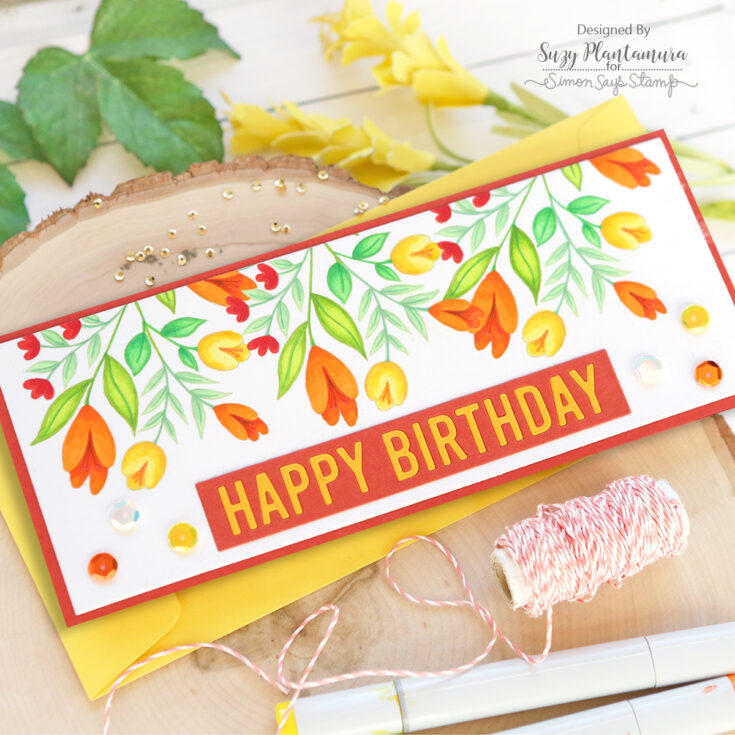
I die-cut the Happy Birthday sentiment from the Slimline Scallop Frame Dies from yellow and burnt orange cardstock. I attached it to the bottom of the card with yellow letters inside the darker orange frame. I added 3 sequins to each side from the Cracking Fire and Cupcake Frosting sequins.
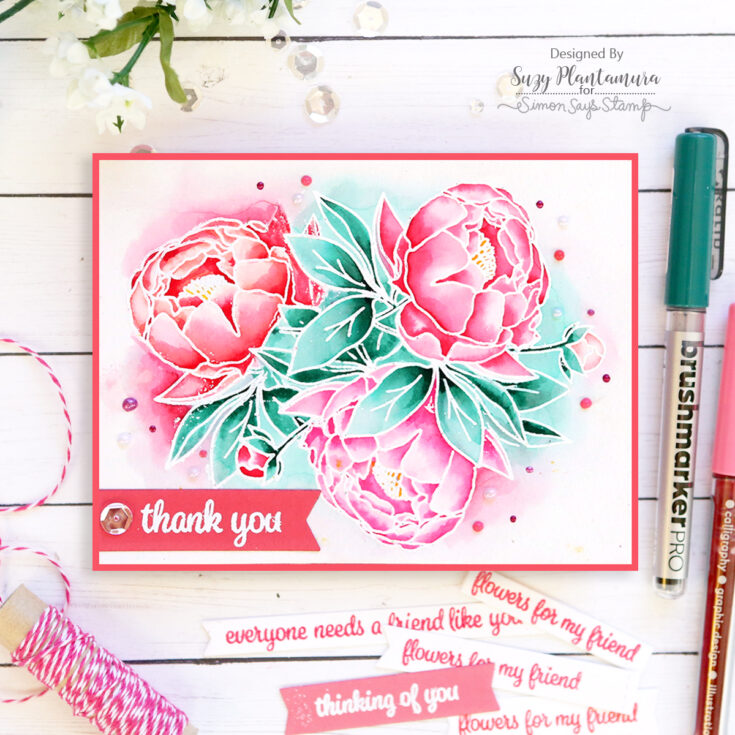
I stamped the rose flower stamp on masking paper and cut it out. I then embossed it 3 times with white embossing powder on Arches watercolor paper. I had to use the masking paper for areas that overlapped. I then used Karin Brushmarkers to paint the roses. I only used 4 colors on this piece. I painted around the flowers with lots of water and a little bit of color. I dipped my brush on the tip of the marker and moved the color around the flowers. One thing I like and don’t like about the Karin markers is the colors will smear after they are dry. I like using them best with embossed images so the color stays where it is suppose to! But when doing backgrounds it is easy to moved some of the color from the painted images to the background.
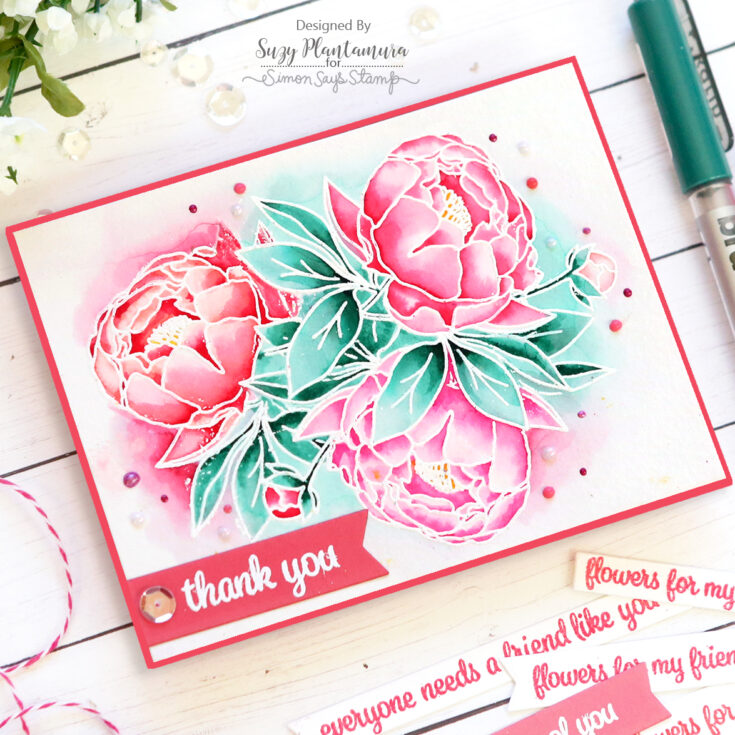
I die-cut the watercolored piece with the largest frame from the A2 Thin Frame Dies. I embossed “thank you” on a small banner with white embossing powder and attached that to the left side of the card. I used Lawn Fawn Guava cardstock for both the card base and the sentiment banner. I added a sparkling clear sequin to the left side of the banner. I also added some different colors of Nuvo Drops around the flowers.
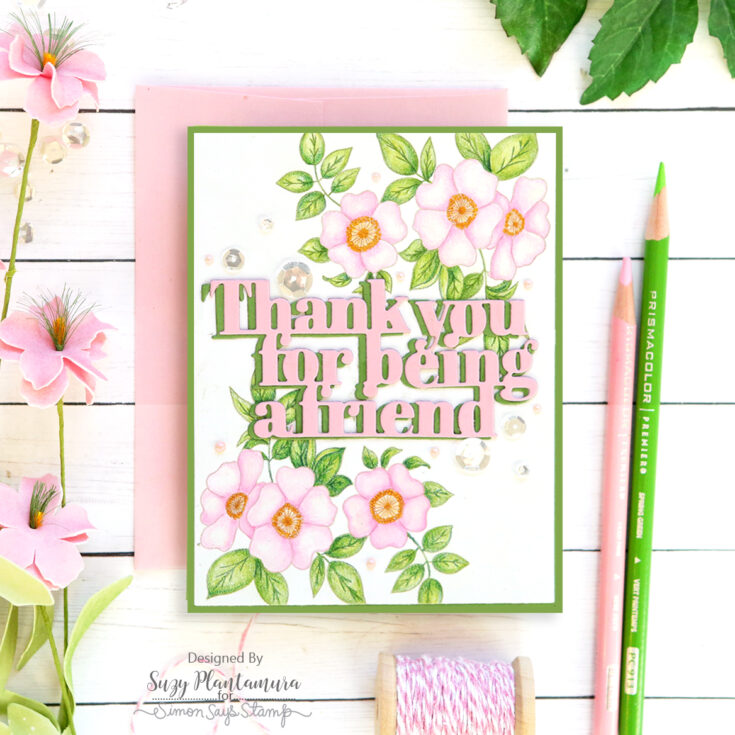
I stamped the Dogwood Blossom stamp (that is what I think it looks like) on the top and bottom of a white cardstock piece with MFT Natural Ink. I then colored the flowers in with colored pencils. I used a yellow Kaisercraft Glitter Pens in the circles around the flowers.
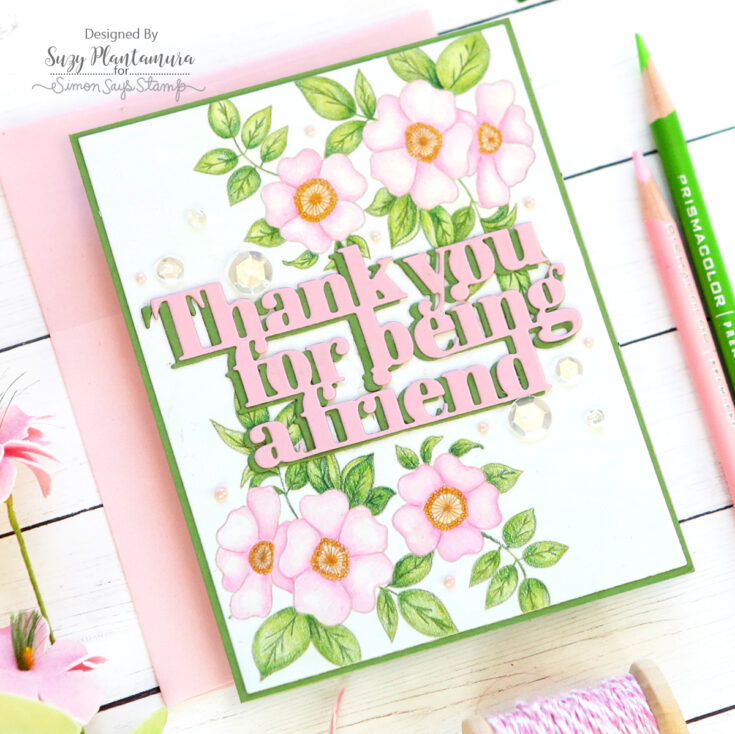
I die-cut the “Thank You For Being A Friend” die from both green and light pink cardstock. I glued them to the center of the card front overlapping the two colors. I first glued the green one on and it looked horrible as I used glue and I couldn’t move the letters into place quick enough. So I used a pink one over it to make it look better by carefully only gluing just little parts as I went so I could position it right. I added some sparkling clear sequins and some Love Potion Nuvo Dream Drops around the flowers. They look like little pearls.
I also made one more card with this stamp set that I posed on my blog earlier this month. Here is an image of the card and you can see the blog post here if interested.
Thank you so much for visiting today and I hope you enjoyed this “one stamp, five ways” post. I love challenging myself to use a stamp set multiple ways so I get the most use possible out of it. Try pulling out an older set you have already used and try to think of new ways to use it! Happy stamping friends! Suzy
SUPPLIES:
|


Thanks so much for stopping by, and thanks to Suzy for being our guest!
10 Mixed Media Tips & Tricks with Shari Carroll

Welcome everyone! It’s Shari here with a mixd media project using some of my favorite techniques.
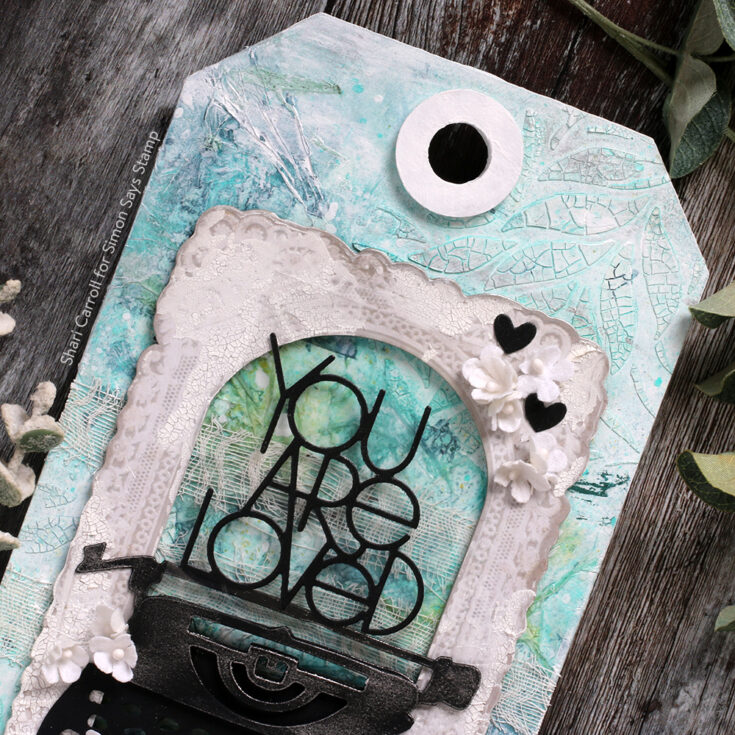
One thing I LOVE and that’s texture! I’ve used several ways to achieve a variety of textures for this project such as; Crackle Paste, tissue paper, and Mummy cloth. I’ve also used Dina Wakley Gloss sprays for a watercolor color look. These sprays are acrylic and are permanent when dry.

I’ve filmed a process video for you but have done something different where I tell you what I’m using and why. I hope you enjoy!!
SUPPLIES:
|


