Making the Cut: Interactive Tropical Magic Iris Card

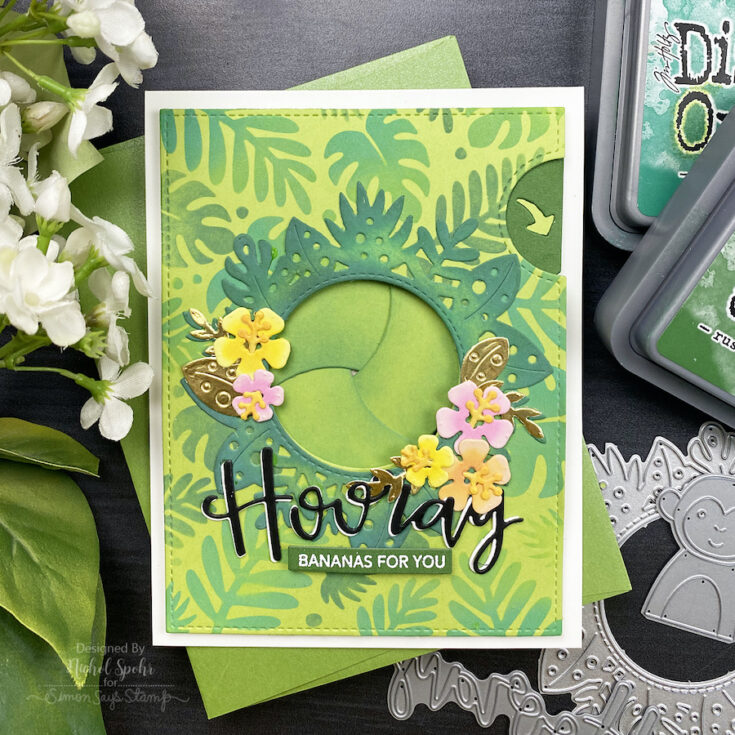
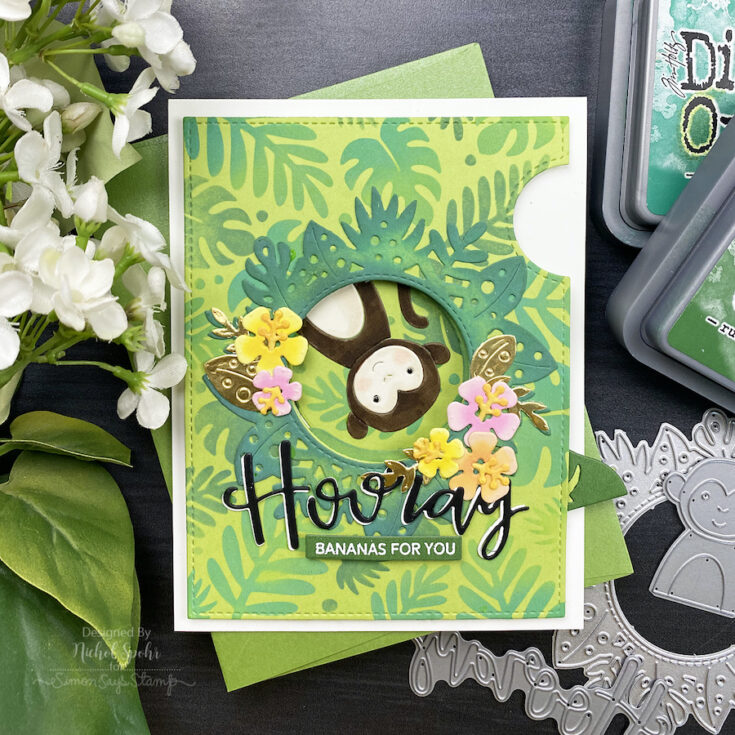
Hi friends! Happy Monday! Please join me in welcoming back special guest Nichol Spohr for our monthly edition of Making the Cut, our blog series that highlights the love of die cutting! The stars of this gorgeous card are Lawn Fawn’s brand new Magic Iris Tropical Leaves Add-On, (to go with the Magic Iris die) Tropical Leaves stencil, our own Hooray die, and that sweet little Picture Book Monkey! Be sure to watch the video for all the details, and enjoy!
WATCH THE VIDEO:
SUPPLIES:
|


Thanks so much for stopping by, and thanks to Nichol for being our guest!
Not a Card with Nina-Marie: Crêpe Paper Flowers!
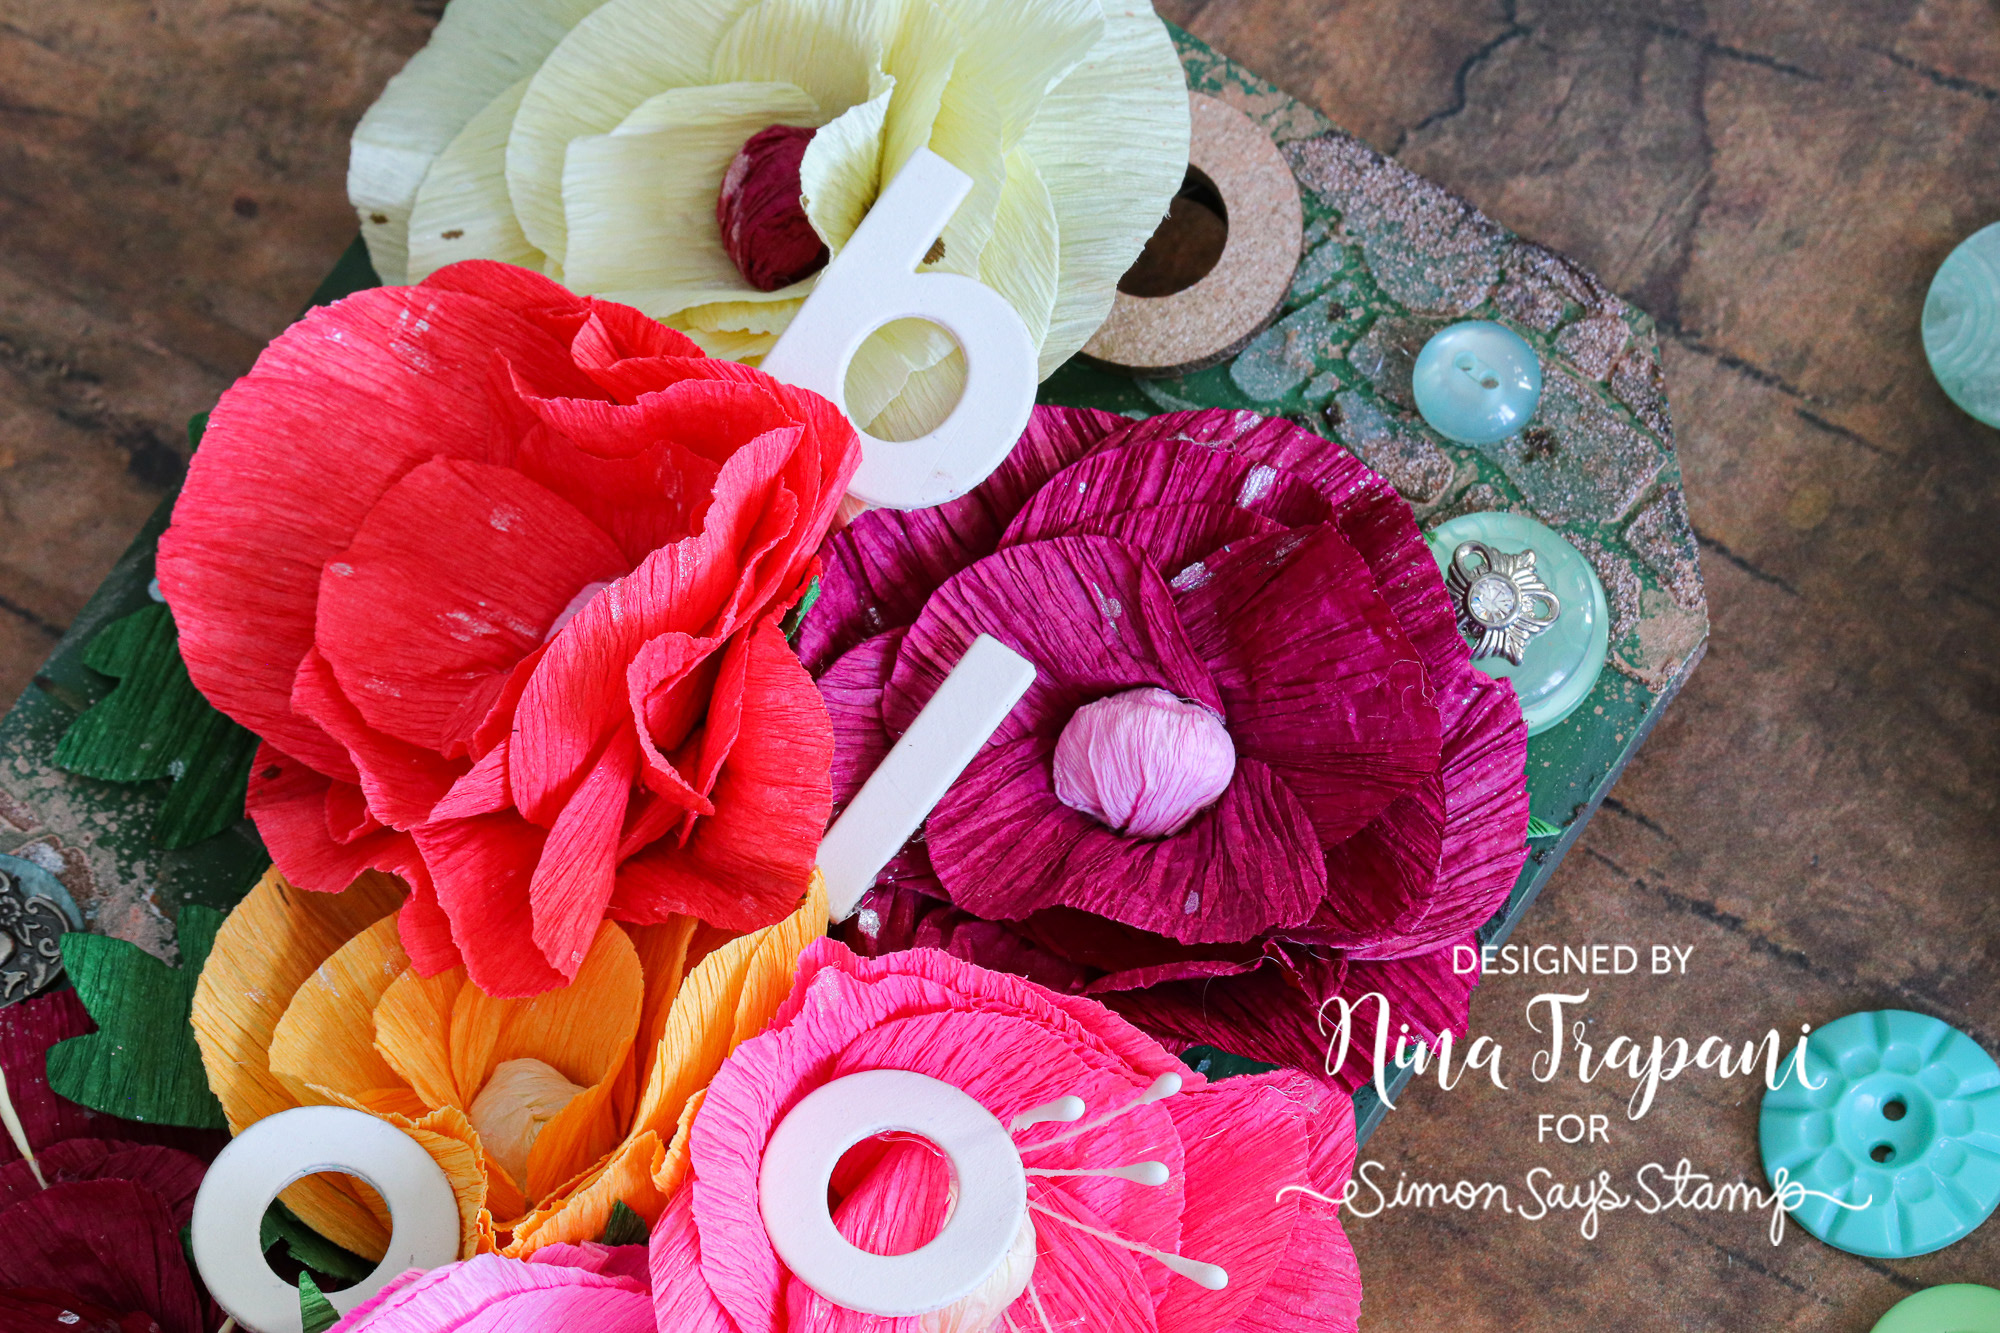
Hello friends! It’s Nina-Marie Trapani here with you! I am creating a dimensional home decor piece that involves making crêpe paper flowers. I love these because they are easy and SO realistic looking!
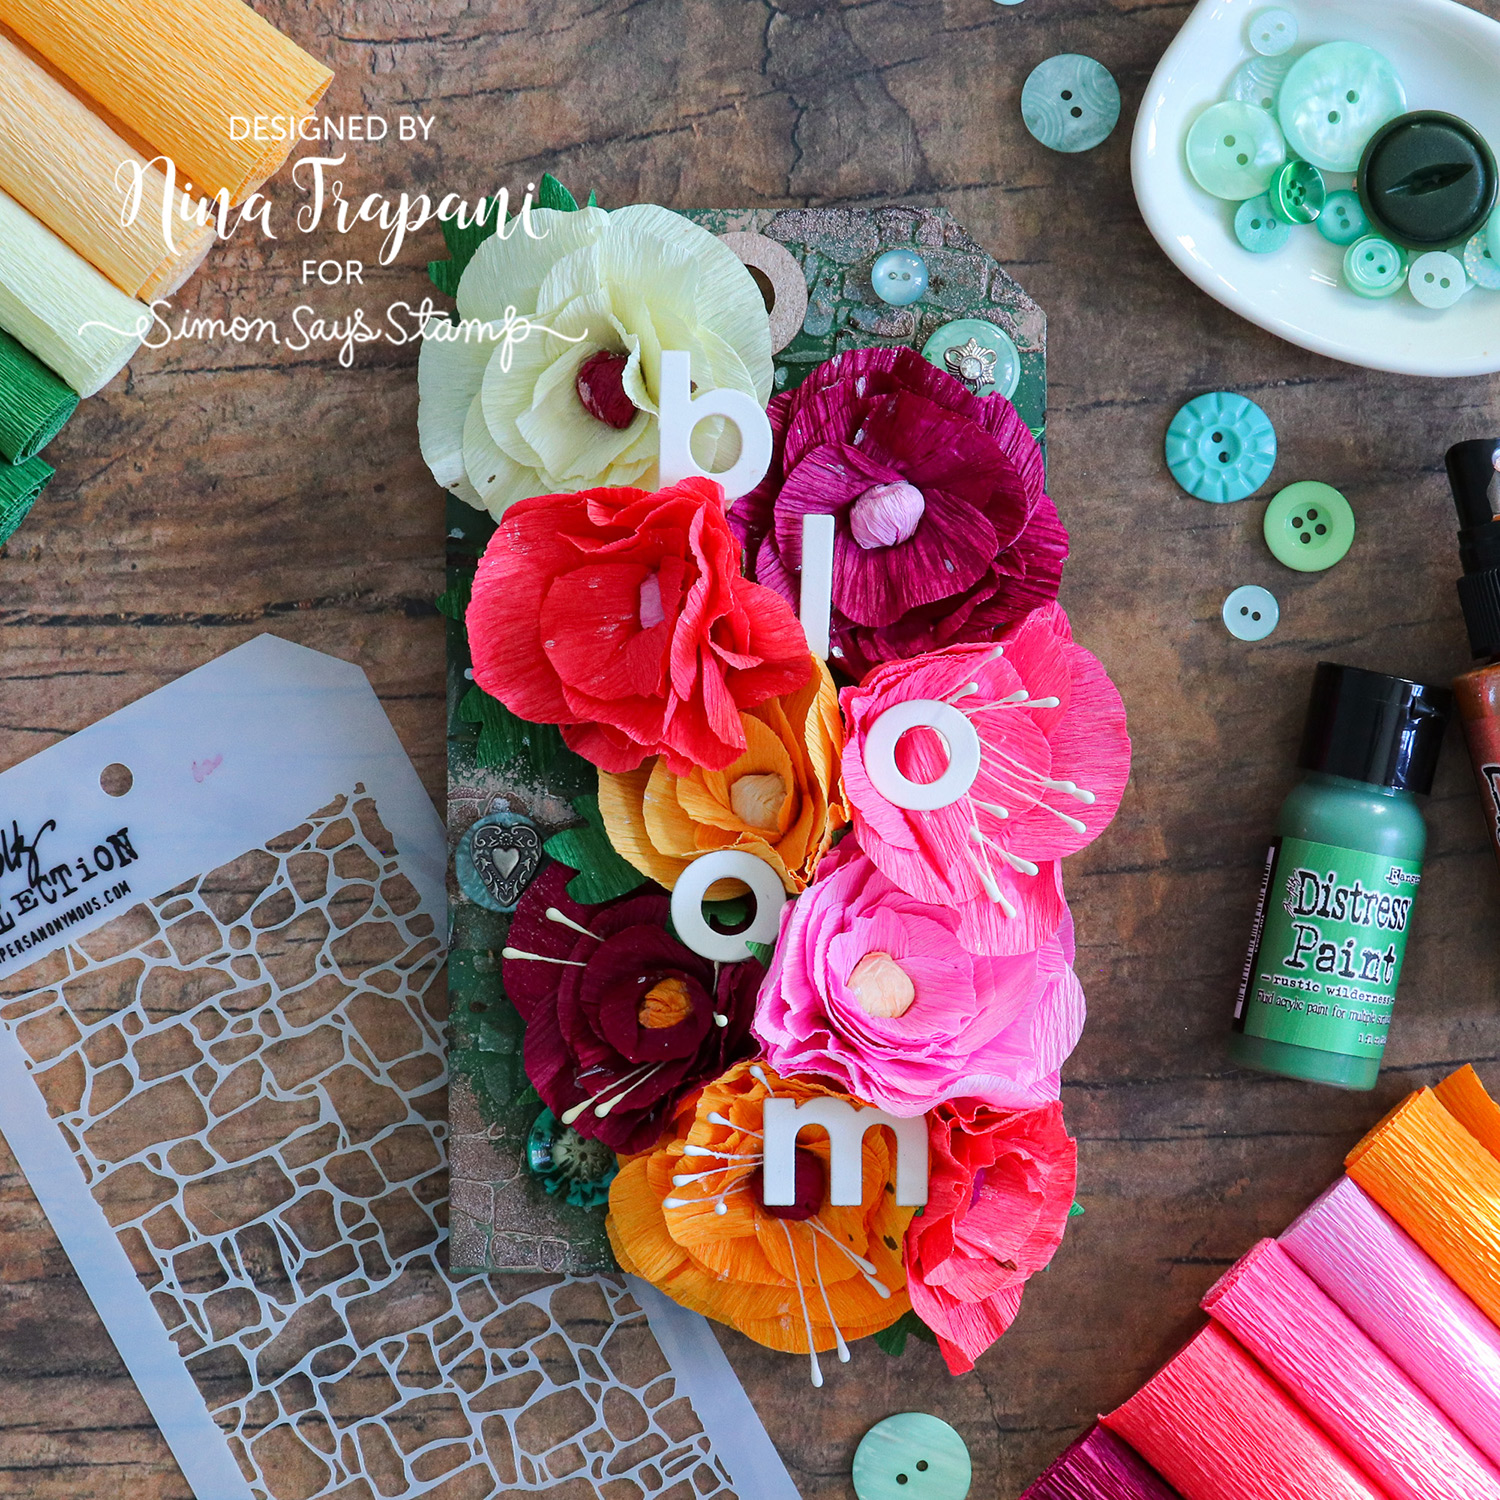
I made my flowers with the Sizzix Ranunculus die set, but there are many other flower die sets to choose from. I also picked out the Color Splash pack of crêpe paper to cut my blooms from. Some of the flowers have stamens attached to them.
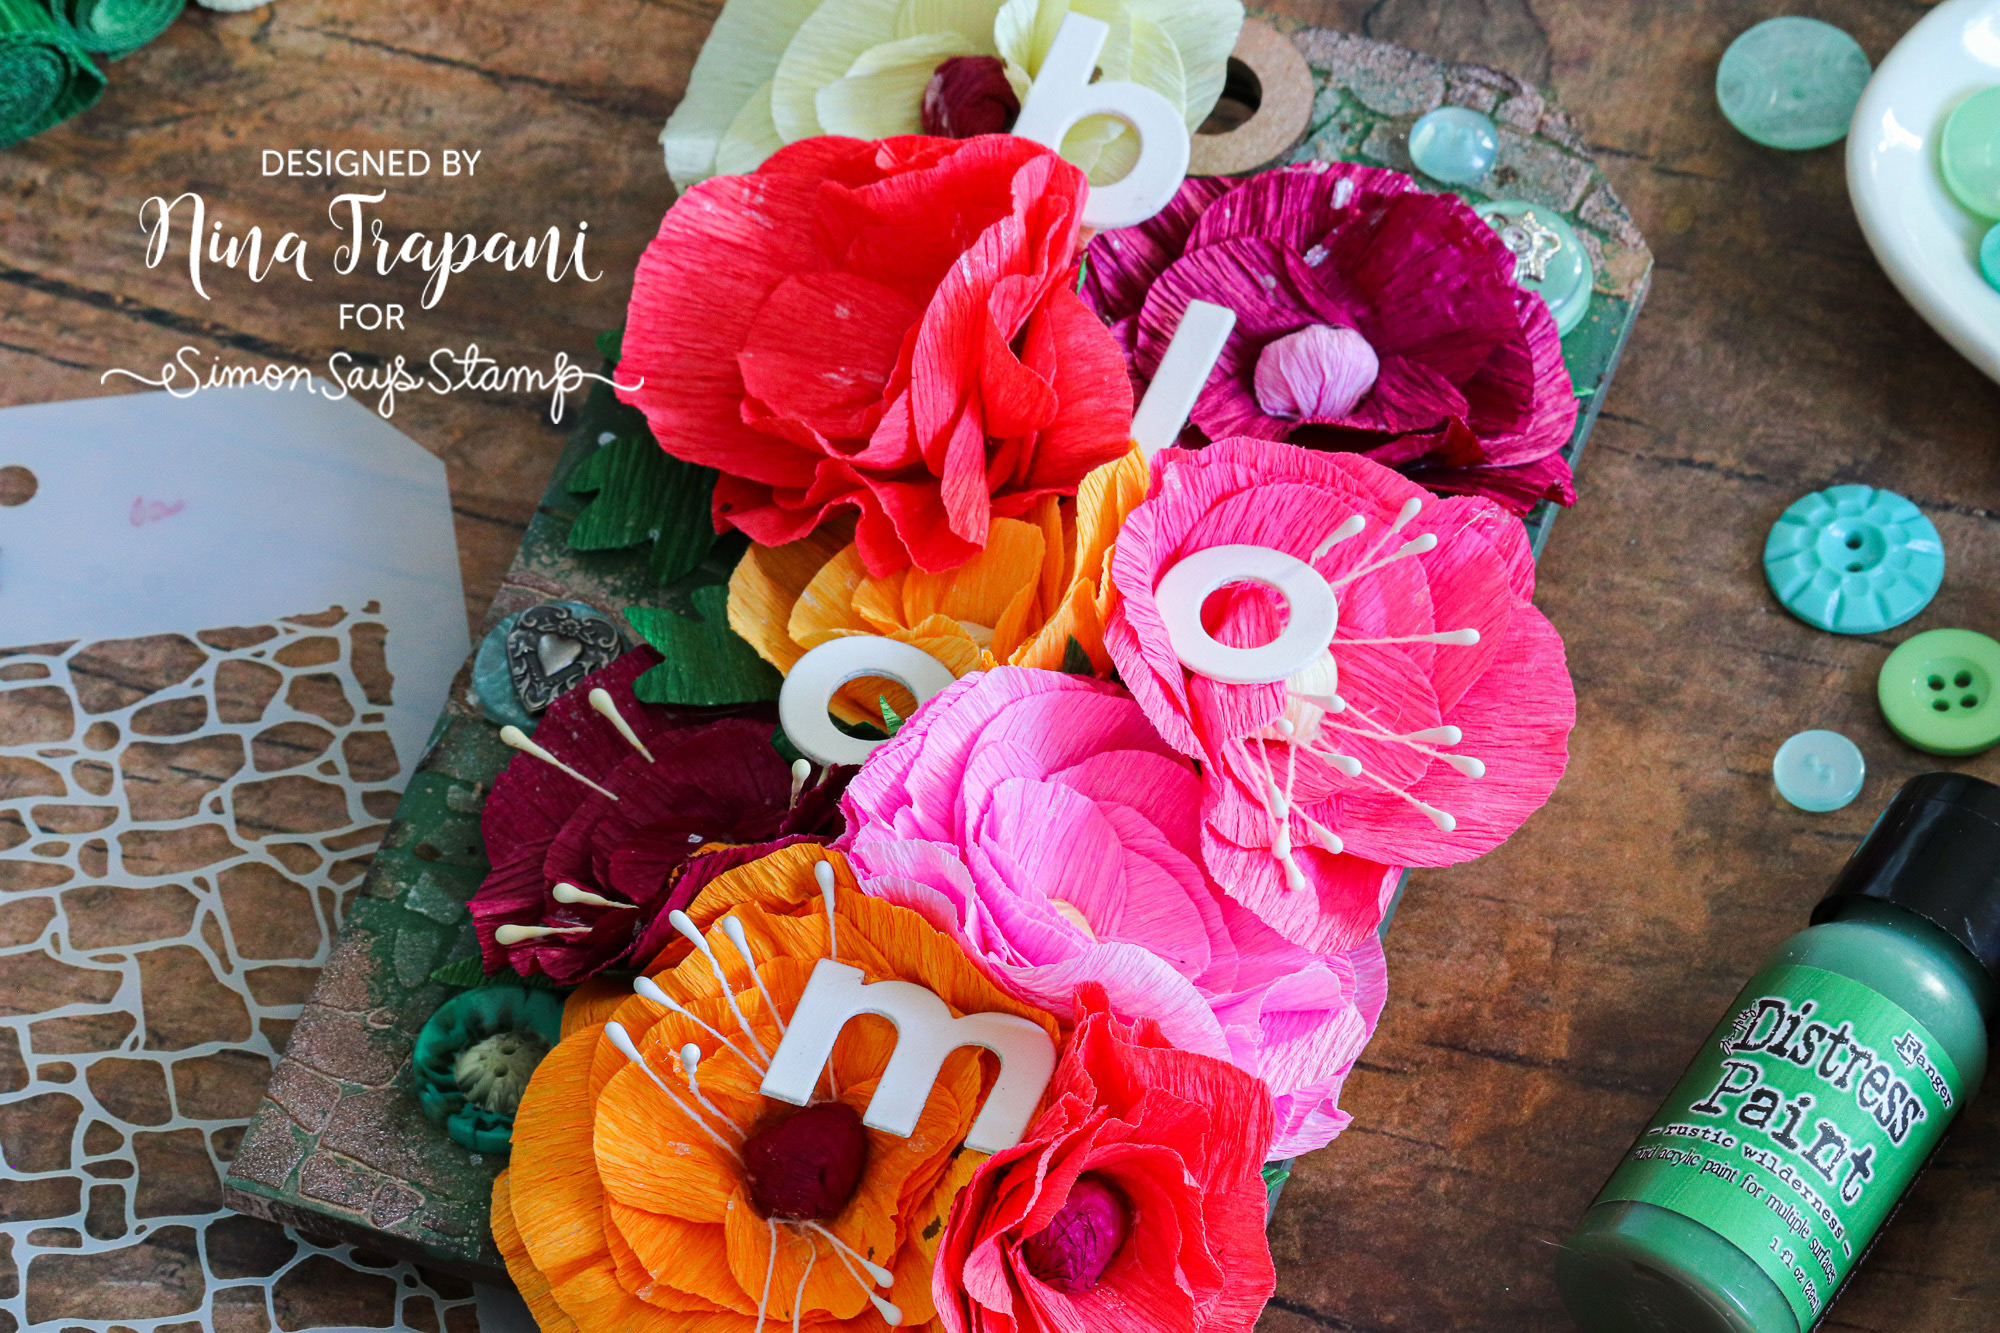
All of the florals were adhered onto an Etcetera Tag from Tim Holtz, which was covered with a combination of Rustic Wilderness Distress Paint, Tim’s Stone layering stencil, Translucent Grit-Paste, and Walnut Stain Distress Ink. As an additional embellishment, I spritzed the tag with Antiqued Bronze and Ground Espresso spray stain.

The word “bloom” was die cut with Simon’s Everett Solid Letters set; I also tucked Fanciful buttons and Heart Adornments around the florals for some additional texture and interest.
This piece is SO gorgeous and would be PERFECT for displaying in your home for the summer season! Be sure to watch the video to learn exactly how I made it!
WATCH THE VIDEO
SUPPLIES
|


Crafty with Caly: XL Rose Bouquet
Hi friends! Happy Saturday! Please join me in welcoming special guest Caly Person to our blog today in the latest edition of our bi-monthly series, Crafty with Caly! Read on and be sure to watch the video for all the details! Enjoy!

Hi, Friends! Stencils are quickly becoming my favorite cardmaking tool – it’s so easy to add color and shading. The best part is that it’s quicker than any other medium that I like to use. Today’s card features the XL Rose Bouquet stencil. It’s a large stencil for larger or slimline-sized cards. My card today is 5” x 7”.
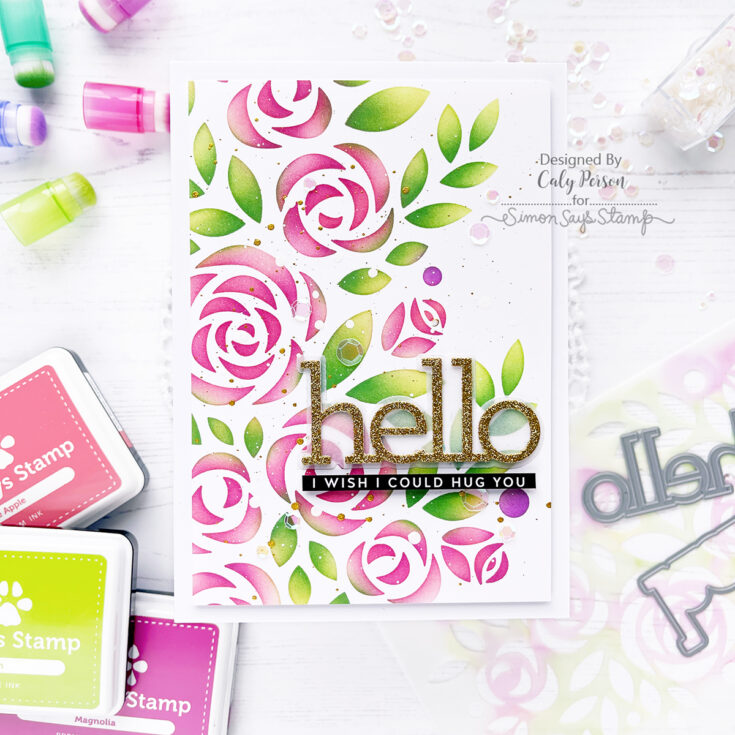
I taped my white panel to the back of the stencil and began ink-blending with Simon Says Stamp Inks. I start with the flowers, then the foliage and finish with the berries.
Colors used (in order): Rose Apple, Magnolia, Jellybean, Fern, Hot Mama
WATCH THE VIDEO:
The Rainbow Pack Blender Brushes are perfect for ink-blending small areas. After ink-blending the flowers and foliage with the lighter color, I went over them with a darker shade to add depth additional color. I really recommend doing this because it will take the “flat” out of your one-layer panel.
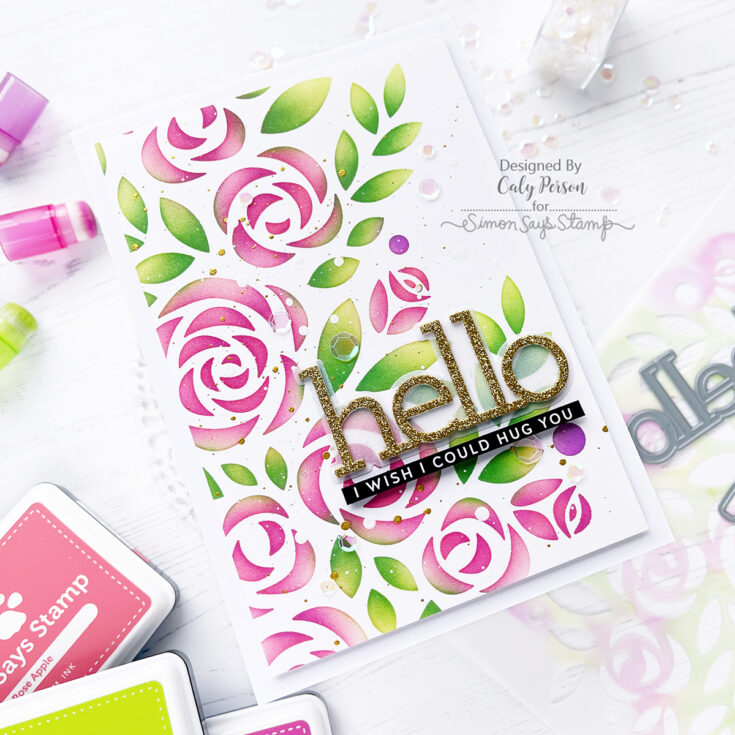
I splattered the panel with gold and white paint and while that dried, I die-cut my sentiment using the CZ Hello Dies. I die-cut the base/halo from vellum and the word “hello” using gold glitter cardstock. I die-cut it twice more using white cardstock to layer for additional dimension.
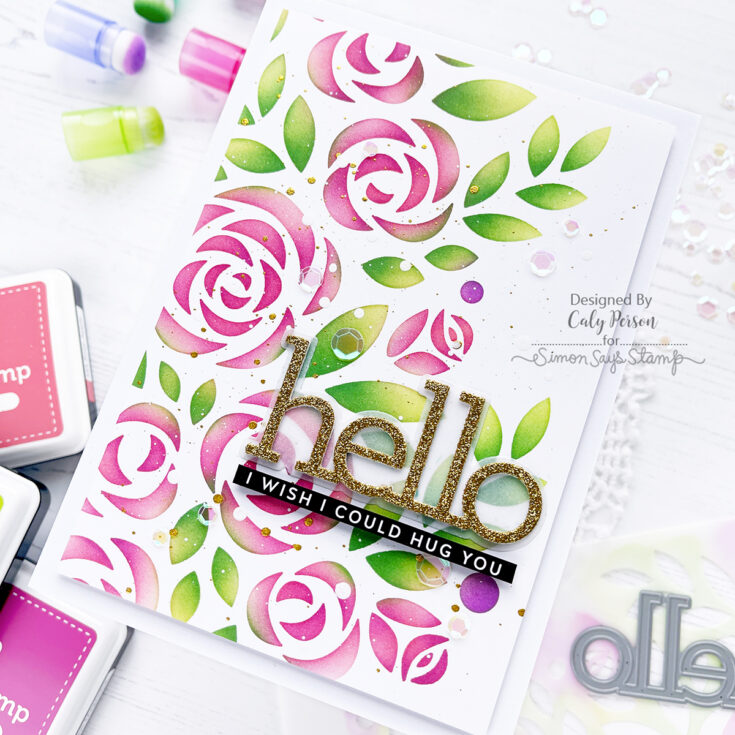
To finish, I cut a sentiment from the Thinking of You Sentiment Strips to accompany my “hello” sentiment and embellished my card with a few iridescent sequins.
I hope you enjoyed this project! Thanks so much for stopping by today! ~Caly
SUPPLIES:
|


Thanks so much for stopping by, and thanks to Caly for being our guest!


