DISTRESS Color Combos: Crackling Campfire
Welcome, everyone!!! It’s Shari here with some new inspiration for you. In the coming months, I’ll be selecting colors to go with some of the NEW Tim Holtz Distress ink colors.
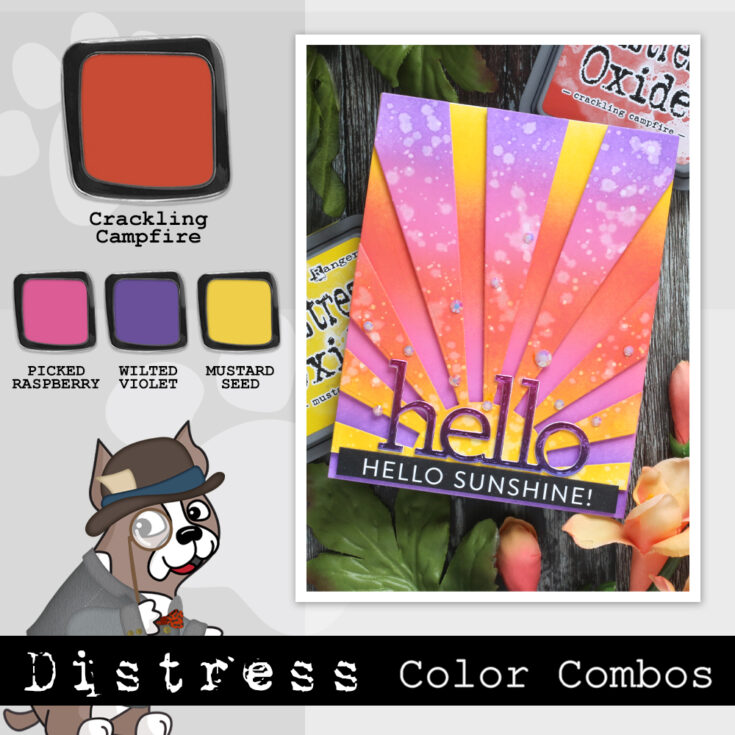
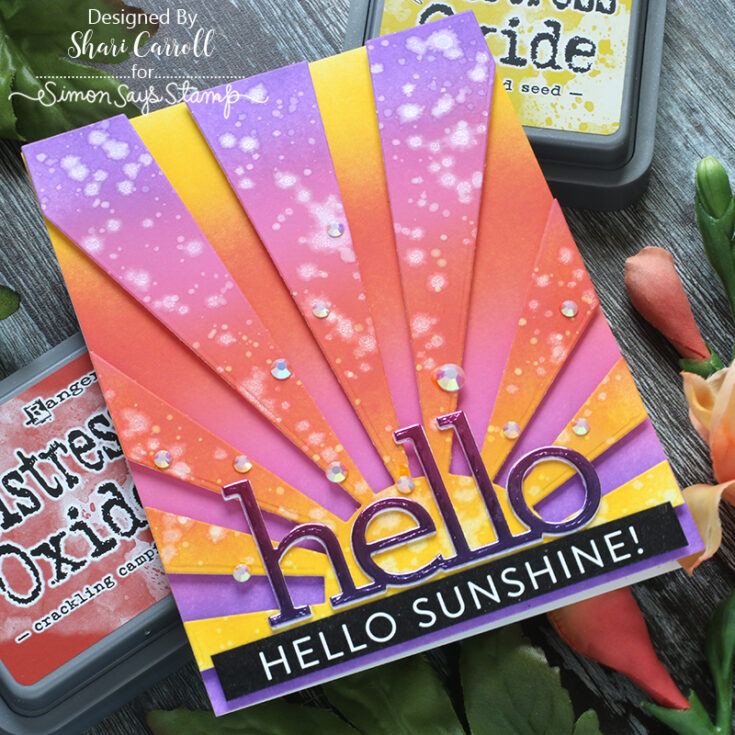
For today’s card, I’m pairing Crackling Campfire with Mustard Seed, Picked Raspberry, and Wilted Violet. I’ve added in the fourth color of Picked Raspberry to get a good transition between Crackling Campfire and Wilted Violet.
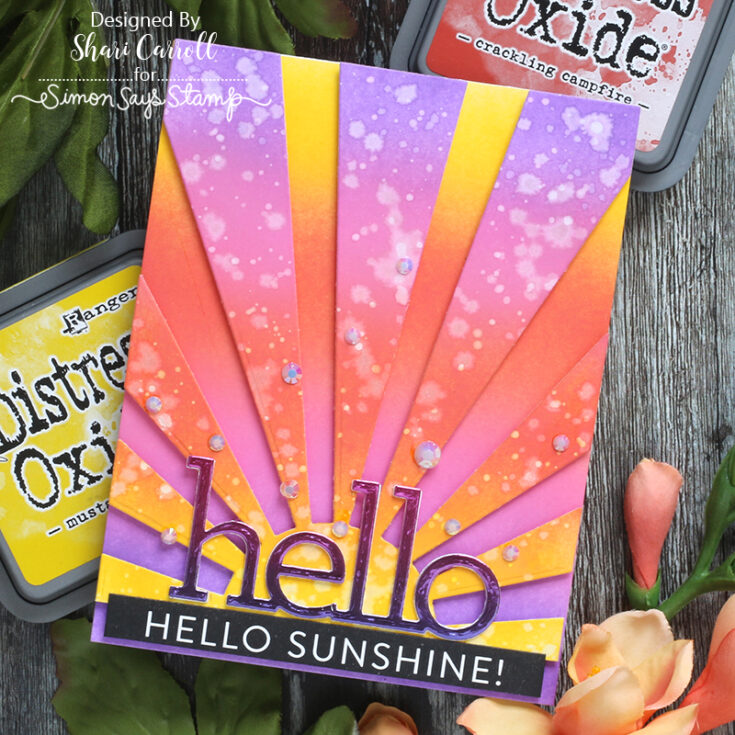
I ink blended two panels, one was die cut using the Sunburst die and the other flipped upside down for a contrasting background.
If this is the first time for you to see this feature, I have a color combination for Salvaged Patina HERE and Kitsch Flaming HERE.
SUPPLIES:
|


Circle Mask Ink Blended Background with Kristina Werner
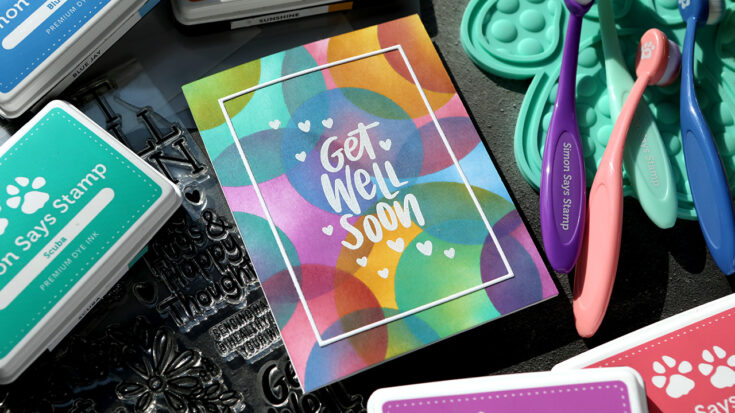
Hello, all! Kristina Werner here. In today’s video, I show how I created a fun, colorful background using the Circle Masks stencil set.
I ink blended using the three smaller circle masks and five colors of Simon ink: Hollyhock, Hot Mama, Sunshine, Scuba, and Blue Jay. I made sure to overlap each circle and continue adding more and more circles until the entire background was filled.
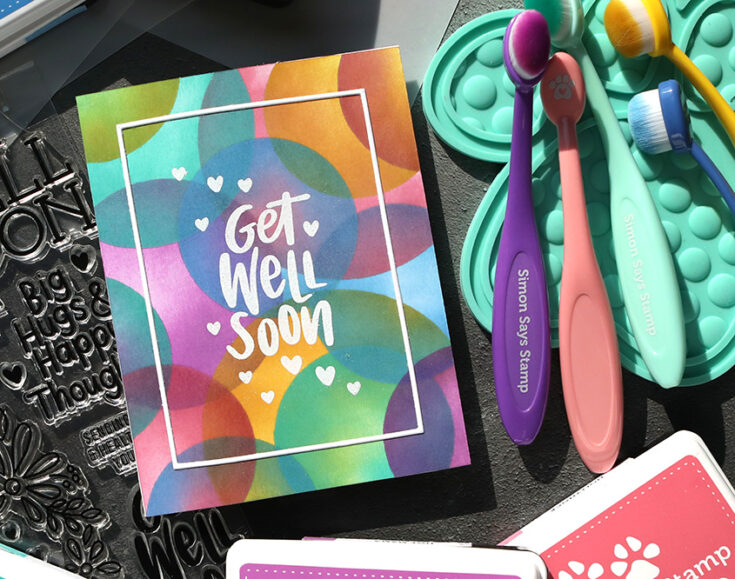
To keep the background as the focus, I used the A2 Thin Frames die set to cut a white frame, then I stamped and white embossed the “Get Well Soon” greeting from the Healing Hugs stamp set. I also stamped and embossed the small hearts in the stamp set around the greeting.
Thanks for stopping by! Enjoy the video!
Supplies
|


Crafty with Caly: Do What it Cakes

Hi friends! Happy Tuesday! Please join me in welcoming back special guest Caly Person in a bi-monthly edition of our Crafty with Caly blog series showcasing our brand new Do What it Cakes stamp and die set! Be sure to read on and watch the video for all the details! Enjoy!
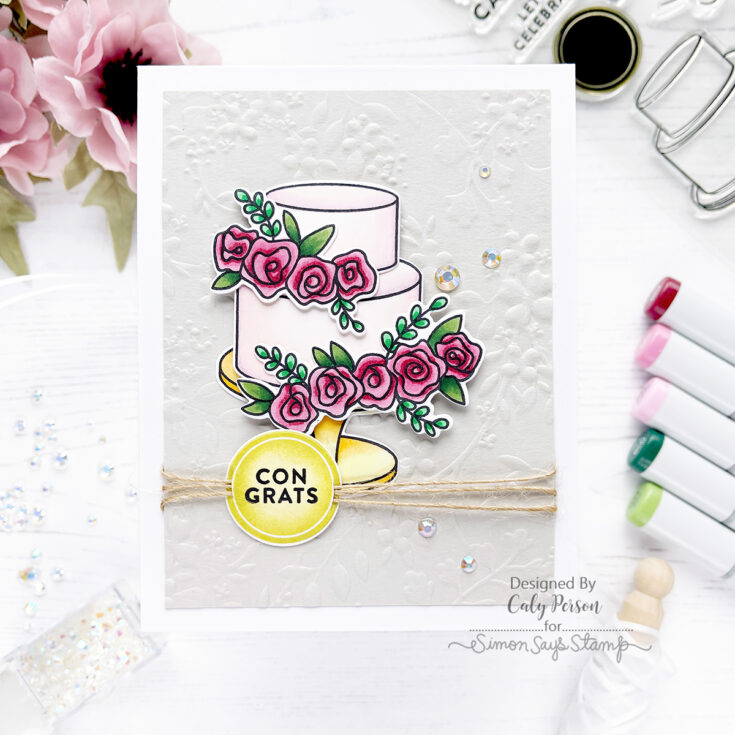
Hello, Friends! It’s Caly with you today, sharing a wedding card using the Do What It Cakes set. This is a versatile set for all occasions, but I had to color those pretty flowers and decided to make a wedding cake.
I love that the tiers can be stamped and die-cut separately– it gives the finished card more dimension (if you want) and layers so nicely to give height to the cake. I’ve got a video to share my process! You can watch it here:
WATCH THE VIDEO:
Weddings always include shine and sparkle – so I tried to achieve gold using both Copic markers on the cake stand and ink on the sentiment medallion. Be sure to check out the video to see how that’s done!
Copic colors used:
Cake: R000, RV10, RV91, RV93
Stand: Y00, YR21, YR24
Flowers:
R83, R85, R89
Foliage: G24, G28, G03, G09
Simon Says Stamp Ink colors used: Lemon Chiffon, Catkin
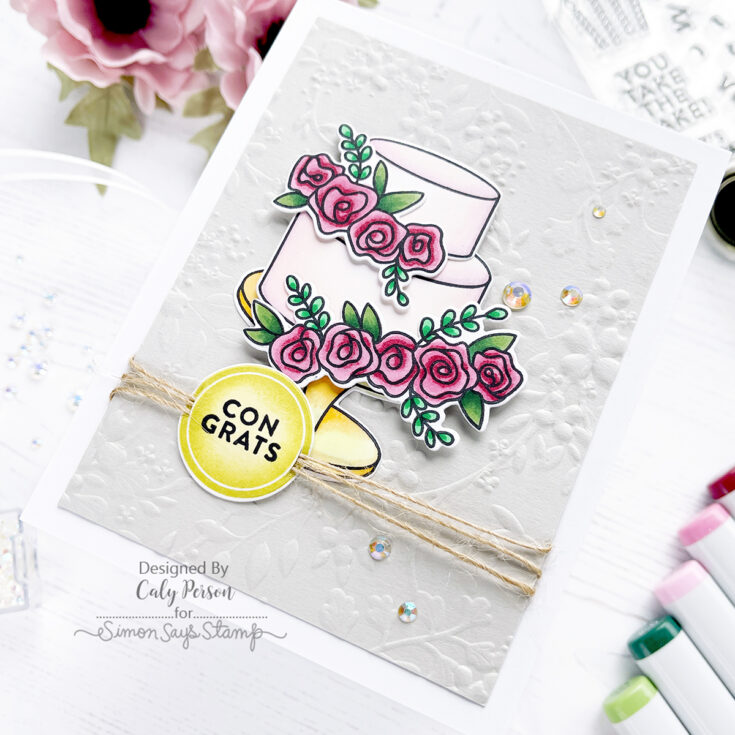
To give my card lots of texture, I used the Blossom Field Embossing Folder over the Fog cardstock background. It reminded me of lace! Then for my sentiment, I used a craft knife to add small slits to the sides to feed some twine through it for another element of interest.
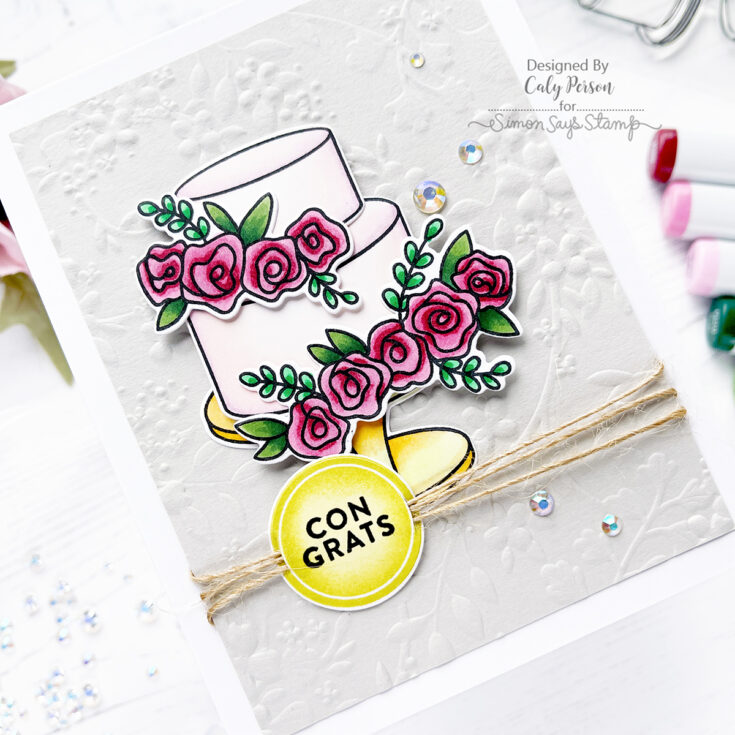
To finish my card, I embellished it with some iridescent jewels. I hope you like it! This set could be used to create a very similar card for a birthday theme too! I can’t wait to see what others create with this set!
Thanks for stopping by and spending some time with me today! ~Caly
SUPPLIES:
|


Thanks so much for stopping by, and thanks to Caly for being our guest!


