New Lawn Fawn for June 2021 is HERE!
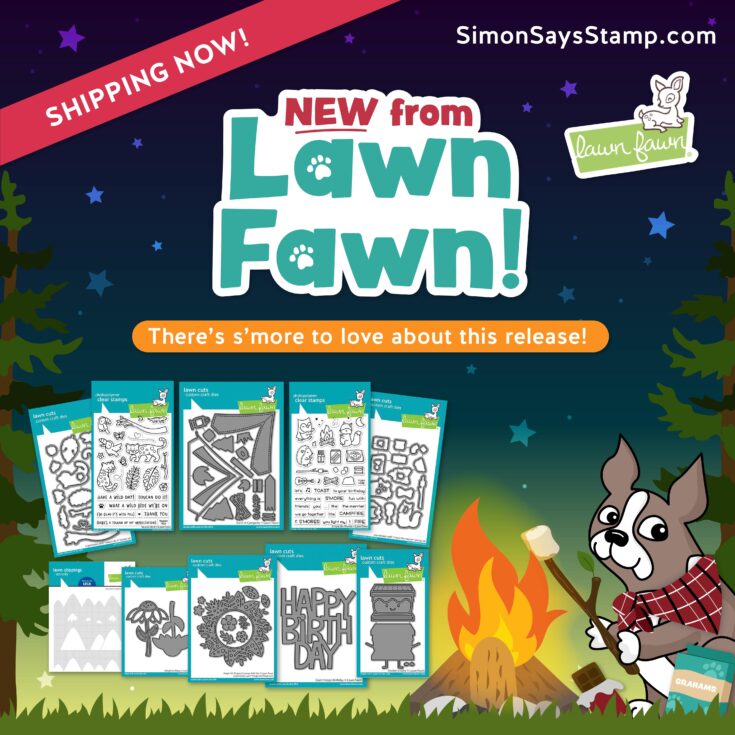
Happy Thursday, friends! We are SO excited to reveal Lawn Fawn‘s latest collection of oh-so-CUTE stamps, dies, stencils, and paper! Peruse the new goodies below and KEEP scrolling for a GORGEOUS and NEW card idea by Caly Person featuring the new collection! Enjoy!!
|


Hello! It’s Caly with you today, sharing a card for Lawn Fawn! The summer release includes tropical-themed stamps and dies and I’m using a few of them today for a fun interactive card.
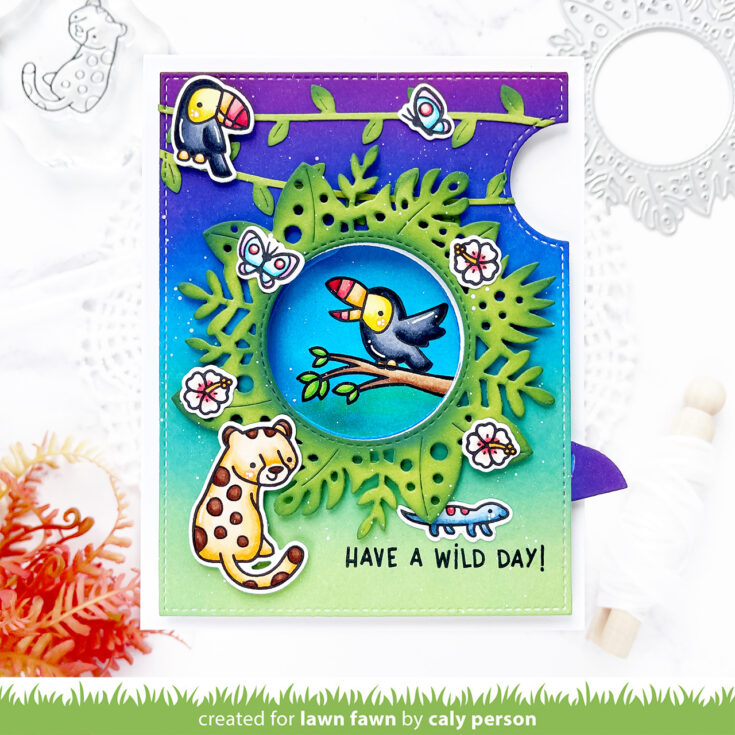
I used images from the Toucan Do It stamp set and colored them using Copic markers. I stamped the branch and the toucan ready to take flight on a whole panel for the Magic Iris opening and the rest of the images on a separate panel to die-cut later for my card. To avoid masking, I colored the area around the toucan and branch using Copic markers as well to match the background that I create next.
- Reds: R20, R30, R32, R35, R37
- Oranges: YR20, Y32, YR12, YR15
- Yellows: Y11, Y15
- Grays: C5, C6, C8, C10
- Browns: E21, E23, E25, E27
- Greens: YG06, YG09
- Blues: [B000, B01, B04], [B91, B95, B97]
- Purples: V01, V05
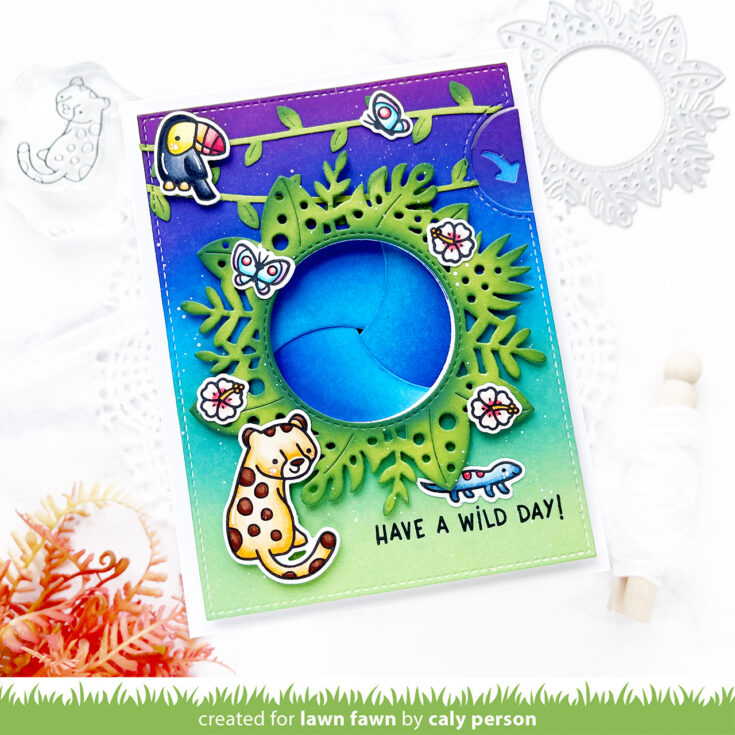
My card also features new products including the Magic Iris Tropical Leaves Add-On Dies and the Tropical Vine Border Dies. I used Lawn Fawn Cilantro cardstock on both and ink-blended them with Wild Wilderness Distress Oxide Ink.
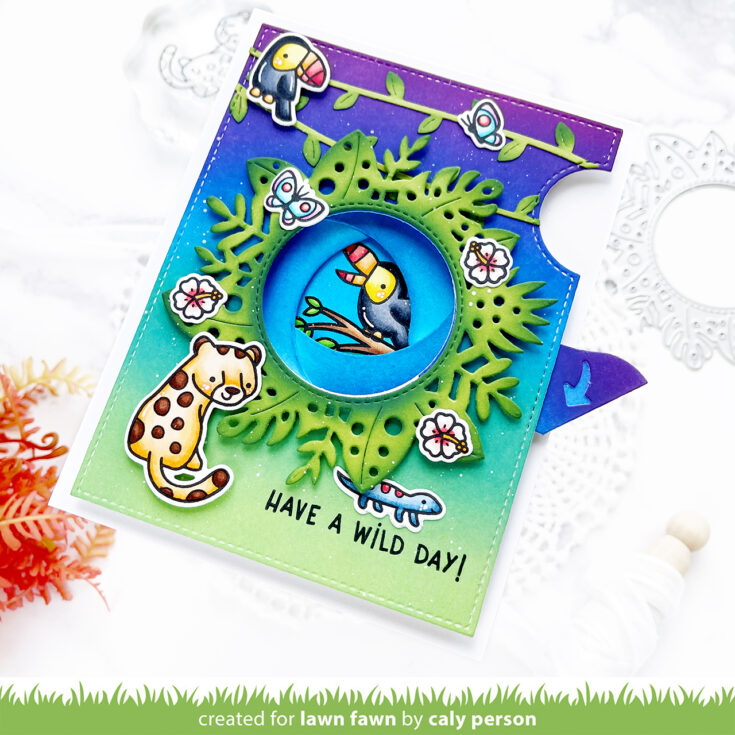
For the Magic Iris Add-On panel, I ink-blended Seedless Preserves, Mermaid Lagoon, and Cracked Pistachio Distress Oxide Inks. I then die-cut the panel and adhered the Magic Iris Tropical Leaves Add-On frame over the opening using foam adhesive for dimension.
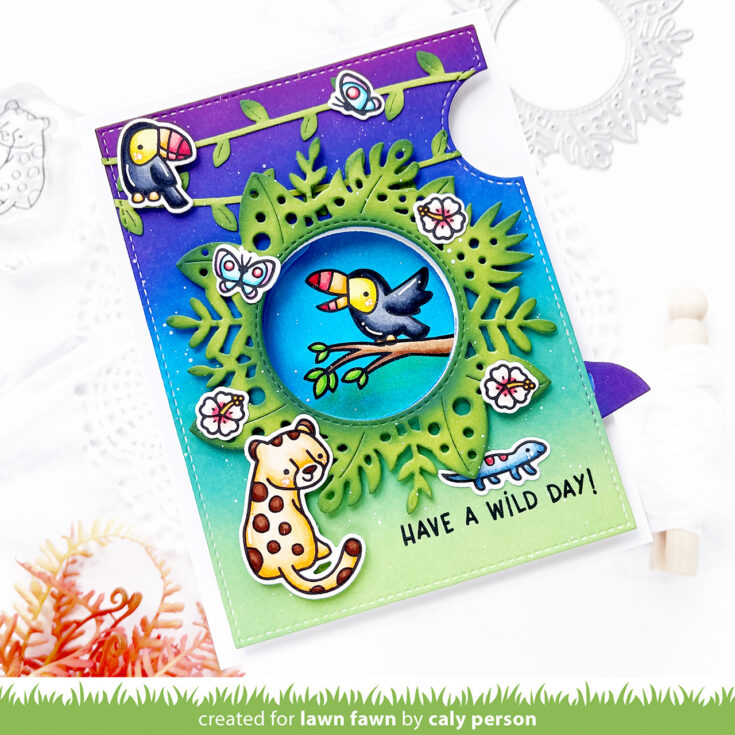
After creating the Magic Iris mechanism, all I had left to do was adhere the ink-blended background panel over it and attach the accessory images to create my scene. I hope you like it! I love that the iris opening reveals another toucan friend! Thanks for visiting! ~Caly
SUPPLIES:
|


Thanks so much for stopping by, and thanks to Caly for being our guest!
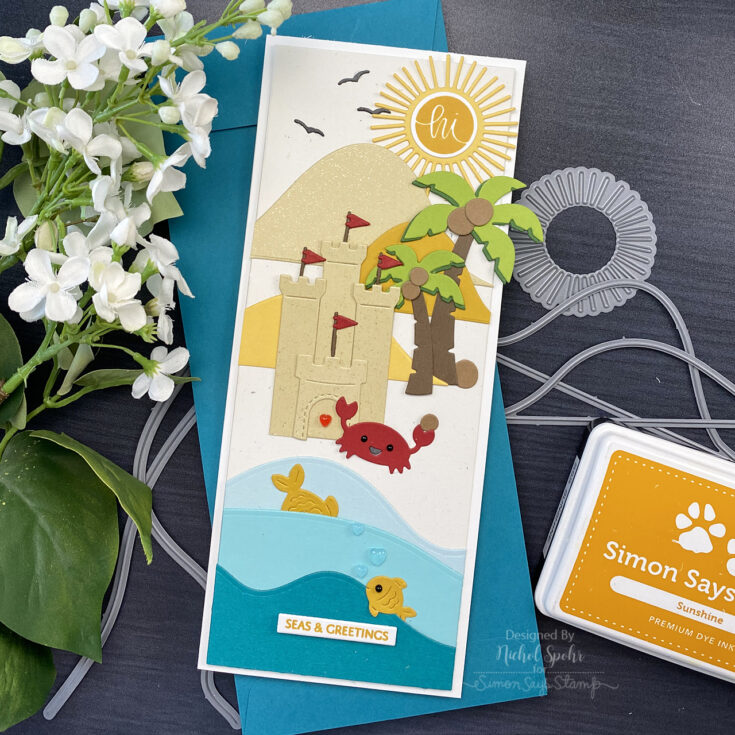
Making the Cut: Die Cut Slimline Beach Scene Card

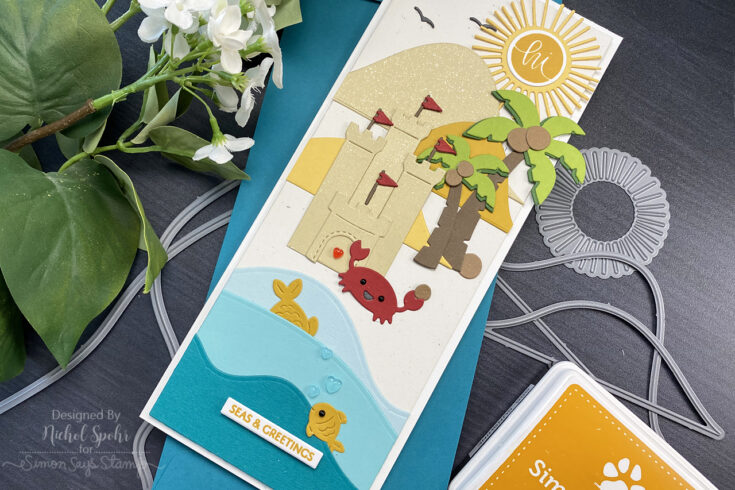
Hi friends! Happy Wednesday! Please join me in welcoming back special guest Nichol Spohr in our monthly installment of Making the Cut, a celebration of all things die cutting! Nichol is showcasing a plethora of our exclusive dies including: Layered Hills, Slimline Nested Rectangles, and our Sentiment Labels! To complete the summery scene she used Lawn Fawn’s dies in Palm Trees, Build-A-Castle, and Build-An-Aquarium! Be sure to watch the video for all the details and enjoy!
WATCH THE VIDEO:
SUPPLIES:
|


Thanks so much for stopping by, and thanks to Nichol for being our guest!
Yippee for Yana: Sea You Soon

Hi friends! Happy Tuesday! Welcome to the latest edition of Yippee for Yana with the fabulous Yana Smakula! Be sure to watch the video for more info and enjoy!
Hello, crafters, this is Yana Smakula for SimonSaysStamp.com! Welcome back for another Yippee For Yana video!
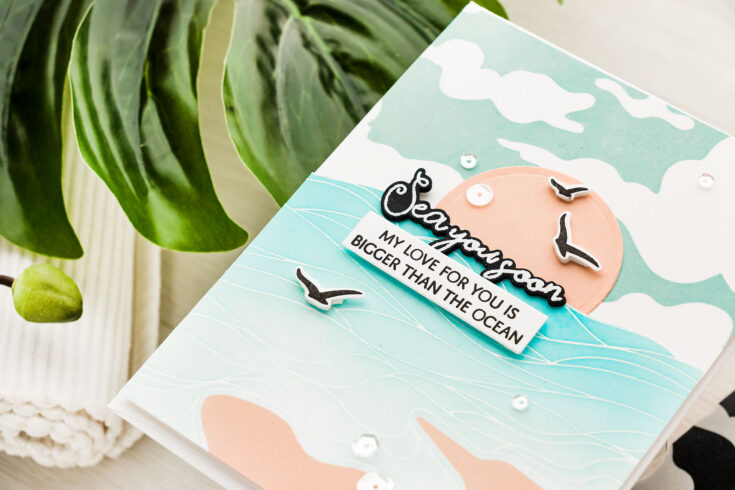
Today I have a Summery card to share featuring Simon’s new absolutely fantastic Sea and Sky cling background stamp set. This is a very large stamp set, it measures 6 x 7 1/2”, you can use it for an A2 card, for a mini slimline and even for a regular slimline, which makes it very versatile.
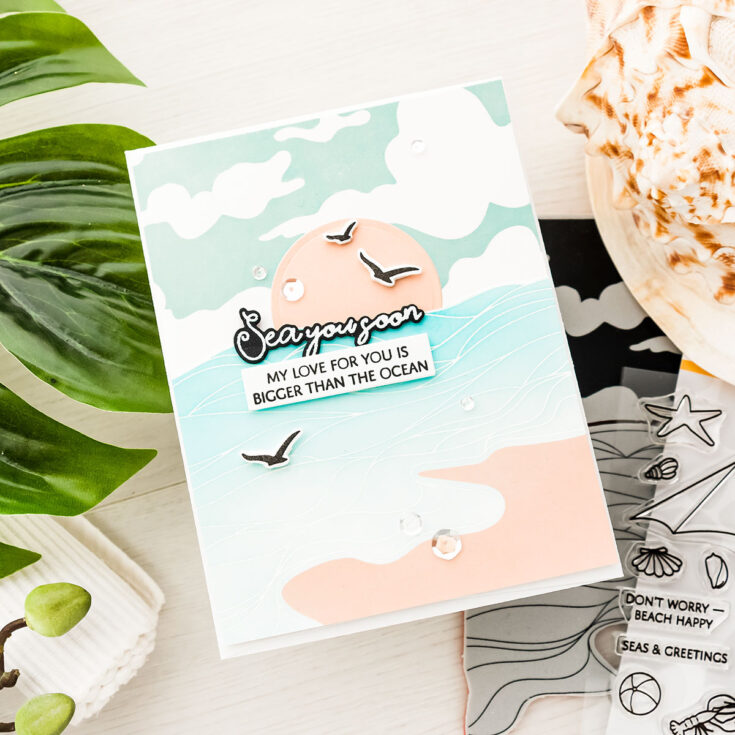
This stamp has 3 parts – each section is separate, making it easy to use, no masking needed! You have the beach section, the sea section, and the sky section. You can use these together, but you can also use them alone with other products from your stash.
To make the card I am sharing today I stamped the sand using Pale Blush Pink ink from Simon Says Stamp. The sea was white heat embossed on white cardstock, I ink blended Maliblue and Audrey Blue inks on top for a very soft, calm looking sea. The sea and beach sections were both stamped on one panel, then the horizon line was fussy cut. The sky was stamped on another cardstock panel in Simon’s Cloudy Sky ink.
I adhered the panels onto an A2 white card base (starting with the sky panel), I trimmed the excess paper off and tucked a circle sun die cut in between them. The sun was created by stamping an extra beach section in Pale Blush Pink ink and cutting a portion of it out using a circle die.
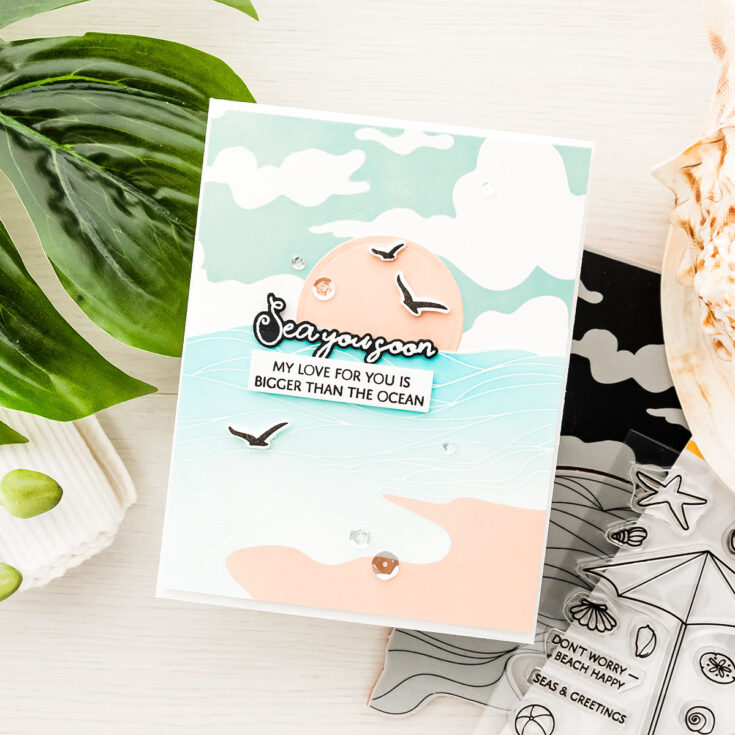
The sentiments for this card were heat embossed in white on black cardstock (Sea You Soon), this one was also cut out using a coordinating die; and stamped in VersaFine Onyx Black ink on white cardstock. I foam mounted the sentiments onto my card and also added several stamped sea gulls. Both the sentiments and the sea gulls come from the Seas and Greetings stamp set.
Finally, I embellish my card with some Sparkling Clear sequins from Pretty Pink Posh. Have fun stamping!
WATCH THE VIDEO:
SUPPLIES:
|


Thanks so much for stopping by, and thanks to Yana for being our guest!


