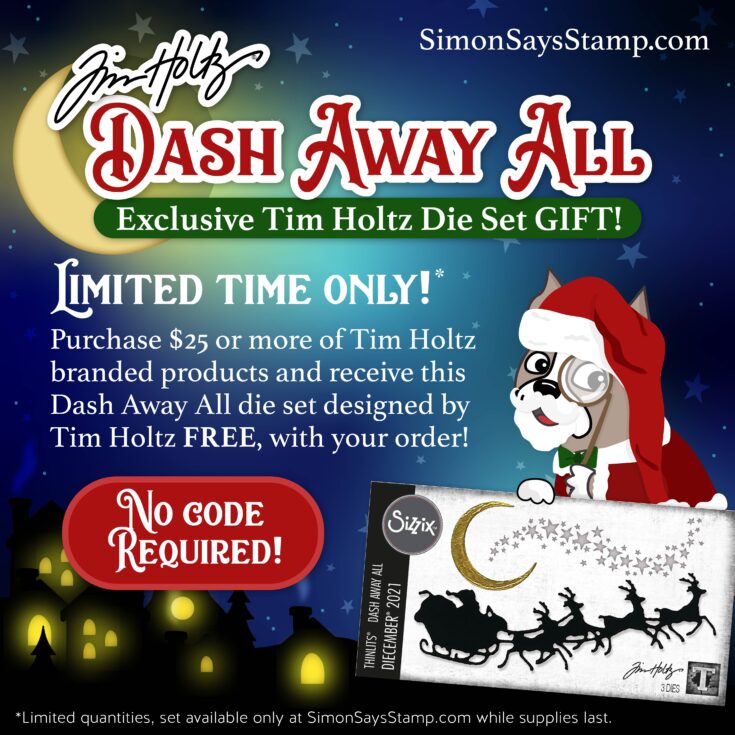
A special CYBER MONDAY surprise GIFT!
We’d love to see what YOU are working on with this great die set! Be inspired AND share!
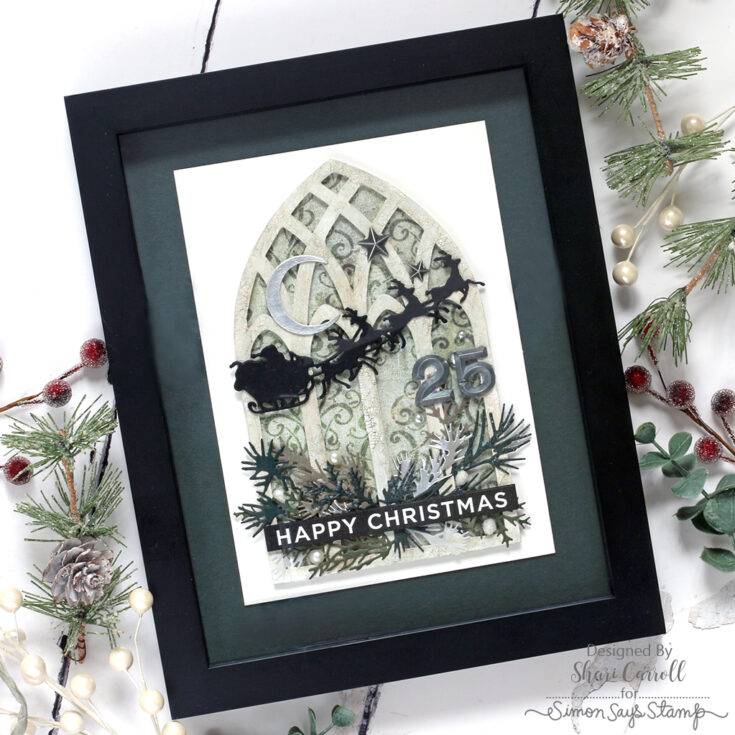
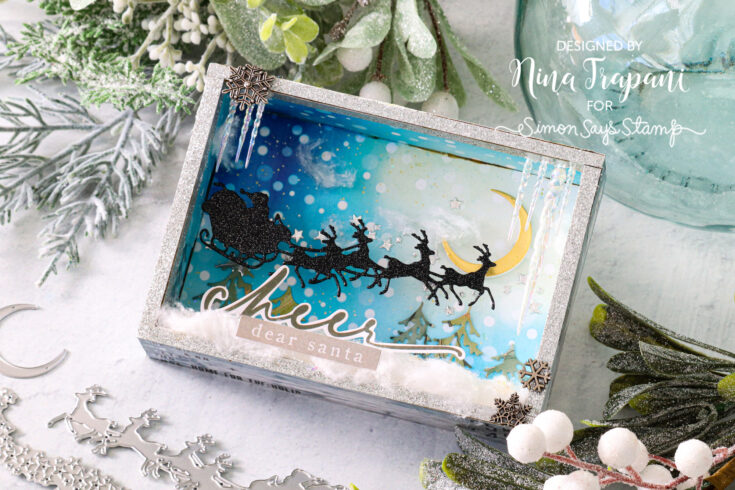
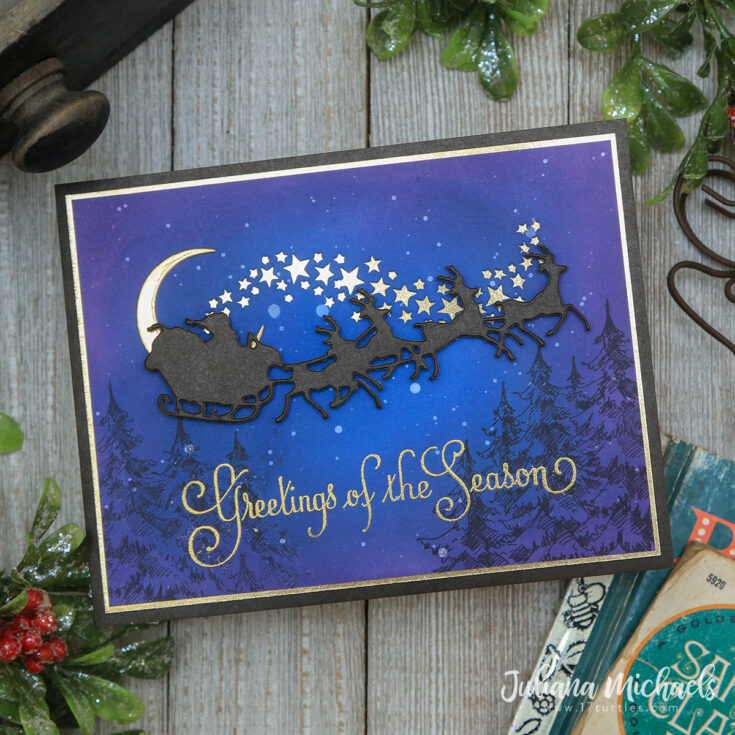
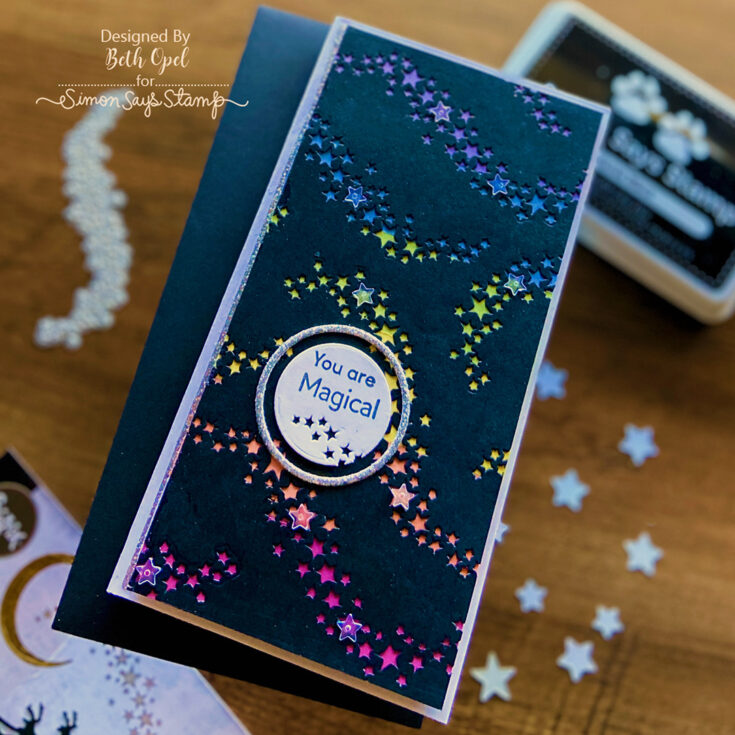
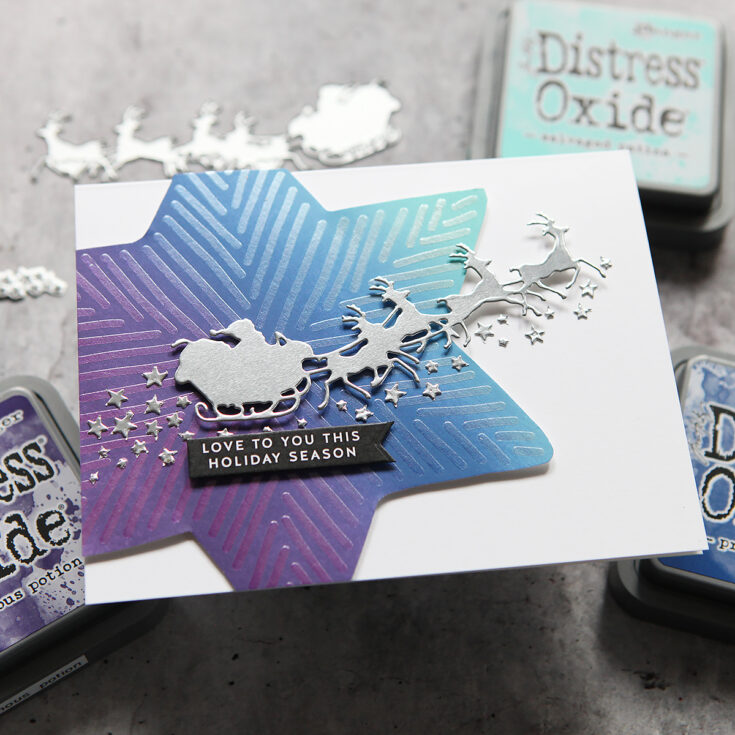
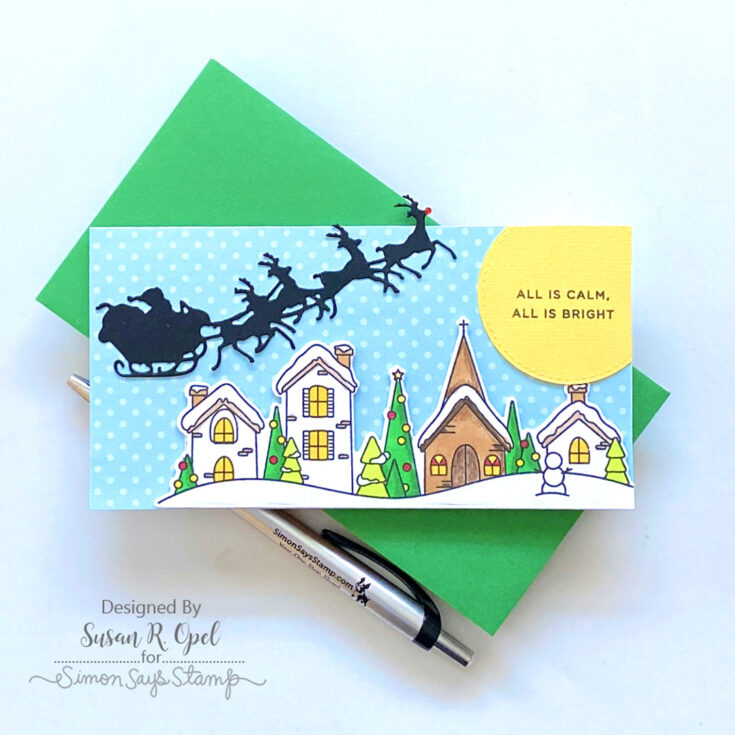
GET INSPIRED!
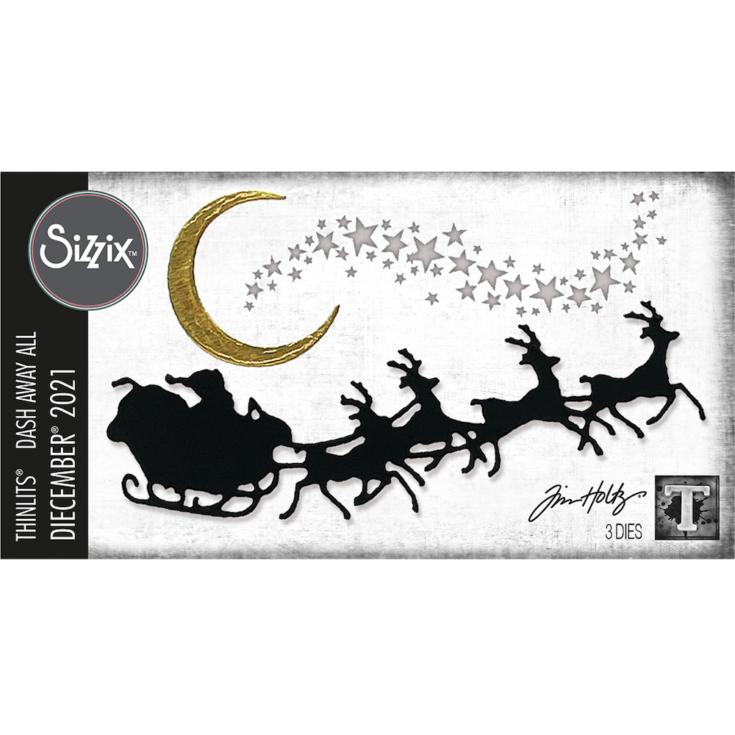
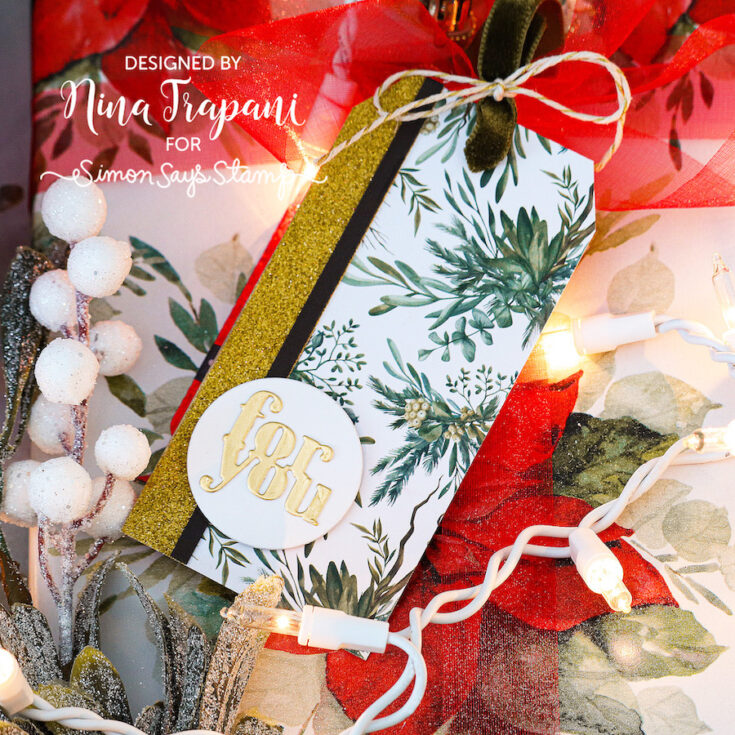
Below are a few stellar ideas of what you can make with this exclusive die set ONLY available as a gift with purchase and ONLY at your one-stop shop for all things paper crafting…. SimonSaysStamp.com

Tim Holtz Cyber Monday Surprise!
Join me on Youtube LIVE at 8am Eastern TODAY to see what BIG SURPRISE we have in store for you with Tim Holtz! I’m so excited I don’t think I’ll sleep a wink! Who’s bringing the coffee? See you there! – Heidi

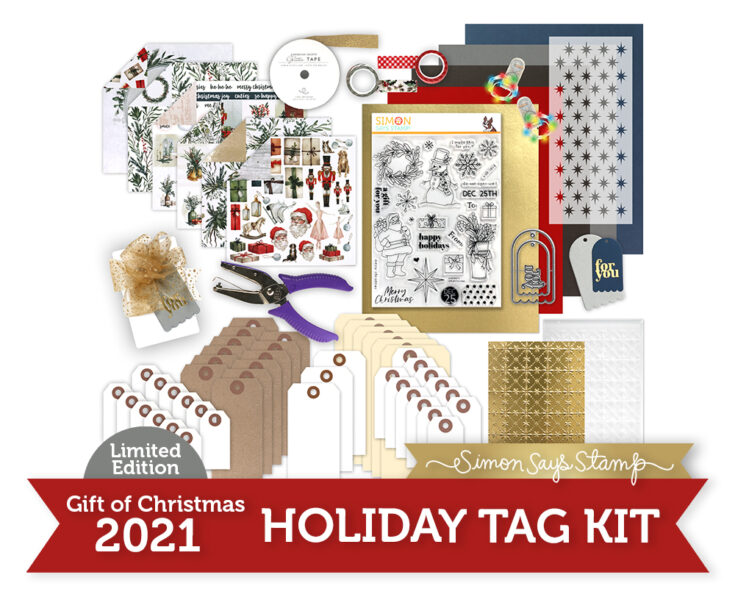
Shipping NOW: Gift of Christmas Limited Edition 2021 Tag Kit!

WATCH THE VIDEO:
Kit contents: (valued at just under $100 priced individually)
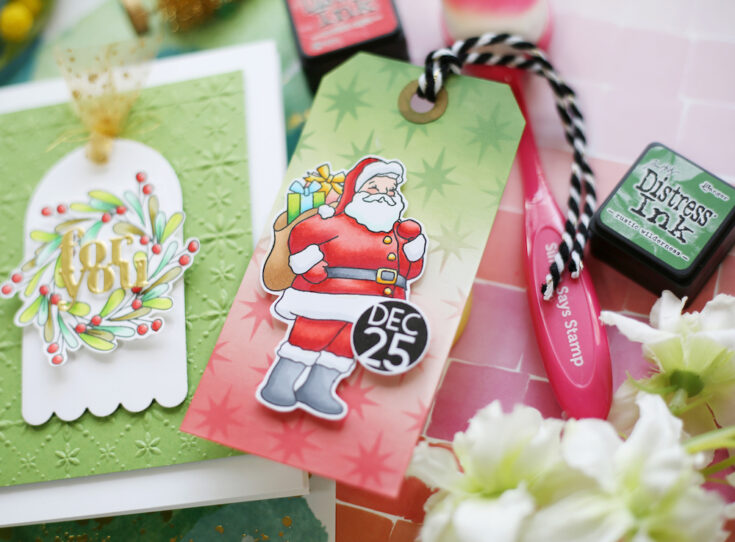
- NEW and Exclusive Simon Says Stamp Gift of Christmas 6×8 inch clear stamp set
- NEW and Exclusive Simon Says Stamp Christmas Star 4×9 inch stencil
- NEW and Exclusive Simon Says Stamp Scalloped Gift Tags Die Set of 3
- 6 sheets of Paper Rose Winter Gathering double-sided 6×6 inch paper
- Simon Says Stamp Pinpoint Starlets Embossing Folder
- 1 hole punch (turn ANYTHING into a tag!)
- 1 package of Tim Holtz Idea-ology Tiny Lights Christmas in festive colors
- 1 package of American Crafts Glitter Washi Tape in Sunflower
- 1 yard of May Arts Gold Sheer Glitter Dot Ribbon
- 2 assorted rolls of washi tape from the Tim Holtz Idea-ology Christmas Design Tape pack
- An assortment of 40 tags
- 1 sheet of Simon Says Stamp cardstock in Matte Gold Mirror
- 1 sheet of 8.5 x 11 inch Simon Says Stamp 100 lb cardstock in Lipstick Red
- 1 sheet of 8.5 x 11 inch Simon Says Stamp 100 lb cardstock in Dark Chocolate
- 1 sheet of 8.5 x 11 inch Simon Says Stamp 100 lb cardstock in Soft Navy
- 1 sheet of 8.5 x 11 inch Simon Says Stamp 100 lb cardstock in Smoke
Get INSPIRED!


Want to see even MORE inspiration and/or share your own?! Stop by our galleries!


