Yippee for Yana: Stormy Sea Waves Builder Card

Hi friends! TGIF! Please join me in welcoming special guest Yana Smakula to our blog today for the latest edition of Yippee for Yana! Be sure to read on and watch the video for all the details! Enjoy!
Hello, crafters, this is Yana Smakula for Simon Says Stamp! Welcome back for another Yippee For Yana video!
In today’s video I am creating an abstract encouragement card with Simon’s Waves Builder stamp set. I love products that give me abstract looking images as I feel I can always get more use out of them.
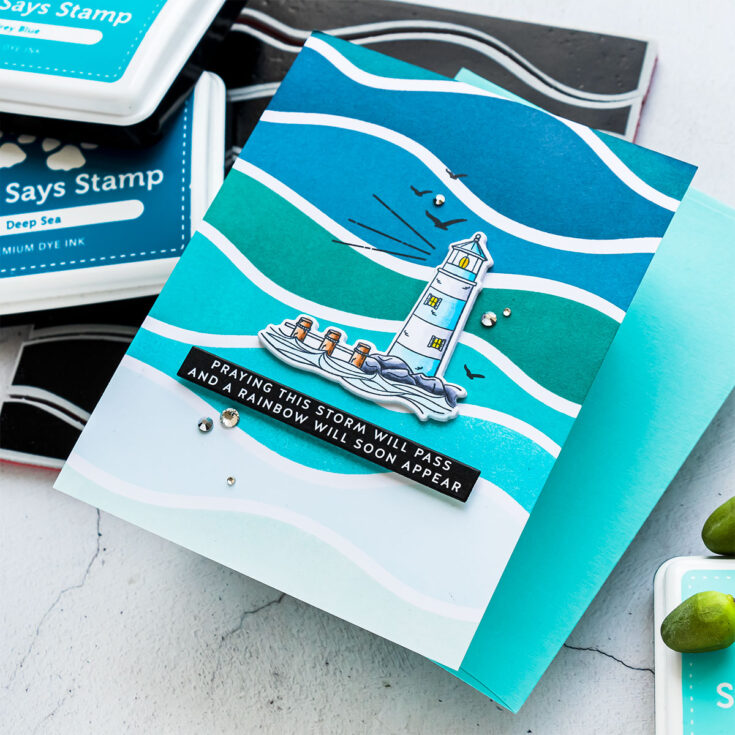
Waves Builder is a 6×6 cling background stamp and all of the sections are separate. Yep, they’ve been pre cut for you so that you can easily stamp each wave in a different color of ink without any masking.
I figured I would stamp from the bottom up and to make things easier I would remove the section immediately next to the one I was inking and stamping. I picked several colors of ink from Simon starting from very light pale blue to very dark, deep blue. I used the following colors: Maliblue, Sea Glass, Audrey Blue, High Dive, Teal, Soft Navy, Deep Sea.
My stamping was done on Simon’s 120lb cardstock. I love this paper for just about anything lately.
While this stamp is called Waves builder, you can easily adapt these shapes to create a pretty landscape. If you stamp the shapes in green, or perhaps even yellow or pink, you can create hills for your card. You could keep some sections blue to mimic sky, one section light brown to mimic a road, another section blue to have a river and stamp the rest in various shades of green to create a different looking background.

You also don’t have to stick to any particular landscape, you can use these shapes just as abstract shapes and stamp them in a rainbow order, or ombre pink or yellow or any other color. The stamp set name does suggest those shapes are waves, but I encourage you to look at these in a different way. Do these shapes remind you or anything else? Can you combine them with other stamps from your stash?
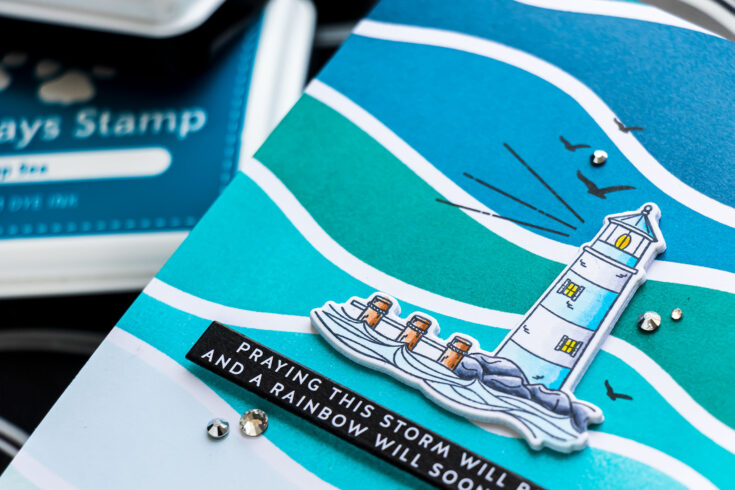
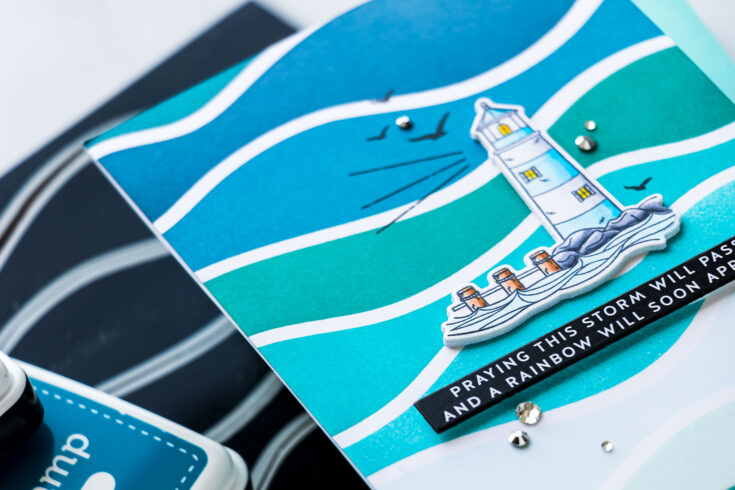
In my head this background looks very much like a stormy sea. To add a focal point I used an older stamp set from Simon – Your Light. I stamped a lighthouse in Memento Tuxedo Black ink.
I used Copic markers to color this image:
- B04, B02, B00, and B000;
- C9, C7, C5, C3, and C1;
- E37, E33, and E31;
- Y17, Y08
I used a coordinating die and cut the lighthouse out in my die cutting machine.
Next, I also cut a sentiment strip from Simon’s Reverse Sunshine and Rainbows Sentiment strips and used a black marker, a Copic, to color the white edge black – I remember this tip from Shari Carol and it does make a world of a difference.
I also die cut 4 blank lighthouses and I used those to add dimension to my main die cut. I love this trick, it does make the card a bit heavier, but I don’t mind. I used the Bearly Art glue and adhered all of those together – here you can see how thick this die cut became.
Next, I used Simon’s dot runner adhesive and adhered my stamped background onto an A2 white top folding card base. I also adhered my lighthouse and foam mounted a sentiment, and stamped some additional detail images from the Your Light stamp set.
Lastly, I embellished my card using a few silver gems from the Spellbinders Color Essentials Gems Silver Mix.
Have fun stamping!
WATCH THE VIDEO:
SUPPLIES:
|


Thanks so much for stopping by, and thanks to Yana for being our guest!
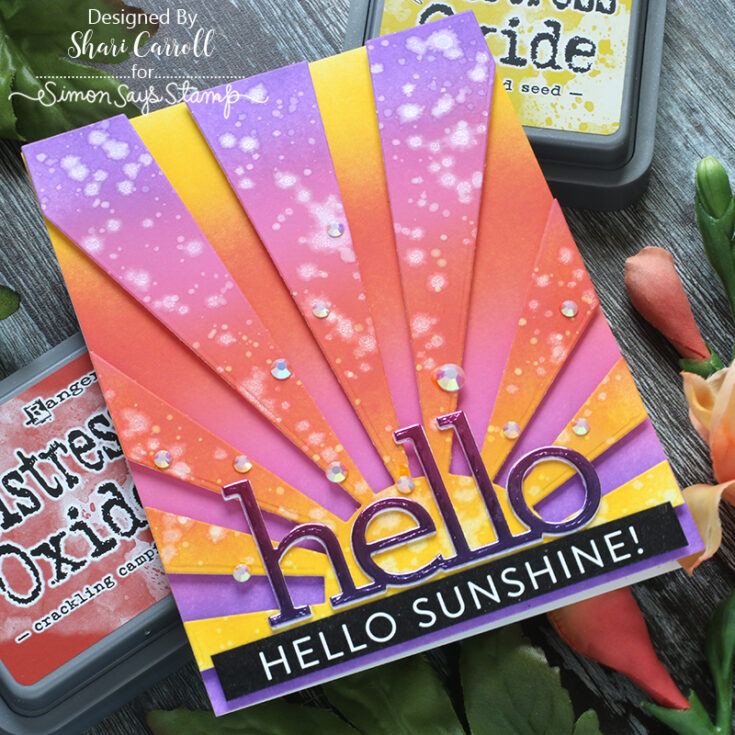
DISTRESS Color Combos: Crackling Campfire
Welcome, everyone!!! It’s Shari here with some new inspiration for you. In the coming months, I’ll be selecting colors to go with some of the NEW Tim Holtz Distress ink colors.
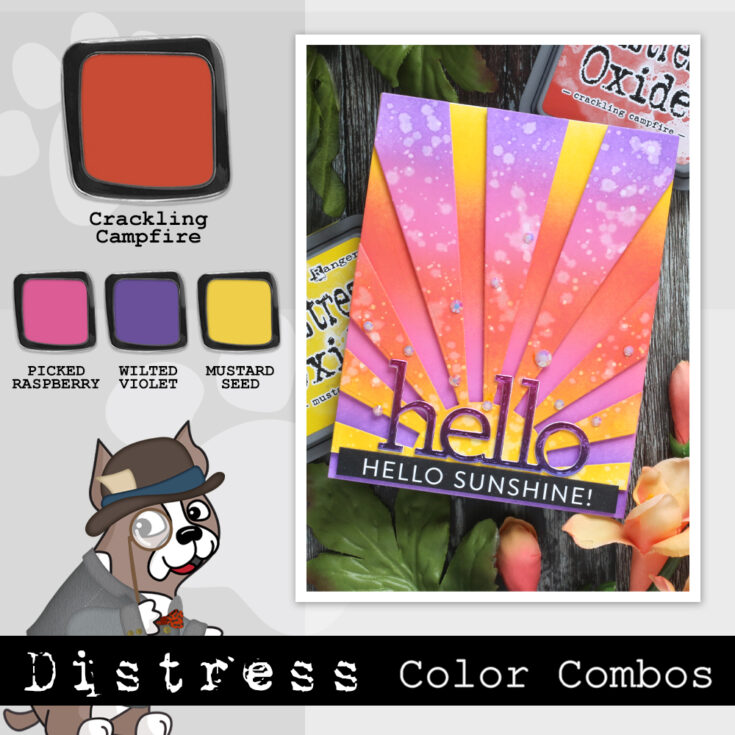
For today’s card, I’m pairing Crackling Campfire with Mustard Seed, Picked Raspberry, and Wilted Violet. I’ve added in the fourth color of Picked Raspberry to get a good transition between Crackling Campfire and Wilted Violet.
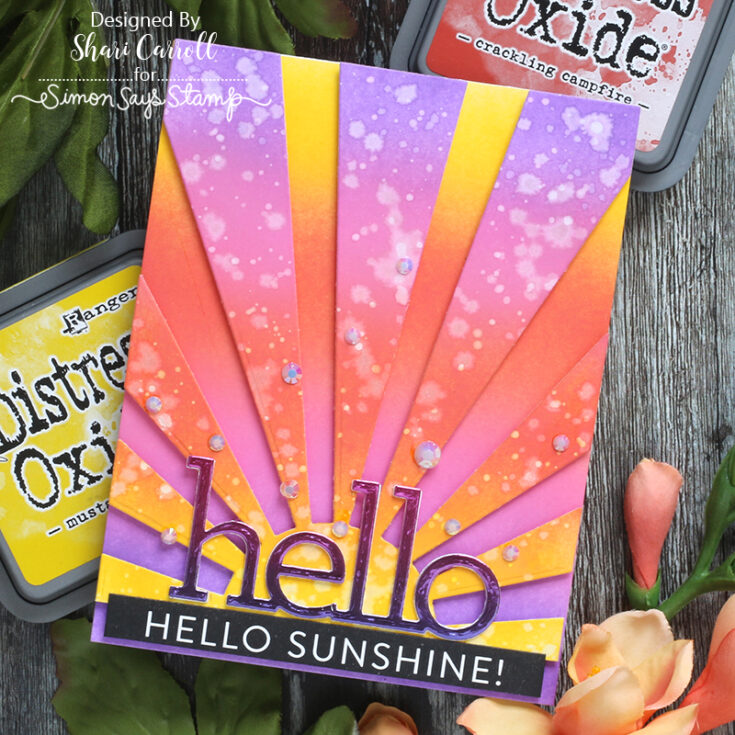
I ink blended two panels, one was die cut using the Sunburst die and the other flipped upside down for a contrasting background.
If this is the first time for you to see this feature, I have a color combination for Salvaged Patina HERE and Kitsch Flaming HERE.
SUPPLIES:
|


Circle Mask Ink Blended Background with Kristina Werner
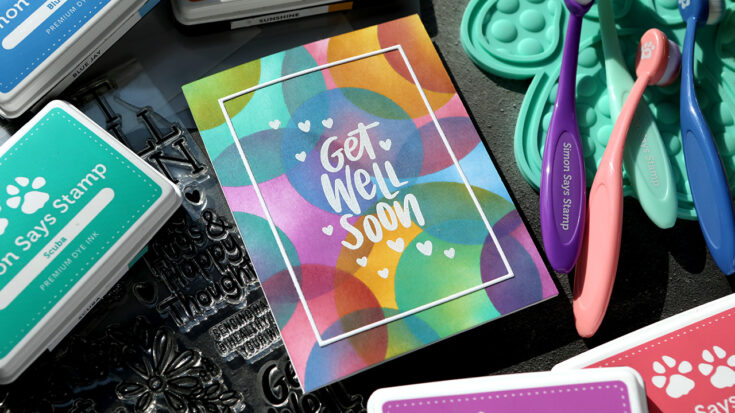
Hello, all! Kristina Werner here. In today’s video, I show how I created a fun, colorful background using the Circle Masks stencil set.
I ink blended using the three smaller circle masks and five colors of Simon ink: Hollyhock, Hot Mama, Sunshine, Scuba, and Blue Jay. I made sure to overlap each circle and continue adding more and more circles until the entire background was filled.
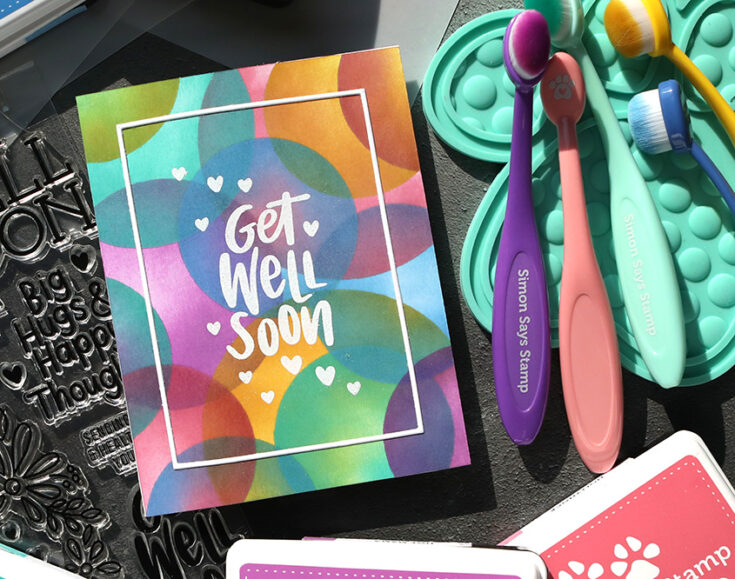
To keep the background as the focus, I used the A2 Thin Frames die set to cut a white frame, then I stamped and white embossed the “Get Well Soon” greeting from the Healing Hugs stamp set. I also stamped and embossed the small hearts in the stamp set around the greeting.
Thanks for stopping by! Enjoy the video!
Supplies
|


