Yippee for Yana: Snowflake Edges

Hi friends! Happy Sunday! I’m delighted to welcome back special guest Yana Smakula with another lovely holiday card idea! Be sure to read on and watch the video for all the details! Enjoy!

Hello, crafters, this is Yana Smakula for Simon Says Stamp! Welcome back for another Yippee For Yana video!
In today’s video, I will show you how to combine heat embossing and hot foil stamping. Both of these techniques require heat and one can damage the other if done in the wrong order.
My idea is to foil a sentiment in matte gold foil on a panel of Simon’s Soft Navy cardstock and add the snowflakes from the Snowflake Edges stamp set around the sentiment framing it, in white. Whenever you want to combine heat embossing and hot foiling you have to save the embossing for the last step. The heat from the hot foil machine can re-heat and re-melt the embossing powder messing up your hard work. The heat from the heat gun, on the other hand, will have zero effect on the hot foiling, so it is safe to heat emboss over a foiled panel.

Begin by foiling the sentiment in the center of the panel. If you have trouble foiling on Soft Navy cardstock, be sure to watch my video for tips. Next, heat emboss the Snowflake Edge above and below the sentiment creating a beautiful snowflake background. I embossed mine in Simon’s Fine Detail White embossing powder.
At this point, you could keep your background as is. I like to step things up, so I added some subtle shadows to the snowflakes using a C7 Copic marker. It is quite a tedious process to add all of that shading, but I didn’t mind. What you could also do, is re-stamp the same image over the heat embossing, but offset it slightly – this will give you that pretty drop shadow look. If you stamp it in watermark ink, you’ll get a similar result. The shadow might not look as dark, but that’s definitely another and easier way to achieve this look.

At this point again, you can call your background done, but I wanted to step it up even more. I added some subtle ink blending around the edges darkening them. This helps to direct the eye to the center of the panel. I used Hero Arts Navy ink and Simon’s large ink blending brush and blended this color around the edges.

I trimmed this panel down slightly, not too much, just about 1/8” from each side, and foam mounted onto an A2 white top folding card base. This gave me a faint white border around the design. I also embellished each of the snowflakes with gems – I used silver gems from Spellbinders, and lastly, I added lots of little white dots using a white gelly roll pen. I clustered them mostly in between the snowflakes – adding more white to the background of my card. Have fun stamping!
WATCH THE VIDEO:
SUPPLIES:
|


Thanks so much for stopping by, and thanks to Yana for being our guest!
Hot Foiling and Watercolor Resist Featuring Gina K. Designs
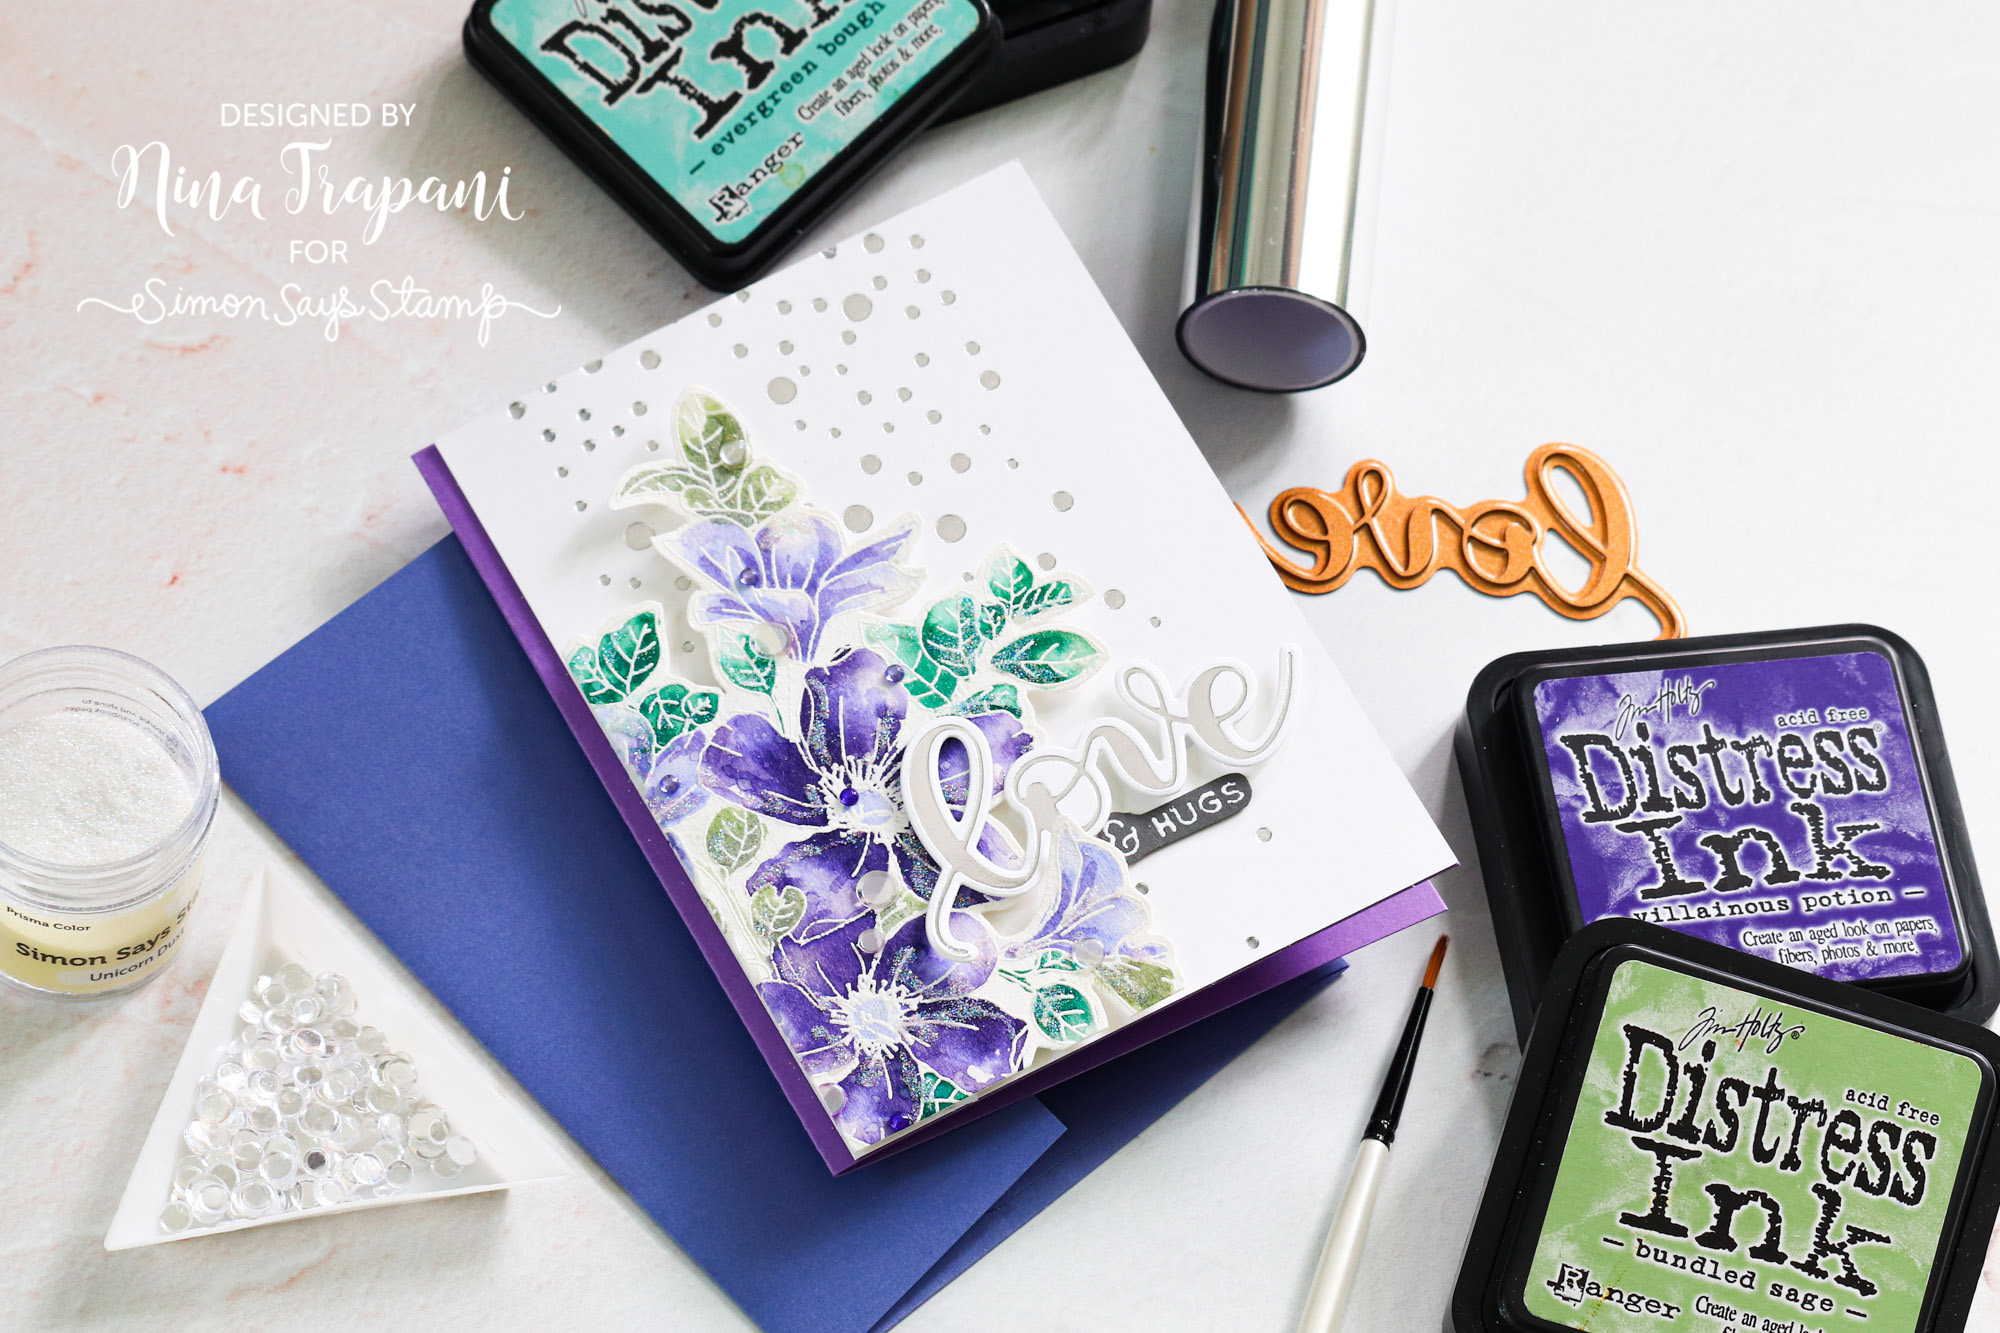
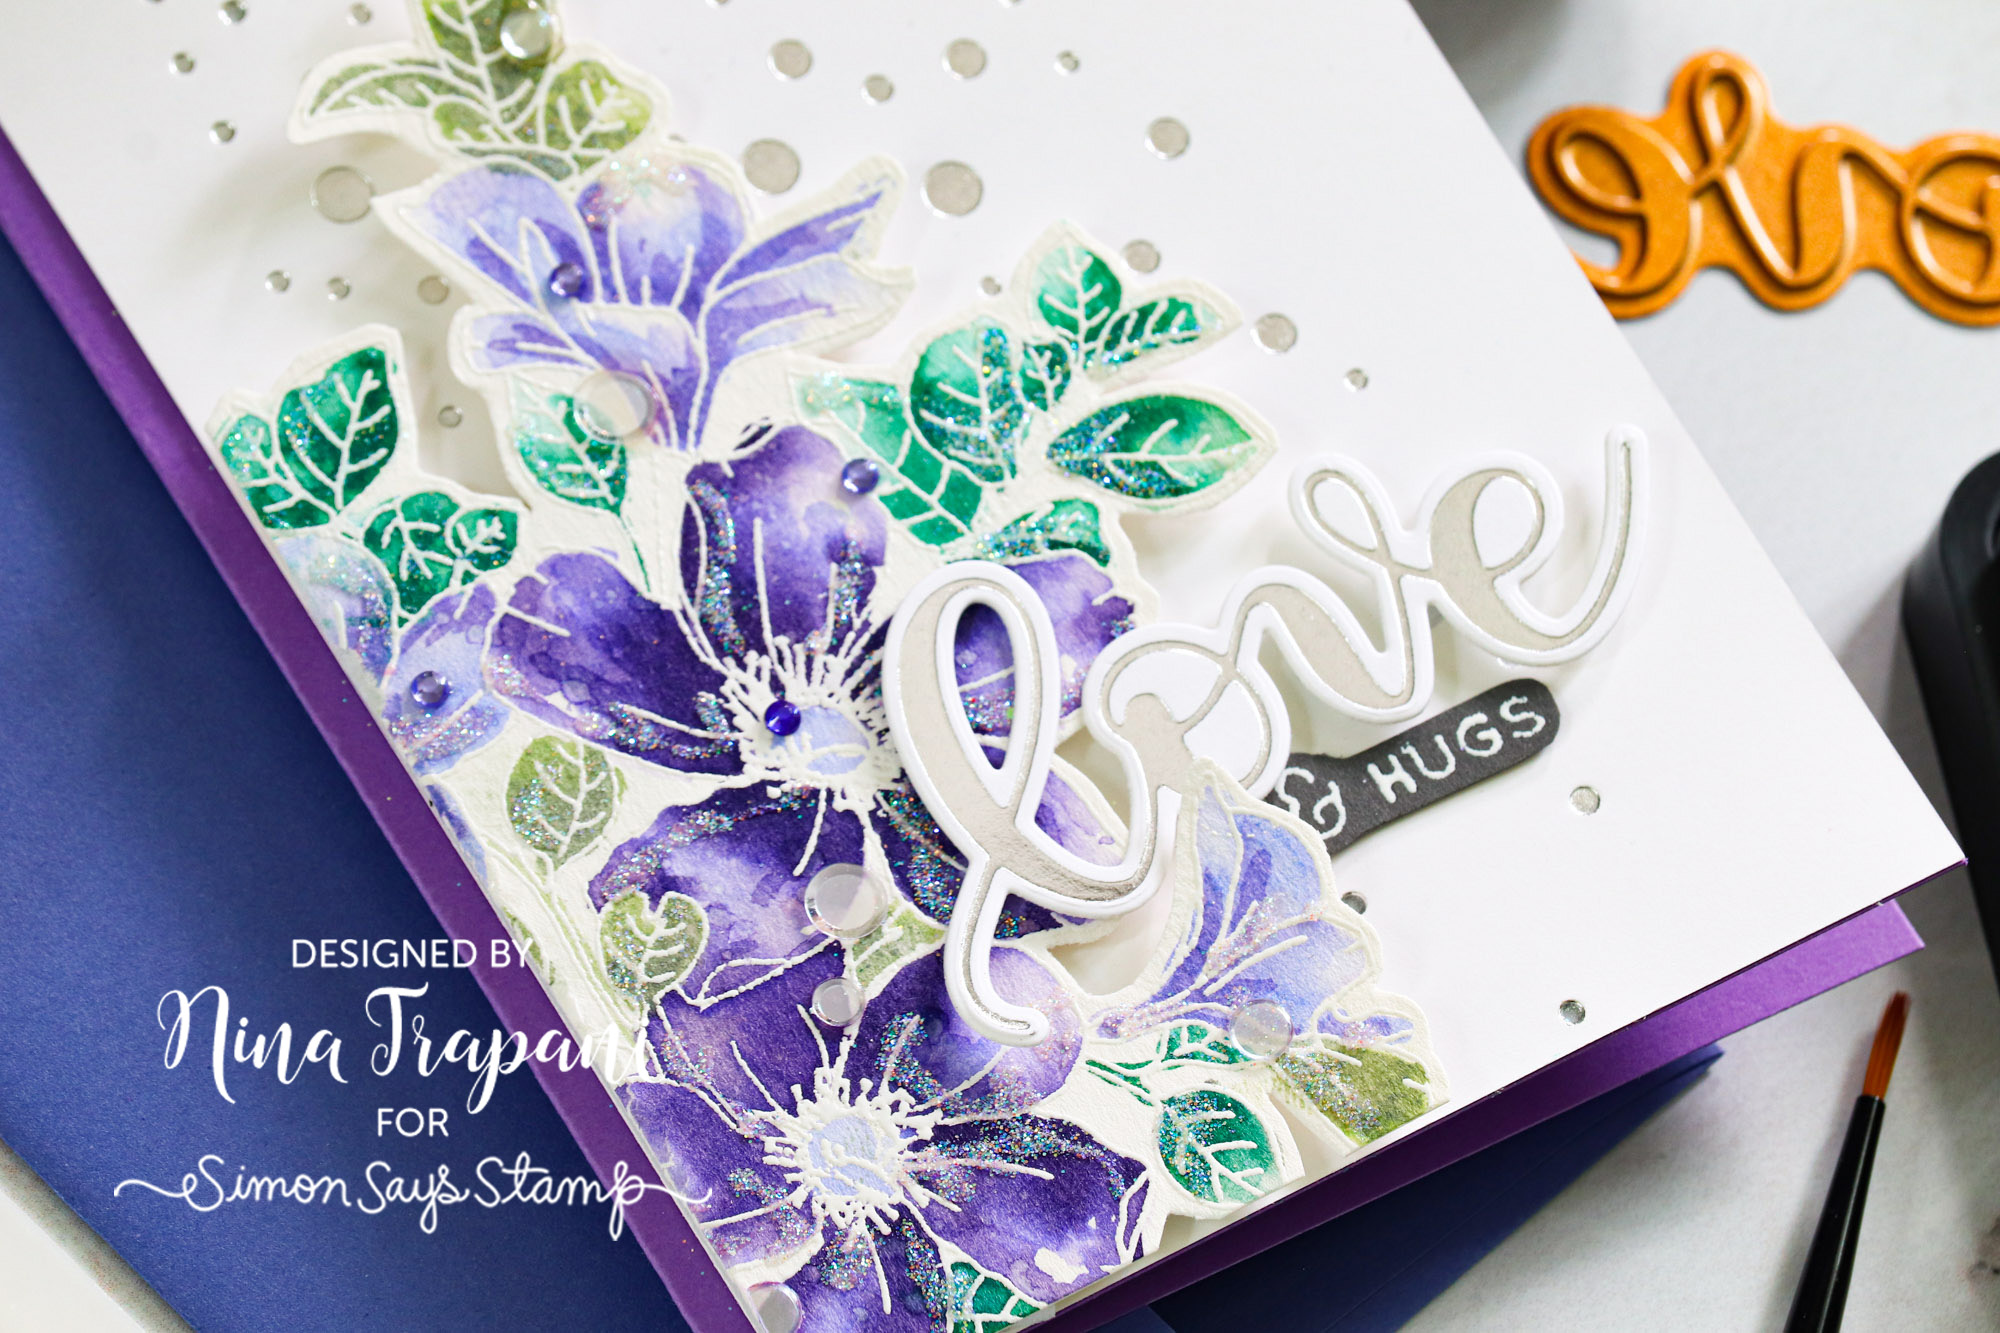
Hello, friends! It’s Nina-Marie Trapani with a card project showcasing a Gina K. Designs stamp set called Flowers for You. In this video, I will be showing you how I watercolored the florals from this set with Distress Inks, as well as hot foiled accents and sentiments for this card.
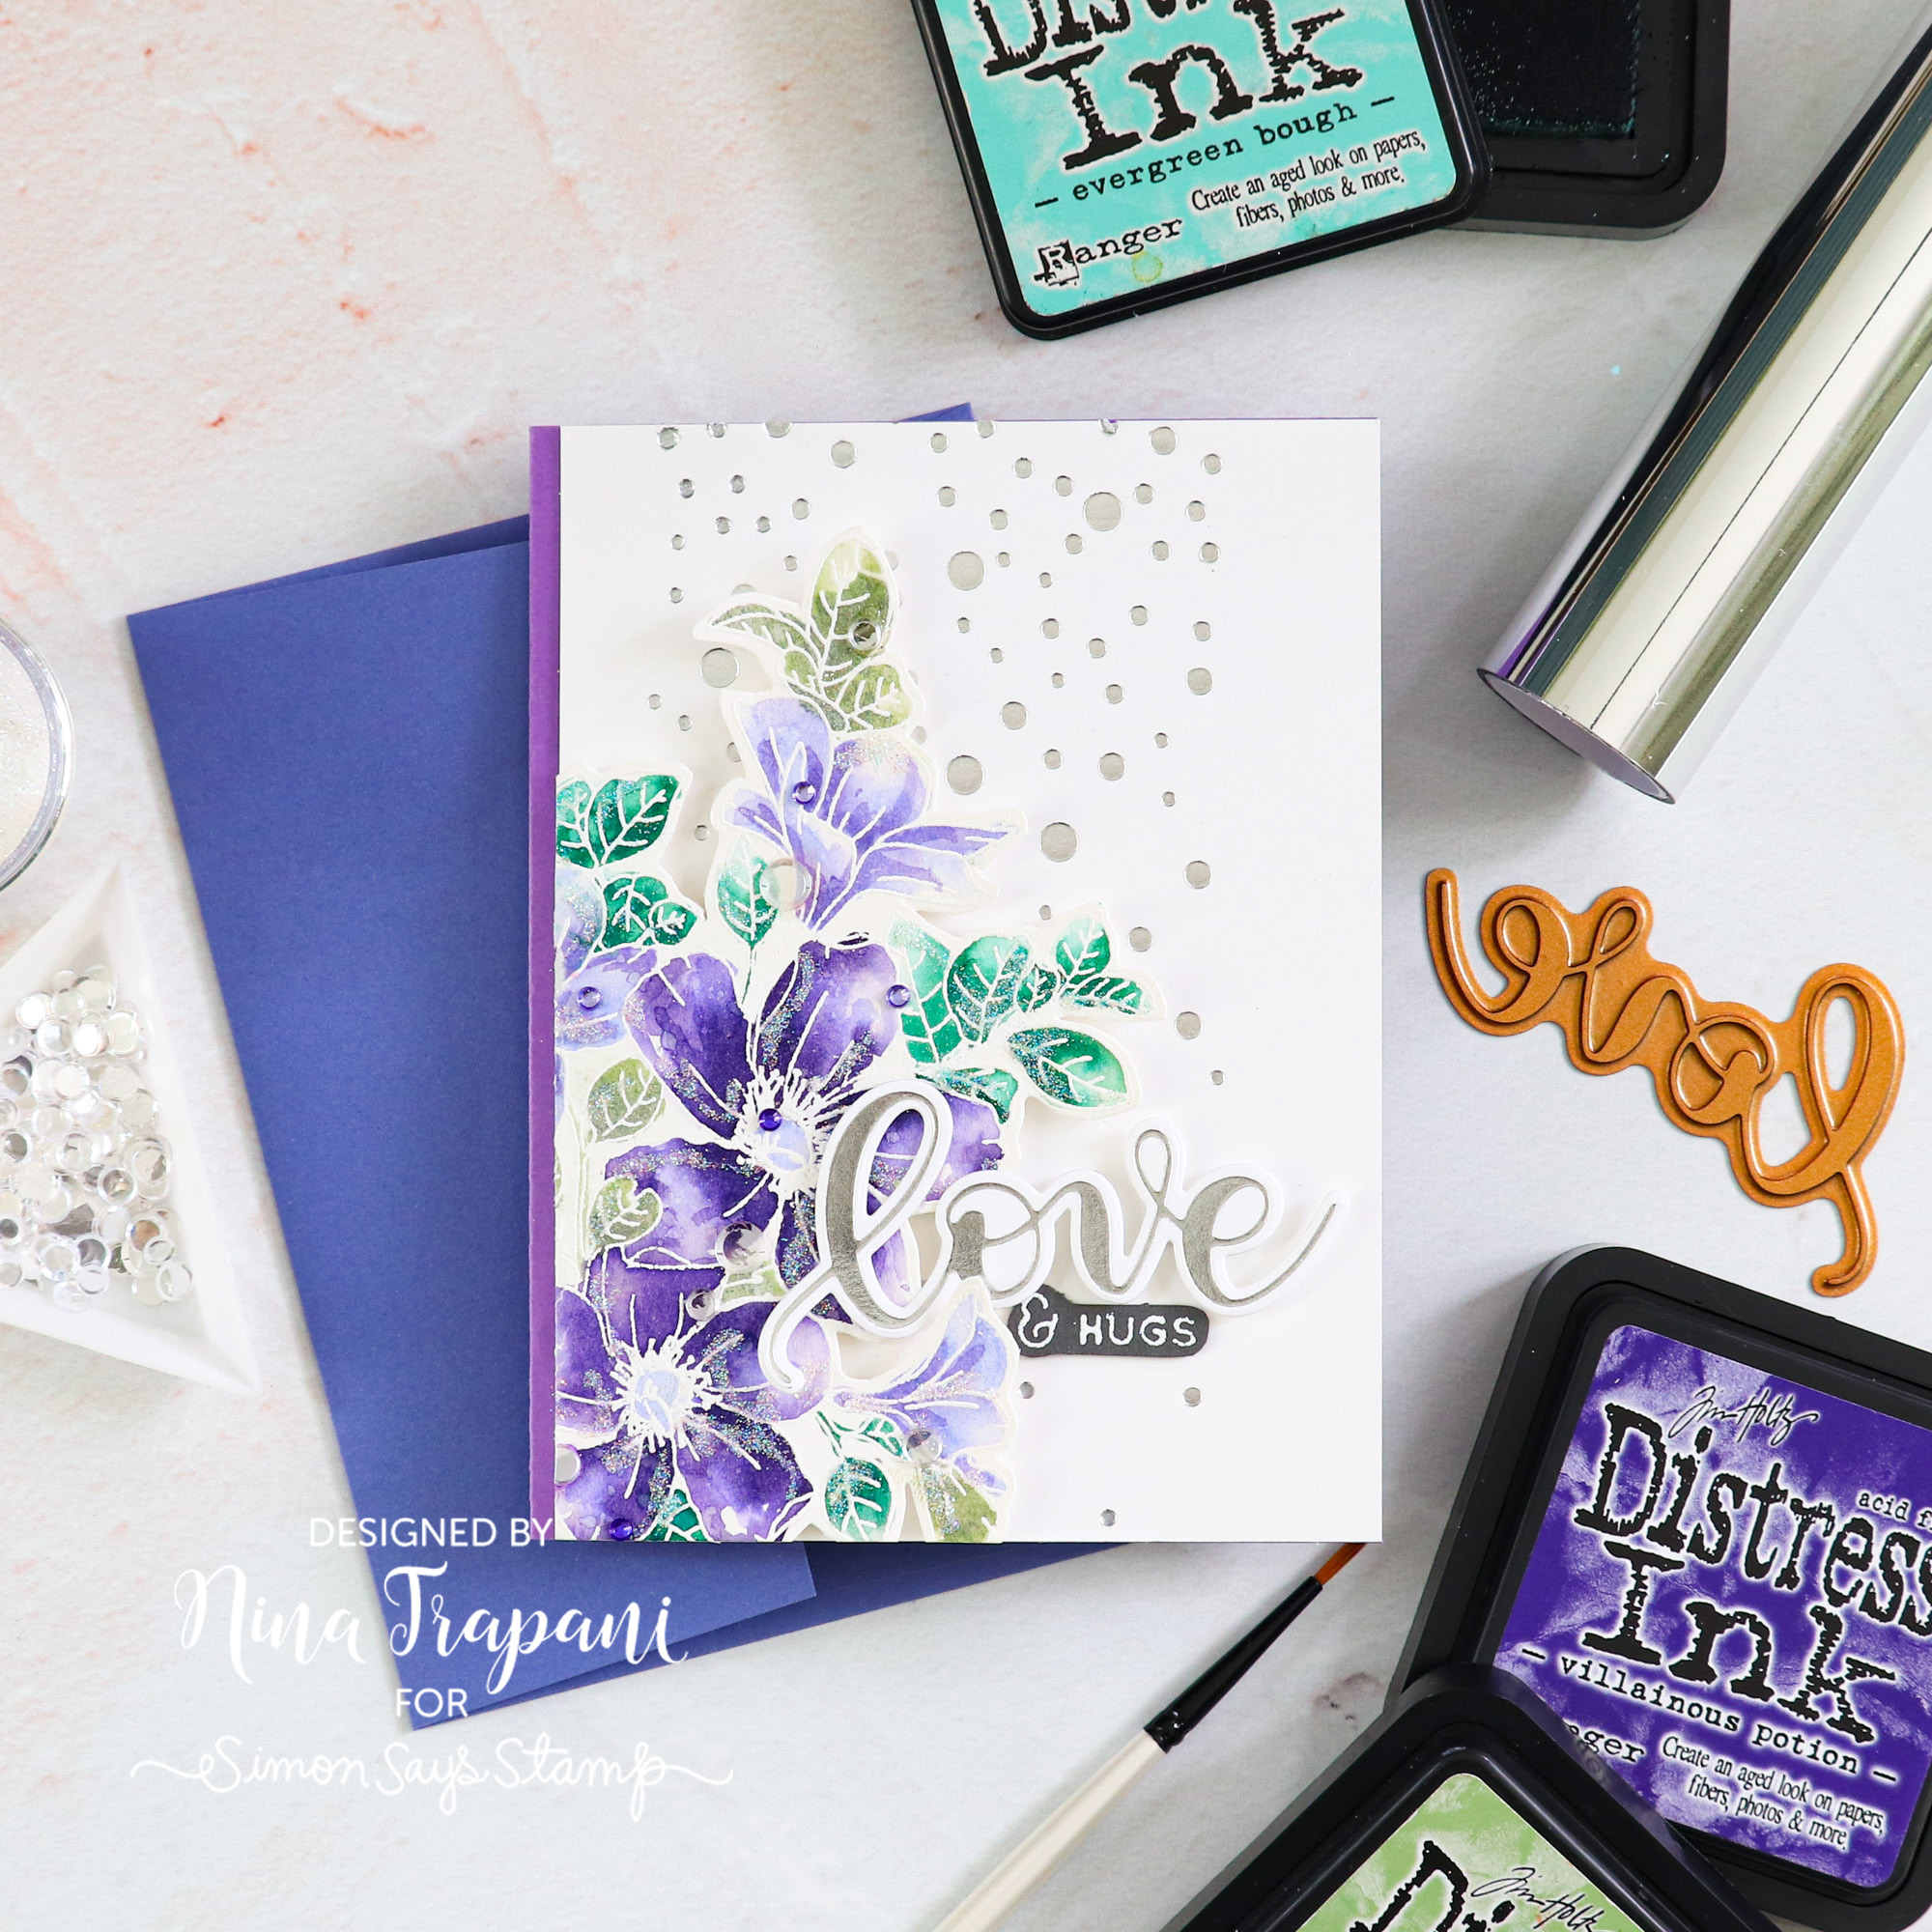
For the hot foiling, I used our Simon Says Stamp Love and Falling Dots plates; both were foiled with silver foil. The silver paired beautifully with the purple colors I used to watercolor the flowers. That purple is a mix of Shaded Lilac and Tim Holtz’s new Villainous Potion Distress color!
Be sure to watch the video below to see how I made this card!
WATCH THE VIDEO
SUPPLIES
|


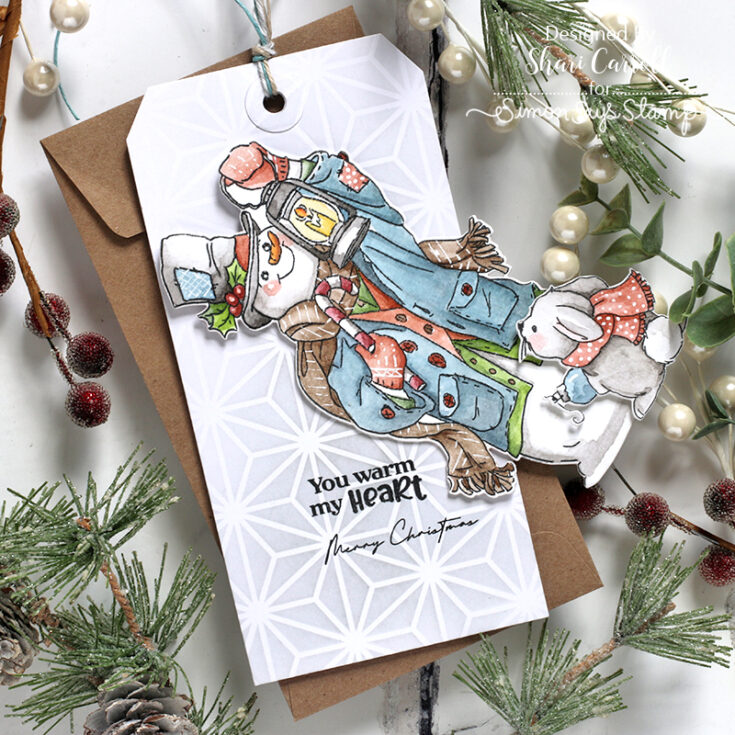
Funny Friday with Shari Carroll: Swing Style Snowman
Welcome everyone, It’s Shari here! I have another edition of our Funny Friday series with Art Impressions that I hope will tickle your funny bone.
Today I’m totally inspired by Jennifer McGuire with her swing style cards. I’ve used the Art Impressions Christmas Slimline stamp set with this adorable snowman. He fits perfectly onto a tag so having a hidden message under him is perfect since it isn’t a folding card.
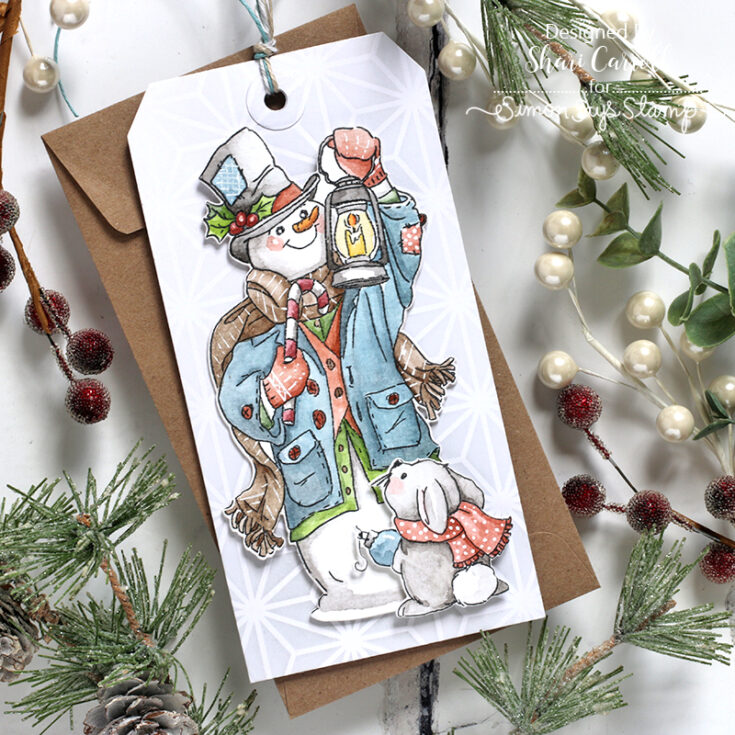
I kept my coloring simple by using my watercolor set and used a small brush to get into the little tiny areas of the image. Be sure to check out the video below to see how this all comes together.
SUPPLIES:
|


