JUST released TODAY exclusive DOORBUSTERS!
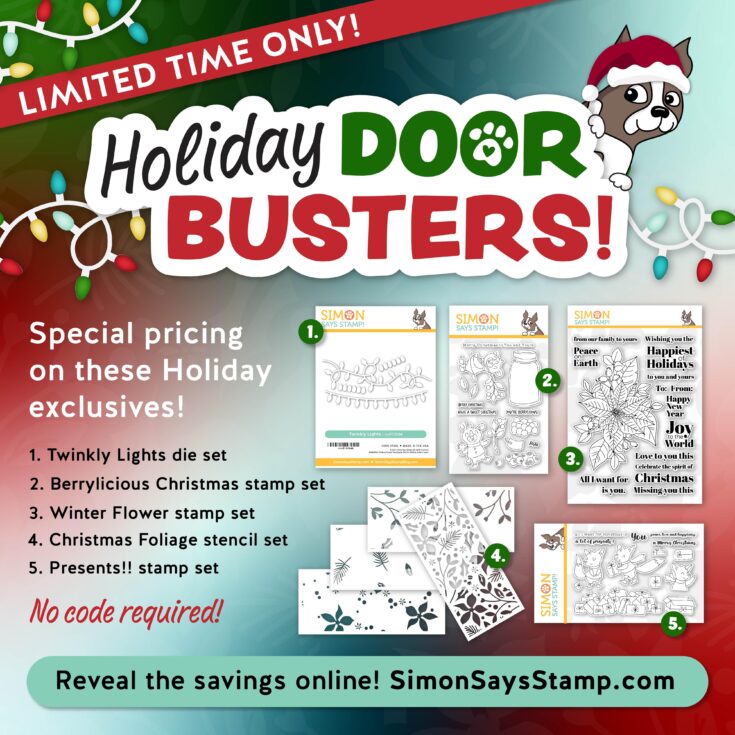
Hi friends! We’re kicking off a long weekend of FUN surprises off with a FUN promotion! We have 5 BRAND NEW exclusive products available at STELLAR deals, NO CODE REQUIRED for a limited time!
Purchase our Twinkly Lights die set, Winter Flower stamp set, Berrylicious stamp set, Presents!! Stamp set, and/or Christmas Foliage stencil set today only for a GREAT DEAL! Click or tap the items to reveal the deal!
ENJOY!
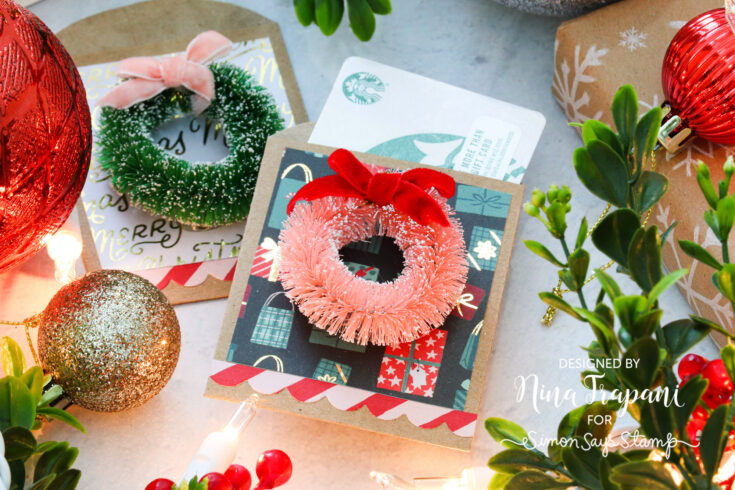
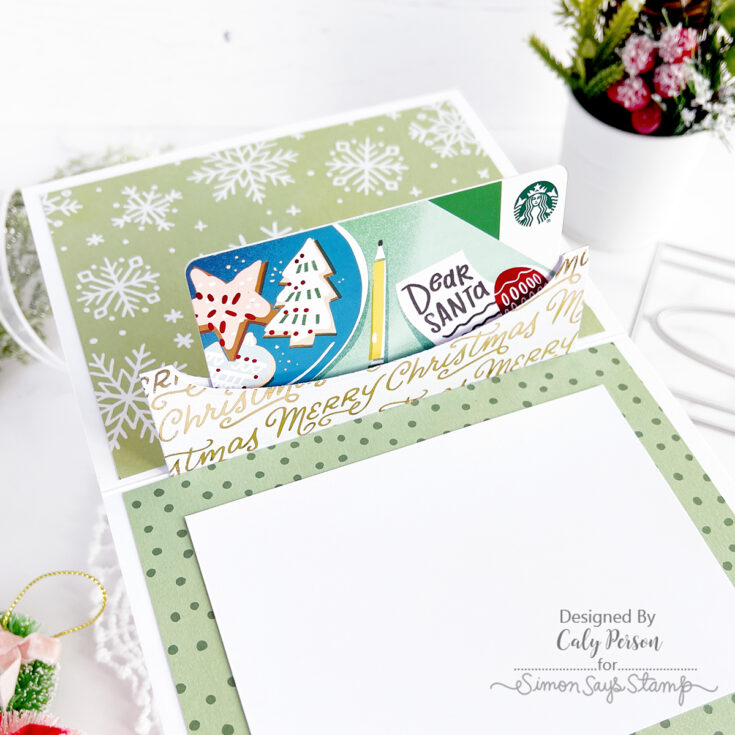
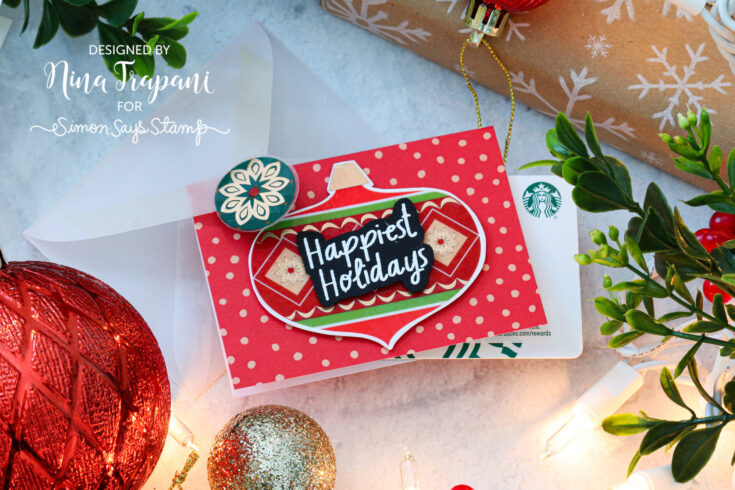
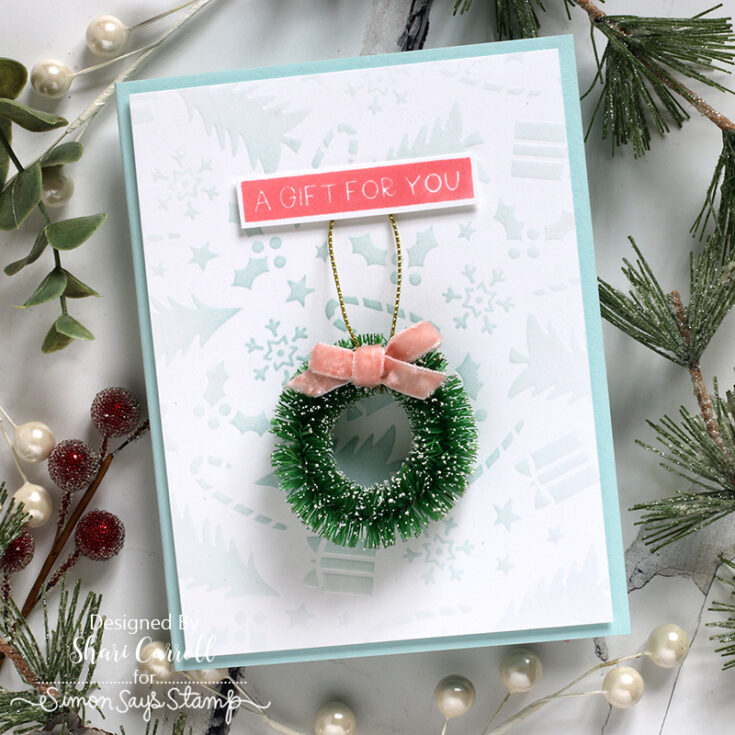
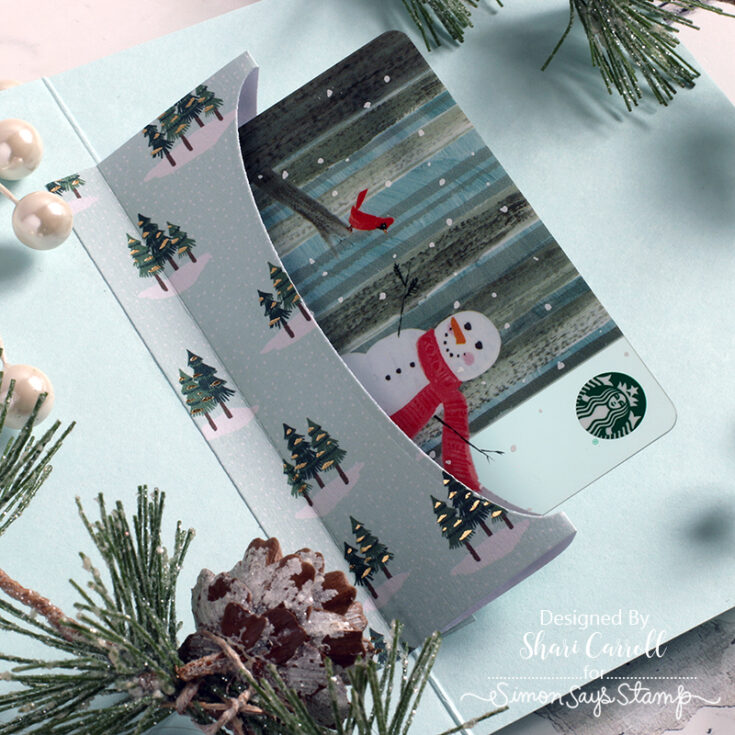
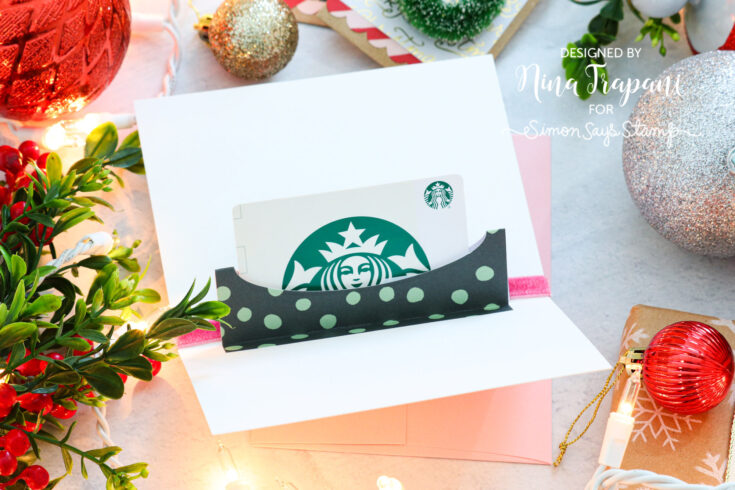
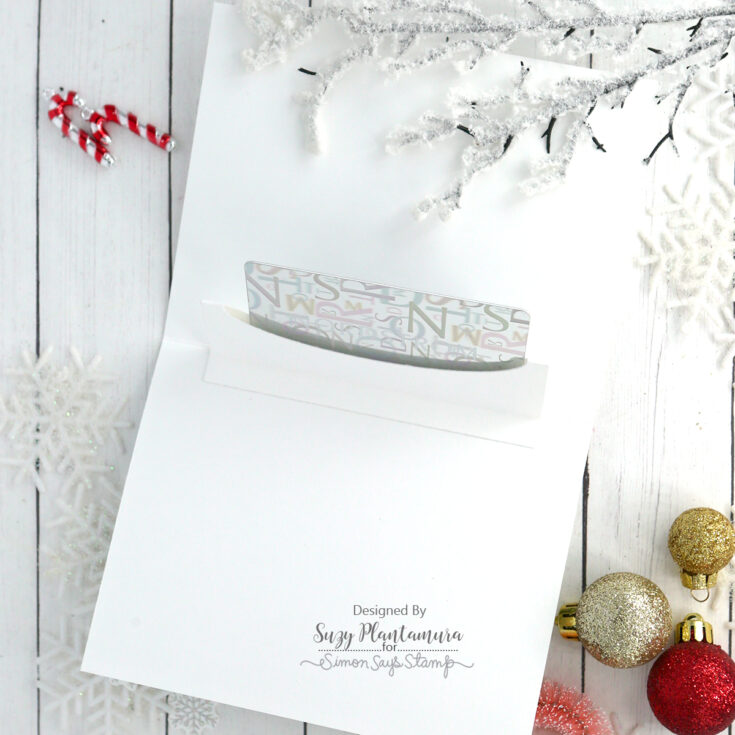
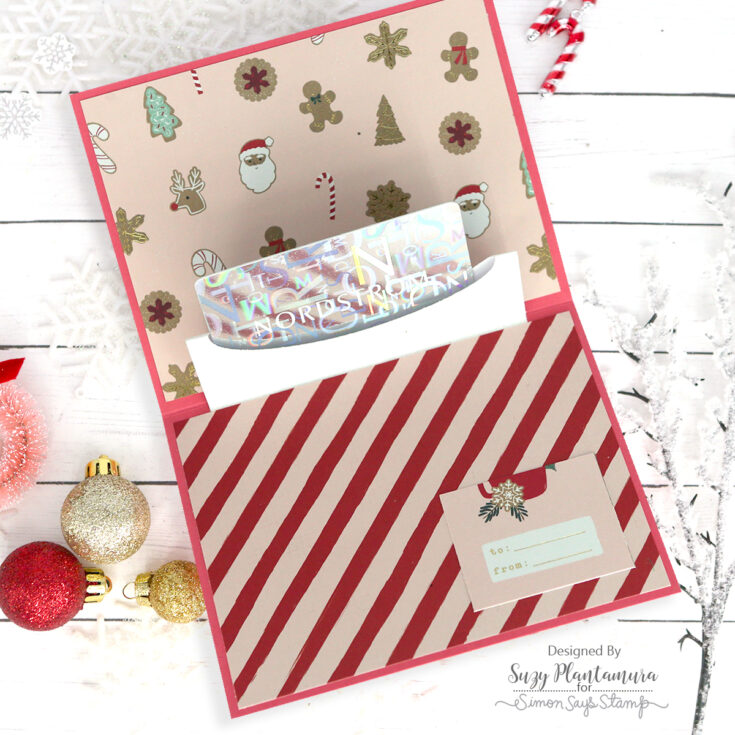
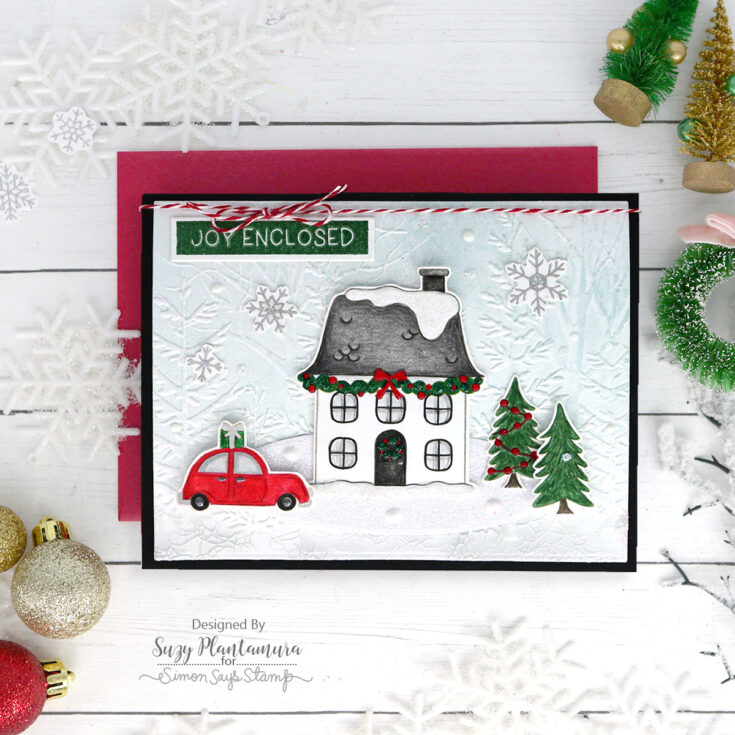
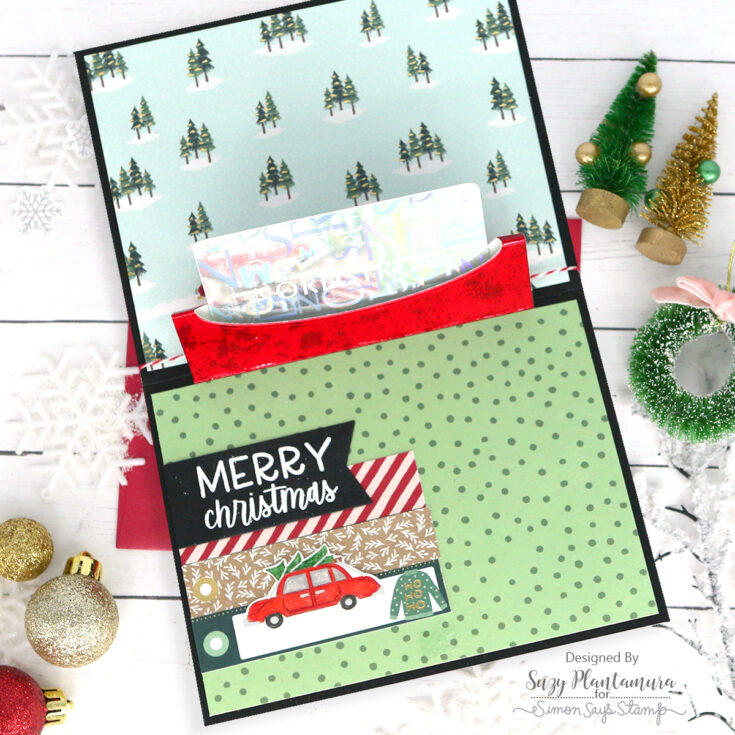
Giving a gift card? Make it EXTRA special!

WATCH THE VIDEO:
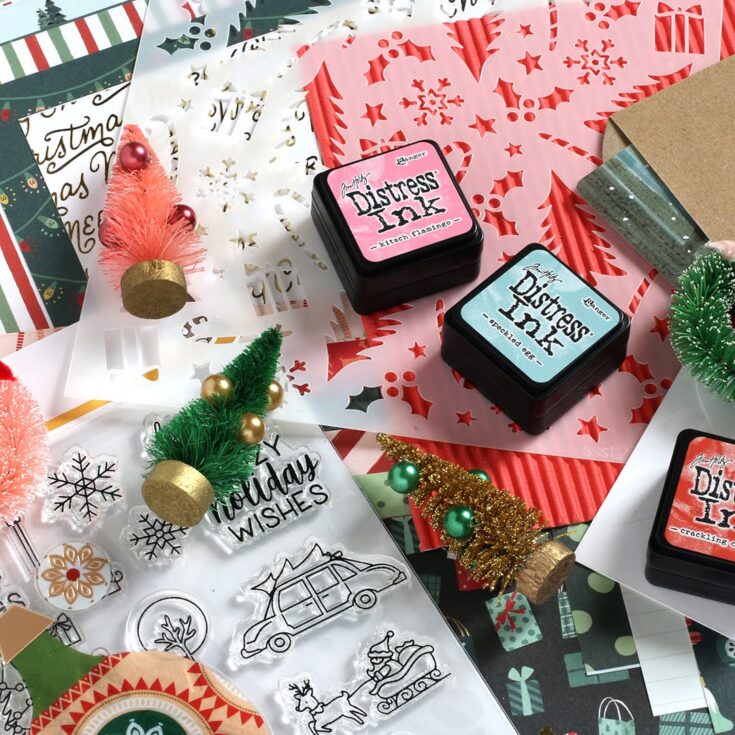
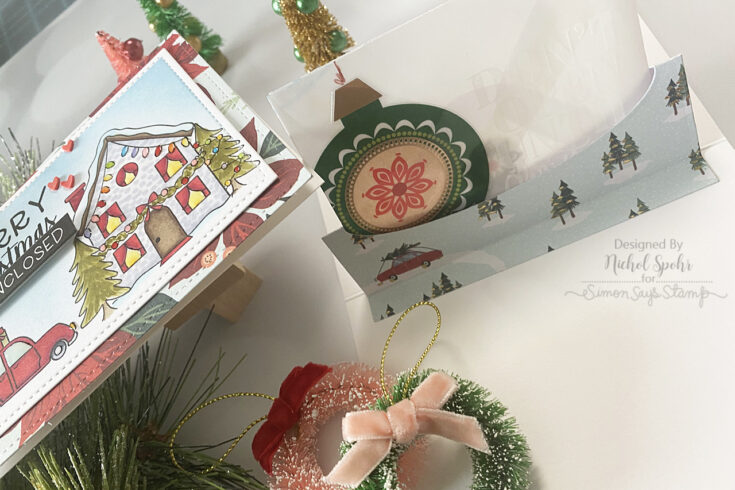
Kit contents: (valued at just under $90 priced individually)
- NEW and Exclusive Simon Says Stamp Cozy Christmas 6×8 inch clear stamp set
- NEW and Exclusive Simon Says Stamp Iconic Christmas 6×6 inch stencil
- NEW and Exclusive Simon Says Stamp Pop-Up Gift Card Holder
- 24 single-sided 3×4 inch sheets of Crate Paper Busy Sidewalks Patterned Paper
- 3 Bottle Brush Trees from the Crate Paper Busy Sidewalks Collection
- 2 Wreaths from the Crate Paper Busy Sidewalks Collection
- 4 sheets of Fancy Pants Coral Corrugate in 6×6 inch size
- 1 package of Ornament Stickers
- 1 package of Tim Holtz Distress Ink Pad Mini Kit which includes the following ink cubes: Speckled Egg, Crackling Campfire, Rustic Wilderness, and Kitsch Flamingo
- 4 American Crafts 3.94 x 2.6 inch Kraft Bags (Perfect for Gift Cards!)
- 6 Simon Says Stamp Gift Card Envelopes in a combination of white and vellum in color.
- 1 sheet of 8.5 x 11 inch Simon Says Stamp 100 lb cardstock in Sea Glass
- 1 sheet of 8.5 x 11 inch Simon Says Stamp 100 lb cardstock in Lipstick
- 1 sheet of 8.5 x 11 inch Neenah 110 lb cardstock in Solar White
Get INSPIRED!!

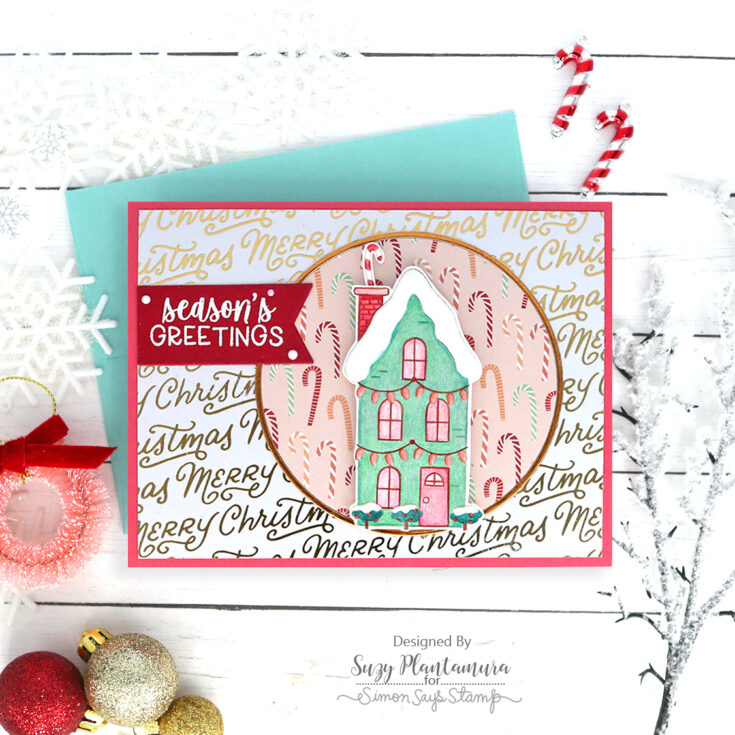
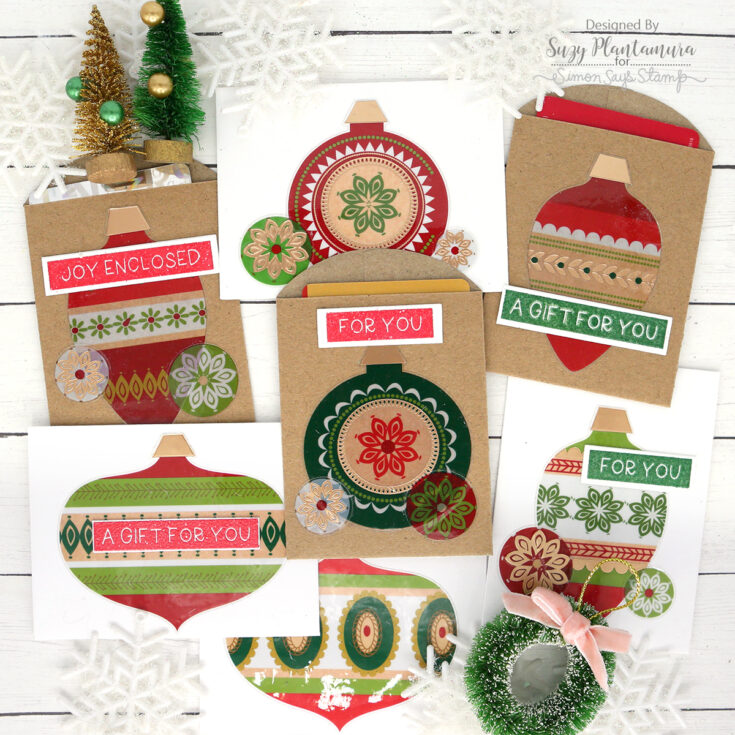
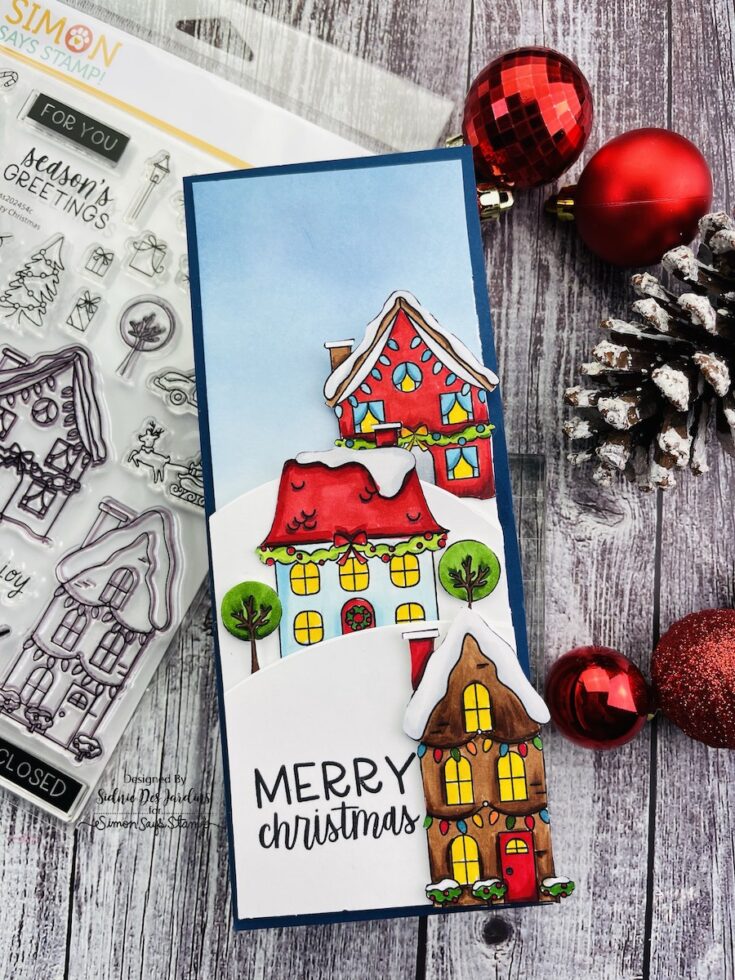

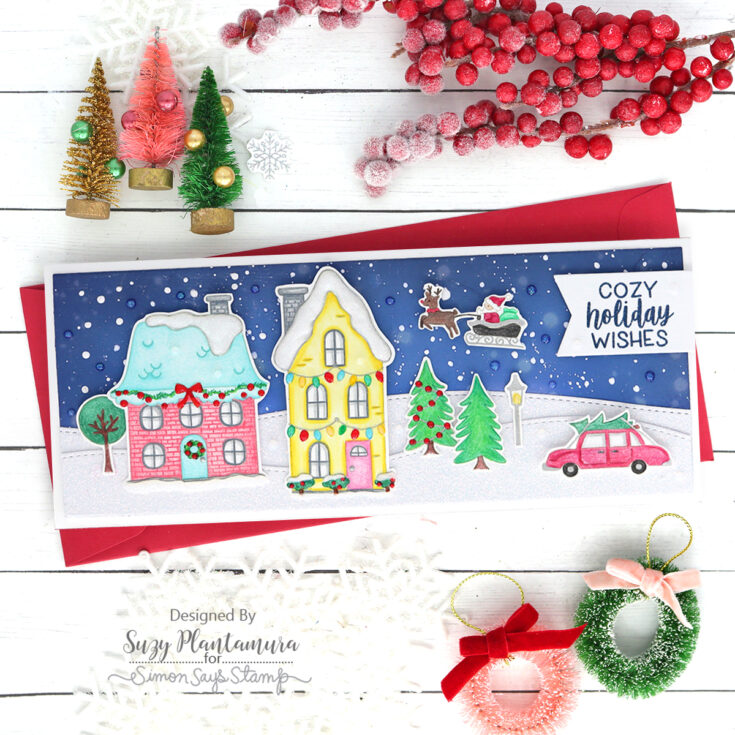


Want to see even MORE inspiration and/or add your own? Stop by our galleries!
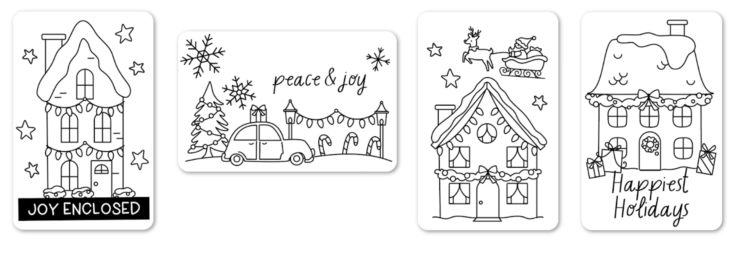
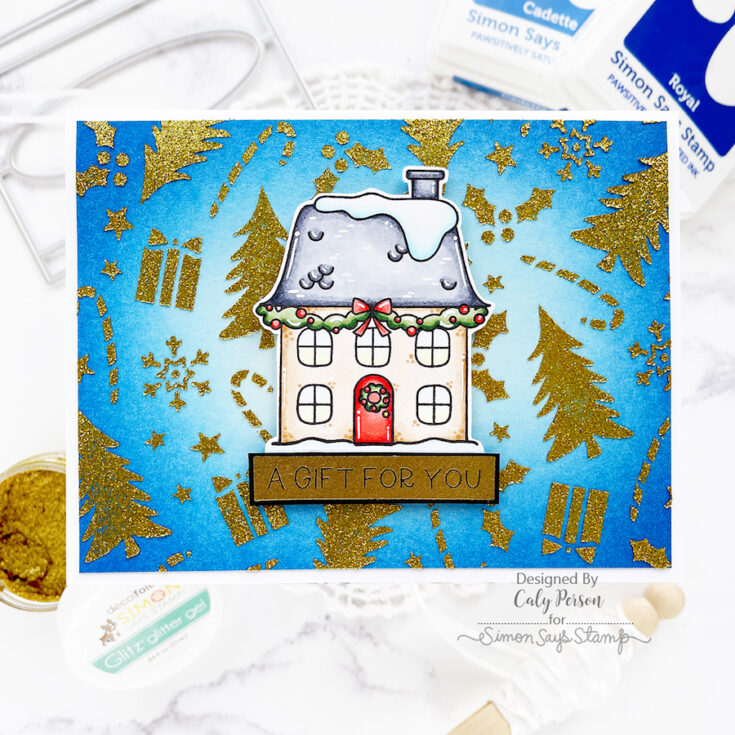
Yippee for Yana: Outline Ornaments

Hi friends! Happy Monday! Please join me in welcoming back special guest Yana Smakula in our bi-monthly rendition of Yippee for Yana! She’s sharing a gorgeous card that is a great design for mass-producing. For more details, be sure to watch the video. Enjoy!
Hello, crafters, this is Yana Smakula for Simon Says Stamp! Welcome back for another Yippee For Yana video!
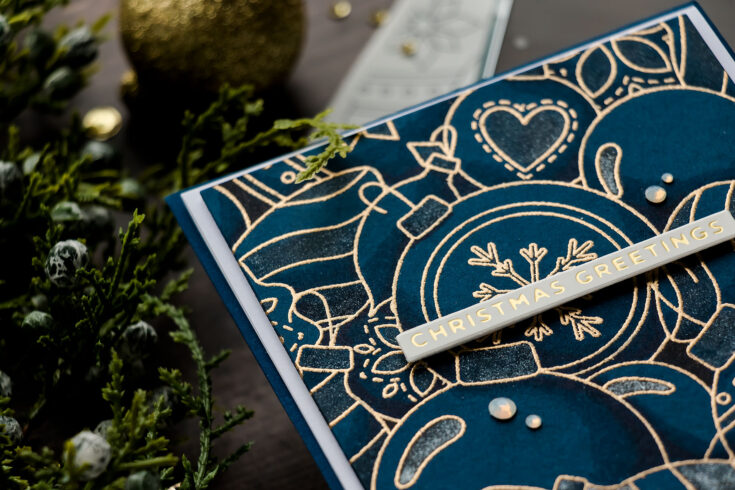
In this video, I have a simple and easy to mass-produce Christmas card idea featuring the Outline Ornaments background stamp. I’ll show you several simple tricks you can use to add color and interest to this background without really coloring it in a traditional sense.
I love to create with stamps like this – first of all, they allow you to easily make a stunning background for a card, the background itself is self sufficient and you don’t need to add much to it to make a beautiful project, and lastly, even though this is an outline image, it doesn’t mean you have to color it from scratch or color or all.
I love to use colored cardstock when working with stamps like this. The colored cardstock provides a beautiful base color for my project and from there, if I want to, I can add additional color, some shading or some special effects.
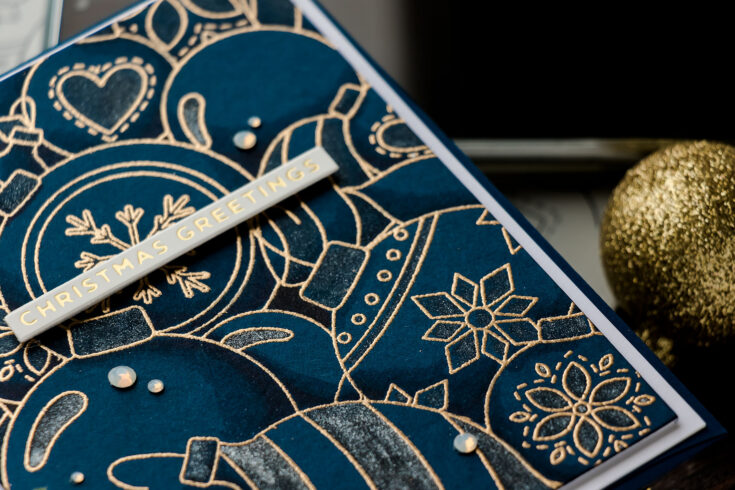
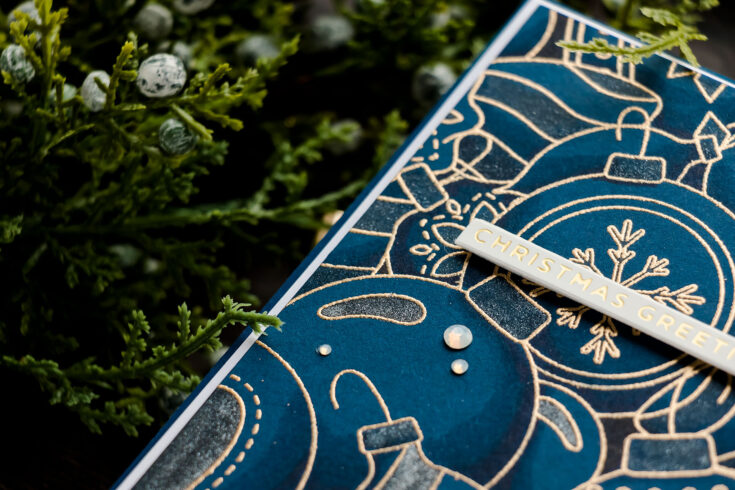
I stamped this background in clear embossing ink onto Simon’s Soft Navy cardstock and heat embossed it in Antique Gold embossing powder. I love the combination of these products – the Soft Navy is a beautiful dark blue, perfect for modern Christmas cards and Antique Gold embossing powder is simply an all time favorite of mine, it goes well with just about anything.
Before we move onto the next step, I like to trim my background to size. I am making an A2 card, it measures 4 1/4 x 5 1/2” so I’ve trimmed this background to that size exactly. This way, if I decide to do any coloring in the next step, I am not coloring unnecessary areas.
Whenever I work with colored cardstock I still like to use my Copic markers, but I also love to incorporate my shimmer pens and any specialty opaque pens I might have in my stash.
Shimmer looks especially beautiful on dark colors of cardstock, the dark papers help it shine.
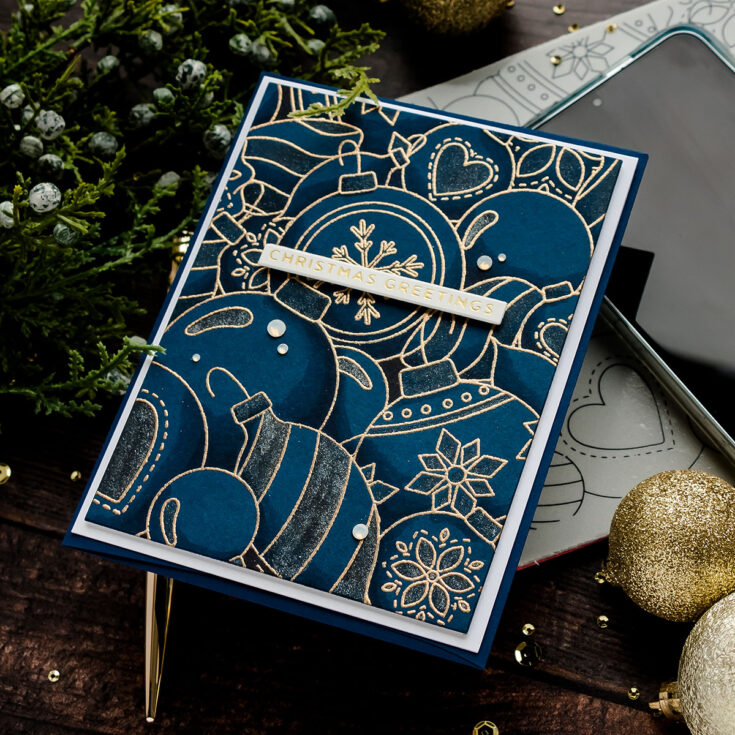
I mentioned I like to use Copic markers on colored cardstock. Copic markers or any alcohol markers are translucent, they are not opaque. So what does that mean? That means that if I used a light color marker, let’s say a light blue over this soft navy paper, it won’t be visible once the marker dries. Light colors of markers will leave no color on dark colors of paper. But, you can still use your card colors of markers to add shading.
For this paper I’ve found I can use B34, this is the lightest blue in this particular color combination, B97, this is a medium blue and B99, this is a darkest blue. I can use a combination of these 3 markers to add shading to my ornaments. It is very easy to do and it creates a beautiful effect. It also saves you a ton of time as you aren’t really coloring the entire background, you are simply adding shading.
At this point we can leave the background as is, but we can also keep working on it. For me, that’s where the shimmer pens come into play. I love to use shimmer pens over dark cardstock to add details.

I trimmed this panel down a bit as I wanted to mount it onto a white card base and have a white border. It also looks amazing when adhered onto a card front without any border at all.
With backgrounds like this I prefer to stay away from large bulky sentiments and I often go for a skinny strip sentiment instead. It can be a stamped or a foiled sentiment or even one of those pre-printed sentiments from Simon. I do try to use something small, so that it doesn’t cover much of the background and one can see all of the beautiful shading and shimmering.
I added several scrap panels of cardstock to the back of my main panel – this helps me to flatten it, and also to pop it up one the card and I also used the skinny foam adhesive strip to foam mount the sentiment.
Lastly, I opted to add some white gems from Spellbinders scattering them around the sentiment. Have fun stamping!
WATCH THE VIDEO:
SUPPLIES:
|


Thanks so much for stopping by, and thanks to Yana for being our guest!