NEW for June 2026 from Gina K Designs!
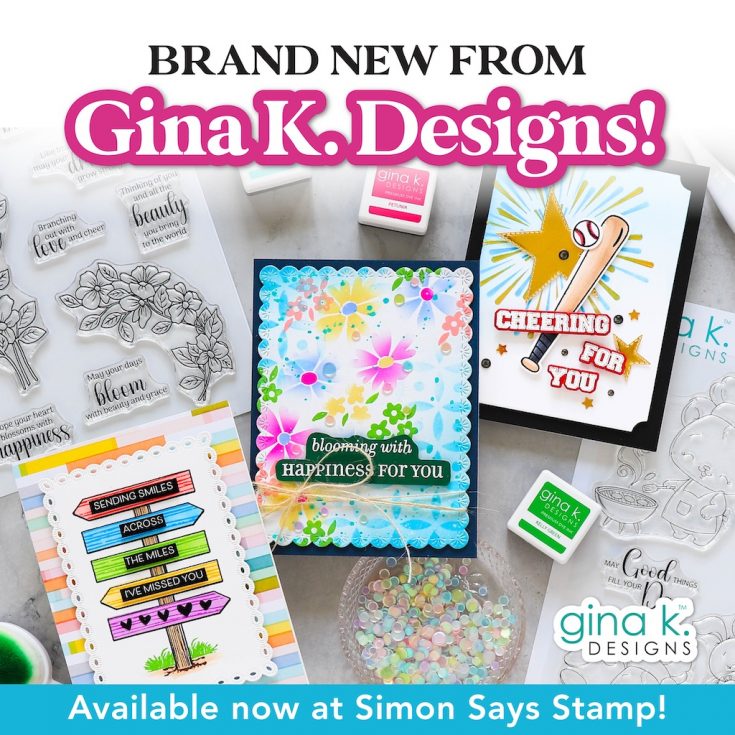
Hey crafty friend! It’s a happy day—the brand-new Gina K Designs June 2026 Collection has arrived! Click or tap here to see all the fresh, fabulous finds!
Need a little creative spark? Scroll on—new inspiration waiting for you!

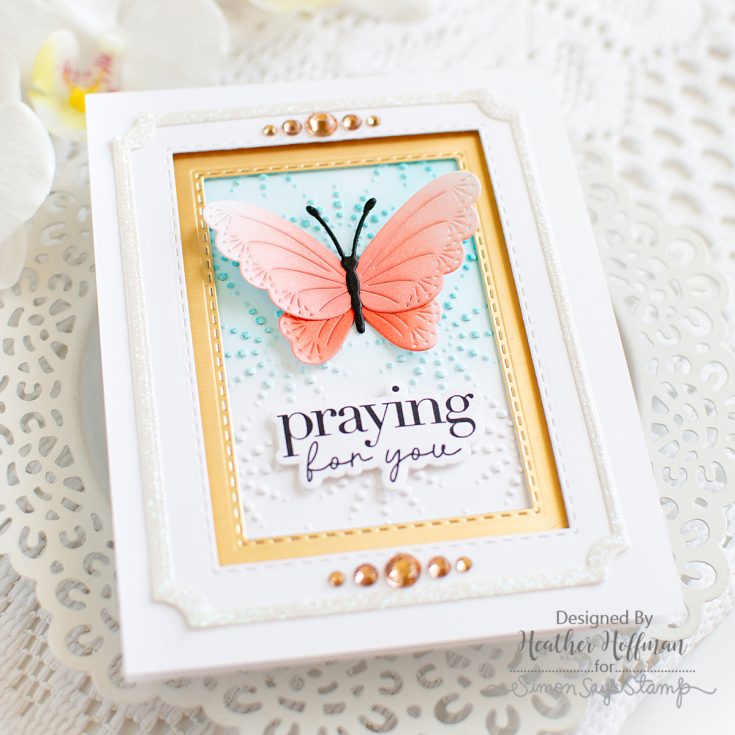
Framed with Kindness: An Encouragement Card Full of Texture
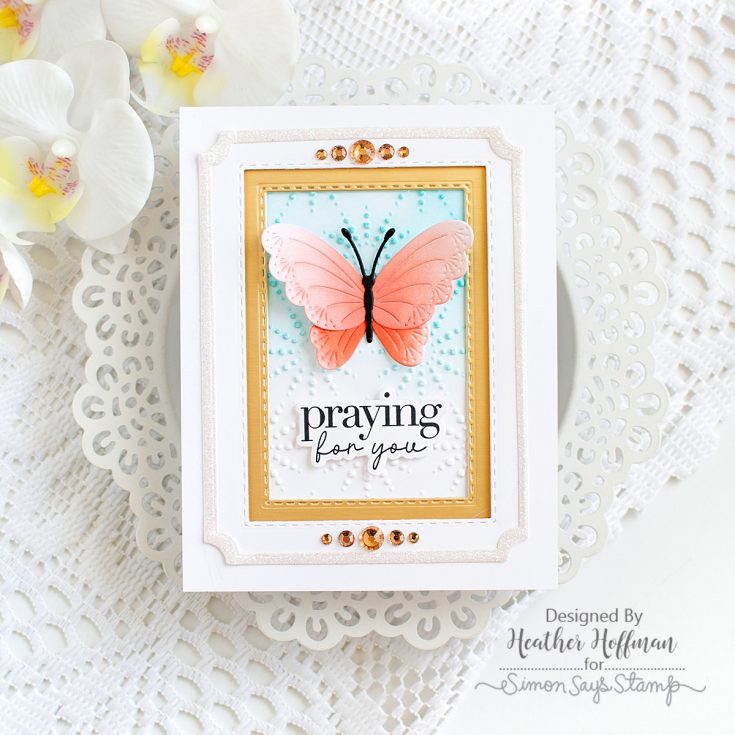
Hi friends! Heather Hoffman here today with a bright and airy card featuring lots of die cutting and building up layers and textures that frame up the lovely butterfly and sentiment on this card!
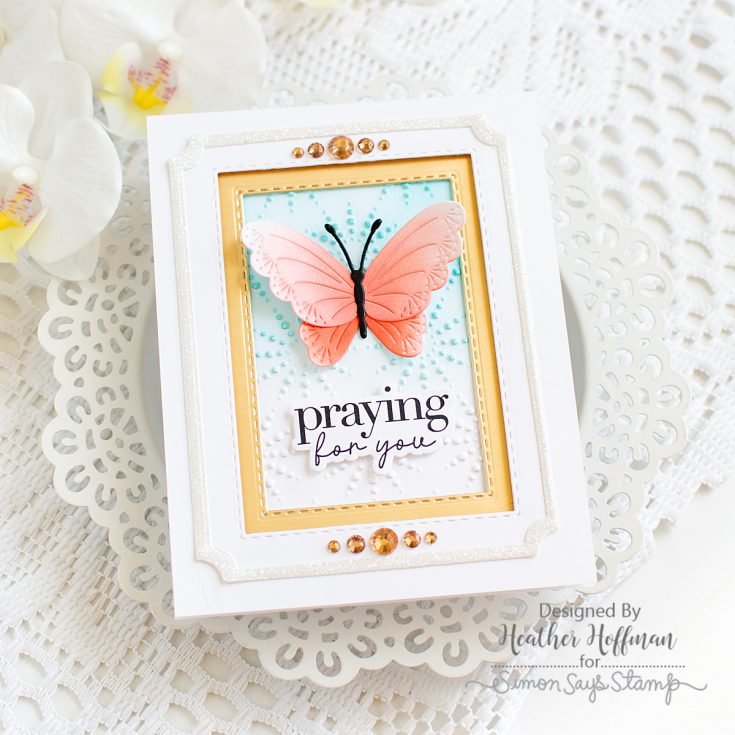
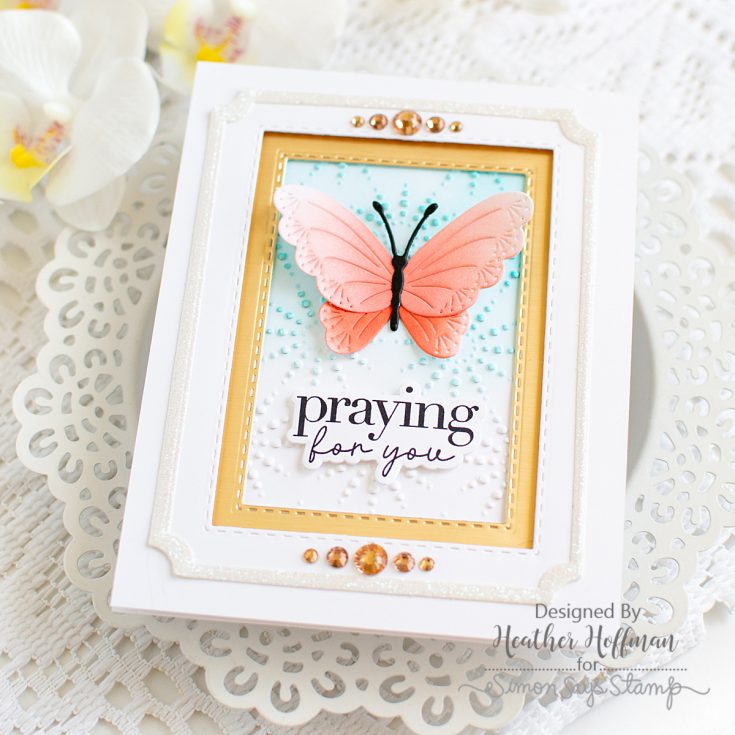
The new Dewpierce Butterfly is so stunning – I love all the texture on it! I die cut it from white cardstock, and ink blended Blush ink on the larger top portion, and Pucker ink on the lower portion, holding it in place on my Craft Tacky Mat. I cut the center from Black cardstock, and assembled it all together, then set it aside to dry while I worked on the rest of the card.

To frame everything up, I started off with Nested Stitched Rectangles, and die cut a window from an A2 panel of white cardstock, then cut a slightly smaller window from Honey Gold cardstock to layer behind, adhering with foam adhesive. Behind the frame, I used the fun Dotty Circles embossing folder on white cardstock, then ink blended from the top down with Surf ink, allowing it to fade to white somewhere around the middle. I added the frame over that with more foam adhesive to make sure I had lots of dimension, then used liquid glue to adhere a White Glitter frame created with two sizes of the recently released A2 Notched Rectangles die.
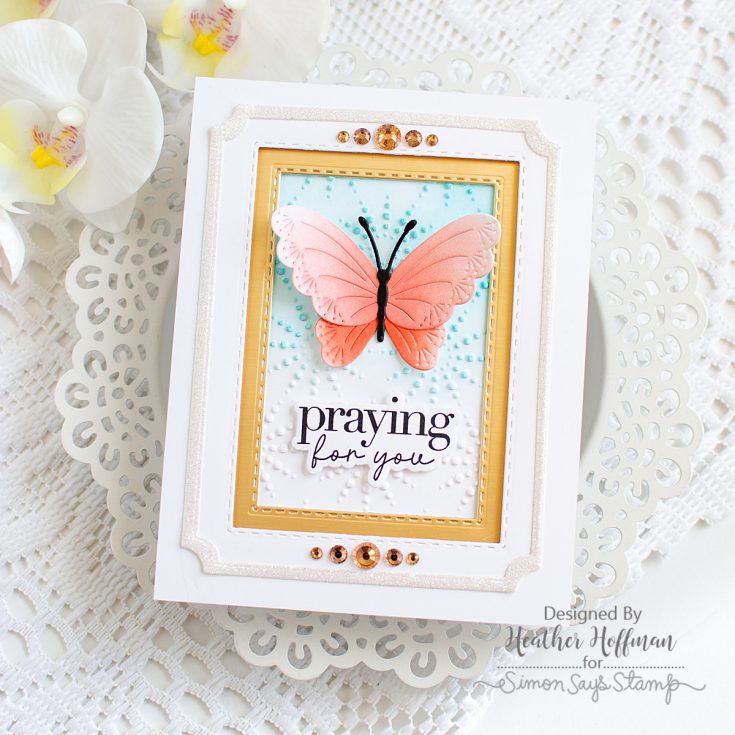
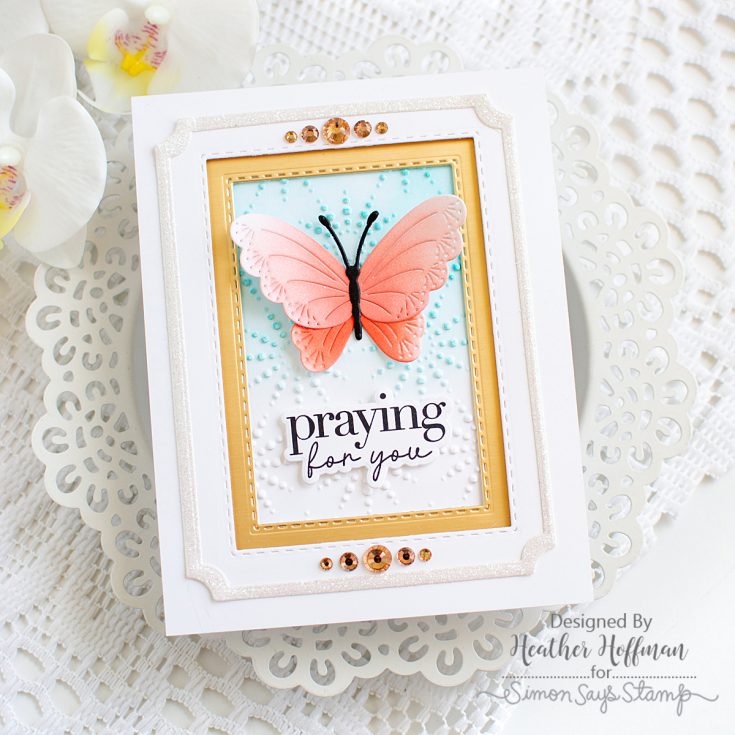
By this time, the butterfly was ready to go, so I adhered it just in the center with liquid glue, leaving the wings to float free for lots of extra dimension! I chose a sentiment from Inside Greetings 1 (which now has coordinating dies that recently released – yay!), and stamped and adhered that with foam adhesive under the butterfly.

Finally, I spent time playing with different arrangements with my Dazzling Peachy gems, but finally settled on a couple simple rows of them on the top and bottom of the frame. I felt like that added the perfect touch of elegance to finish this card off!
What is your favorite way to frame up a card? Die cutting, ink blending, or maybe stamping? Drop your favorite ways in the comments – I’d love to hear!
SUPPLIES:
|


Thanks so much for stopping by!
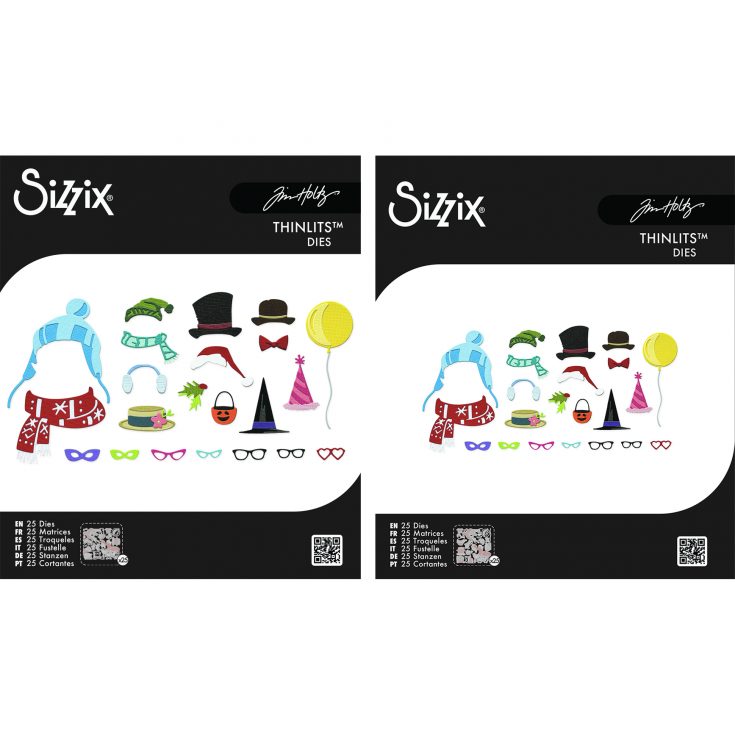
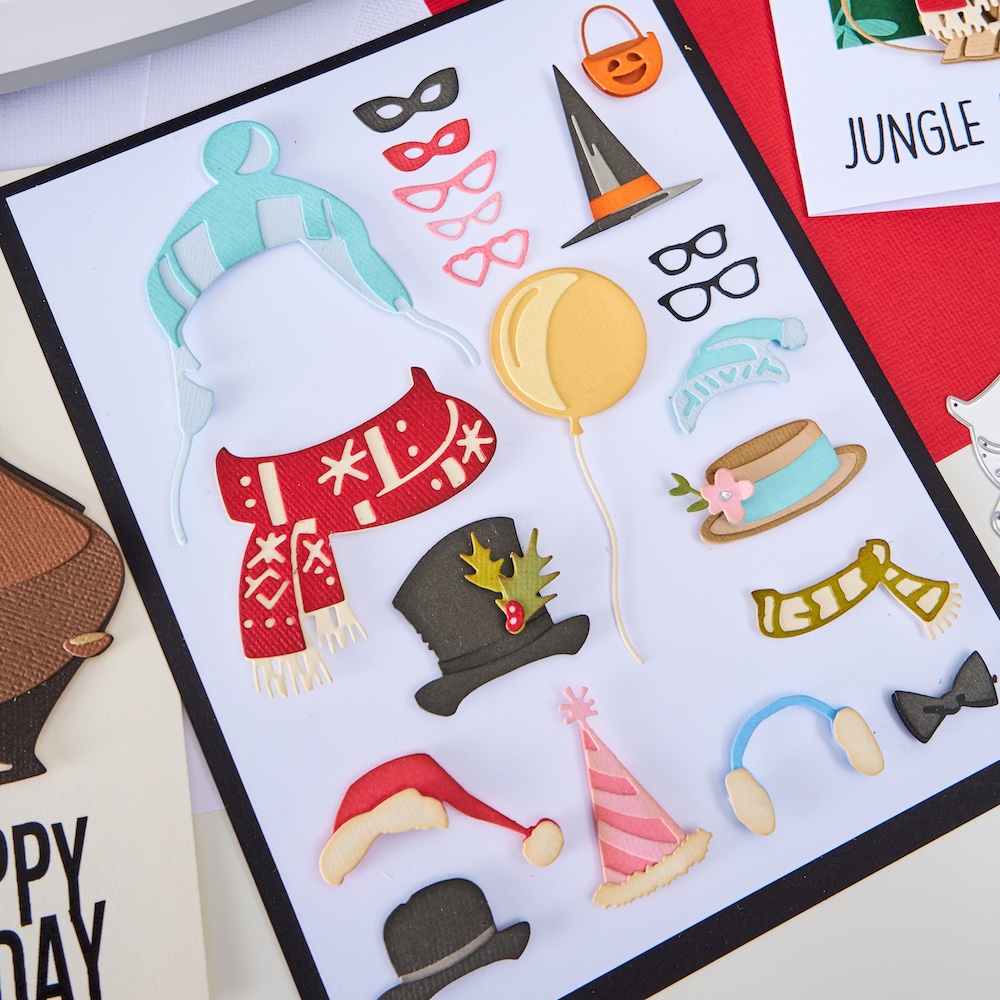
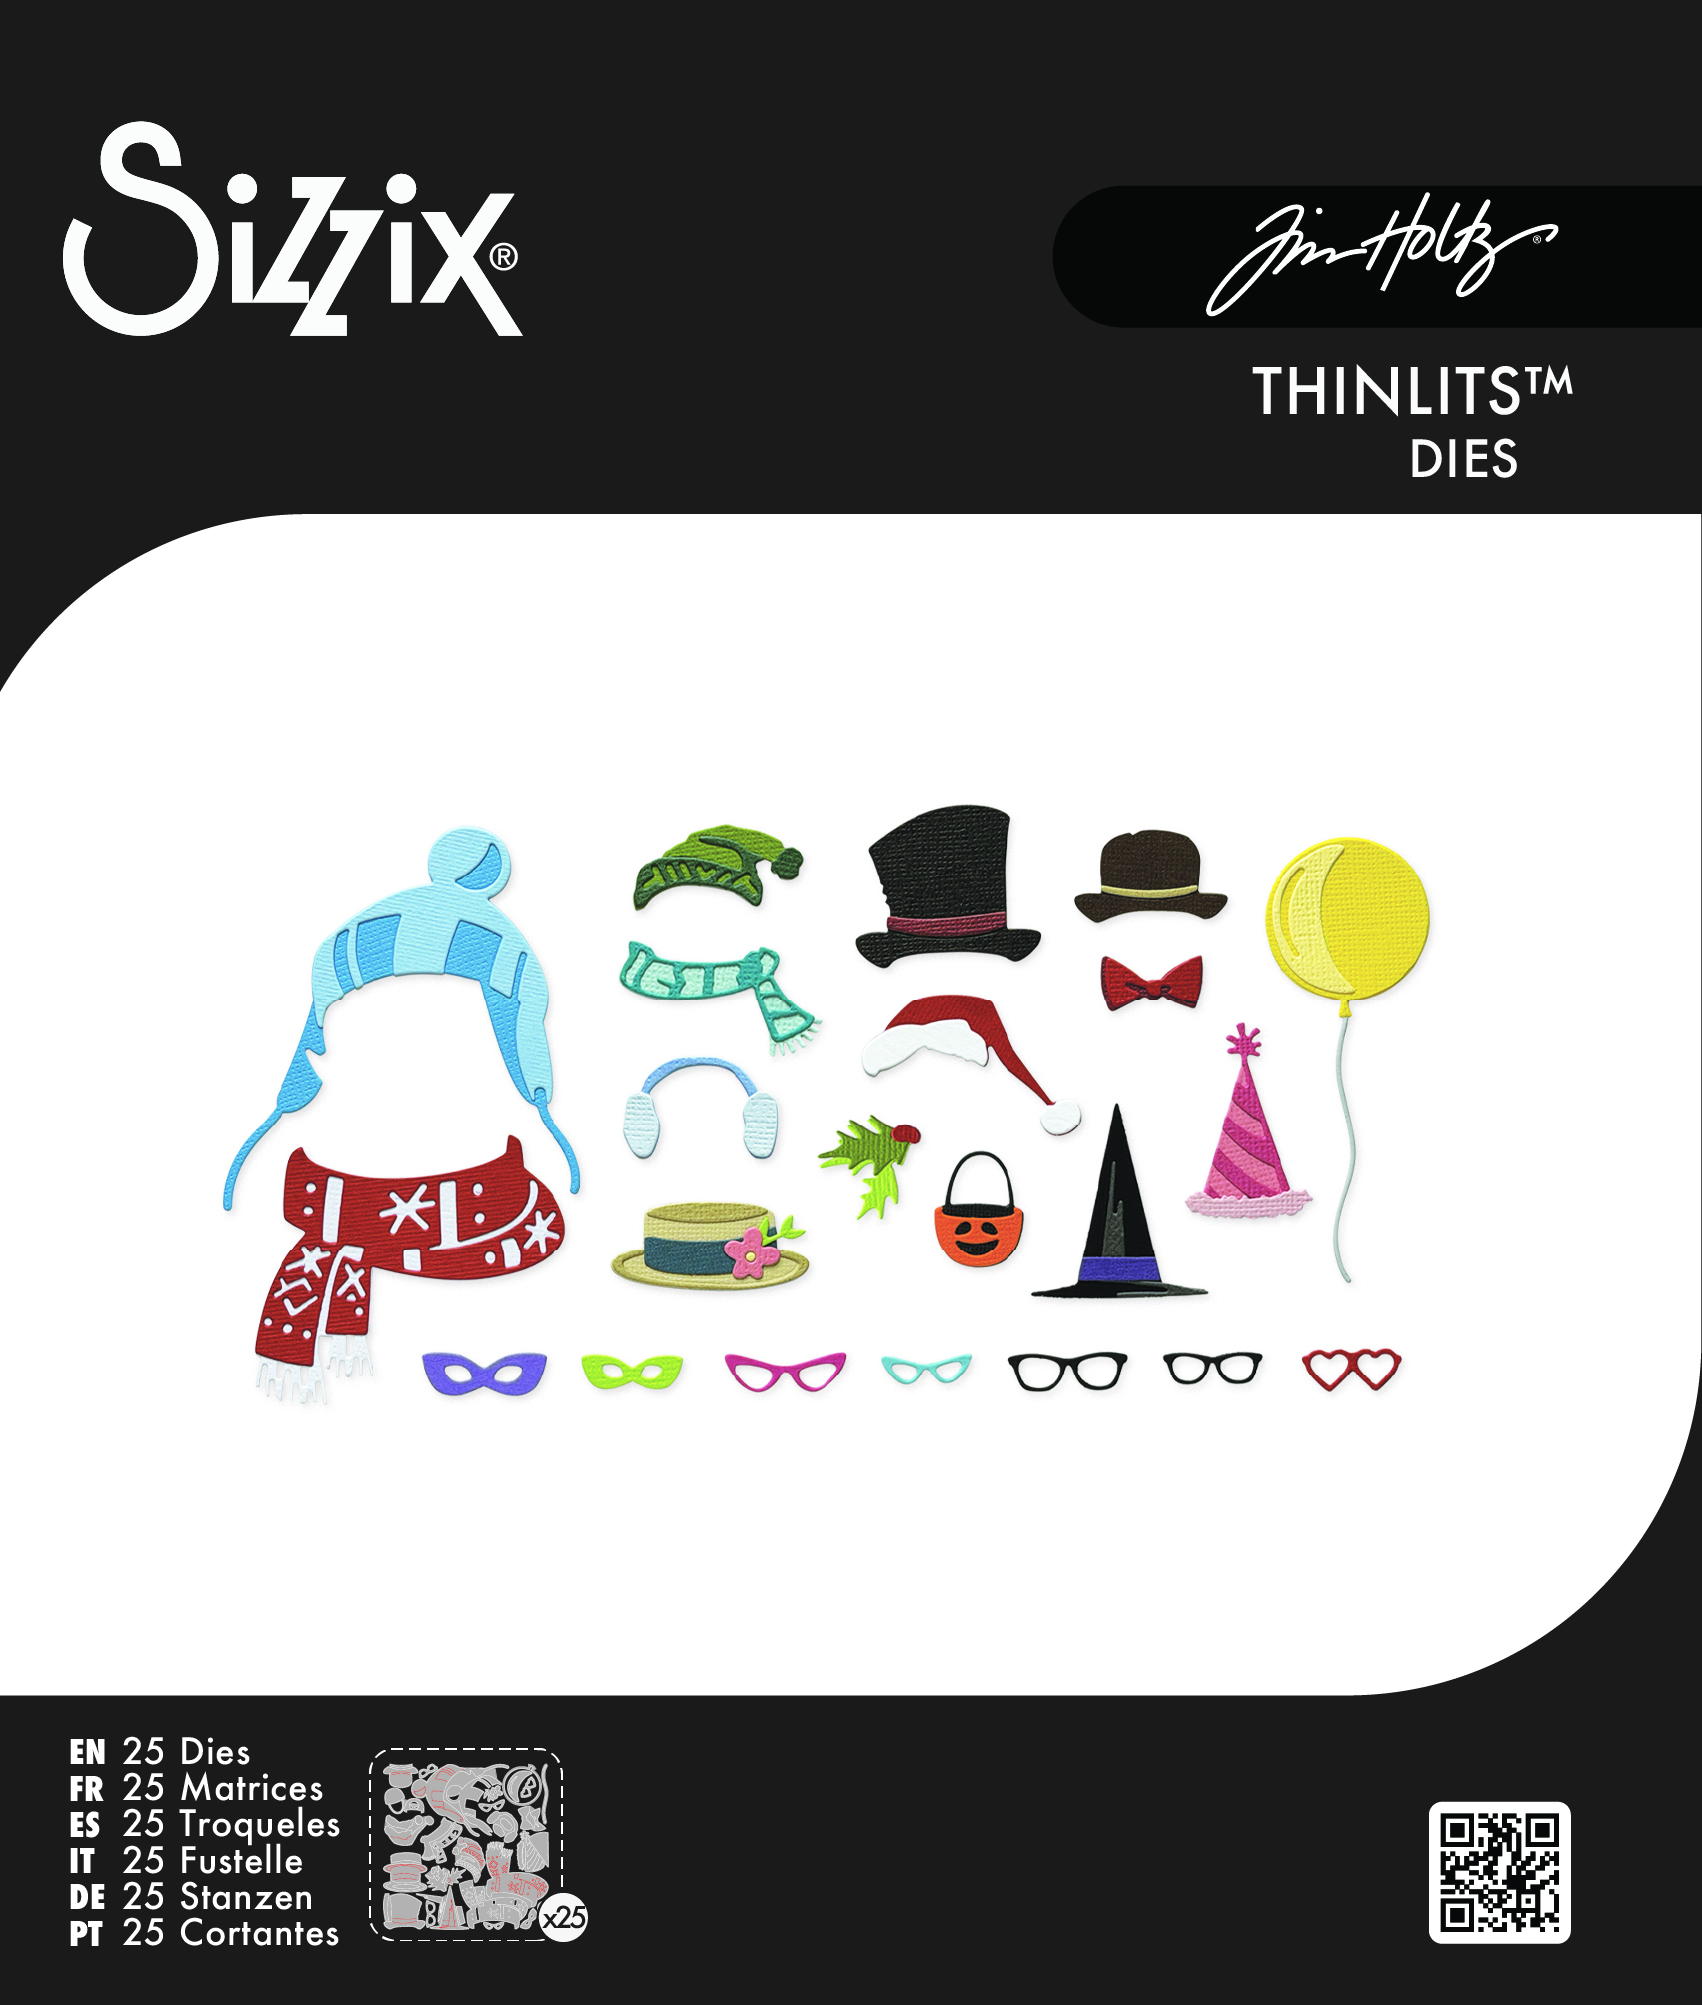
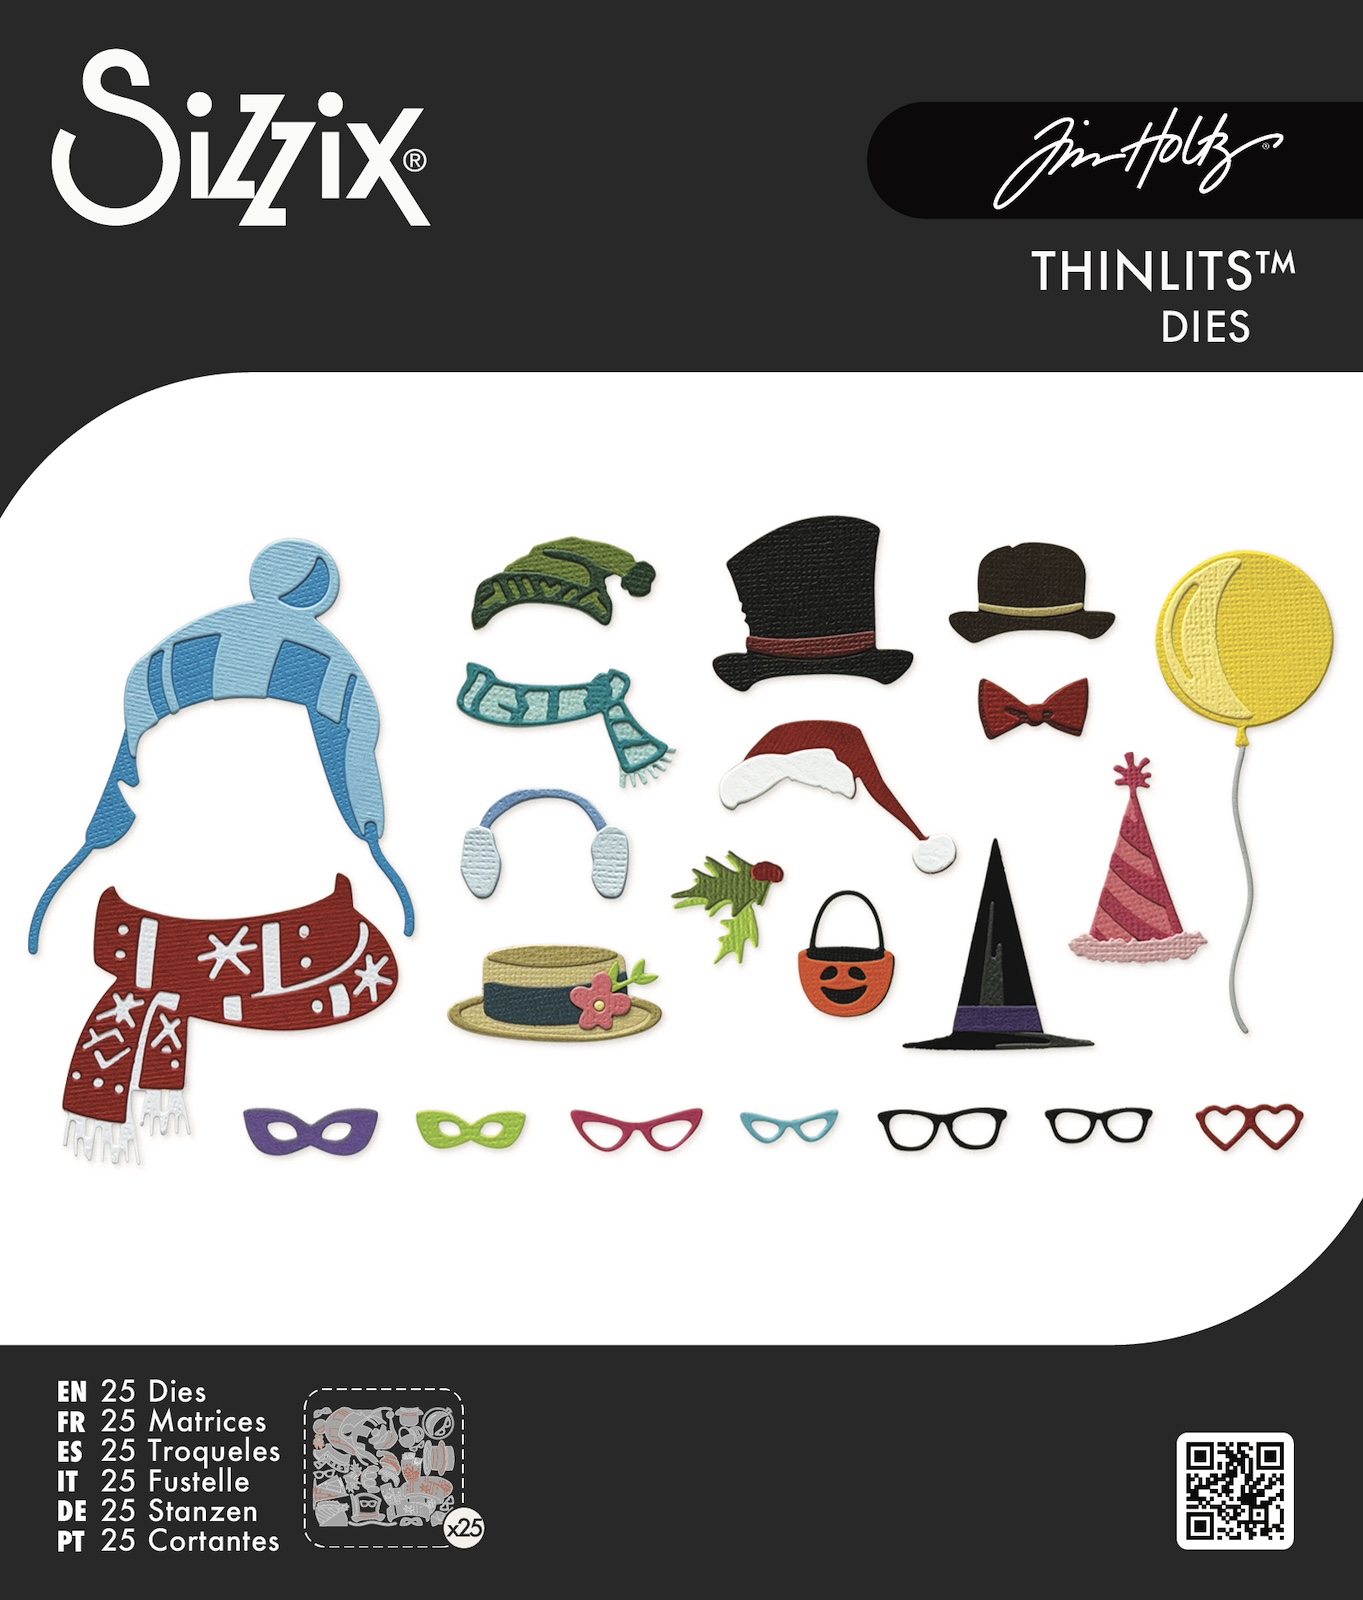
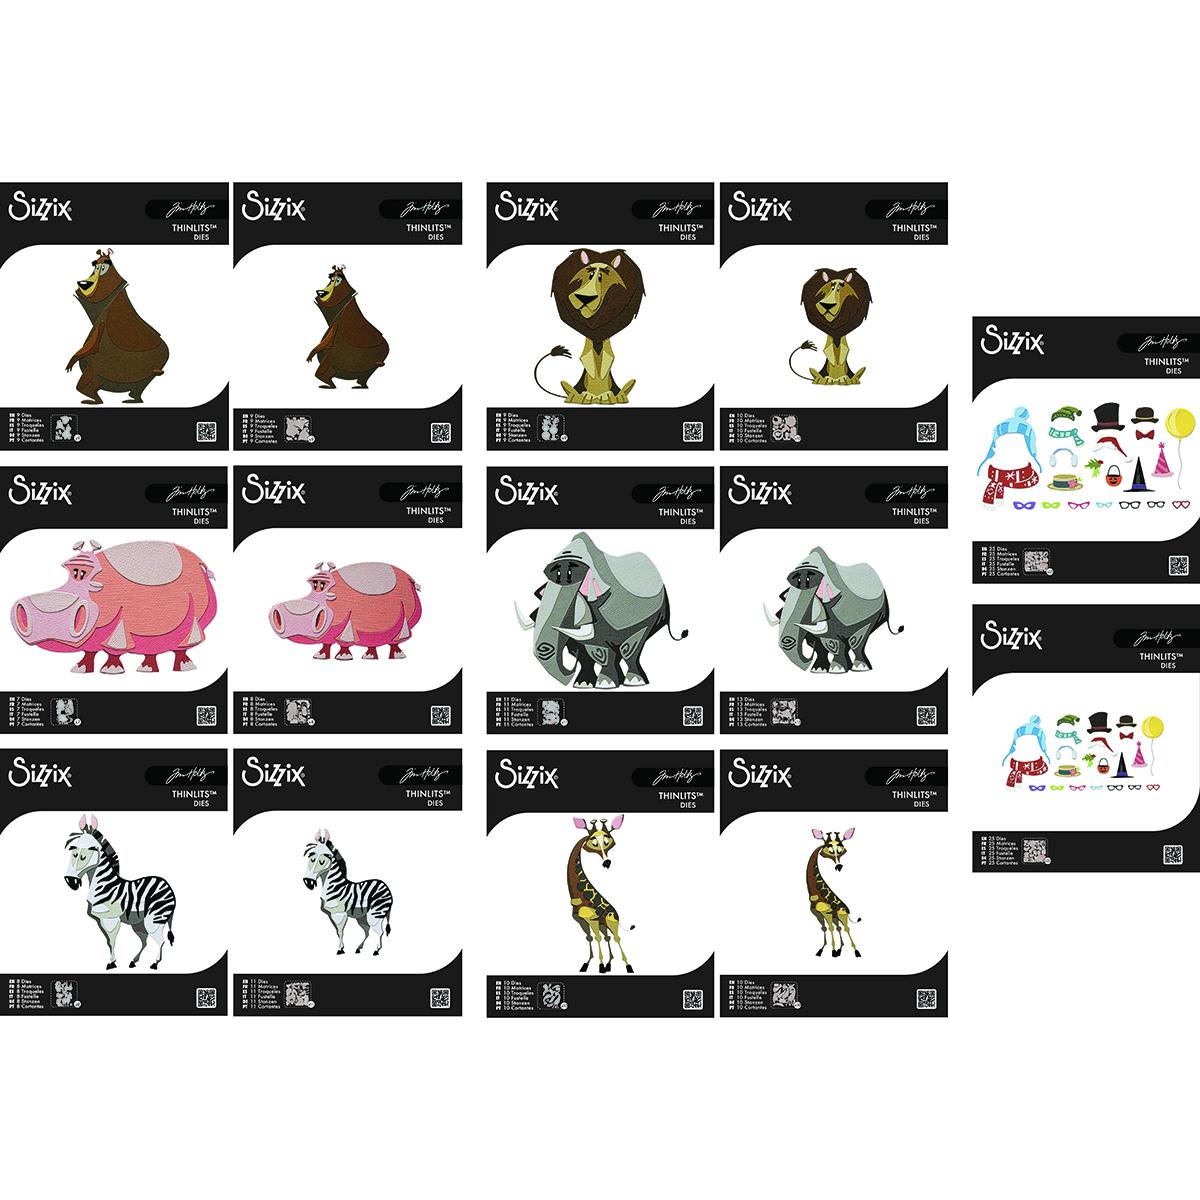
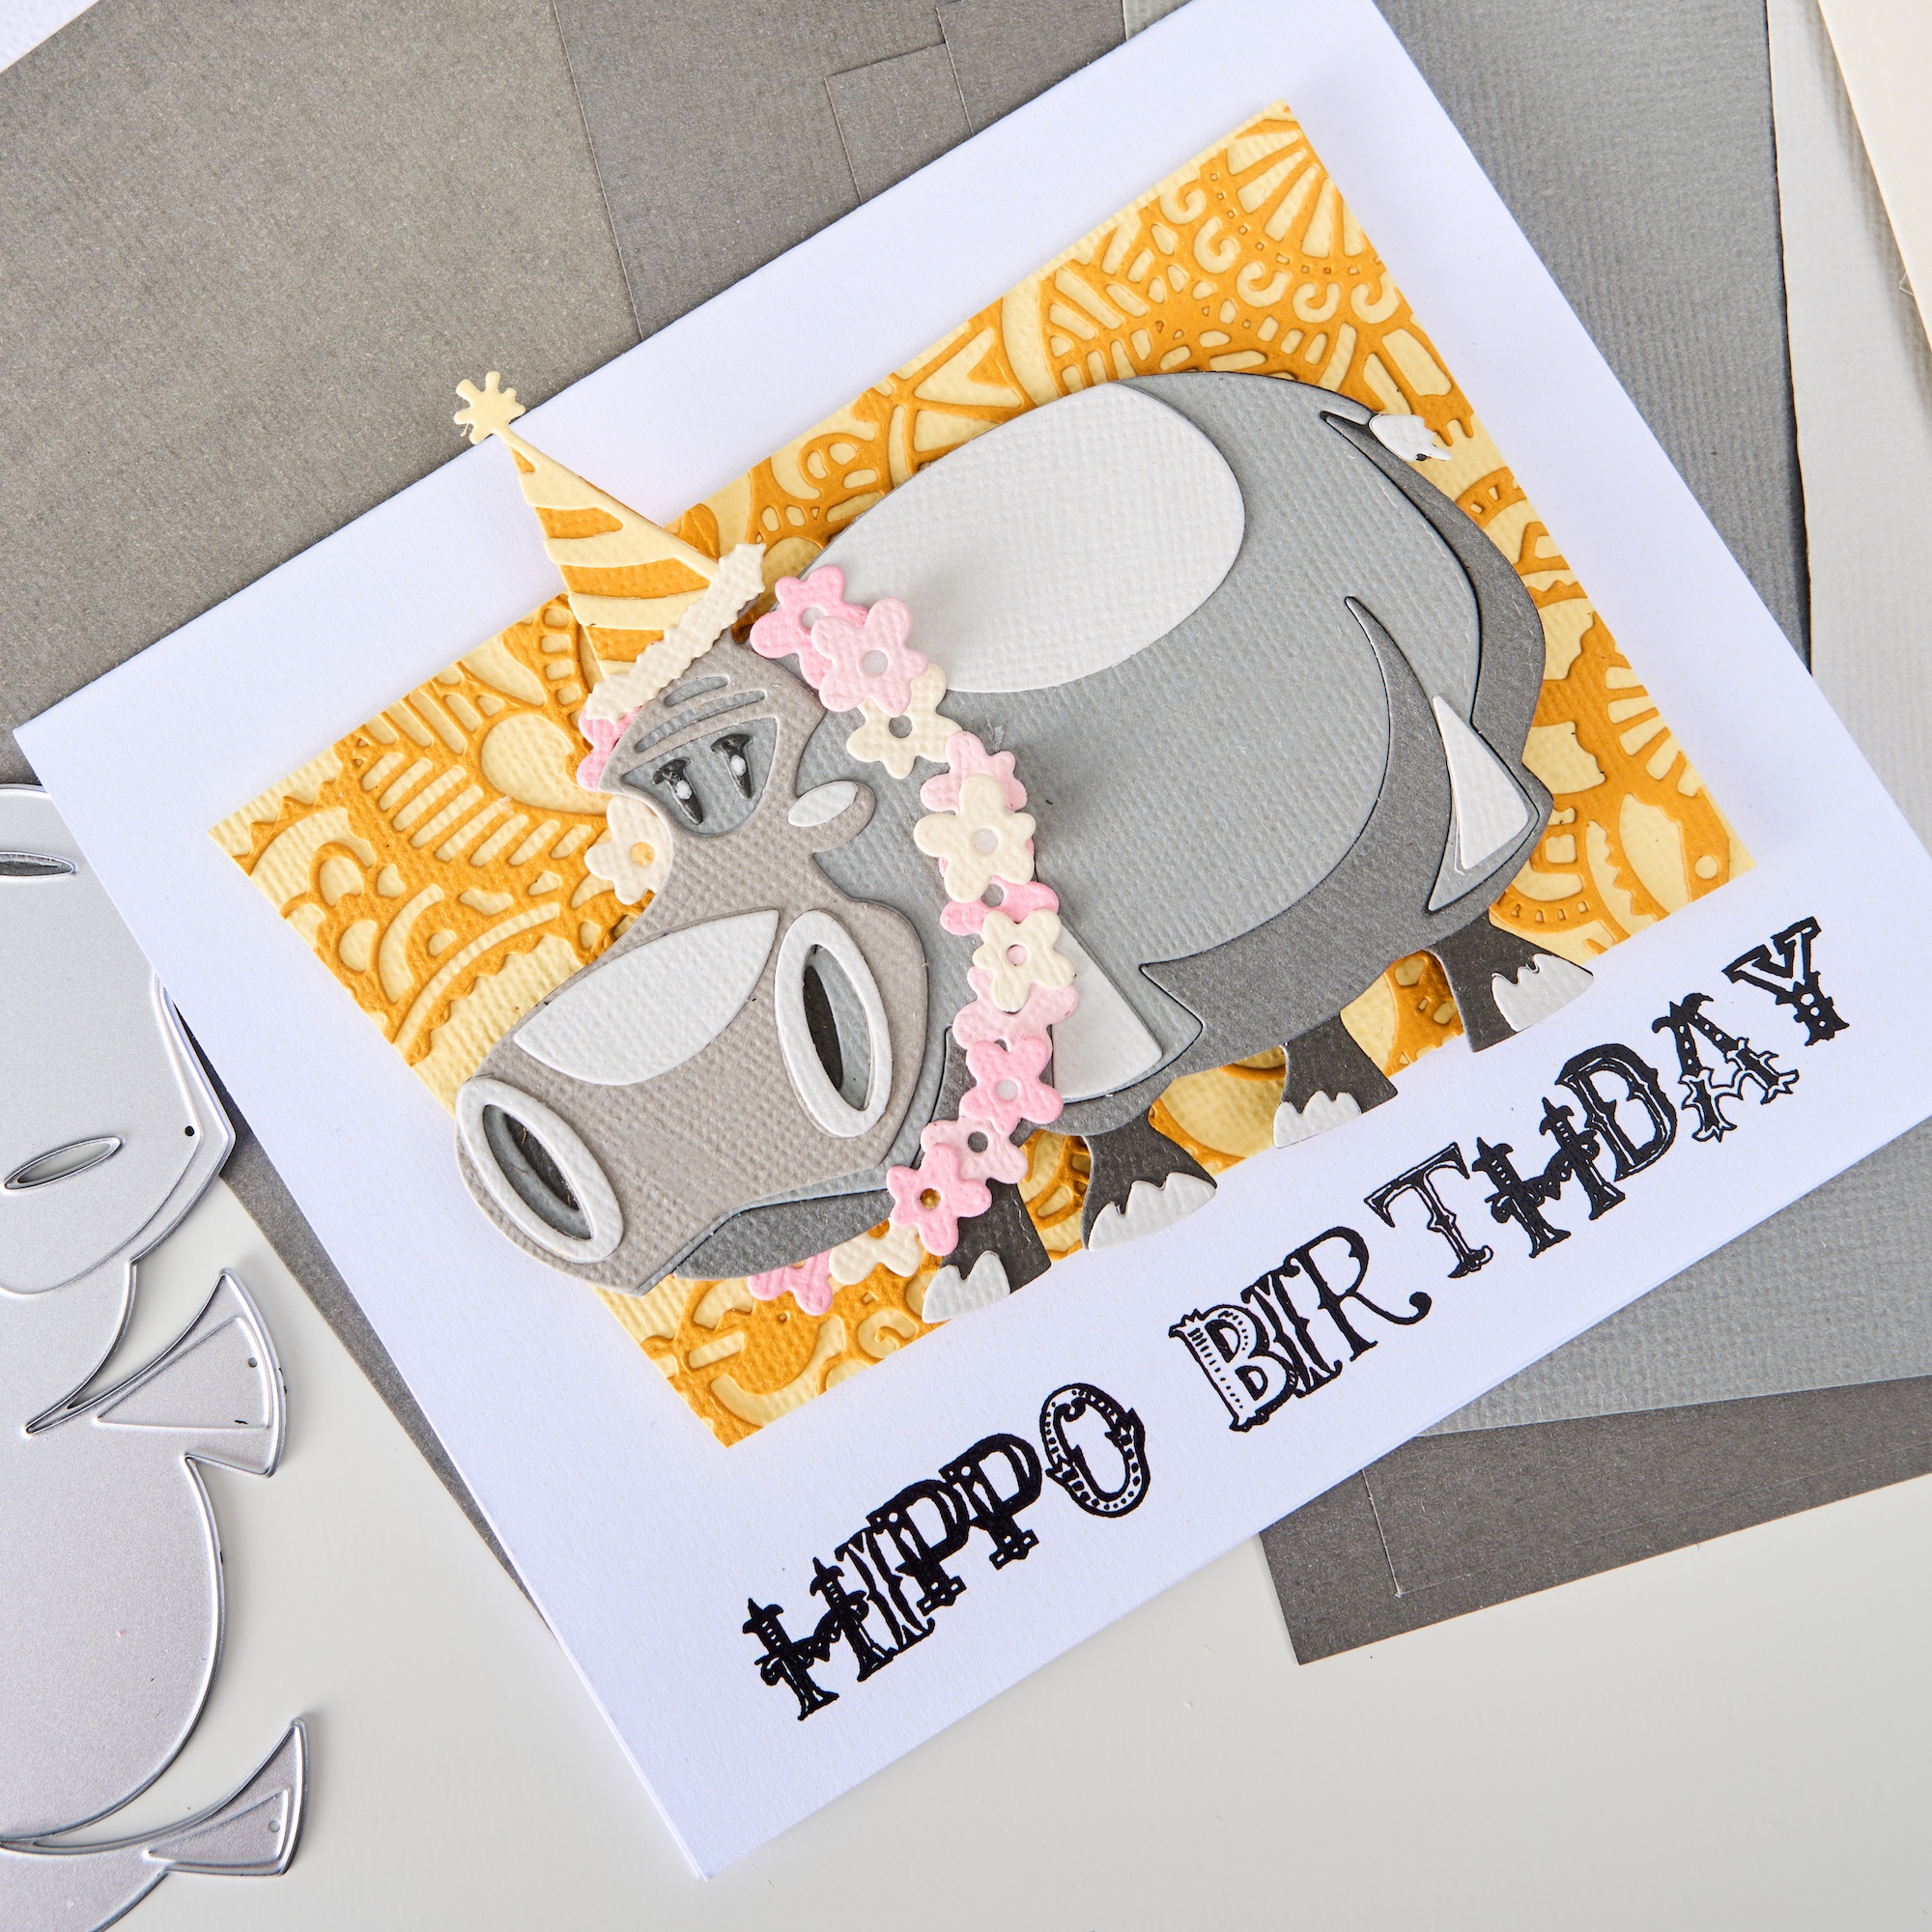
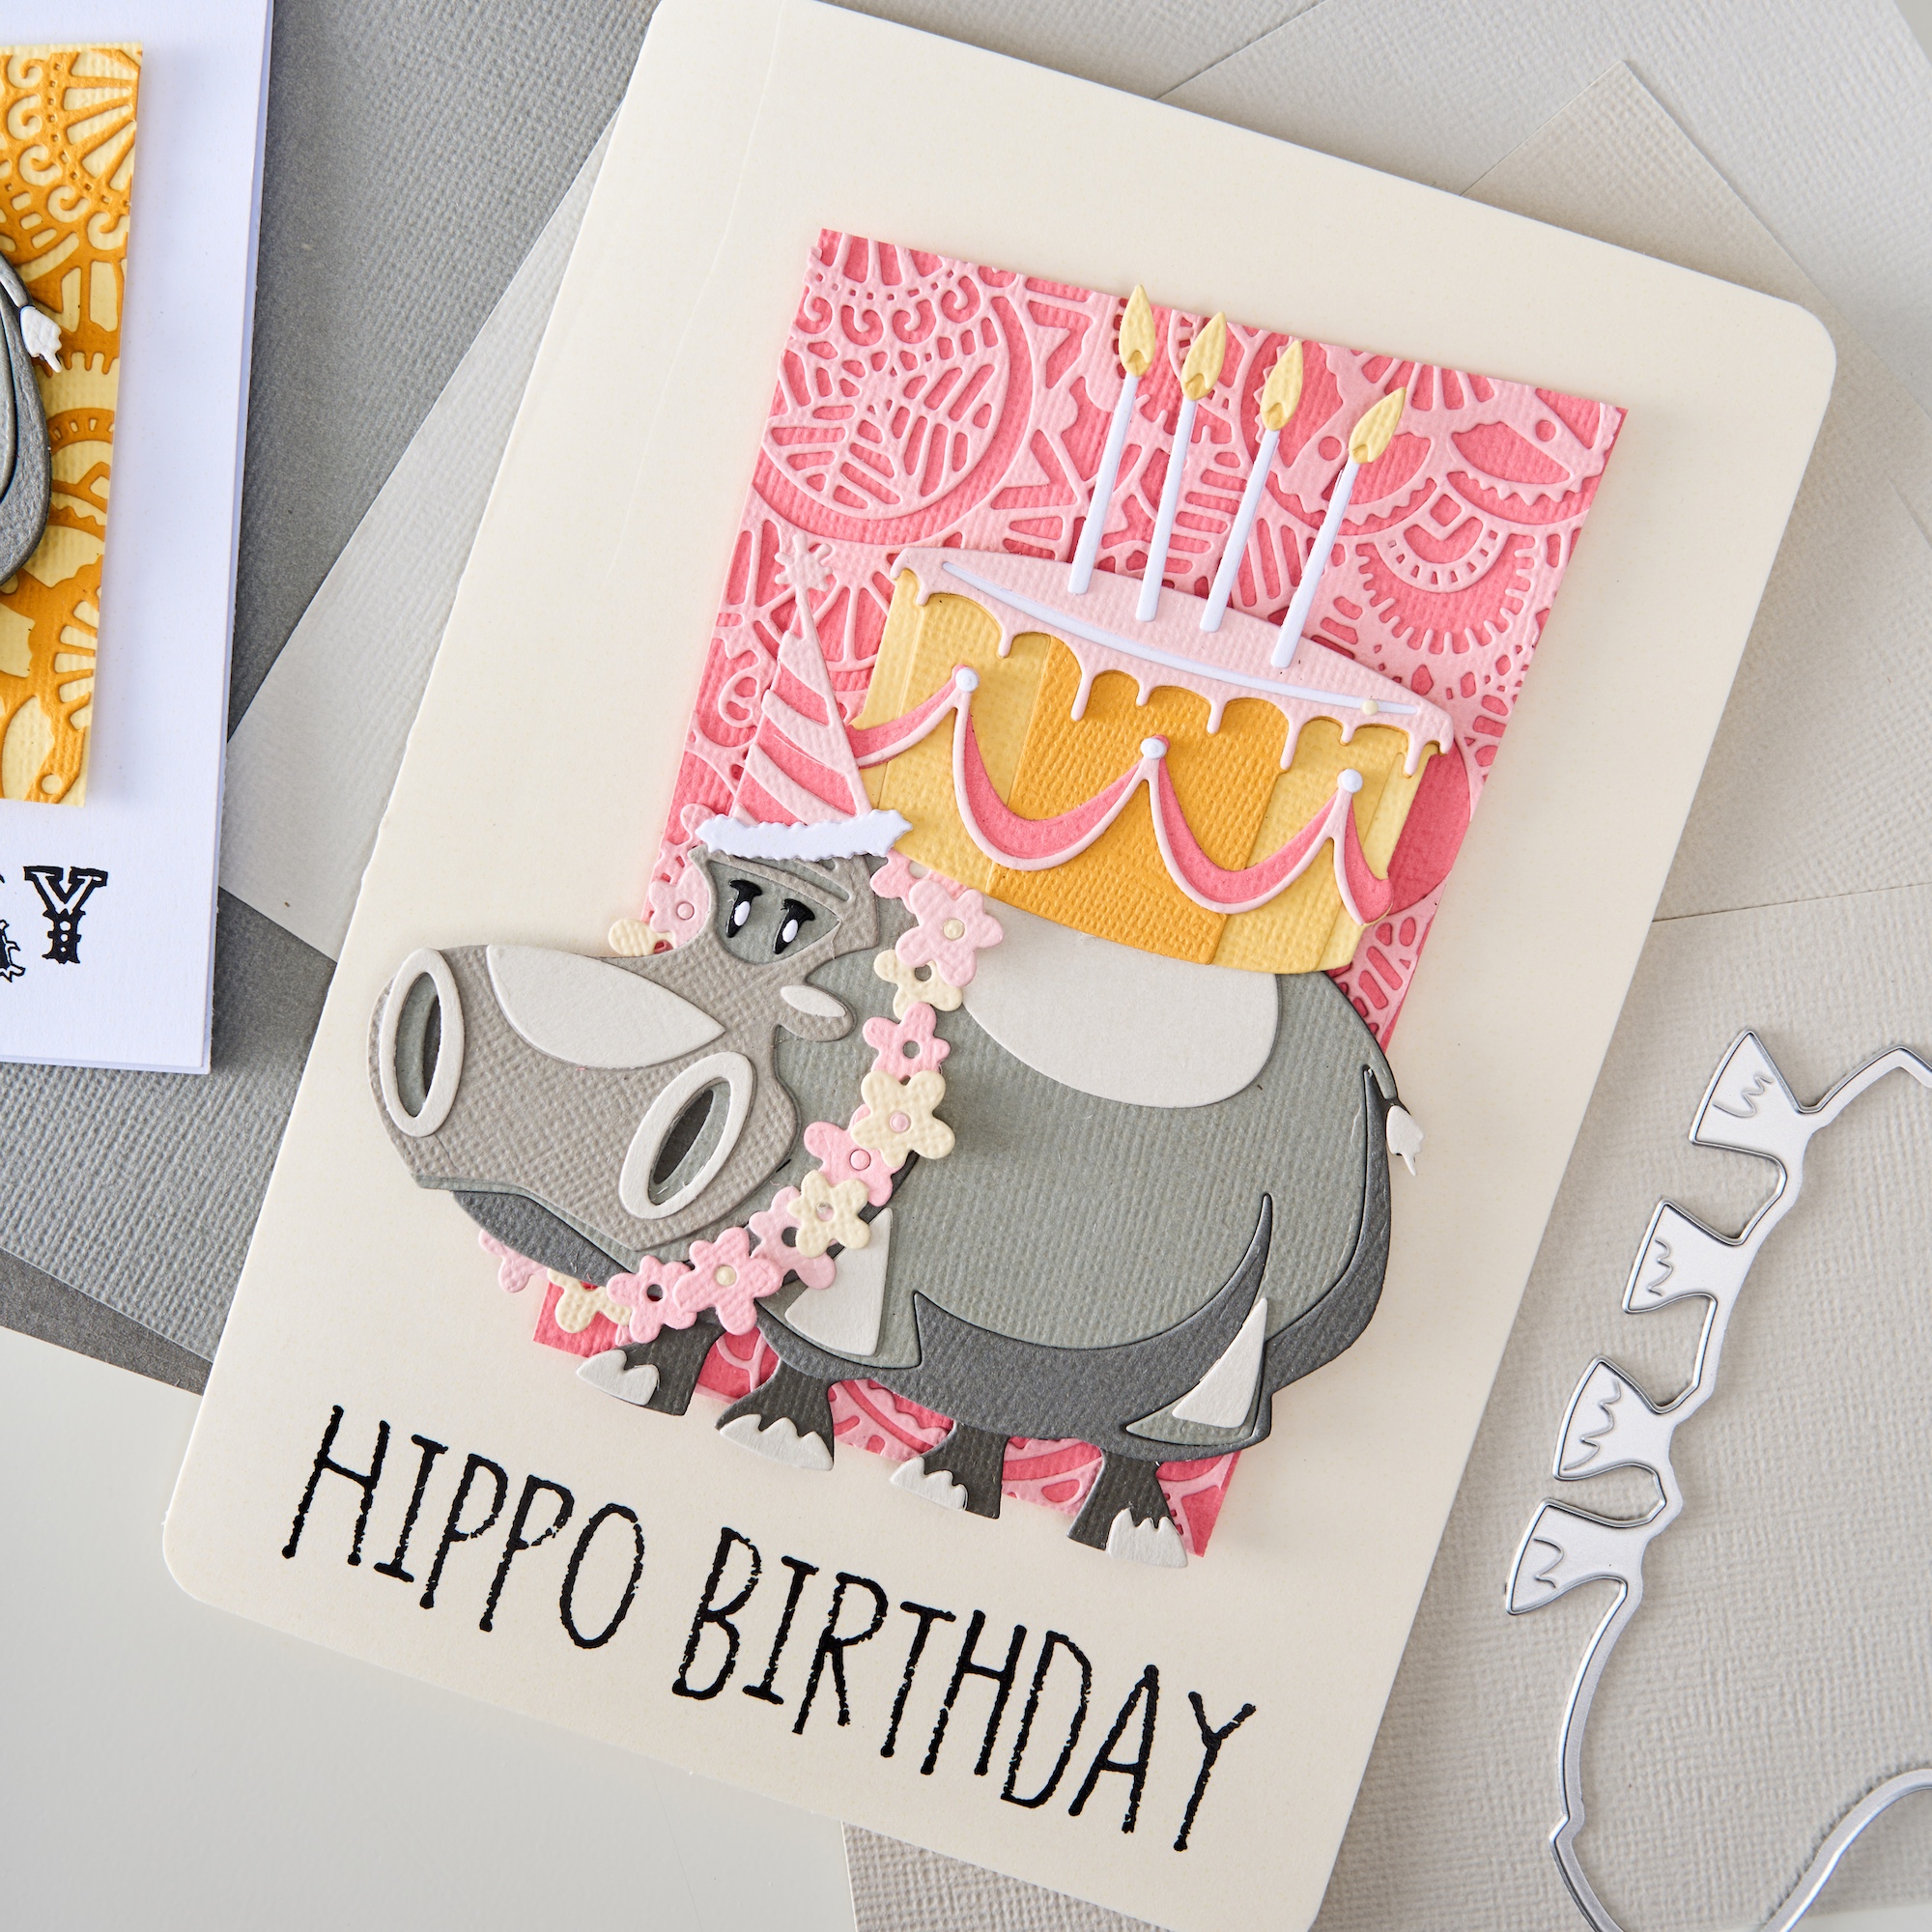
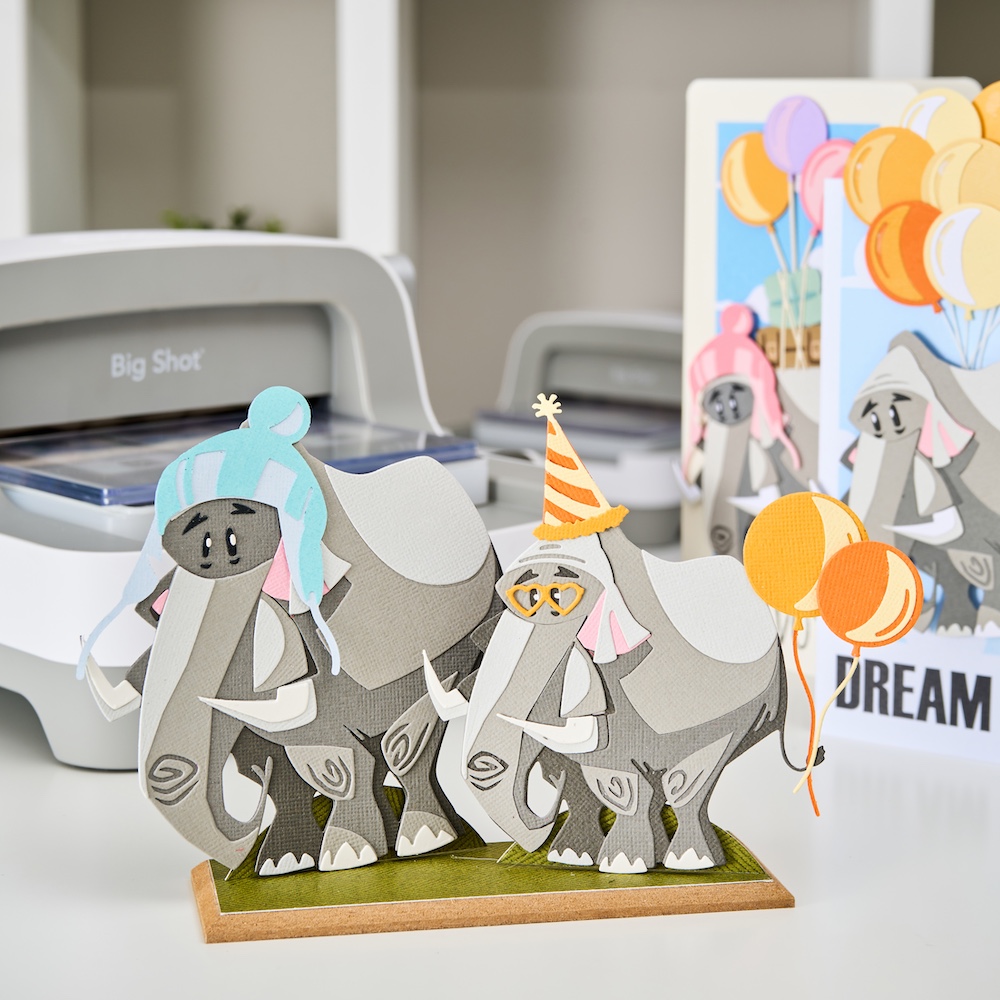
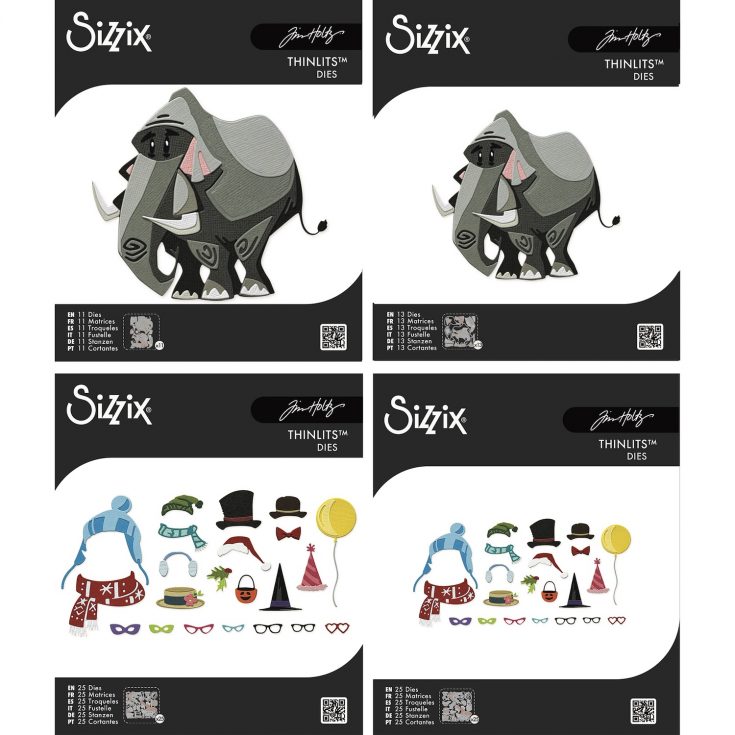
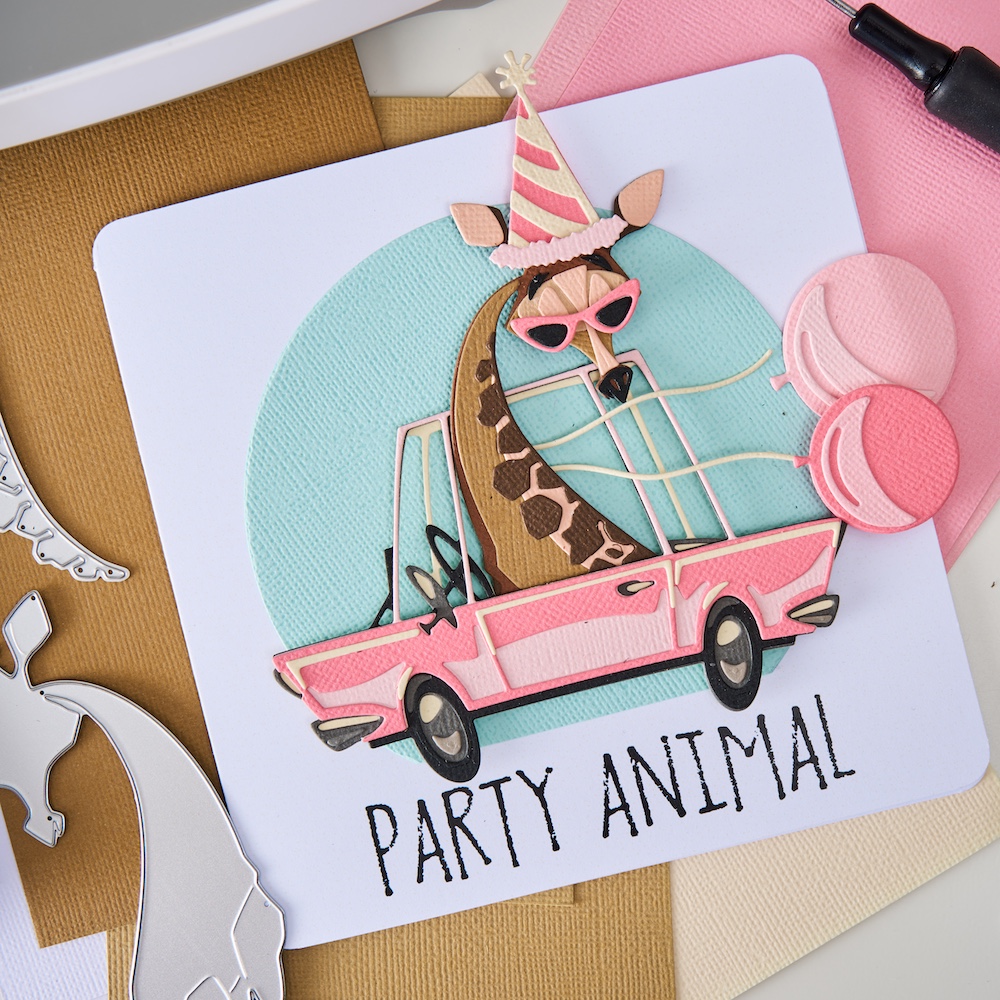
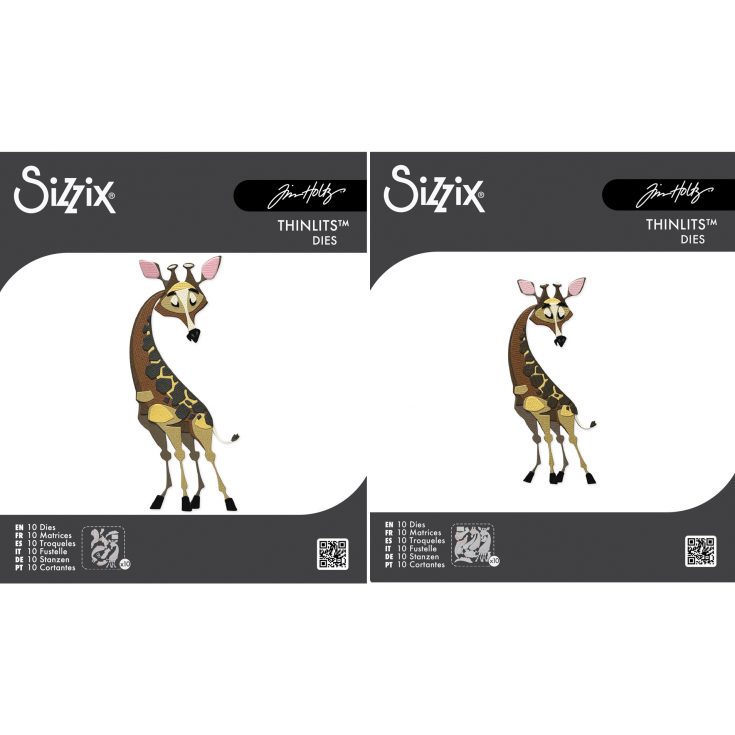
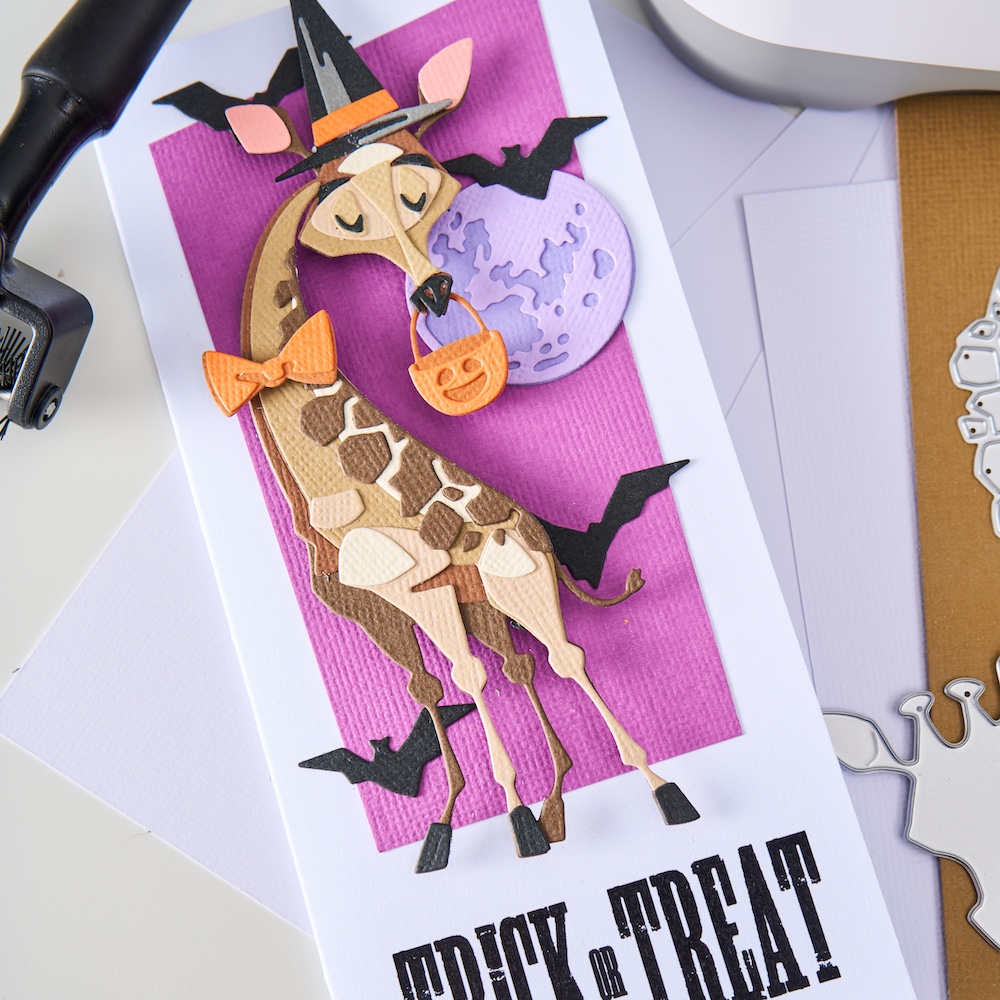
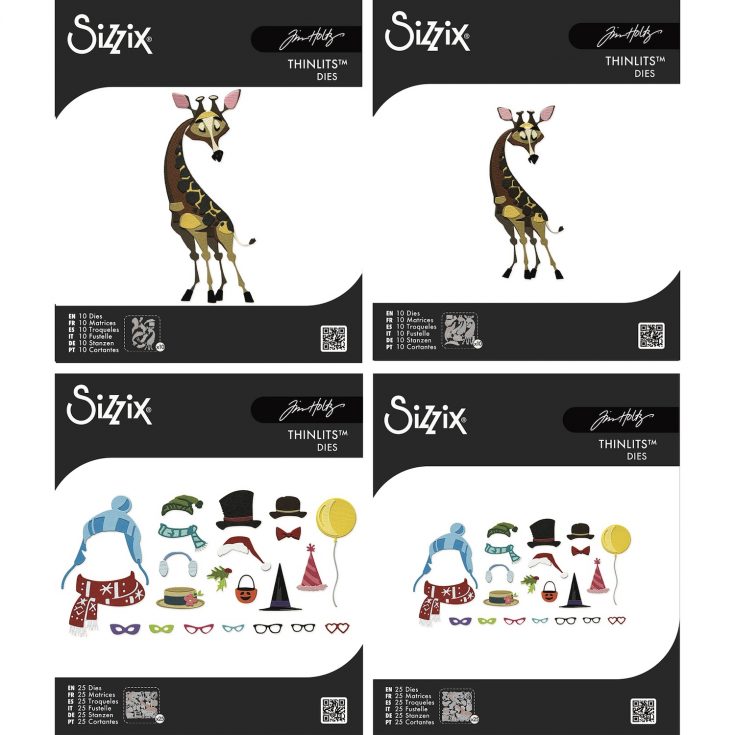
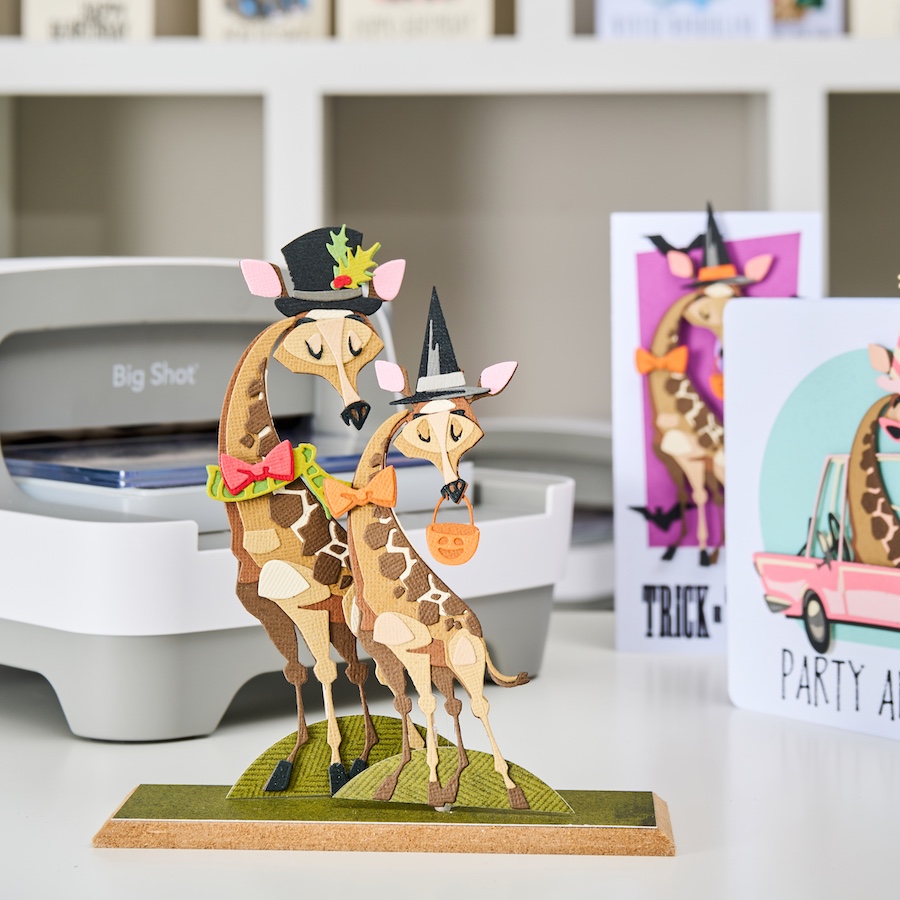
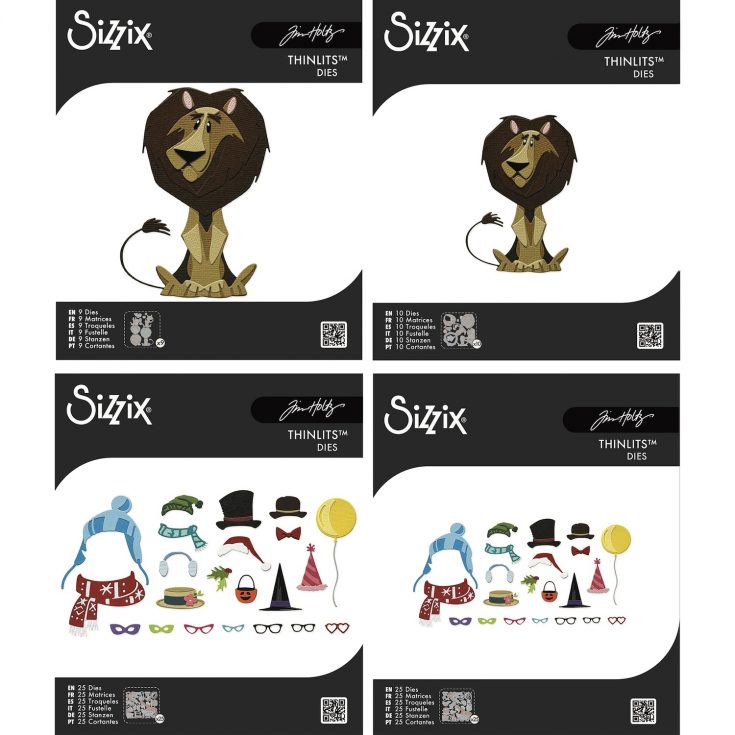
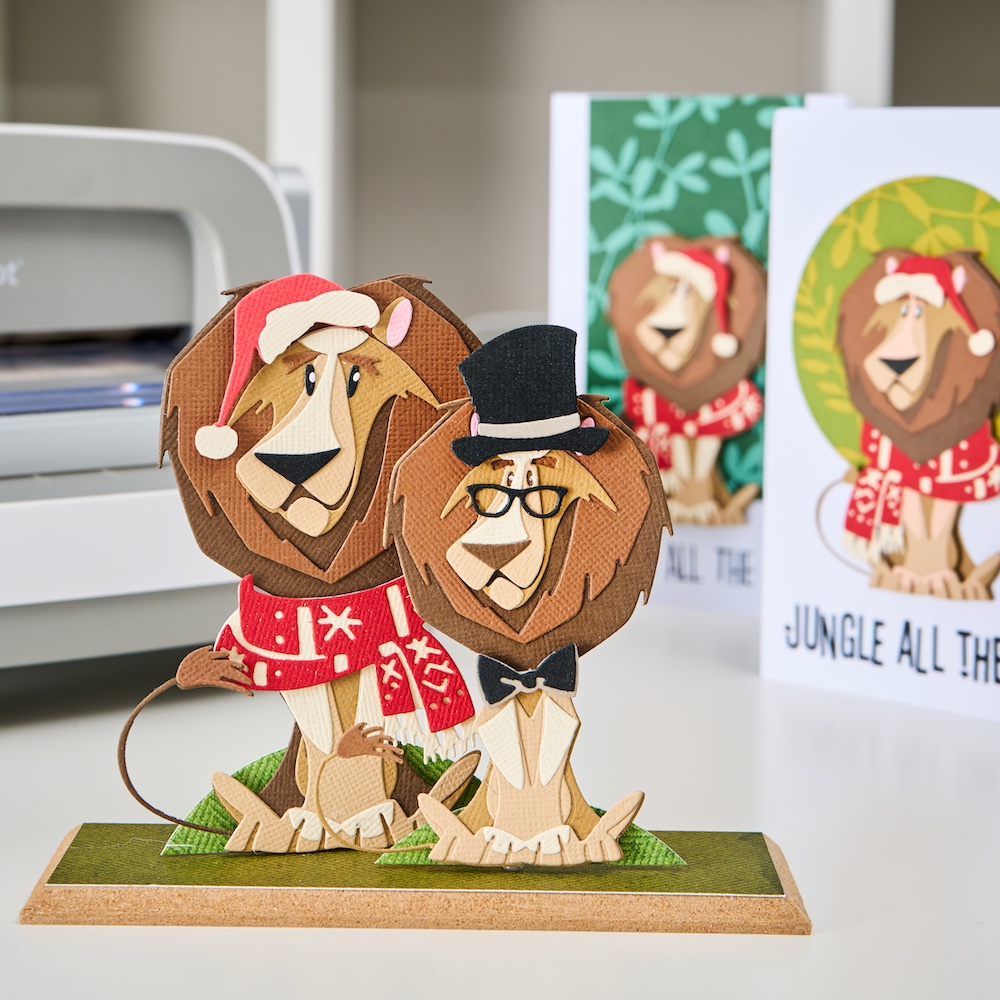
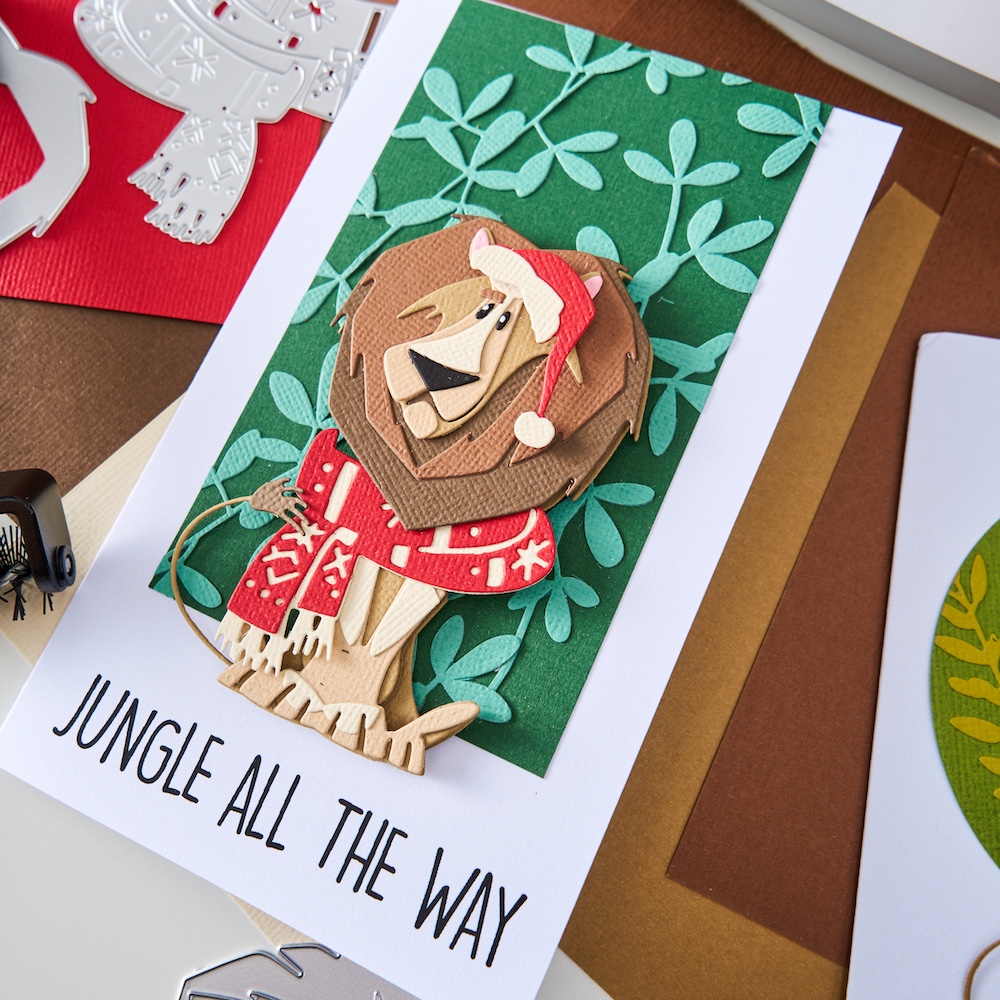
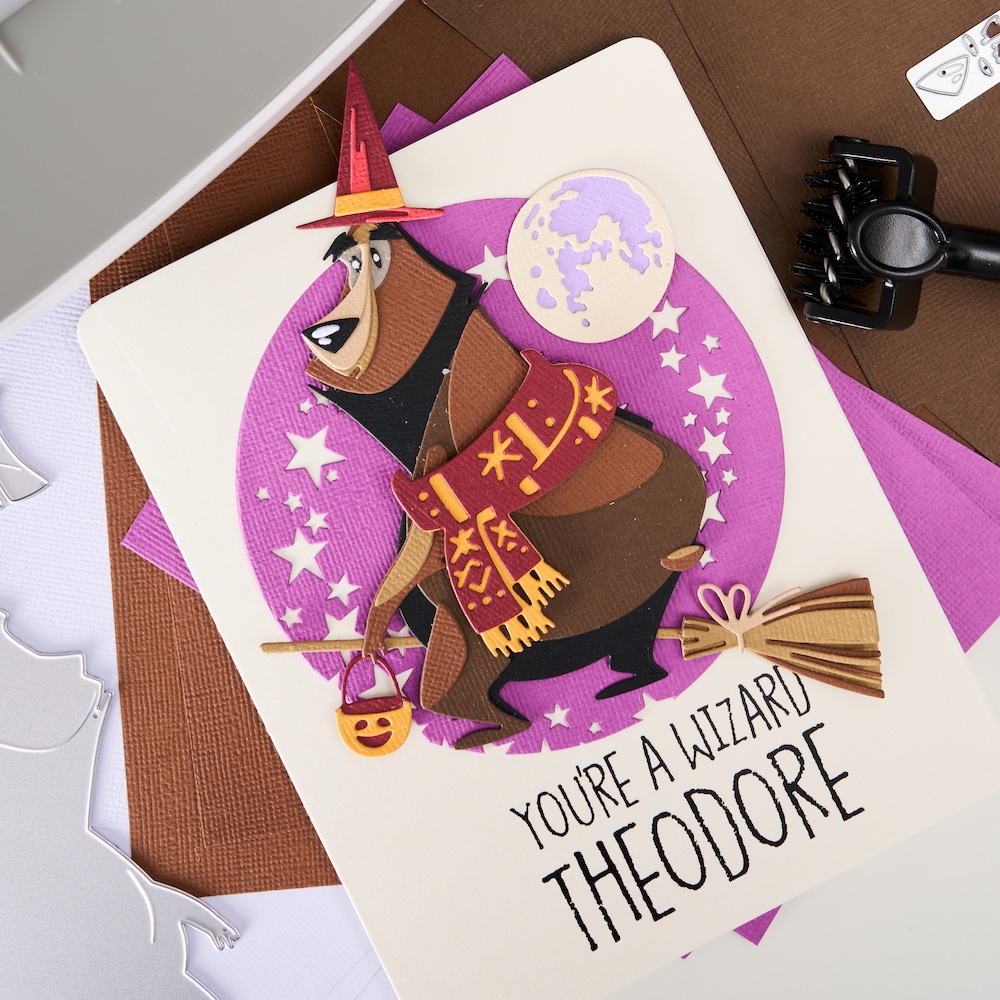
Returning Colorize™ Classics + New Minis from Tim Holtz Sizzix!
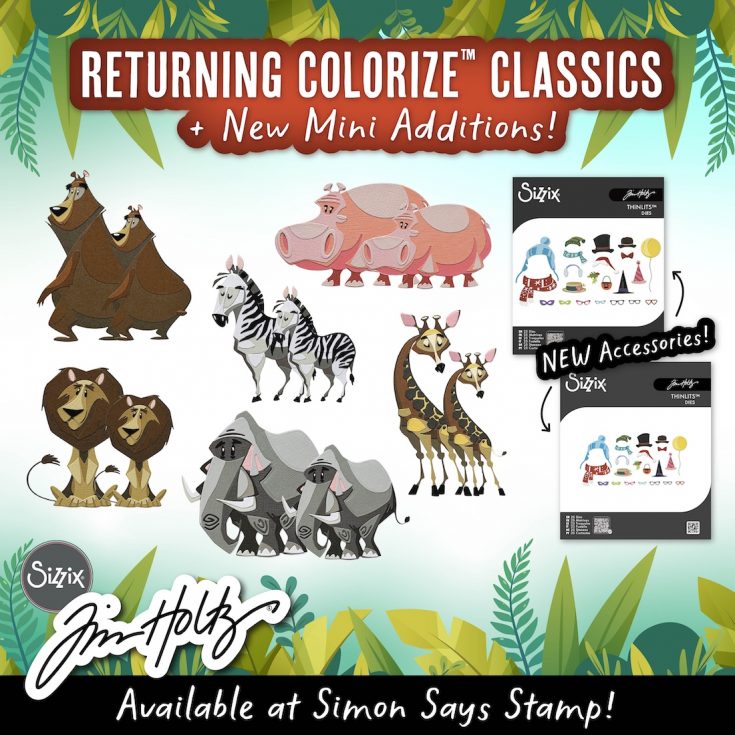
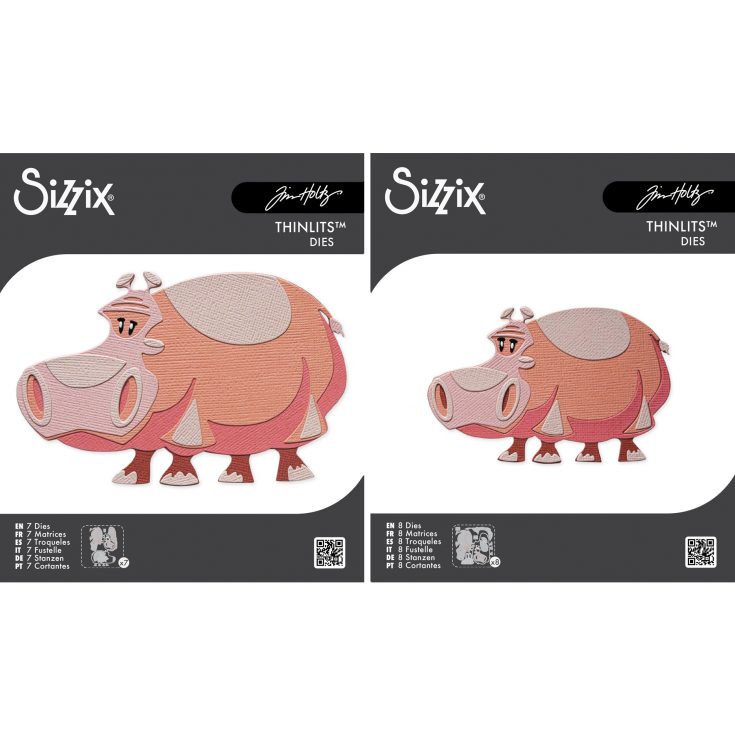
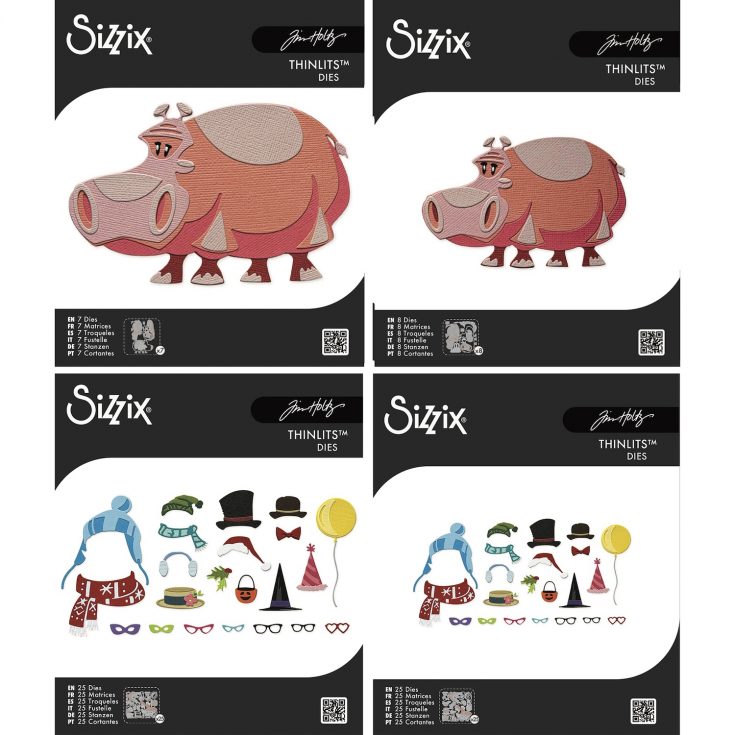
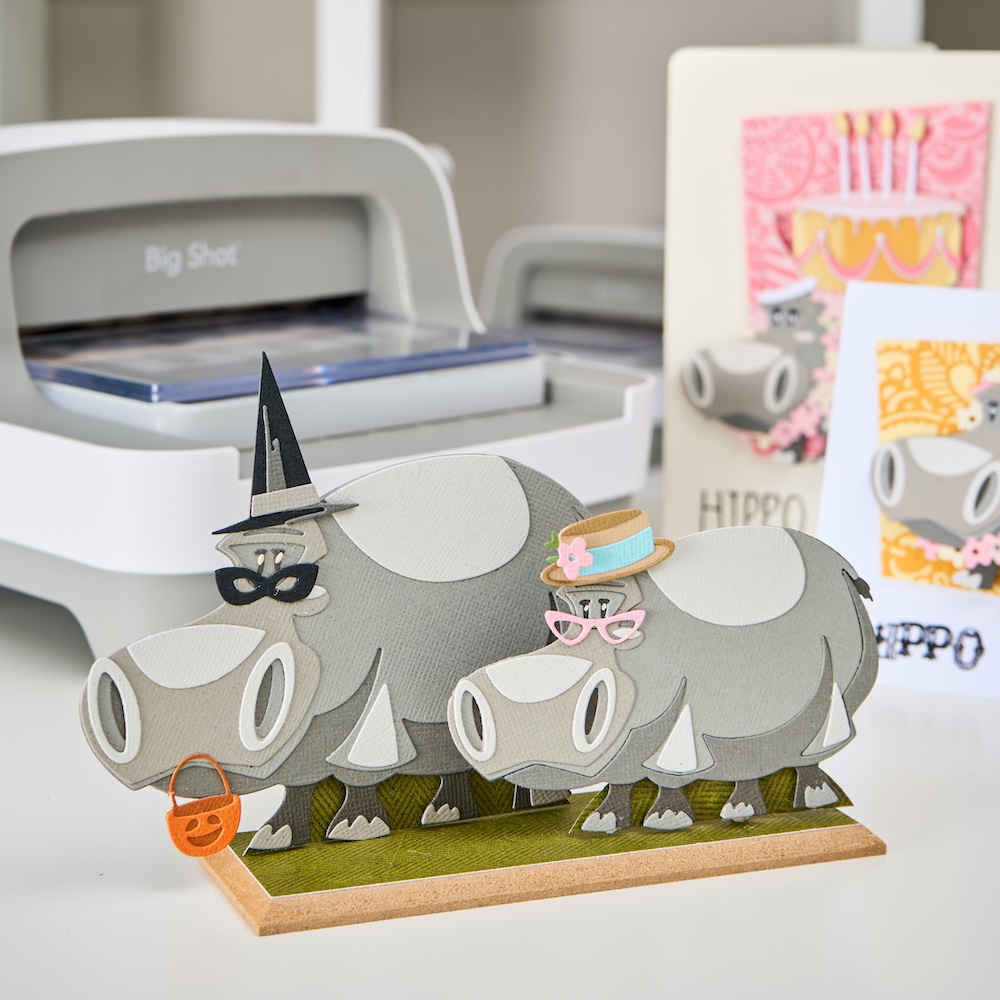
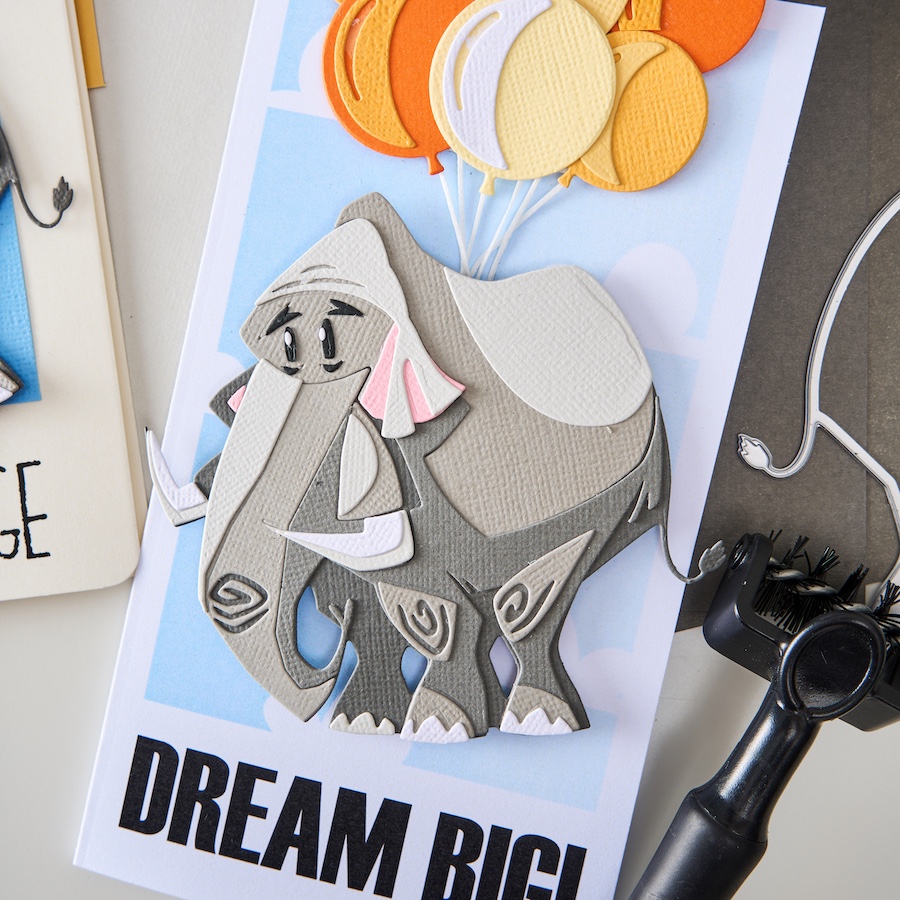
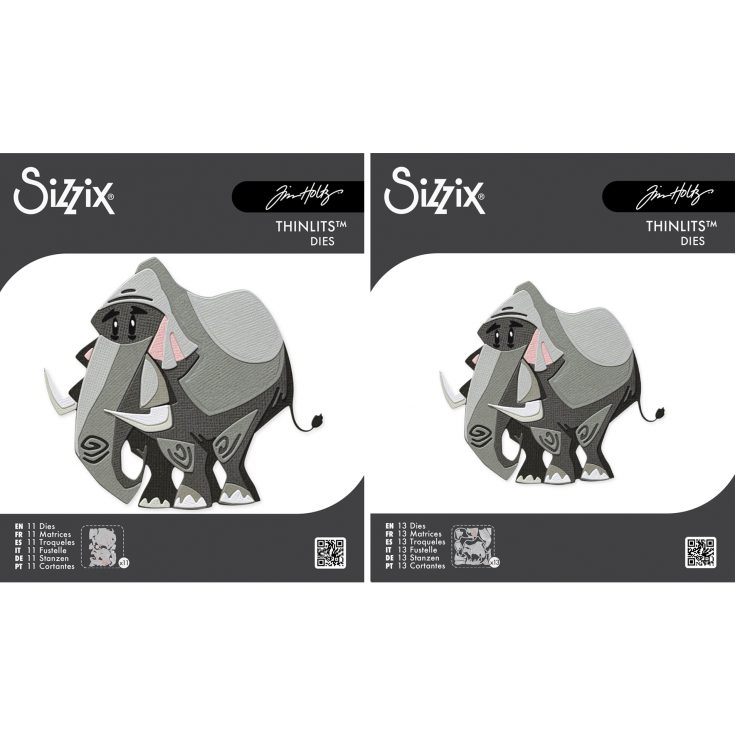
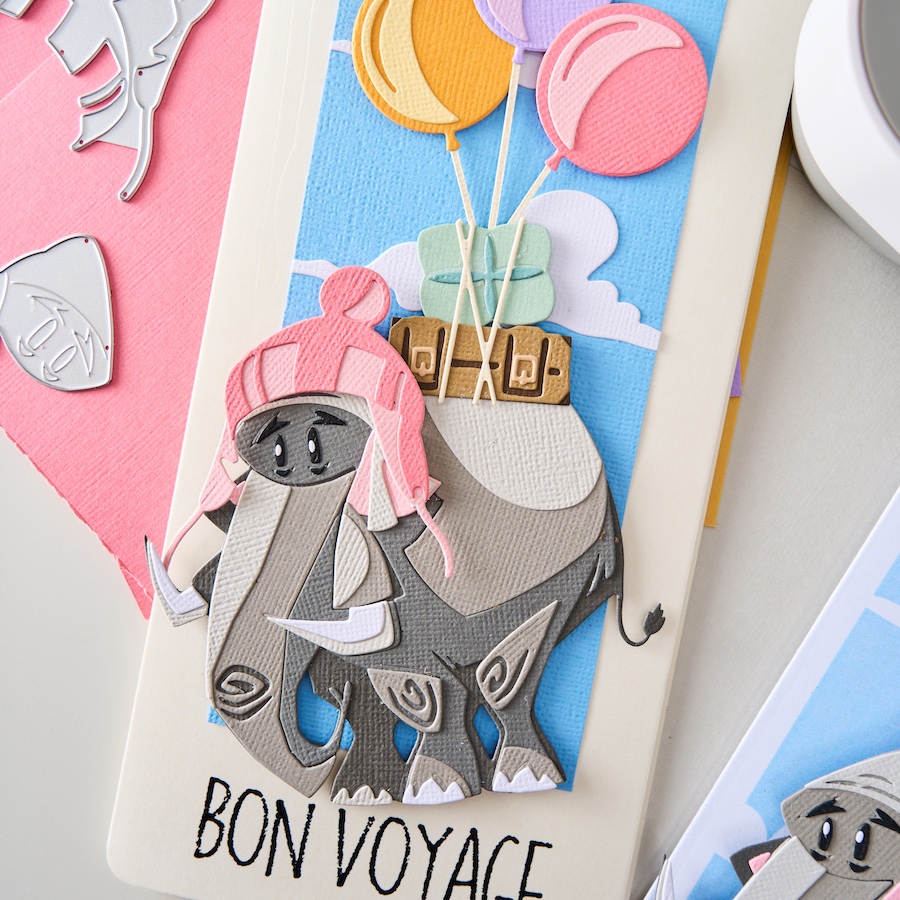
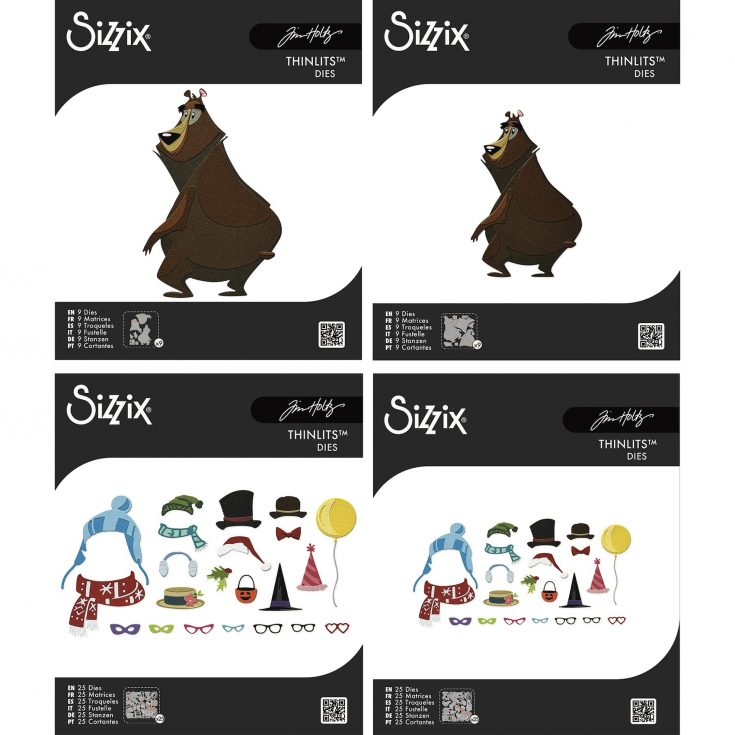
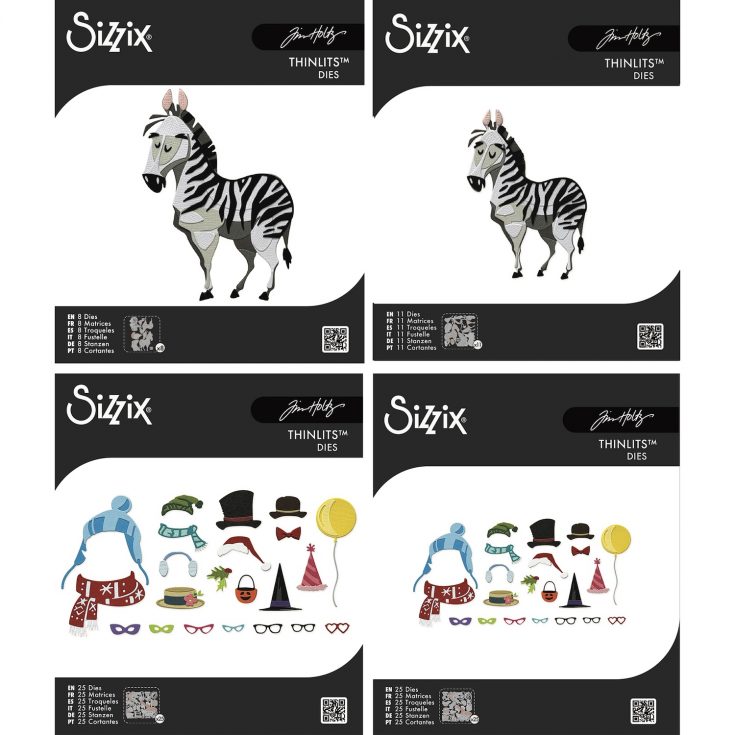
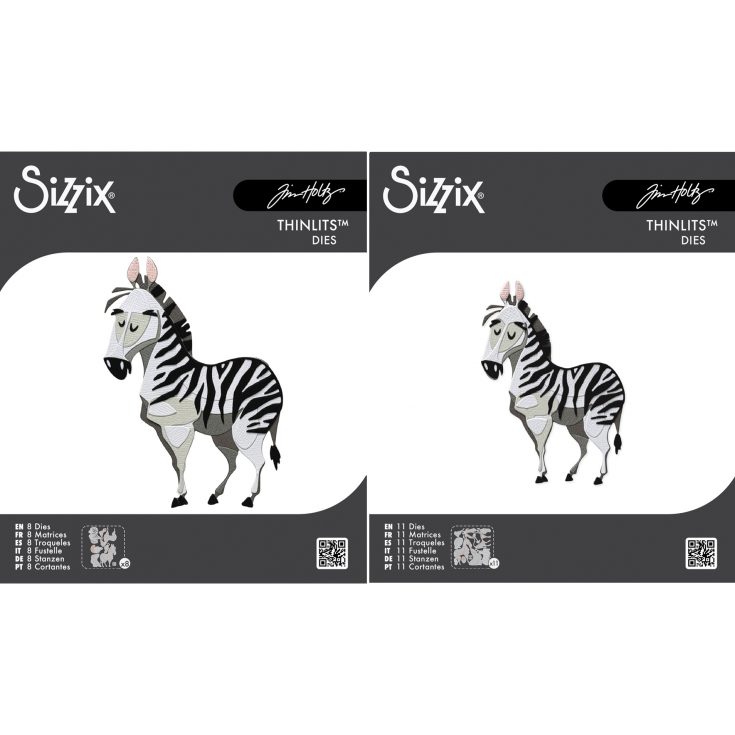
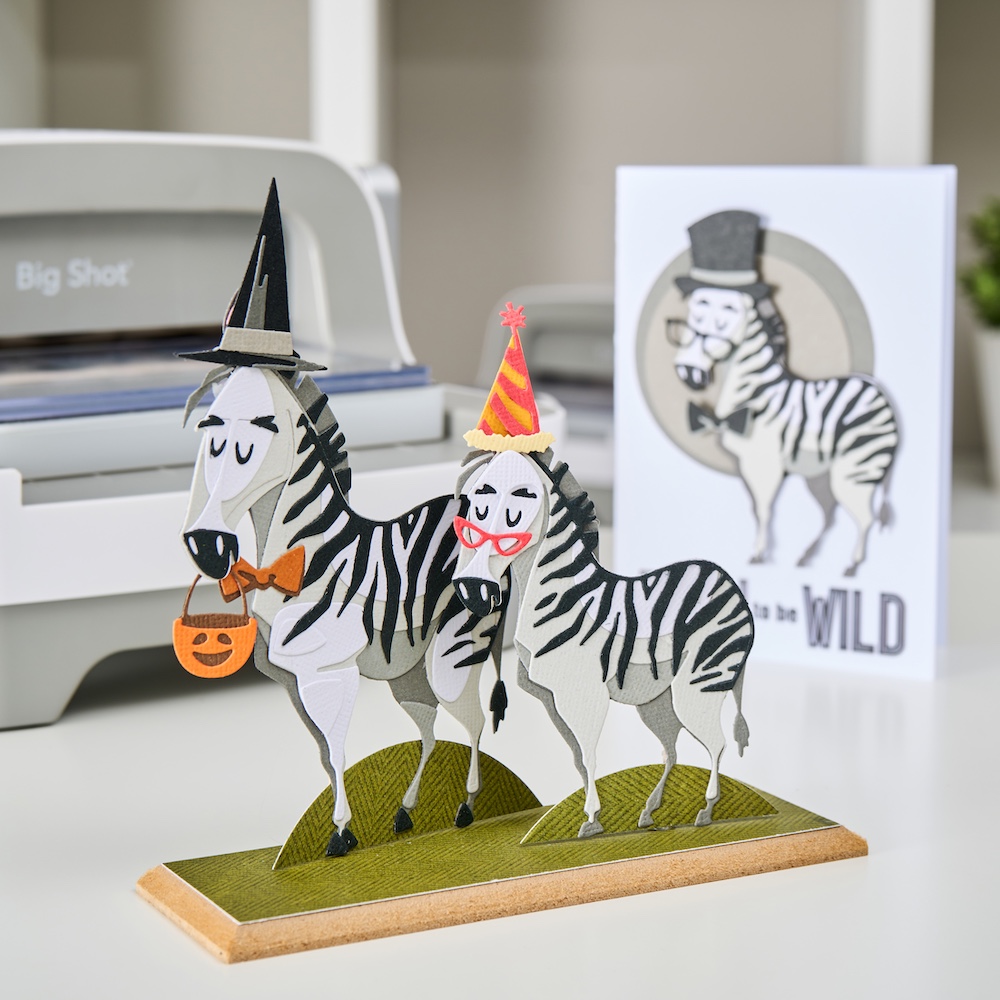
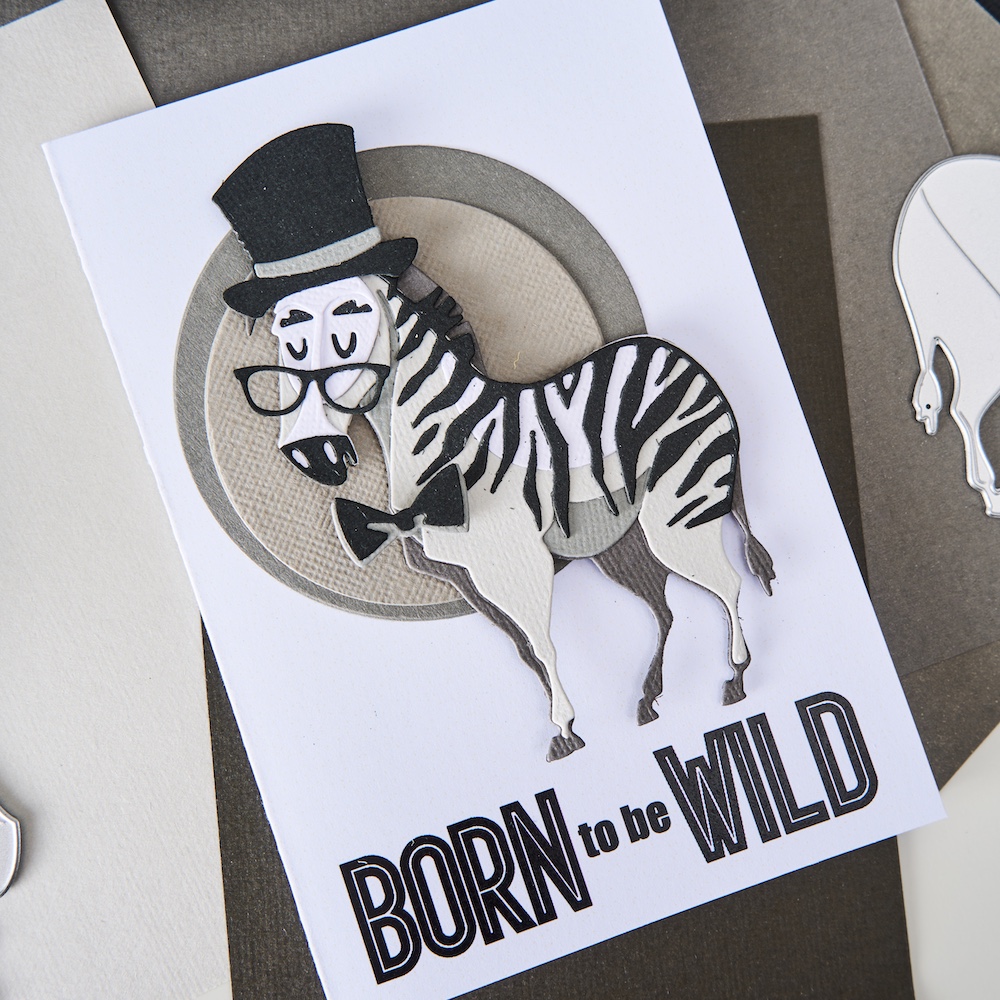
Let the party begin! Tim Holtz and Sizzix are bringing back beloved Colorize™ animal classics in the original sizes you know and love—PLUS adorable NEW mini versions! Say hello again to Bernice the hippo, Clarence the elephant, Gertrude the giraffe, Harrison the lion, Theodore the bear, and Winifred the zebra!
And the fun doesn’t stop there… the playful accessory sets are now available in BOTH sizes too! Get ready for the cutest crafty party ever!

Shop Bernice:
Shop Clarence:
Shop Gertrude:
Shop Harrison:

Shop Theodore:

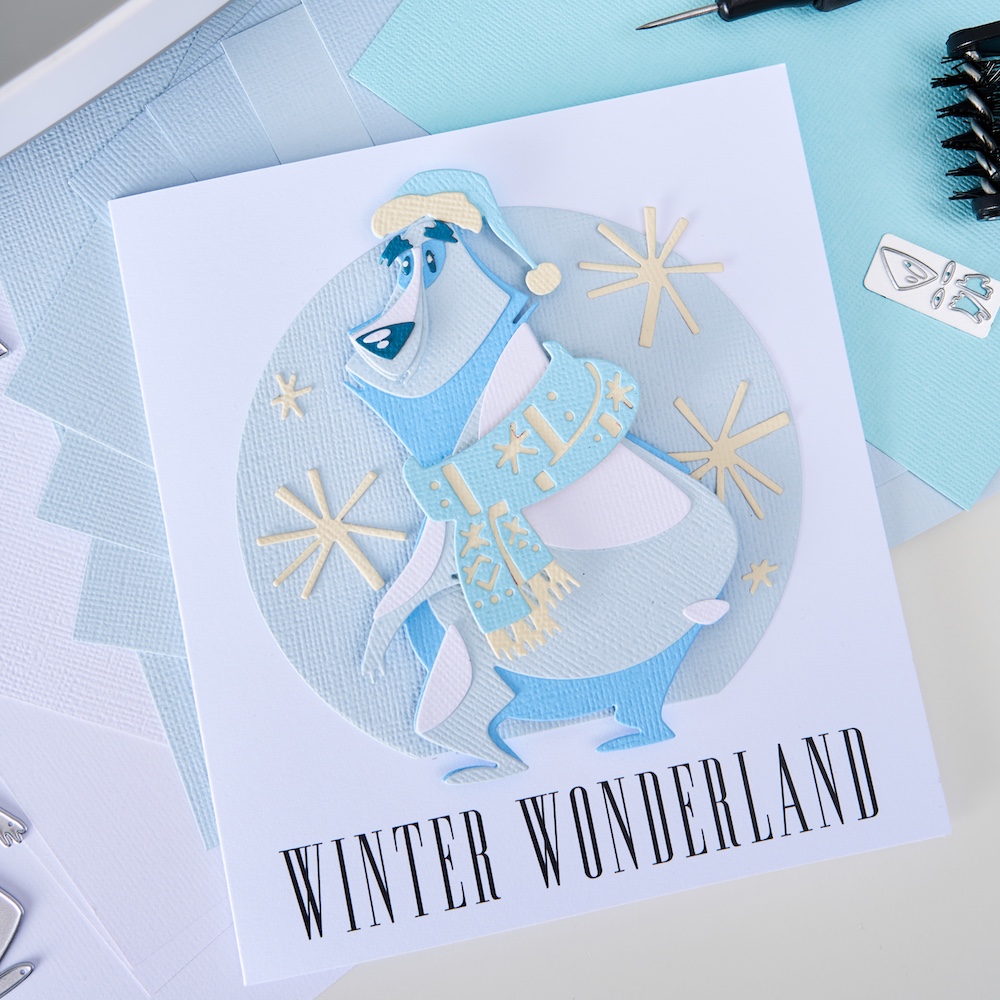

Shop Winifred:
Shop Accessories: