Thoughts of the Past: Mixed Media by Paula Cheney
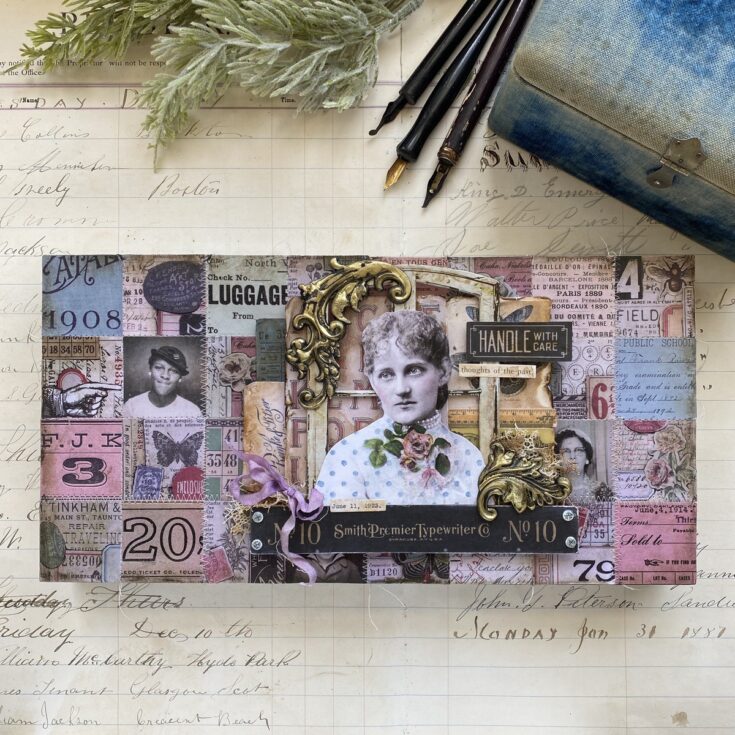
Hi friends! Happy Wednesday! I’m delighted to welcome back special guest Paula Cheney to our blog! Read on to learn more about this super cool mixed media project and enjoy!
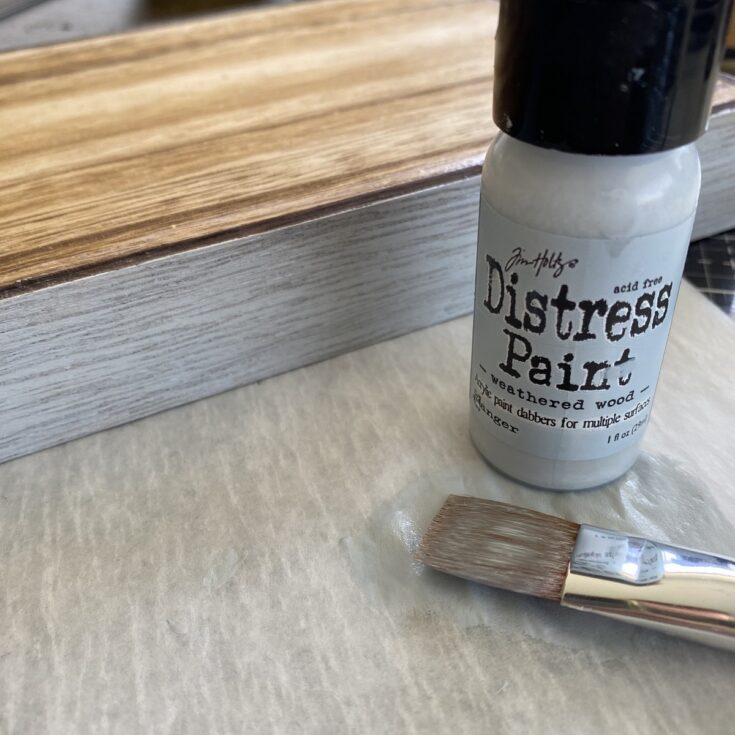
Paint the edges of the Vignette Tray in a light color, like Weathered Wood Distress Paint. Set aside to dry completely.
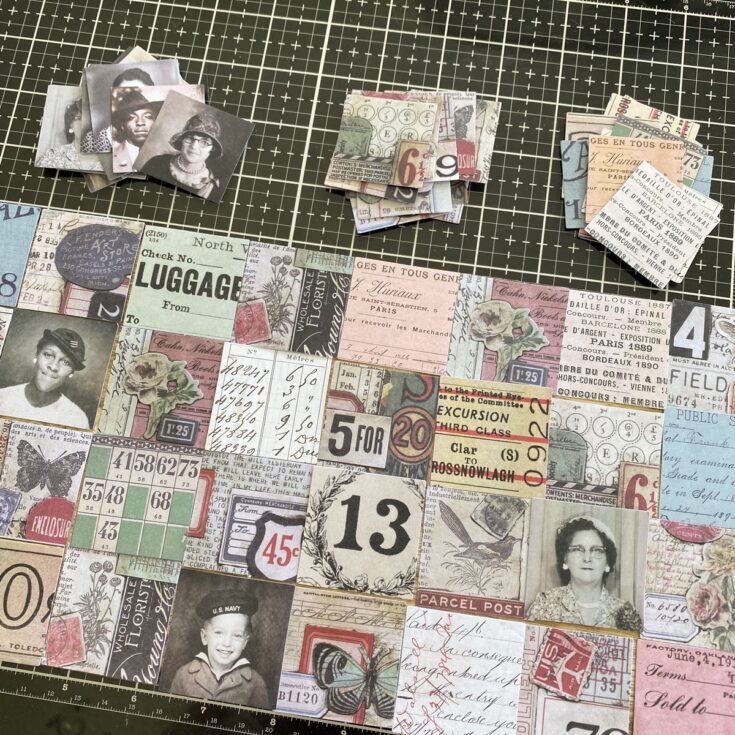
Using idea-ology Collage Tiles, layout a patchwork pattern, 8 across and 4 down in preparation to adhering them to a piece of cardstock.
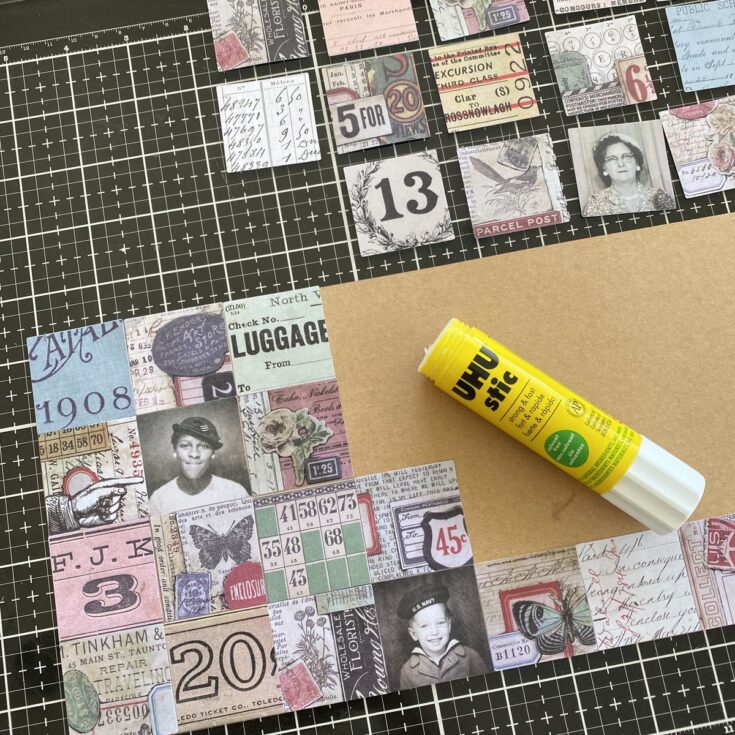
Cut a piece of cardstock to match the surface of the Vignette Tray (6 x 12”). Use a UHU Glue stick to add each square to the cardstock. Keep the squares tight together without overlapping.
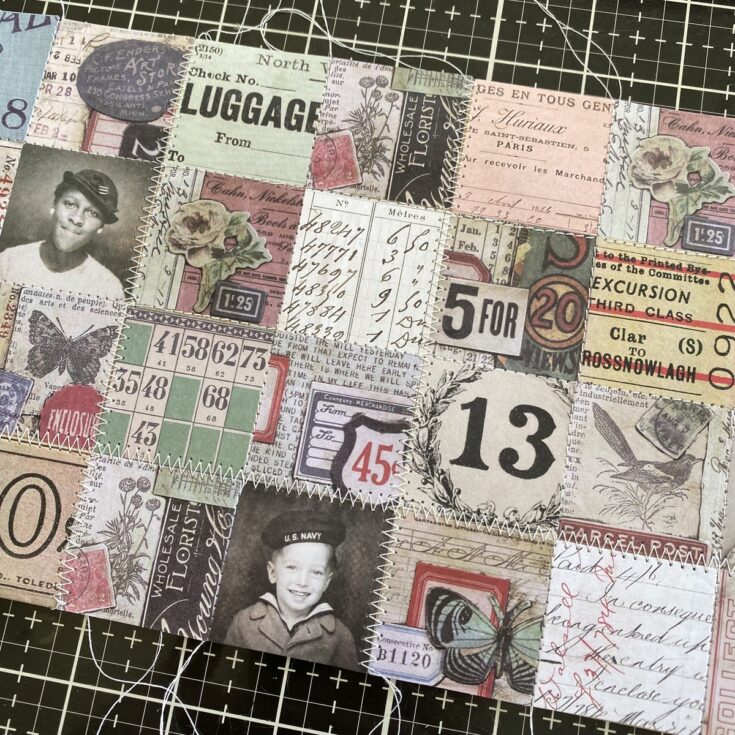
Once the process is complete, take the cardstock to the sewing machine and sew (straight or zig-zag) down all seams. You can leave the strings long or cut them off.
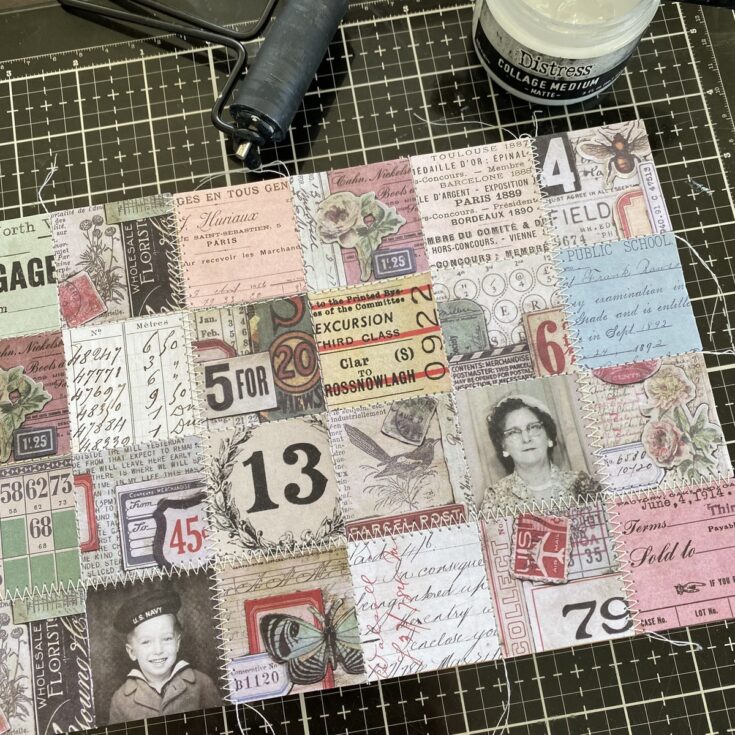
Use Collage Medium to add the patchwork to the surface of the Vignette Tray. Use a brayer to adhere the patchwork securely to the surface. Ley dry.
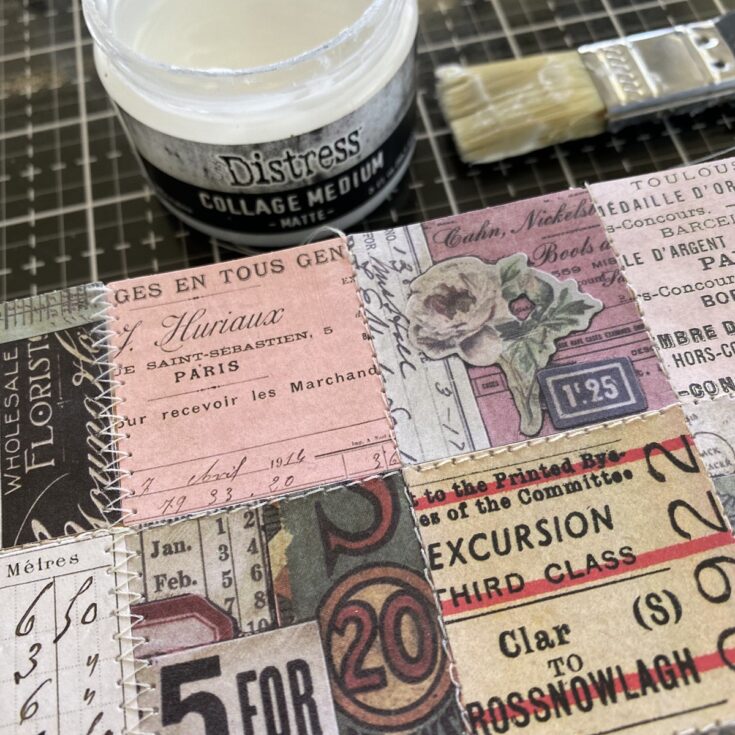
Add a thin layer of Collage Medium over the surface. Rub the Collage Medium into the surface with your hand to make sure it gets around the stitching. This will seal the surface to prepare it for the crayon + secure any loose stitching around the edges. Let dry.
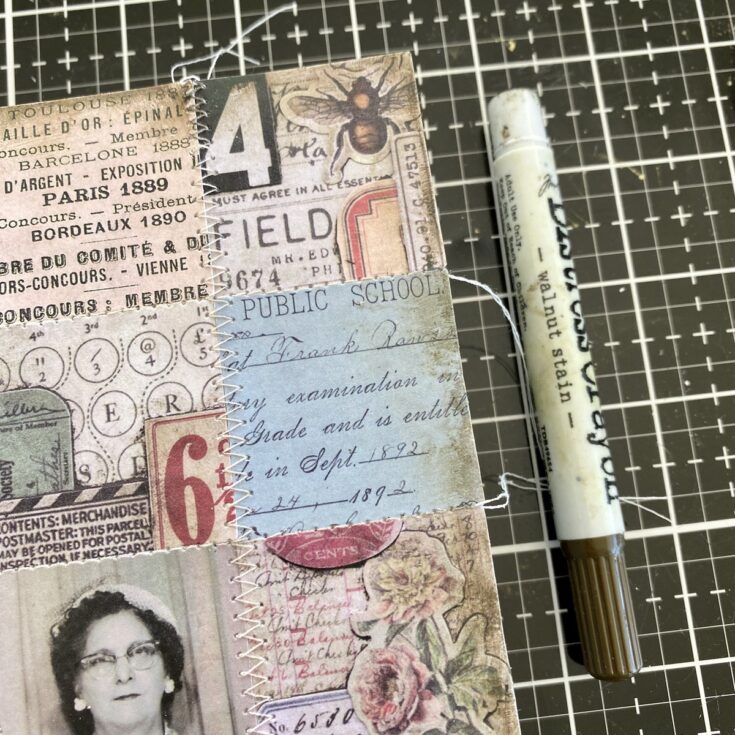
Use a Walnut Stain Distress Crayon to scribble around the outside edge of the Collage Tiles. Rub scribbles with a damp finger to smooth out the crayon. If you add too much, just pounce over the surface with a wet wipe to remove. Once dry, the crayon will not come off on your hands.
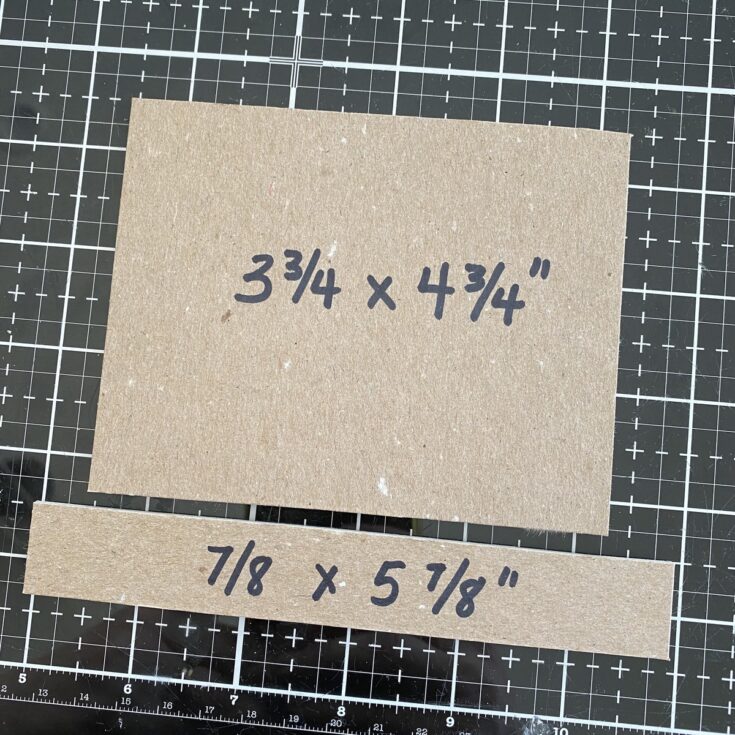
Cut two pieces of chipboard 3 3/4 x 4 3/4” and 7/8 x 5 7/8.
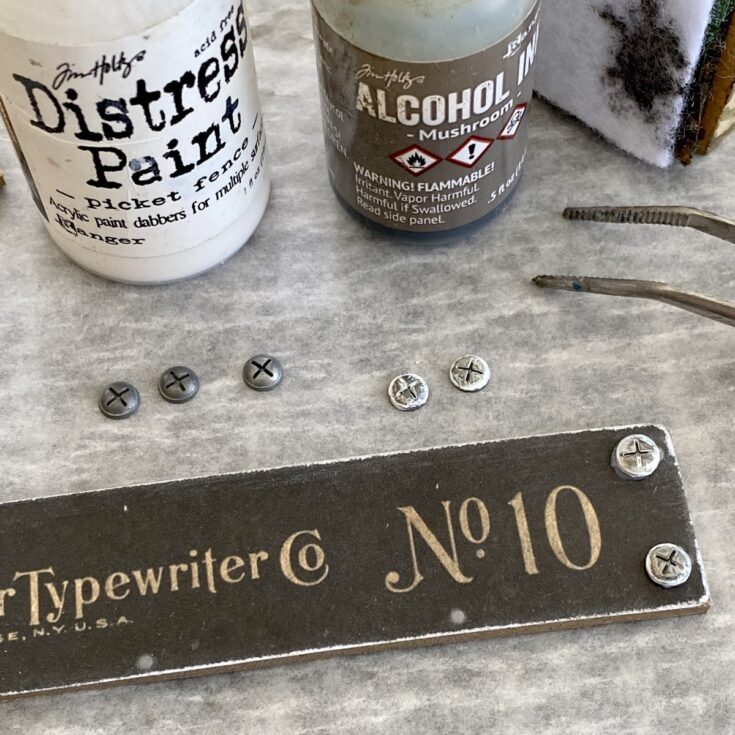
Adhere black typewriter ephemera piece, from the ephemera pack Memoir, to the 7/8 x 5 7/8” chipboard. Dot the tops of 4 Hardware Heads with white paint. Once dry, tap the top with Mushroom Alcohol Ink. Use Collage Medium to add the Hardware Heads to each end of the ephemera that has been mounted on the chipboard. Let dry.
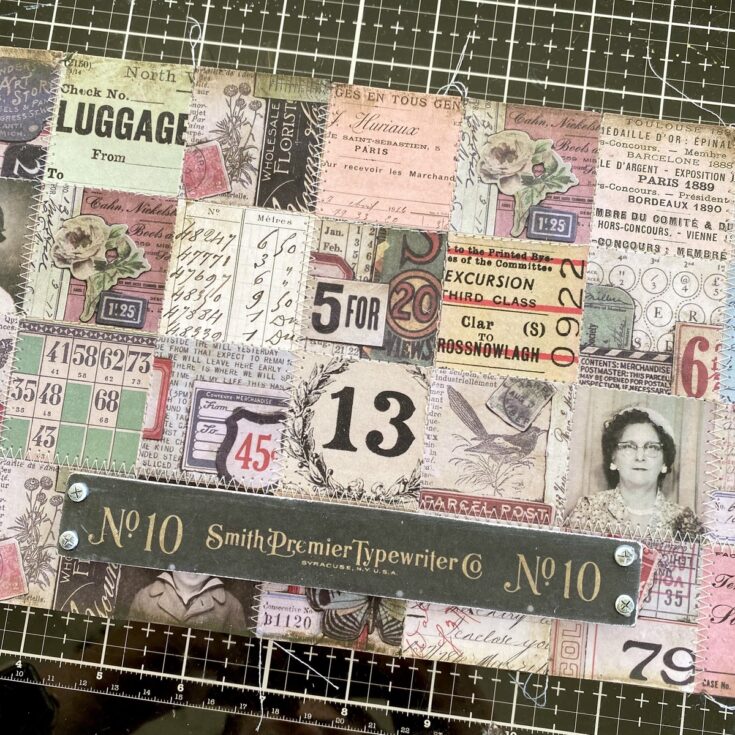
Add a double stack of 3D foam squares to the back of the chipboard. Adhere to the tray about 1/2 – 3/4” from the bottom edge.
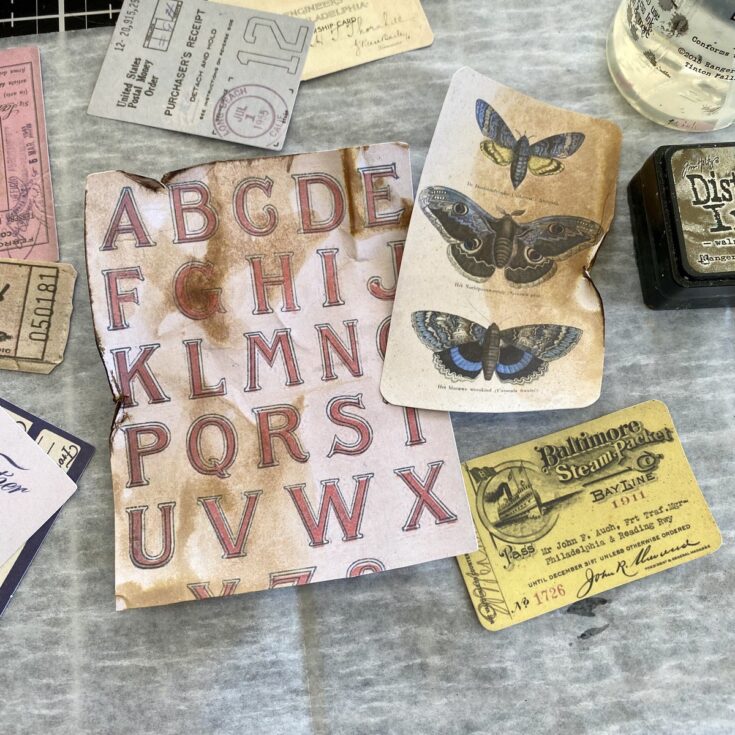
Choose a few more ephemera pieces from the same ephemera pack. Use Distress Ink to age the ephemera. I pressed the ink onto the glass mat, spritzed it with water, then pressed randomly into the ink, trying not to saturate it too much. I also ripped and crumpled the edges in a few places.
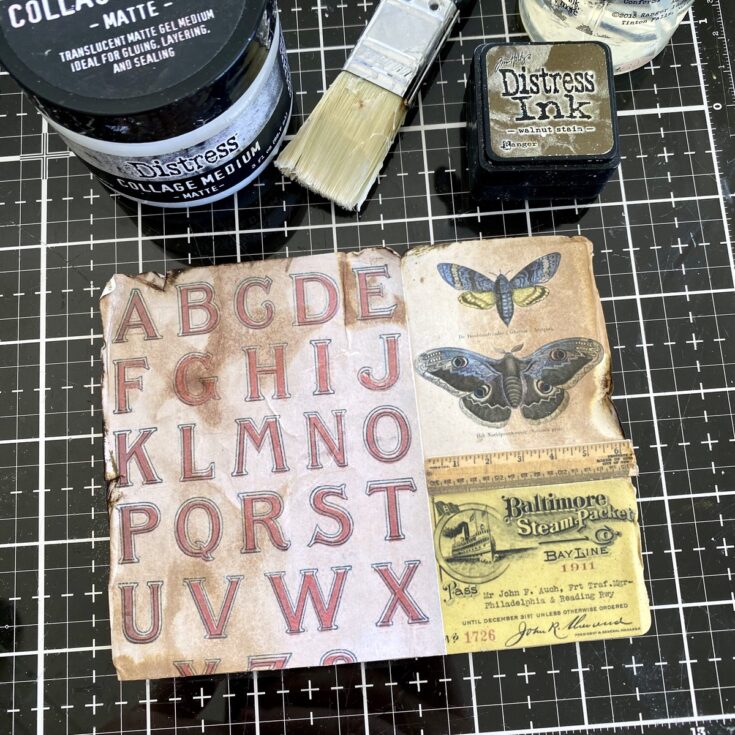
Adhere the pieces of ephemera to the large piece of chipboard. Let the ephemera hang over the edge about a 1/8” so that the ripped and torn edges do not expose the chipboard underneath.
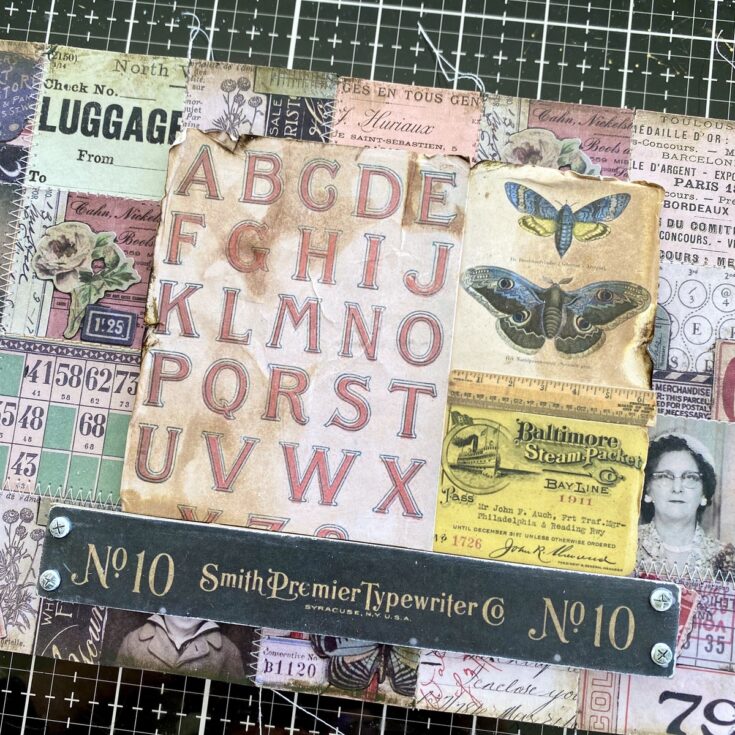
Use Collage Medium to adhere to the Vignette Tray above the last piece.
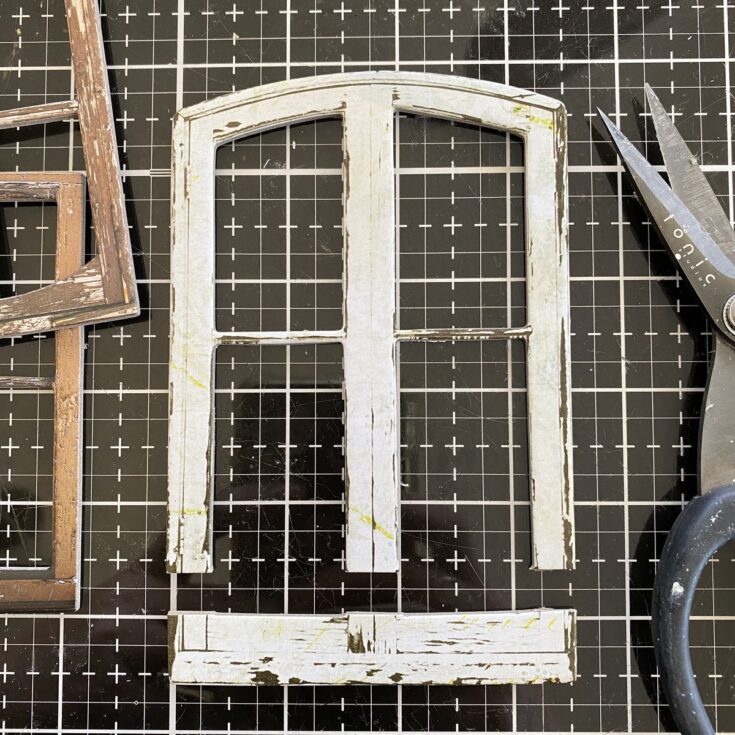
Cut the bottom off one of the windows from the idea-ology Window Frames.
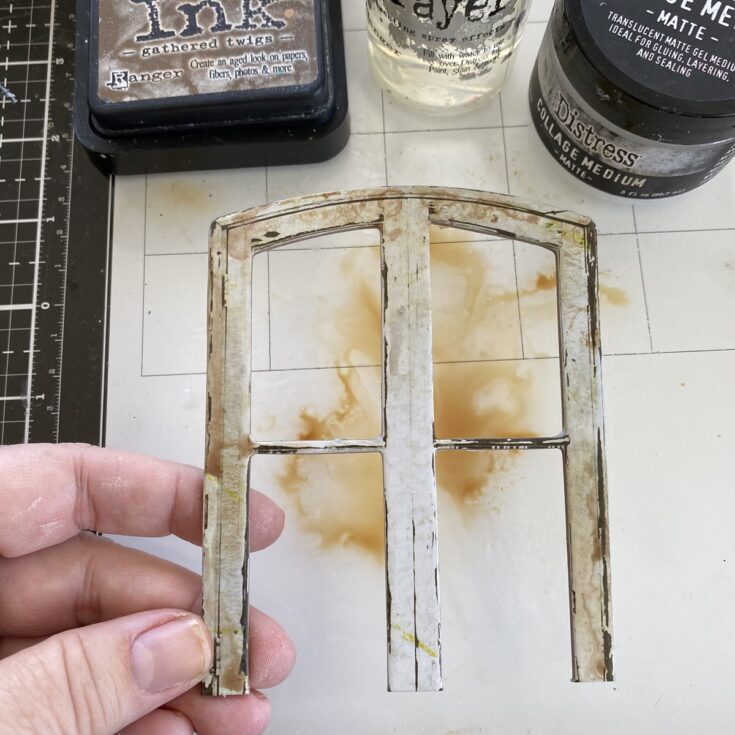
Give more dimension to the white frame using Collage medium and Distress Ink. Here’s how I did it: Press Gathered Twigs Distress Ink onto the glass mat. Spritz ink with water. Use your finger to quickly wipe a thin layer of Collage Medium over the surface of the window. Immediately press window frame into the ink. Dry with a heat tool, dapping up excess ink with a paper towel. Repeat until satisfied with the amount of ink. The Distress Ink will be permanent on the frame because it is imbedded in the Collage Medium.
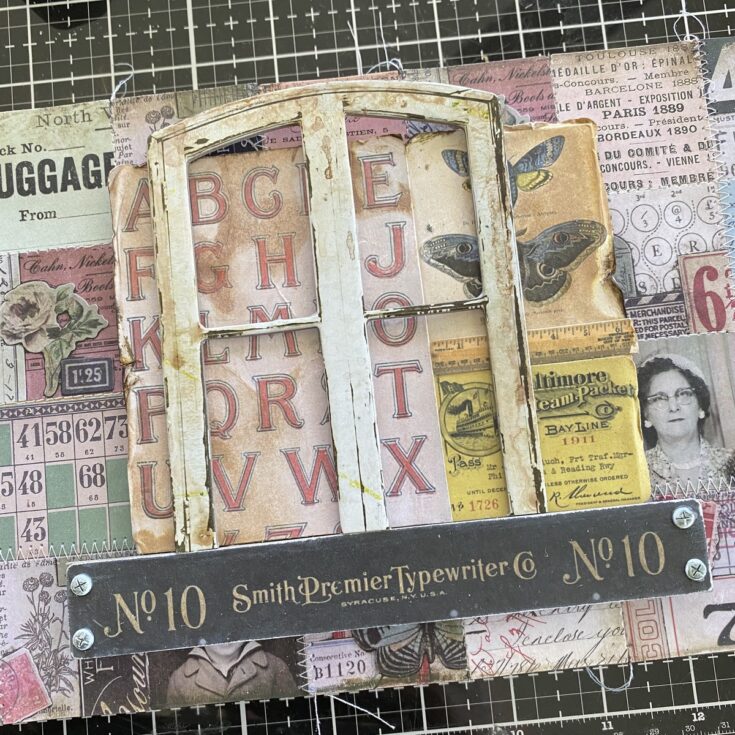
Adhere the window to the panel with Collage Medium. I used 1/4” Scor-Tape.
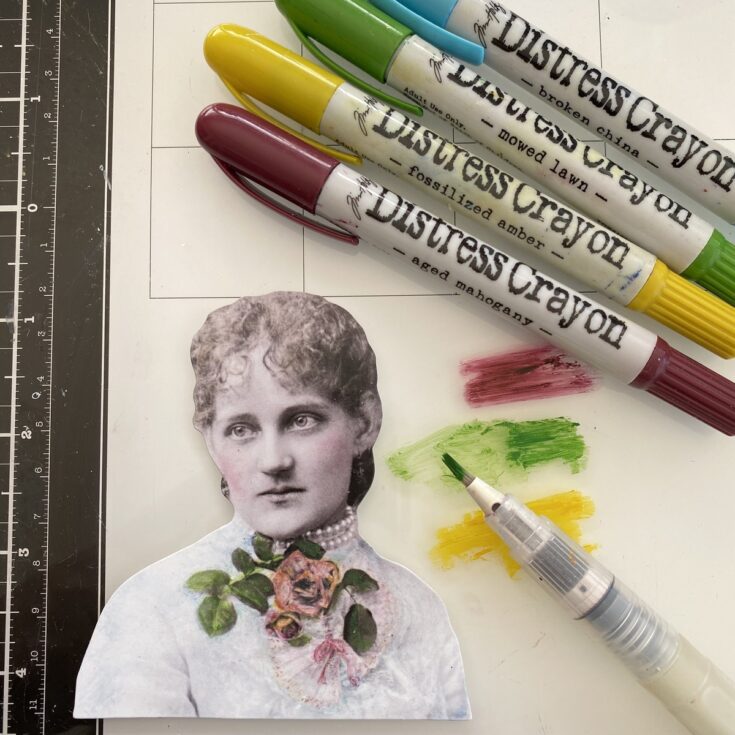
For the focal point, I am going to use one of the idea-ology Portraits. I chose this one because of the flower at her neck. Use any color of Distress Crayons to color the Portrait. My method is to scribble the crayon on the glass mat and pick it up with a damp water brush (damp, not wet). Then paint over details like the the flower, leaves and her cheeks.
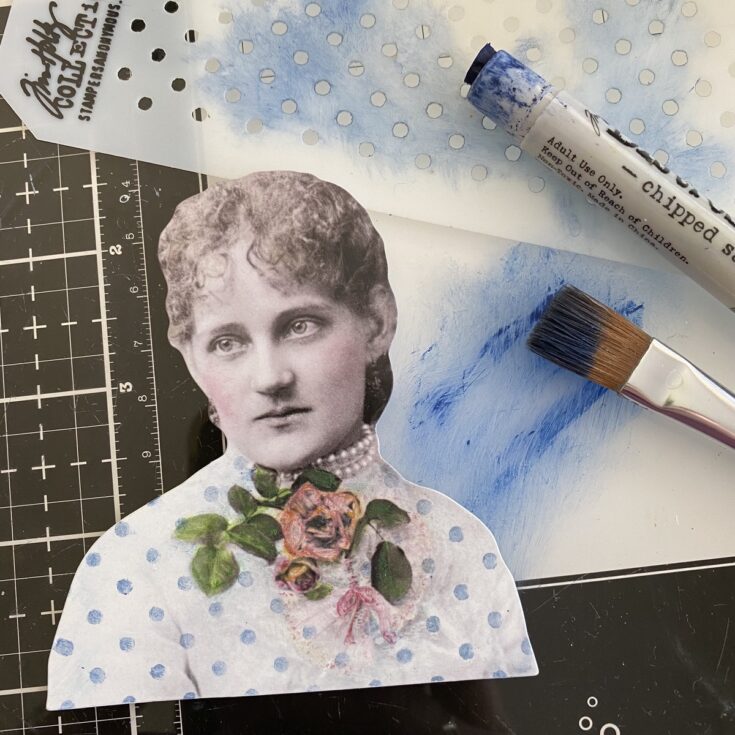
Use the Polka Dot Mini Stencil (Set 20 from Tim Holtz/Stampers Anonymous) to add pattern to her dress. The Mini Stencil size dot is perfect! Lay the stencil over the Portrait, and using a brush, pick up more Distress Crayon (this time, Chipped Sapphire). Brush repeatedly over stencil to create the polka dots. Super easy to do!
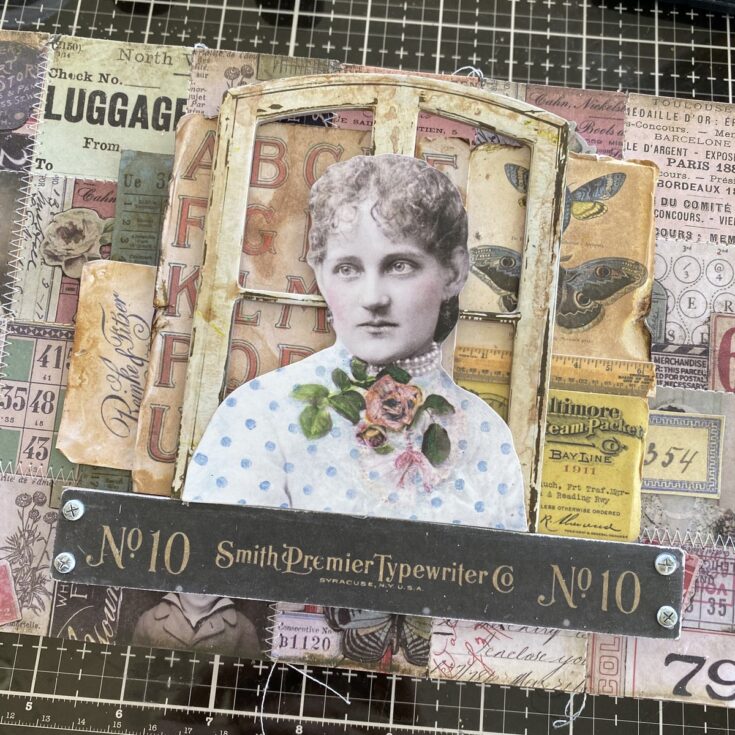
Add the Portrait to over the window. I used Scor-Tape on the center of the Window frame to adhere the Portrait.
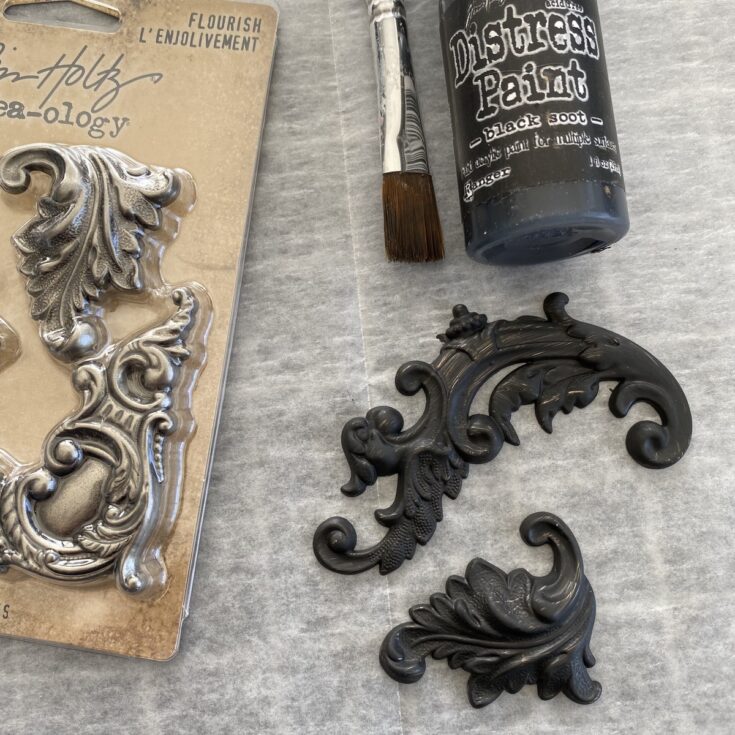
Paint two metal pieces from the Adornments Flourish pack with Black Soot Distress Paint. Let Dry.
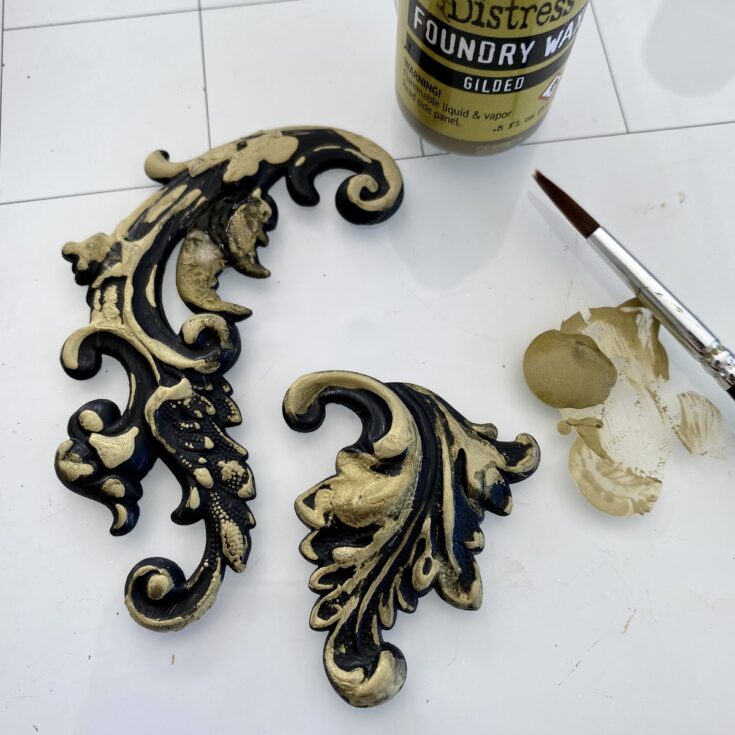
Make a small puddle (dime size) of Gilded Foundry Wax on craft mat/glass mat. Use a small brush to add wax to the high points on the metal as shown.
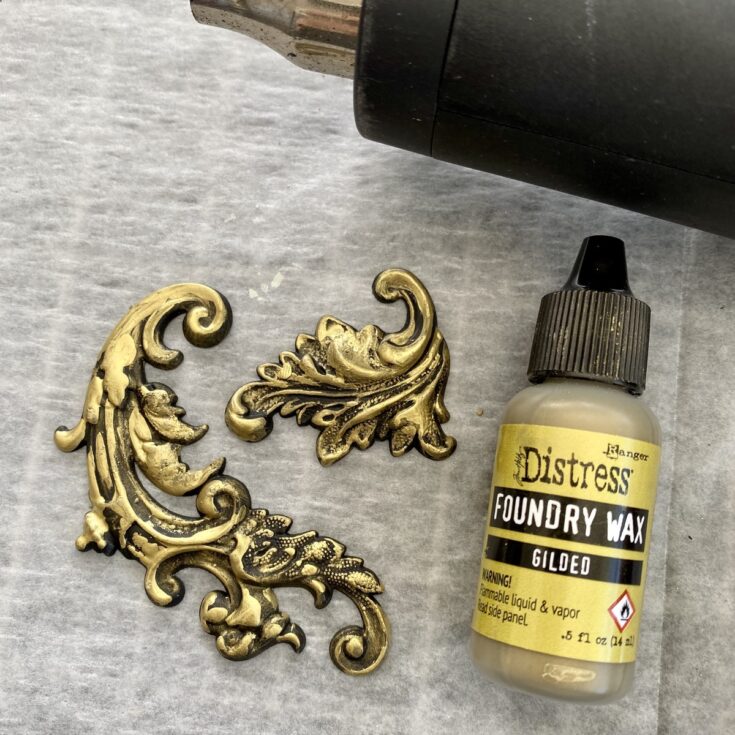
Use an embossing tool to heat the Foundry Wax and turn it a shiny gold. You might notice that there is much more detail in the finished flourish compared to the last photo. After heating the first time, I went back with dry brush technique over the small details and repeated the heating. It worked perfectly to add all the details!
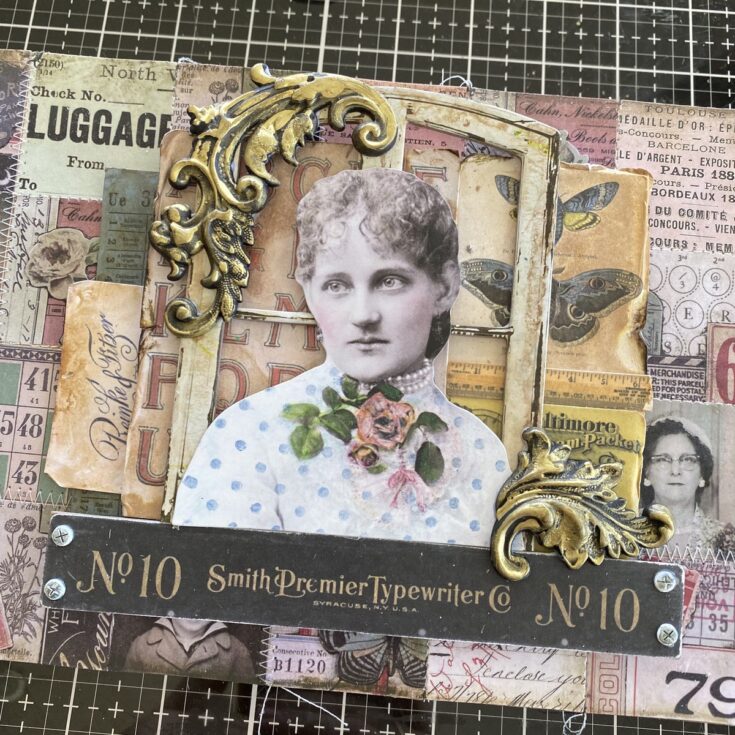
Adhere the two metal Flourishes to the panel with Collage Medium. I used a foam square under the small metal Flourish on the right, since it hangs off the Window frame (otherwise it would not lay flat).
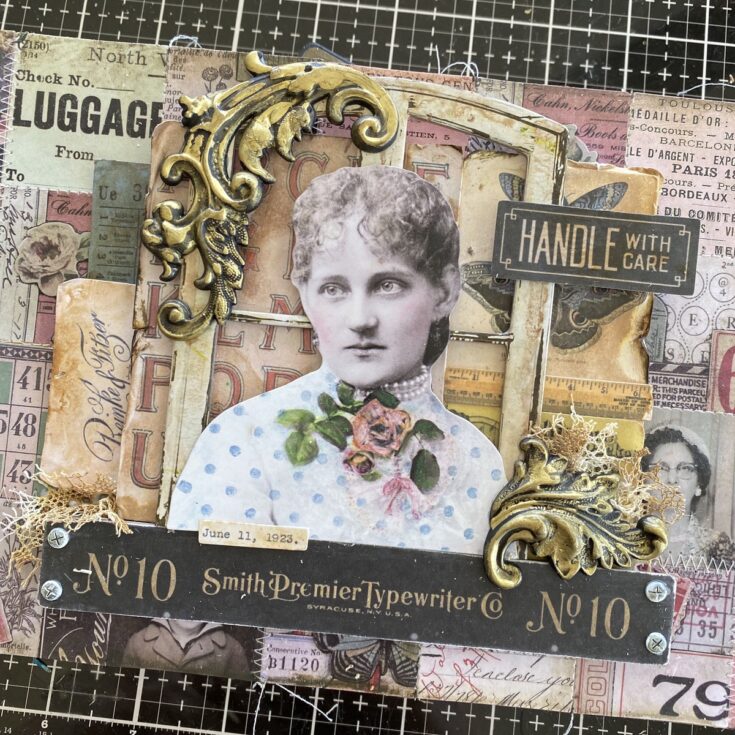
Add more ephemera from the Memoir pack to both sides of the panel. A bit of vintage lace was also added for needed texture.
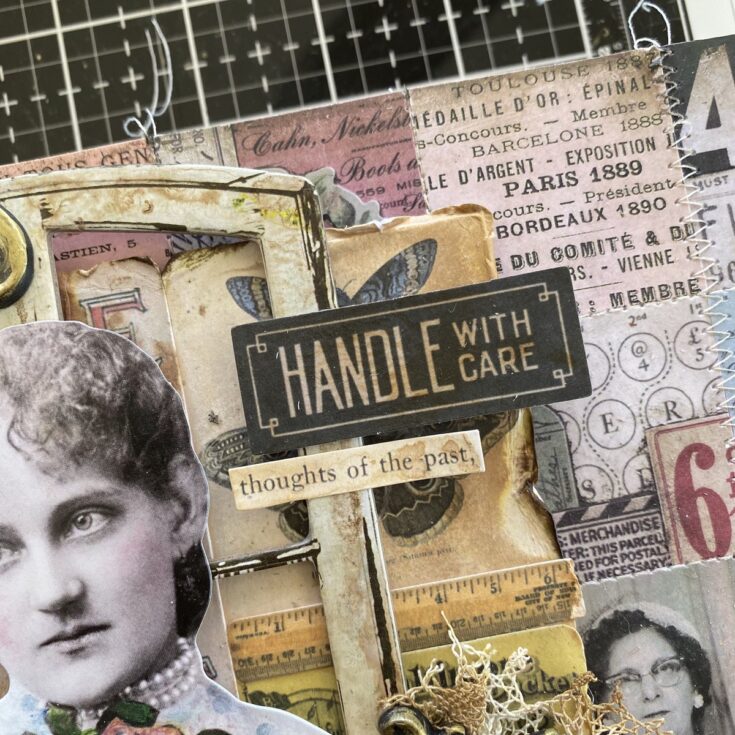
Now just a couple more embellishments: A sentiment from the Clippings Stickers book, “thoughts of the past”. So many choices in one book that could be used!
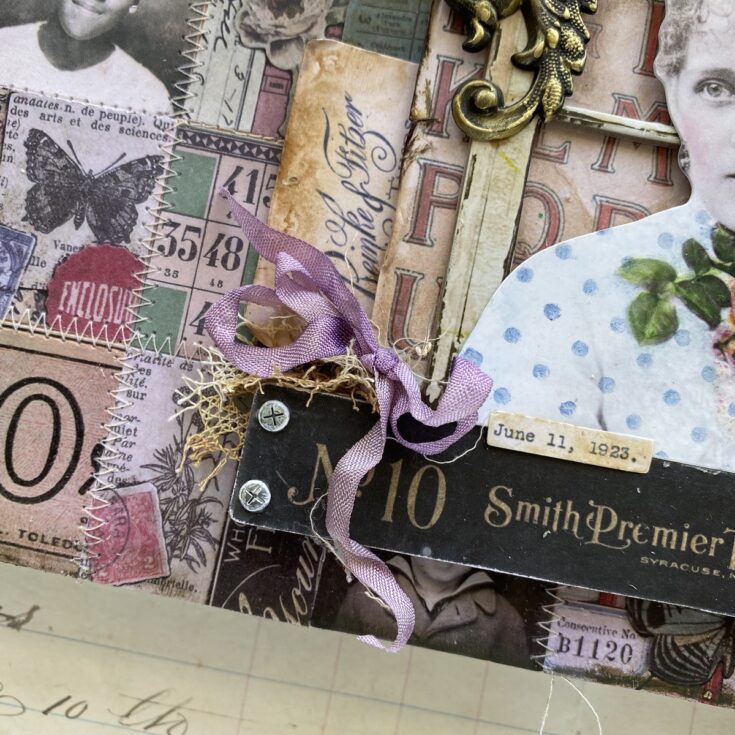
And a little bow made from vintage ribbon I found in my stash. That makes the perfect ending!
SUPPLIES:
|


Thanks so much for stopping by, and thanks to Paula for being our guest!
Making an Ephemera Card with Gina K!
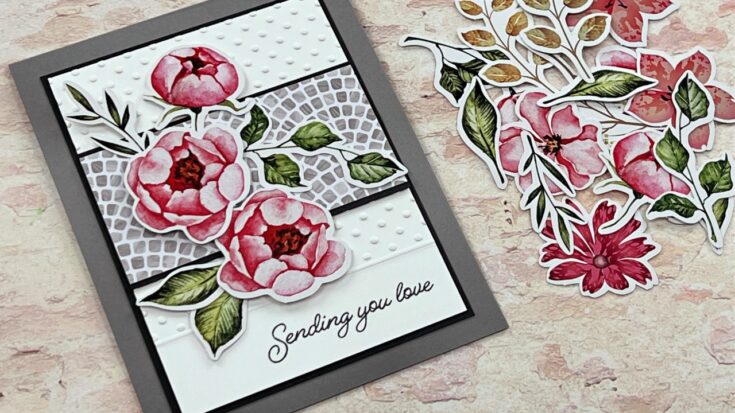
Hi friends! Happy Tuesday! Please join me in welcoming back special guest Gina Krupsky of Gina K Designs to our blog and Youtube channel! Have you seen the NEW ephemera from Gina K Designs?! It is so gorgeous! And, there is also a matching Watercolor Floral paper pack! I also love the texture from the Swiss Dot embossing folder. Don’t forget to watch the video for all the details, and enjoy!
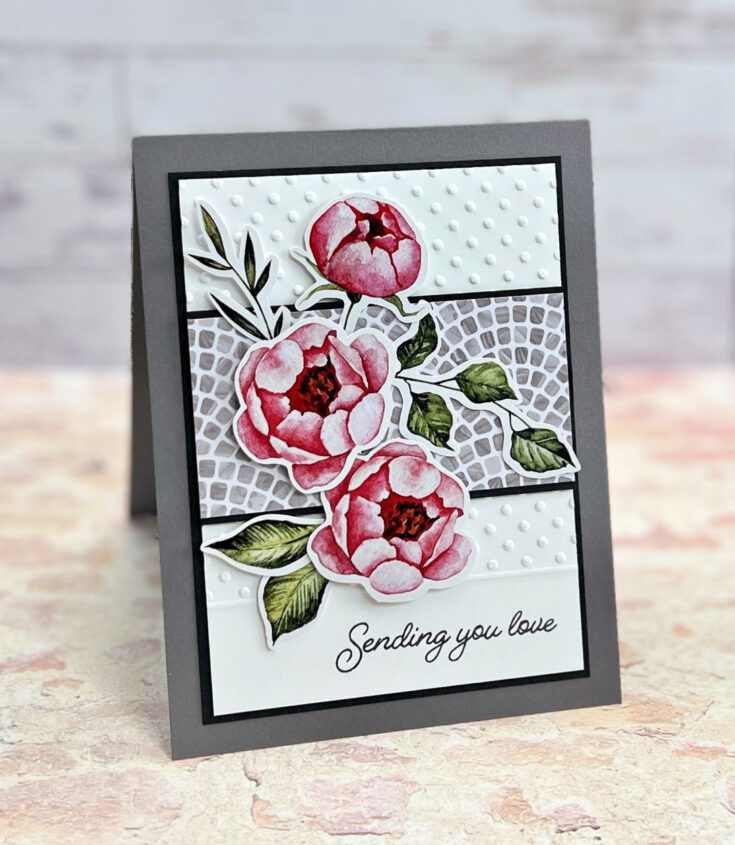
WATCH THE VIDEO:
SUPPLIES:
|




Thanks so much for stopping by, and thanks to Gina for being our guest!
July 2022 Card Kit Inspiration with Kristina Werner
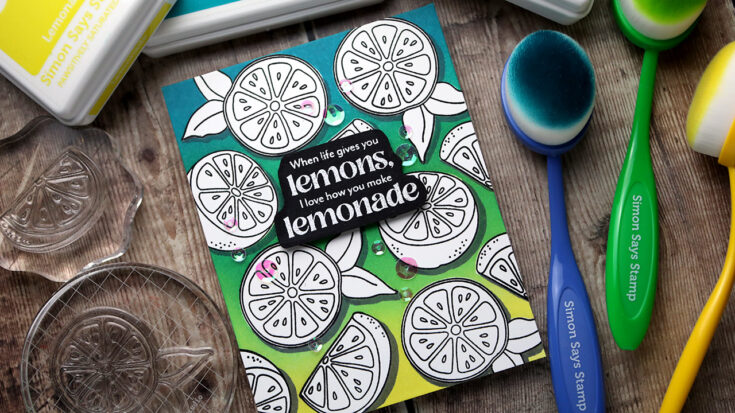
Hi all! Kristina here with a card made using the July 2022 Card Kit! I use the You Shine stamp set from the kit to create a fun ink blended card.
I stamped and masked all the lemon images on the card front, and then blended inks over the top. I used Lemonade, Limelicious, and Ocean ink from Simon for all the blending. And then after removing the masks, a dramatic black and white (plus blended color) background is revealed.
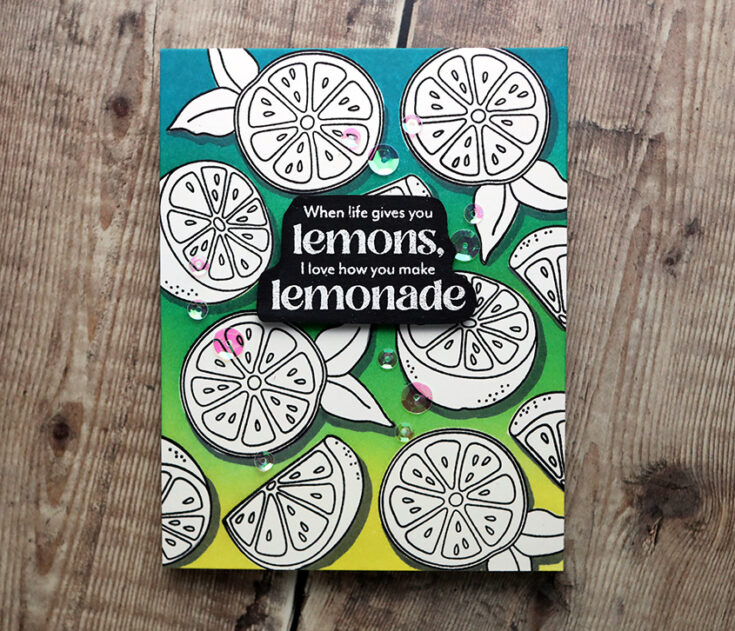
To finish off the card, I stamped and heat embossed a greeting from the stamp set, and then popped it up off the card. I also added a few sequins.
I hope you enjoy the video! You can grab the July 2022 Card Kit HERE, or subscribe to this kit and future kits HERE.
Supplies
|