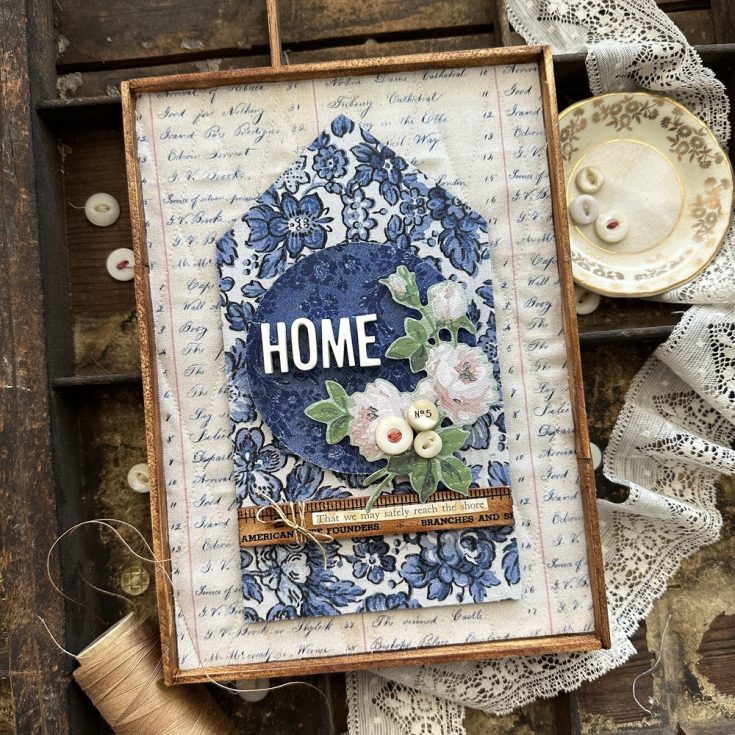
Home Décor Idea Showcasing NEW Tim Holtz Palette Fabric in Indigo by Paula Cheney
Hi friends! Happy Saturday! Please join me in welcoming back special guest Paula Cheney to the blog with a truly magnificent home panel piece showcasing the newly released Indigo color from the Tim Holtz Palette Fabric line! Read on to learn more and enjoy!
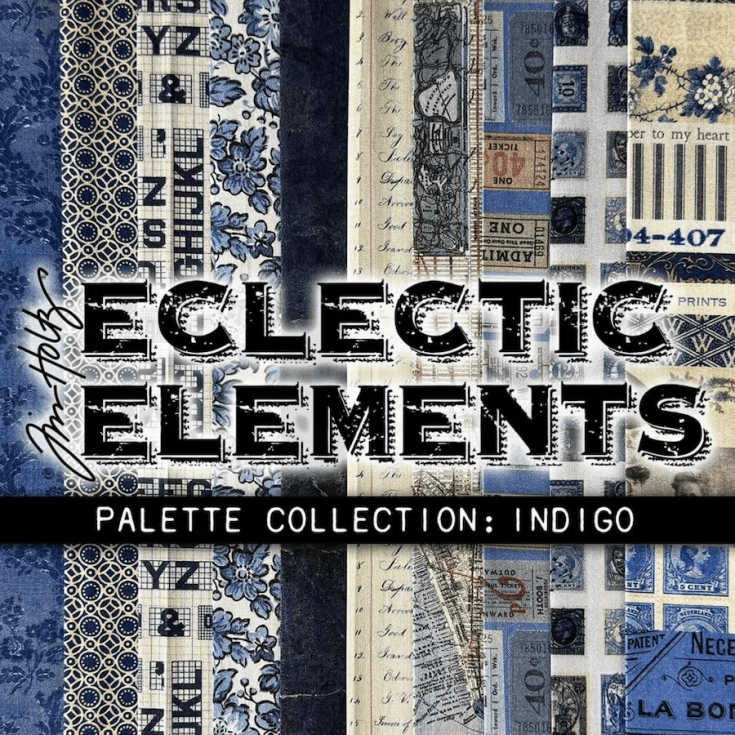
Today’s home decor project showcases the stunning Palette Indigo fabric by Tim Holtz for FreeSpirit Fabrics. I’ve selected three of my favorite Indigo fabrics and paired them with Tim Holtz Idea-ology and Etcetera products to infuse a wonderful vintage feel into this project. Now, there is some quilting in the background but that is optional if you are not a sewer. Let’s get started!
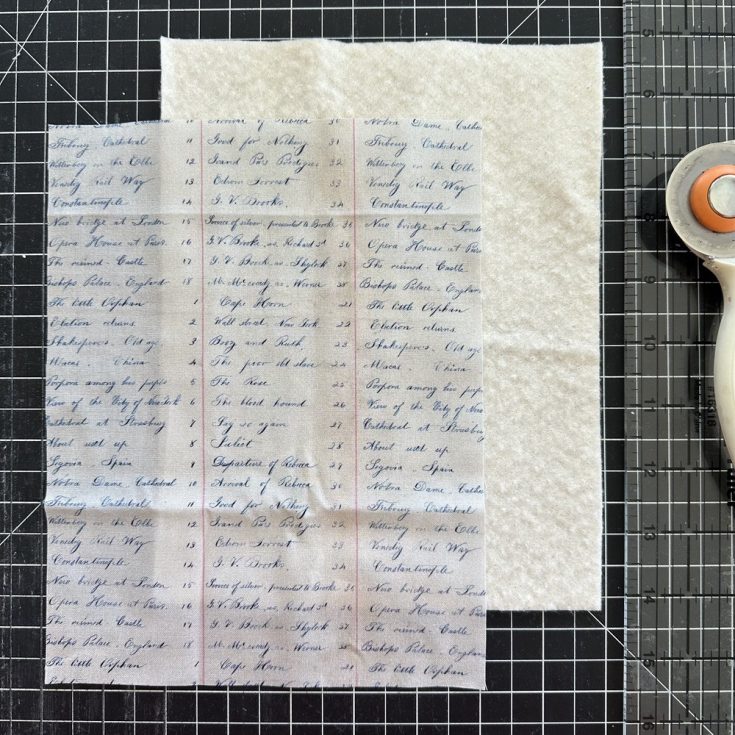
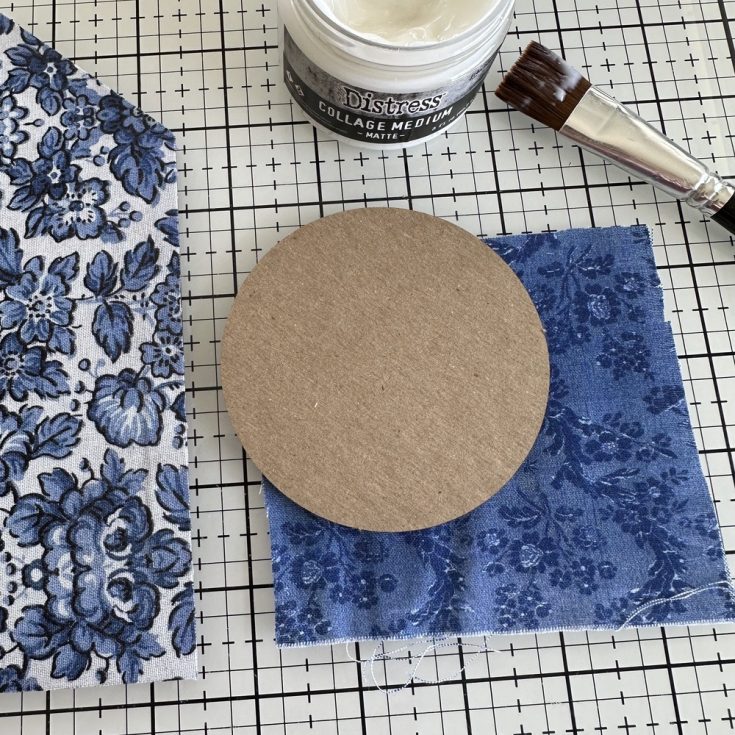
Cut 7 x 9” pieces of both Palette Ledger and cotton batting. The Ledger fabric is directional so take care to cut as shown.

Lay the Ledger Fabric on top of the cotton batting. Use a marking pen and a clear ruler to mark lines for stitching. They can be vertical, horizontal or a diamond pattern like I’m using here. My lines are 1” apart (an easy to number to follow on a ruler!)
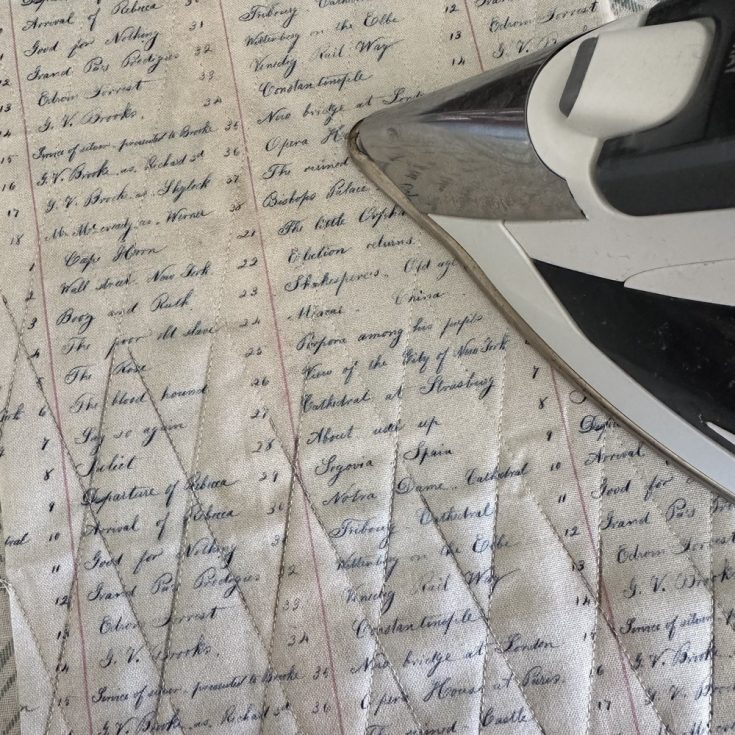
Once the lines are stitched, iron over the top to remove the pen marks (now no one will even know you had lines to follow).
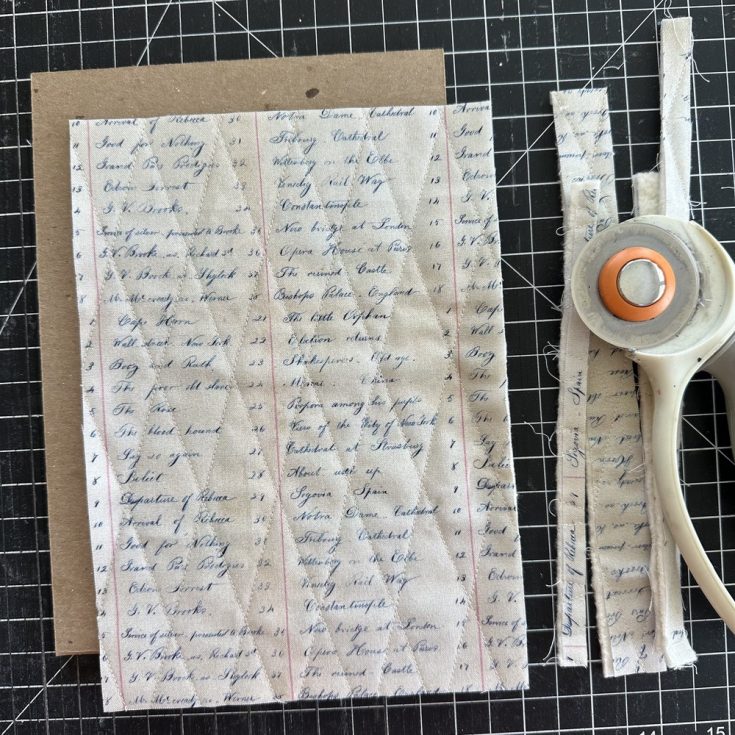
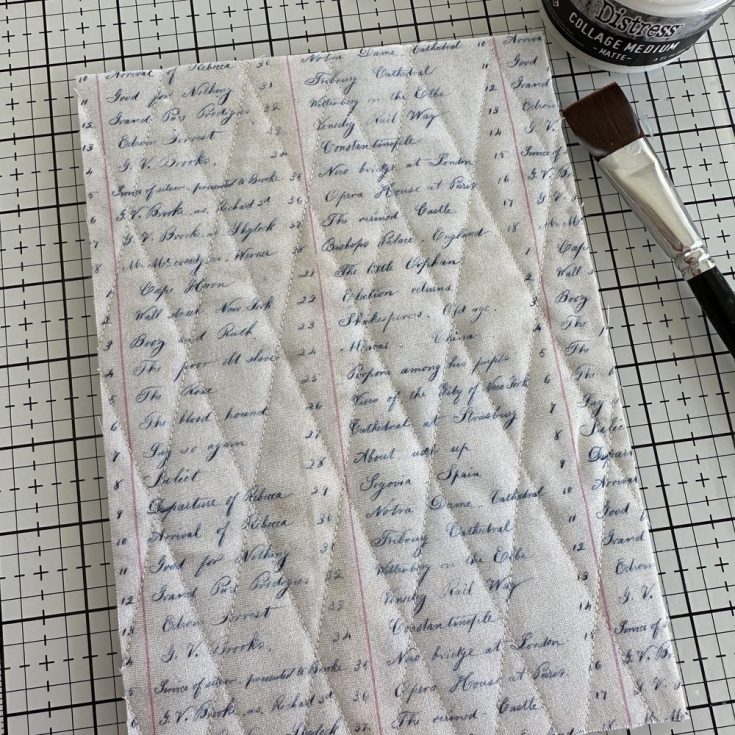
Use a rotary cutter to trim the edges of the quilted piece. It should be the same size as a large Rectangle Etcetera Panel (6 x 8.5”).
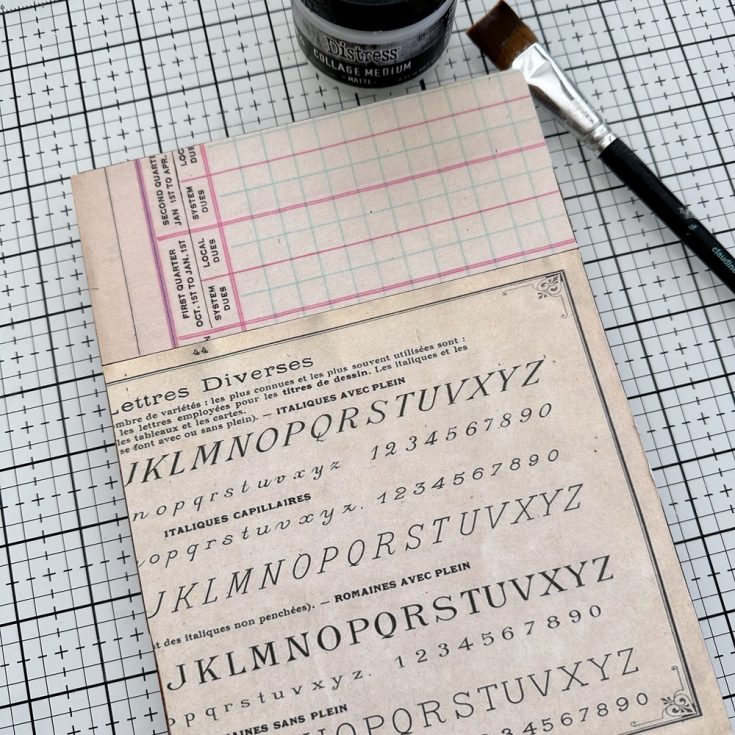
Use Collage Medium to add the quilted Fabric panel to the Etcetera Panel. Trim an excess fabric.
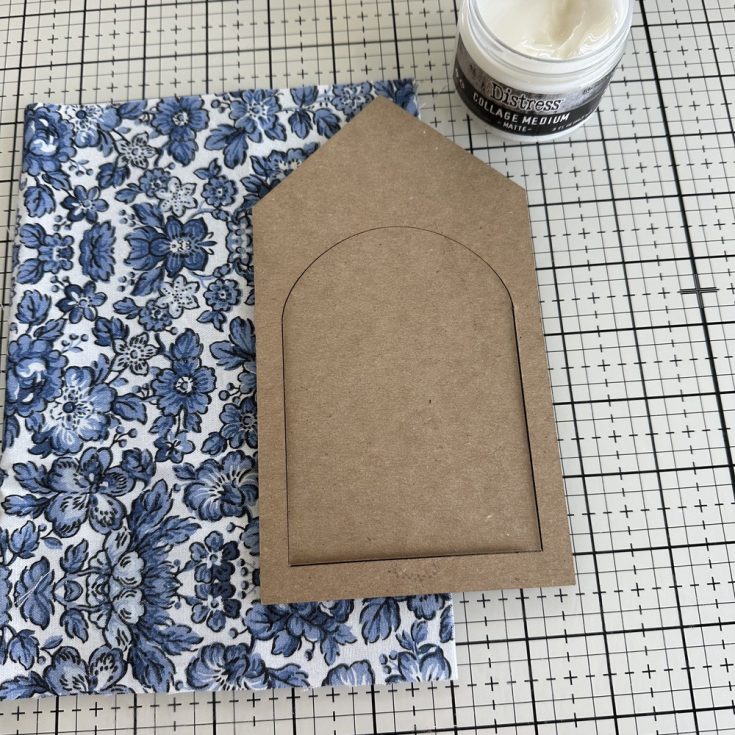
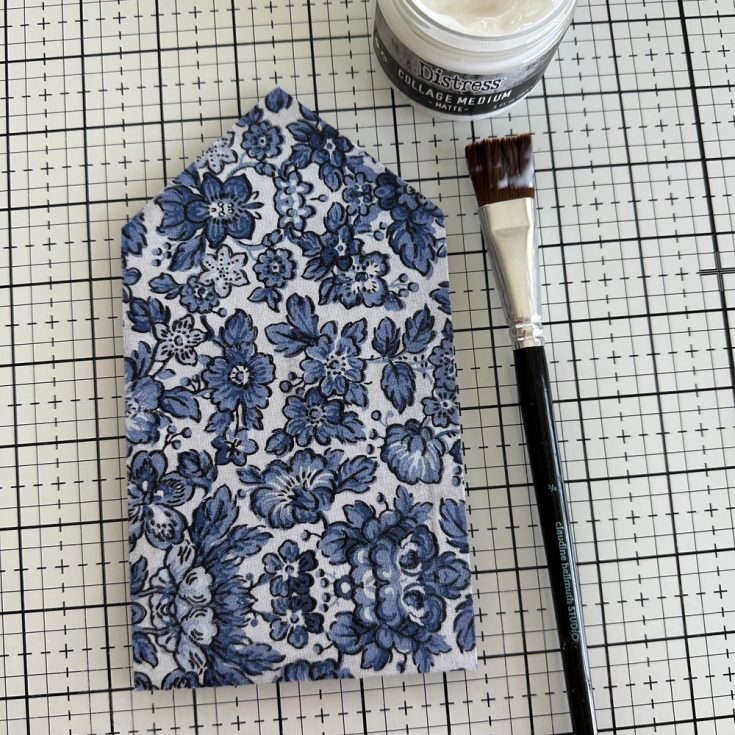
Cut a piece of Palette Wallpaper fabric that will be large enough to cover the house shape (5 x 8”) from the Etcetera Facades pack.
Adhere fabric to the house shape with Collage Medium. Once dry, cut away the excess fabric. I used my rotary cutter to do this, but fabric scissors could also be used.
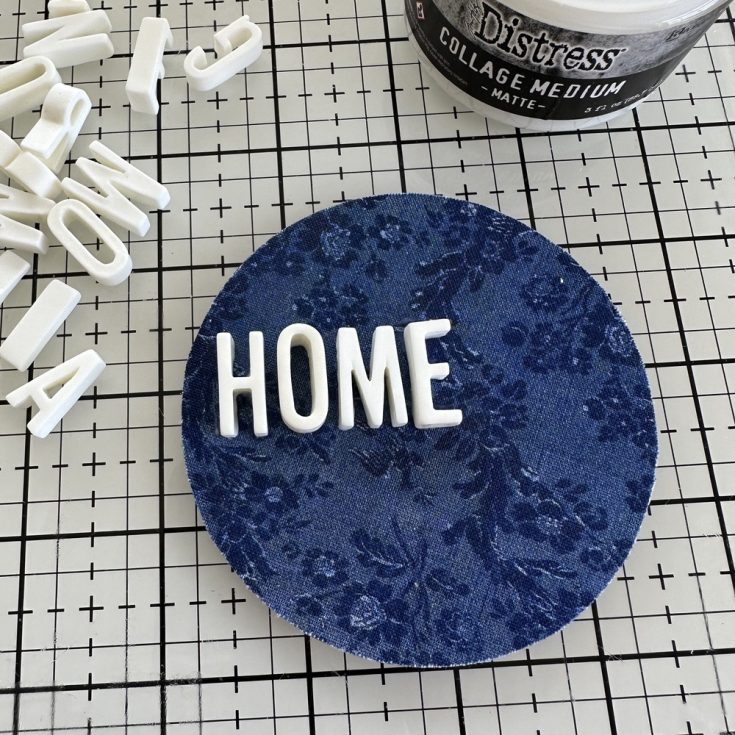
Find the 3 3/8” circle in the Facades pack. Use Collage Medium to adhere Palette Tapestry fabric to the circle. Once dry, cut away the excess fabric.
Using idea-ology Typography, add the word HOME to the circle with Collage Medium.
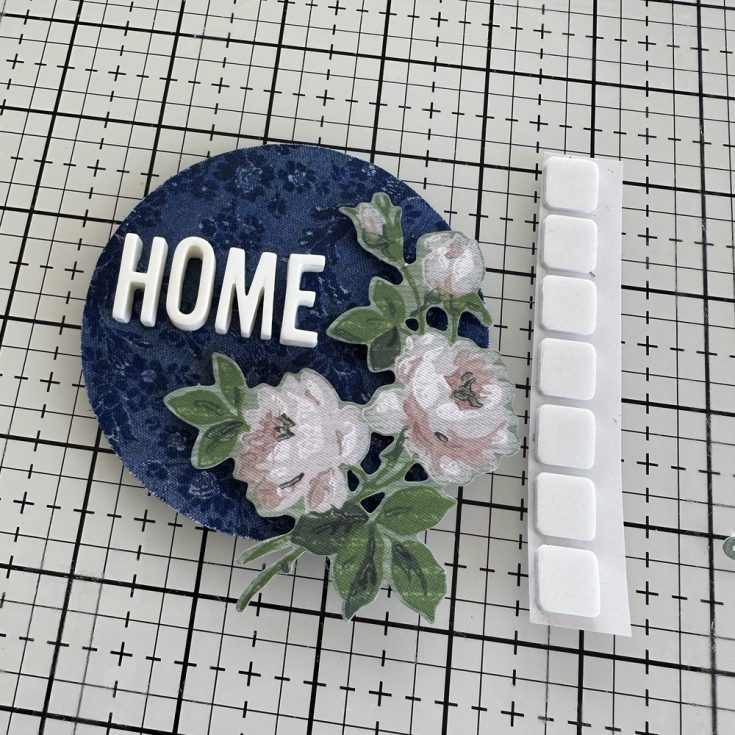
Add 3D Form Squares to a small floral from the idea-ology Worn Wallpaper Scraps pack. Add the floral to the circle so it hangs just off the right side.
I like to use vintage items in some of my projects and today I’m adding vintage buttons. I collect buttons that still have the thread left in tack for projects just like this one. But what if you have a shank button? (that means the sewing holes are hidden in a shank underneath). I thought, since I have a flat top, why not add a Remnant Rub to the top of the button? So that’s just what I did.
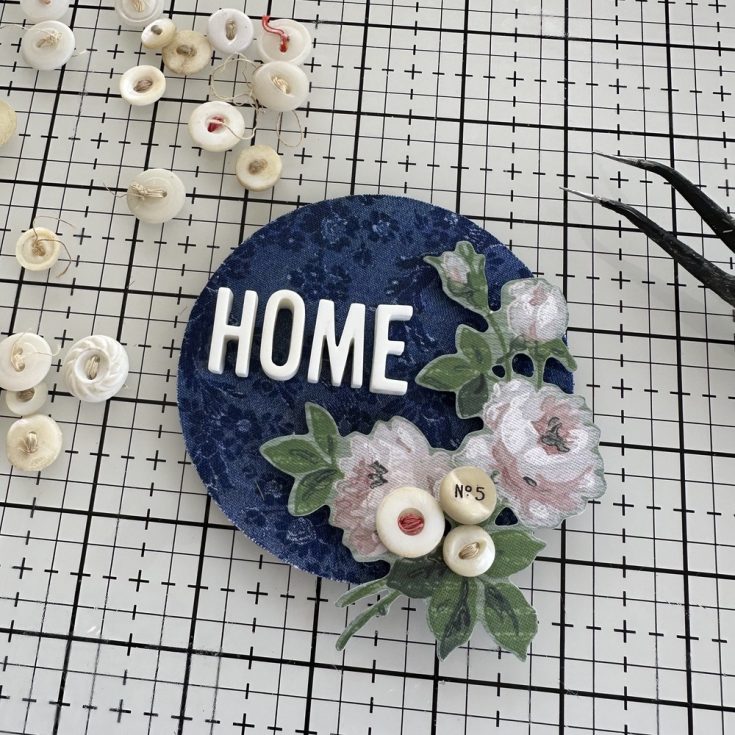

I use Collage Medium to add the three buttons to the floral. It will take a bit of time to dry, but it’s worth it. Once they are stuck, they are really stuck when you use Collage Medium.
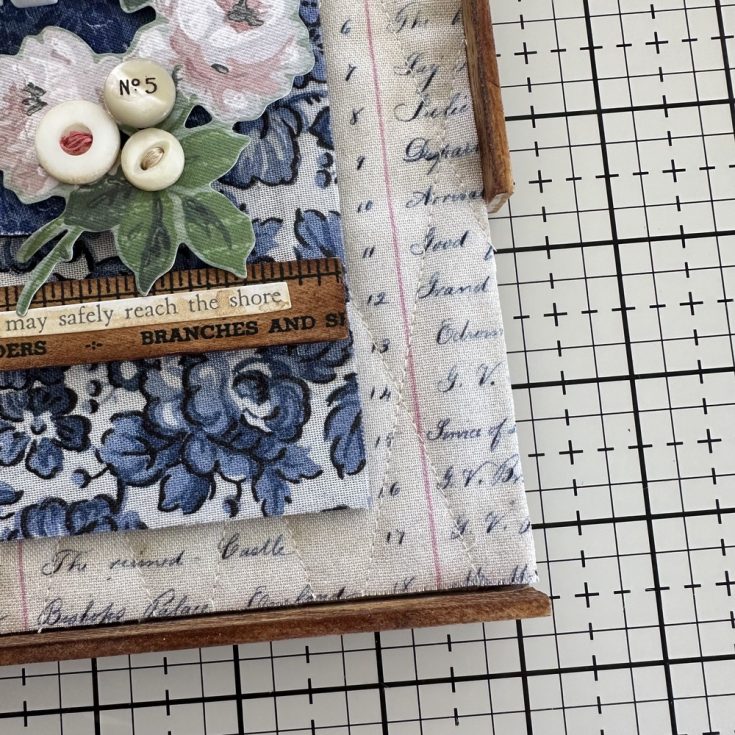
Both pieces need to be glued to the base. First I added the house shape. It is a long shape, so it’s best to place a few heavy books on top while it dries. After about an hour or two, I added the circle to the house shape.


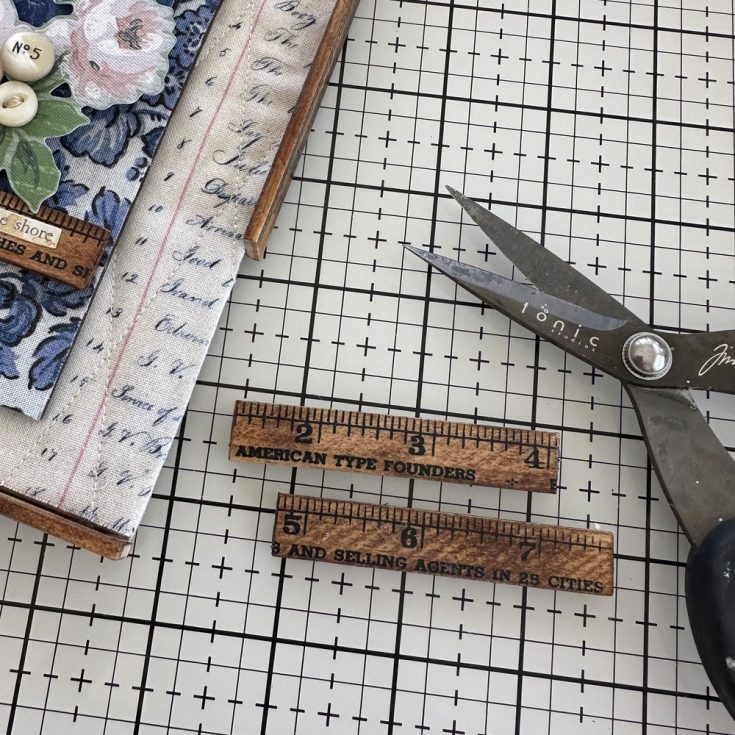
For an additional detail, I decided to use a Ruler Piece. I rubbed a Gathered Twigs Distress Ink pad over the top of the Ruler.
Use your fingertip (or a brush) to add Collage Medium over the top of the Ruler. The wet medium makes the ink wick and gives it a beautiful stain. You can do this technique with any color of Distress Ink!
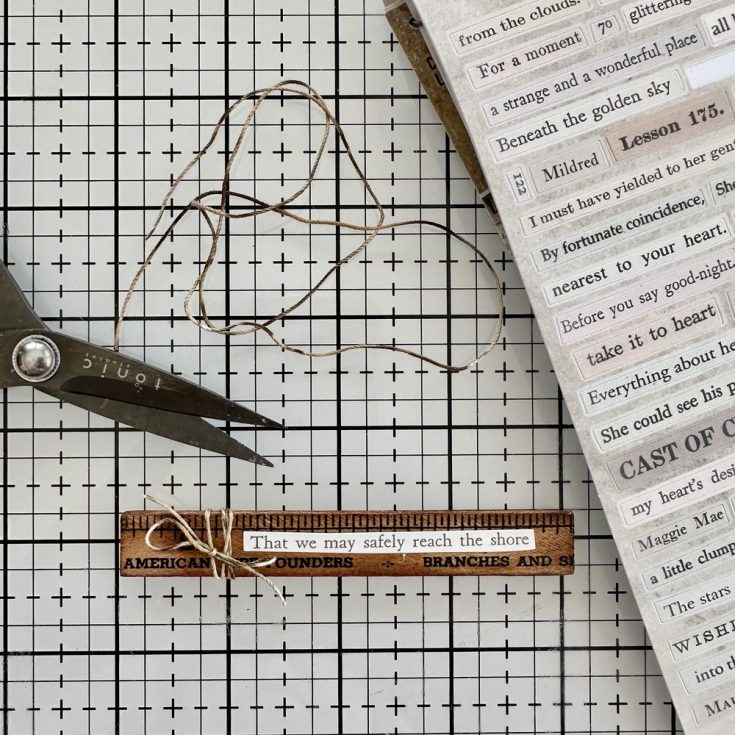
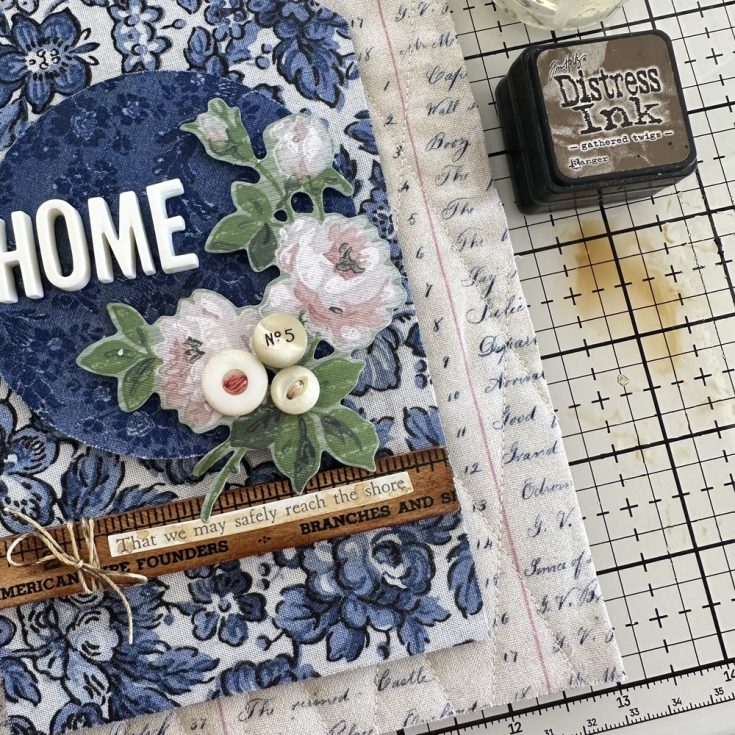
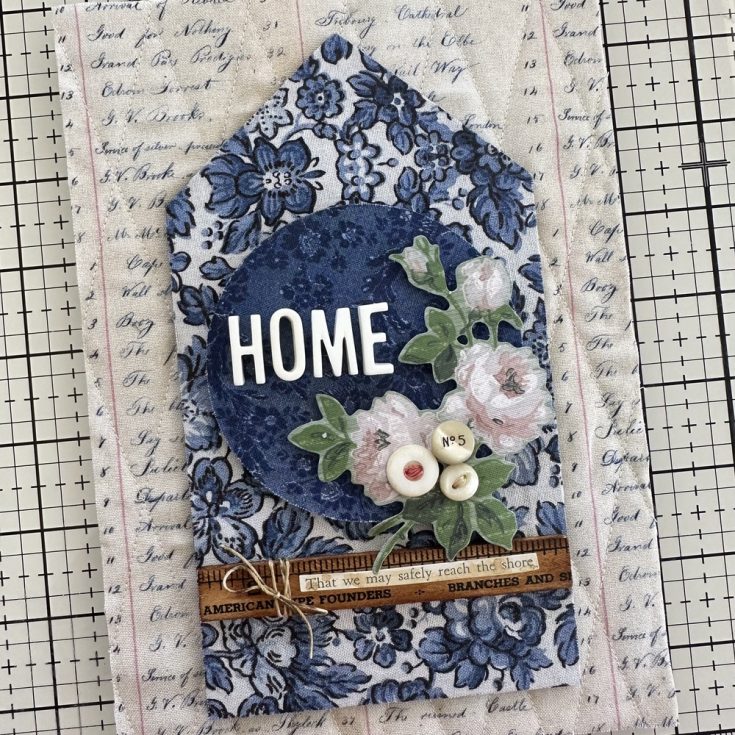
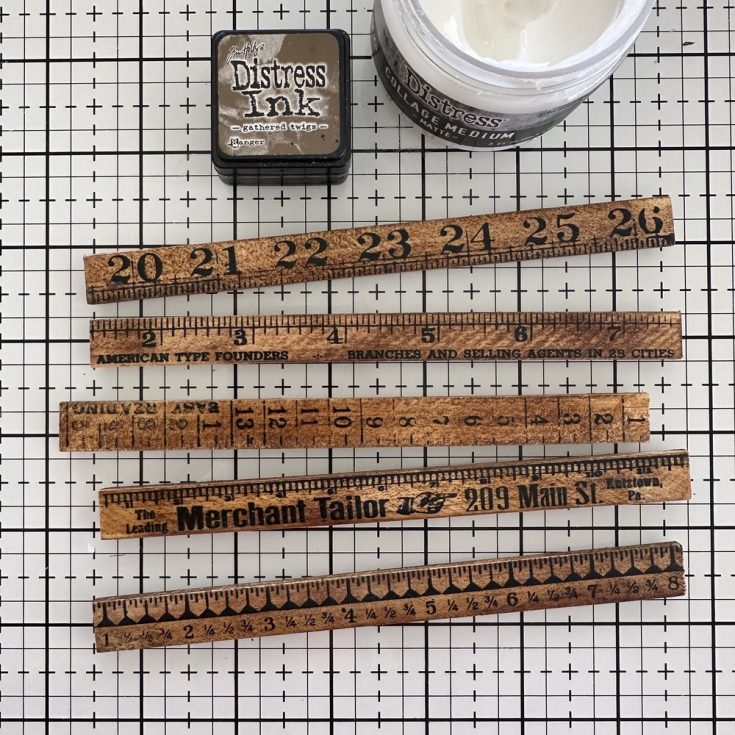
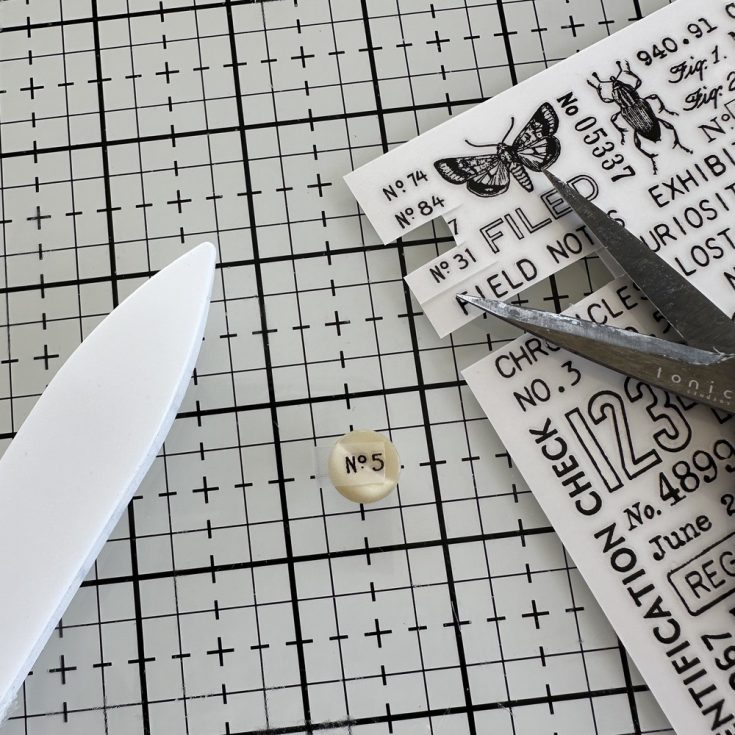
Cut the Ruler Piece to fit the House Shape (4”). Add a Clippings Sticker and a bit of old string (remember any string can be made to look old with Distress Ink).
Add the Ruler to the house with Collage Medium. I wanted that Clippings Sticker to look a bit more aged, so I made a puddle of Gathered Twigs Ink and water. Then I just dipped my fingertip into the ink and tapped it over the sticker. Clippings Stickers have a coating so the ink will sit on top for a a bit. Dry with heat tool and dab off any excess.
So you could be done with your piece, but I decided to add a frame. This is optional but the finished look is awesome, so lets get started.
The one thing you will need is five Ruler Pieces. That is a full package. So if you used one on the house you will need a second package of Ruler Pieces. I followed the same technique as the first Ruler, but this time I also colored the back of the each ruler.
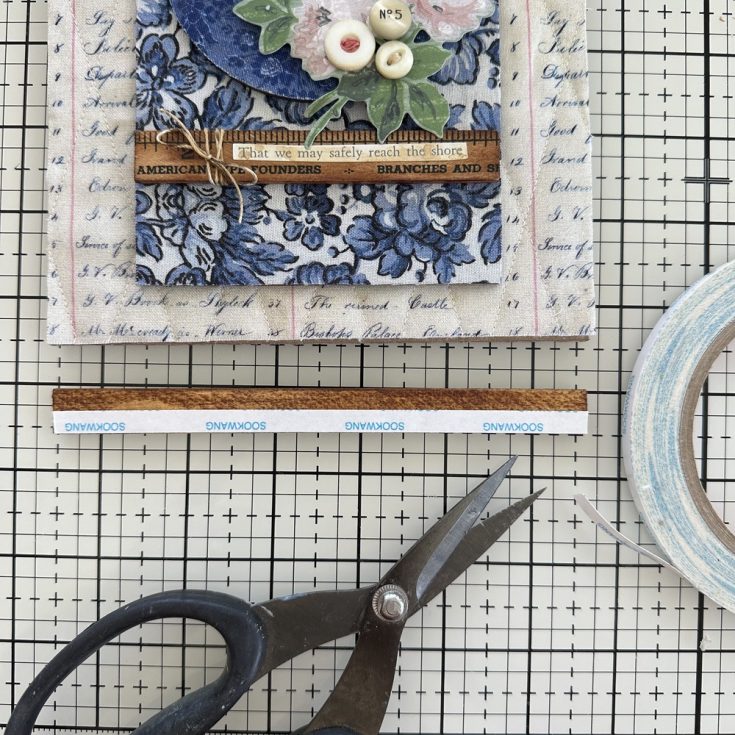
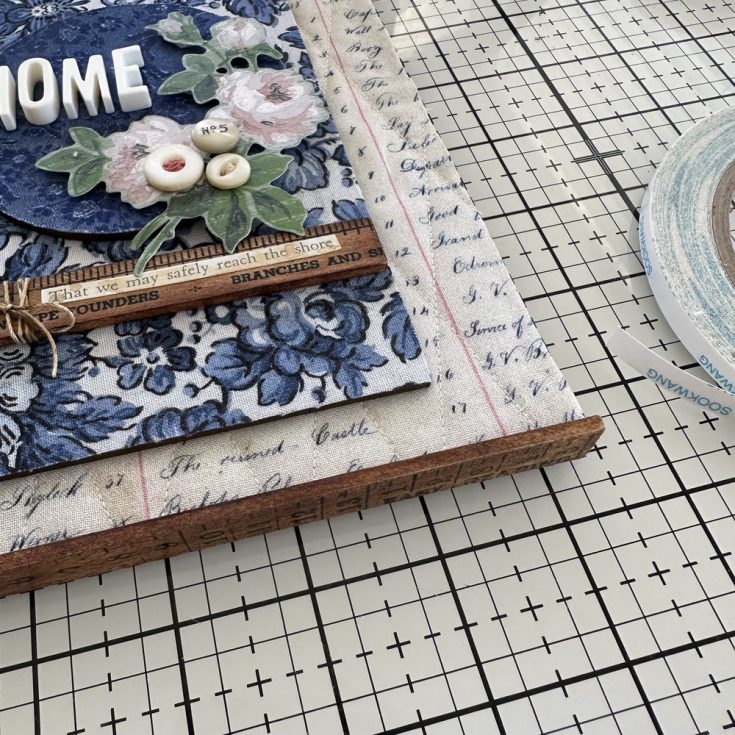
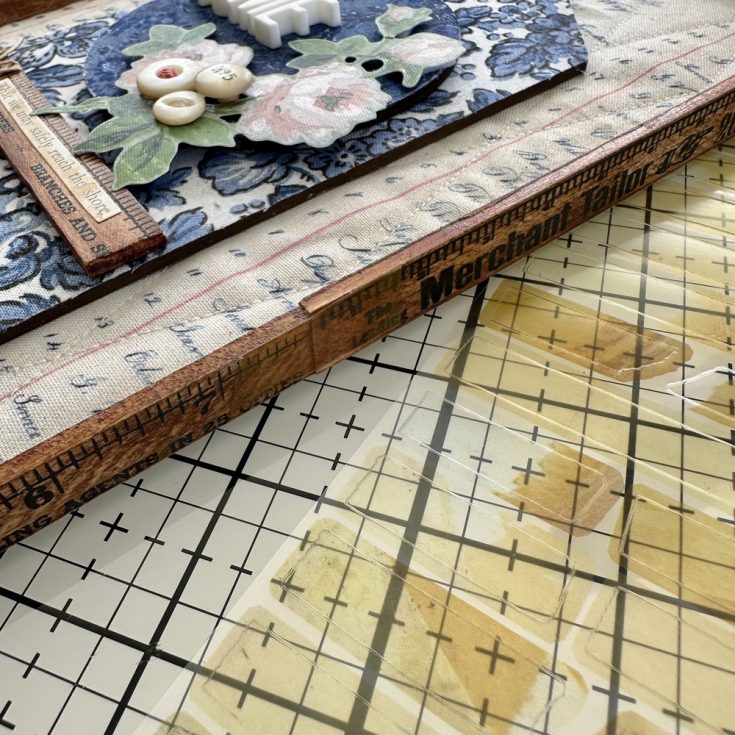
There are two options for adding the Rulers to create a frame, one is 1/4” Scor-tape (same thickness as the Etcetera Panel) and the other is Collage Medium. I used a combination of both and it worked great but if I could only use one, I’d use Collage Medium. Start by adding the Scor-tape or the Collage Medium to two Rulers, one for the top and once for the bottom of the panel. The Rulers and the Panel are both 6” wide.
Add the Rulers to the Panel.
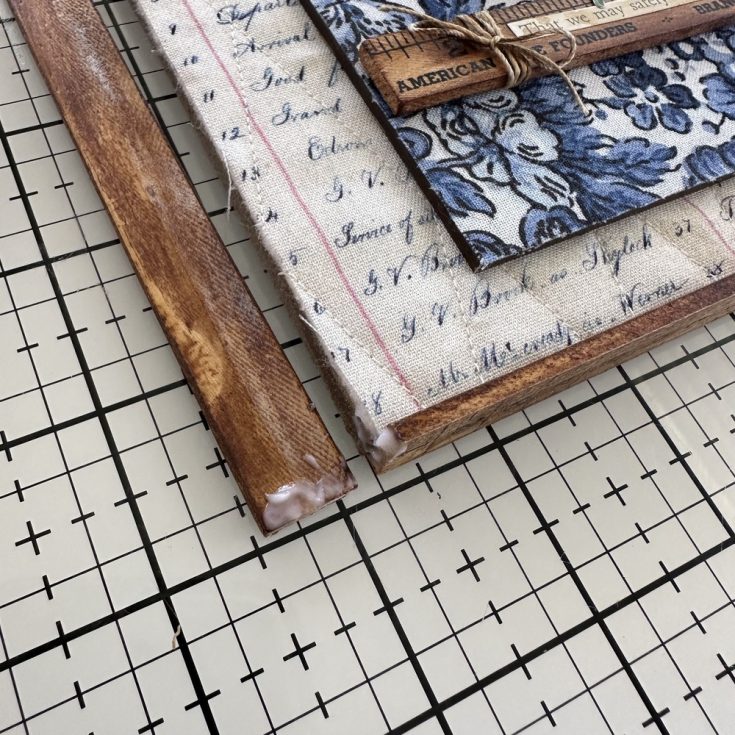
When it comes to the sides, you will need to add Collage Medium to the ends of the Rulers – this is the weak spot when it comes to Scor-tape – Collage Medium can help, but you have to allow it to do its thing and leave it to sit for a few hours.
Once the two Rulers have been added to the side you will have a 2 3/4” gap on each side. I left the gap at the bottom on the right and a gap at the top on the left, so the break in the rulers is not in the same place (the break is less noticeable this way).

With the last of the 5 Rulers, cut into two 2 3/4” pieces.
Add each piece to the gap (remember to add Collage Medium) then place a strip of blue tape while you leave it to dry. Honestly, overnight is best.
Once your frame is secure, use Collage Medium to adhere paper to the back. I used a couple pieces of idea-ology Backdrop Papers from the Neutral pack. Notice the paper covers the entire back?(etcetera panel + edge of ruler)
If you have some Cello Tape Stickers, you can use these over the breaks in the frame on both sides. Another measure of security as well as being a great little detail.
SUPPLIES:
|


Thanks so much for stopping by, and to Paula for being our guest!
Join us LIVE!
Join us live with our founder Heidi live on Tuesday, August 12th at 10 AM ET to learn more about our HDSA Fundraiser and how you can support this great cause!

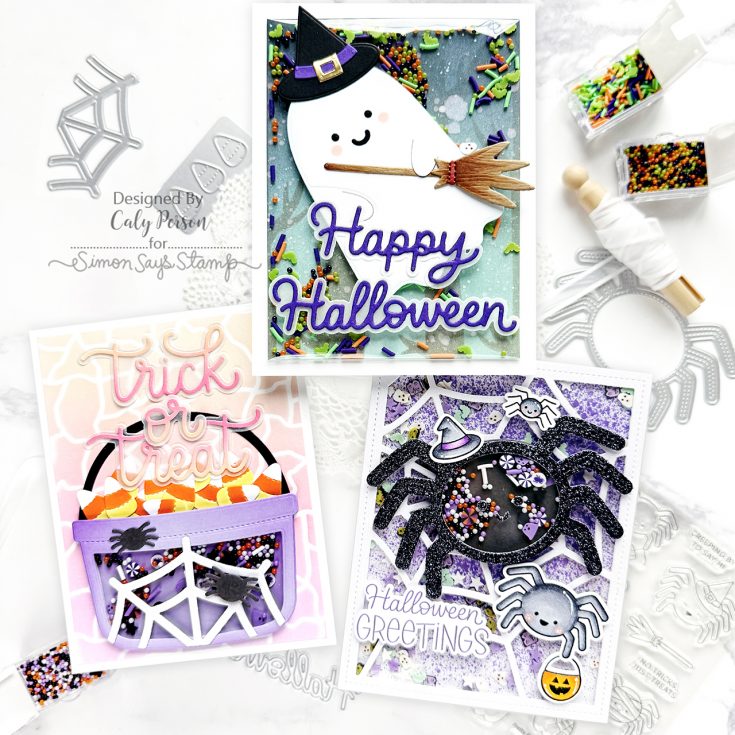
Explore NEW Halloween Goodies from Pretty Pink Posh!
Hello friends!
It’s Caly with you today and I’m thrilled to be sharing a few projects using the latest products from Pretty Pink Posh! The Halloween release is much anticipated each year, as they are always filled with great new products!
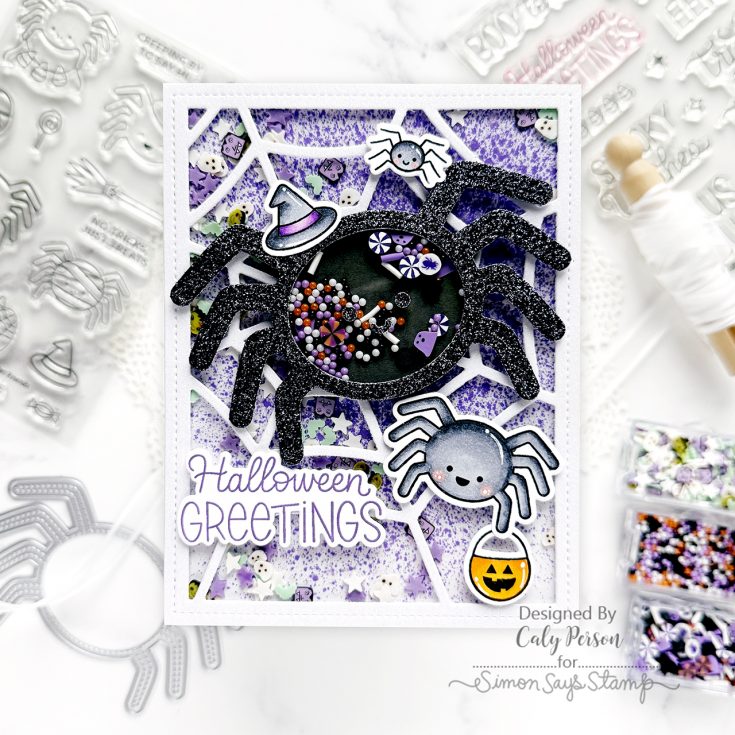
What’s better than a shaker card? A DOUBLE shaker card! The background uses the Spider Web Cover Plate. I spritzed the background with Wilted Violet Distress Stain spray and Royal Flush Solar Spray. The Spider Shaker die is on top with it’s own mix of shaker beads and clay embellishments. I paired this die with Spider Friends images.
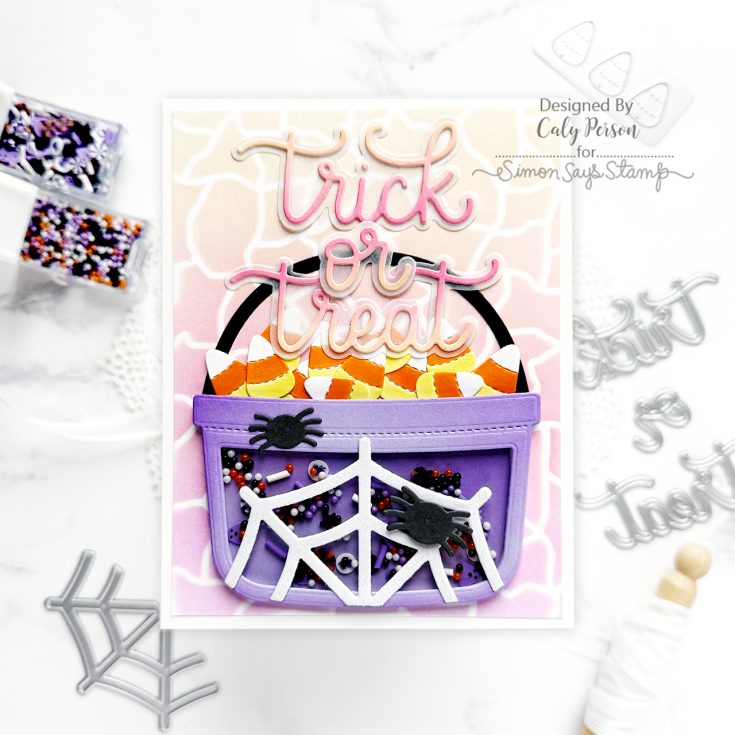
This release also features the Halloween Bucket Additions dies and it coordinates with the previously released Candy Bucket dies. I used the Crackle Background Stencil for the background and used the Trick or Treat Shadow dies for the sentiment.
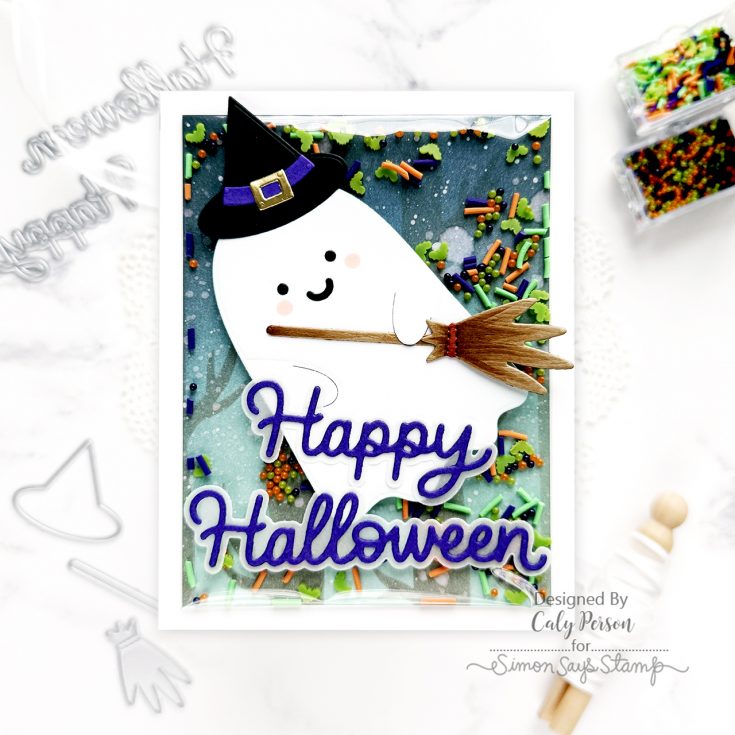
My final card uses the Halloween Holder Additions dies and it coordinates with the previously released Ghost Holder dies. I decorated the friendly ghost with a broom and witch hat. For the background, I ink-blended with the Spooky Trees Background Stencil to make an infinity shaker using more shaker beads and clay embellishments. I topped this one with the Happy Halloween Shadow dies.
I hope you enjoyed these projects! Be sure to check out the full release, available now at SimonSaysStamp.com!
~Caly
SUPPLIES:
3 Easy + Fun Space-Themed Card Ideas

Hi friends! Please join me in welcoming back the oh-so-talented and amazing Yana Smakula! (Please note: our dear friend Yana is Ukrainian. To show support to our brothers and sisters in Ukraine, please see Yana’s post HERE.)
Hello, crafters, this is Yana Smakula for Simon Says Stamp! Welcome back for another Yippee For Yana video!
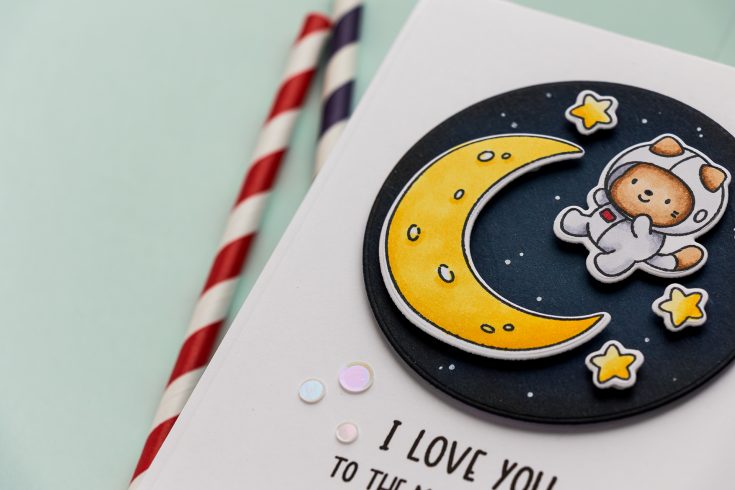
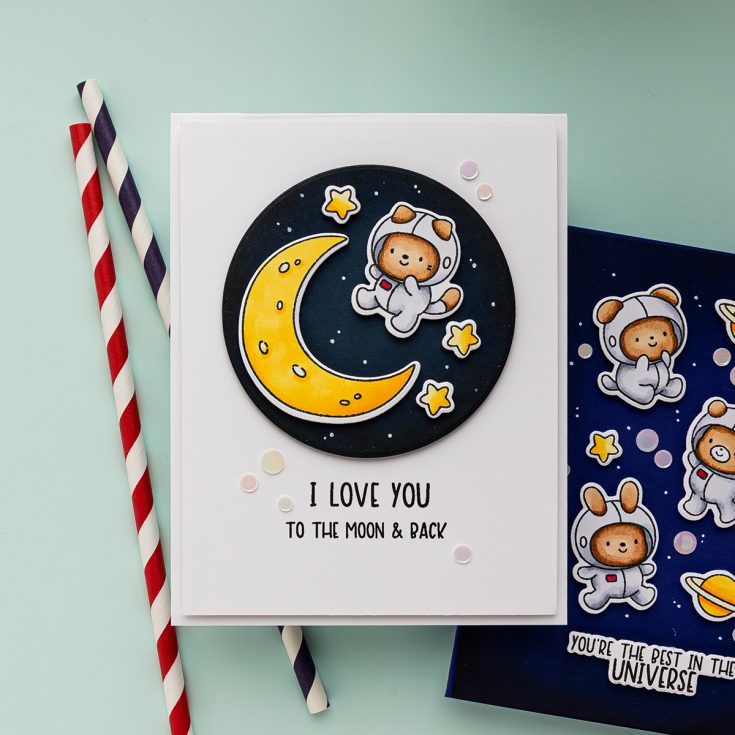
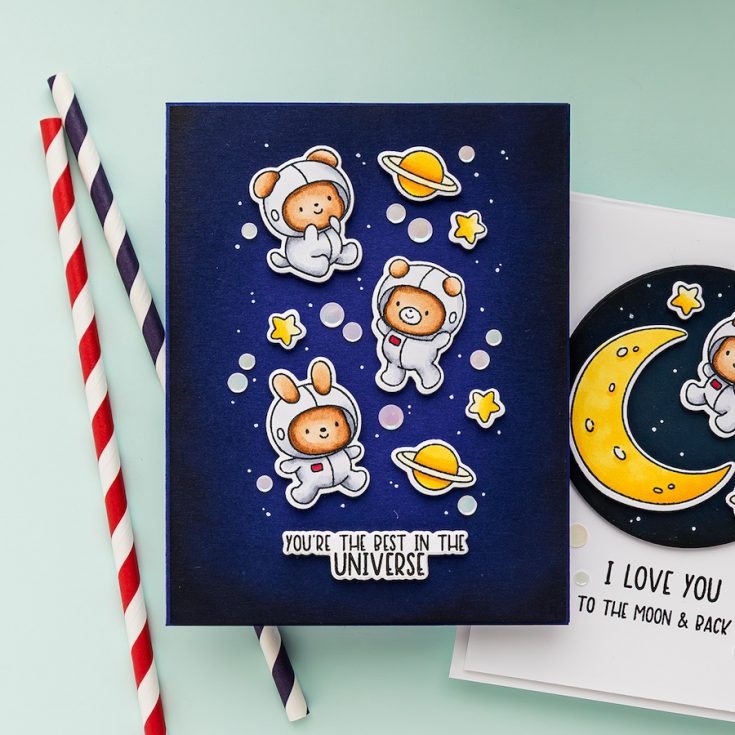
Today I’m sharing three fun and playful card ideas using the Shoot for the Moon stamp set. This adorable space-themed set is packed with whimsical astronaut bears, rockets, and celestial details that are just begging to be colored and used in scenes.
In today’s video, I’m walking you through how I created each of these cards step by step — from coloring tips to clever ink blending shortcuts. Let’s take a closer look!
Simple Cartoon-Style Coloring
I started by stamping all the images from the Shoot for the Moon set onto white Hammermill cardstock using Memento Tuxedo Black Ink. For the coloring, I went with a cartoon-style approach — easy and bright!
Copic Color Combos Used:
- Rocket: R38, R27, R24 + Warm Grays for contrast
- Spacesuits: W5, W3, W1 (to mimic white)
- Bears: E37, E33, E31 (my go-to brown trio!)
- Moon & Stars: YR04, Y19, Y15, Y11
- Pops of Red: R24 for accent details

Tip: When unsure about color choices, I always look for inspiration on Pinterest — just search terms like “cartoon astronaut” or “illustration rocket” for tons of ideas!
Once all the images were colored, I used the coordinating dies to cut them out — they’re super easy to line up and really bring the characters to life.
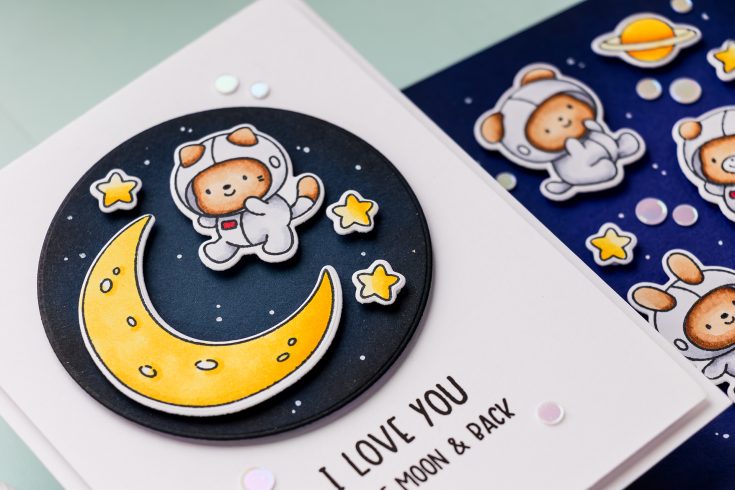
For the first card, I created a space-themed spotlight using a die-cut navy circle, blended with Pawsitively Saturated ink in Nightand Versafine Onyx Black ink to simulate a galaxy look. The images were arranged inside the circle and popped up with foam adhesive for dimension.
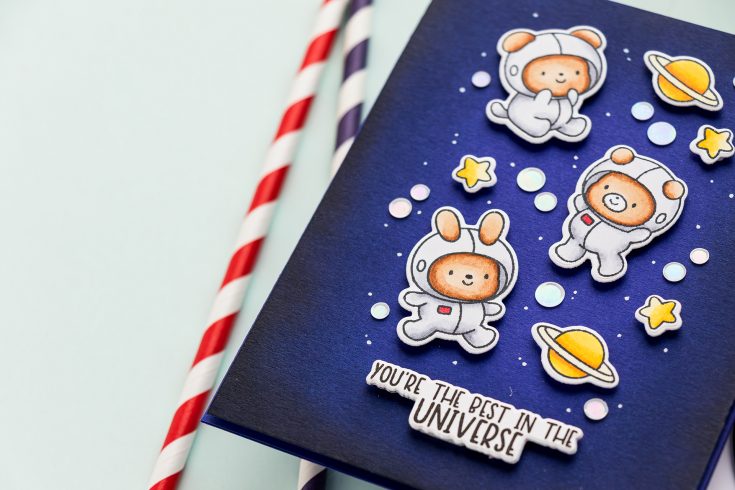
The second card features a blended background on Simon Says Stamp Blue Violet cardstock. Using the same Night and black ink combo, I blended around the edges to create a rich, moody space effect.
I added multiple die-cut images to build a full space scene and finished off with more marshmallow embellishments and white pen accents. This is a great way to use a full batch of colored elements!
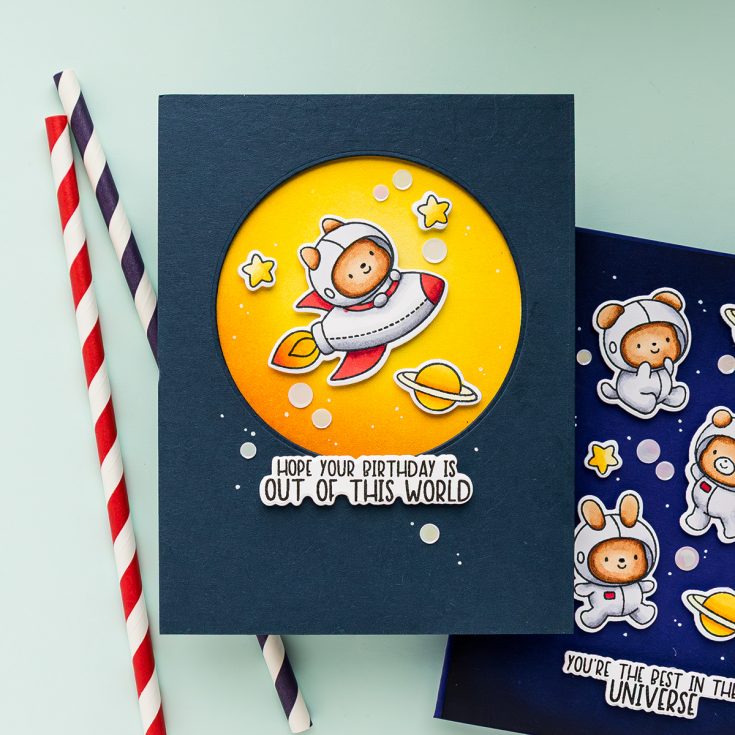
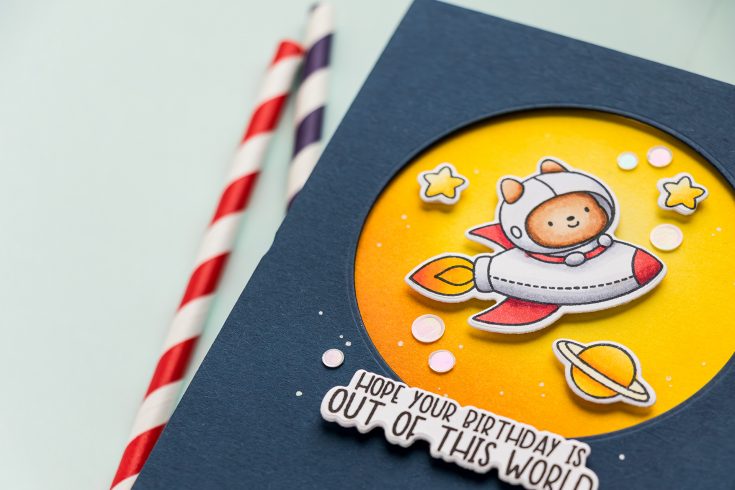
For the final card, I layered a Soft Navy panel (with a die-cut circle opening) over a Banana cardstock panel to mimic a glowing moon. I added shading to the yellow panel with Sunbeam, Citrine, and Clay inks.
The sentiment — “Hope your birthday is out of this world” — ties it all together perfectly. Once again, I added stars, embellishments, and those classic white dots to finish the card.
Thanks so much for joining me today. I hope you feel inspired to explore the cosmos in your next cardmaking session. Don’t forget to check out the full video for all the behind-the-scenes tips, and let me know which card is your favorite in the comments below!
WATCH THE VIDEO:

SUPPLIES:
|


