Funny Friday with Art Impressions: Mixing Stamps

Hey there, friends its Nina-Marie here with you! Welcome back to another edition of our Funny Friday series featuring Art Impressions. In this project, I am mixing and matching stamp sets to make a darling collection of custom Mini Critter Pots! How cute are these???
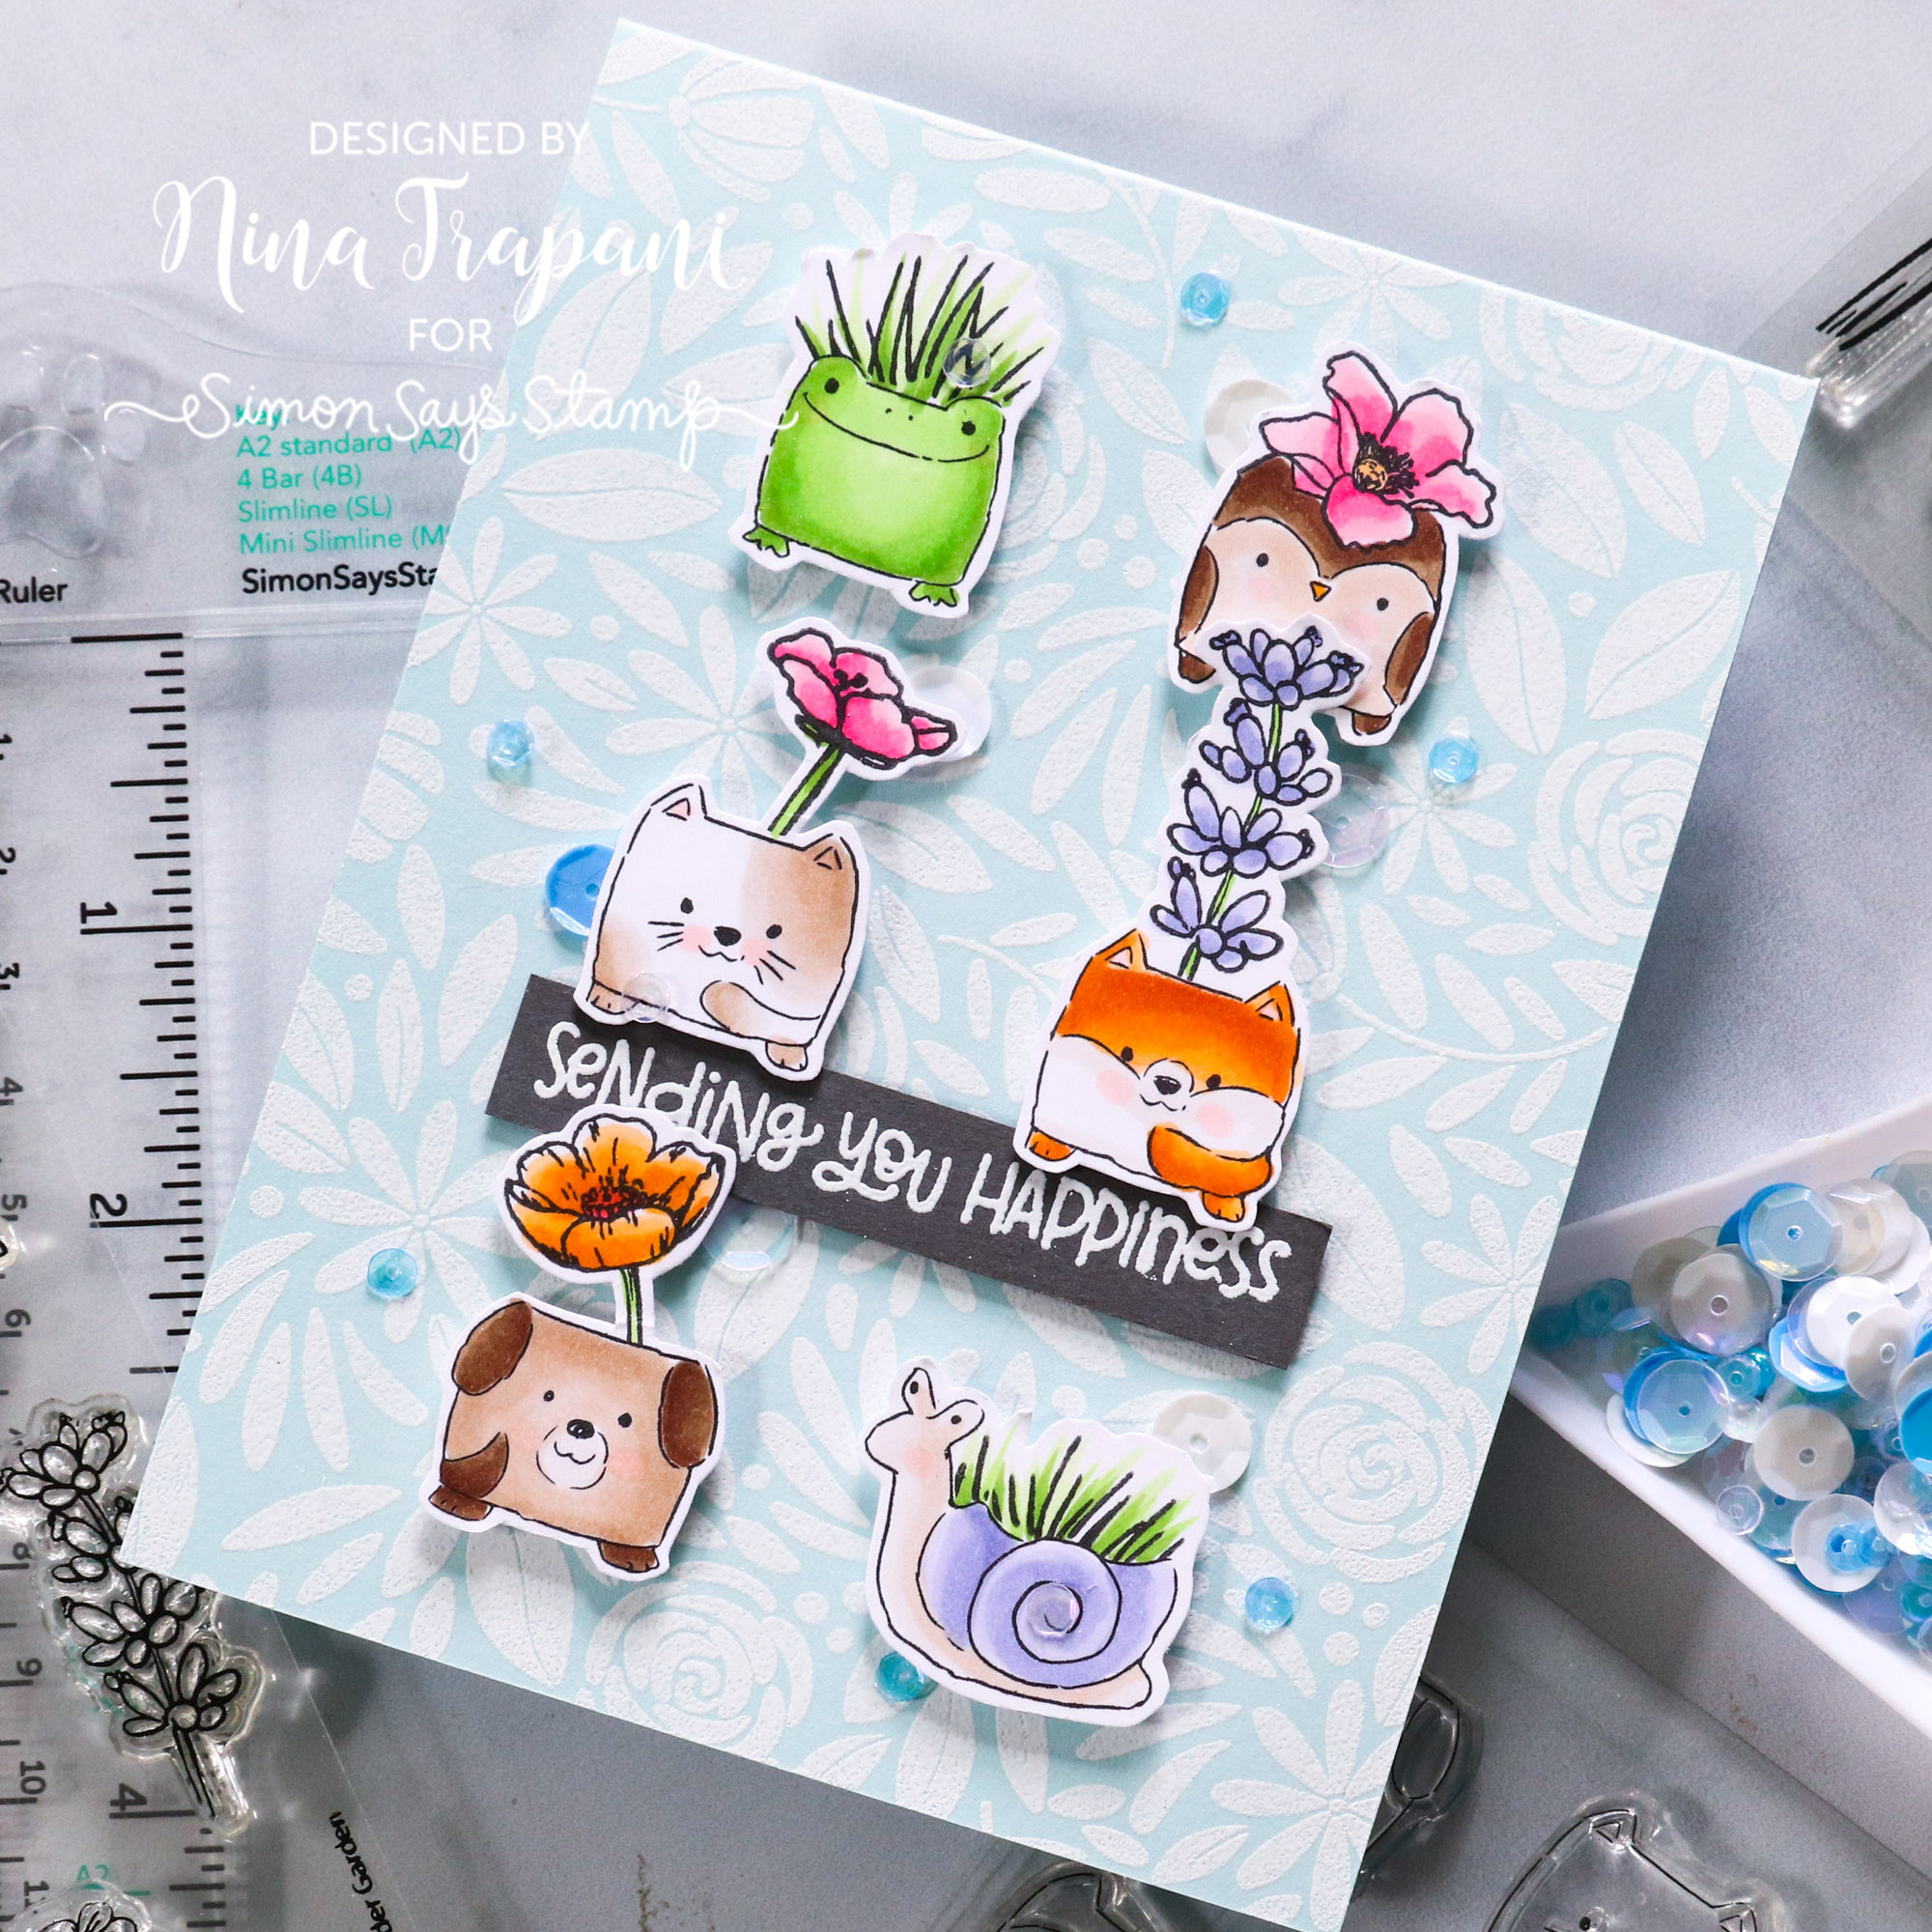
The Mini Critter Pots are able to be filled with whatever you prefer; you could even draw your own flowers in them! But if you like to stamp, find leaves, grass, or flowers that fit well inside—that’s exactly what I did here! I used Simon Says Stamp’s Thoughtful Flowers and Lavender Garden sets to fill them. Be sure to watch the video and see how!
WATCH THE VIDEO
SUPPLIES
|


Rainbow Stacked Die-Cut Greeting with Kristina Werner
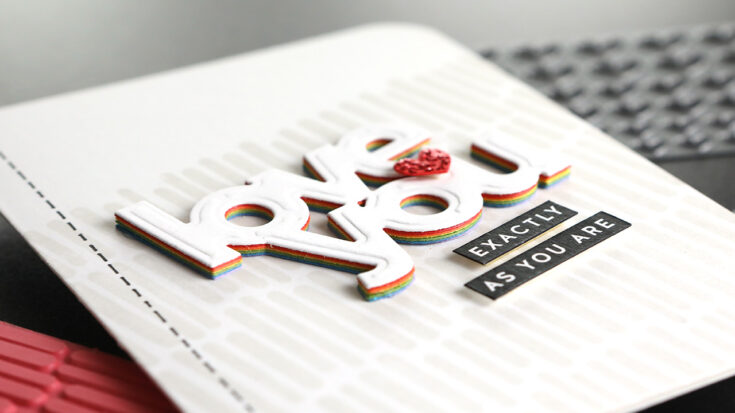
Hi all! Kristina Werner here. For today’s card, I wanted to create very substantial and thick die-cut greeting using a rainbow of cardstock colors.
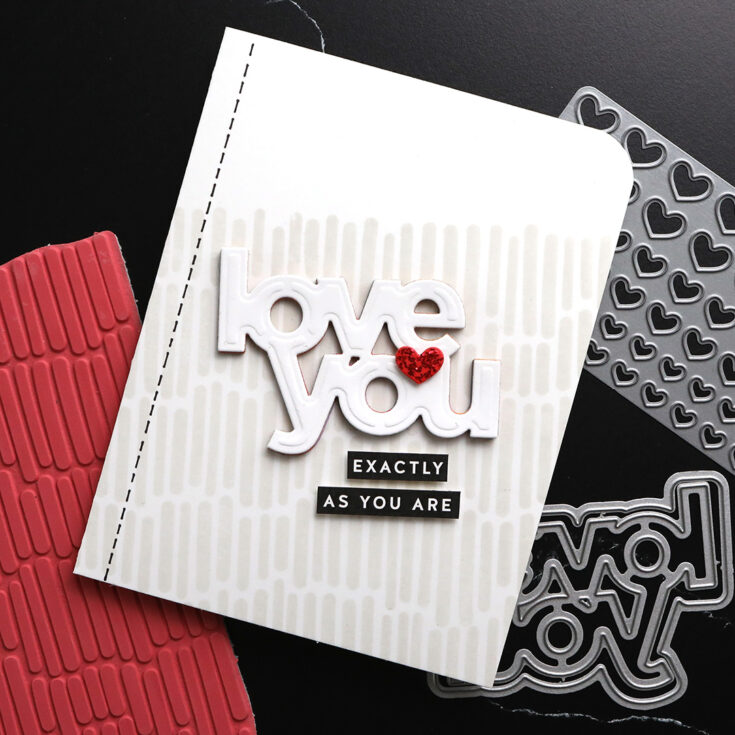
Looked at straight on, the greetings appears only to be white. But as soon as you tip the card, a rainbow edge is revealed.
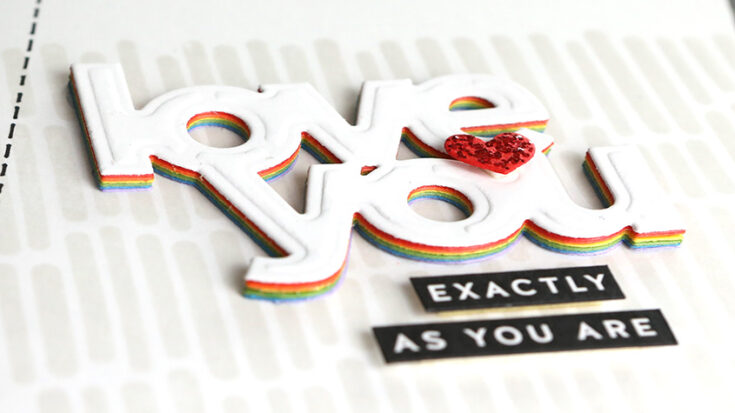
I used the Love You dies from CZ Design for my main greeting. I cut the words out once using white cardstock, and then six more times with different colors (see supplies below for exact colors). I stacked the die-cuts using Micro Dot adhesive, with the white layer on top.
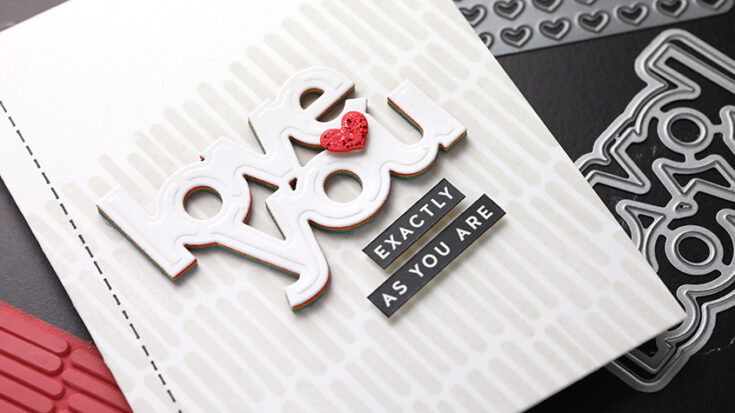
The background was stamped using the Lined Background stamp in Fog ink at a slight angle. Then I adhered the die-cut greeting at the stamp angle.
To finish off the card, I used a greeting from the Reverse Encouraging Words sentiment strips. I also adhered a small red heart on top of the greeting that was cut using the Mini Hearts Party die.
Thanks for stopping by today!
Supplies
|


Art Journaling with Shari Carroll: Adventure

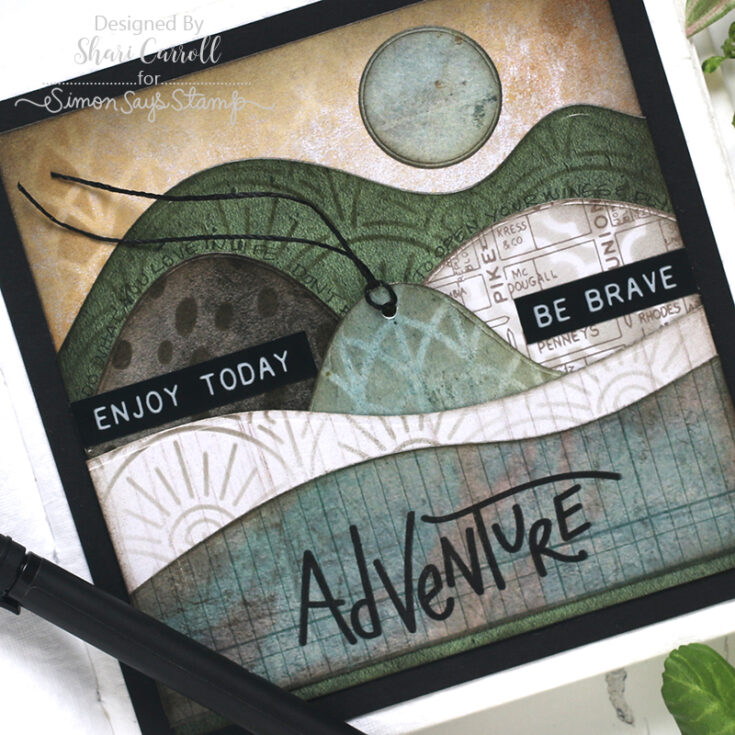
Welcome, everyone! It’s Shari here with a simple art journal page using natural tones of paper and Simon Says Stamp dies to create a mountainous scene.
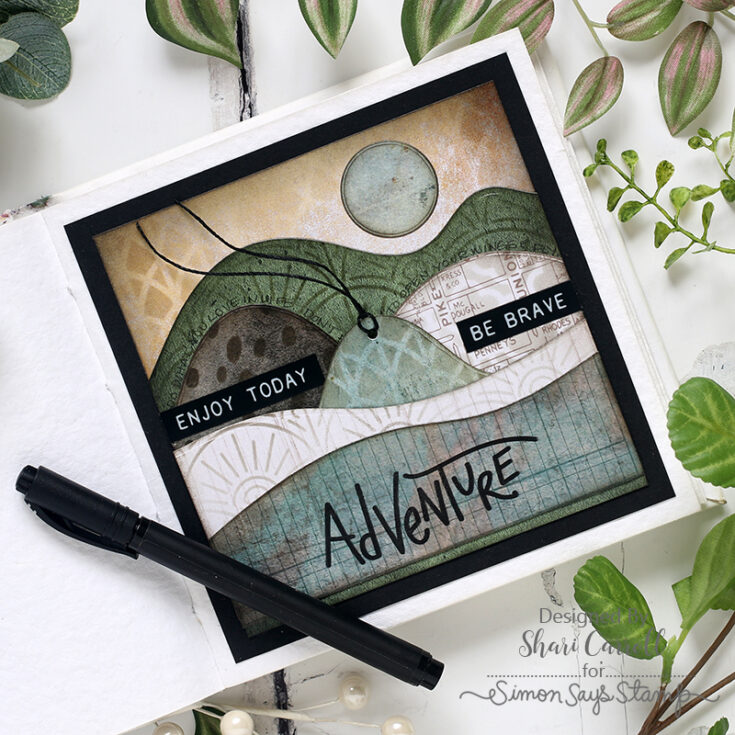
For this page, I’ve added a little pocket to hide some additional journaling using one of the hills as a tag.
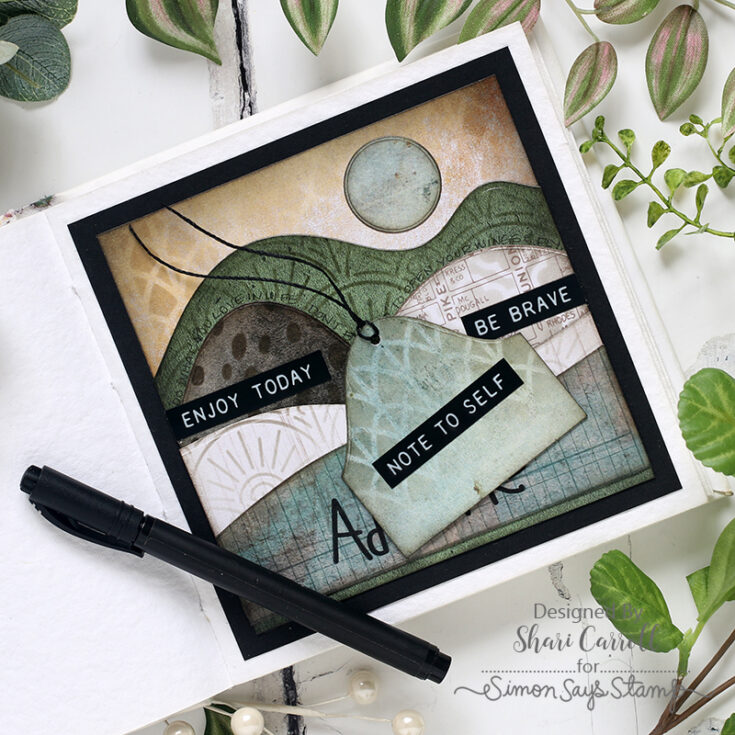
Art Journaling doesn’t have to be messy, they are intended to be your own personal expression and experiments. I hope this gives you some inspiration to give journaling a try.
You can see how this page came together in the video below. Enjoy!
SUPPLIES:
|


