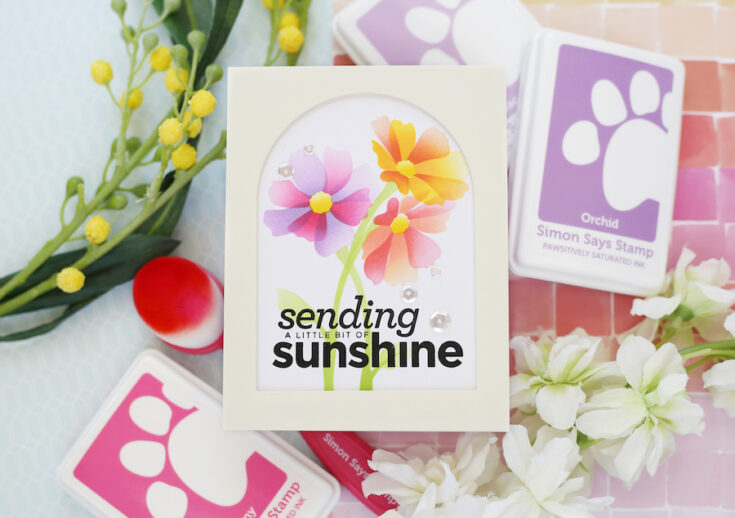
Amore Laurafadora: Layered Cosmos
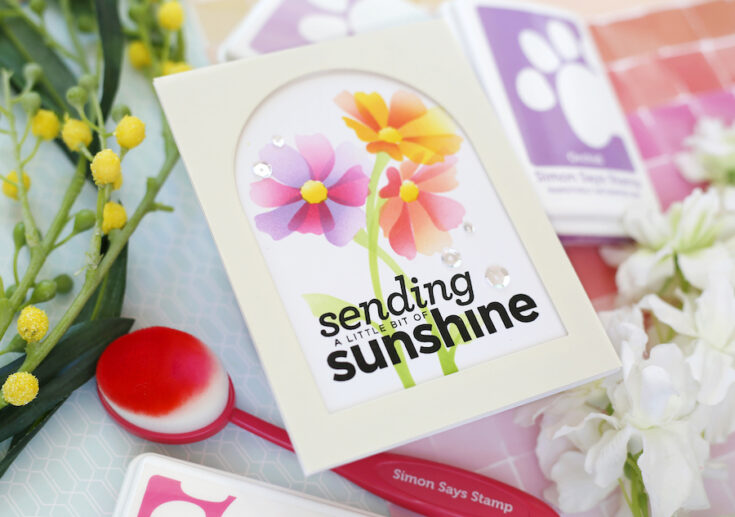
Hi friends! TGIF! Please join me in welcoming back special guest Laura Bassen who is sharing this gorgeous card featuring our brand new Layering Cosmos stencil and Beachy Keen stamps and colored with our Pawsitively Saturated ink pads! Be sure to watch the video below for all the details! Enjoy!
WATCH THE VIDEO:
SUPPLIES:
|


Thanks so much for stopping by, and thanks to Laura for being our guest!

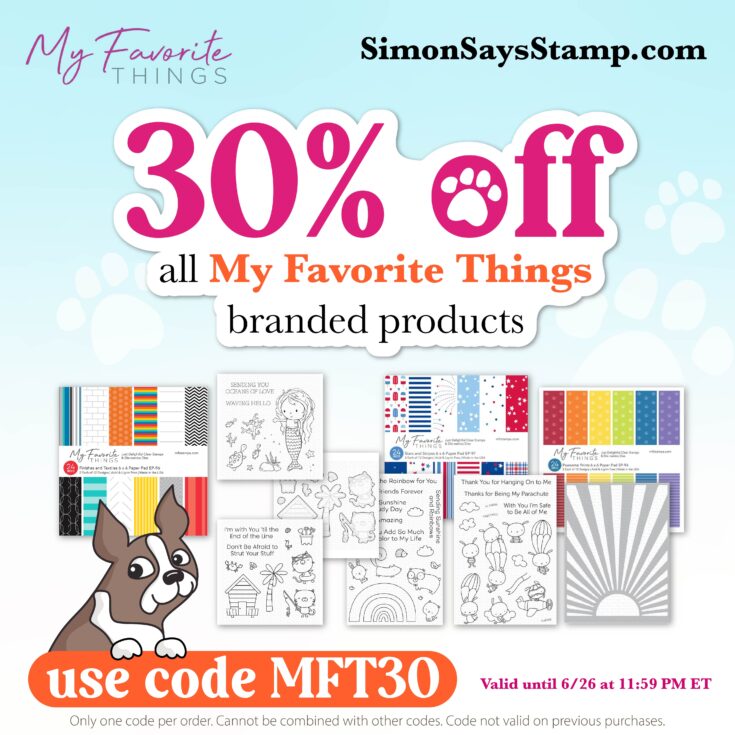
MFT Weekend Sale!
Happy Friday, friends! Surprise! We’re hosting a super RARE sale on a hot brand!! This weekend only take 30% off on all in-stock My Favorite Things branded items with code MFT30 at checkout! Shop early for the best selection, and enjoy!

Crafty with Caly: Sunflower Field

Hi friends! Happy Thursday, and please join me in welcoming special guest Caly Person back to our blog today! Be sure to read on and watch the video for all the details! Enjoy!
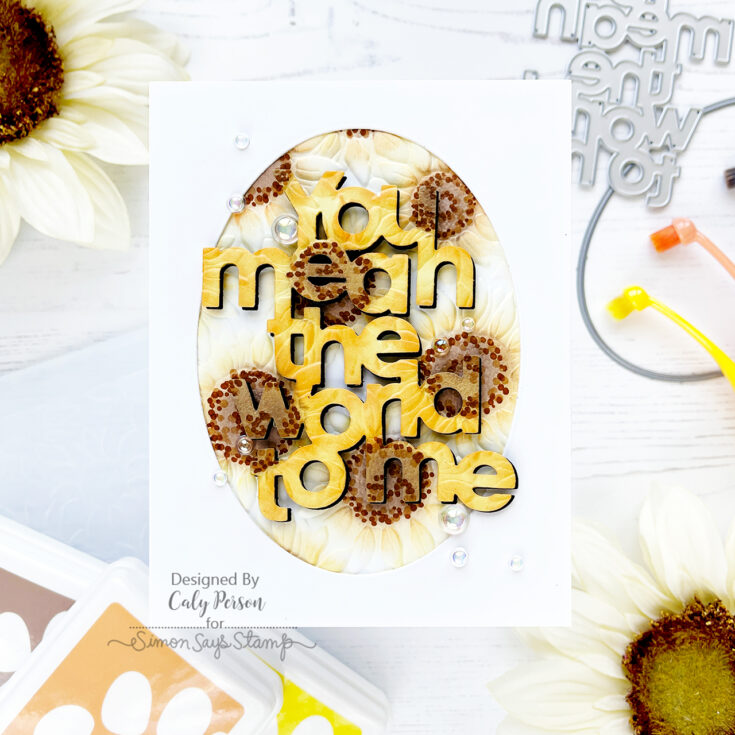
Hello! It’s Caly and I’m here to share a card using the “spotlight” technique. This is often done with stamping but today, I’m going to use a die-cut sentiment and an embossing folder!
The Sunflower Field embossing folder is new from the Let’s Chill release. It comes with a die for a single sunflower and you can use it also for the spotlight technique, but I decided to use a large sentiment die instead. To create a spotlight, we first need to emboss our image and add color. You can choose to color a single image to “spotlight” that image, or use more color to “spotlight” a certain area on your card.
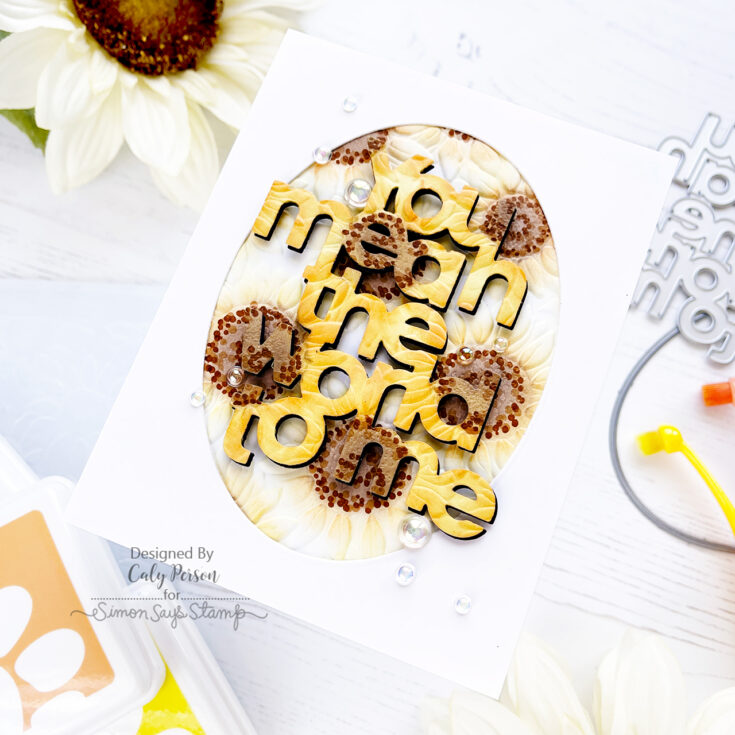
I chose to ink-blend my embossed image with Pawsitively Saturated Inks in Lemonade, Cantaloupe, and Cappuccino. After ink-blending, I also added some details to the sunflower centers with Copic markers by stippling dots for texture using E34 and E37.
WATCH THE VIDEO:
For my spotlight effect, I used the You Mean the World to Me die and die-cut it in Lemon Chiffon cardstock, then I embossed it. I then ink-blended and colored it as I did before to mimic the exact look as on my full sized panel. Because I die-cut my base layer in yellow, I also started with the Cantaloupe ink and intensified the colors to give it more focus.

I gave my die-cut/embossed sentiment a drop shadow by die-cutting it a second time in black. I added foam tape to the back and adhered it in alignment with the original image after die-cutting a Nested Oval window. To finish, I added some iridescent bubbles.
I hope you like this technique! Thanks for stopping by today! ~Caly
SUPPLIES:
|


Thanks so much for stopping by, and thanks to Caly for being our guest!


