July 2022 Card Kit Inspiration with Kristina Werner
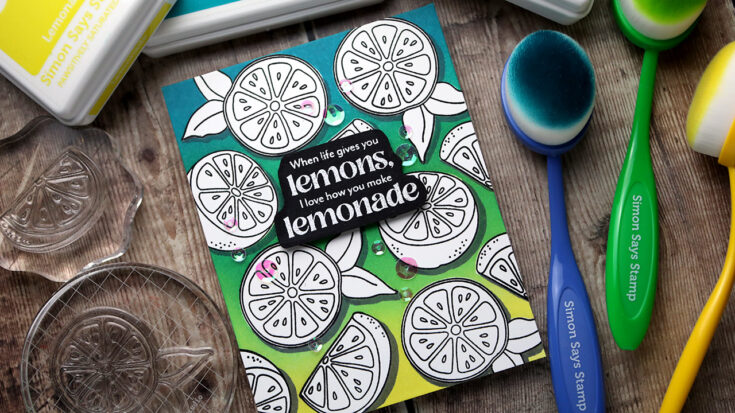
Hi all! Kristina here with a card made using the July 2022 Card Kit! I use the You Shine stamp set from the kit to create a fun ink blended card.
I stamped and masked all the lemon images on the card front, and then blended inks over the top. I used Lemonade, Limelicious, and Ocean ink from Simon for all the blending. And then after removing the masks, a dramatic black and white (plus blended color) background is revealed.

To finish off the card, I stamped and heat embossed a greeting from the stamp set, and then popped it up off the card. I also added a few sequins.
I hope you enjoy the video! You can grab the July 2022 Card Kit HERE, or subscribe to this kit and future kits HERE.
Supplies
|


EZ with CZ: Add a Little Texture

Hi friends! Happy Sunday! We’re delighted to welcome back special guest Cathy Zielske to our blog in the latest edition of our monthly EZ with CZ series! Read on and be sure to watch the video for all the details! Enjoy!

Hello Crafty Friends! It’s Cathy Z. here, back with another installment of EZ with CZ! Today I’m sharing a fun way to create a background panel with simple tone-on-tone texture: use those embossing folders!
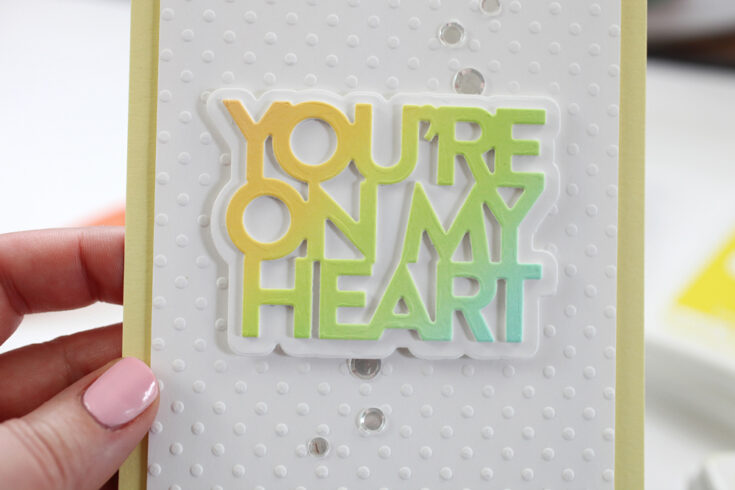
I love a good Swiss dot folder and this one from Gina K. Designs is great and will emboss up to a 5 x 7 size. The perfect topper is a beautifully blended (with Pawsitively Saturated Inks!) sentiment like this one called You’re on my Heart!
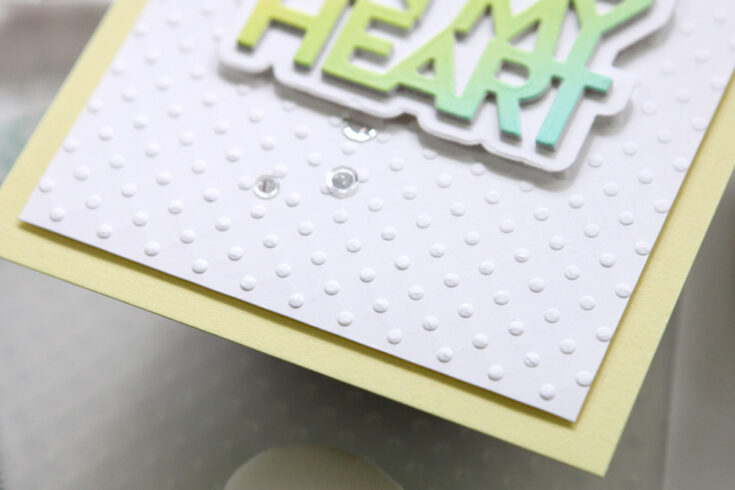
The texture is subtle but it creates the perfect home for whatever greeting you want to use. Here, I created a simple ink blend for my top die cut layer. Easy and breezy!
WATCH THE VIDEO:
Thanks so much for stopping by! See you back here next month with another card project.
SUPPLIES:
|


Thanks so much for stopping by, and thanks to Cathy for being our guest!

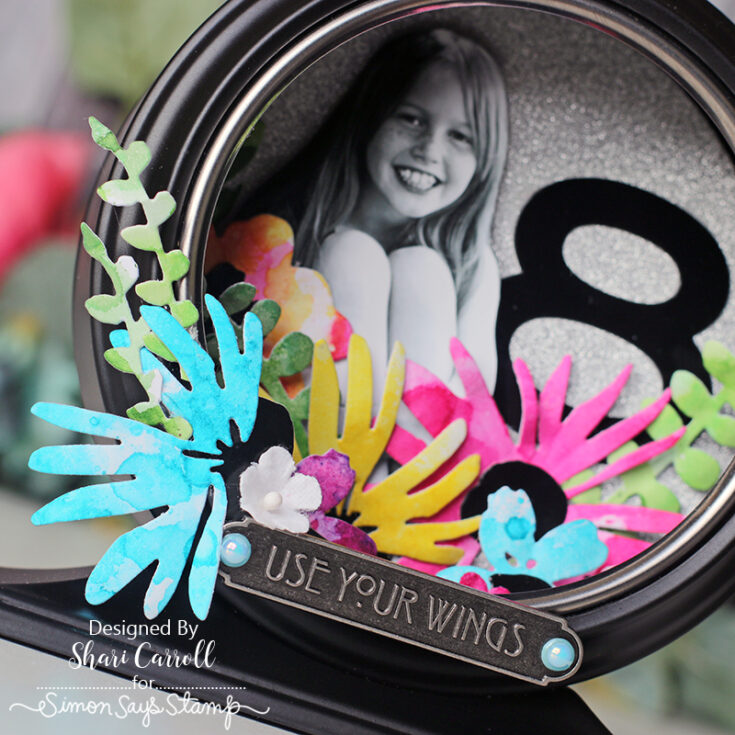
Mixed Media with Shari Carroll: Make It Personal

Happy Saturday, everyone!! It’s Shari here with a mixed media project that’s bright and cheerful to celebrate Melody’s 8th birthday. I wanted to give this Tim Holtz Ideaology Curio Clock a 60’s feel with some Flower Power!

She is so much like me, even her style when I was her age. I’ve used a variety of Distress Spray Stains to color some cardstock. Once the papers were dry, I die-cut them with Tim Holtz Sizzix Modern Floristry dies. I used the Tim Holtz Shaping kit on each of the flowers to give them some curves and form, then assembled everything using a hot glue gun.
Want to see how this is made? Check out the video below! Enjoy!!
SUPPLIES:
|


