Black Friday Sitewide Sale starts NOW!
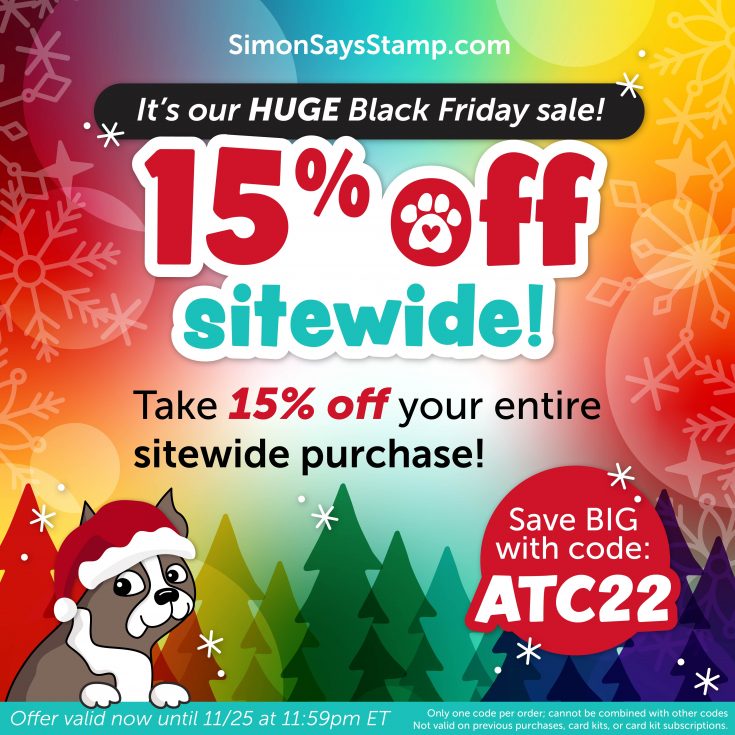
Hi friends! ‘Tis the Season to shop! Today we are providing a very rare STOREWIDE discount! Use code ATC22 at checkout to receive 15% off your entire purchase of in-stock items! It’s the perfect time to grab a gift or something on your project list! Please enjoy!
Thanksgiving SALE! Plus, Oh Deer Gift with Purchase!
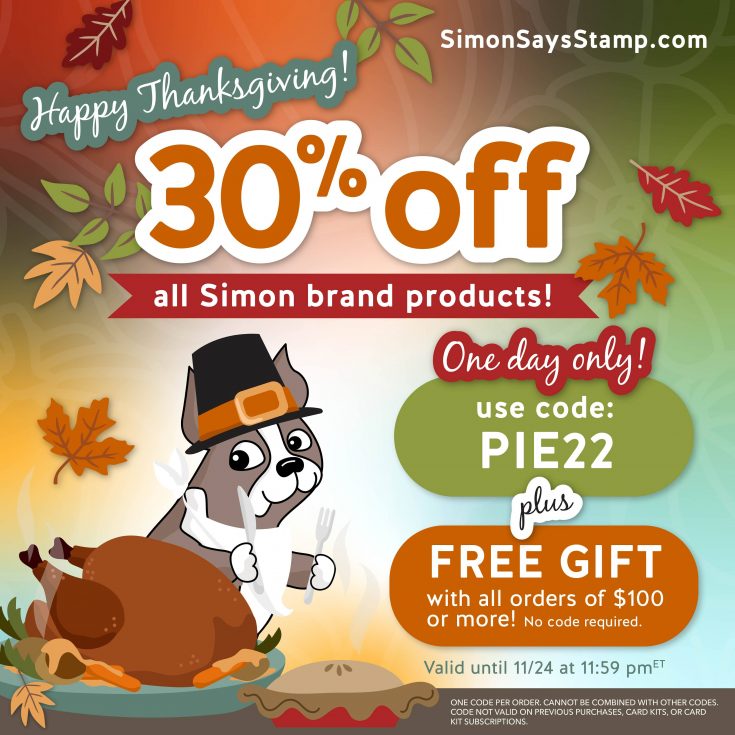
Hi crafty friends! Happy Thanksgiving! This is a special time of the year to gather and celebrate the people in our lives that we are so grateful for. We hope you know that we are SO THANKFUL FOR YOU: our loyal and loving customers! You inspire us, make us smile, and allow us to do what we love. THANK YOU!
To celebrate with gratitude, we are having a special sale TODAY ONLY where you will save 30% off in-stock Simon Says Stamp branded products with code PIE22 at checkout!
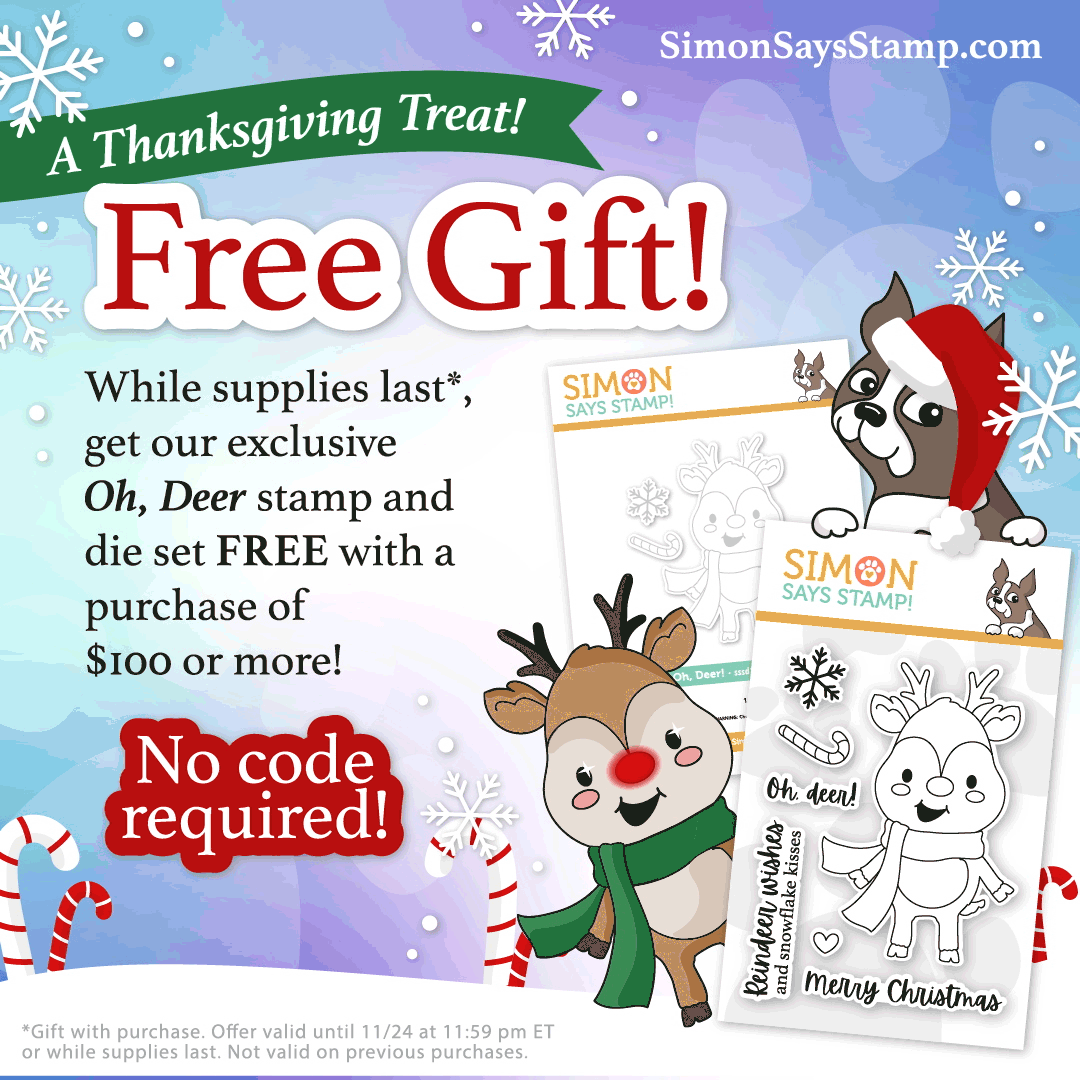
As a special bonus, any order that is subtotaled at $100 or more will automatically receive this ADORABLE 3×4 Oh Deer clear stamp AND coordinating dies SET for FREE (no code required!)! This stamp and die set will be available as a free gift while supplies last and is not currently available for sale separately. We hope you enjoy this special treat! Happy shopping!
JUST released TODAY exclusive NEW DOORBUSTERS!
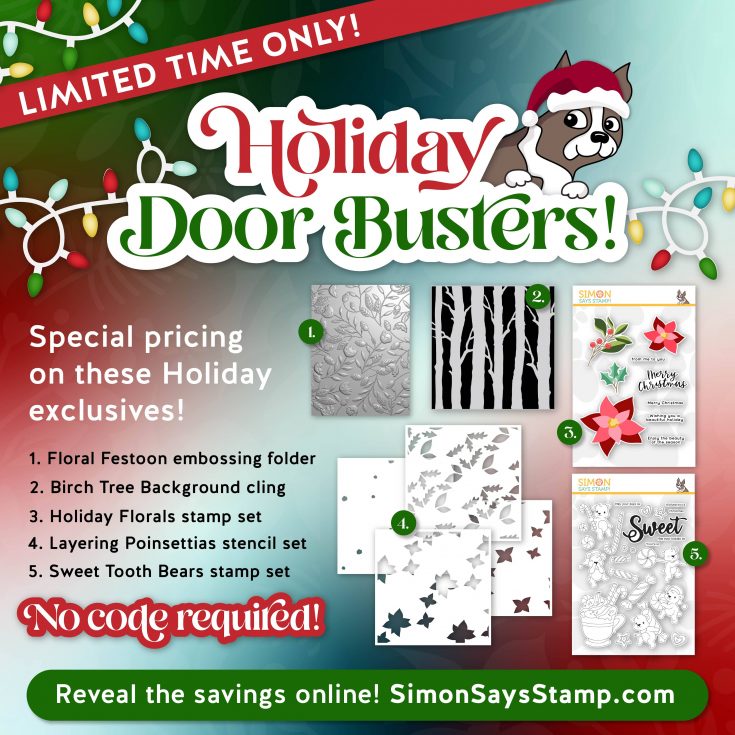
Hi friends! We’re kicking off a long weekend of FUN surprises off with a FUN promotion! We have 5 BRAND NEW exclusive products available at STELLAR deals, NO CODE REQUIRED for a limited time!
Purchase our Layering Poinsettias stencil set, Holiday Florals stamp set, Birch Tree Background Cling stamp, Sweet Tooth Bears stamp set, and/or Floral Festoon embossing folder for a limited time for a GREAT DEAL! Click or tap the items to reveal the deal!
ENJOY!


