Bright and Bold Miss You Card by Cheiron Brandon
Hi friend! Happy Sunday! I’m delighted to welcome special guest Cheiron Brandon as our guest today showcasing the re-released classic Handwritten Love die set from Tim Holtz Sizzix along with the Vault World Travel fan favorite die set, and some pretty pops of bold color with Tim Holtz Ranger Neon Alcohol Inks! Read on to learn more and enjoy!

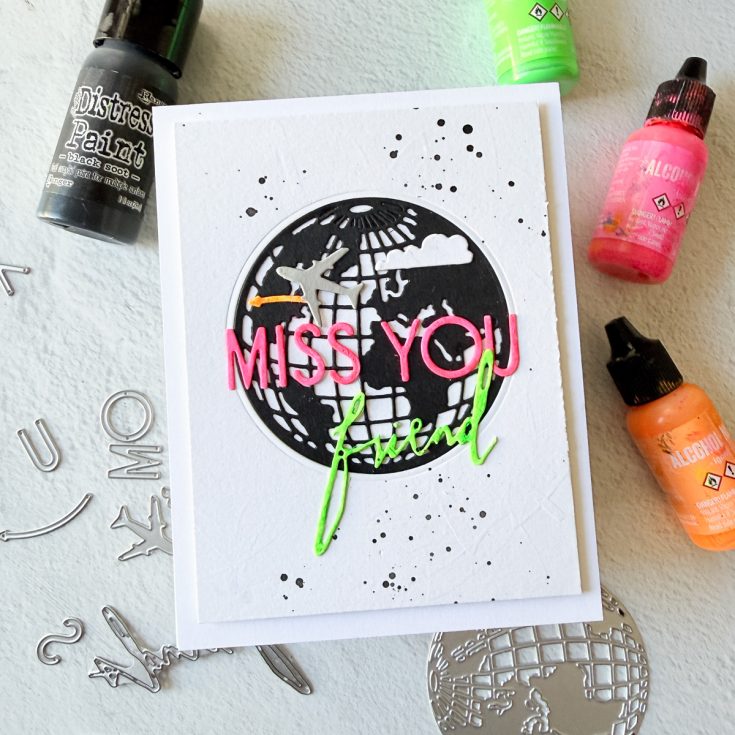
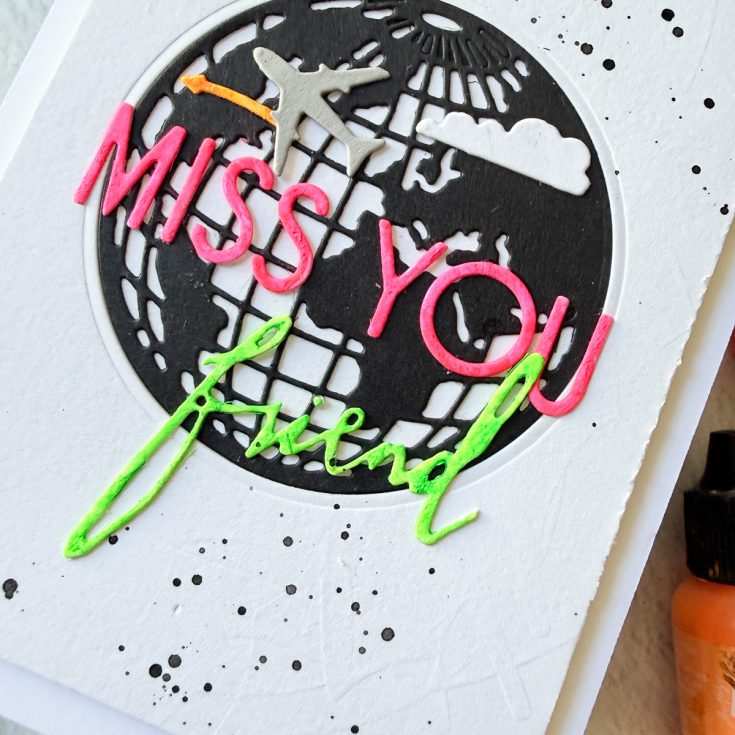
Hi there, crafty friends! It’s Cheiron here and I am thrilled to be back here on the Simon Says Stamp blog today with a fun card featuring some favorite Back From the Vault items from Sizzix. I love that all of these handwritten words are back from the vault and I’m creating a fun Miss You card in a simple palette of black and white with a pop of neon using Neon Alcohol Inks to color in my cut out words.
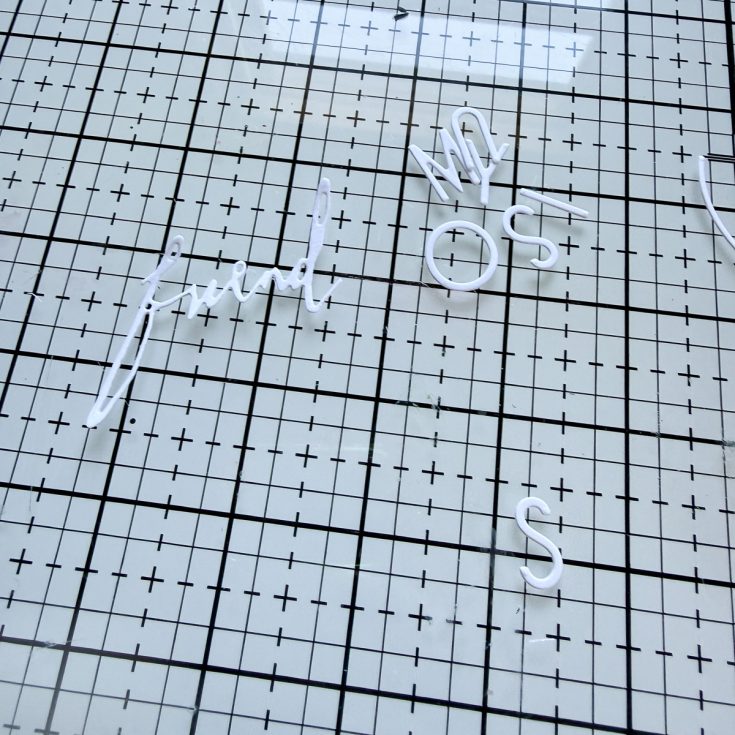
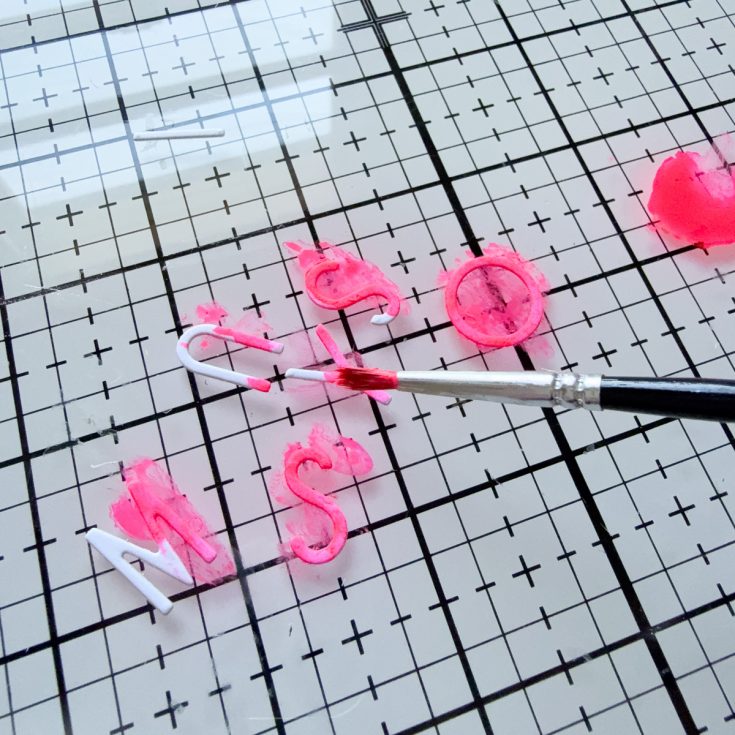
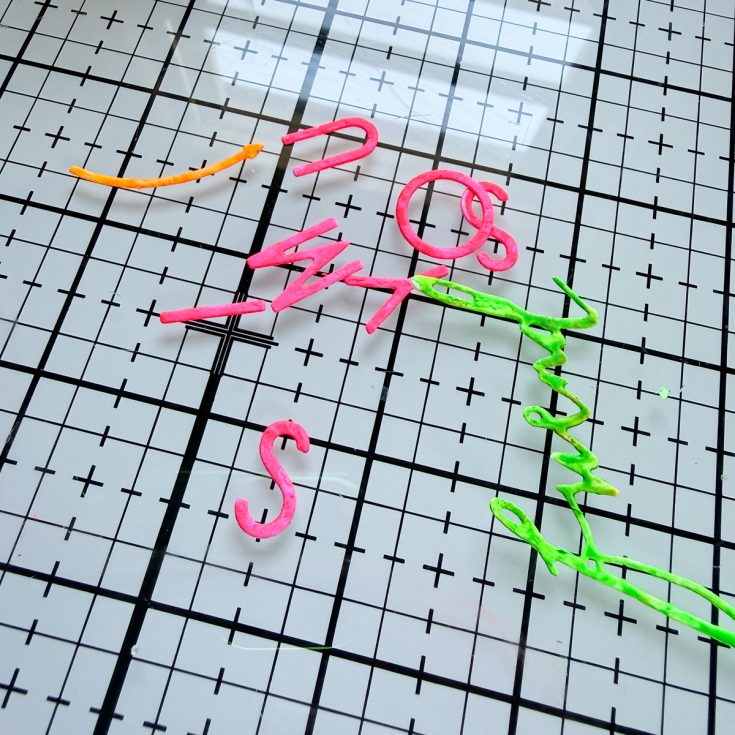
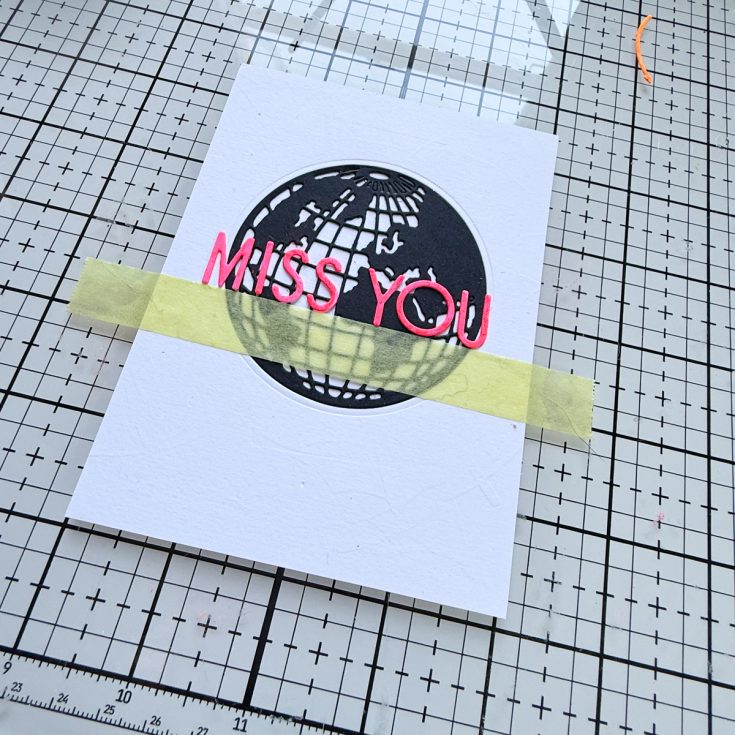
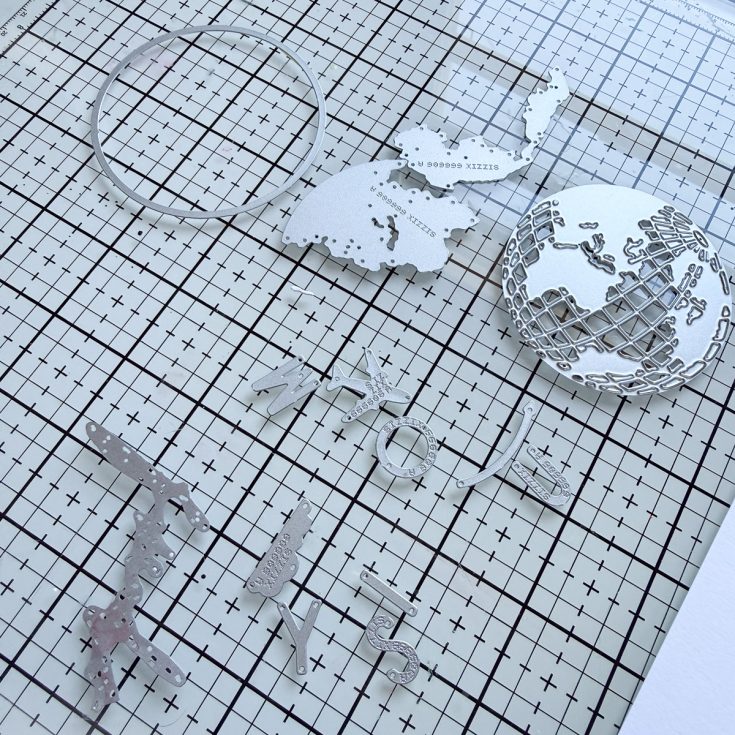
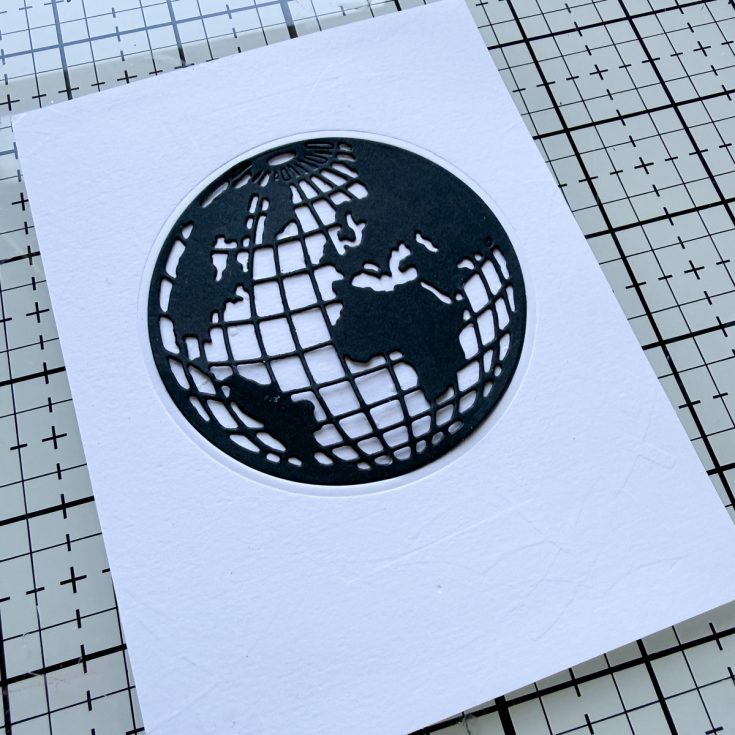
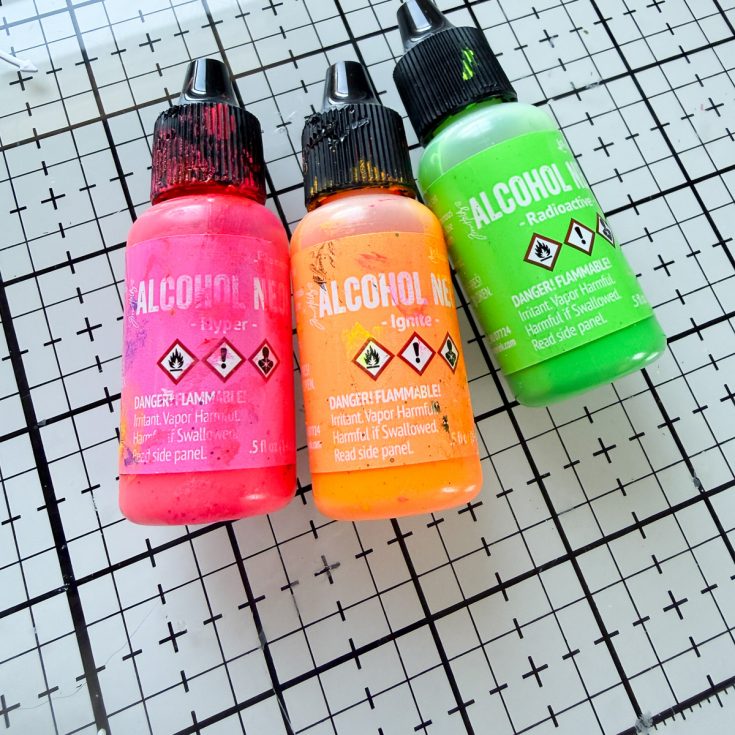
To begin, I cut the circle from the Vault World Travel dies from Distress Watercolor Cardstock and then backed it with another panel of white cardstock. Then I cut the globe die from Simon Says Stamp Black Cardstock and inlaid it into the circle I had cut out. I used the letters in the Vault World Travel dies to cut out the words Miss You and cut out the plane, cloud and arrow as well. I also cut the word friends from the Handwritten Love dies and then snipped off the “s” to spell friend. To color in my pieces, I used Neon Alcohol Inks in Hyper, Ignite and Radioactive. I just shook up my inks well, put a little bit onto my glass mat and picked it up with a brush to paint my papers. I let all of my painted pieces dry completely.
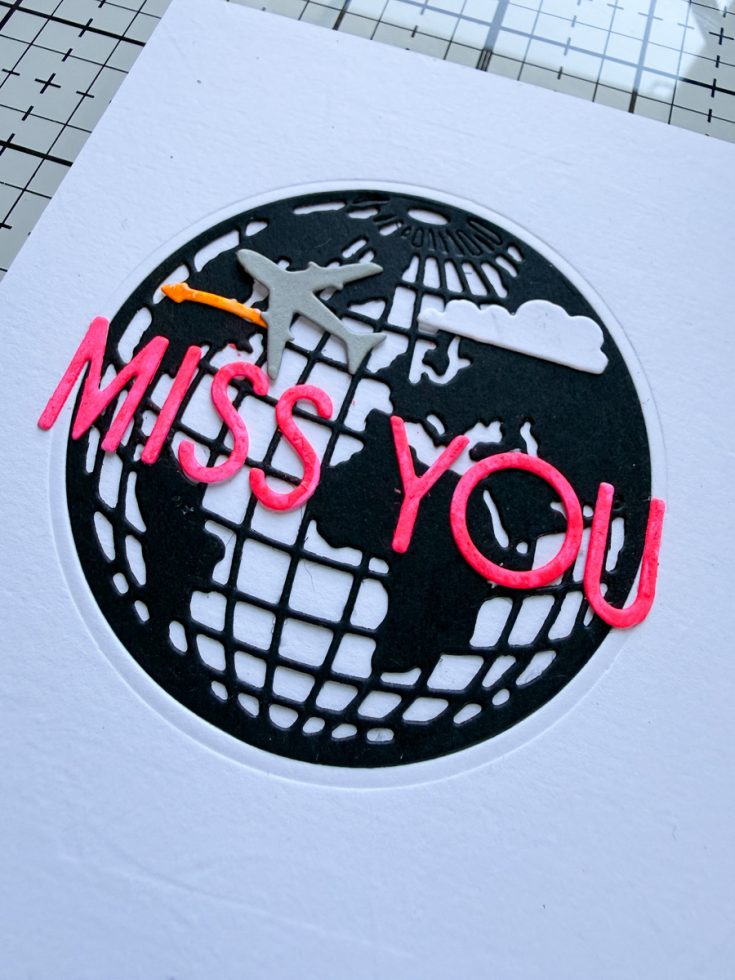
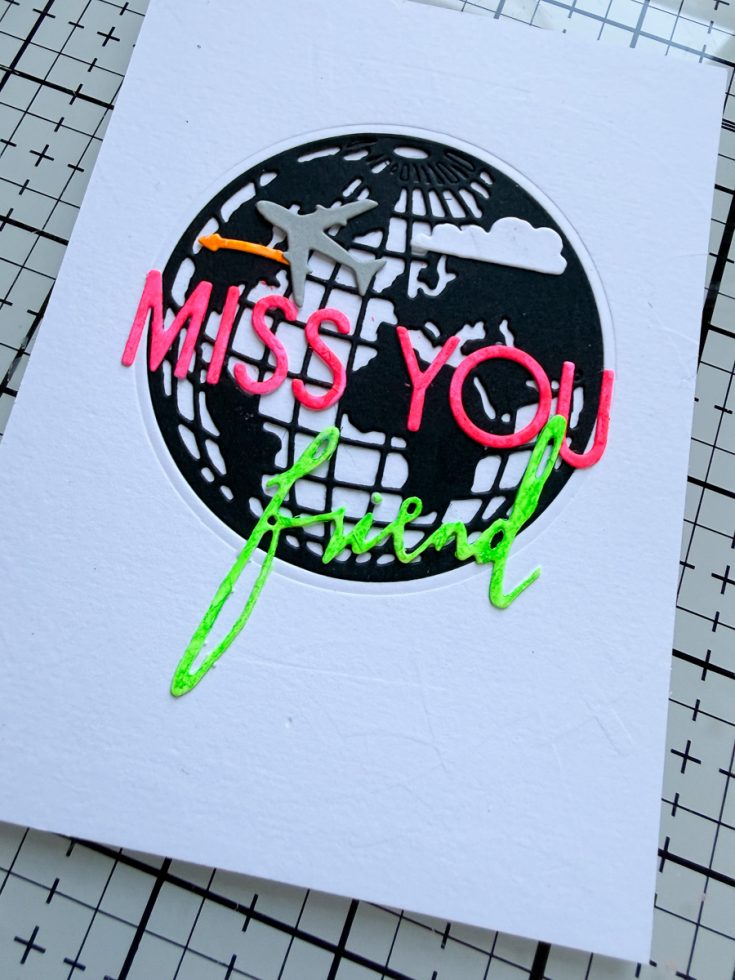
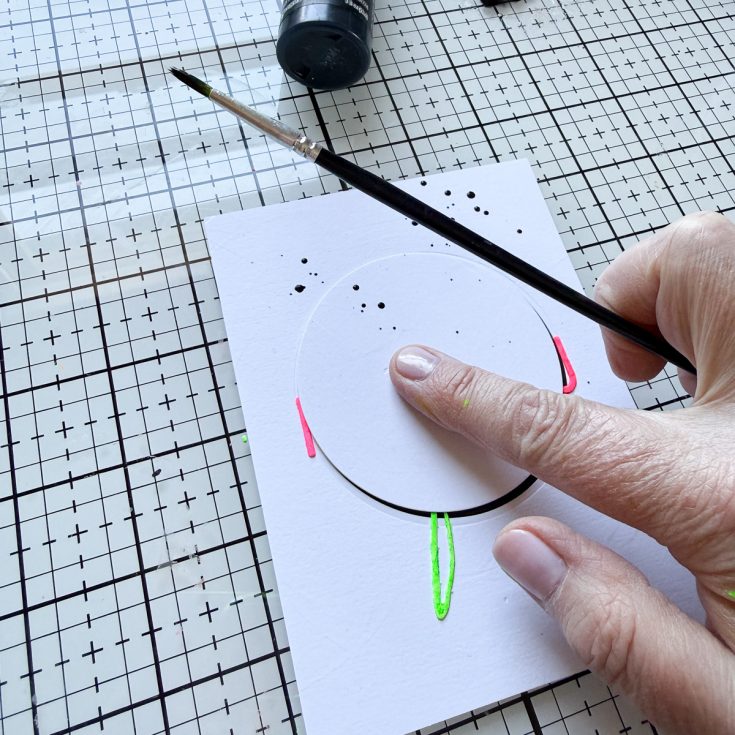
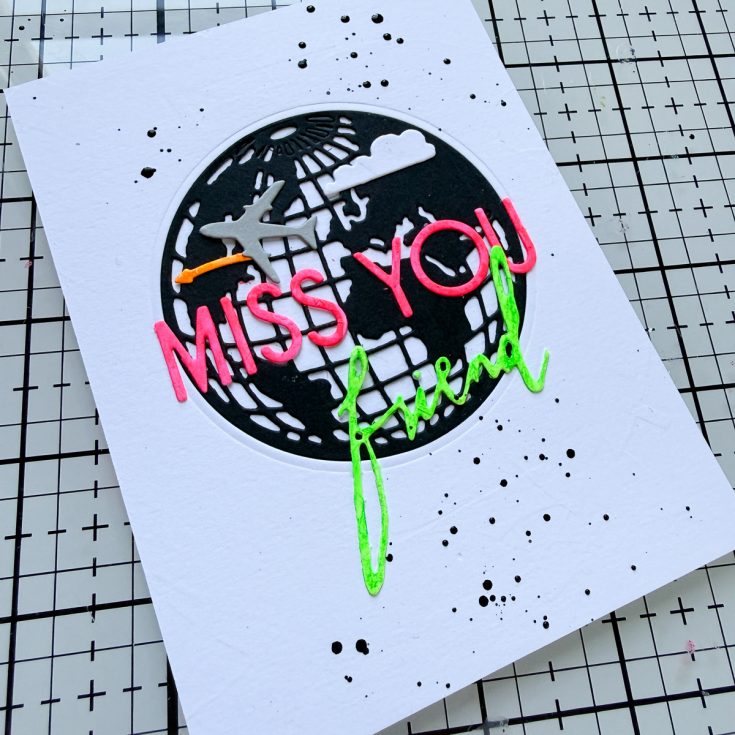
To put the letters onto my card, I placed a piece of tape across my panel. I usually put the tape on the fabric of my shirt once or twice before putting it on the paper to make it a little less sticky. I lined up my Miss You and then glued each letter down carefully by placing them with a tweezer. I added the word friend, so it was overlapping missing you ever so slightly. The card was looking a bit plain, so I added some Black Soot Distress Paint splatter, using a mask and my hand to make sure the splatter only landed where I wanted it to go. Hope you liked this fun neon card!
SUPPLIES:
|


Thanks so much for stopping by, and thanks to Cheiron for being our guest!
Classic Tim Holtz Sizzix Handwritten Dies!
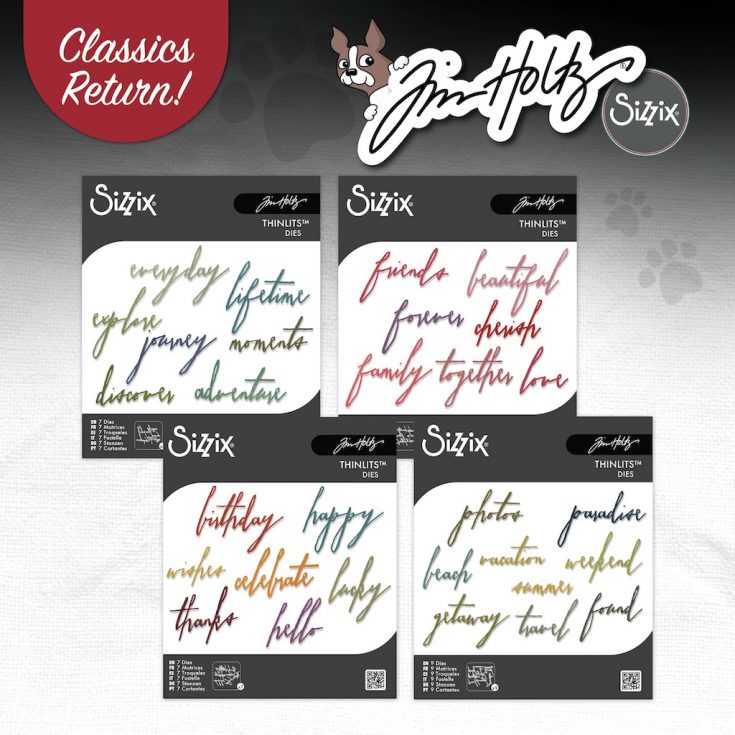
Classic from Tim Holtz + Sizzix!
Say welcome back to the Handwritten Dies from Tim Holtz—designed to bring the beauty of authentic handwriting to your handmade cards and creative projects.
These gorgeous dies create sentiments that feel personal, expressive, and full of heart, instantly giving your cards that special handmade connection.
Even better? The versatile words make it easy to craft for birthdays, thank yous, celebrations, and everyday encouragement.
Why you are going to LOVE these:
• Elegant handwritten style
• Versatile words for countless occasions
• Perfect as bold focal points or layered accents
• Instantly adds a heartfelt handmade feel
Whether you’re making a quick card or a layered masterpiece, these dies help your projects say exactly what you feel—beautifully.
Don’t miss Tim Holtz LIVE to explain it all and inspire!

Existing alphabet sets that pair perfectly with these new handwritten sets:
- Alphanumeric Bulletin
- Alphanumeric Bold
- Alphanumeric Emporium
- Alphanumeric Shadow
- Alphanumeric Stretch
- Alphanumeric Theory
Want even more to love? These fan favorites have returned!
- Vault Rosettes
- Vault Pillow Box + Bag
- Vault Picture Show
- Vault Matchbox
- Vault World Travel
- Vault Funky Floral
Stay tuned!
New inspiration on our blog featuring some of these amazing sets will post at 8 AM ET! Here’s a sneak peek:
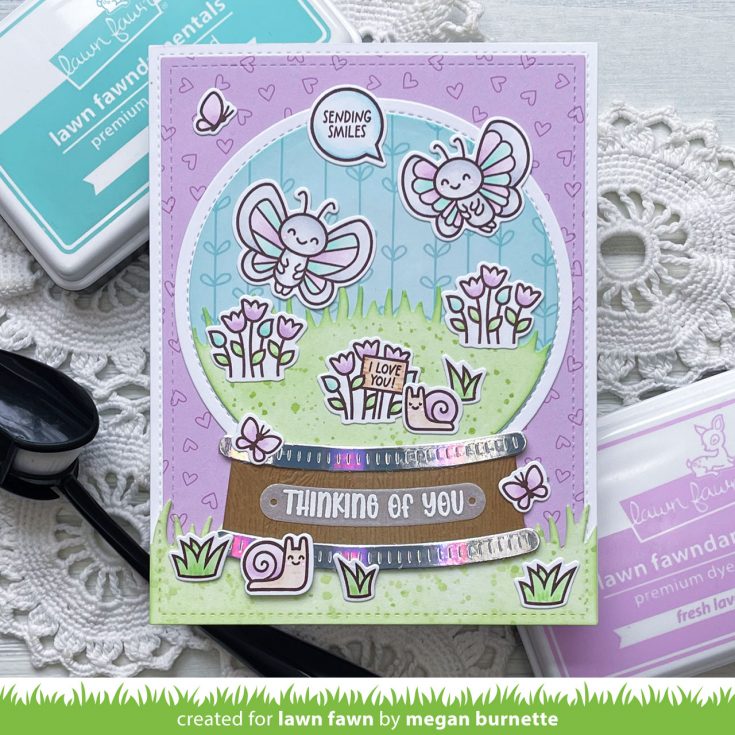
Build a Butterfly Snow Globe for Spring! NEW Lawn Fawn card idea by Megan Burnette!
Hi friend! Happy Saturday! Please join me in welcoming back special guest Megan Burnette with a darling card idea featuring new Lawn Fawn products! Please read on to learn more and enjoy!
Hello friends! It has been awhile since I have visited with you here on the Simon Says Stamp Blog and I am thrilled to be back! I have a fun, pick-me-up design to share with you using some products from Lawn Fawn’s latest release.
Lawn Fawn’s February Spring Release is chock full of adorable critters and accessory sets! For my project, I began by stamping out images from the I Like Big Butterflies, All the Grasses, To My Fungi, Porcu-pine For You, and Spring Basket Stamp Sets. After coloring them using Copic Markers, I cut them out using the coordinating dies.
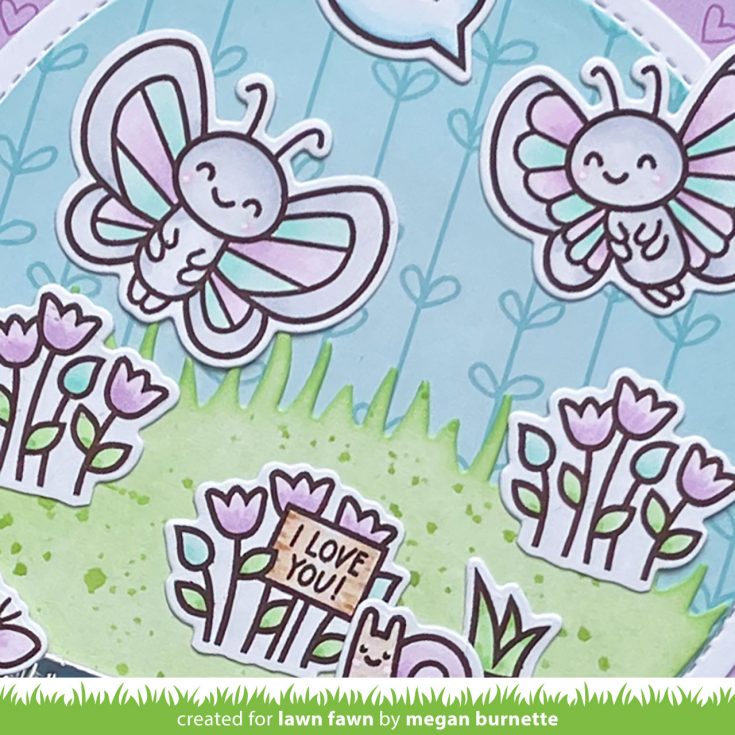
On this design, I wanted to create the feeling of looking into a terrarium filled with sweet butterfly and snail images. I added in floral and grass elements to bring it all together.
Next, I chose patterned papers for the background that coordinated with the purples and aquas from the colored images. This helps to tie the whole scene together and make it look more cohesive. For the grassy borders, I die cut white yardstick using the Lawn Fawn Grassy Borders Die and one of the dies from Lawn Fawn’s Grassy Hillside Borders Die Set. I then ink blended the pieces using a blender brush and Lawn Fawn’s Celery Stick Ink. I adhered all of the elements down using the Lawn Fawn Glue Tube and this card is done.
I just love how this card turned out and I hope that it brought a smile to your face! Thank you for stopping by and spending time with me today!
SUPPLIES:
|


Thanks so much for stopping by, and thanks to Megan for being our guest!


