EGGstra Special Art Inspiration by Emma Williams!
Hi friends! Happy Sunday! Well, this sweet project by the one-and-only Emma Williams made me smile from EAR to EAR! (pun intended) Isn’t it the sweetest?! It was just TOO sweet to not re-post so in case you missed it from last year, be sure to check it out!! Read on for a detailed tutorial below and enjoy!
Hello everyone! I’m so happy to be back on the SSS blog today and excited to share my make with you that I created using some of the gorgeous new Sizzix Chapter 1 products from Tim Holtz.
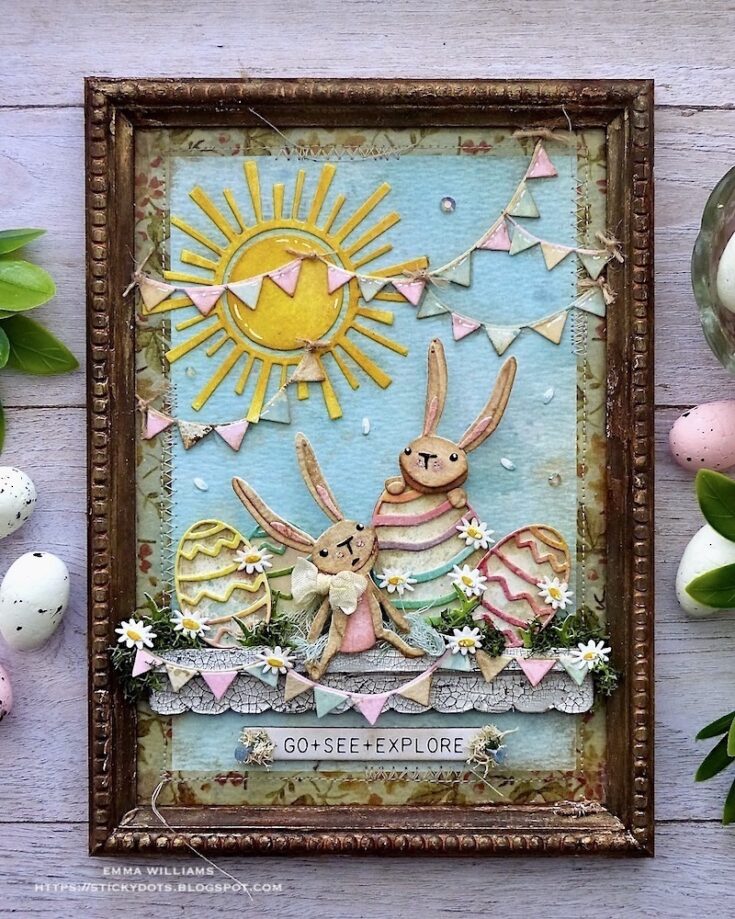
This is such a beautiful release and with Spring hopefully just around the corner, I couldn’t resist using the Bunny Games Thinlits Die Set to create a framed panel that is perfect to display for springtime, or Easter.
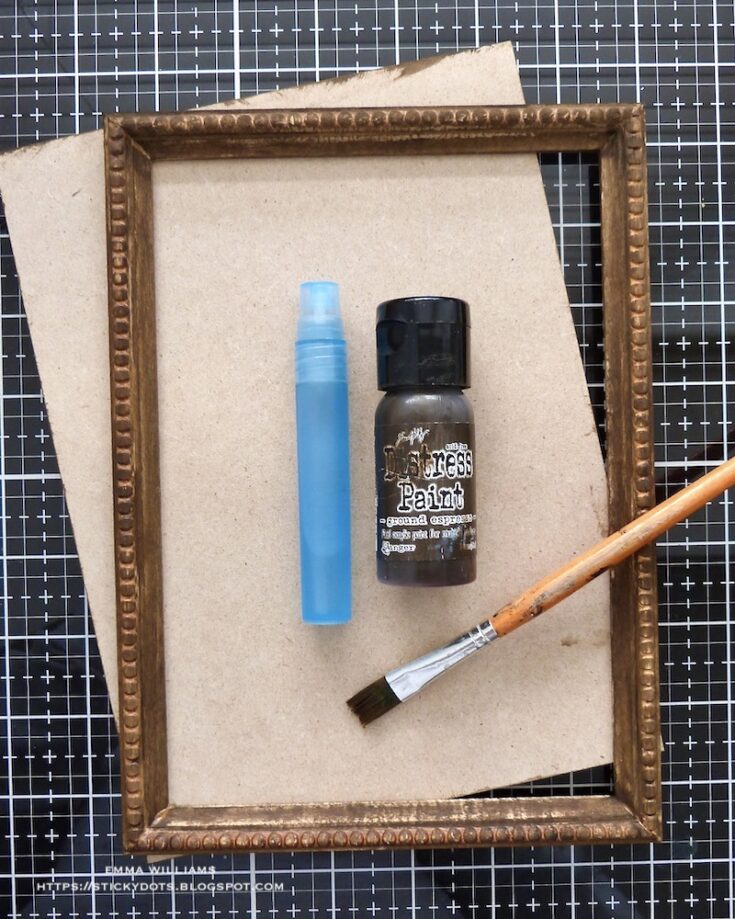
So, let’s get begin and to start this project you will need a Tim Holtz idea-ology Framed Panel. This panel comes in two separate parts, the wooden frame and a baseboard and using Ground Espresso Distress Paint which I slightly watered down to create more of a stain, I painted both the frame and the sides and back of the baseboard. After drying the paint, I added a touch of Vintage Gold Gilding Wax over the top to accentuate the beading and then set the frame to one side.
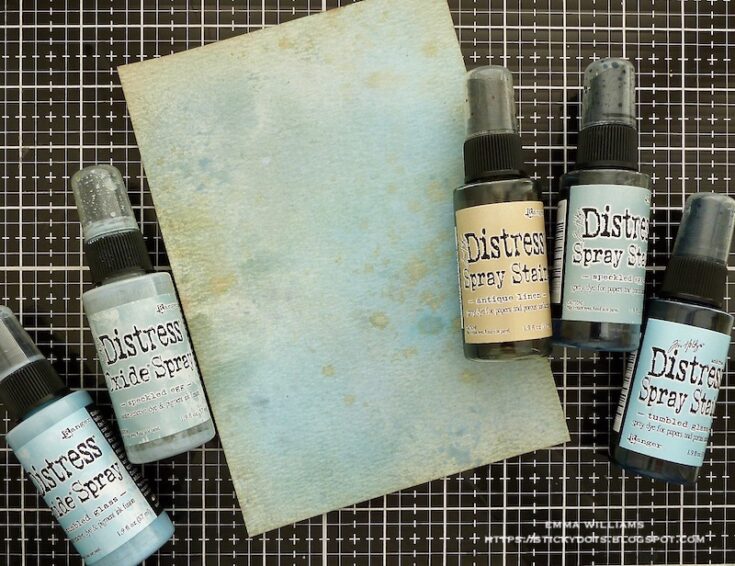
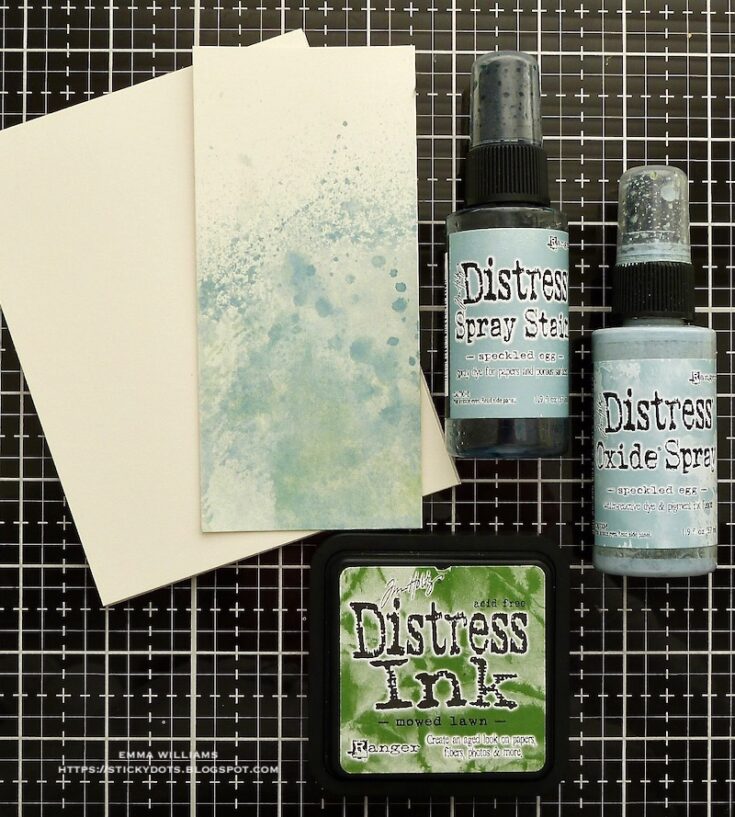
Cut a panel of Distress Watercolor Card just slightly larger than the aperture of the frame and add colour to the card panel, by placing it inside a Splat Box, applying a light misting of water before spritzing with a combination of Antique Linen, Tumbled Glass, Speckled Egg Distress Sprays Stains and Tumbled Glass and Speckled Egg Oxide Sprays. If you choose, you can add more water over the sprays to blend the colours.
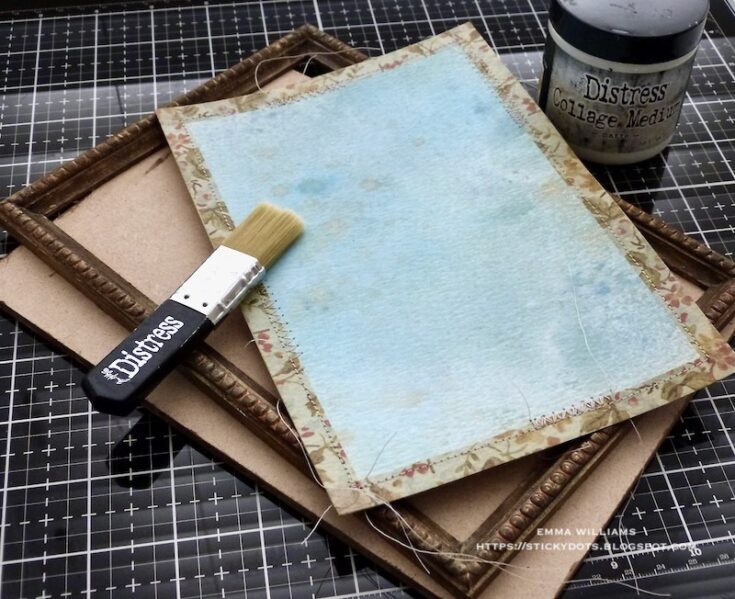
Once I was happy with the blend of colour, I heat dried the panel and applied Collector Design Tape around the edge, I used a floral pattern. I then machine stitched a border before attaching the card panel onto the centre of the baseboard using Matte Collage Medium. Adhere the wooden frame over the top, again using the medium. At this stage, I always clamp my frame using bulldog clips to ensure it is secure.

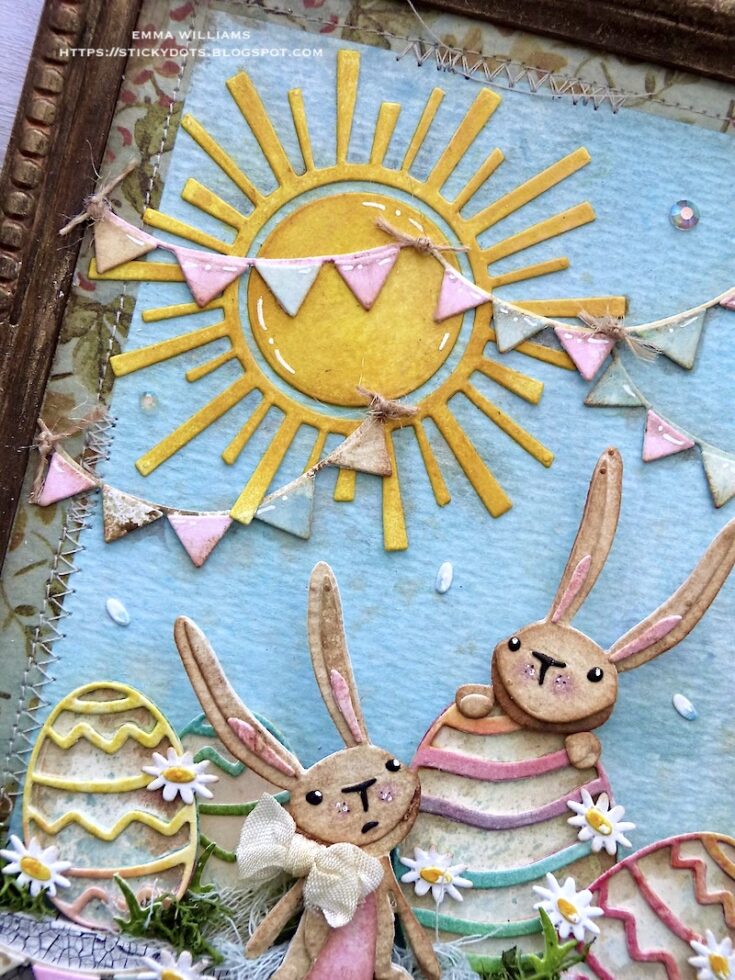
The frame is now complete and I moved onto creating the scene. To begin with I created the sun, using the sun die from the Circle Play Thinlits set and cut the image from a piece of Distress Watercolor card, inked with a blend of Mustard Seed and Fossilized Amber Distress Inks. Ink the edges of the die cut with Walnut Stain Distress Ink.
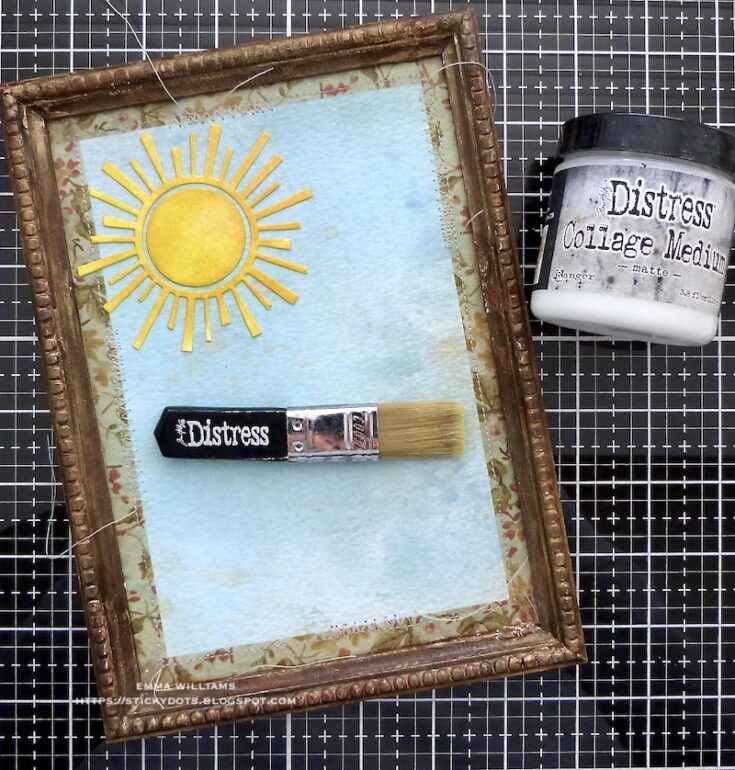
Adhere the sun into position using Matte Collage Medium.

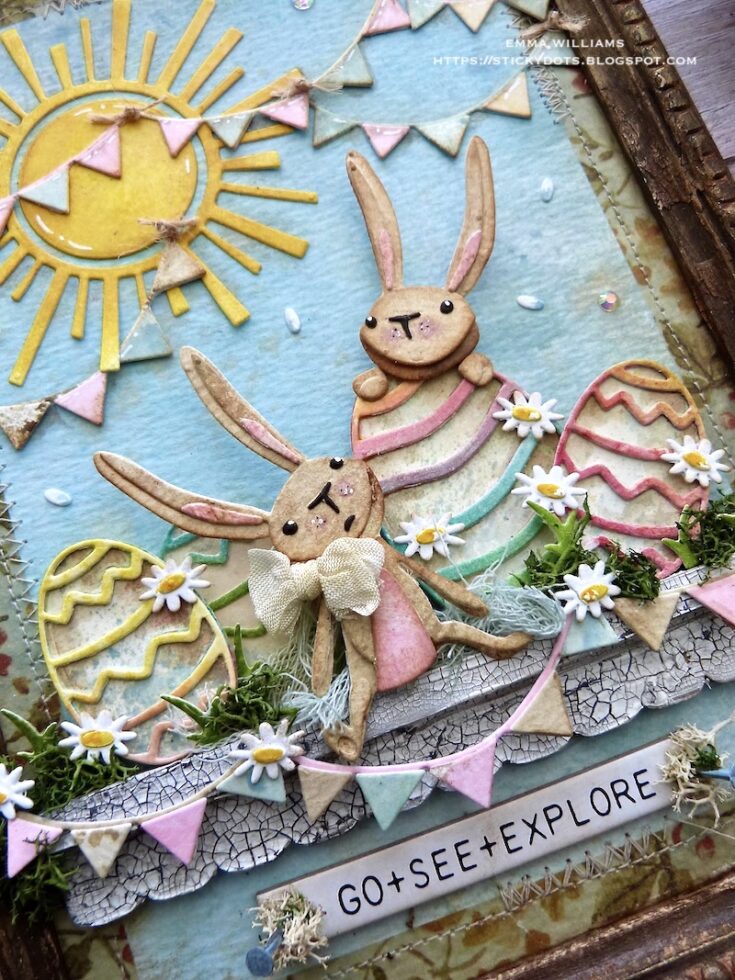
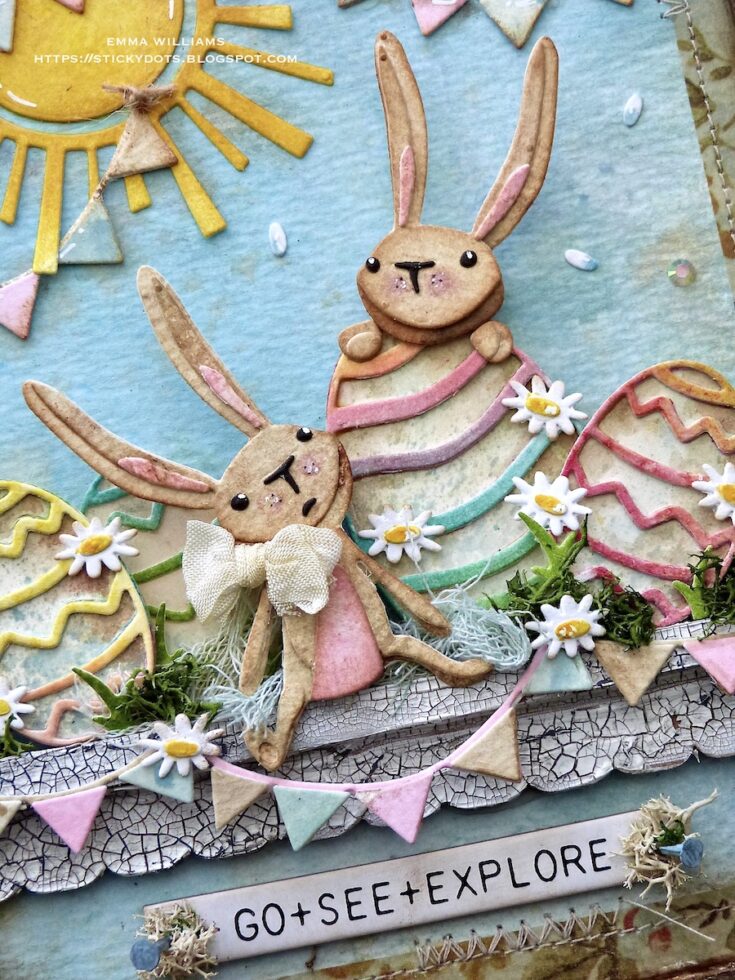
For the easter eggs and bunnies, I used the Sizzix Bunny Games Thinlits Die set by Tim Holtz. Starting with the bunnies, I inked two separate pieces of the watercolor card the same way as I coloured the background but this time I used Antique Linen, Frayed Burlap and Old Paper Spray Stains and the second panel, which will be for the ears, and tummy, is inked with Spun Sugar and Kitsch Flamingo Sprays.
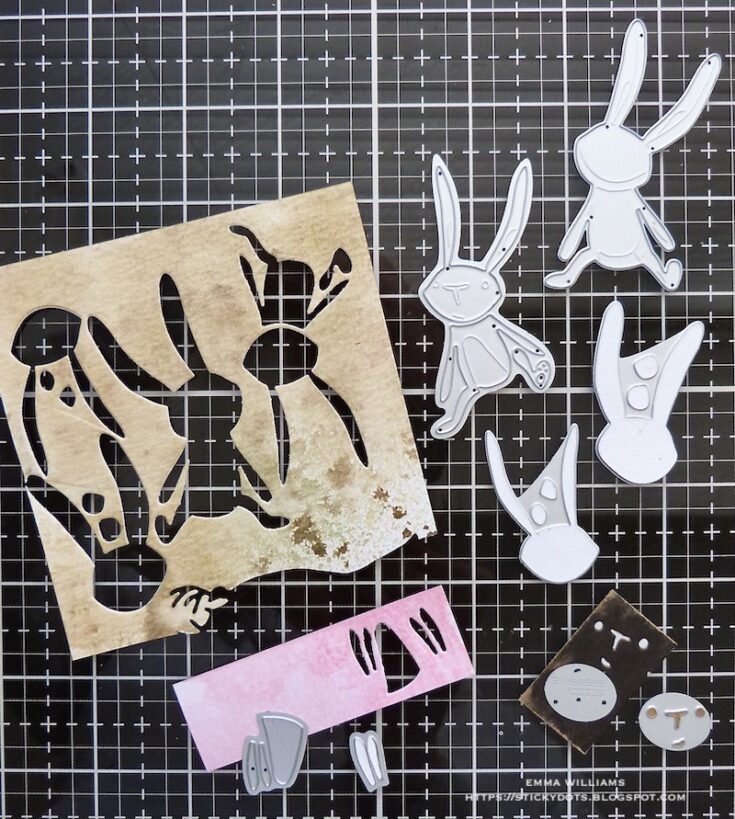
Die cut all the separate pieces to make the two bunnies and for the eyes, I used plain black card stock. Assemble each of the bunnies and ink the edges with Walnut Stain Distress Ink. When building the layers for your bunnies, I would recommend using Sizzix Adhesive Sheets on the back of your cardstock before die cutting as this makes the assembly of the dies so much easier!
Now to create the easter eggs and once again, I used the Bunny Games die. The eggs come in two sizes, and also two separate dies to create each egg. For the solid part of the inked some Mixed Media Heavystock card with a combination of Speckled Egg Oxide and Distress Spray Stain, and a touch of Mowed Lawn Distress Ink and then blended the inks with a misting of water. Once dry, die cut your solid layers of the eggs. I used three small and one large for this make.
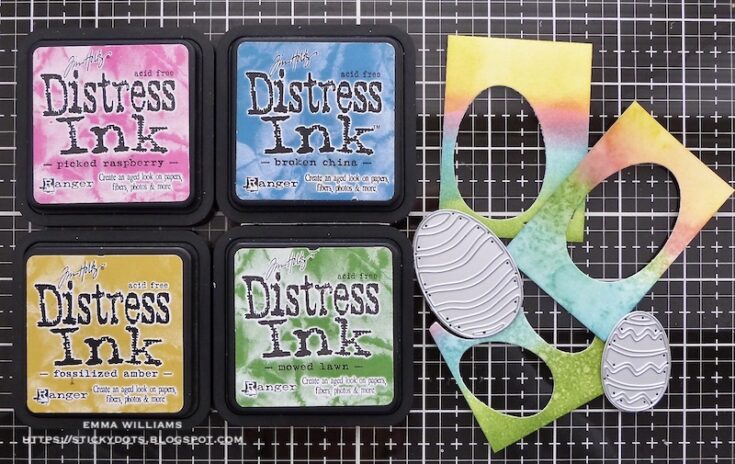
For the decorative layer of the egg, I inked panels of card using a rainbow of various Distress Inks which I blended onto the cardstock with a blending tool and spritzed with water. These are the colours I used but this is your make, so the choice is up to you! I then cut my decorative layer from the rainbow inked cardstock.

Layer all the pieces together to form the eggs to go with the bunnies.
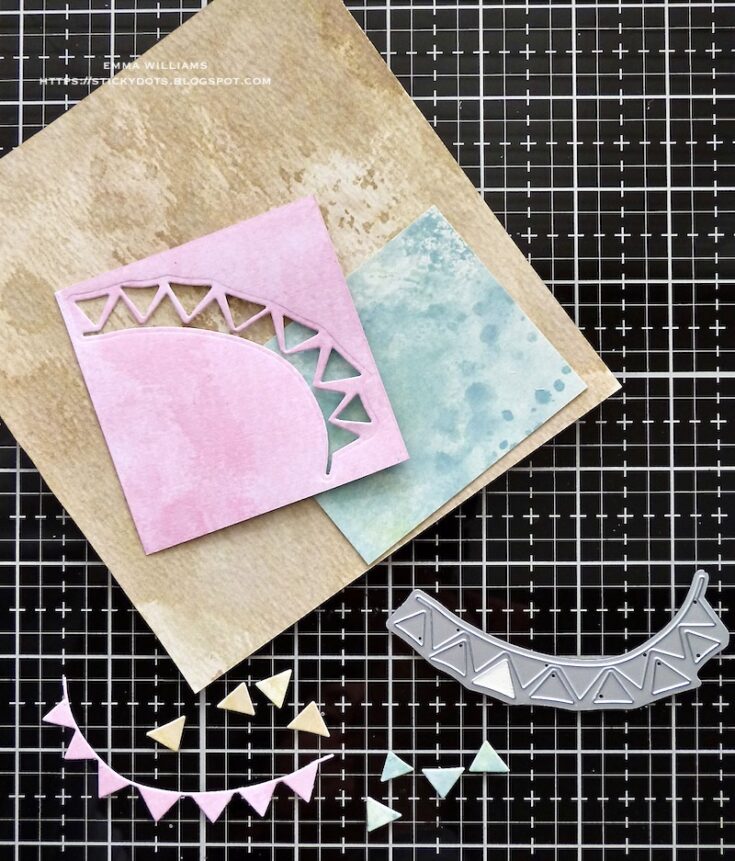
To make the bunting, I cut all the pieces using the blue, pink and neutral card that was previously inked for the bunnies and eggs. After I layered the flags over the solid bunting layer, I then trimmed the bunting die cuts into various lengths.
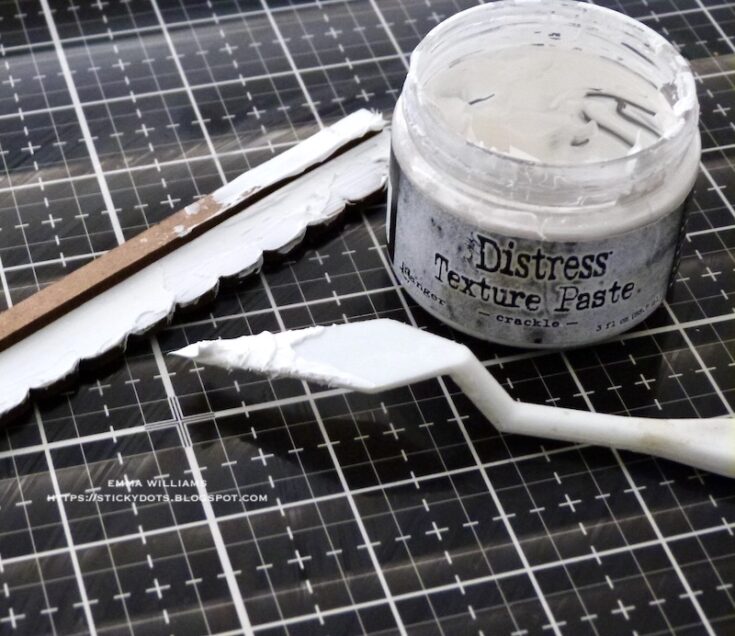
To form the ledge that sits across the frame, I used a Scalloped Etcetera Trim and attached a straight edge trim over the top, which I actually cut from the waste of the packaging that is holding the trims. Apply a good amount of Crackle Paste over the top, set to one side to dry and once the paste has worked it’s magic, run the Hickory Smoke Distress Crayon over the crackles to accentuate them, blending the crayon with your finger or a semi dry baby wipe, to avoid any harsh lines.
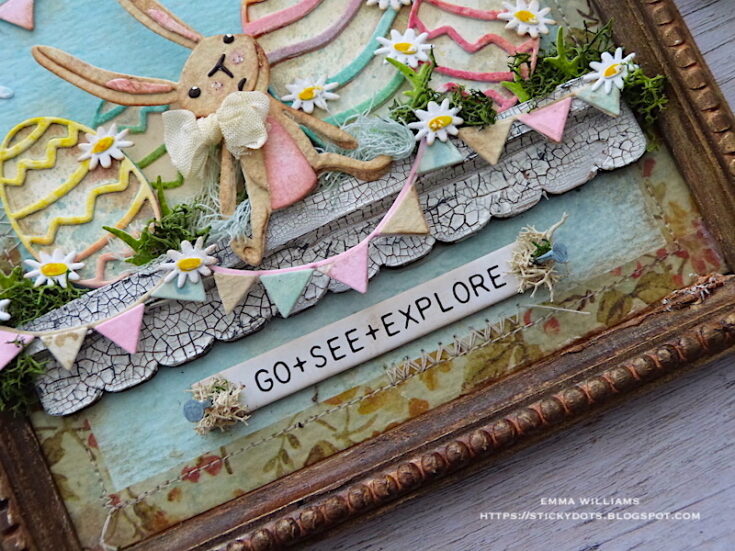
Fix the crackled Etcetera Trim inside the frame, placing it directly onto the background and using Matte Collage Medium, attach some of the bunting pieces along the bottom edge of the trim.
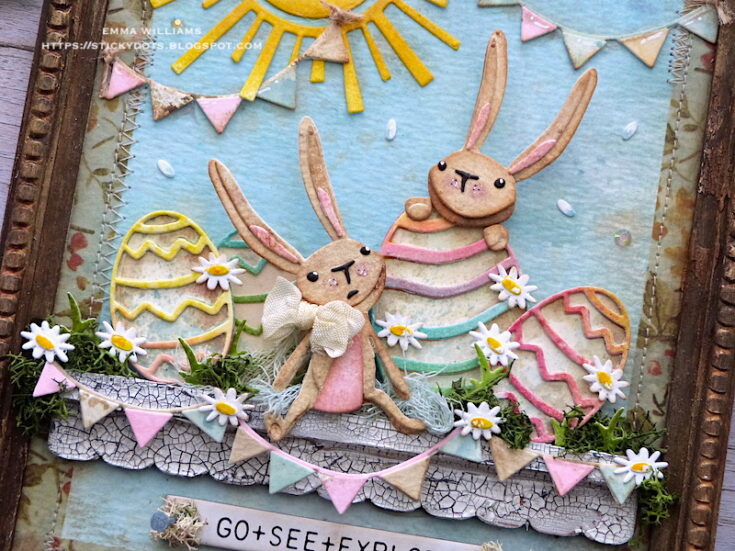
Arrange the eggs along the ledge, using various depths of foam pads to form different heights and dimensions and then add the bunnies ~ one looking over the large egg and one sitting on the ledge.
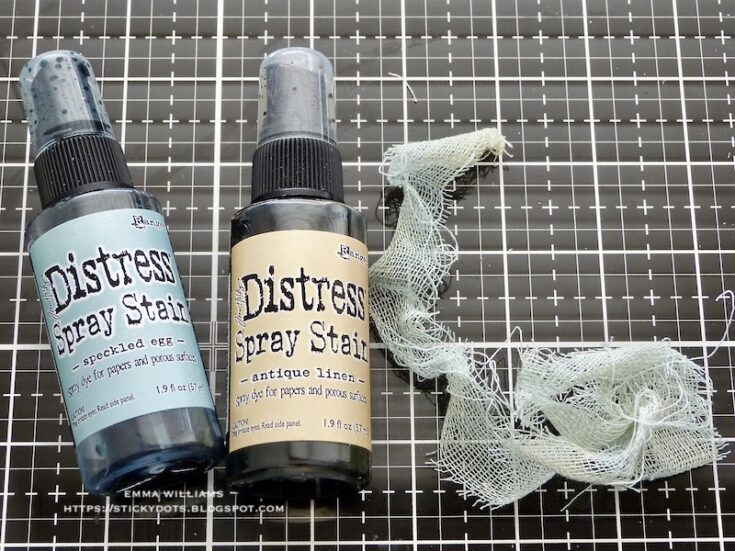
Underneath the seated bunny, I added some texture using Mummy Cloth that I dyed with Speckled Egg and Antique Linen Distress Spray Stain. Just spritz the sprays directly onto the cloth and then allow to dry before attaching small pieces of the cloth to the project ~ now Mr Bunny has something soft to sit on!!
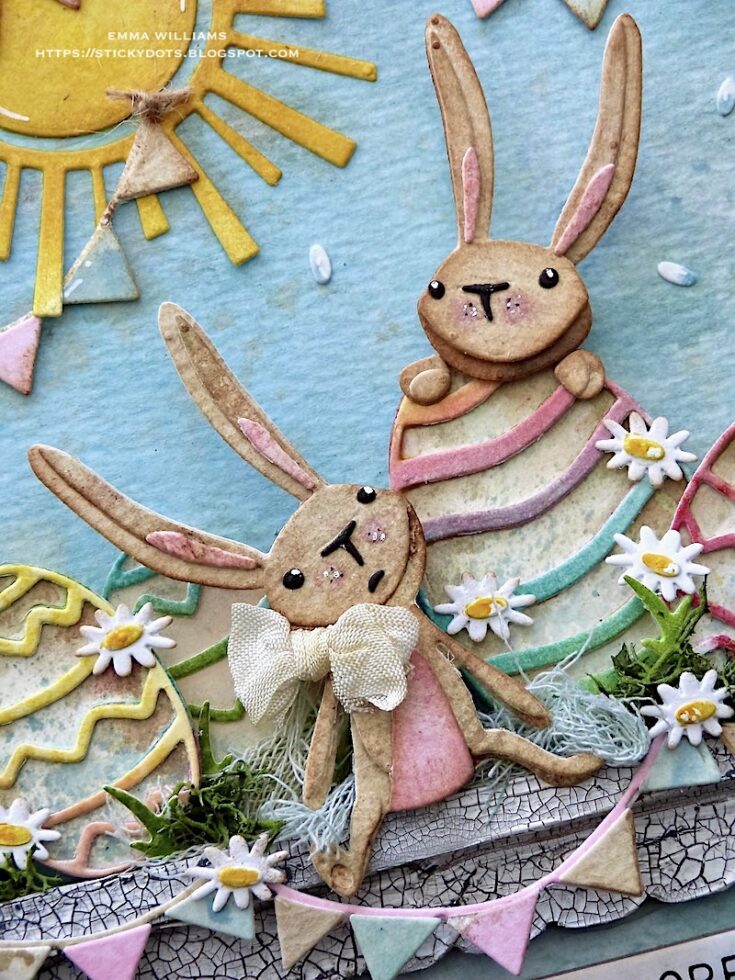
At this stage, I also added a small bow that I tied using ribbon in my stash and I attached this to my bunny.
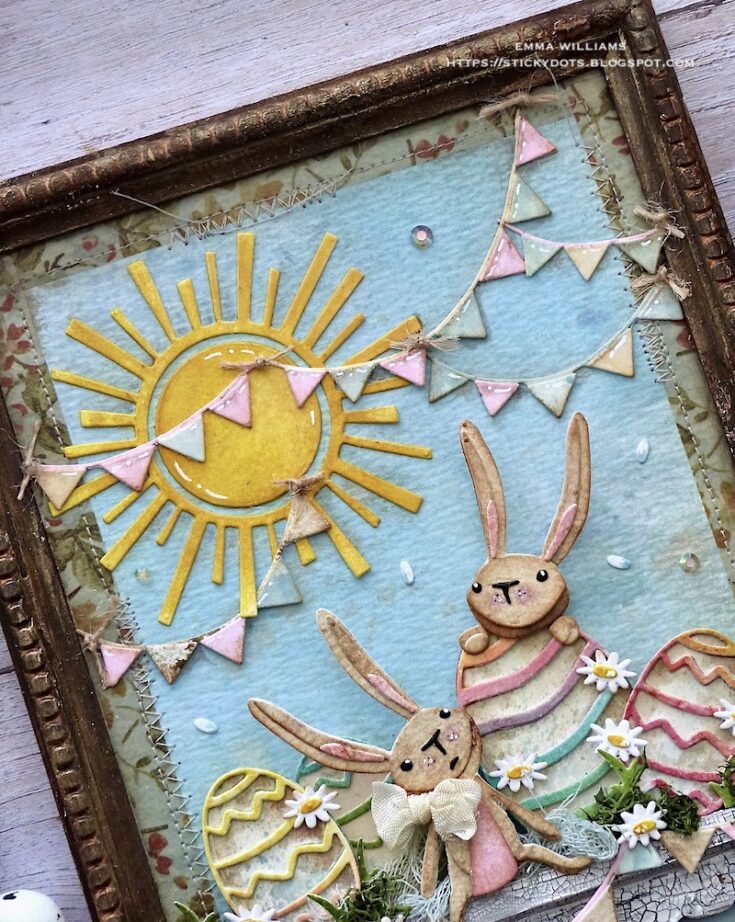
Adhere the remaining bunting pieces in swathes across the top of the framed panel and then add highlights to the flags, using a white gel pen.
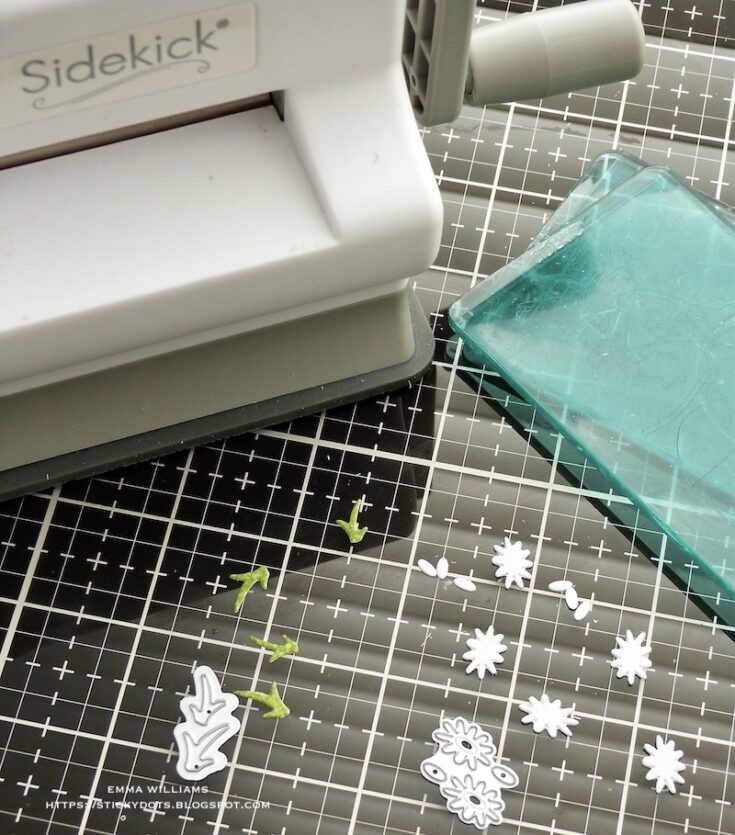
Die cut a selection of daisies from white card and the tufts of grass from green card. For these tiny pieces, I always use the SideKick which is indispensable on my desk, and goes along with my larger machine, the Big Shot Foldaway. Place the small centres in the middle of each and then using a fine paint brush, paint the centres of each daisy with Mustard Seed Distress Ink. Attach the daisies and the grass tufts to my ledge, adding small clumps of moss in between.
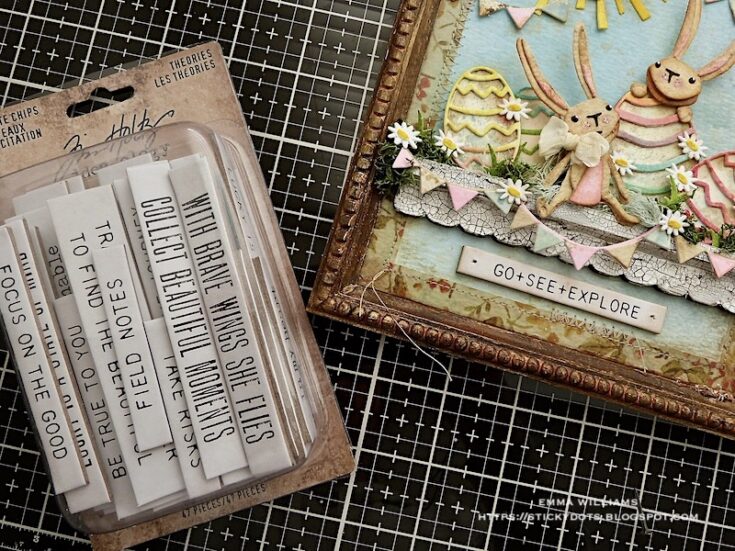
To complete the project, I used a Theories Quote Chip, GO+SEE+EXPLORE. I lightly inked the edges and surface with Walnut Stain Distress Ink before attaching the chip directly beneath the etcetera trim.
Using tacks from the idea-ology Vignette Findings set, hammer one into either side of the trim and then add small clumps of moss around each of them. At this stage, I added small gems to the background and also attached the tiny leftover centres from the daisies.
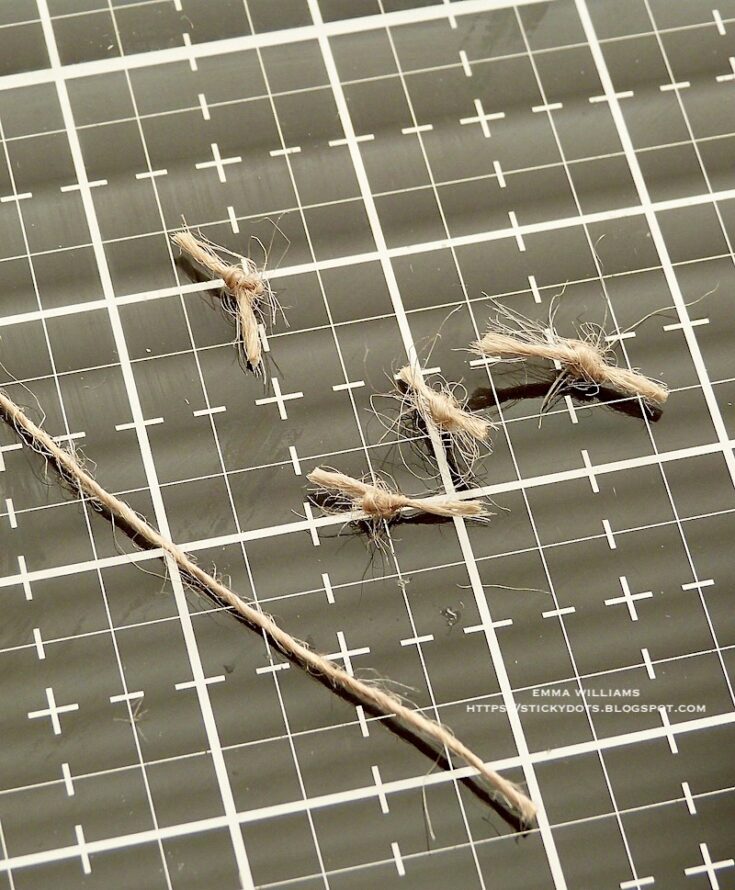
Finally, I cut a piece of twine and tied tiny knots along the length of the twine.
Cut each knot and attached them to the bunting on the project, placing them where each piece joins together.
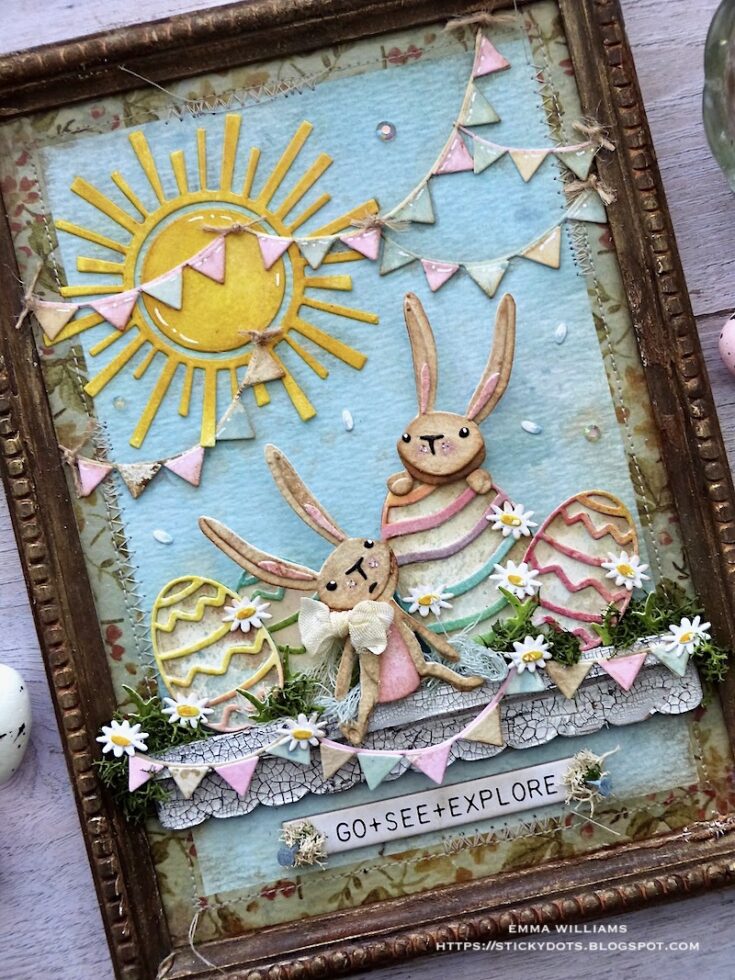
…and that final touch completes my framed panel and I hope you love what I’ve made and will be inspired by the techniques I’ve used and the project itself! See you all again very soon and Happy Crafting everyone…Emma x
SUPPLIES:
|


Thank you so much for stopping by, and thanks to Emma for being our guest!


Be Creative Blog Hop 2!
Hello, friends, and welcome to day two of our Be Creative release blog hops! If you missed yesterday’s hop, be sure to circle back and check it out HERE.
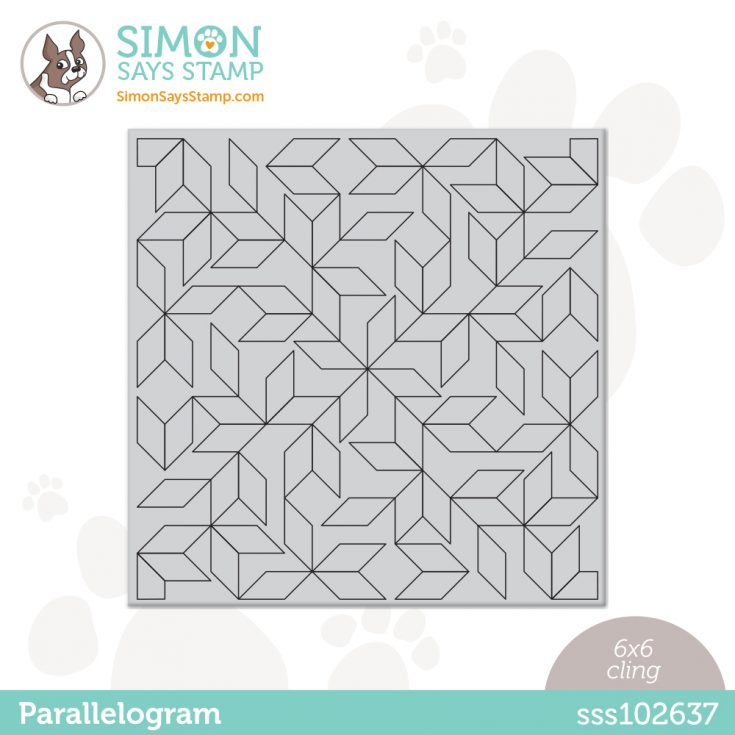
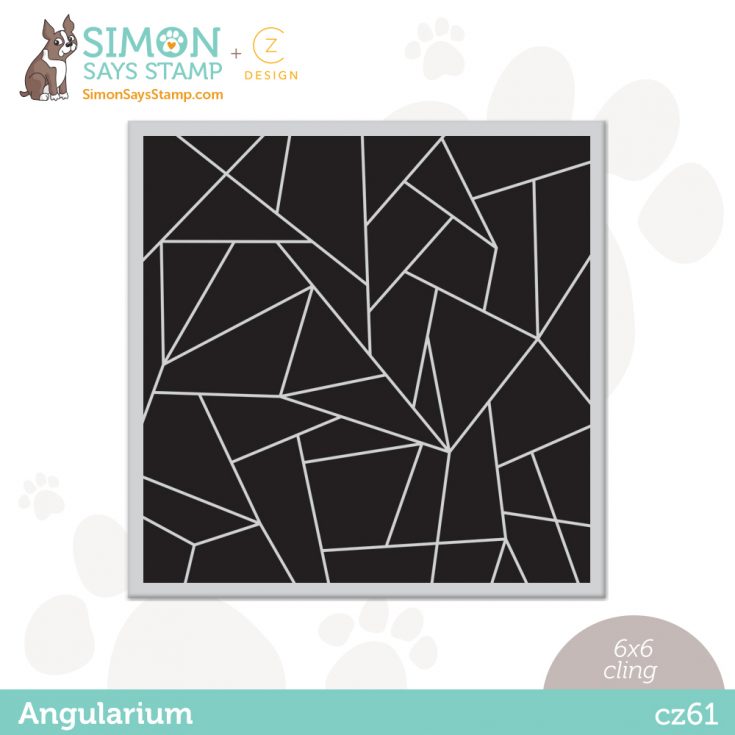
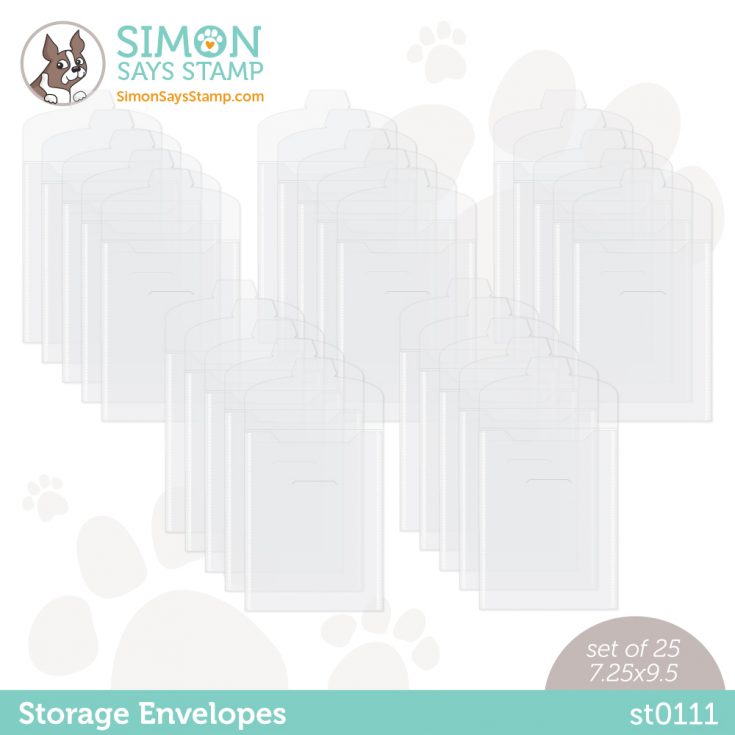
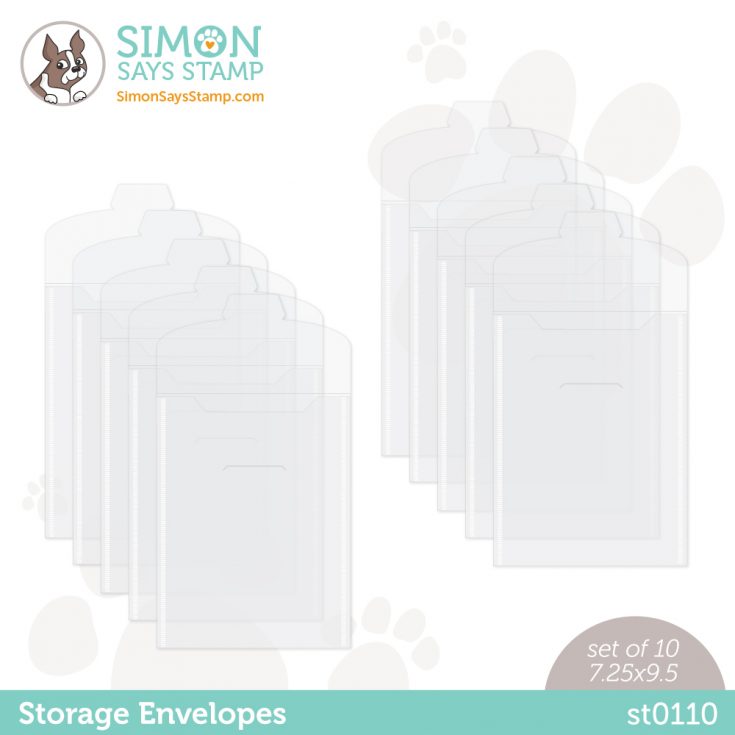
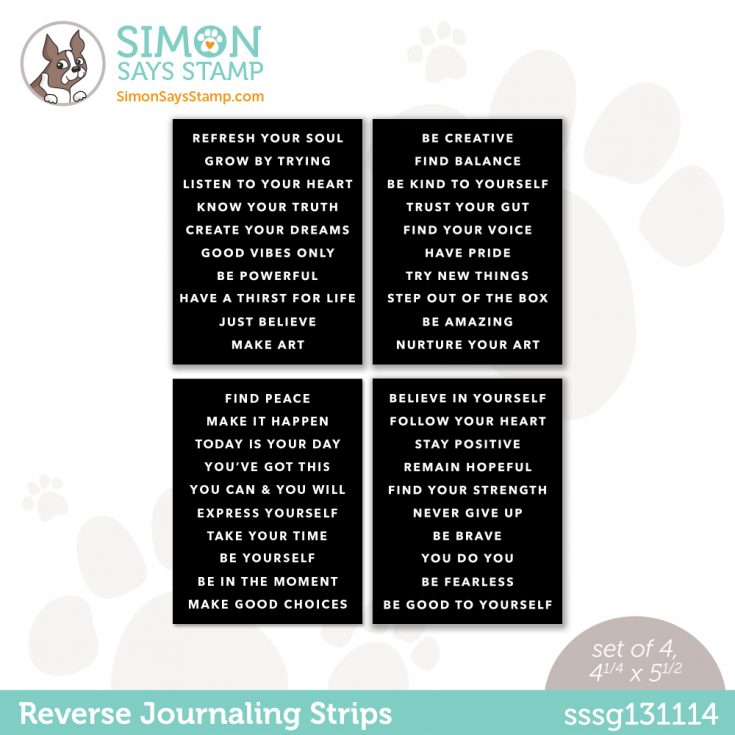
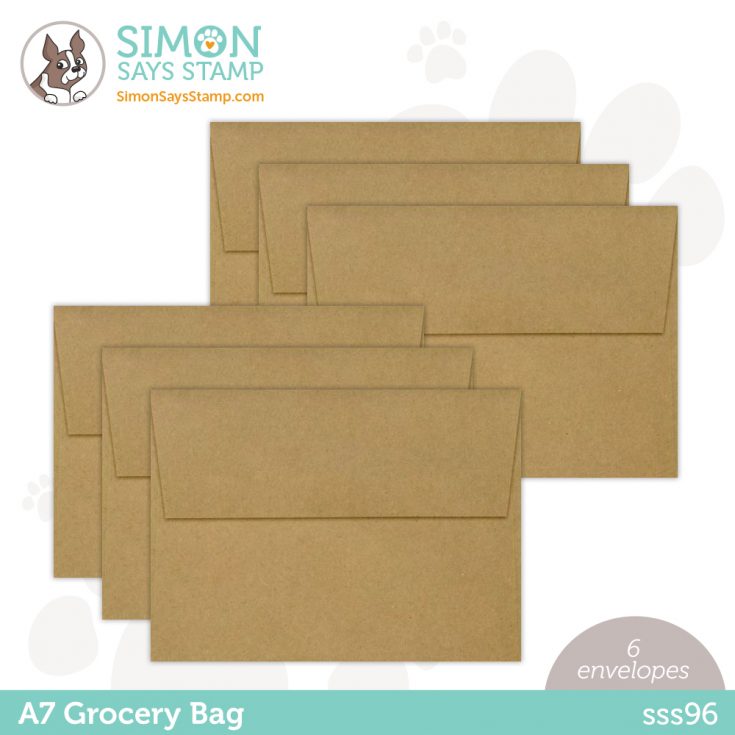
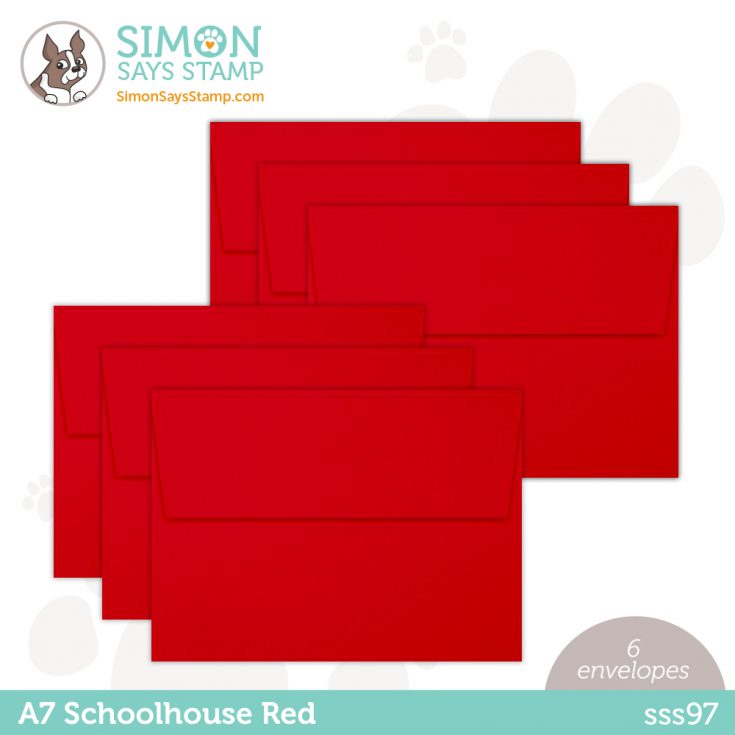
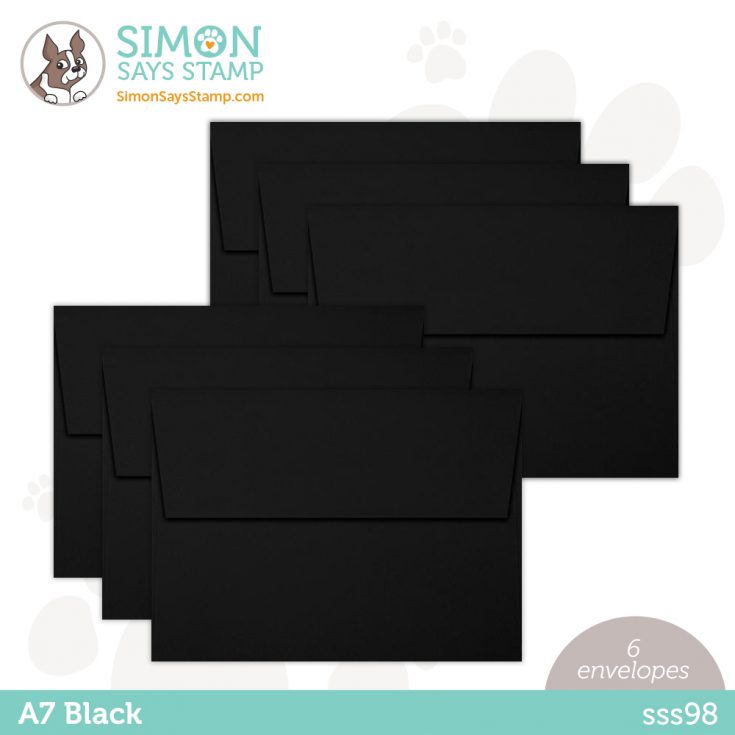
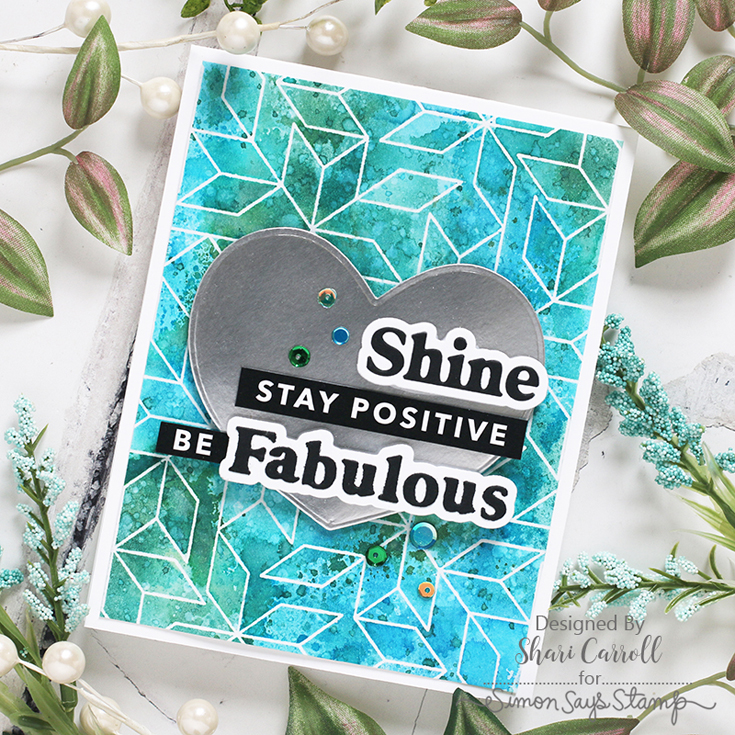
We hope our brand new release inspires you to Be Creative! Go geometric with cling stamps like Angularium and Parallelogram; channel your inner artist with our Brush Strokes stencil and Journaling Strips; and improve your creative process with our innovative Corner Ink Cube Holder and new Storage Envelopes.
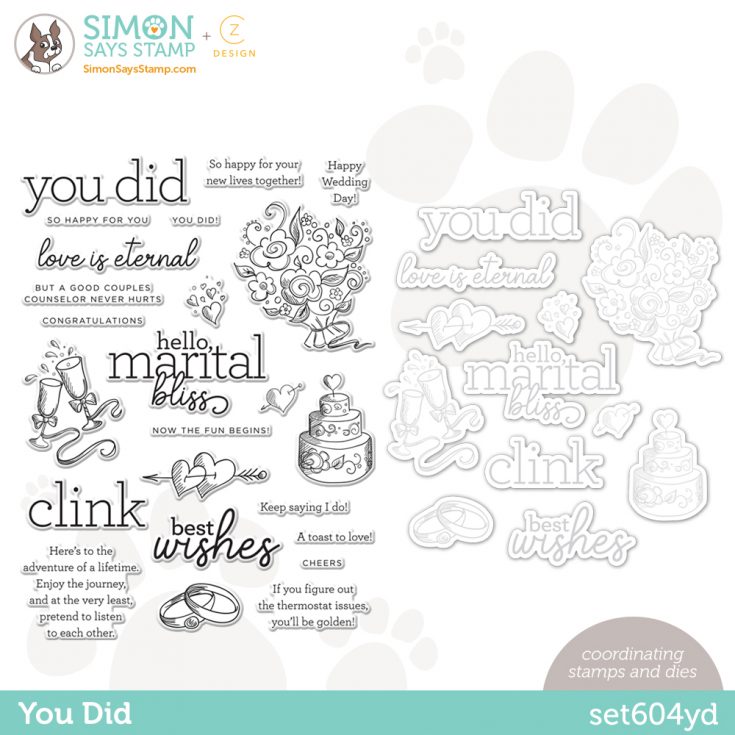
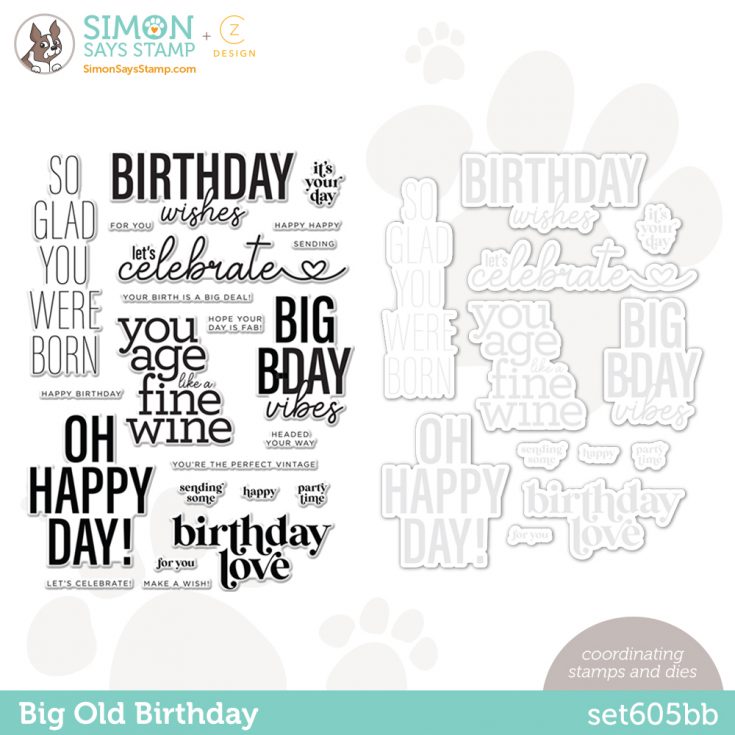
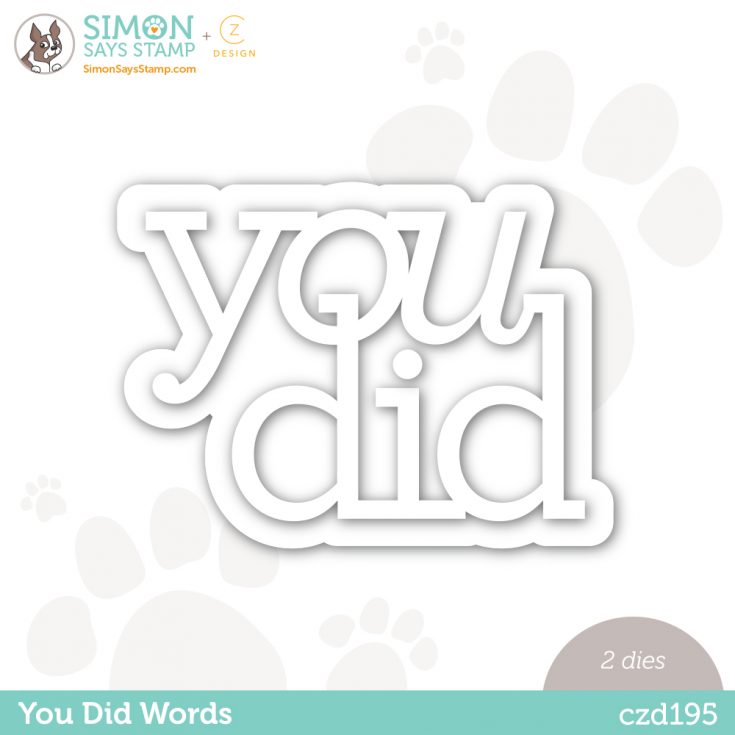
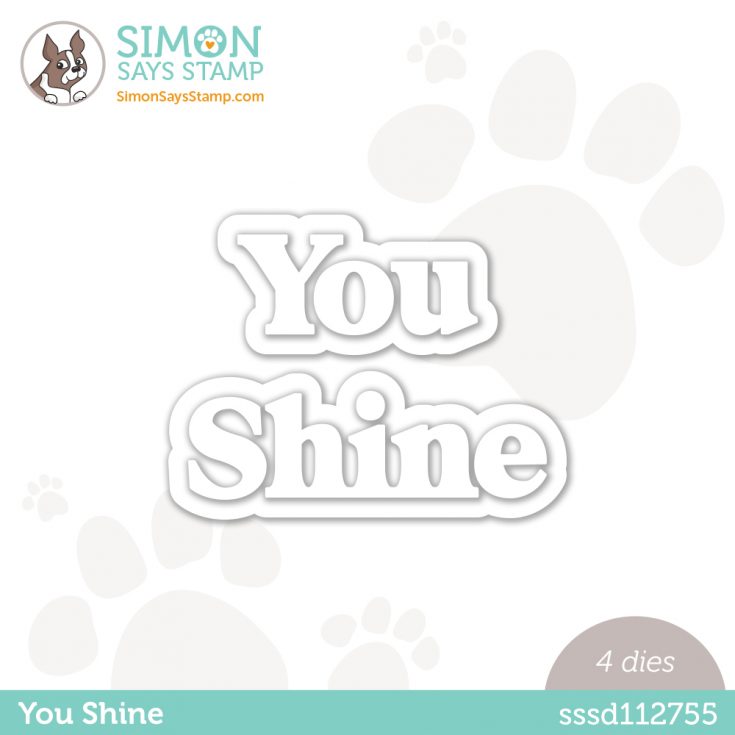
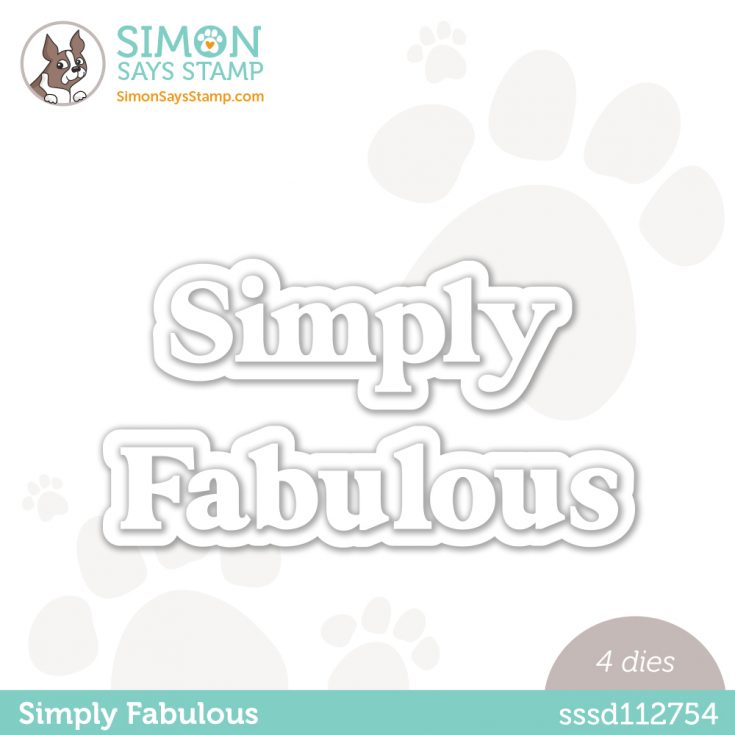
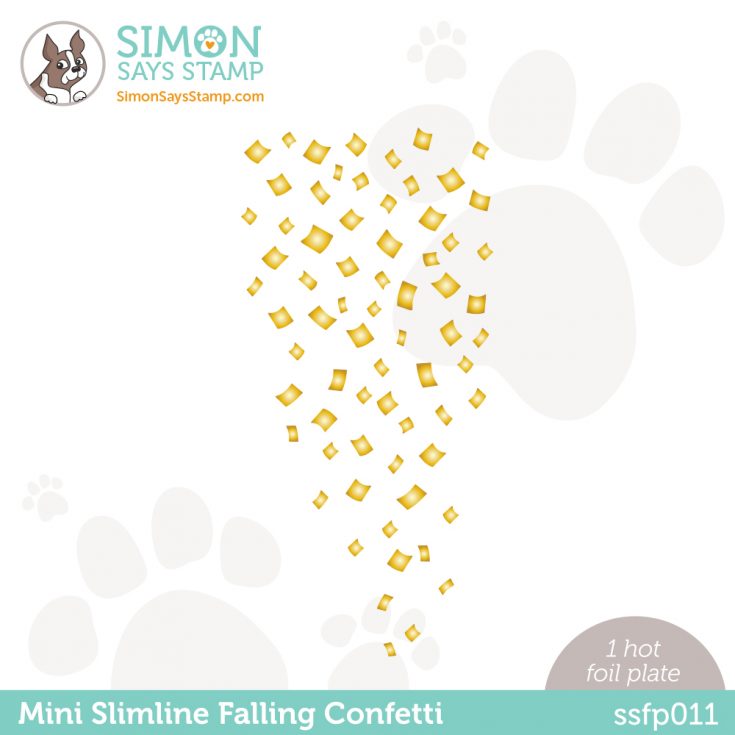
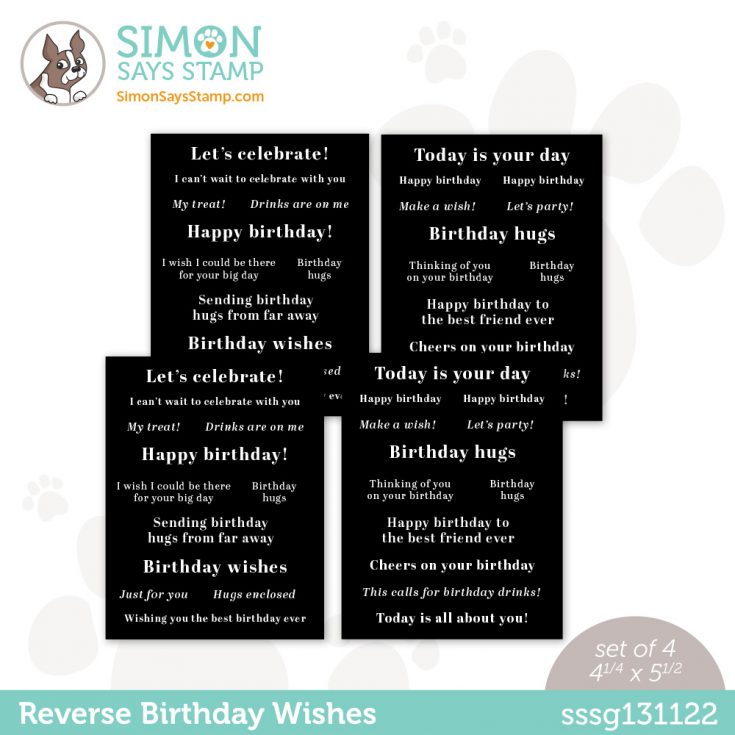
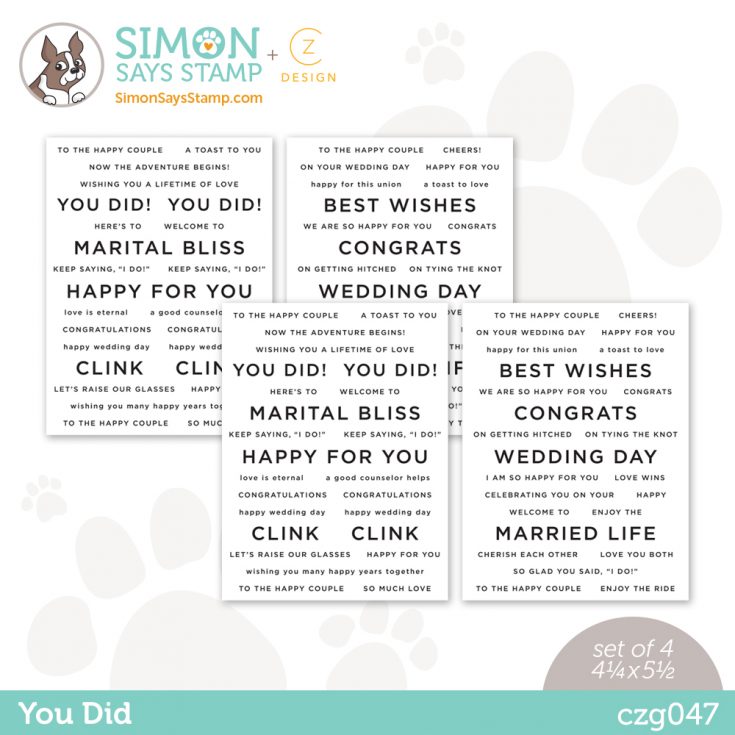
As always, we’ll help you celebrate life’s special moments with dies like You Shine and Simply Fabulous, stamps like Big Old Birthday and You Did, and our festive new Mini Slimline Falling Confetti hot foil plate.
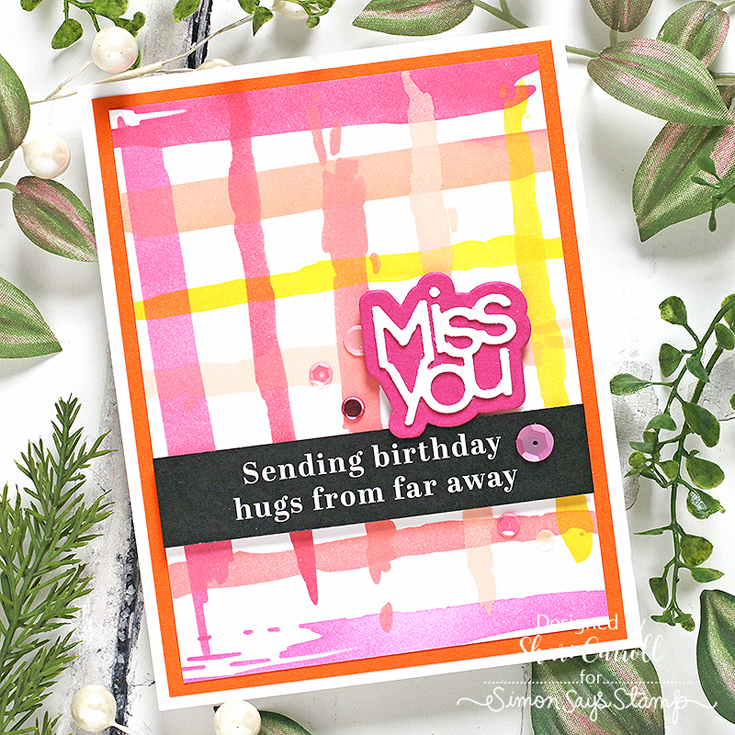
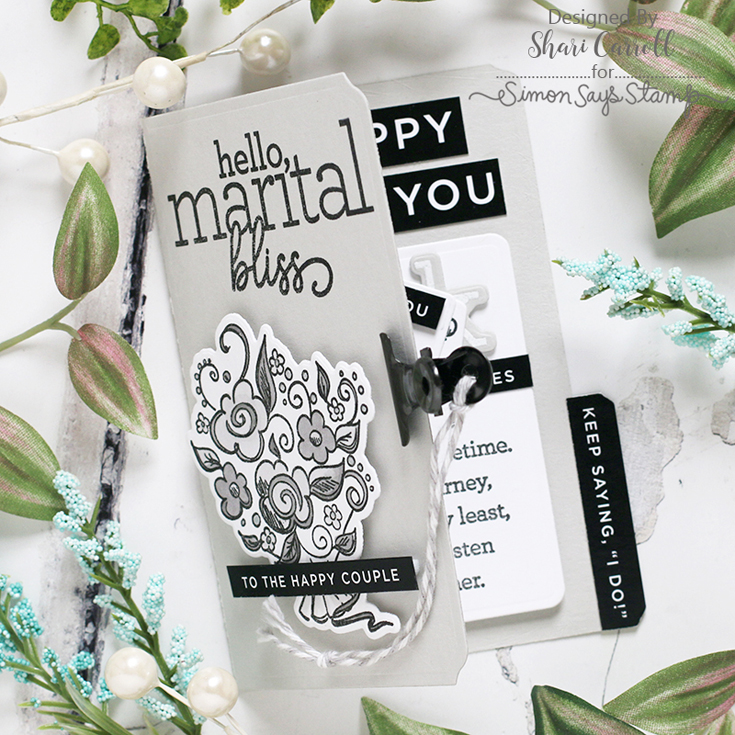
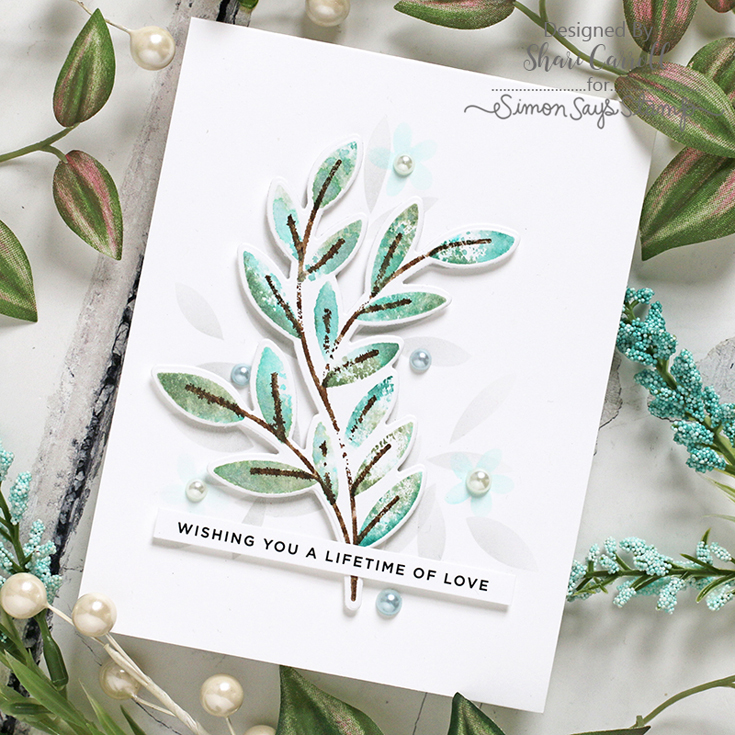
Before we hop, let’s take a look at some fabulous inspiration from Shari Carroll:
We love our customers! And we love your enthusiasm for our exclusive releases and blog hops. To celebrate, Simon has set aside a free gift just for you! The free gift with any purchase for the this blog hop is the Handcrafted with Love 3×4 stamp set! Check out the details on the banner at the top of this post for information about claiming your gift.
Ready for even more Be Creative inspiration? Hop along with these talented designers! You’ll be inspired AND for every comment you leave on each blog, you’ll earn a chance to win a $25 Simon Says Stamp store shopping spree. YAY!
- Simon Says Stamp Blog <<YOU ARE HERE!
- Laura Bassen
- Nichol Spohr
- Cathy Zielske
- Alberto Gava
- Barbara Tarayao
- Keisha Charles
- Mindy Eggen
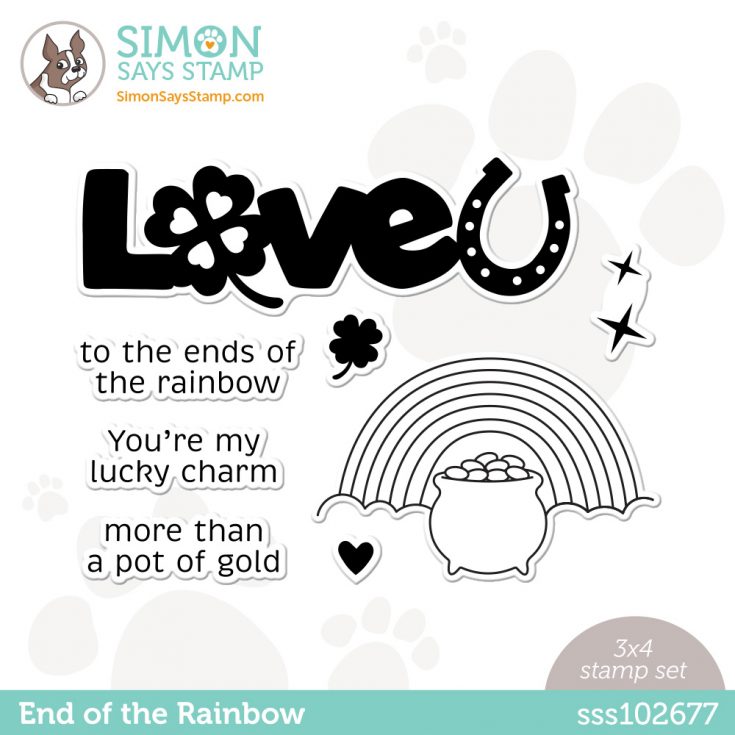
- Emma Williams
- Heather Ruwe
- Emily Midgett
- Lea Lawson
- Sandi MacIver
- Seeka
Please share some feedback with these creative artists who work hard to inspire and excite us! Your comments mean so much to them.
Thanks again for joining us today!
We hope you will join us on Instagram on Thursday, February 23, for an Instagram Hop featuring even more inspiration from our Be Creative release! We are excited to share awesome ideas from several creative minds using these fantastic products.
You’ll love browsing our Be Creative gallery on our blog for loads of additional inspiration, and you can add your projects to these galleries as well!
You can check out the entire Be Creative collection below:


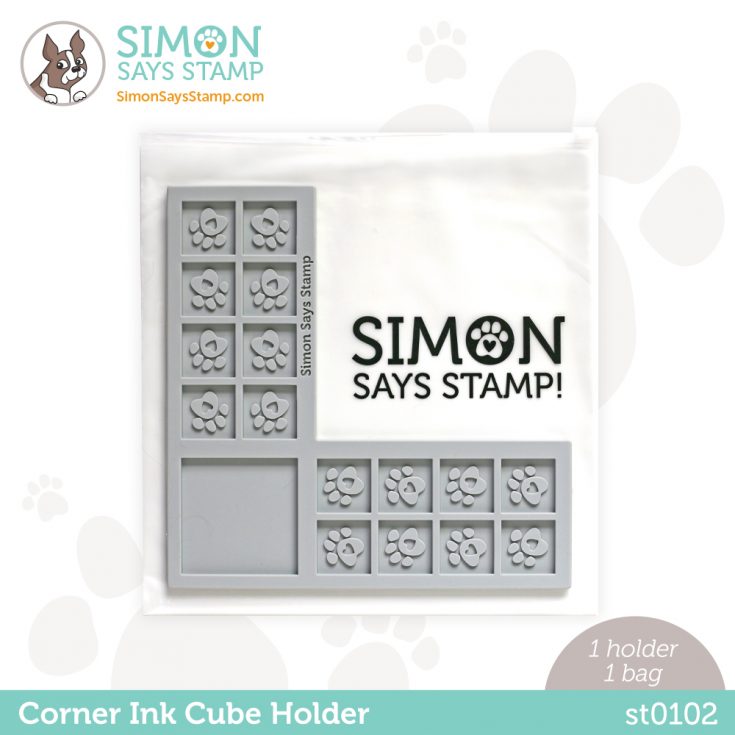
Learn MORE about our NEW Corner Ink Cube Holder:
Be Creative Blog Hop 1!
Hi, friends! Welcome to day one of two special release blog hops celebrating our Be Creative release! Come back tomorrow for more amazing inspiration!
We hope our brand new release inspires you to Be Creative! Go geometric with cling stamps like Angularium and Parallelogram; channel your inner artist with our Brush Strokes stencil and Journaling Strips; and improve your creative process with our innovative Corner Ink Cube Holder and new Storage Envelopes.
As always, we’ll help you celebrate life’s special moments with dies like You Shine and Simply Fabulous, stamps like Big Old Birthday and You Did, and our festive new Mini Slimline Falling Confetti hot foil plate.
OK! Let’s get a sneak peek of what’s in store for our blog hop today with inspiration from Shari Carroll! They used products from our Be Creative release to make these fantastic projects:
We love our customers! And we love your enthusiasm for our exclusive releases and blog hops. To celebrate, Simon has set aside a free gift just for you! The free gift with any purchase for the this blog hop is the Handcrafted with Love 3×4 stamp set! Check out the details on the banner at the top of this post for information about claiming your gift.
Ready for even more Be Creative inspiration? Hop along with these talented designers! You’ll be inspired AND for every comment you leave on each blog, you’ll earn a chance to win a $25 Simon Says Stamp store shopping spree. YAY!
Please let these talented designers know how much you appreciate their designs. They work hard to inspire and excite us!
- Simon Says Stamp Blog <<YOU ARE HERE!
- Nina-Marie Trapani
- Caly Person
- Suzy Plantamura
- Amy Rysavy
- Debby Hughes
- Lisa Addesa
- Sidnie Des Jardins
- Miriam Prantner
- Bobbi Lemanski
- Kath Stewart
- Barb Engler
- Misty Elam
- Jennifer Kotas
- Allison Frazier
Thanks again for joining us today!
We hope you will join us on Instagram on Thursday, February 23 for an Instagram Hop featuring even more inspiration from our Be Creative release! We are excited to share awesome ideas from several creative minds using these fantastic products.
You’ll love browsing our Be Creative gallery on our blog for loads of additional inspiration, and you can add your projects to these galleries as well!
You can check out the entire Be Creative collection here:
Learn MORE about our NEW Corner Ink Cube Holder:


