HOPPY Spring Card Trio!
Hi friends! Happy Thursday! I’m delighted to welcome back special guest Cheiron Brandon to our blog with this adorable trio of cards that is bright and happy and great for a multitude of occasions! Read on for more details, and enjoy!
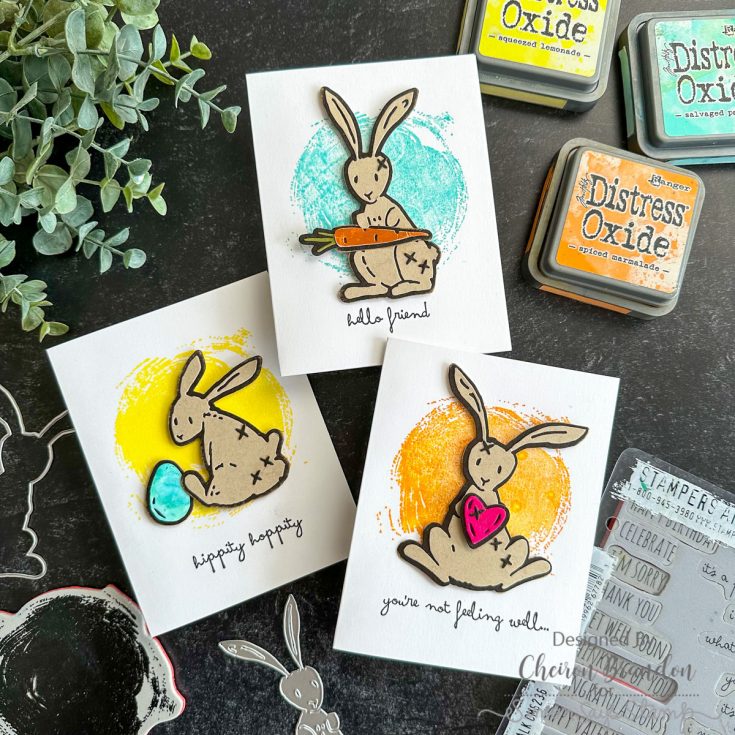
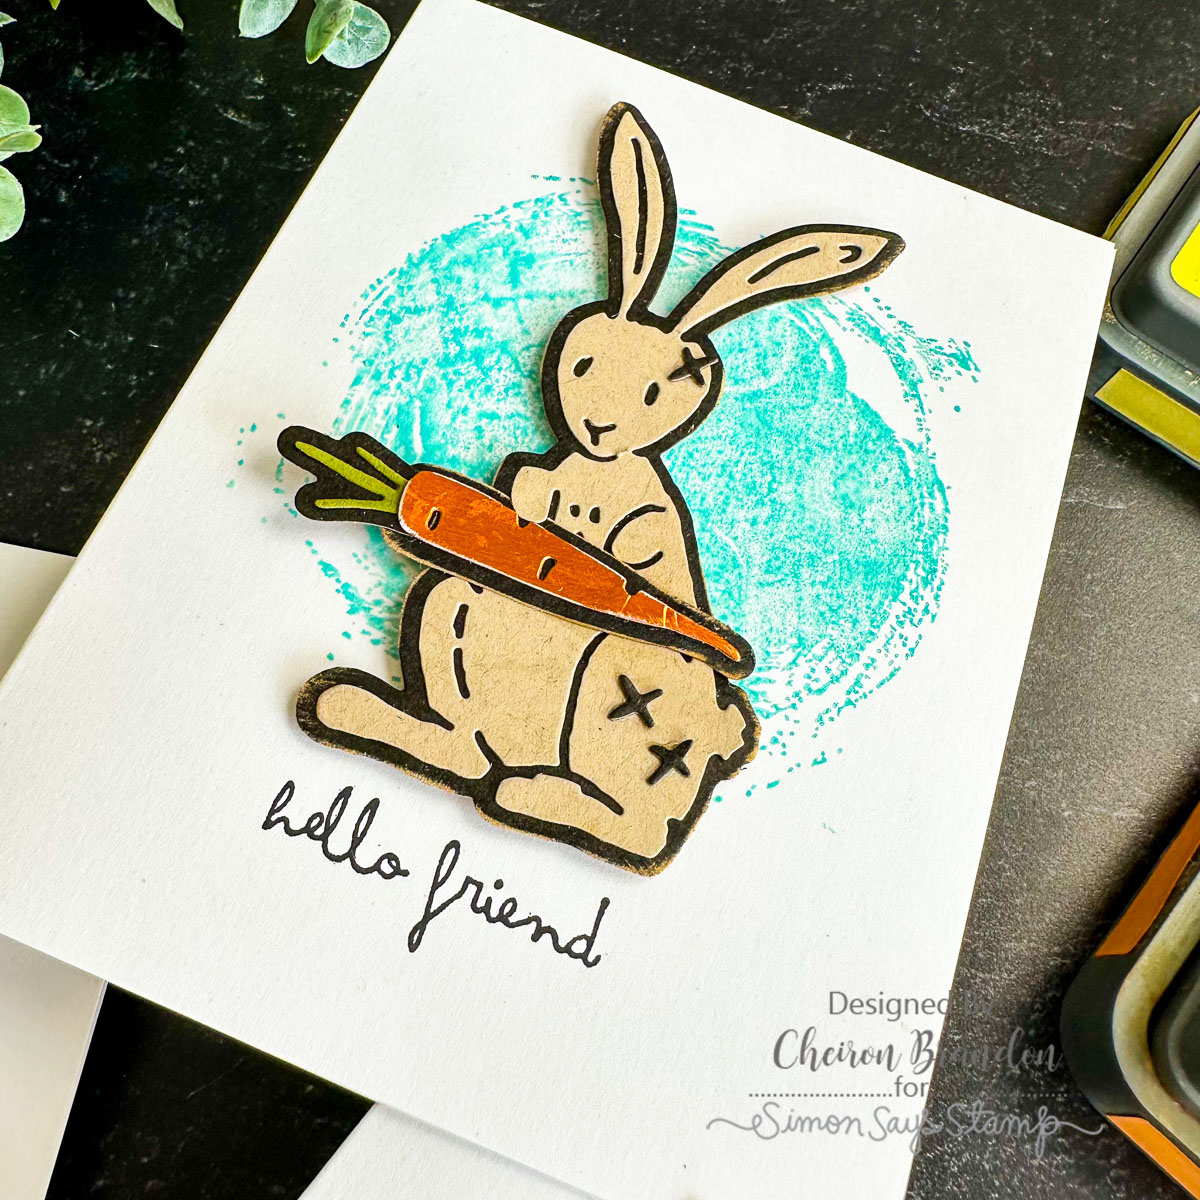
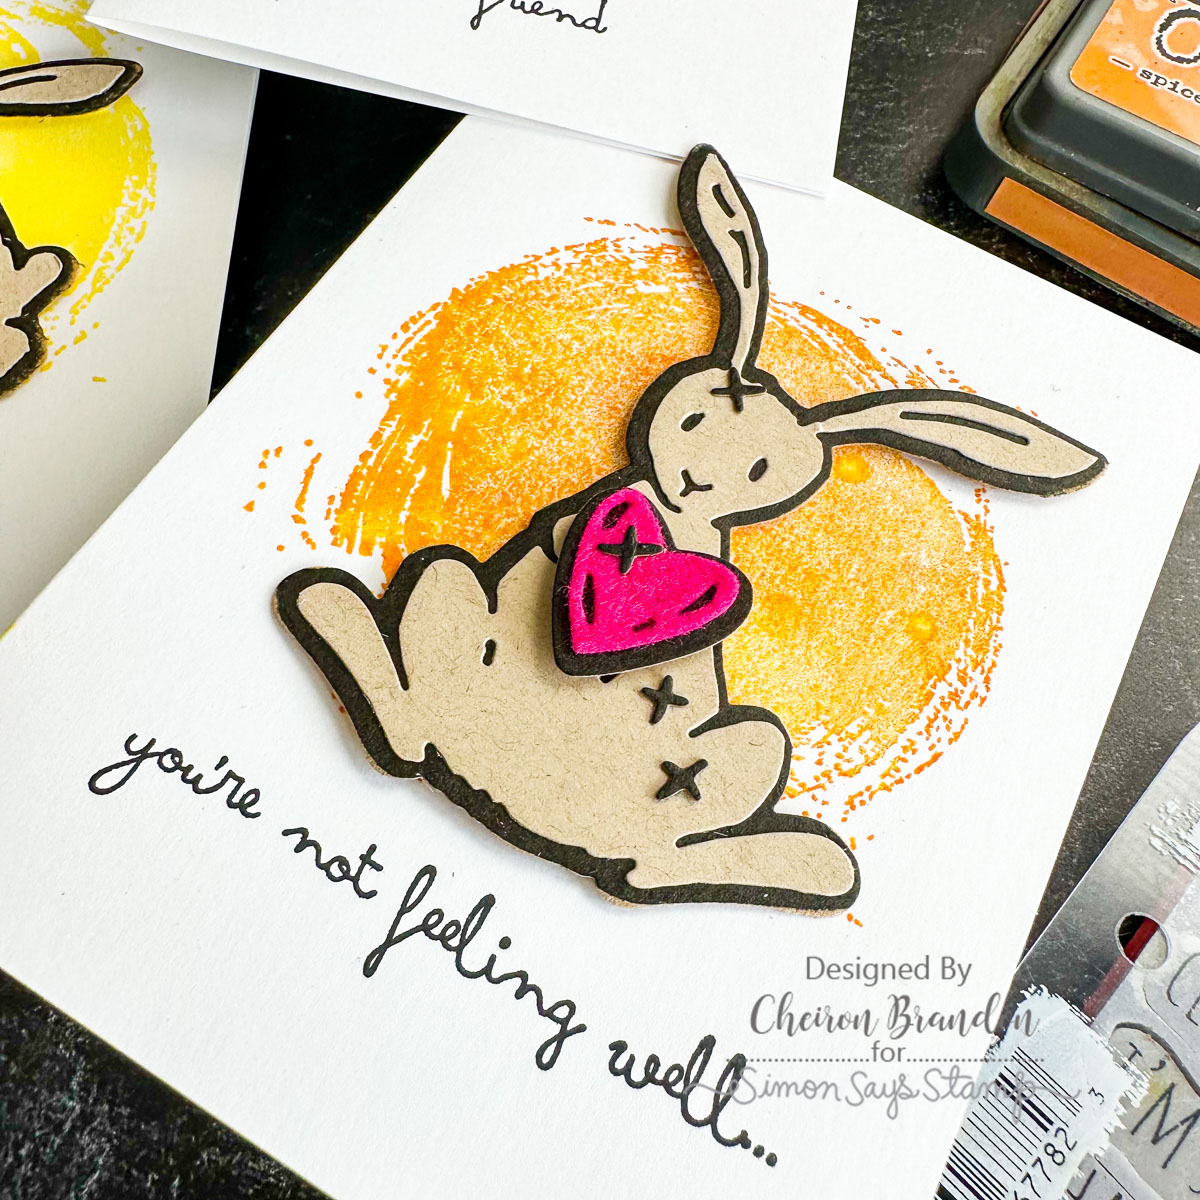
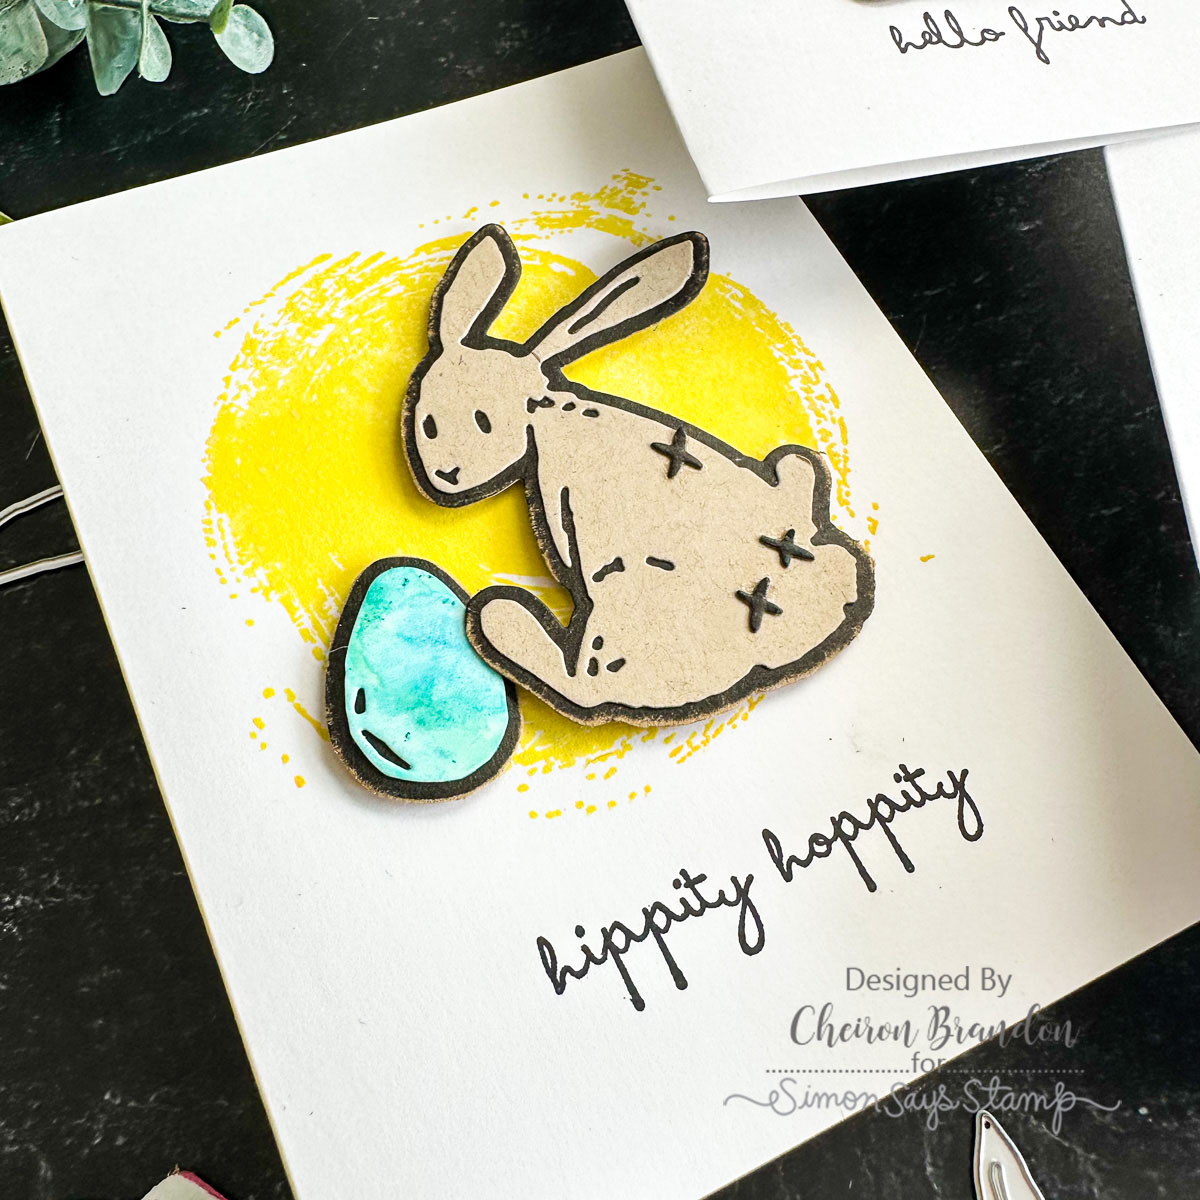
Hello there crafty friends it’s Cheiron Brandon here and I am thrilled to share a set of notecards with you using some of the latest products from Tim Holtz. I am definitely ready to welcome some spring weather and thought it would be fun to have some springy cards on hand. I used the new Tim Holtz Bunny Stitch dies. I wanted to create a set of cards that was not just for Easter. This bunny die set comes with little accessories (egg, carrot, and heart) so I cut each one from a different surface. I cut the egg from Yupo paper and colored it with Alcohol Ink for a real dyed egg look, for the carrot I cut from Metallic Kraft stock, and the heart I cut with a piece of felt.
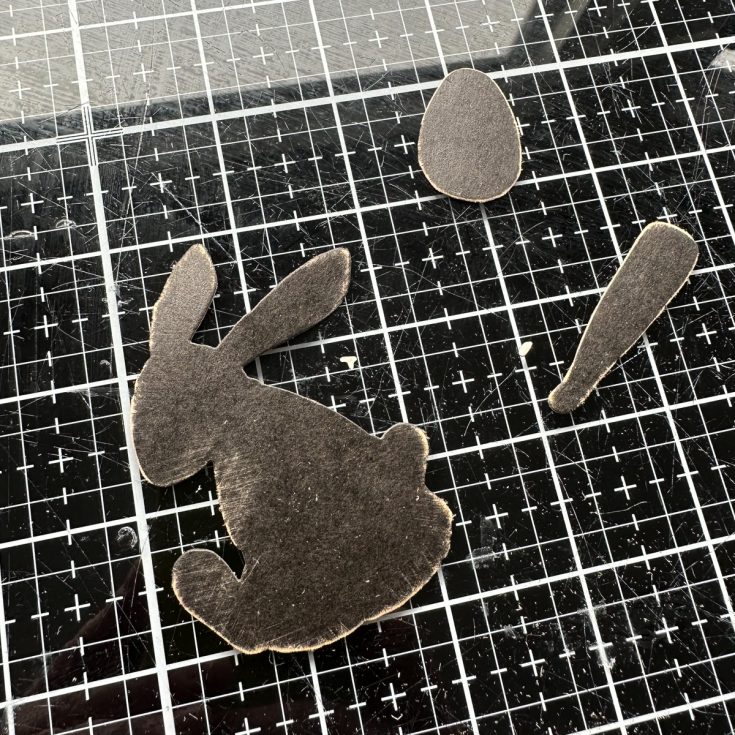
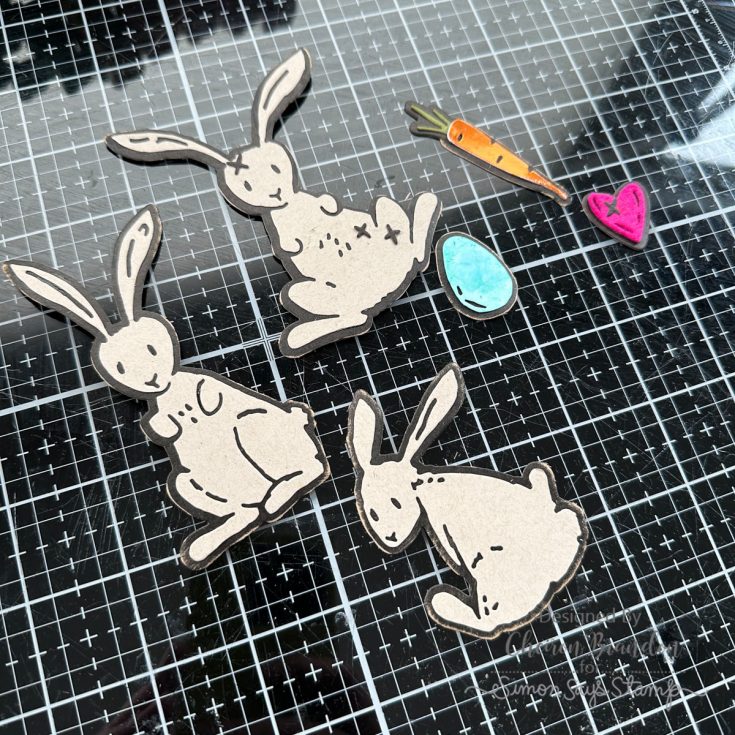
For the bunnies, I cut each one from Kraft Cardstock and layered them onto a piece of Black Kraft Stock that I had sanded on the edges with a Sanding Disk. If you have not tried these, they work with the Ranger Ink blending tools and just stick on to the end like the foam or felt. They are so easy to use. I added the little stitches to each bunny that I had also cut from Black Kraftstock.
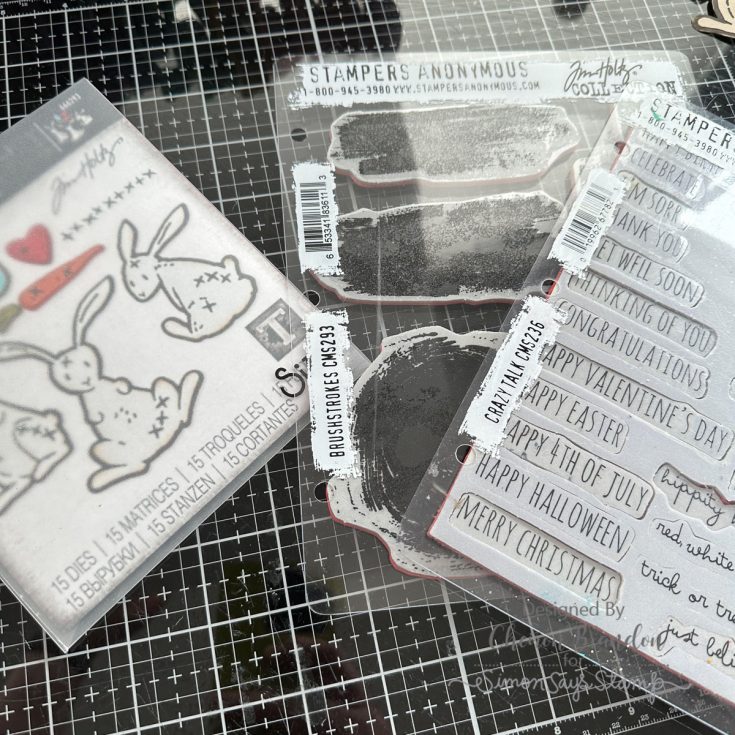
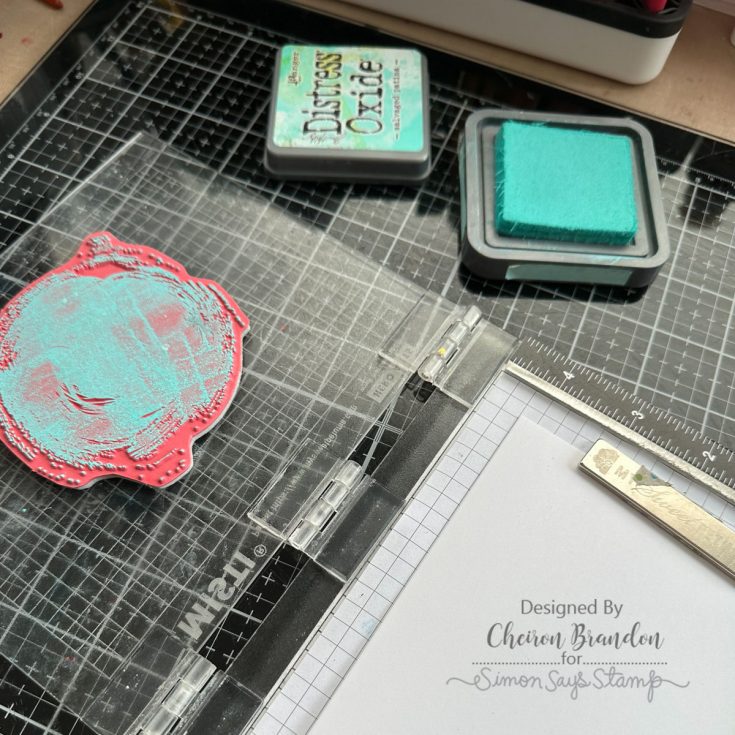
To assemble the cards I picked some springy colors of Distress Oxides and stamped the big circle image from the Brushstrokes stamp set onto a notecard, then added a sentiment to each one from the Crazy Talk set. I adhered each of the bunnies to the card with foam squares and added the egg, carrot or heart to make a quick and easy set of notecards. These were so fun to create, I may have to make another set!
SUPPLIES:
|


Thanks so much for stopping by, and thanks to Cheiron for being our guest!
Heart-Shaped Wedding Card with Layered Stenciling
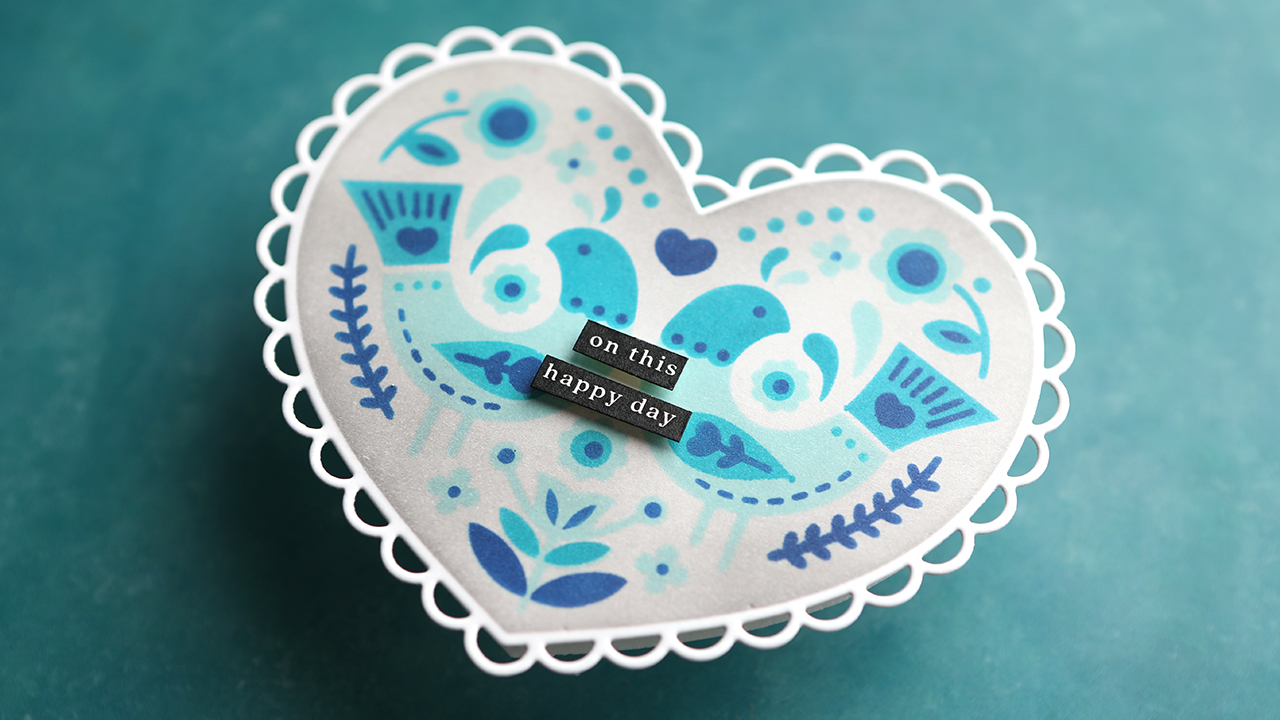
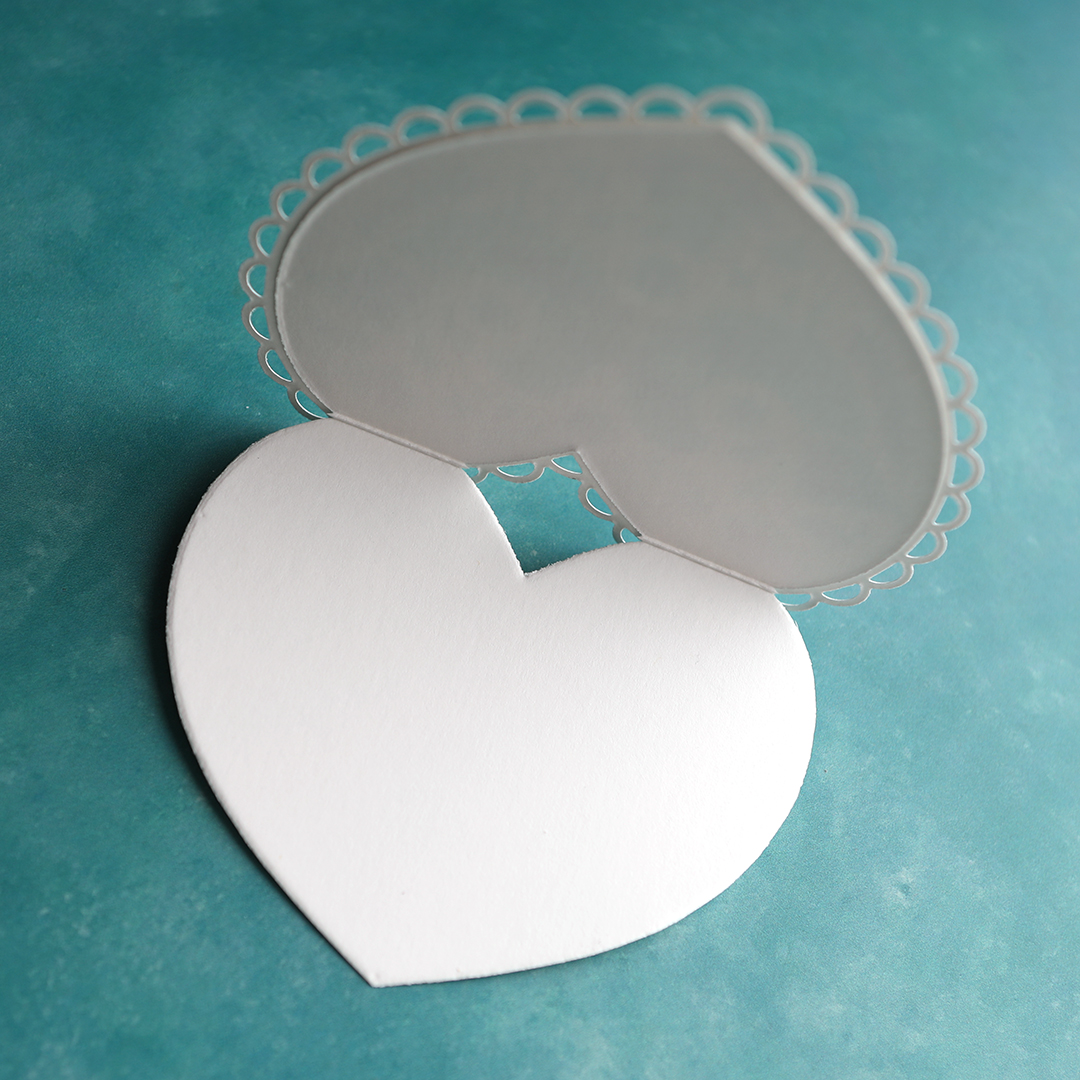
Hi all! Kristina Werner here with a fun heart-shaped card that would be perfect on top of a wedding gift! I use the Layered Folksy Heart stencils, Happy Hello coordinating dies, and Nested Round Hearts dies to create this card.
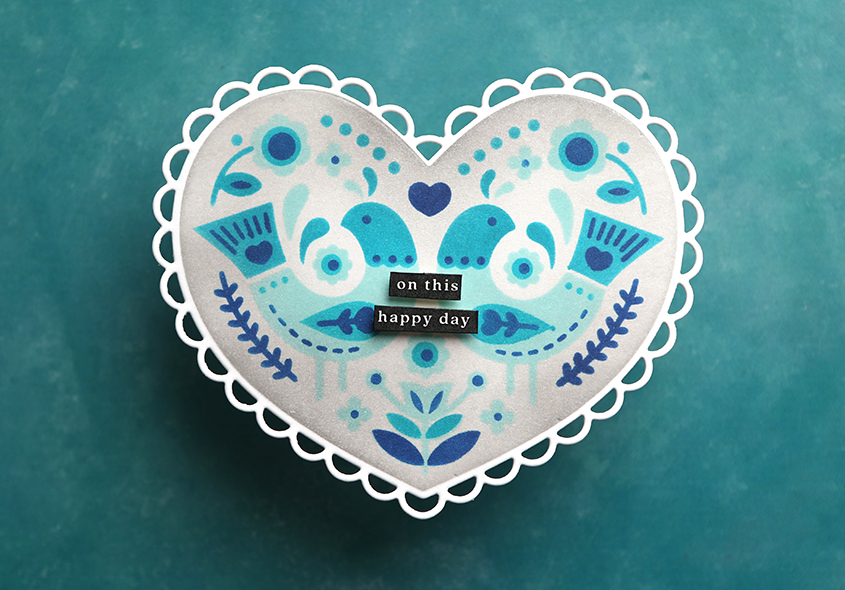
I started out by blending the four layers of stencils with four different ink colors: Fog, Seafoam, Ocean, and Royal. Then I die cut the image using the Happy Hello dies.
To make the die cut heart into a card, I used the largest heart die in the Nested Round Hearts die set to cut a card base and then adhere it to the stenciled heart.
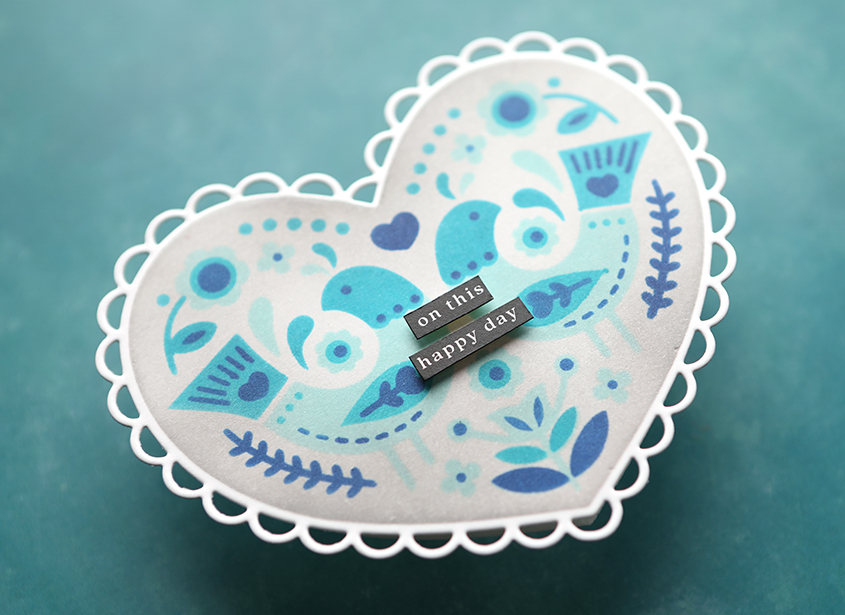
To finish off the card, I used a small sentiment from the Reverse Wedding Sentiment Strips.
Enjoy!
Supplies
|


Clean & Simple Slimline Birthday Candle Card: Yippee for Yana

Hi friends! Please join me in welcoming the oh-so-talented and amazing Yana Smakula! (Please note; our dear friend Yana is Ukrainian, to show support to our brothers and sisters in Ukraine, please see Yana’s post HERE.)
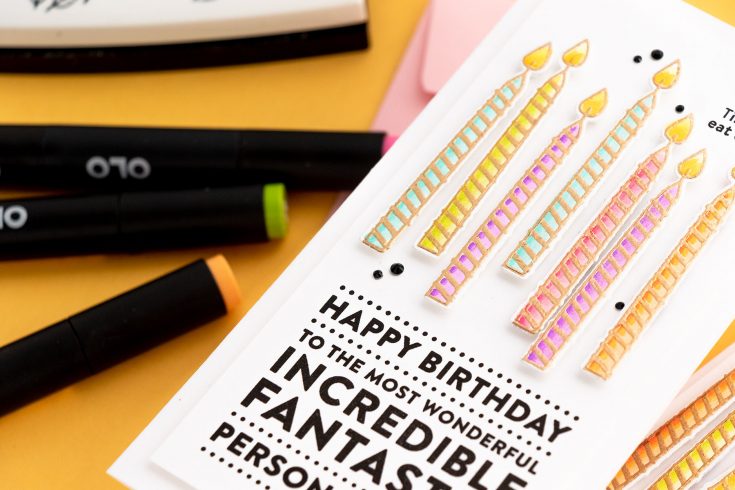
Hello, crafters, this is Yana Smakula for Simon Says stamp! Welcome back for another Yippee For Yana video! In this video, I’m creating CAS Birthday Cards using just a single candle stamp along with some sentiments and I’m also playing with the OLO markers.
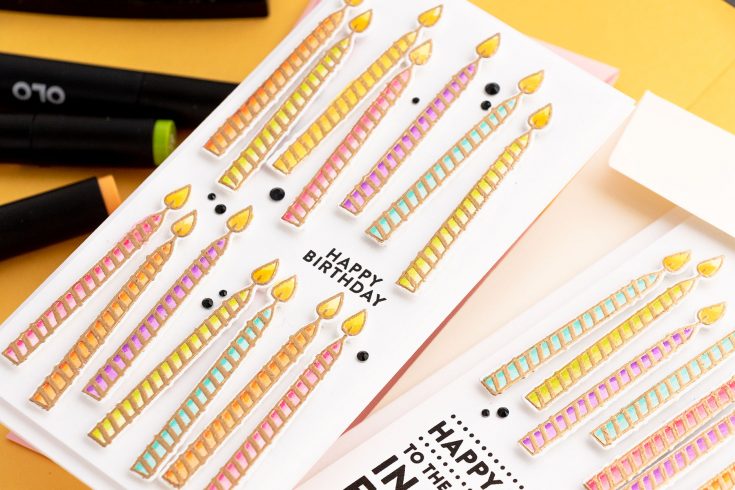
I never have enough birthday cards, so I tend to make a lot of them. For my today’s video, I pulled out an older stamp set from Simon, called Big Birthday Greetings, it is one of my all-time favorites. The main image I am using today is the candle. This stamp set also has a set of coordinating dies and there’s a die to cut that candle out. So the idea that I have for this card – I want to have a bunch of colorful candles, basically have a candle background and just add a simple birthday sentiment.
I stamped and heat embossed a bunch of candles in Simon’s Antique Gold Embossing Powder onto Simon’s #130LB cardstock.
I used new-to-me markers, OLO, to color the images. I did use one Copic marker, the Y35, and I combined it with the OLO markers. You can combine Copics and OLOs. In fact, if you have a decent size Copic marker collection you can use the OLO markers to fill in any color gaps that you might have. Here I did the opposite, I used a Copic marker to fill the yellow gap that I had with my OLOs.
Coloring over embossing powder is always tricky. You don’t want to do a lot of blending, in fact, it is best to do no blending over the embossing powder, as the alcohol might dissolve it, so when it comes to coloring over embossing powder, it is best to do minimal blending.
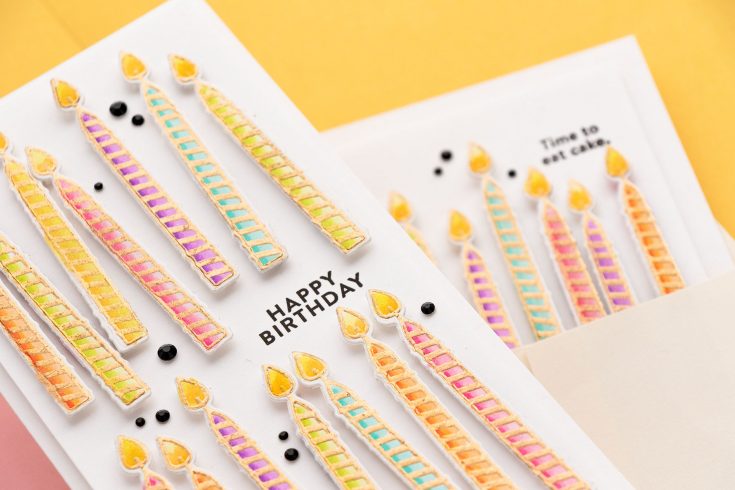
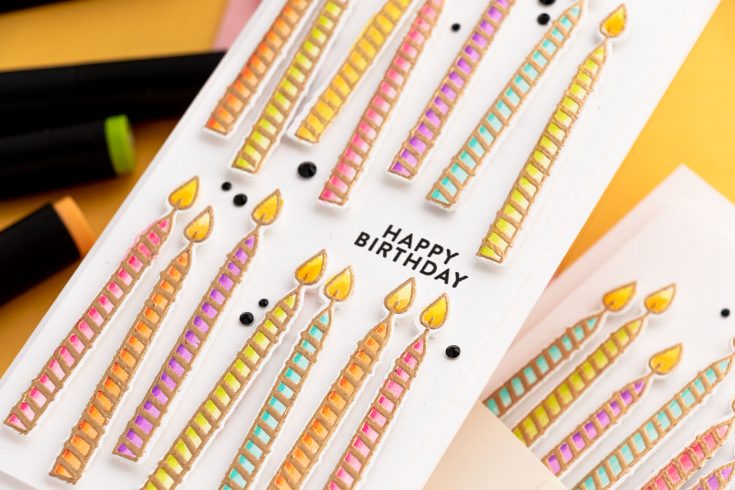
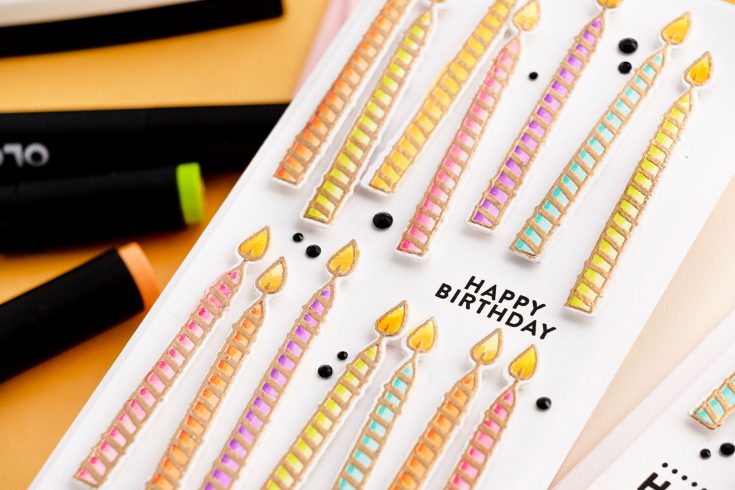
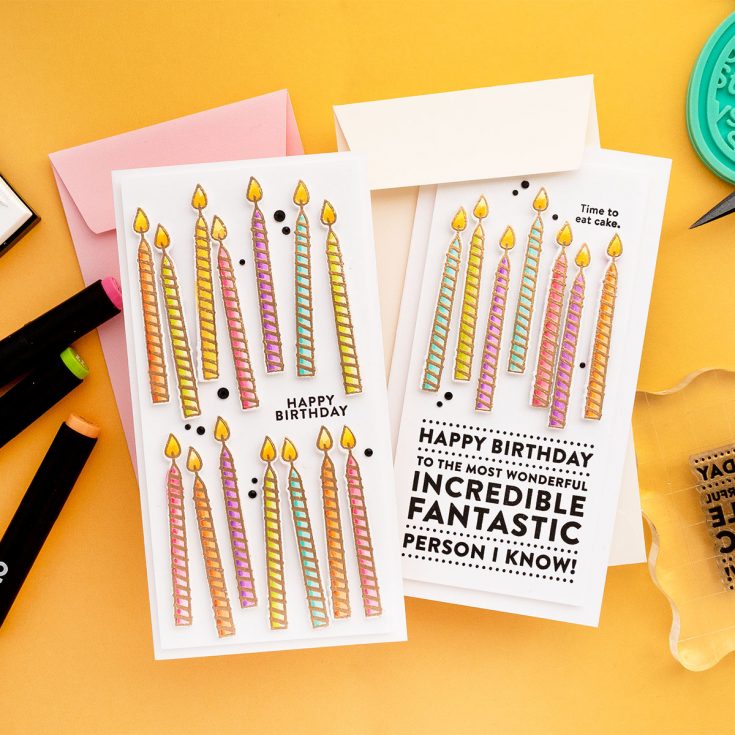
With the coloring done I cut the candles apart and used a coordinating die to cut each one of them out. At this point, I started testing the layout of the candles that I wanted to have on my card and I realized that an A2 card wouldn’t work here, so I switched to a mini slimline. The mini Slimline cards measure 3 1/4 x 6 1/4”. Here I cut a white cardstock panel to 3 x 6” and my plan was to have 2 rows of colorful candles with a tiny Happy Birthday sentiment in the center.
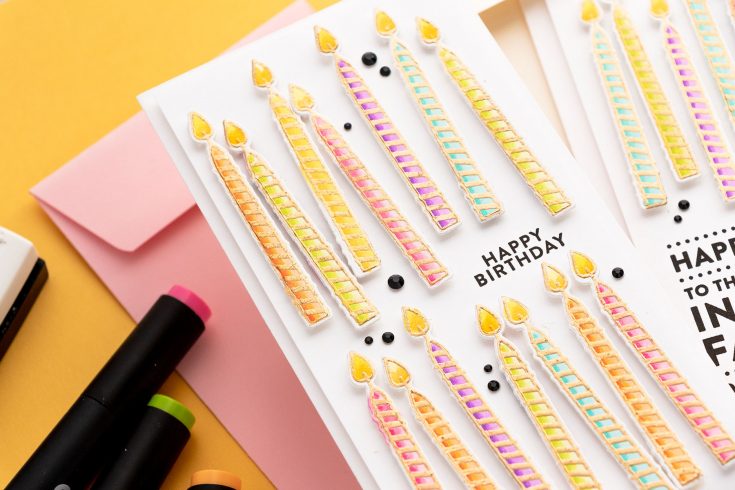
I stamped the sentiment in Versafine Onyx Black ink and foam-mounted the candles on top. I also foam-mounted the panel onto the card base.

I wanted to add something else to the background, so I used the black gems from Spellbinders and scattered them here and there adding movement and interest to the background. The black color worked well here as it coordinated with the black-stamped sentiment.
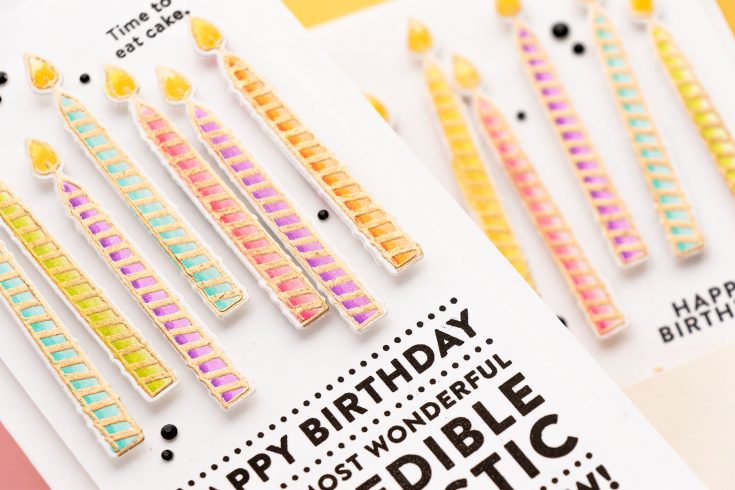
I still had some candles left, so I decided to create another card, also a mini slimline. I used a big sentiment from the same Big Birthday Greetings stamp set, I stamped it in Versafine Onyx Black, I also stamped a mini sentiment at the top – it reads Time to Eat Cake and I filled the space between the sentiment using my leftover candle die cuts. This panel was cut even smaller, so 2 3/4 by 5 ¾” and it was also foam mounted onto the slimline card base. I love the way they turned out, I feel pumped to go ahead and stamp and color a bunch more candles and make a bunch more birthday cards and I hope you feel the same after watching this video. Have fun stamping!
WATCH THE VIDEO:
SUPPLIES:
|


Thanks so much for stopping by, and thanks again to Yana for being our guest!
Ways to support Ukraine:
If you are looking for ways to support Ukraine, we encourage you to visit this page on Yana’s blog:


