Berry Sweet Slimline Lawn Fawn Card Idea!
Hi friends! Happy Thursday! Please join me in welcoming special guest Caly Person representing Lawn Fawn with this super SWEET slimline card idea! Read on for all the details, and enjoy!
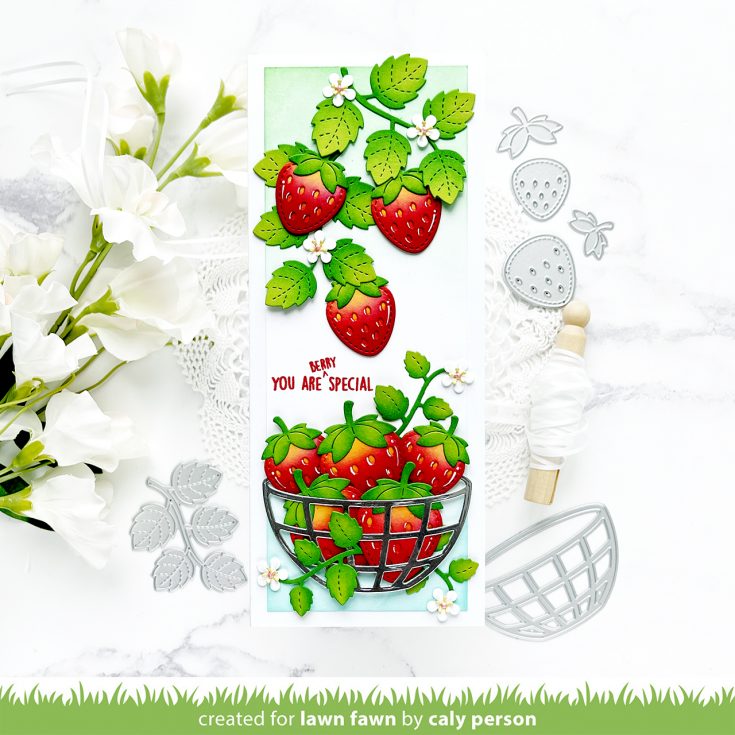
Hello! It’s Caly with you today sharing some Lawn Fawn Inspiration! Winter months are so long and I hope this card brings you some spring and summer vibes!
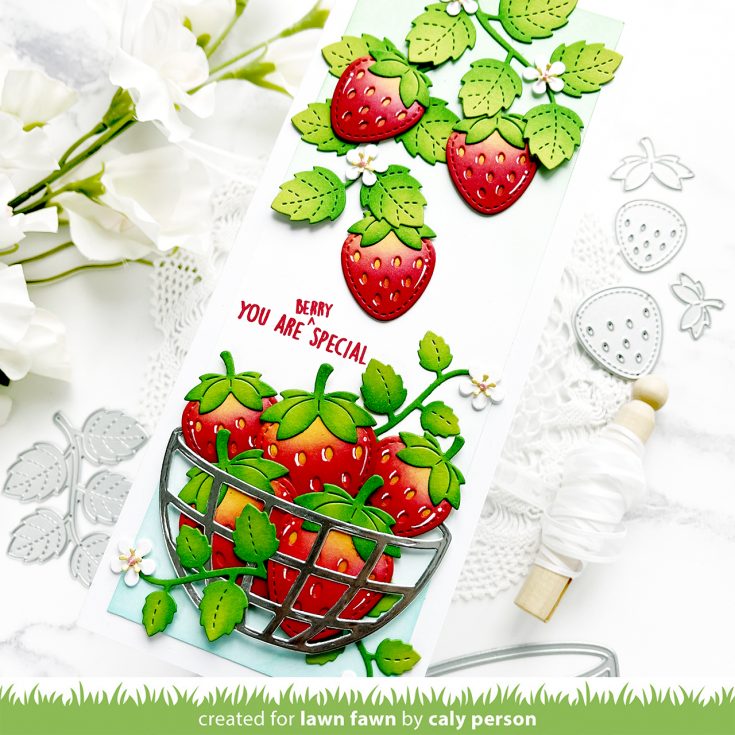
My card features the Strawberry Patch die. I paired it with smaller foliage and flowers from the Stitched Strawberry Frame die. I die-cut my strawberries, foliage, and flowers using colored cardstock and ink-blended with coordinating colors to add depth.
Lawn Fawn cardstock used: Sticky Note, Cilantro, Ballet Slipper
Lawn Fawn ink used: Lobster, Raspberry, Sunflower, Merman, Clover
Next, I die-cut the Fruit Basket die using Matte Silver Cardstock. On a slimline panel, I ink-blended the top with the Clover ink and the bottom with Merman ink before arranging my fruit basket at the bottom and strawberry stems at the top.
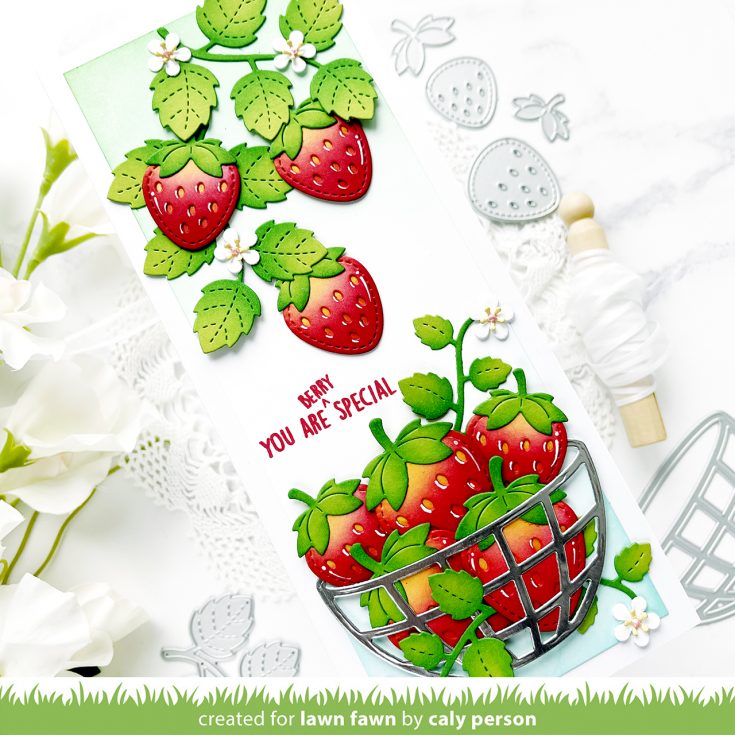
I added my flowers in various areas and used Nuvo Crystal Drops in Metallic Shimmering Gold to the centers to give them some color and dimension. To finish, I stamped a sentiment from the Berry Special stamp set using Lobster ink.
I hope you like it! Thanks so much for visiting today!~Caly
SUPPLIES:
|


Thanks so much for stopping by, and thanks to Caly for being our guest!
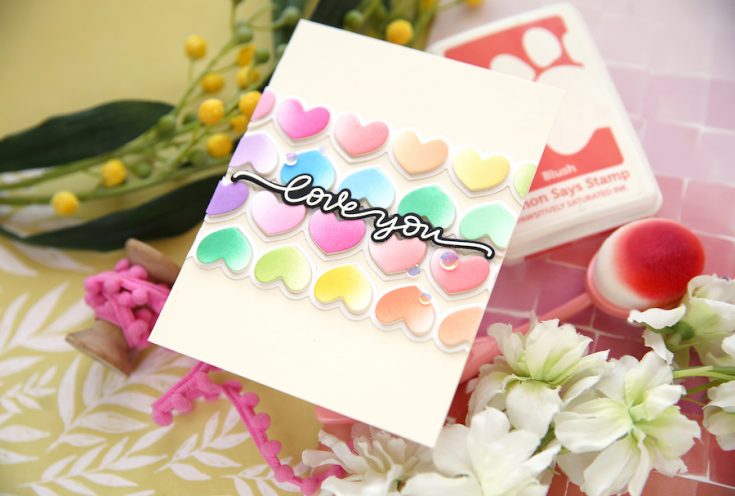
[Blending to the high heavens!] + cool tip for perfect placement in a Love card: Amore Laurafadora
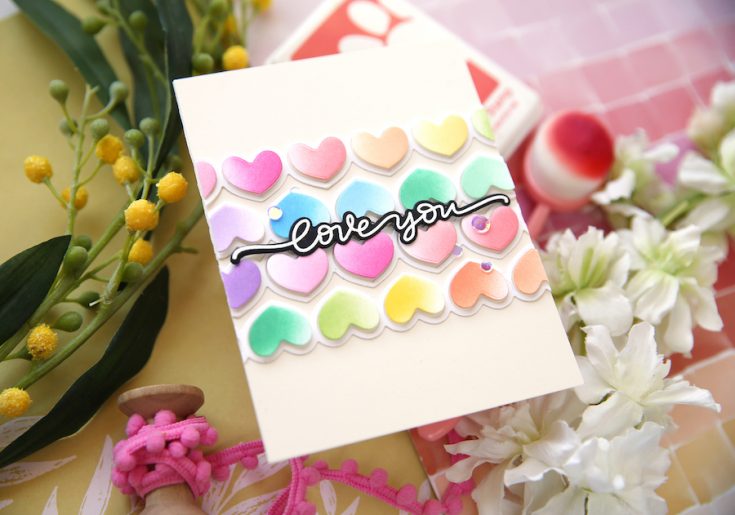
Hi friends! Happy Wednesday! This card design by Laura Bassen might just tug at your sweet tooth! She’s ink blending “to the high heavens” using a plethora of our creamy and dreamy Pawsitively Saturated inks, and sharing some great tips for placement and adhering our Heart chain die for a similar look! Polish it all off with a pretty sentiment like the one Laura used from our XL Love Greetings stamp set! Be sure to watch the video for all the details, and enjoy!
WATCH THE VIDEO:
SUPPLIES:
|


Thanks so much for stopping by, and thanks to Laura for being our guest!
[How To]: Playful Quirky and Colorful Birthday Cards! Yippee for Yana

Hi friends! Happy Tuesday! Please join me in welcoming back special guest Yana Smakula who is sharing the most adorable and playful trio of Puffin Birthday cards! Be sure to read on to learn more! (Please note; our dear friend Yana is Ukrainian, to show support to our brothers and sisters in Ukraine, please see Yana’s post HERE.)
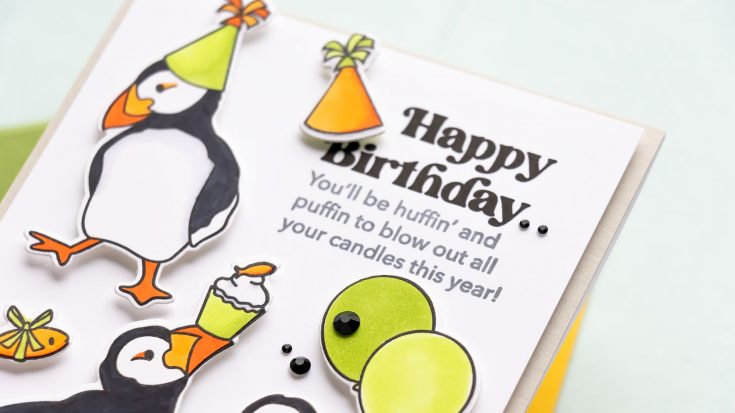
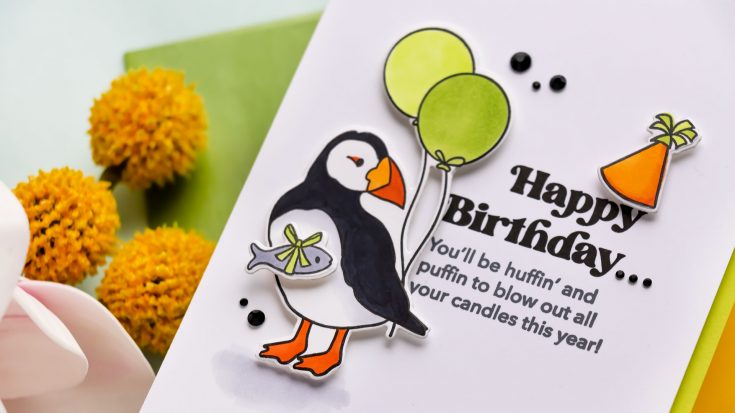
Hello, crafters, this is Yana Smakula for Simon Says stamp! Welcome back for another Yippee For Yana video! In this video, I’m creating CAS Birthday cards with the Simon Says Stamp Party Like a Puffin stamp set.
I stamped images from this stamp set in Intense Black ink onto Simon Says Stamp 130lb cardstock using my mini MISTI stamping tool. Next, I did very simple coloring. I picked this stamp set in particular, because I wanted to show you how you can do coloring on a very simple, very basic level, but still, have your stamped images look colorful and beautiful.
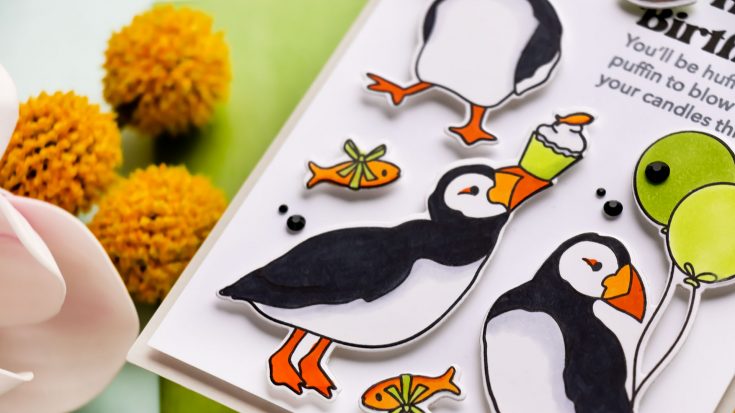
I’ve used C9 to color the bodies of the birds. You can go with a lighter shade, perhaps a C7, or a different tone, like a neutral gray or even a warm gray. I also added a touch of darker C10 along the detail lines of my bird, just to help that line remain visible on the finished image. Lately, I love to color images without the need to do excessive color planning, and color blending, all I want to do is add a solid layer of color and call it done and I feel this is the best way to get into coloring. If you’ve never done coloring before, or if you struggle, doing this sort of single marker coloring is very approachable. Next, I used C3 and C1 to add a touch of shading to the belly.
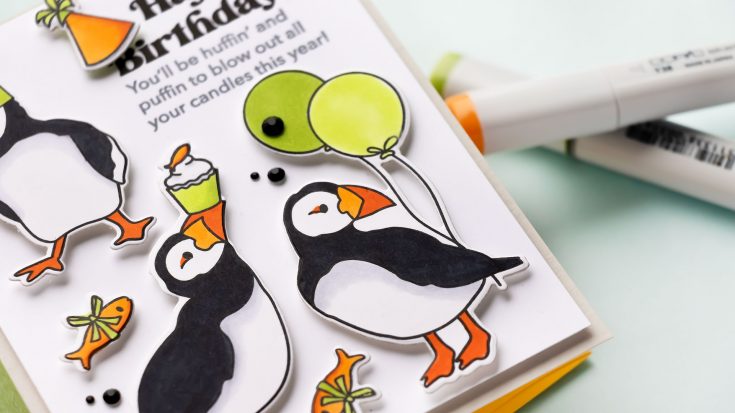
Next, I used YR07 to color part of the beak orange, add detail about the eye, and color the feet.
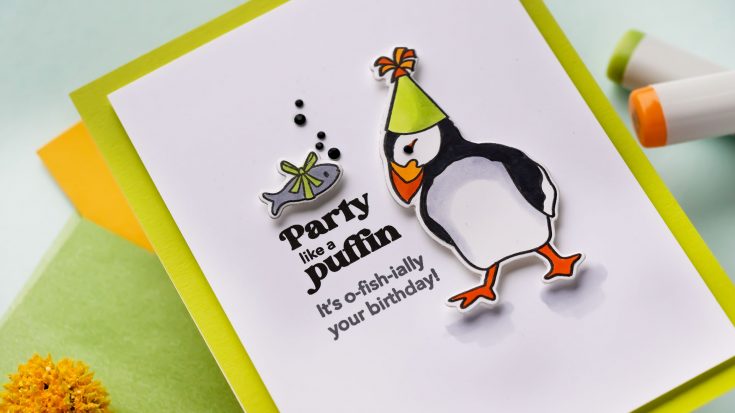
Y35 was used to color the other part of the beak yellow. YG01 and YG03 were used to color the balloons. There is also a party hat image and a fish tied with a bow and I used the same marker color to color those. With the coloring done I cut the images out using coordinating dies.
Next, I planned the layout for my card, I went with a 2×2 grid with 3 sections filled with birds and the 4th section used for the sentiment.
The sentiment was stamped using Charcoal, for the sub sentiment part and VersaFine Onyx Black for the “Happy Birthday” part.
I trimmed my panel to 4 x 5 ¼” and foam mounted it over a white A2 top folding card base covered with Fog cardstock.
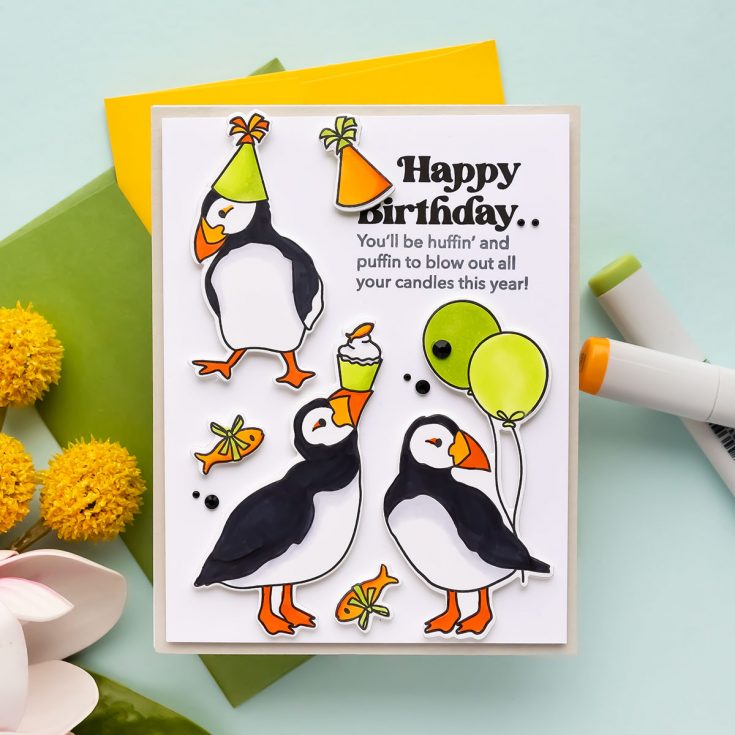
Lastly, I used black gems from Spellbinders to embellish this project.
Here are 2 more simple card ideas created using the same supplies and techniques – I loved using this stamp set and I couldn’t’ stop at just one card, I was inspired to make more! Have fun stamping!
WATCH THE VIDEO:
SUPPLIES:
|


Ways to support Ukraine:
If you are looking for ways to support Ukraine, we encourage you to visit this page on Yana’s blog:

Thanks so much for stopping by, and thanks to Yana for being our guest!


