What Do You Put on the Inside of Your Card? Yippee for Yana

Hi friends! Please join me in welcoming back the oh-so-talented and amazing Yana Smakula! (Please note: our dear friend Yana is Ukrainian. To show support to our brothers and sisters in Ukraine, please see Yana’s post HERE.)
Hello, crafters, this is Yana Smakula for Simon Says stamp! Welcome back for another Yippee For Yana video!
What do you do on the inside of your card? Truth be told, I rarely do anything and I just keep it boring and blank. But this time I challenged myself to continue the card design from the front to the inside of my card! I hope you’ll join me and create a card with a simple design repeated on the inside.

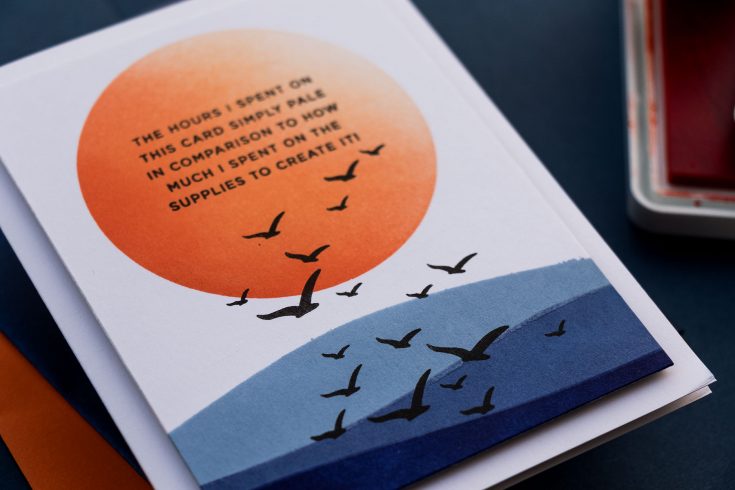
I used the circle mask from Simon Says Stamp to ink blend a sun using 3 shades of orange ink – Cantaloupe, Sherbet, and Mandarin. Next, I used the Horizon Line stencil, this stencil has a brilliant design, you can simply slide your cardstock panel into or between the sections that you want to ink blend and you not only have the stencil but also the mask to protect the areas you have already blended. I used Galaxy, Twilight, and Morning to ink blend the bottom part of my panel. Next, I used a rectangle die and I trimmed this panel down.

Next, I used my mini MISTI stamping tool and stamped the sentiment in the center of the sun. I was going for a snarky card and my sentiment reads – The hours I spend on this card simply pale in comparison to how much I spend on the supplies to create it! This stamp is from Cathy Zielske, who is the master of unique and snarky sentiments! I stamped this in VersaFine Onyx black ink.
Next, I stamped a bunch of bird silhouettes – these come from 2 different stamp sets from Simon and these happen to be among my favorites, I keep going back to these sets again and again – these are the Seas and Greetings and the Your Light sets.

Next, I foam mounted this panel onto the A2 card base, I used black fun foam, I typically use white, but I’m out of white, so black it is for this card!
Now let’s talk about the inside of the card! Typically the inside is left blank, this time I challenged myself to repeat the card design on the inside and I ink-blended an identical panel.

I stamped a different sentiment, this one reads Hugs! You Are Literally My favorite and I adhered to this panel on the inside of my card and I love this result! Have fun creating!
WATCH THE VIDEO:
SUPPLIES:
|


Thanks so much for stopping by, and thanks again to Yana for being our guest!
Ways to support Ukraine:
If you are looking for ways to support Ukraine, we encourage you to visit this page on Yana’s blog:

Hawaiian Dimensional Floral Card by Caly!
Hi friends! Happy Saturday! Please join me in welcoming back special guest Caly Person with a gorgeous and Summery floral card idea featuring Lawn Fawn products! Read on to learn more and enjoy!
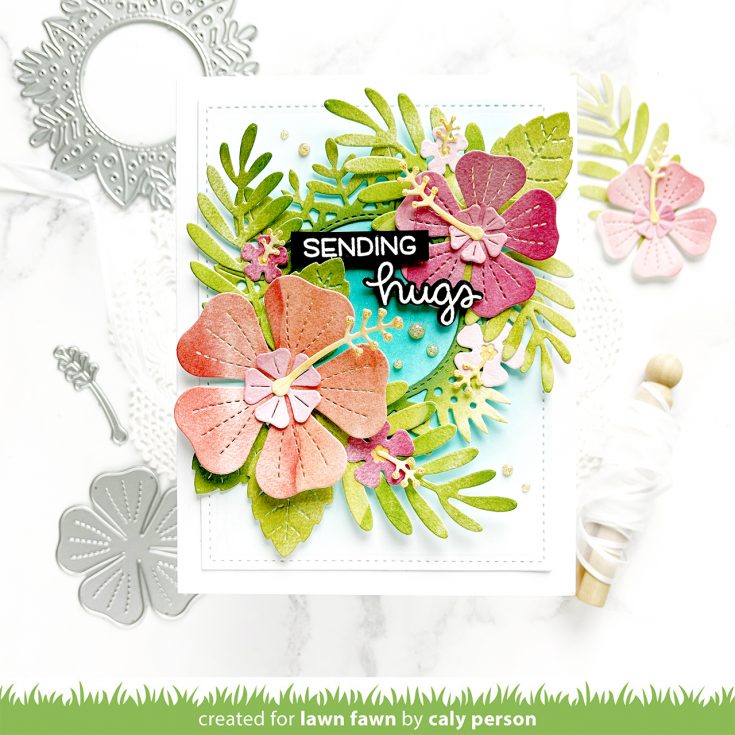
Hi friends! I hope today’s card brings you tropical summer vibes. It’s colorful and die-cut from colored cardstock – super convenient and easy to do! All the patterned paper used is from the Watercolor Wishes Petite Paper Pack.
I die-cut the Happy Hibiscus flowers using red, pink, and yellow cardstock. Then for the foliage from the Tropical Leaves and Magic Iris Tropical Leaves dies, I used green cardstock from the paper pack.
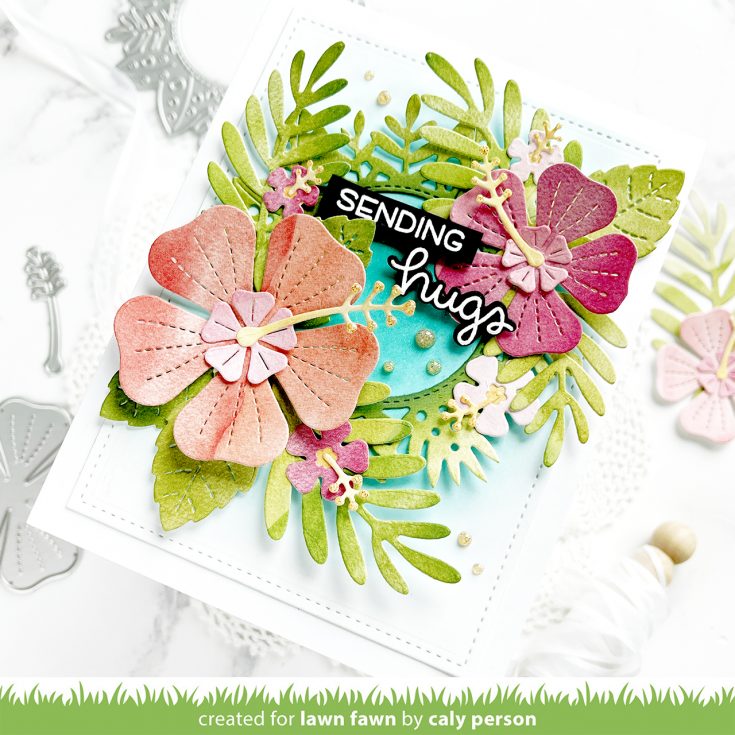
After die-cutting everything, I added some Rustic Wilderness Distress Oxide Ink to the Magic Iris Tropical Leaves die-cut to give it more color. On a white panel, I ink-blended the background with Peacock Feathers Distress Oxide Ink before die-cutting a stitched border using the largest Small Stitched Rectangle Stackable die.
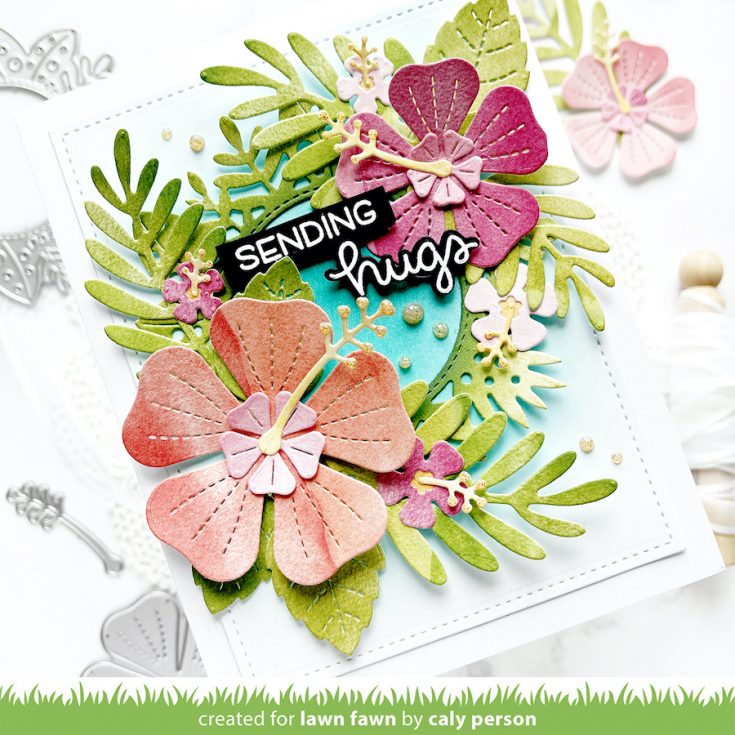
After arranging my images over the background, I embossed and die-cut my sentiments from the Long Distance Hugs set. I then finished with some sparkles by using some Nuvo Glitter Drops in Honey Gold.
SUPPLIES:
|


Thanks so much for stopping by, and thanks to Caly for being our guest!
Did You Know? July 2023 Edition!

Hello crafters, it’s Shari Carroll here with you! Today I have a new edition of our popular Did You Know series!
If it’s your first time seeing this feature, each month we bring you fun facts, creative tips, and even crafty hacks about your favorite supplies and brands; you can then use these awesome tips that you learn in your next crafting projects! Are you ready to learn some fun tricks? Keep on reading!
YELLOW SUNSETS AND GREEN MEADOWS INK CUBES
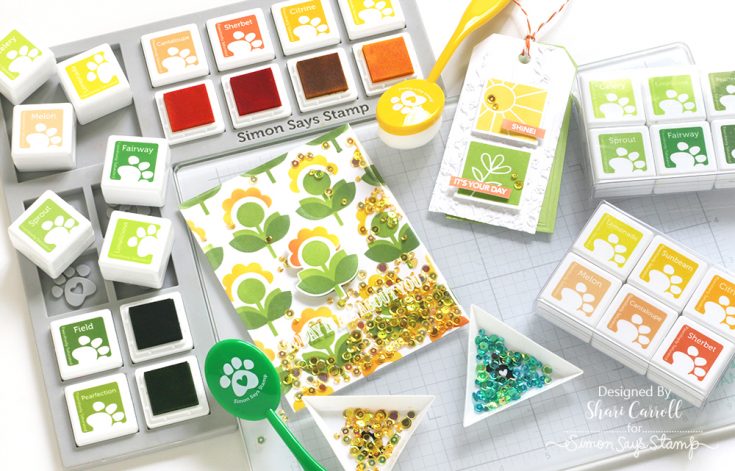
As promised, we recently came out with another two sets of ink cubes. The Yellow Sunsets 6-pack features a bright and cheery yellow/peach palette. The versatile Green Meadows 6-pack features a beautiful green color palette. All our ink cubes can be used for various techniques and projects. The handy box is easy to take ink on the go taking up less space than full-size ink pads.
TIP: Don’t forget, these can be re-inked when dry with Simon Says Stamp Pawsitively Saturated Re-inkers!
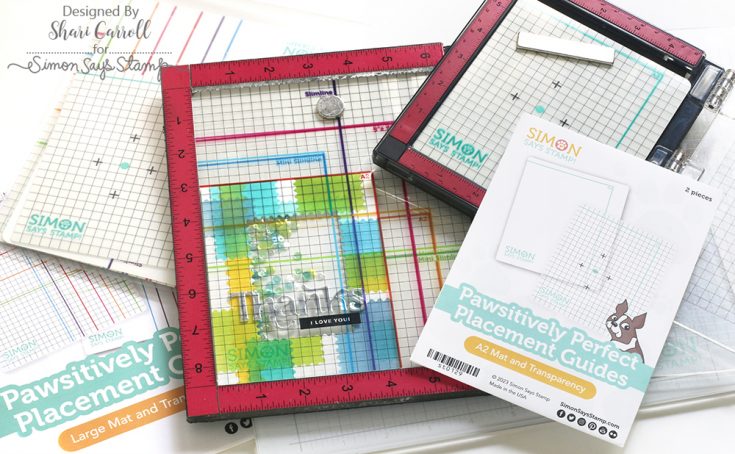
The Pawsitively Perfect Placement Guides Mat and Transparency by Simon Says Stamp are essential tools for precision stamping and card making. They come in two sizes, the A2 size inserts perfectly into the 6 x 7-inch Misti stamp platform, and the large size fits the 8 x 10 Misti platform.
The transparencies have markings to make your stamping and aligning a breeze.
TIP: Check out our Quick Tip video below to see how these work.

Too CUTE not to share!! Our Paw-It sticky notes are a pad of 40 sweet notes fashioned in the form of a paw. These pads are perfect for your office, craft room, or any place where you need to jot down a quick message or reminder.
TIP: Use them as a removable message inside your cards so the recipient can repurpose your card.
SIMON SAYS STAMP BRUSH POWDER TOOL
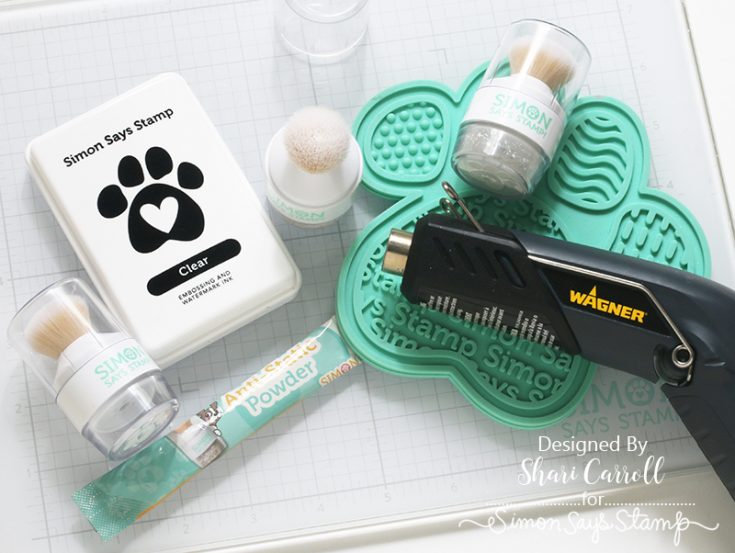
Are you ever frustrated with stray speckles or marks on your heat-embossed projects? The Simon Says Stamp Brush Powder Tool is perfect for preparing a surface for embossing! This brush features a compact design that allows you to fill the reservoir with the Simon Says Stamp Anti-Static Powder and to apply in just the right areas of your projects.
TIP: Apply powder to the project surface, stamp with clear embossing ink, apply embossing powder, tap off the excess, and set with a heat tool.
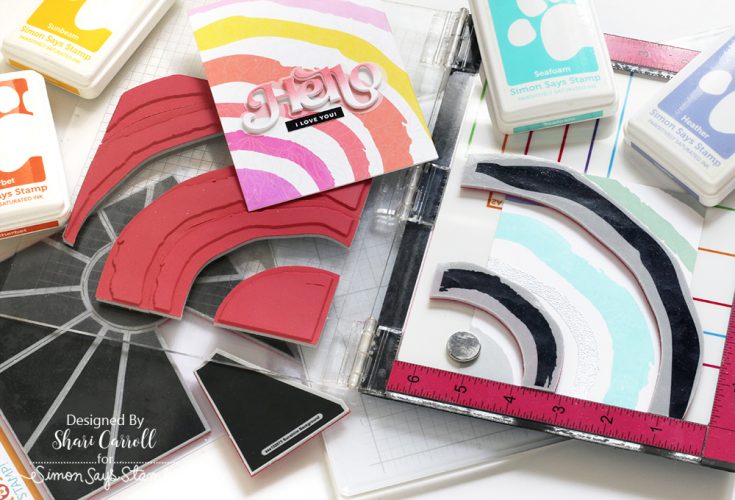
We have several pull-apart type Cling stamps. These are designed to allow you to use segments separately with different color inks and techniques. They are simple to use. Pull them apart, stamp, clean, and return them to their original design on the clear acetate. I have listed several of our pull-apart type stamps below.
TIP: Use these stamps with a large Misit for perfect positioning.
I hope these tips have helped you learn a few tricks for your upcoming crafting projects… Thanks for tuning in today and spending some time with me!
SUPPLIES:
|


