More August 2023 Card Kit Inspiration with Kristina Werner
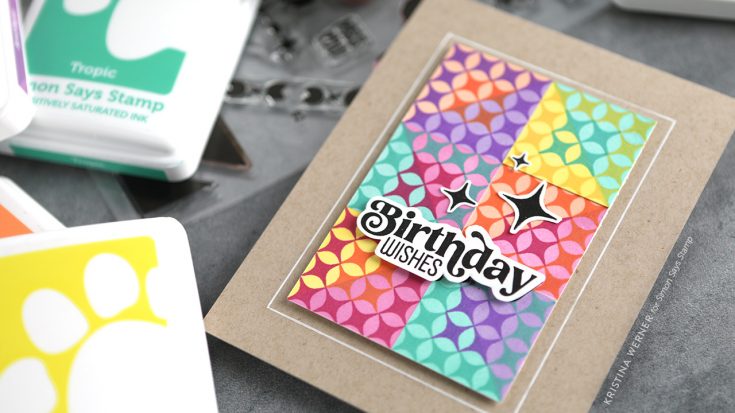
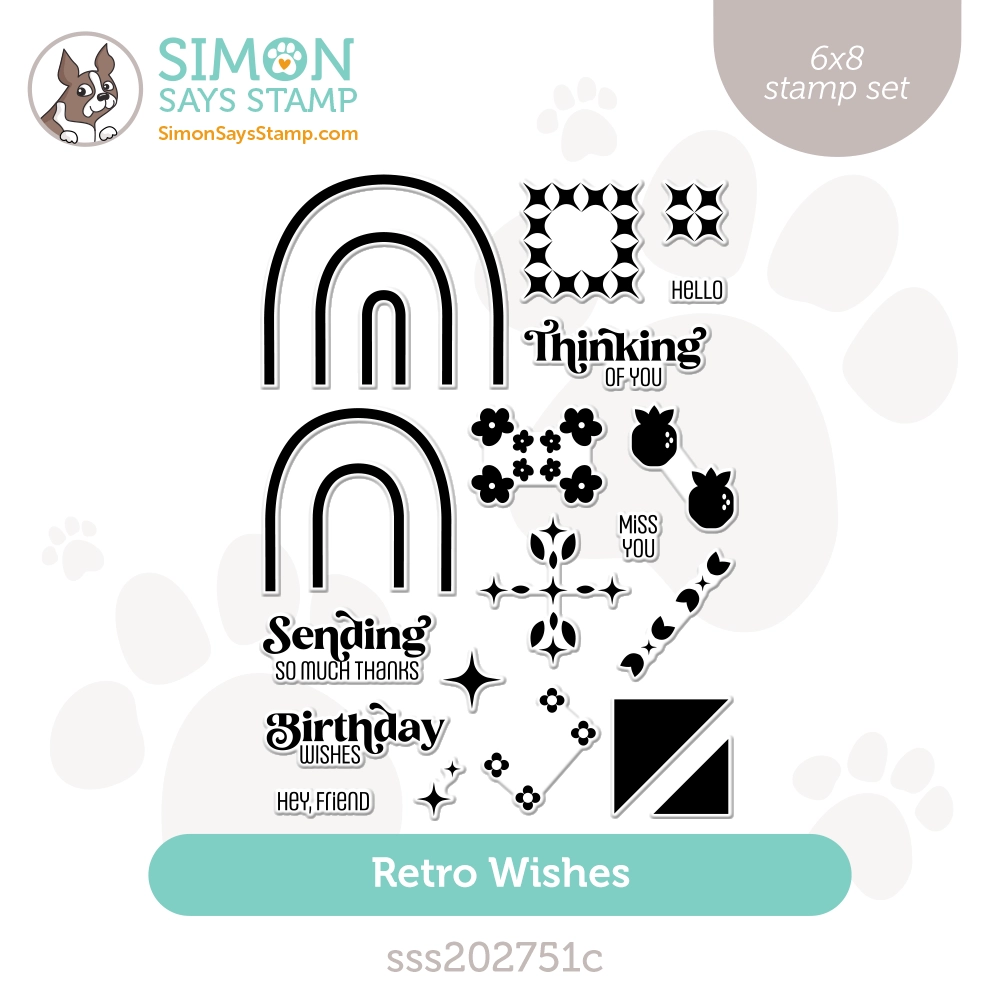
Hi all! Kristina Werner here. Today I have some fun, all-stamped card inspiration for you featuring the August 2023 Card Kit! I used the Retro Wishes stamp set to create a super colorful birthday card, and I did it all with stamping.
There are lots of fun ways to use the images in the Retro Wishes stamp set. After experimenting with some of the elements, I focused in on the elements labeled D1 and D2. I loved how these elements looked stamped on top of the half square elements. Super fun!
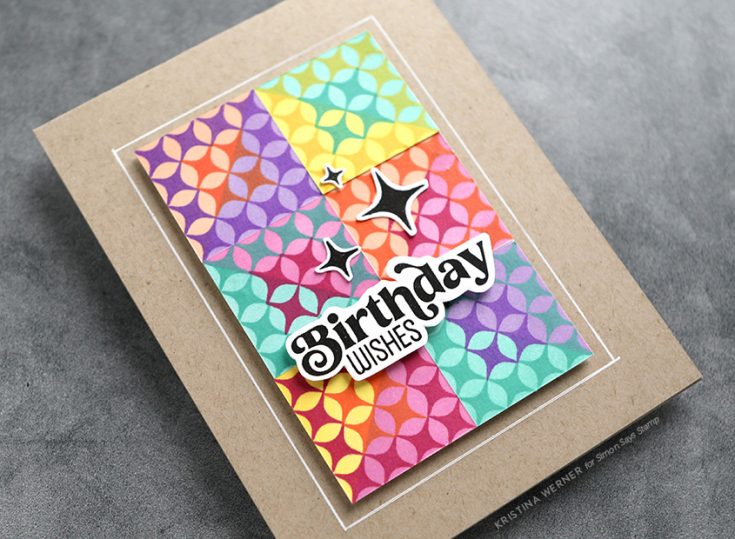
I mixed and matched the different colors of ink and ended up with six squares that I combined into a pattern. I cut out the squares and adhered them together and them popped them up on a kraft colored notecard.
The greeting was stamped in black ink and them carefully cut out using scissors. I also stamped three of the “burst” elements from the stamp set.

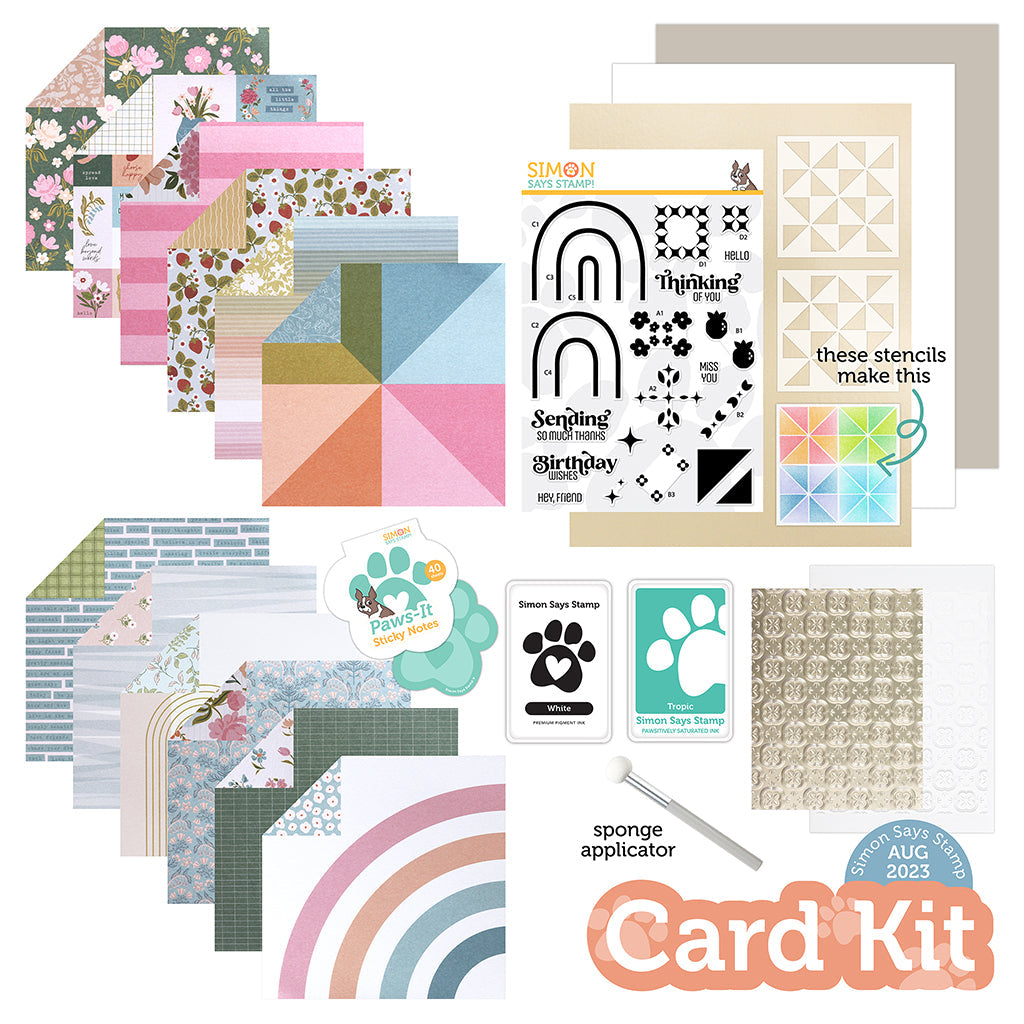
Thanks for stopping by today! You can pick up the Retro Wishes stamp set individually or in the card kit. You can also subscribe to receive the August 2023 Card Kit and future card kits HERE.
Supplies
|


Nature Collage Panel by Anna-Karin
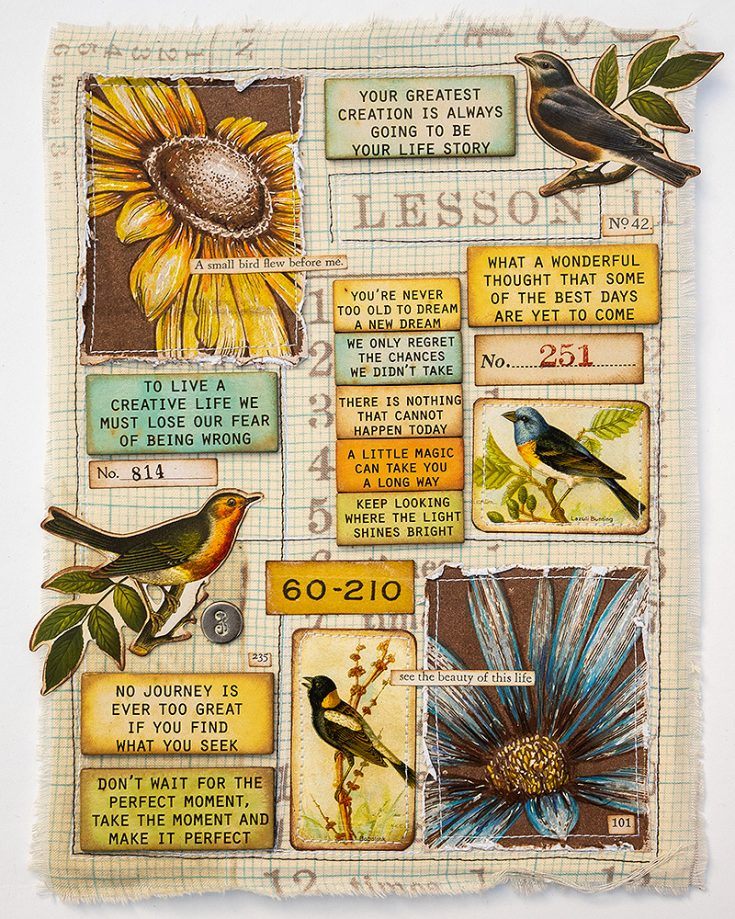
Hi friends! Happy Sunday! We’re always delighted to welcome back special guest Anna-Karin Evaldsson on our blog! She’s made this gorgeous nature collage panel to share today! Wouldn’t this be a super fun summer project? Read on for all the details, and enjoy!
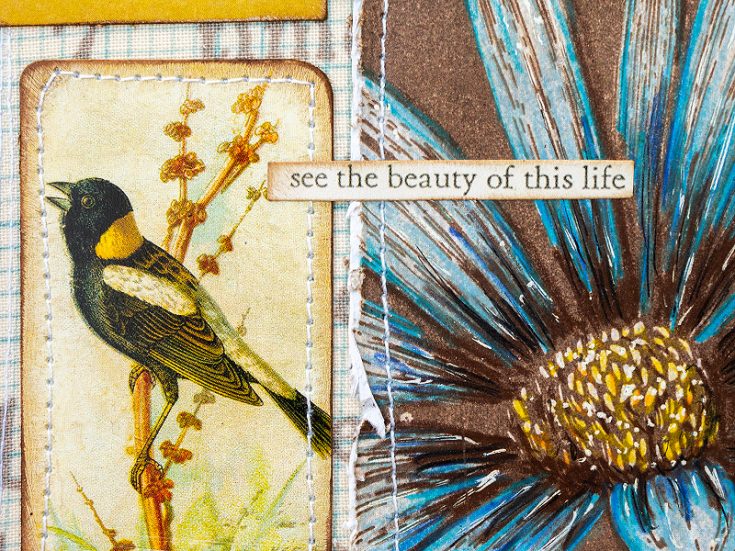
Hi everyone! I am happy to be back here today with a new tutorial. The sun is shining and I was inspired to create a collage panel inspired by nature. You can make a similar project using many different themes.
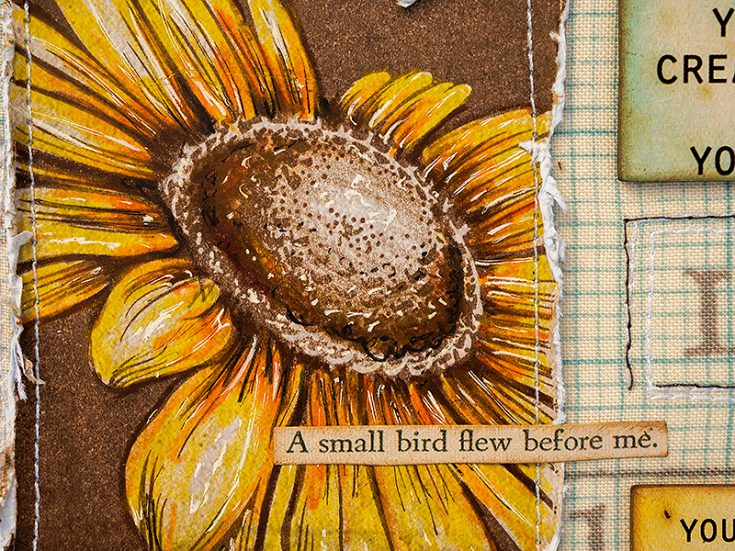
This panel is inspired by Tim Holtz new idea-ology products and in particular the Quote Chip Labels. I love the different quotes, sizes and distressed finish of these chips and wanted to use many of them on one project. I created a collage piece with a blocked design, with only the birds breaking the pattern. The background is Tim Holtz Memoranda fabric, which gives the project a nice tactile feel. You don’t have to use the same images, stamps and words as I did and the project can be both smaller and larger. Mine is 10 x 7.5 in.
I thought it would be fun to use fabric as my background instead of paper and picked a grid fabric from Tim Holtz Simon Says Stamp Exclusive Memoranda pack. Glue cardstock to the back with a glue stick. Avoid getting glue where you want to stitch.
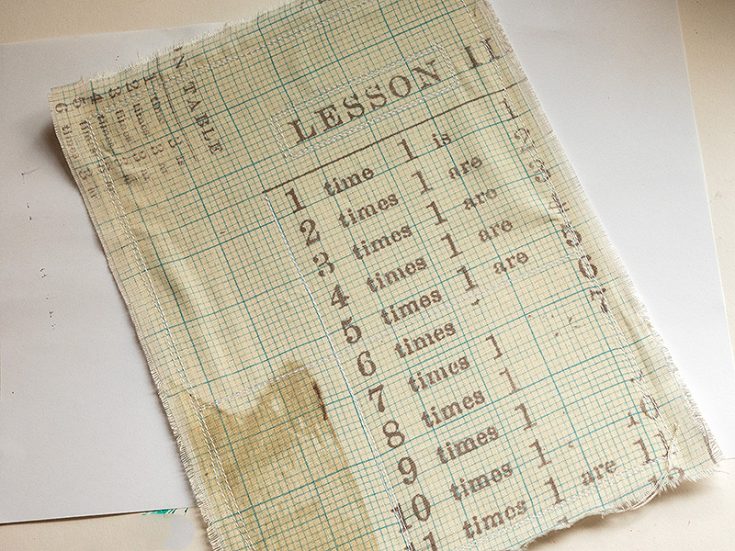
Stitch to cardstock with a sewing machine. I decided to use some of the words and numbers from the fabric in my design and framed them with stitching. I started with white thread and stitched around the panel twice, not aiming for a straight line.
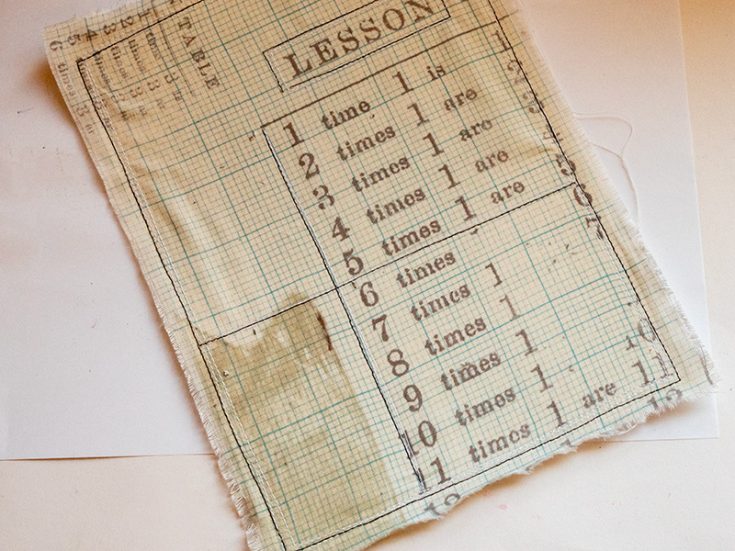
The white thread didn’t stand out enough, so I stitch once with a brown thread too.
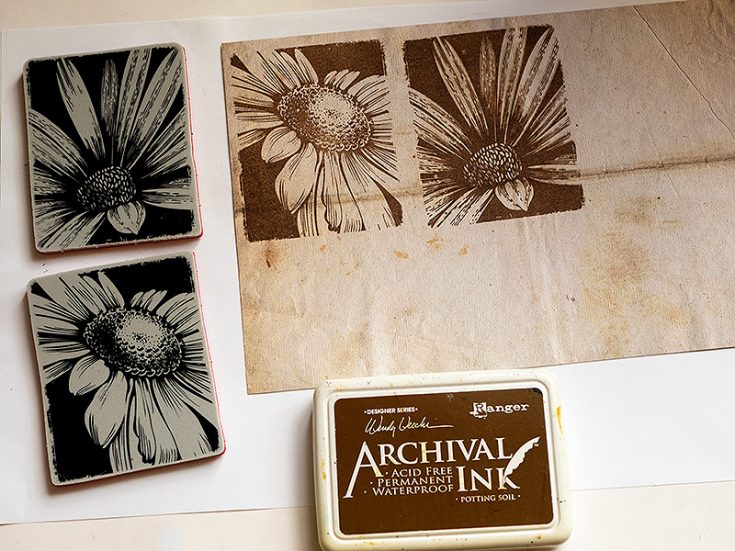
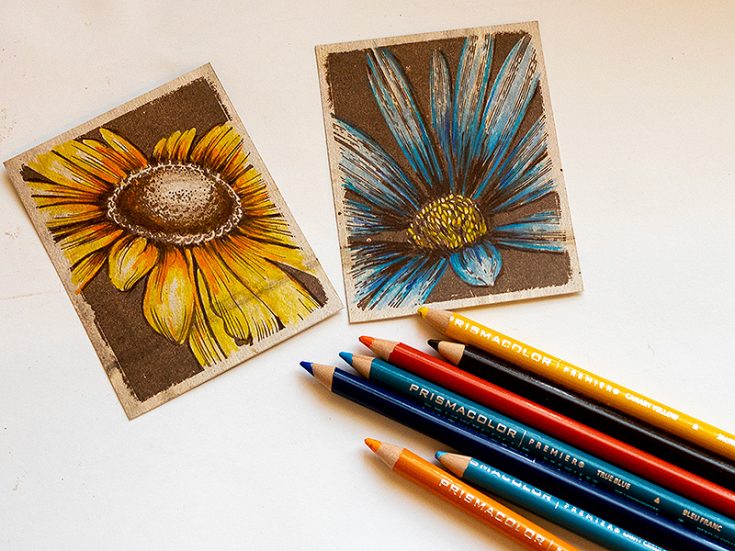
Stamp two of Tim Holtz Bold Botanicals with Archival Potting Soil ink on Tim Holtz Backdrops Vol. 4 paper.
Color the flowers with colored pencils. I used Prismacolor pencils.
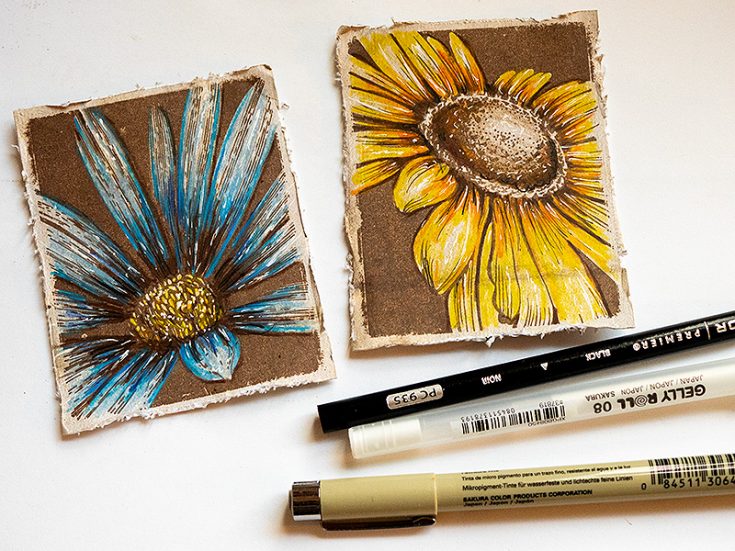
Add shading with a dark brown and a black pencil. I also added highlights with a white gel pen and some scribbles with a black pen.
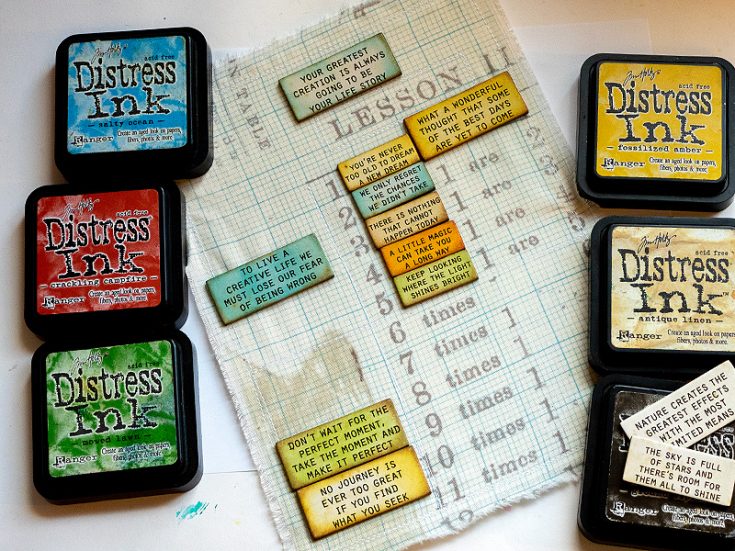
The Tim Holtz Quote Chip Labels are easy to color with Distress Ink. Apply the ink with an ink-blending tool.
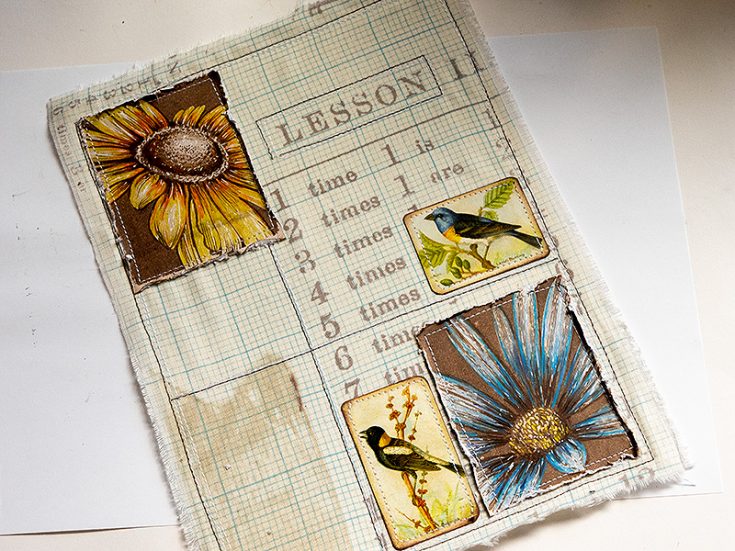
Distress the edges of the flower panels and stitch to the background. I also stitched around the two bird ephemera pieces. The bird illustrations are from Tim Holtz idea-ology Organic Layers. Sand and ink the edges first. For stability, I glued the fabric piece to a canvas board, but you can also leave as it is or glue it to another surface, such as cardboard or mat board.
I added two Clippings Stickers for additional sentiments.
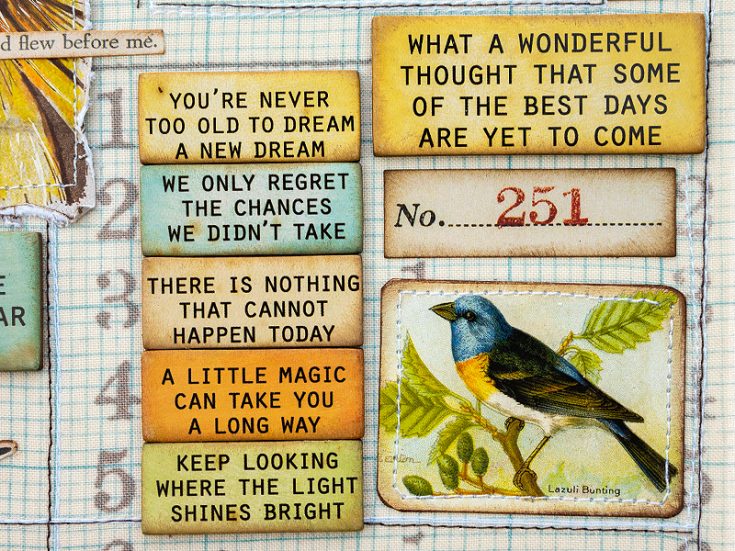
The numbered list on the fabric was used to create a list with the smallest size Quote Chip Labels.
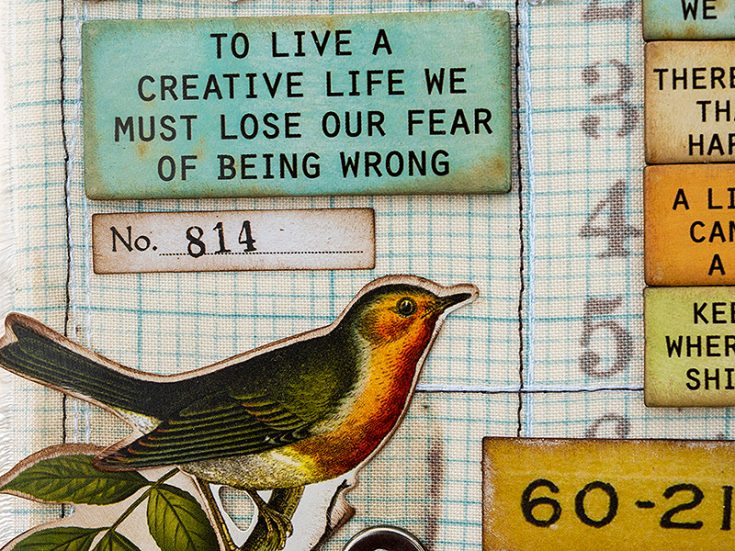
The birds and leafy branches also come from the Organic Layers set, while the number ephemera comes from the Palette Ephemera Pack.
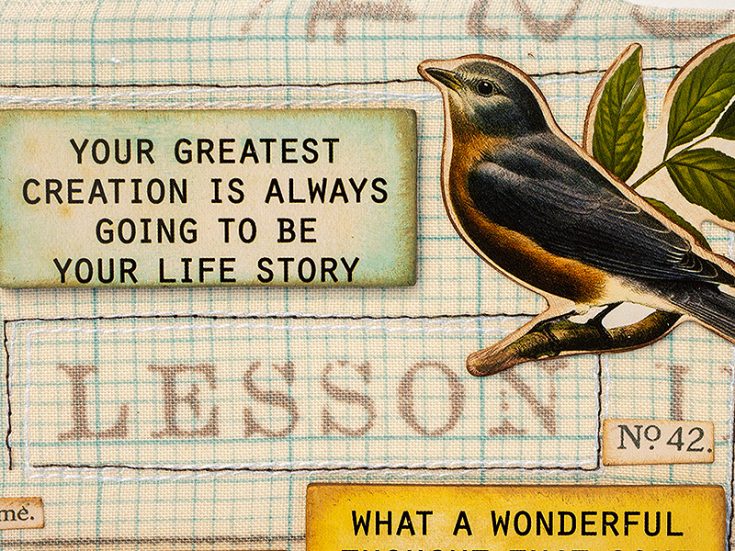
I stitched a frame around the word ‘lesson’ and used it as inspiration for the theme of the panel.
You can stamp the Bold Botanicals with black ink too, but I aimed for a softer look on this project and used brown ink instead.
I hope this tutorial inspired you to play around with fabric, quotes and collage pieces. It is fun to pick words and images and to move them around on the project.
Thank you so much for looking! Happy crafting! –Anna-Karin
SUPPLIES:
|


Thanks so much for stopping by, and thanks to Anna-Karin for being our guest!


Color Block Card Set by Cheiron Brandon
Hi friends! Happy Saturday! We’re excited to welcome back special guest Cheiron Brandon to our blog and highlight this lovely collection of cards that are relatively quick and easy to make with the kiddos (or grand-kiddos!) or yourself and pair with a pen and postage stamps to make a great gift! Read on to learn more, and enjoy!
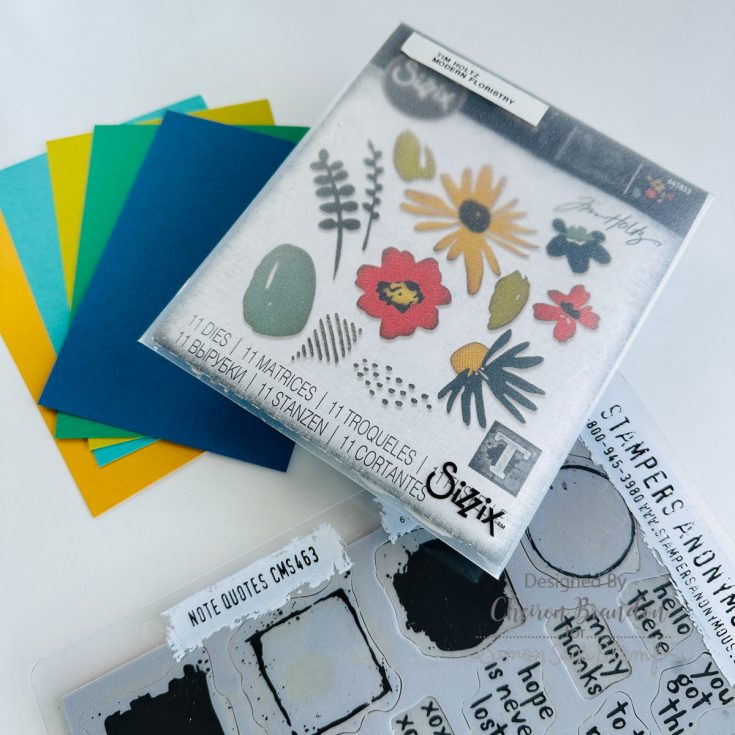
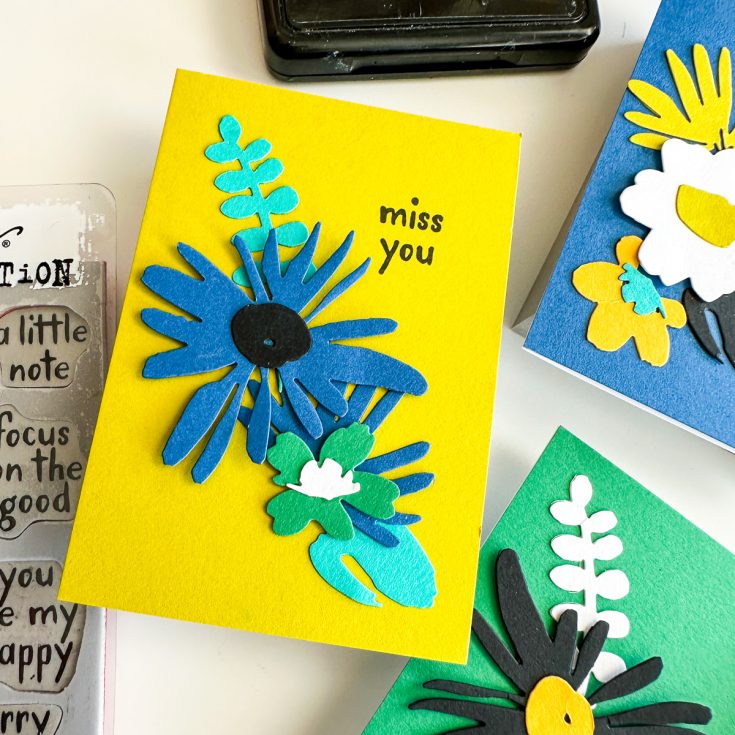
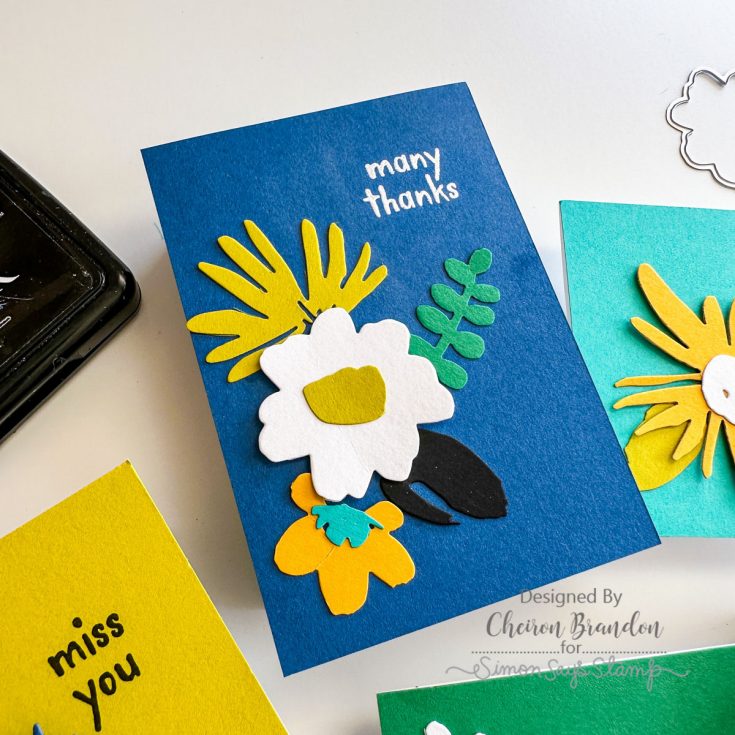
Hi there crafty friends! It’s Cheiron Brandon and I am thrilled to be back on the Simon Says Stamp blog this month using some products from Tim Holtz to create this fun floral notecard set. You don’t need a ton of supplies to make this set and would be a fun activity to make with kiddos too if you cut all the flowers out beforehand.
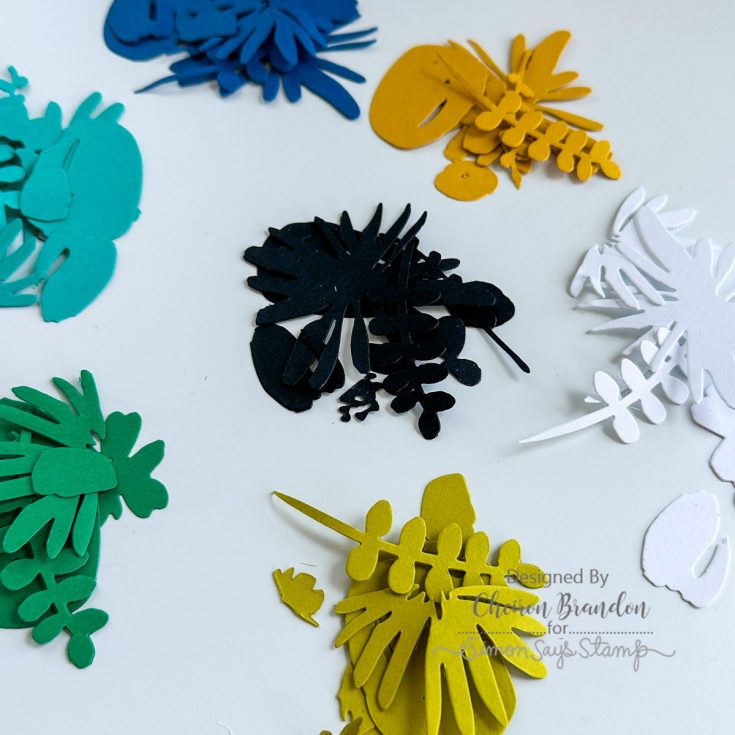
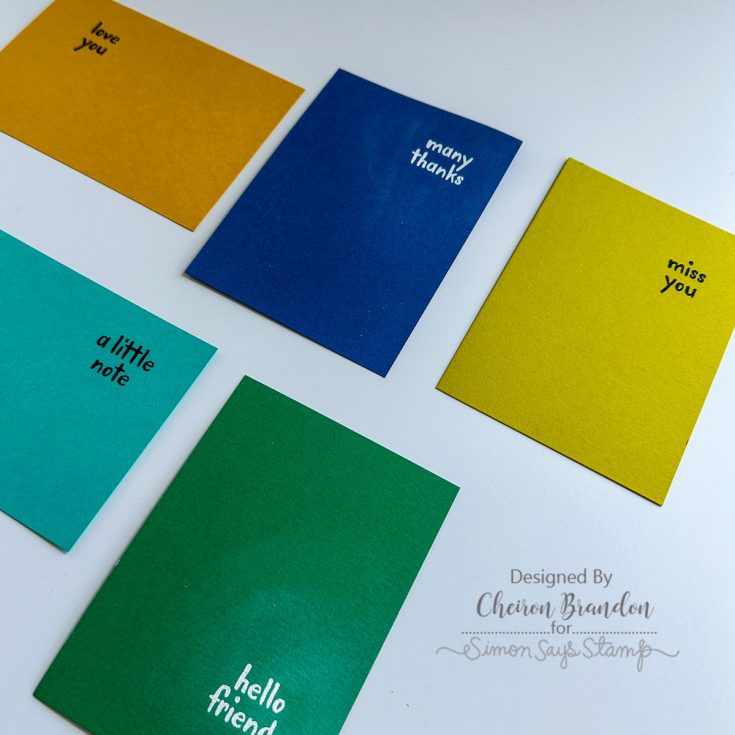
I used the Tim Holtz Sizzix Modern Floristry dies and cut them from a palette of blues and greens and some black and white for contrast. You could certainly cut more of these to have on hand for other projects too, or even just make a huge stash of notecards. I also cut some note card bases and stamped them with the little sentiments from the Note Quotes stamp set. Depending on the color of my card base (how dark or light it was) I stamped the sentiments in Black Soot Distress Archival Inks or emboss them in white.
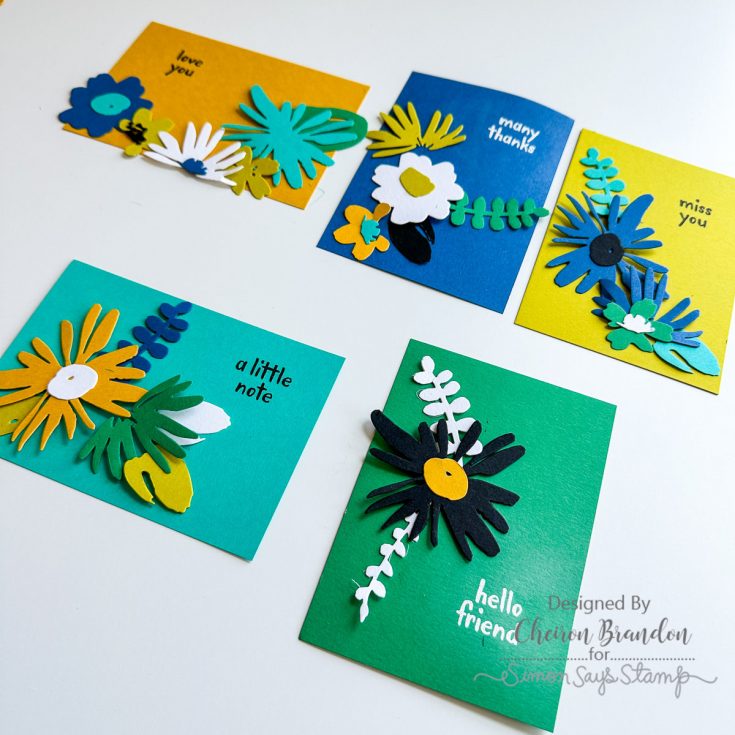
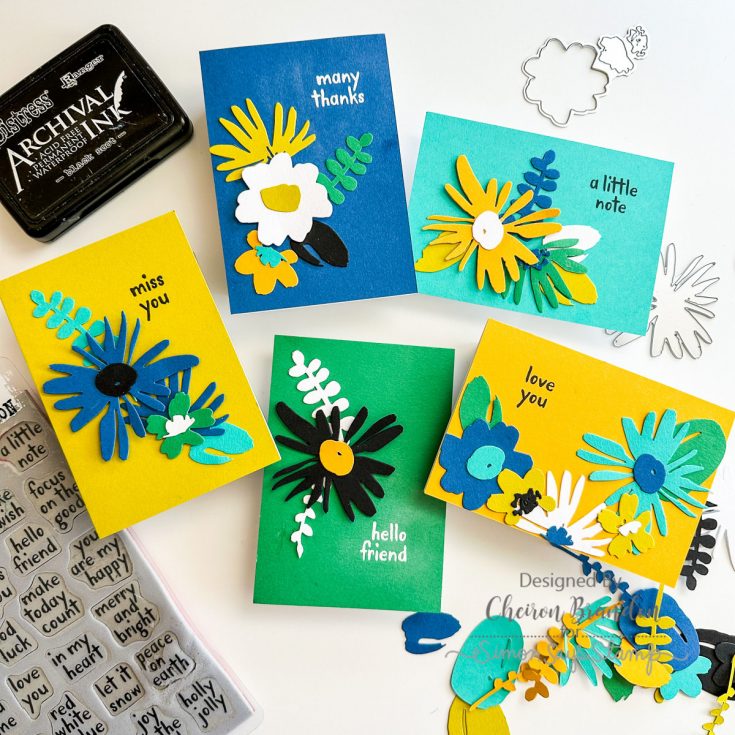
To put them all together, I laid all of the sentiment panels on my work surface. I placed the flowers, leaves and petals to make little arrangements on each card panel. Once I figured out what would go where, I began adhering the arrangements down on each panel and let them dry. For some of the bigger flowers that were the focal points of the card, I adhered them with foam squares for a bit of added dimension. Once they were all dry, I adhered them to notecard bases. I love the look of this color combo and how fun it was to arrange the pieces for each card. This little set would be perfect paired with some small envies and tied up for a gift too!
SUPPLIES:
|


Thanks so much for stopping by, and thanks to Cheiron for being our guest!


