Free Shipping! ONE DAY ONLY!
Hi friends! Happy Saturday! SURPRISE!! We wanted to pass on a little fun summer savings to help save you some money while you’re getting some crafty goodies! Today only, USA and Canada customers will receive free shipping with code SHPFREE at checkout with any purchase of $25 or more, -OR- all customers worldwide are eligible to receive $7.99 off any purchase of $25 or more with code 799 at checkout! Please enjoy!
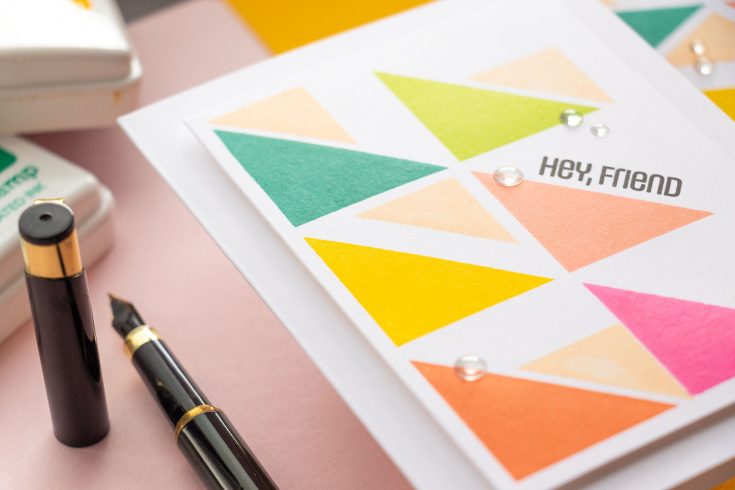
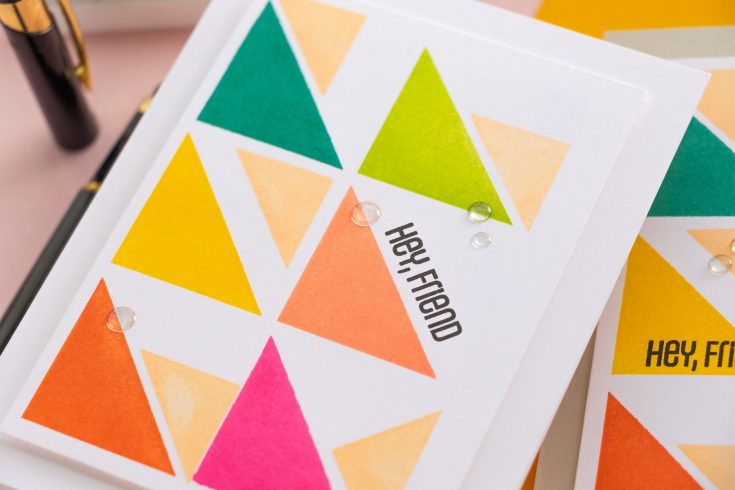
Bright, Happy & Geometric “Just Because” Card Idea: Yippee for Yana

Hi friends! Please join me in welcoming back the oh-so-talented and amazing Yana Smakula! (Please note: our dear friend Yana is Ukrainian. To show support to our brothers and sisters in Ukraine, please see Yana’s post HERE.)
Hello, crafters, this is Yana Smakula for Simon Says Stamp! Welcome back for another Yippee For Yana video!
In this video, I’m stamping a geometric grid design with the simplest ever triangle stamps. The simpler shape, the more use you can get out of it. I love geometric designs so that’s what we are going to do in this video.

I’m using the Retro Wishes stamp set from Simon Says Stamp, this is the set from the August 2023 Card Kit, so if you are a kit subscriber you’ll receive this stamp in your kit, or if you are not a subscriber – you can purchase this stamp set separately or you can also look through your stash and see if you have triangle shape stamps in some of your older stamp sets.
I used a sheet of Neenah Solar White 80lb cardstock, a T-square ruler, and a pencil to pencil in a grid. I’m not the best at eyeballing and I did try stamping this without a grid and it was all wonky and crooked, so a pencil grid is a must for me. I added horizontal and vertical lines that are 1 ½” apart as that’s the size of my rectangle.
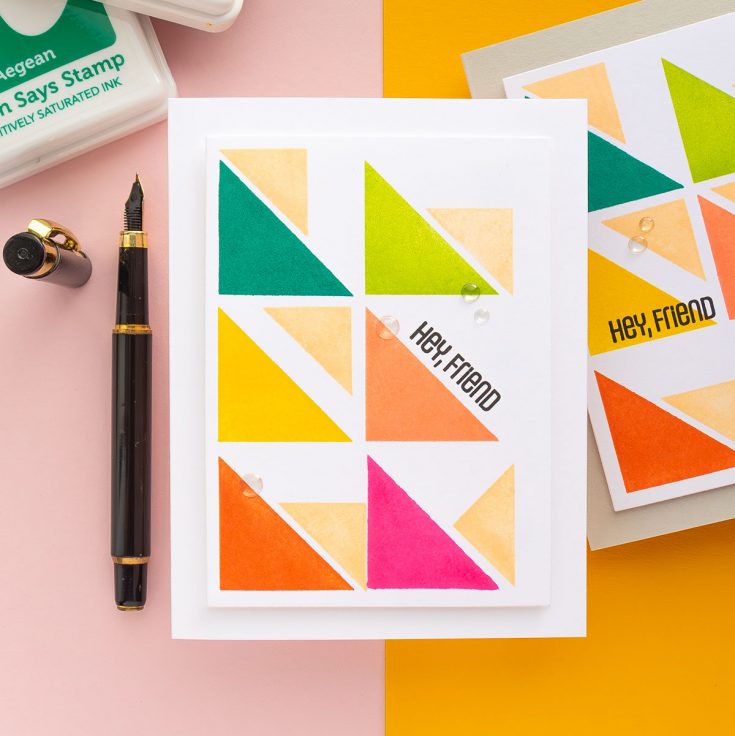
I used the mini MISTI stamping tool for my stamping. This is a grid design, having things stamped straight and aligned is critical, so using a MISTI is a must.
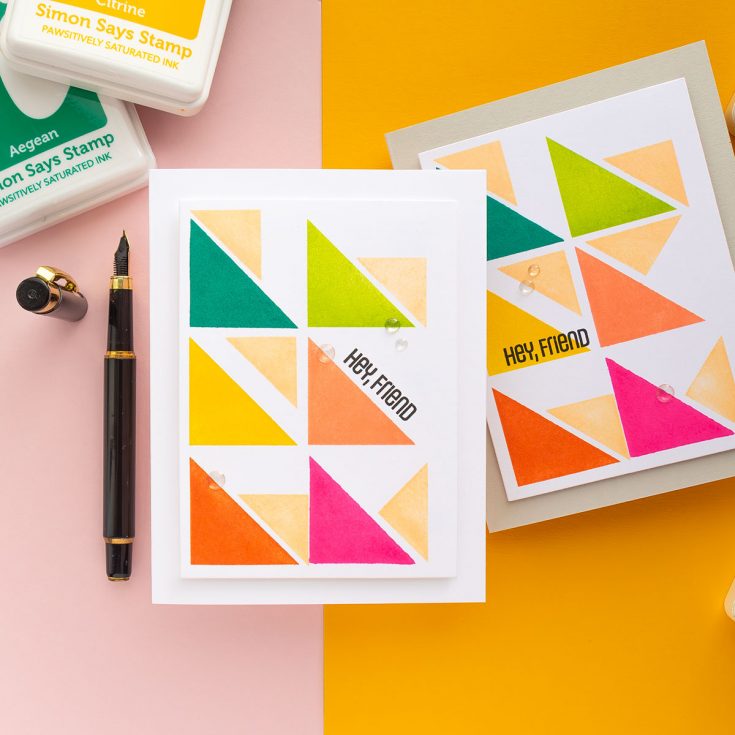
I used 7 colors of ink: Aegean, Pearfection, Citrine, Mandarin, Sherbet, Peony, and Melon. The last one was used for stamping the small triangle. The sentiment was stamped in black ink and I experimented with the sentiment placement on each of the panels. With the stamping done, I cut the panels out using a rectangle die and popped each onto either a white or a Fog Gray A2 card base. Lastly, I embellished these using clear dots.
Have fun stamping!
WATCH THE VIDEO:
SUPPLIES:
|


Thanks so much for stopping by, and thanks again to Yana for being our guest!
Ways to support Ukraine:
If you are looking for ways to support Ukraine, we encourage you to visit this page on Yana’s blog:

You’re Out of This World! Four fun outer space cards with Kristina Werner
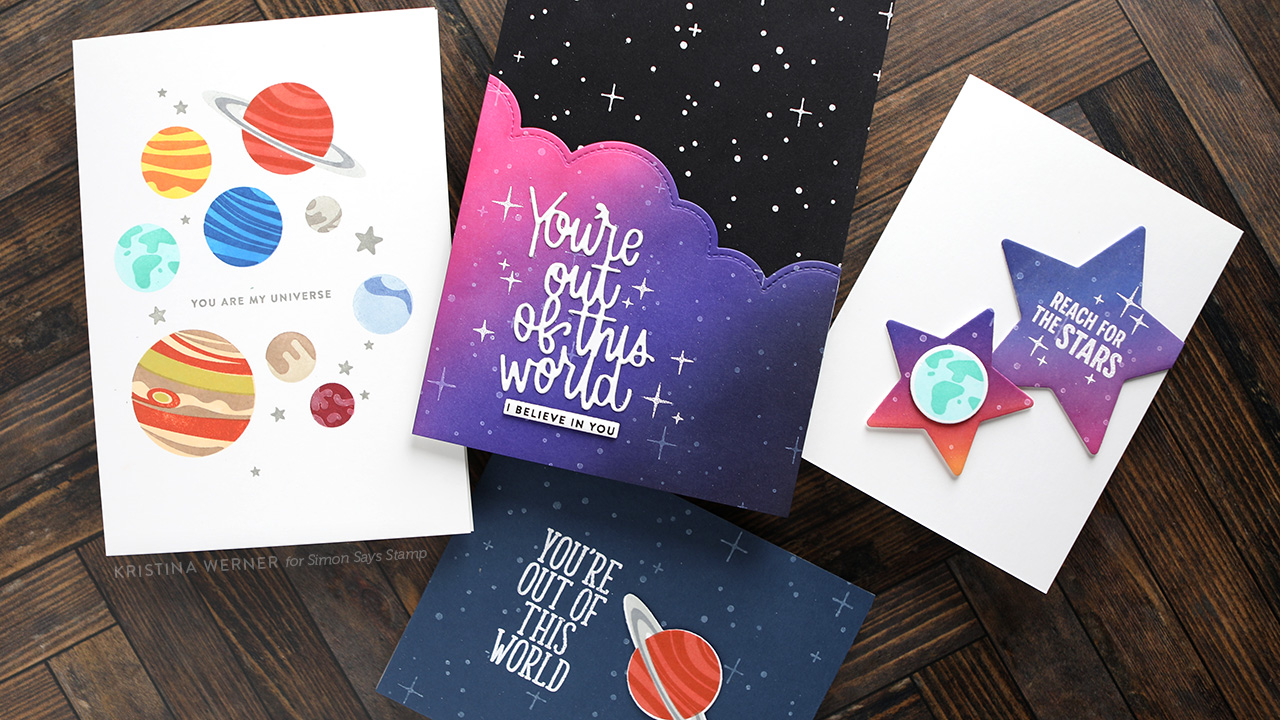
Hi all! Kristina Werner here. Today I have four colorful and fun cards featuring the You Are My Universe stamps, coordinating dies, You’re Out of This World dies, Twinkling Stars cling stamp, and the Nested Stars dies. This suite of products work together beautifully!

Each card looks so different. For the first card, I did simple layered stamping using the You Are My Universe stamp set. I used the image in the Simon shop as a guide. I used lots of different ink colors (be sure to look at the top of the video for exact colors as their shown in the video).

The second card has a fun cloud edge that was created using Lawn Fawn’s Puffy Clouds Borders dies and some in blending. The Twinkling Stars cling stamp was used for all the stars, plus individual stars were stamped using the large 6×8 You Are My Universe stamp set. The main greeting was diecut using the You’re Out of This World dies.
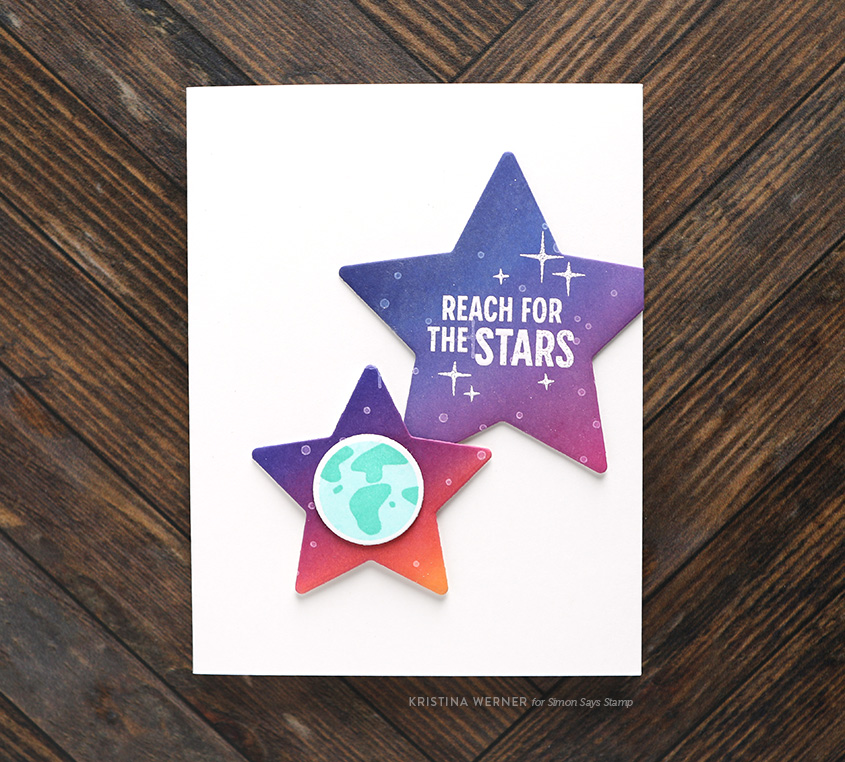
For the third card, I cut two stars using the Nested Stars die set, ink blended on both, and stamped and white heat embossed “Reach for the stars” on the larger star. To finish off the card, I stamped the Earth image from the stamp set, die cut the image, and adhered it to the smaller star.
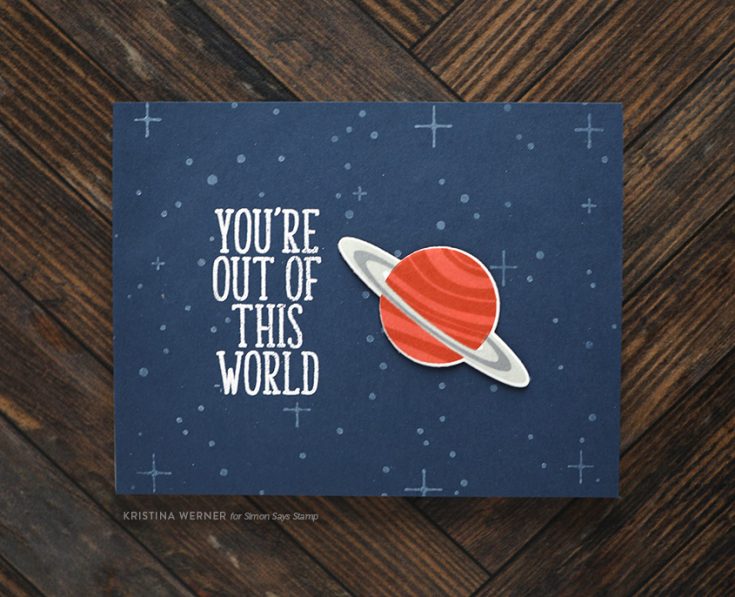
The final card was super easy! I white heat embossed the greeting and then stamped the Twinkling Stars cling stamp in white pigment ink. Then I stamped the Saturn image from the You Are My Universe stamp set, die cut it using the coordinating dies, and adhered it to the card using foam squares.
Thanks for stopping by! Enjoy the video!
Supplies
|