HOT Idea: Coloring and Embellishing with Layering Stencils!

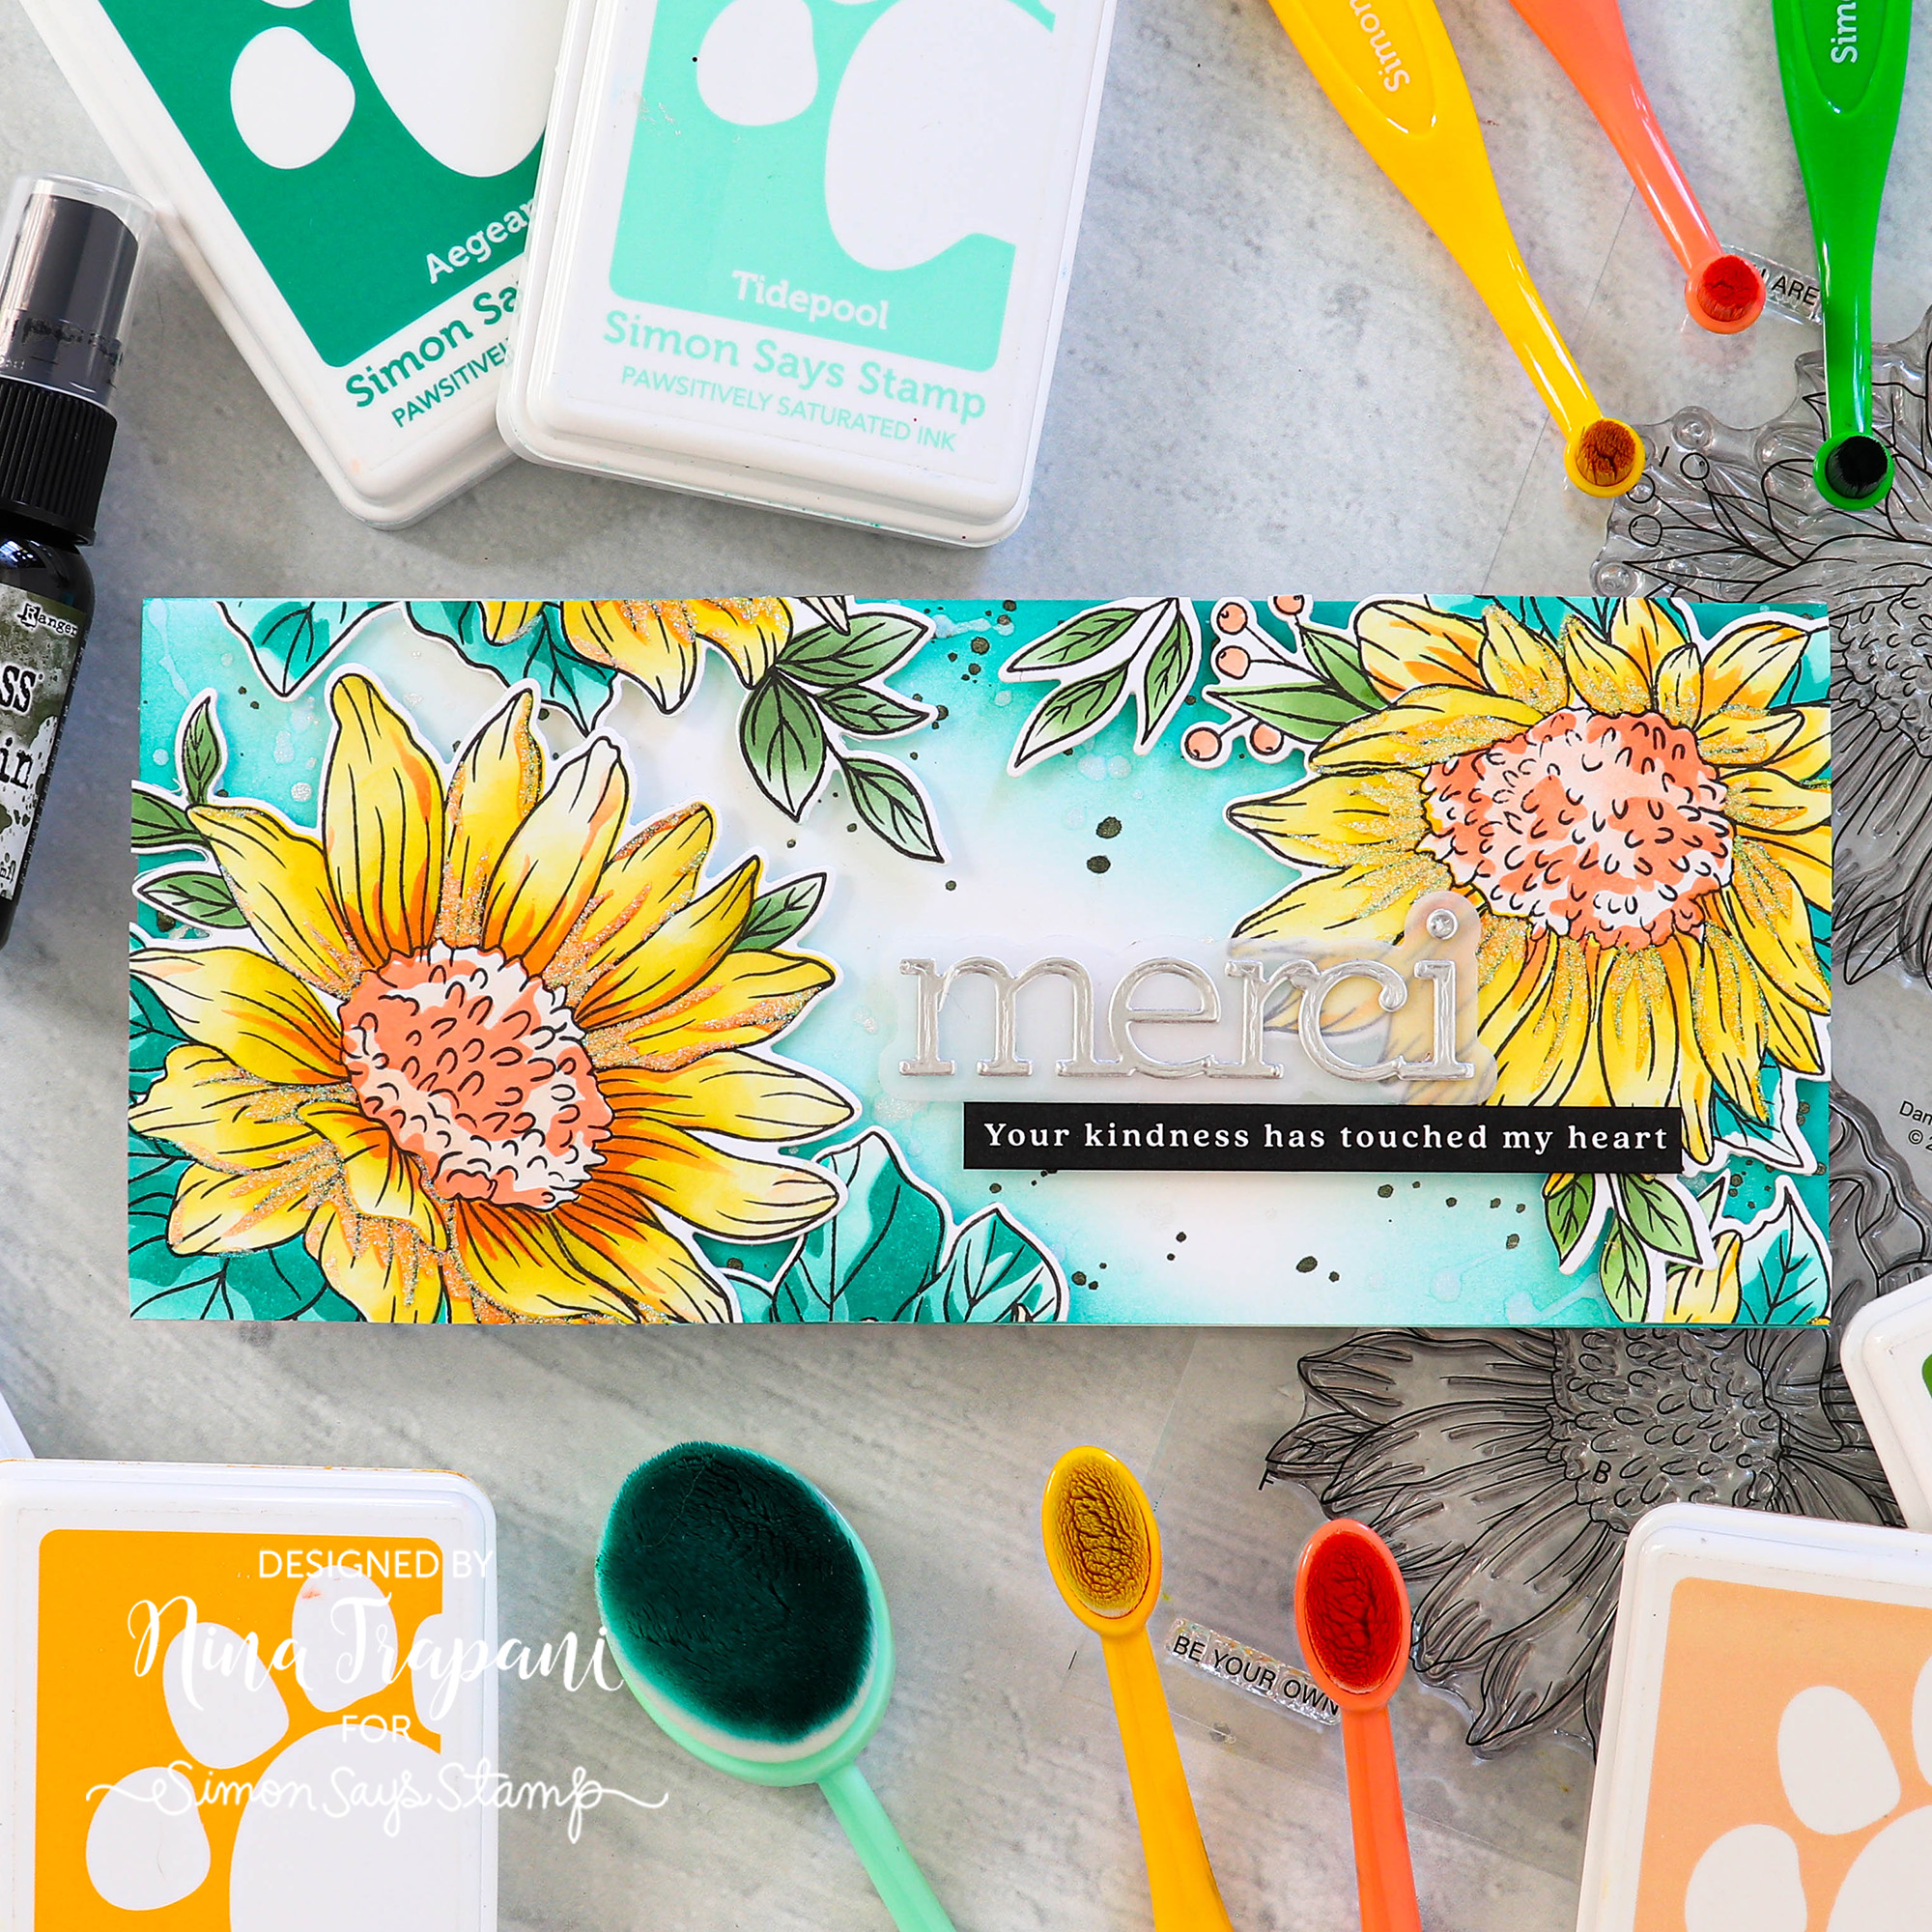
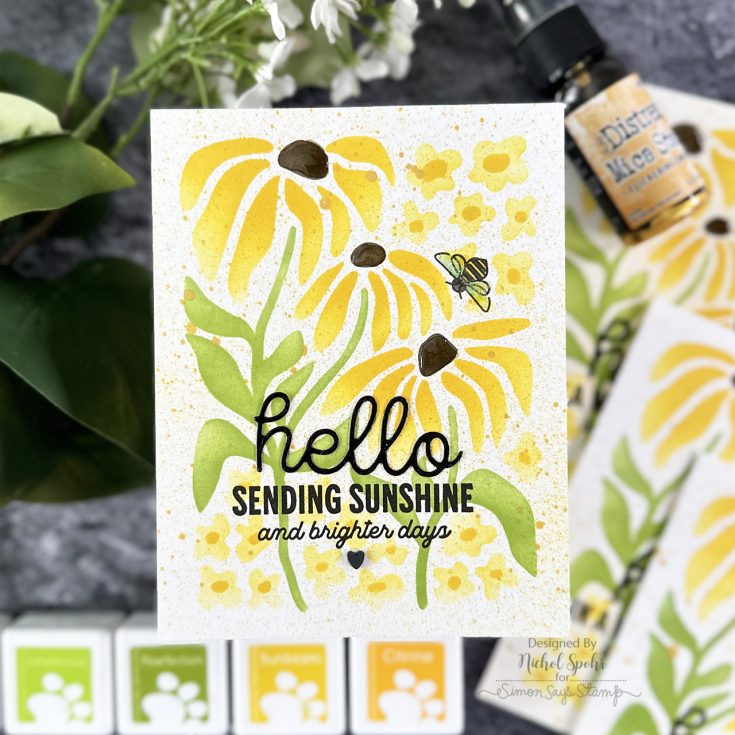
Hey there friends, it’s Nina-Marie Trapani here with you! I am going to show you how you can use your layering stencils to color in stamped images—but step it up a notch and add extra embellishing to enhance your finished pieces! In this video I am using Altenew’s Dancing Sunflowers stamp, stencil, and die set.
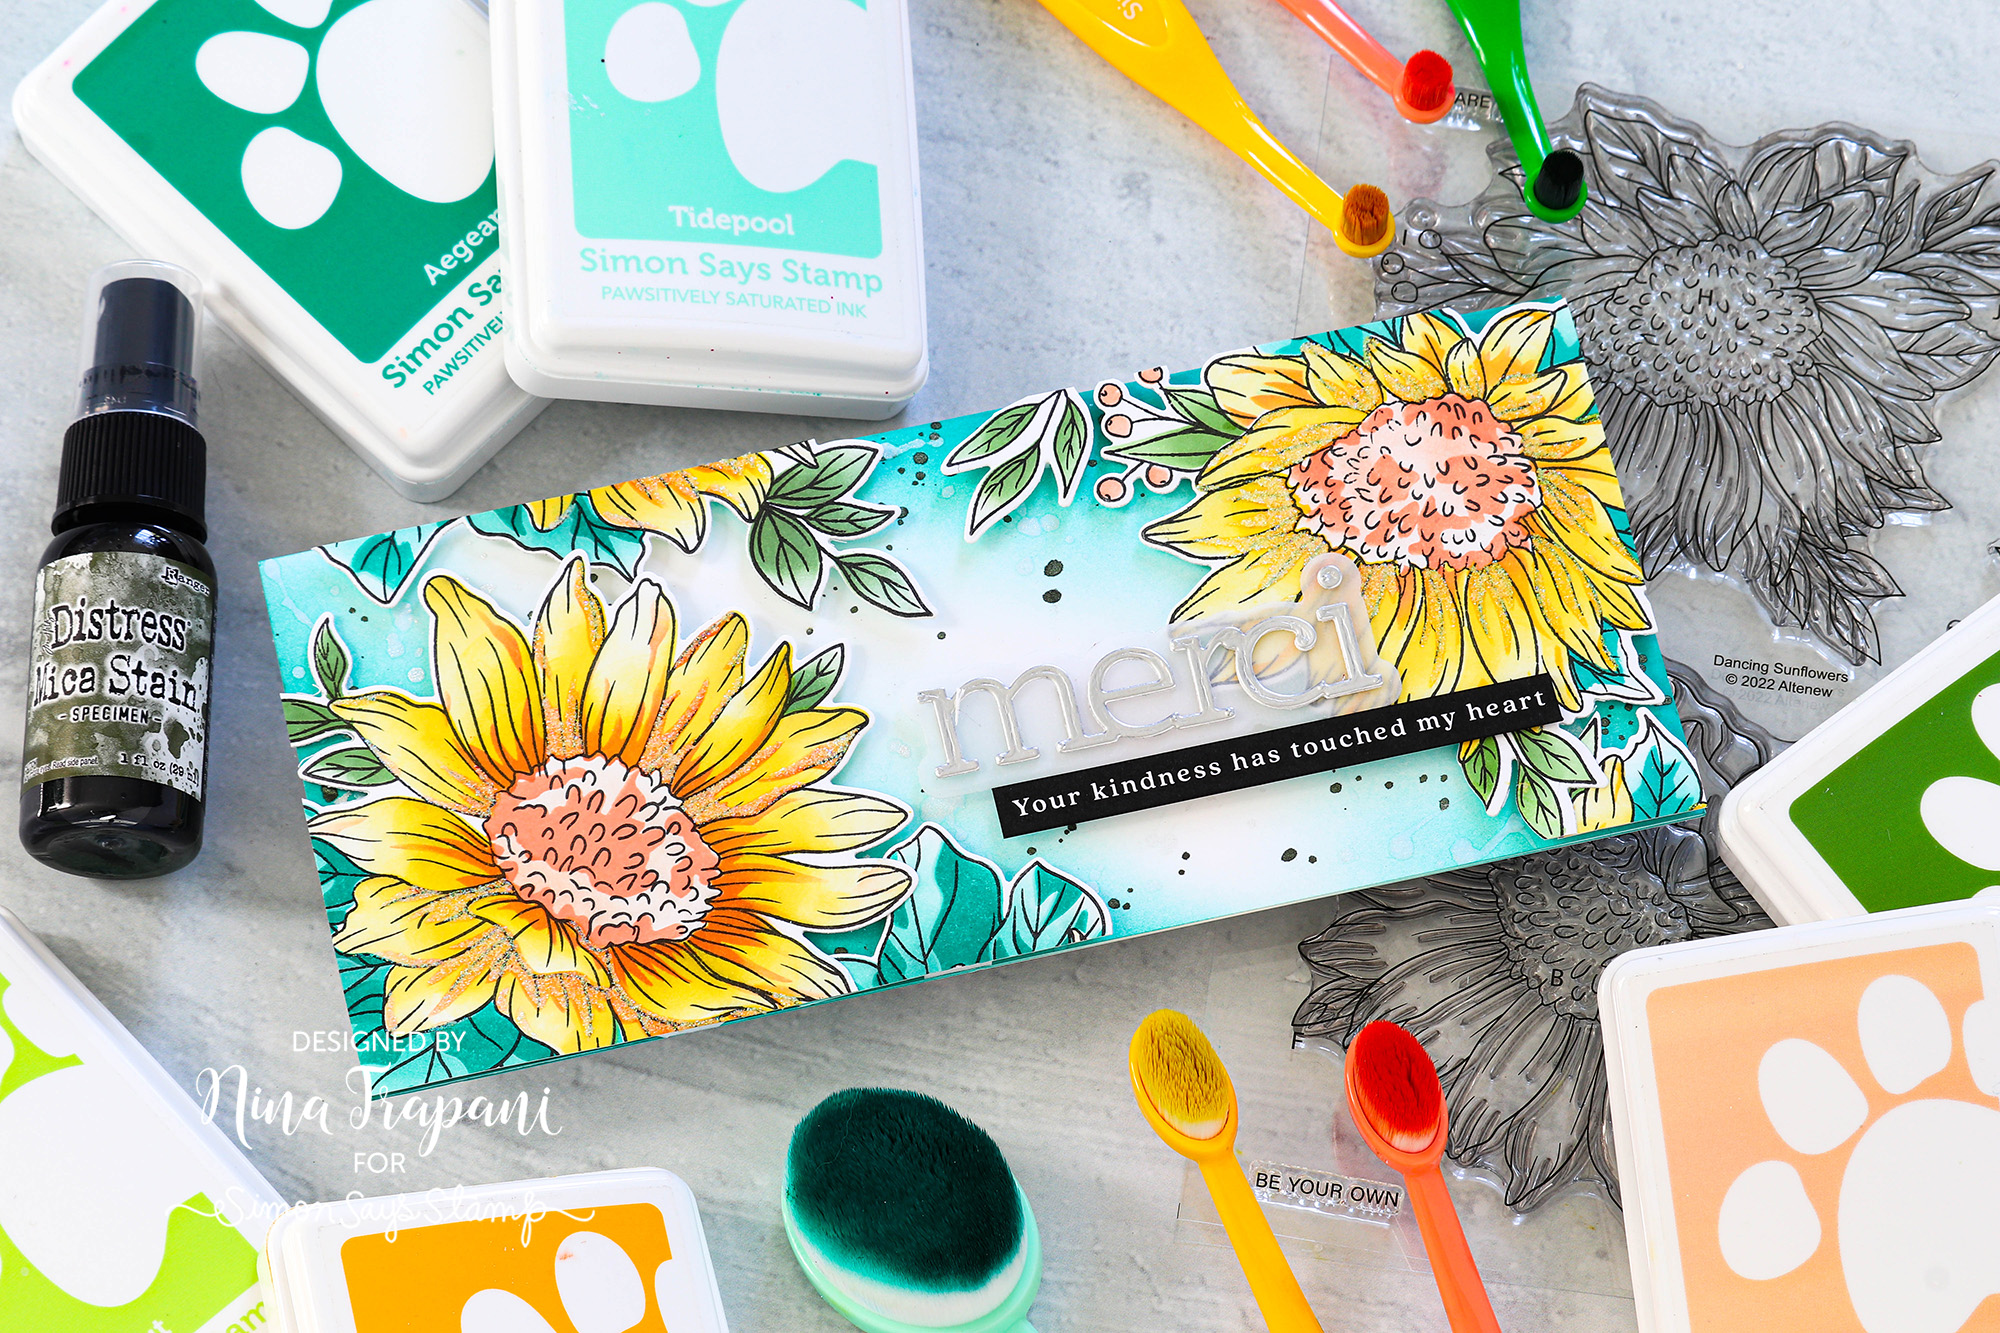
I also added a sentiment with our Simon exclusive Merci die and a sentiment strip from the Reverse All the Thanks set.
Want to learn how you can add pizzaz to your stamped and stenciled image? Check out the video below for all the details!
WATCH THE VIDEO
SUPPLIES
|


The Cutest Little Slimline Card EVER!
Hi friends! Happy Sunday! Please join me in welcoming special guest Cheiron Brandon to our blog! Isn’t this card ADORABLE? I smiled the second I saw it! On the heels of seeing lots of AMAZING Halloween inspiration featuring this set it’s really neat to see how versatile this set can be! Read on and enjoy!
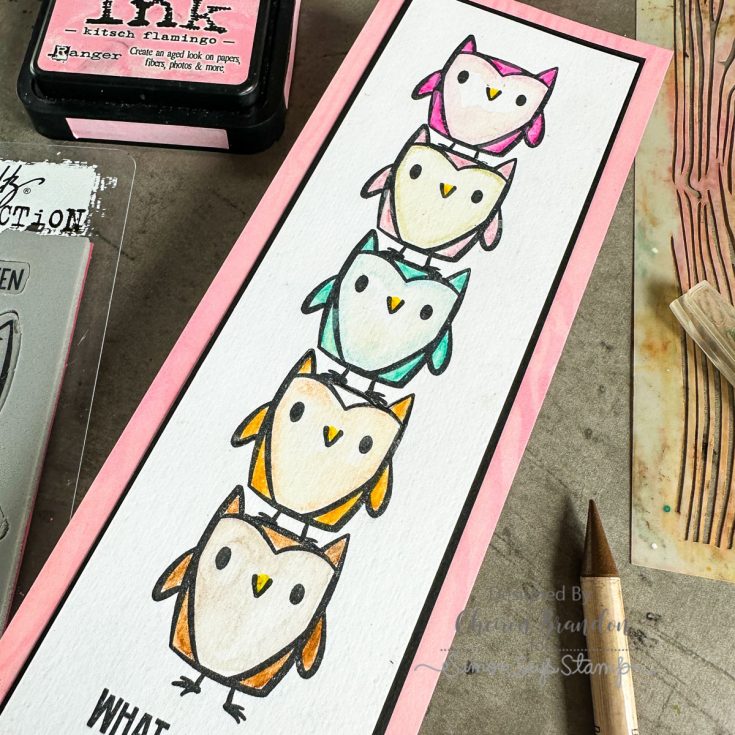
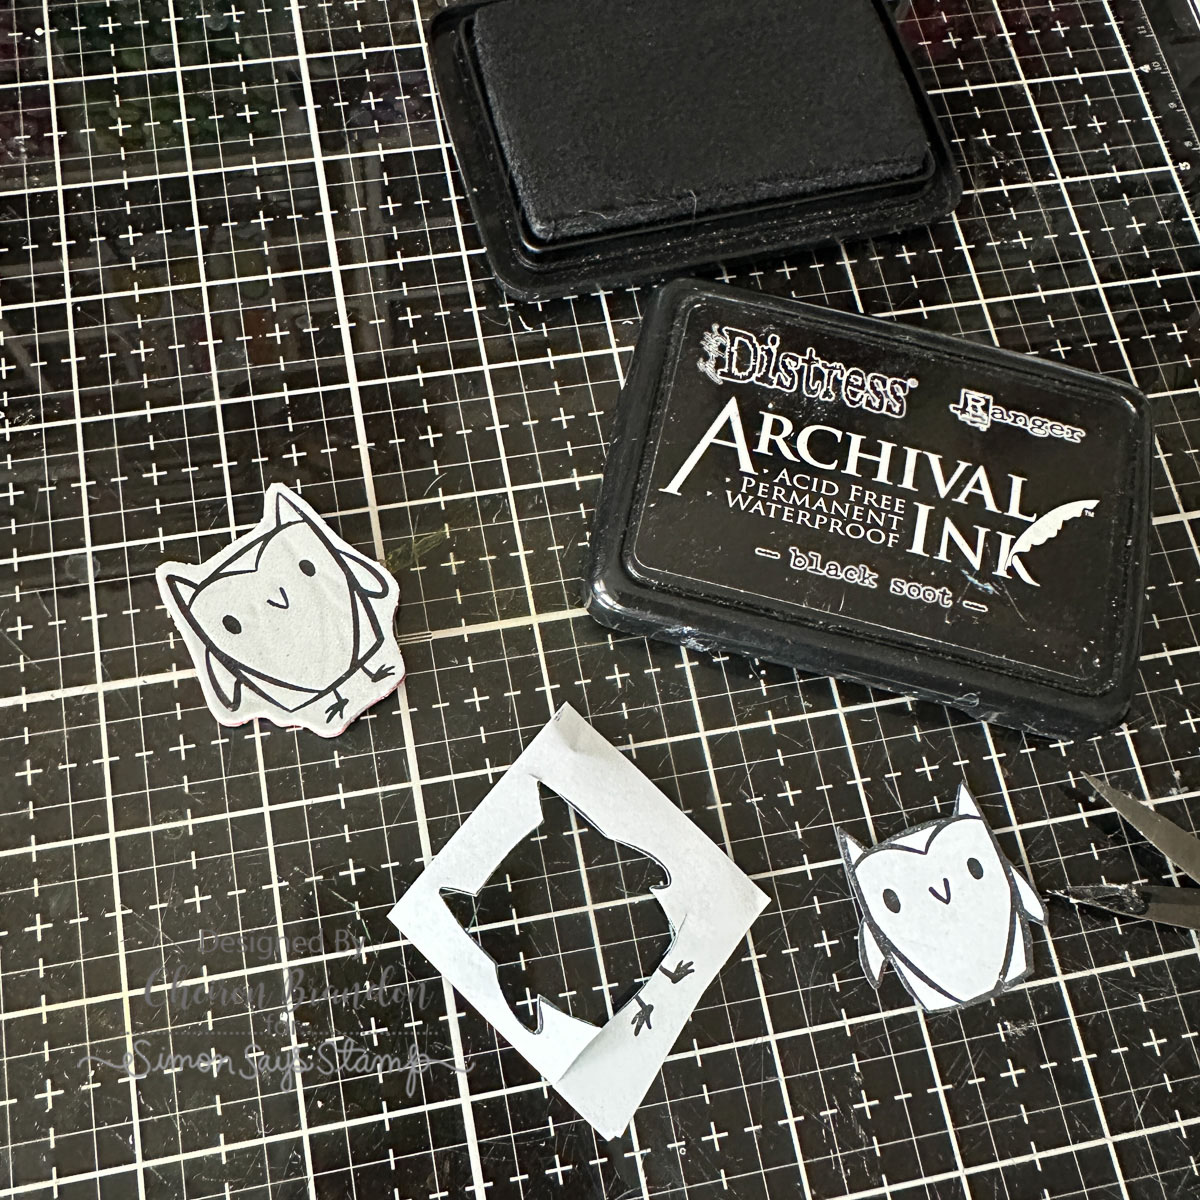
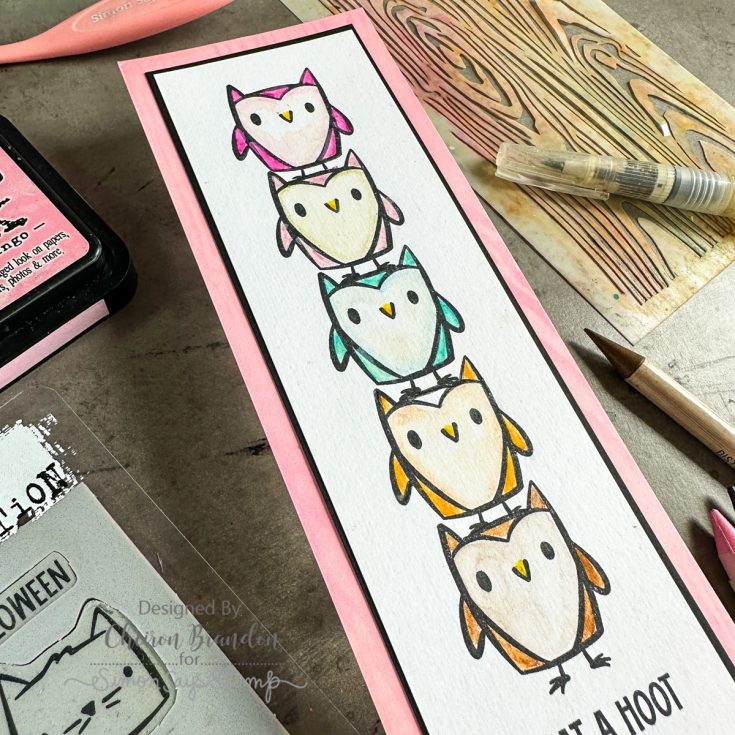
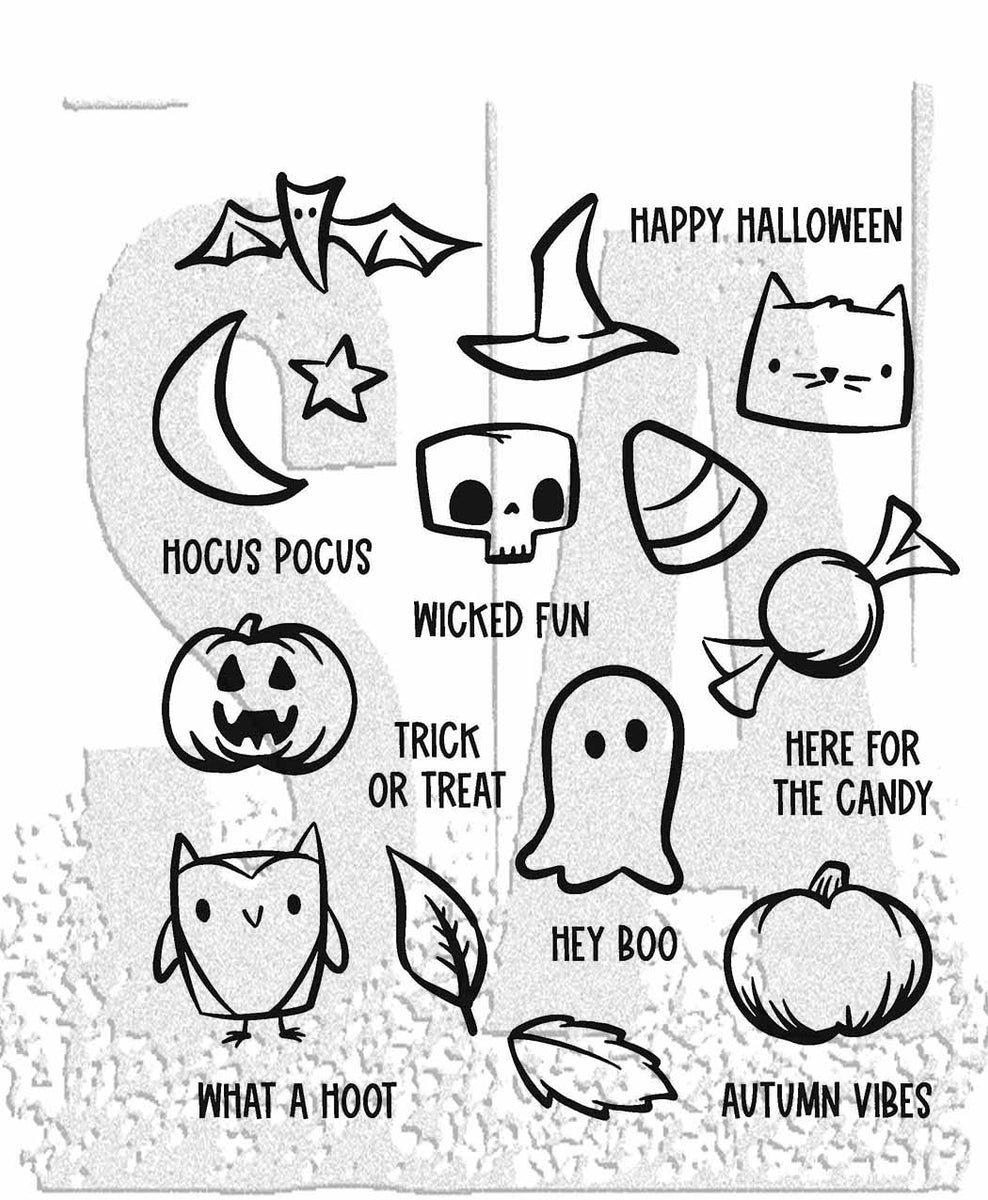
Hello there crafty friends! It’s Cheiron Brandon here and I am thrilled to share a card with you using some of the newest Tim Holtz Stampers Anonymous Halloween stamps. My favorite of this new release has to be the brand new Tiny Frights set. There are so many adorable small images and sentiments in this set for Halloween and beyond. I absolutely love the tiny owl and What a Hoot sentiment and thought it would be fun to create a fun everyday owl card with the owls stacked on top of each other by using a little masking. You could also use a stamp positioner to line them all up, but sometimes I find cutting out a simple mask to be easier :) I stamped the owl on some masking paper using Black Soot Archival Distress Ink and cut it out before starting to stamp.
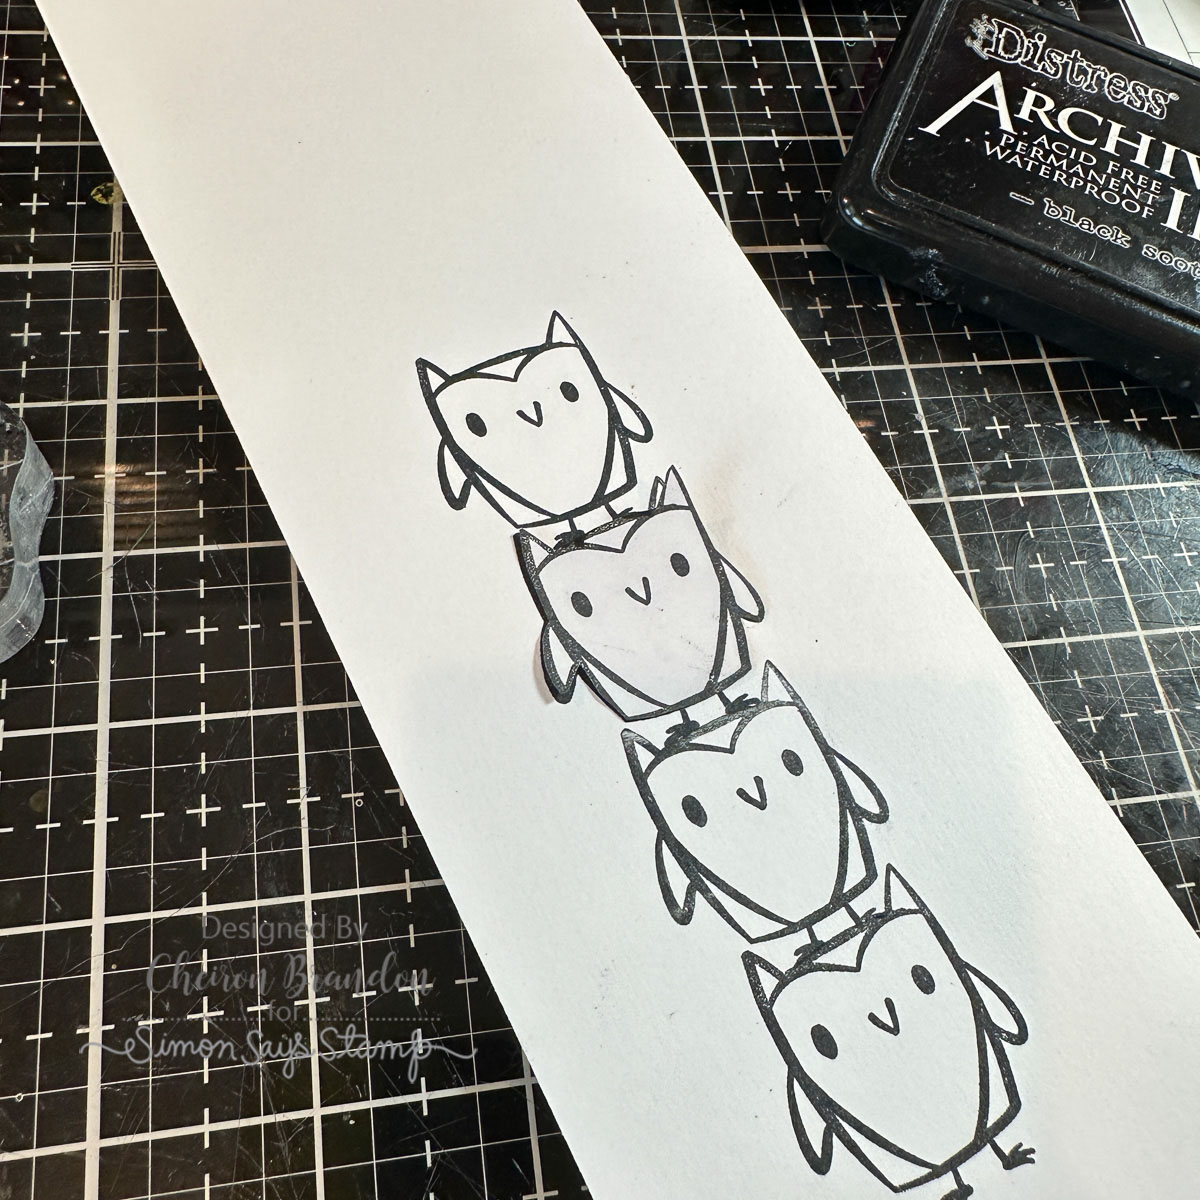
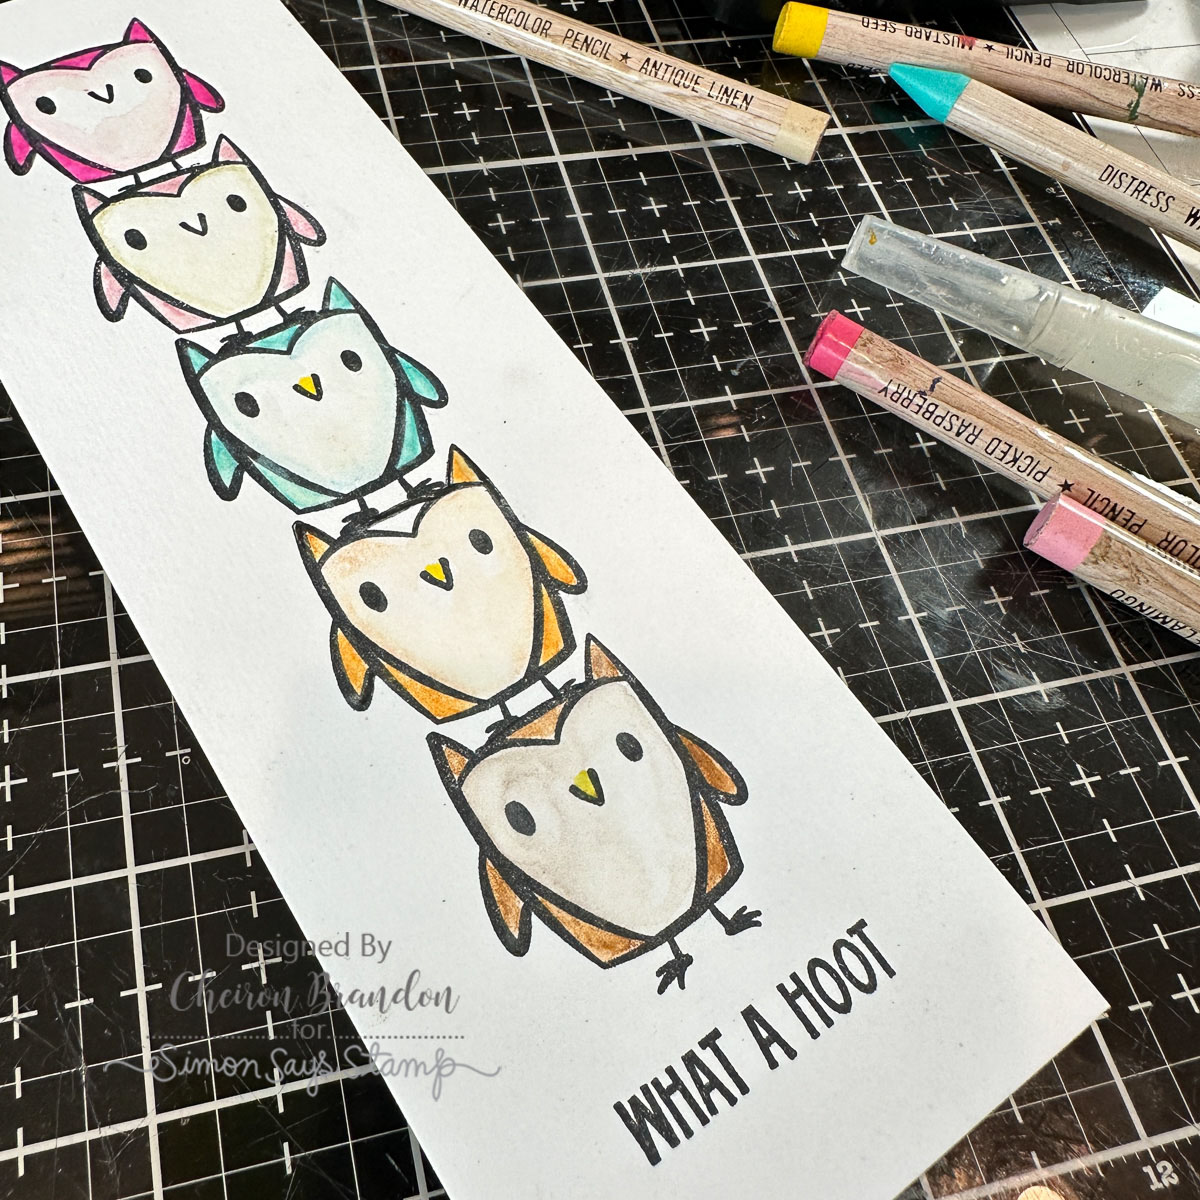
I stamped the owl that I wanted to be on the bottom first using Black Soot Archival Distress Ink onto a panel of Distress Watercolor Cardstock. I thought it would be fun to stack a few…so I stamped, added the mask to the bottom owl, then stamped again. I removed the mask then moved it up to the image I last stamped and stamped another owl on top and repeated this process until I had 5 owls. Once they were all stacked and stamped I added the What A Hoot Sentiment. To color these owls, I used some Distress Watercolor Pencils and a Detailer Waterbrush.

Panel sizes:
- Distress Watercolor Panel 8 x 2 3/8
- Black Mat 2 ½ x 8 1/8
- Cotton Candy Panel 3 x 8 ½

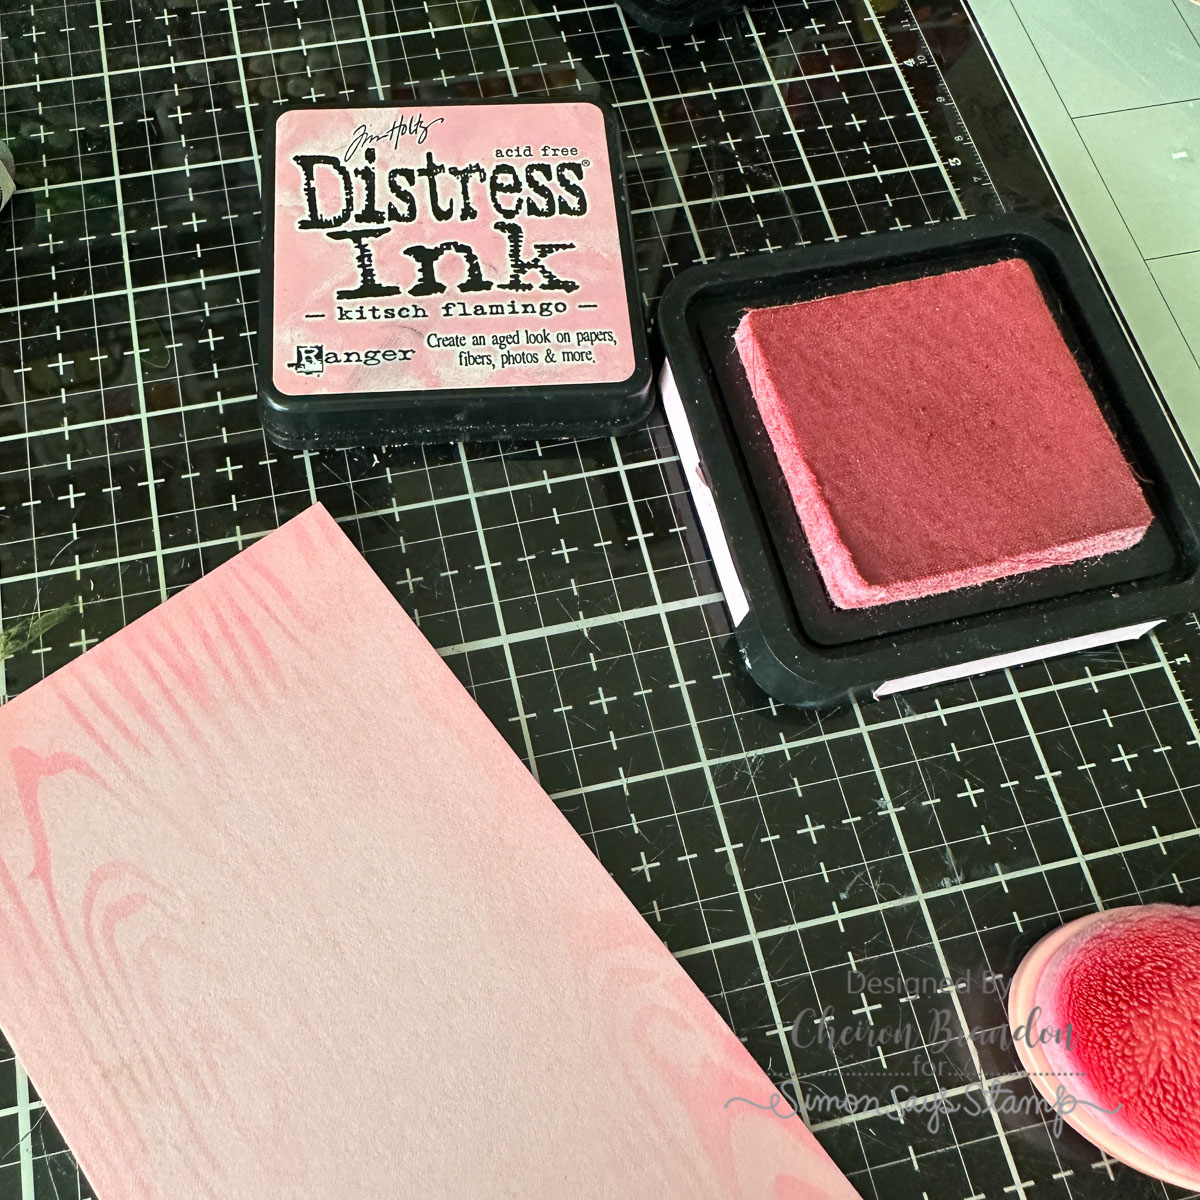
To create my background panel I used a piece of Simon Says Stamp Cotton Candy Cardstock and the Woodgrain Layering Stencil. I ink blended Kitsch Flamingo Distress Ink through the stencil to create some fun pink woodgrain for my background. I also inked around the edges of the panel to make it more cohesive. To finish my card, I mounted my owl panel onto a piece of black cardstock to leave a very thin black border, then I mounted the panel onto the woodgrain panel and adhered it to a card base. I hope you enjoyed creating this fun owl card with me today!
SUPPLIES:
|


Thanks so much for stopping by, and thanks to Cheiron for being our guest!
One Layer Wonder Flower Cards!

Hi friends! Happy Saturday! Please join me in welcoming back special guest Nichol Spohr to showcase our NEW September 2023 card kit, Bee Happy with this gorgeous one-layer wonder card! Be sure to watch the video for all the details and enjoy!
WATCH THE VIDEO:
SUPPLIES:
|


Thanks so much for stopping by, and thanks to Nichol for being our guest!


