Abstract Tree Stamp with Embellishments for a Gorgeous Christmas Card: Yippee for Yana

Hi friends! Please join me in welcoming back the oh-so-talented and amazing Yana Smakula! (Please note: our dear friend Yana is Ukrainian. To show support to our brothers and sisters in Ukraine, please see Yana’s post HERE.)
Hello, crafters, this is Yana Smakula for Simon Says Stamp! Welcome back for another Yippee For Yana video!
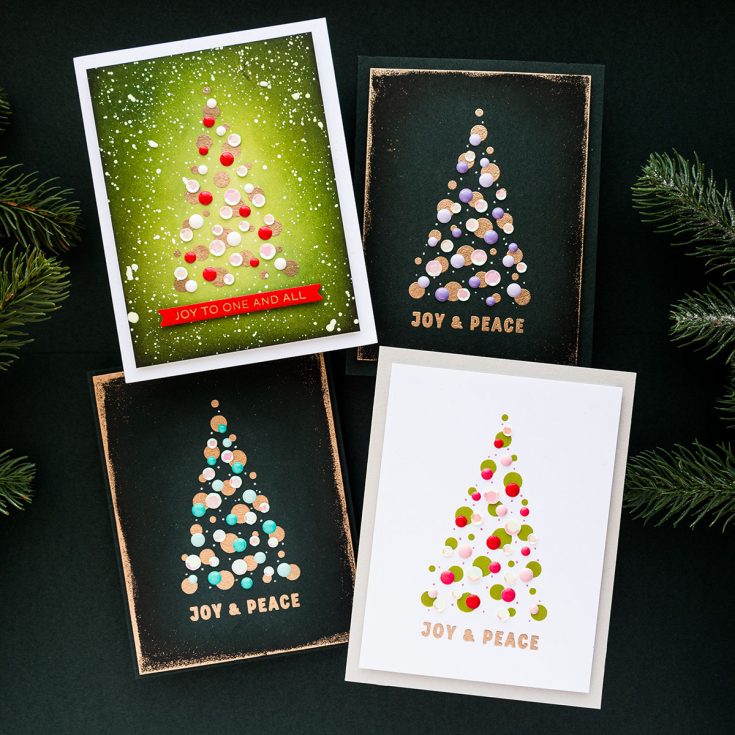
Today I am creating several Christmas cards with the Trees and Stars stamp set from Simon Says Stamp. This is a fun set with several bold graphic Christmas tree images, there are 6 designs to choose from, each sized perfectly for an A2 card.
I really liked the tree with the different-sized dots. I prepared several cardstock panels, which are all cut to 4 1/4 x 5 1/2″ (I later trimmed them to 3 3/4 x 5″, although I think the 4 x 5 1/4″ is a better cut, especially if you want to add the gold embossing around the edges).
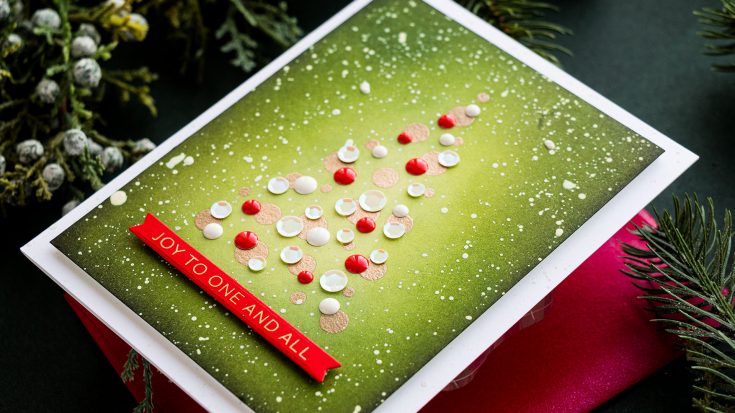
I used my mini MISTI stamping tool and a grip mat inside the MISTI, and stamped the tree along with the sentiment in clear embossing ink, added Antique Gold embossing powder and heat set it.


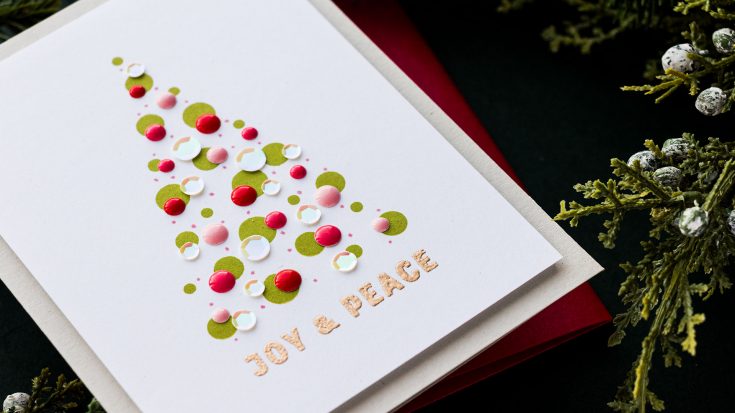
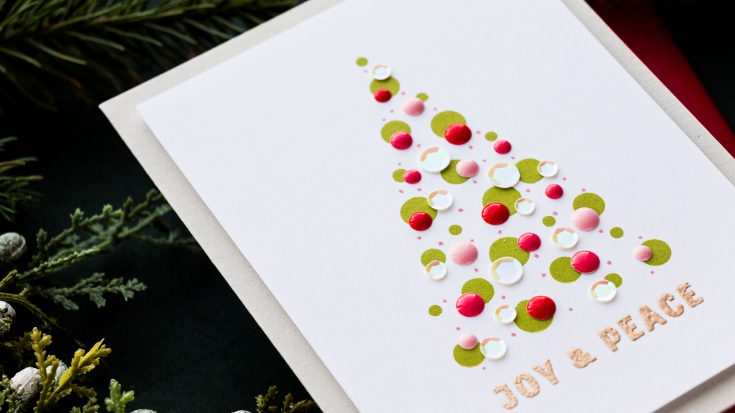
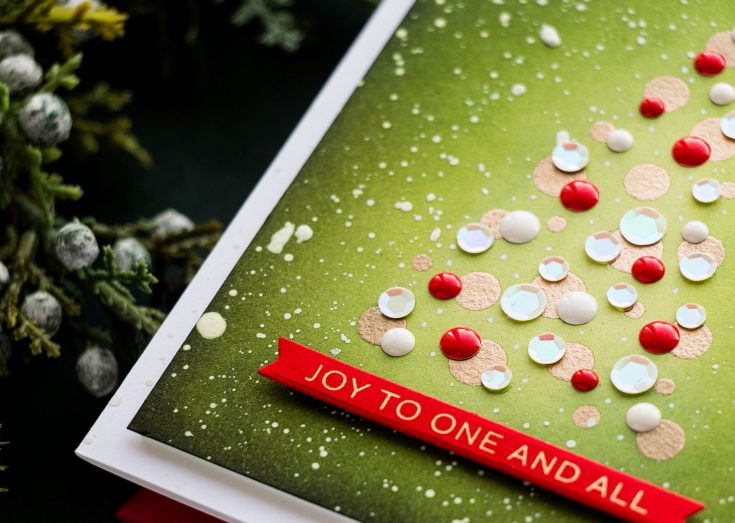
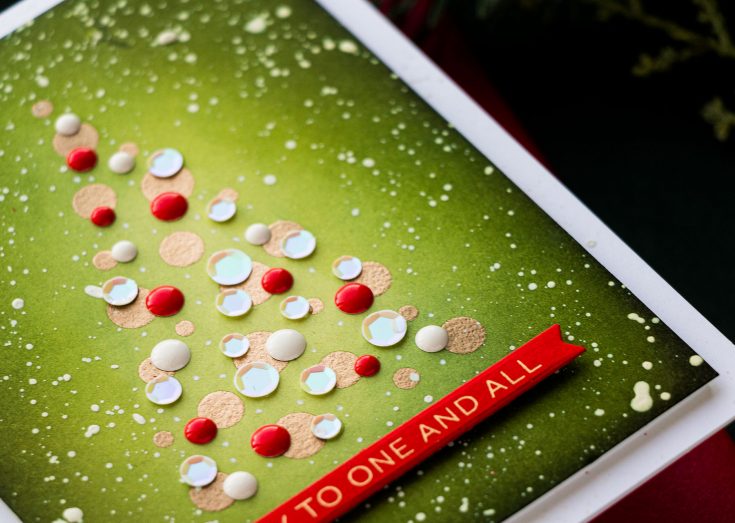
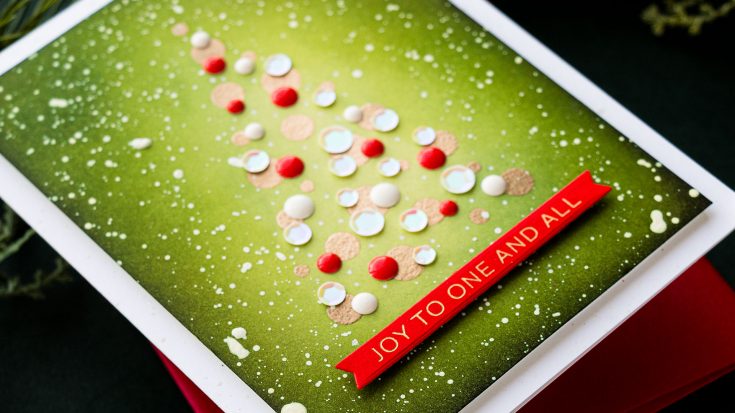
You can use any color powder you like and the color of the powder will make the color of your ornaments. This Christmas tree consists of various size circles arranged in a tall triangle and they create the illusion of the Christmas tree. To me, these circles look like ornaments, they can also look like Christmas lights on a Christmas tree. So you can use any color embossing powder if you are heat embossing on colored cardstock or any color ink if you are stamping on white cardstock for these circles.

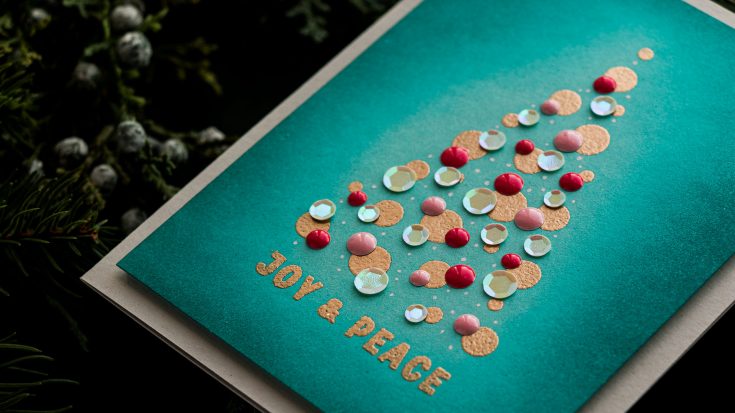
Next, I added ink blending to each of the colored cardstock panels to help guide the eye of the viewer to the center of the cards where the tree is placed.

The beauty of this stamp is that it creates the base of your tree, but you can then use that base to decorate it with other supplies you have in your stash. So think about all of those embellishments you have and how you can incorporate those into your tree.

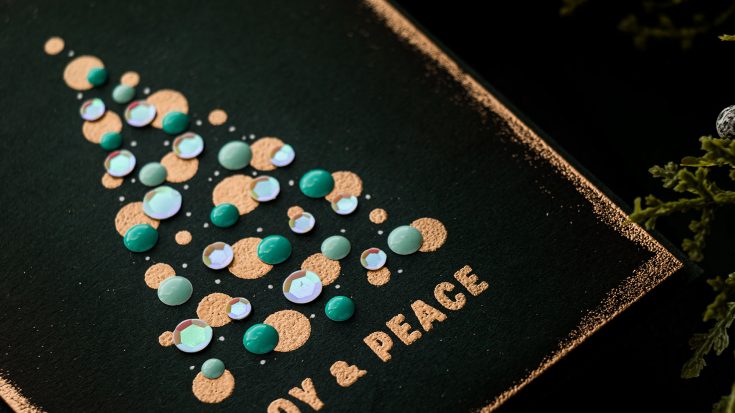
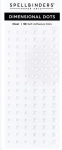
I used enamel dots from Spellbinders, I have them in different colors and I thought it would be fun to make my trees all different colors. In addition to the enamel dots, I added sequins, these are Aura sequins, also from Spellbinders.
Because that wasn’t enough I also used a white pen and added white dots to fill in even more and I love this result.
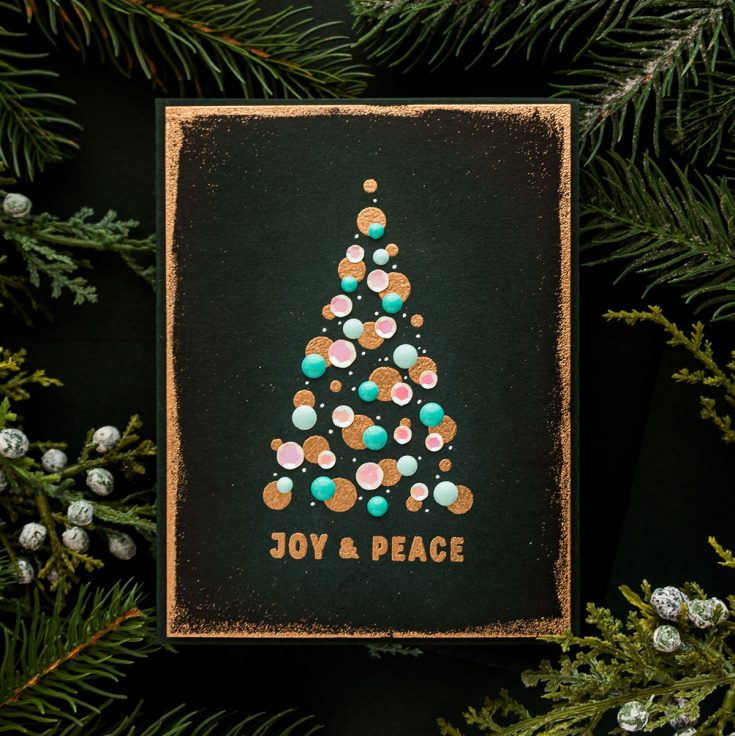
So here’s a look at the cards I have for you today created with the Trees and Stars stamp set from Simon Says Stamp. Have fun stamping!
WATCH THE VIDEO:
SUPPLIES:
|


Thanks so much for stopping by, and thanks again to Yana for being our guest!
Ways to support Ukraine:
If you are looking for ways to support Ukraine, we encourage you to visit this page on Yana’s blog:

3 QUICK & EASY Cards with stencil and Glitter Glaze!

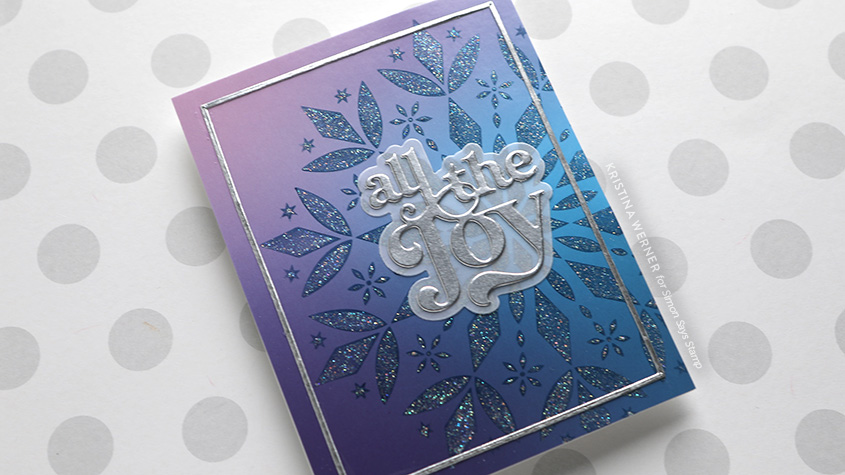
Hello, all! Kristina here with three fun holiday cards! I used the Stylized Mandala stencil to create glittery fun cards. These cards were created very quickly by starting with the Holiday Color Blends backgrounds and Pastel Color Blends backgrounds.
For the glitter, I used Fallen Snow Glitter Glaze and Scarlet Glitter Glaze from Brutus Monroe.
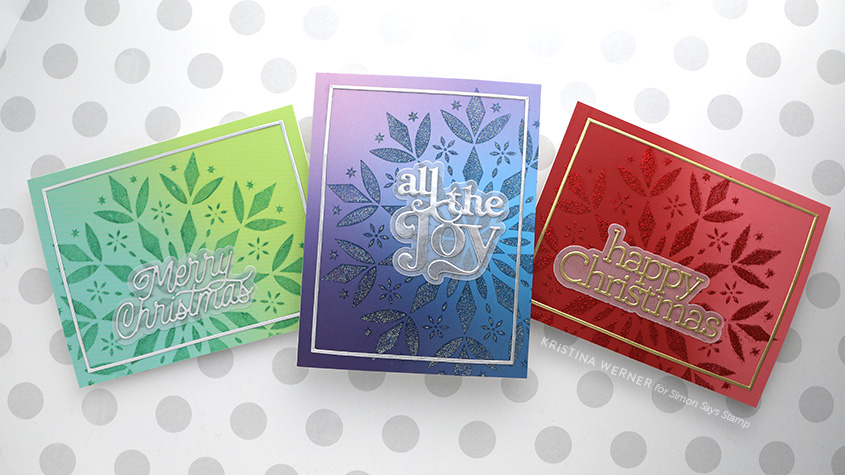


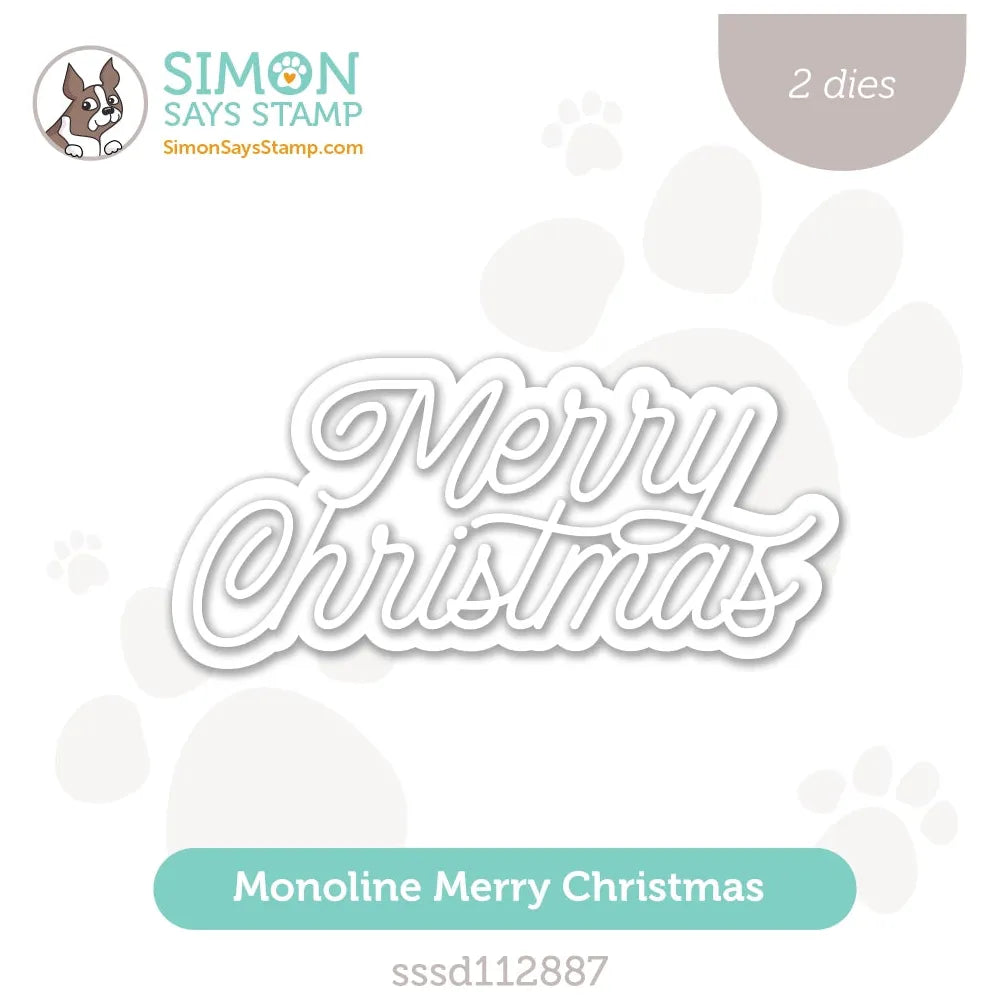
I finished off the cards with A2 Thin Frames dies cut in matte gold and matte silver cardstock, and then three different greeting die sets also cut in the same colors. The die sets for the greetings are Monoline Merry Christmas, Happy Christmas, and All the Joy.

Enjoy the video!
Supplies
|


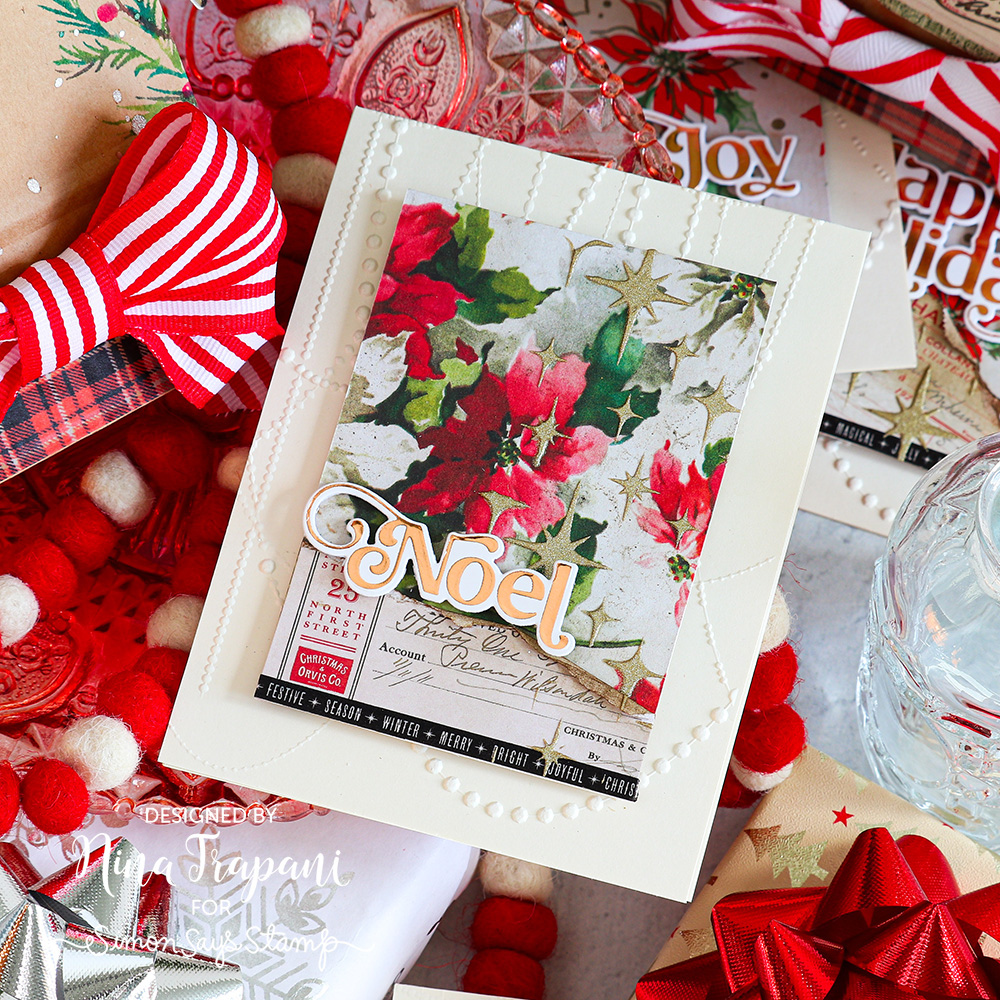
Easy Holiday Gifting + Cards Featuring Tim Holtz! Studio Monday with Nina-Marie

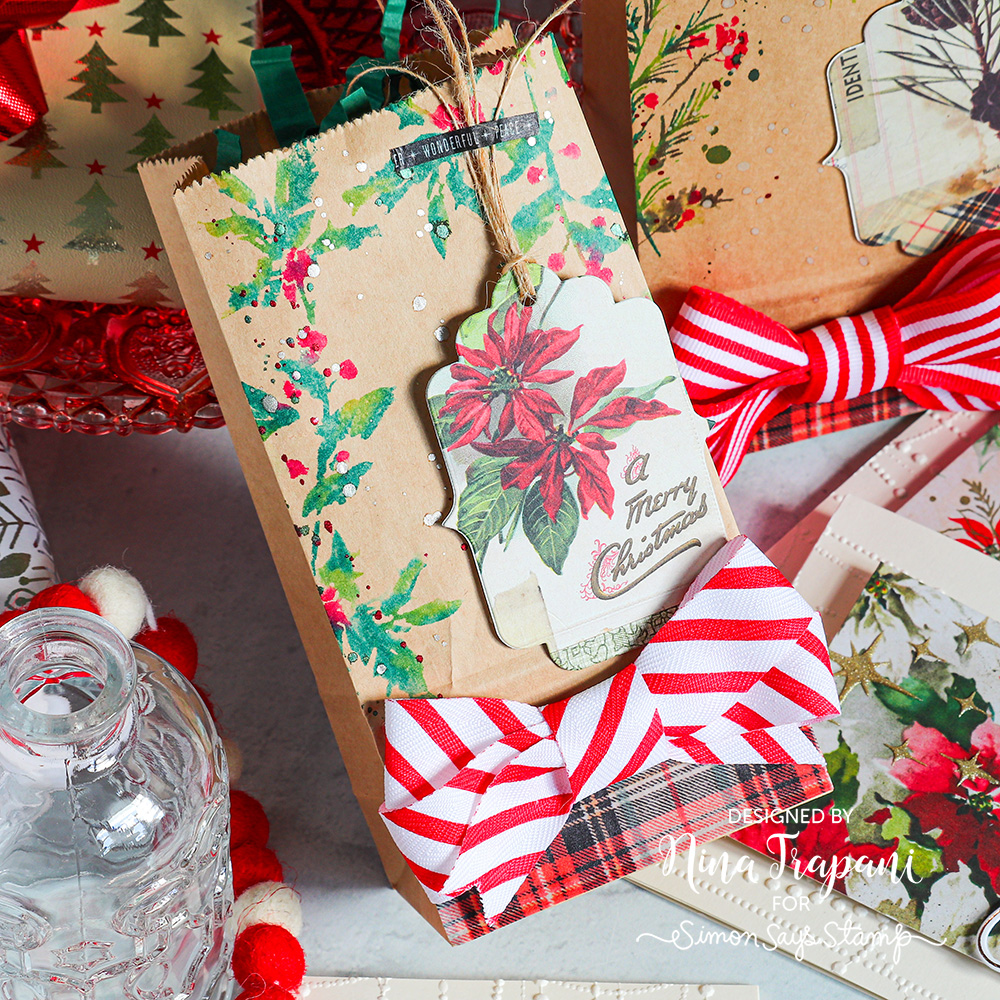
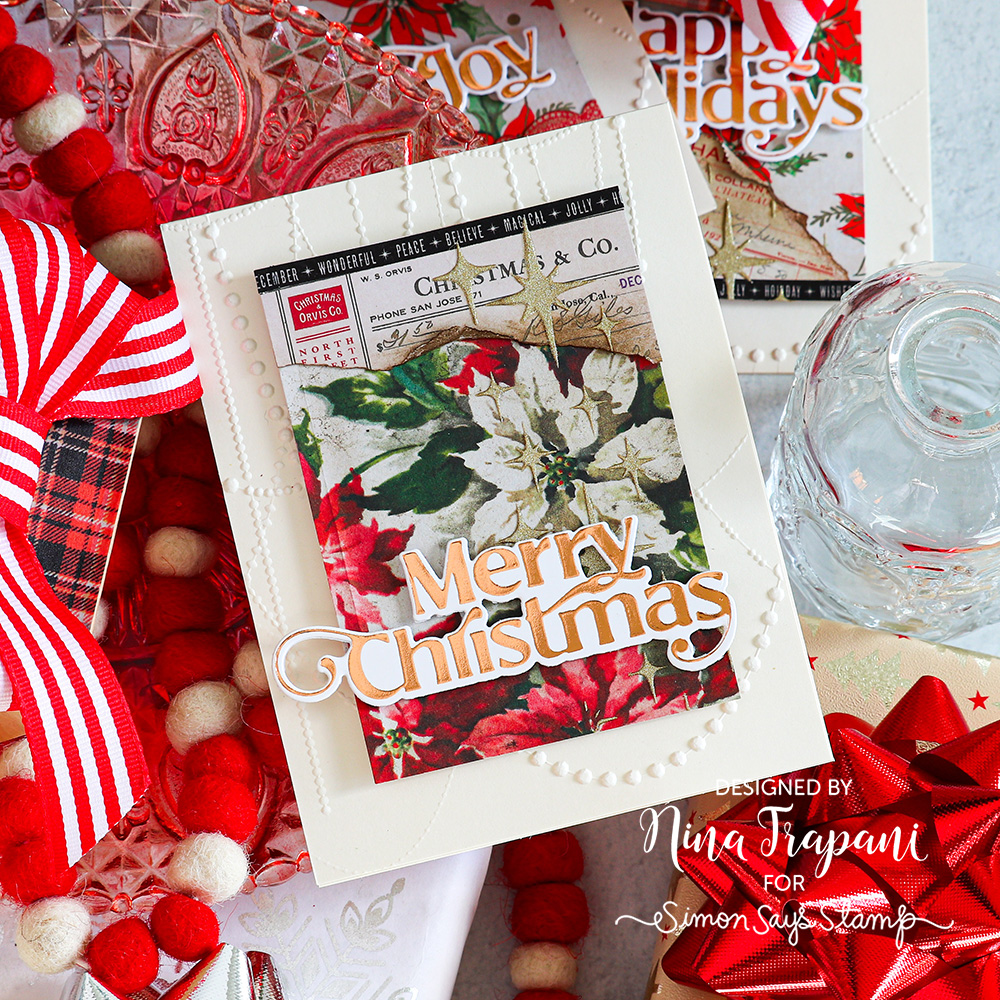
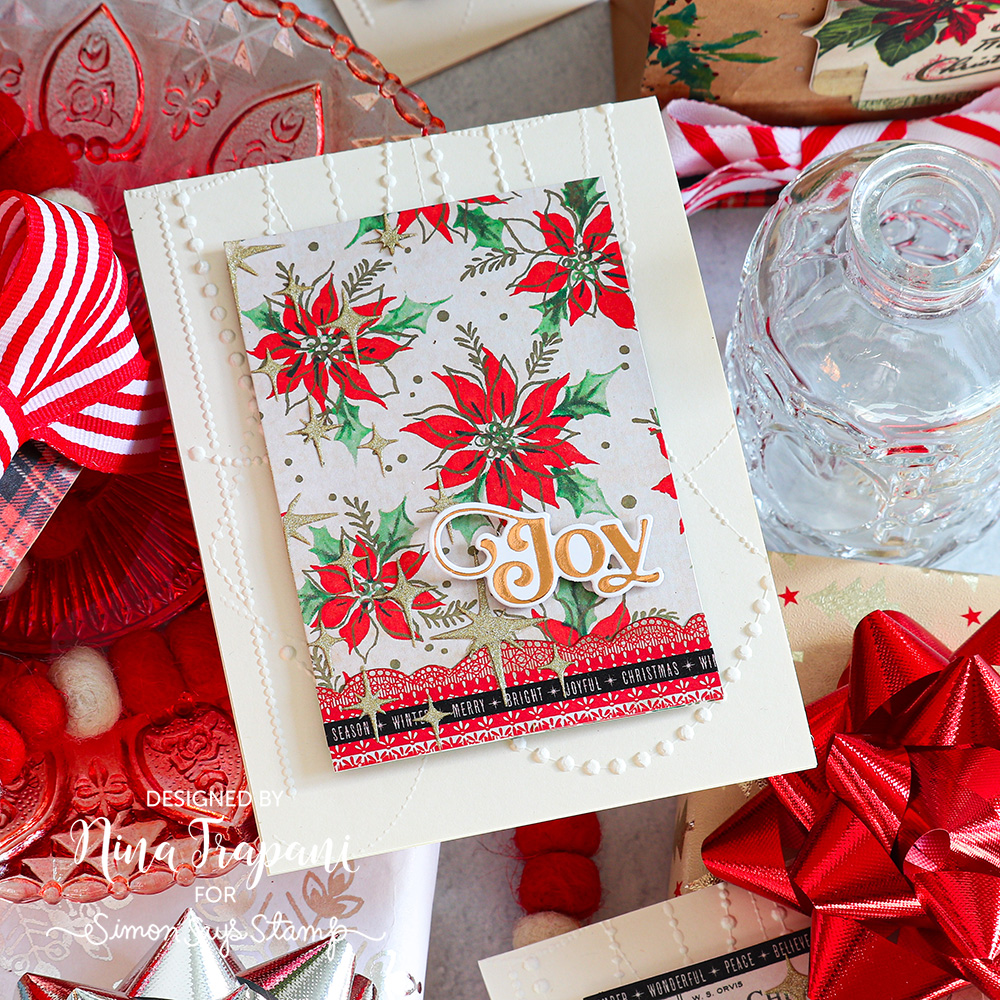
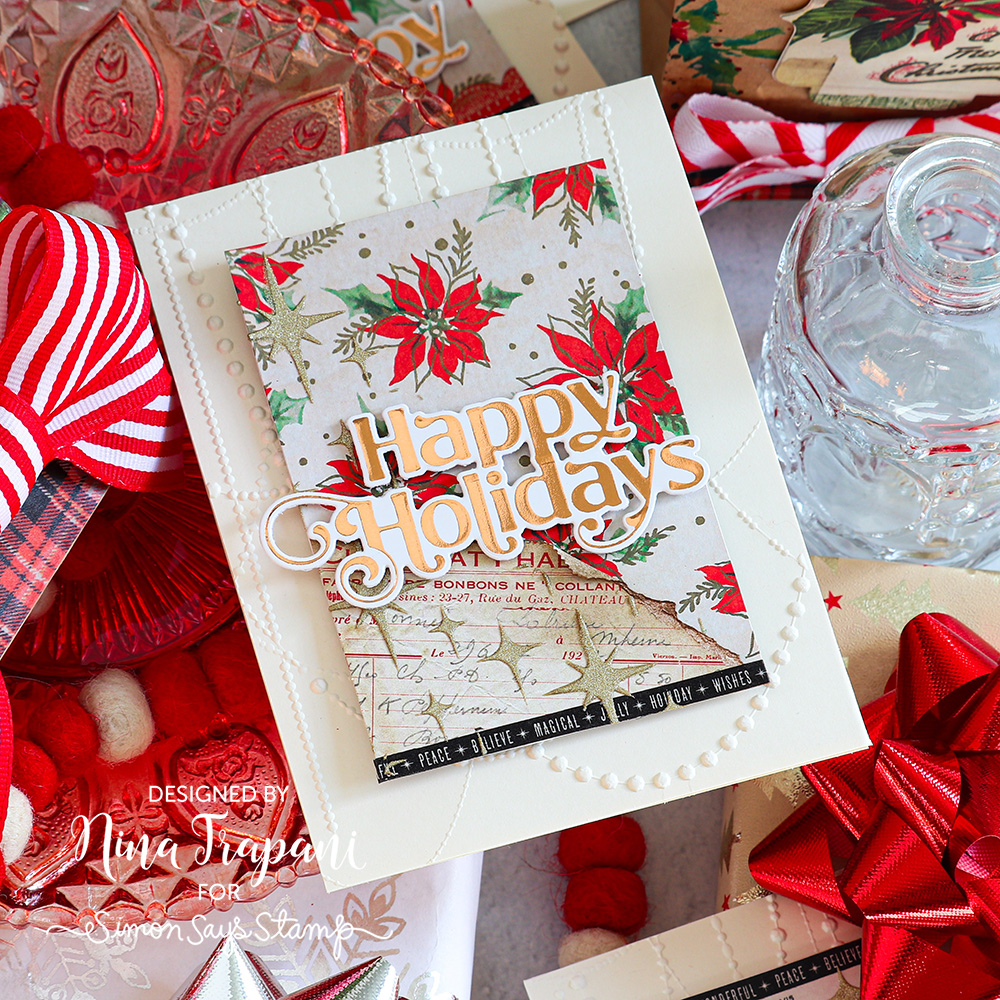
Hi everyone it’s Nina-Marie Trapani here with you! Christmas is one of my favorite times of the year to make extra-special gift giving projects, such as gift bags, tags, and card sets. Today I am sharing a set of projects that I made with Tim Holtz Christmas products!
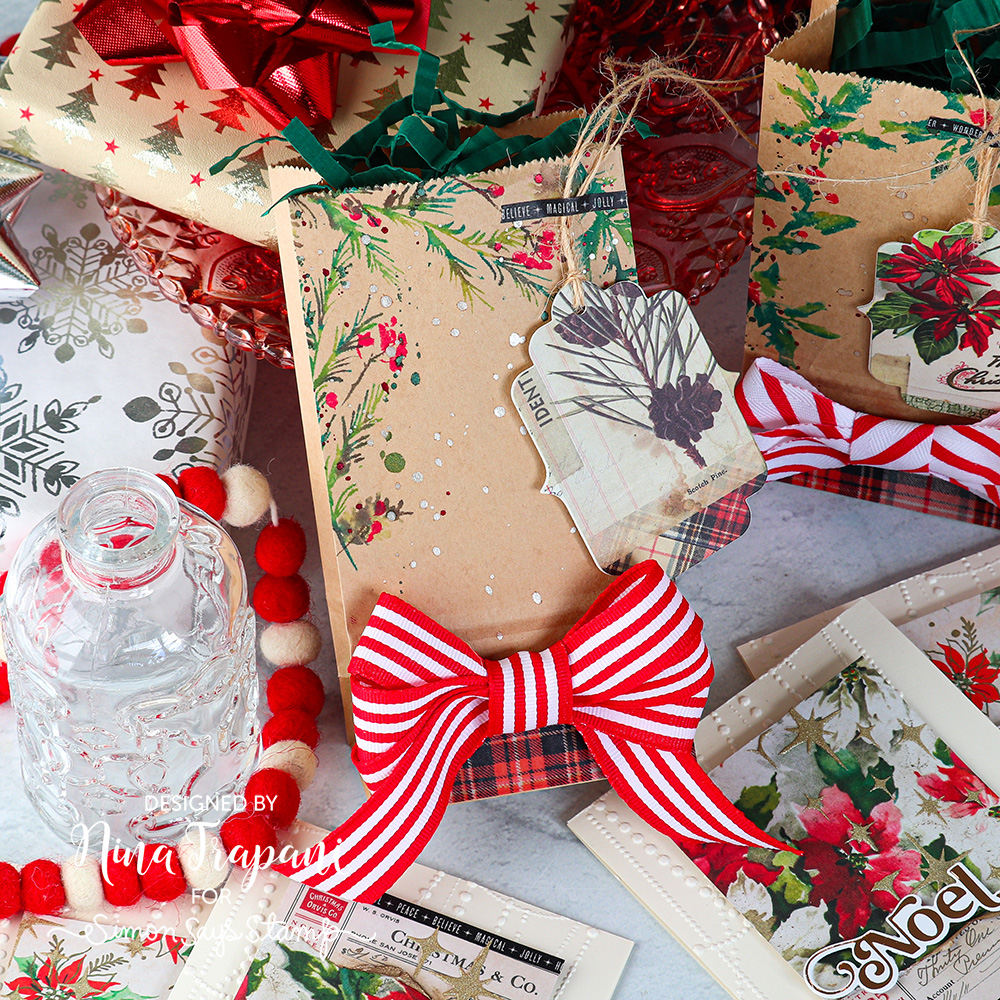
I made watercolored gift bags, which were super easy to make because you stamp with water-based markers to create that watercolored effect—no coloring required! The stamps I used were the Winter Watercolor 2 set. Each bag features quick tags that I made with Tim Holtz Pocket Cards. I even made my own paper filler with a Marvy Crimper Tool!
The cards look complicated but trust me, they come together SUPER fast! I used some Christmas Backdrops, a Twinkle stencil, Sparkle Texture Fades embossing folder, and ephemera (all from Tim Holtz) to create the effect. I also added greetings with Simon’s Elegantly Modern Christmas foil plates and dies.
Want to learn how I made these festive projects? Watch the video below for all the details!
WATCH THE VIDEO
SUPPLIES
|


