5 Ways to GET ORGANIZED in Your Craft Space! Studio Monday with Nina-Marie

Hey there friends, its Nina-Marie Trapani here with you! We’re kicking off the new year with some organizational ideas to freshen your crafty space and help you meet those goals for 2024. Check out all of these fun and simple ideas!
Re-inker Storage
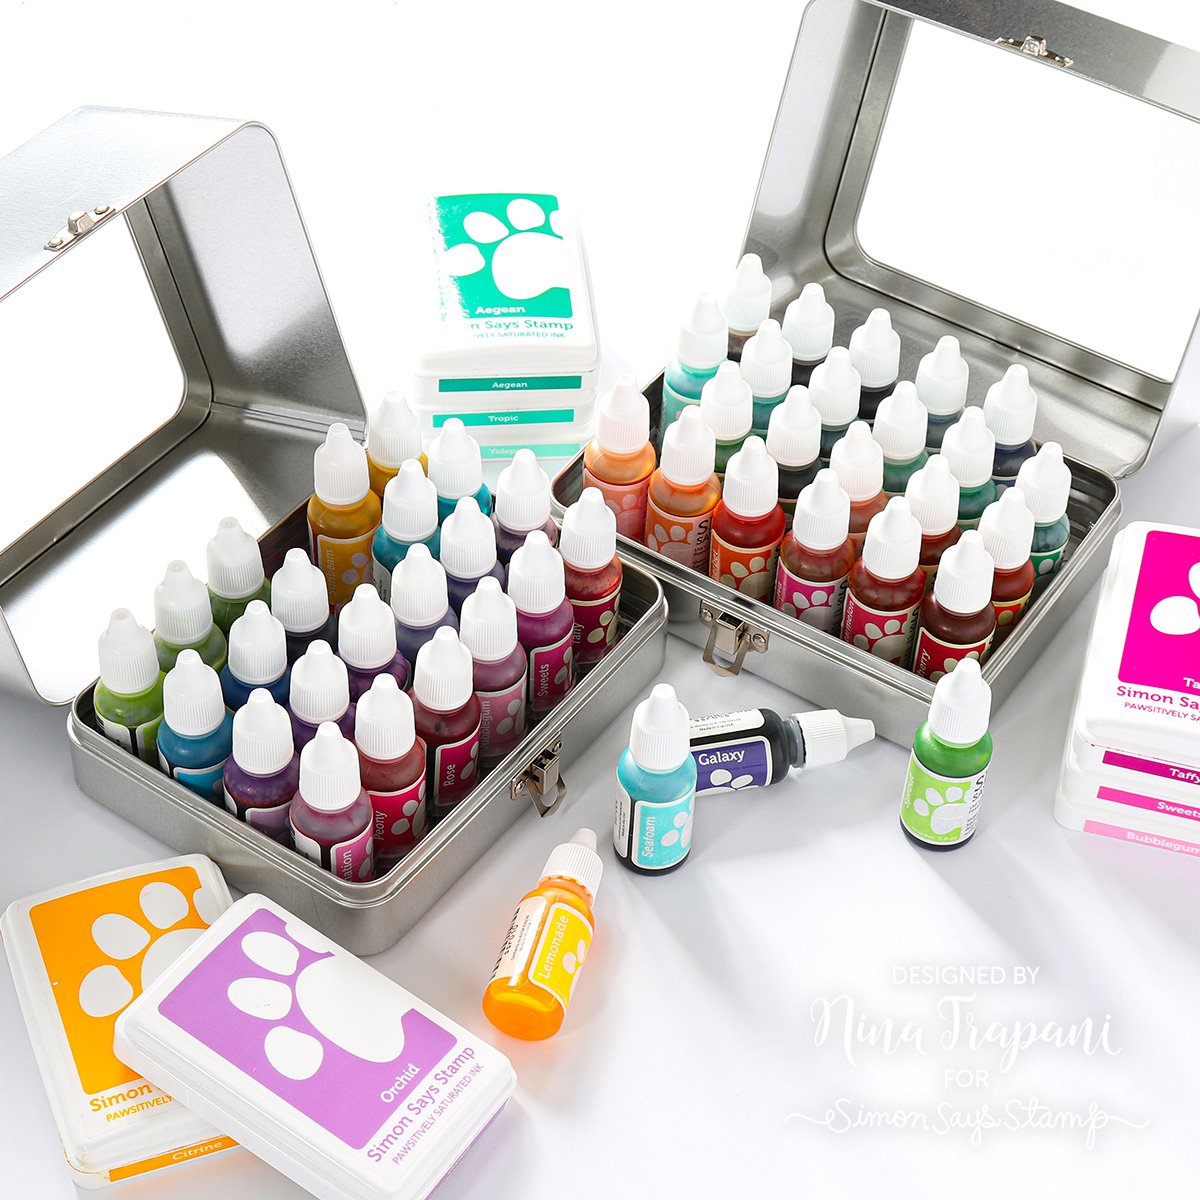
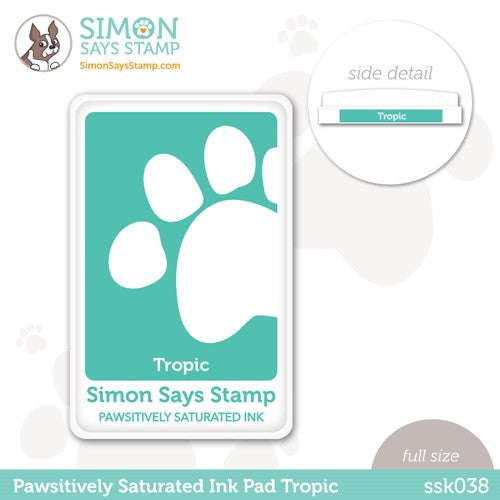
Our Simon Says Stamp Pawsitively Saturated Inks are available in re-inkers so you can keep your pads primed for perfect stamping—but what’s the best way to store these beautiful bottles? An easy solution is to use Tim Holtz’s Multi-Storage Tin! The tin comes with two inserts, one of which works perfectly for holding up to 24 bottles of our Pawsitively Saturated Re-inkers.
For All the Things: Pawsitively Everything Clear Pockets and Storage Boxes

Our Simon exclusive Clear Pockets and Storage Boxes is the perfect, multi-use organizational system for smaller sized products. If you use a lot of gem stickers and sticker embellishments, the Clear Pockets are a convenient method for sorting and storing different sheets. The pockets have a flap to keep anything inside secure. And the pockets fit perfectly inside our Storage Boxes so you can store all of your gems and stickers together in one place! If you have a lot of embellishments, you could also label the boxes for different types and styles.
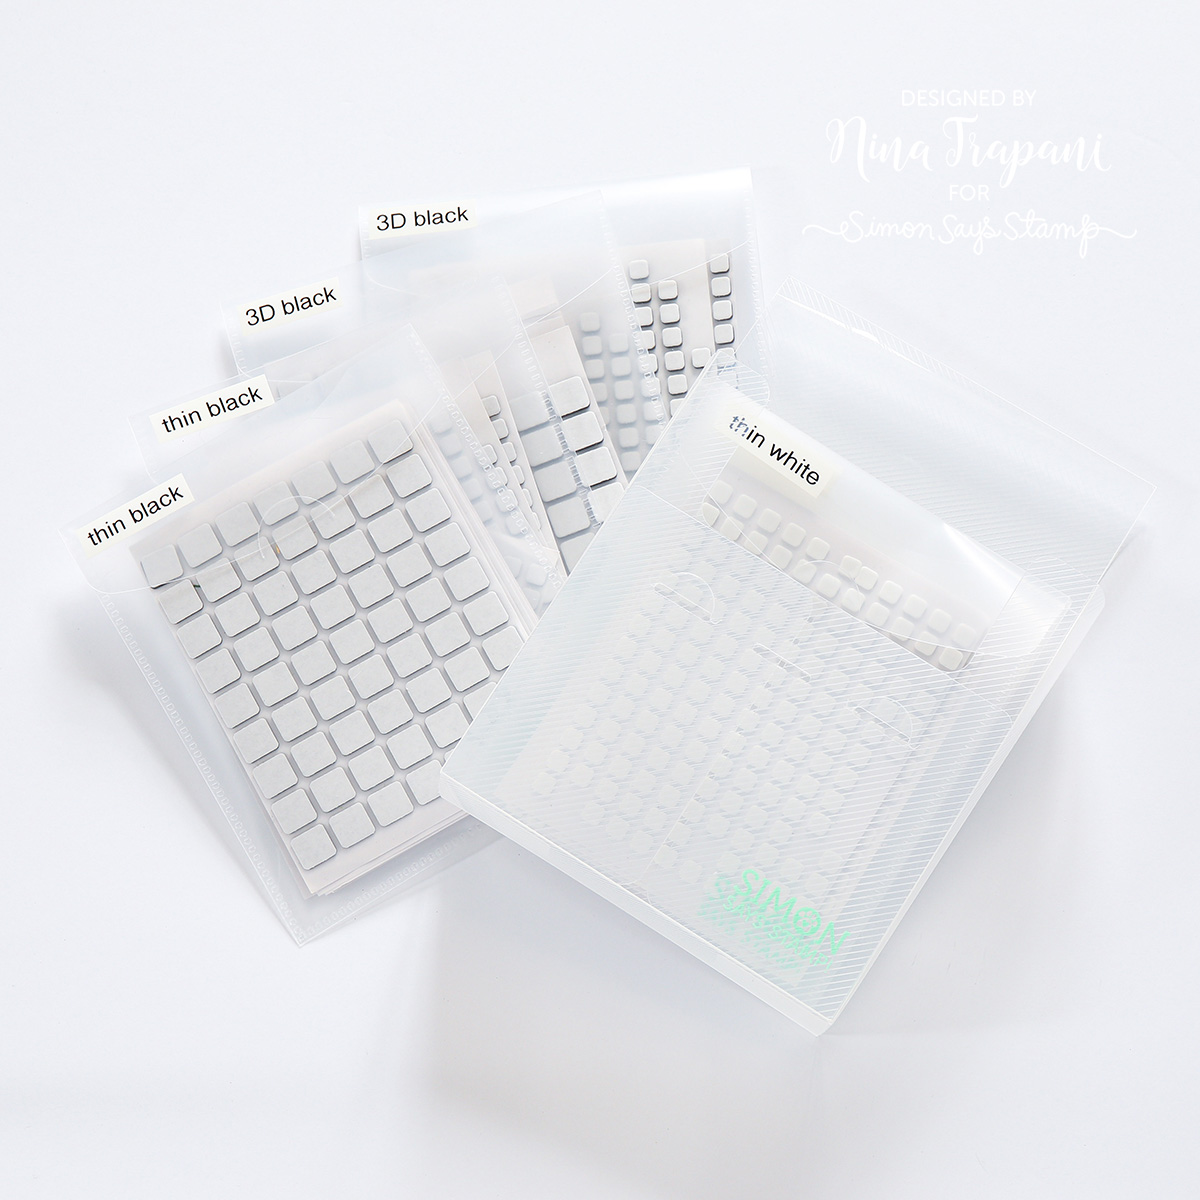
These storage options are also super handy for adhesives! I like to sort our Simon Says Stamp foam squares by type into Clear Pockets (of which I label), and then store all of them together within a Storage Box. It keeps them all together but while I’m crafting I’m able to easily distinguish which kind I am looking for.
Scrap Sorting

If you like holding on to all those scraps of paper but have trouble figuring out the best way to organize them, you should try THIS! Our Simon Says Stamp Rainbow Mesh Bags and Ring Clip offer a colorful but functional way to keep your scraps. Because they are large enough to hold 8 1/2″ x 11″ sheets of paper, you have all the room you need inside to hold any sized scrap of leftover cardstock! Use the rainbow of bags to sort your scraps—when you are crafting, the visual guide will help you find the color of cardstock you’re looking for in no time at all!
Envelopes for Ephemera
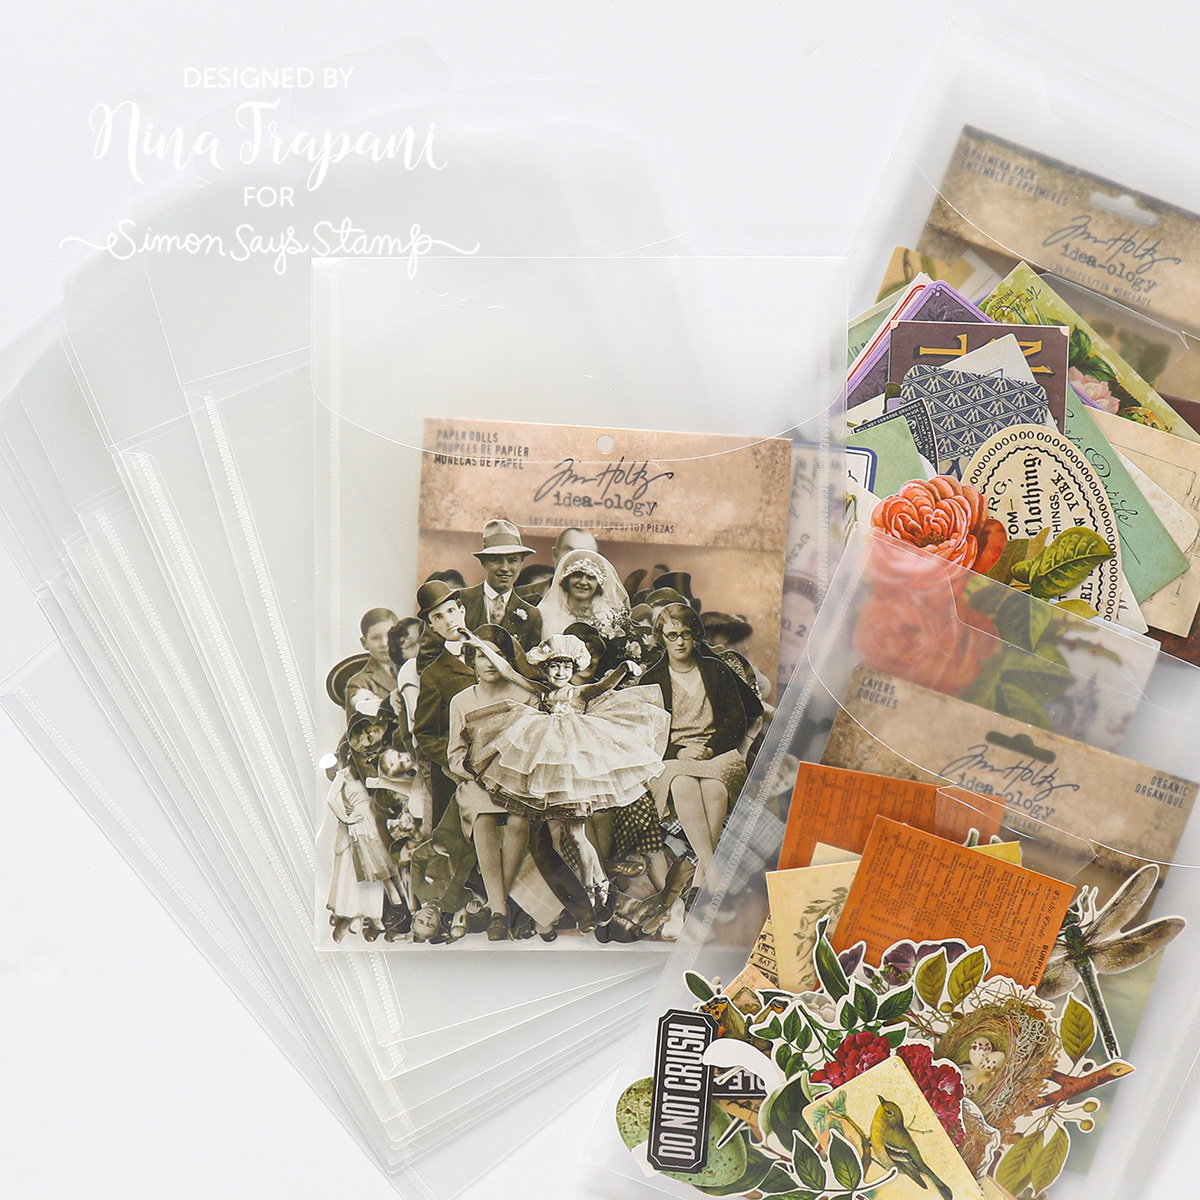
Our Simon exclusive Storage Envelopes are a multi-functional option for storing a lot of different products (such as Tim Holtz cling stamps). I find they also work great for organizing my different packs of ephemera. The envelopes can hold an entire package of ephemera (sometimes even more than 1 pack depending on how large it is). And the flap closure keeps me from losing even the smaller bits and pieces. You can also label these if you’d like, or keep the original packaging inside for reference as I do.
All of these simple solutions are very effective ways to step up your organizational game this year and refreshen your craft space! Be sure to watch the video below for additional details!
WATCH THE VIDEO
SUPPLIES
|


One Stamp, Five Ways: Flower Love

Hi friends! Happy Sunday, and happy New Year’s Eve / last day of 2023! If your year has been wonderful or a bit rough, we are sending the sincerest wishes for the most wonderful 2024! Please join me in welcoming special guest Suzy Plantamura one last time for 2023! Take it away, Suzy!

I’m making the cards for this post the week before Christmas, but by the time you see it, the holidays will be “all wrapped up”! Hopefully you will all be ready for some bright Springtime flowers! My “one stamp, five ways” post today uses the Flower Love stamp and die set from the SSS Smitten release. I’ve made a total of 4 cards and 5 tags to share with you. I can’t say I used 5 different coloring methods for my flowers, but I did try to show them used in five different ways! I’ve also combined a bunch of other Smitten products into my post which will help you get a feel for this fun release in case it got a little lost in the holiday splendor!

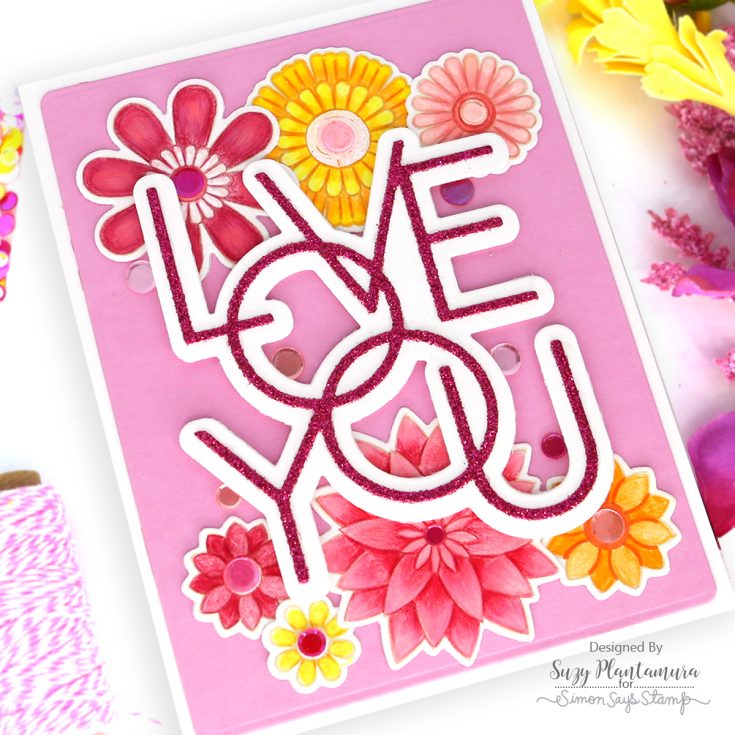
On one of my latest orders with SSS, I purchased the Pink and Main Fun Pastels 6×6” paper pad. One of the pieces of paper inspired my look for this card. I die-cut a piece with the A2 Thin Frame Die and attached it to a white card base. I stamped a bunch of the Flower Love stamps with Intense Black Ink. I colored them with a mix of Copic Markers and Prismacolor Pencils in lots of bright colors. I used some Glitter Pens and a White Uniball Gel Pen to add details.

I die-cut three leaves from the Plentiful Petals Dies and colored them with Copic markers. I arranged all the flowers and leaves in a circular pattern in the center of the card. I used foam tape beneath the center flower. I added sequins to the center of all the flowers and then white sequins around the bouquet. I used the new Candy Hearts and Be Mine sequin mixes as well as the Icy Sequin Mix. I stamped the “sending” stamp from the Flower Love stamp set on a SSS Sentiment Banner with Intense Black Ink and attached it to the top. I die-cut the Stacked Love You Die from white cardstock and glued the letters to the bottom of the card.

I just love this big Lined Love You die from the Smitten release. I die-cut it from white cardstock and from a piece of the new Be Mine Glitter Cardstock and glued the letters over the white background. I die-cut a piece of pink patterned paper and attached it to a white card base. I attached the large love you to the center of the card with foam tape behind it.
I stamped flowers from the Flower Love stamp set with Latte Pawsitively Saturated Ink and colored them in with Prismacolor Pencils. I used a white Uniball over the centers of the flowers and the end of some petals. I arranged the flowers under the top and bottom of the love you die. I then used sequins from the Candy Hearts sequin mix in the center of the flowers and around the edges of the big I love you die.

I die-cut a white frame using the outside of the third smallest A2 Thin Frame Die. I then used a piece of Glossy Black Cardstock to make a frame and attached that over the white piece. I painted a piece of watercolor paper with Cherry Bomb Nuvo Shimmer Powder and attached the frame over it. I stamped a sentiment from the Flower Love stamp set in the top left corner with black ink. I added a second sentiment from the My Love Greetings stamp set also stamped in black ink, but this time on white cardstock and die-cut out with the matching dies. I attached it under the first sentiment.
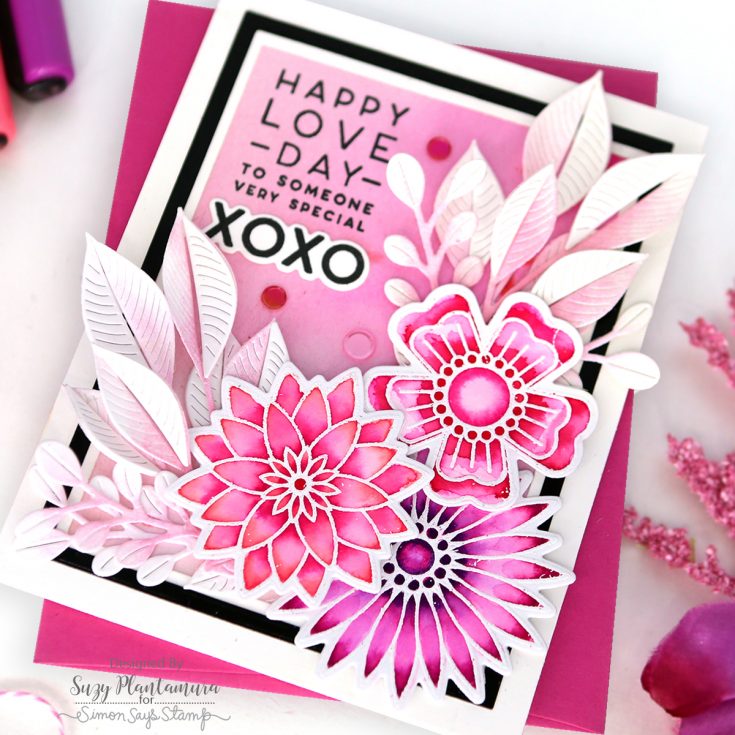
I embossed the flowers in the Flower Love stamp set with white embossing powder on Ranger Watercolor Paper. I painted them with Karin Brushmarkers. I die-cut two sets of the Grand Corner Leaves dies from white cardstock. I applied some Pawsitively Saturated Ink in Guava to two of them and in Bubblegum to the other two. I kept the ink mostly on the inside of the leaves leaving lots of white space. I attached the extra leaf pieces leaving them white. I arranged three of the largest flowers I had painted in the bottom left corner. I then tucked two of the leaf sprigs under each side of the flowers going around the frame. I love how you can fold the leaves in half, so they are very dimensional! I added some sequins from the Candy Hearts mix around the sentiment.

For this card, I used my favorite embossing folder, the Swiss Dot that is part of the Rainbow Splash collection. I attached that to a purple cardstock card base. I used more of my white embossed flowers on this card that are painted with Karin Brushmarkers. I also die-cut some leaves and flowers from the Plentiful Petals dies. I applied some Tidepool Ink to the leaves (very lightly). I used Marine and Violet Ink on some of the little flowers.

I die-cut two of the Fancy Love You dies from white cardstock. I applied Violet and Orchid ink to one of them and then popped the letters out and attached them over the other one. I attached that to the center of the card with foam tape beneath it. I then arranged my Flower Love painted flowers and my inked smaller flowers and leaves around the sentiment. I used some Pink Fresh Glitter Drops in the center of the flowers and around them to finish the card.

When I saw this release, I was so excited they had several new tag dies as I love making tags! I had a bunch of flowers left from my other projects that I used on these tags. For these two tags, I layered two different tag dies on each. For the one on the left, I used a white Love Ya Tag over a CZ Noted Tag die-cut from a piece of the new glitter paper. For the one on the right, I die-cut the top Love Ya Tag from glitter paper and attached it over the Tag Adornments tag in white.
I attached one of my colored flowers to both and then added sentiments from the new All the Love sentiment strips. And of course, I added some of the two new sets of sequins to both and large ribbons tied to the tops. The one on the left is a strip of torn fabric with twine tied around it and I just love how it looks.

I made these three tags from the Love Ya Tag die (left), the Tag Adornments tag die (center) and the Swatching Tag die (right). I used one of the new glitter papers for the one in the center. I attached colored flowers to each. I used sentiments from the My Love Greetings stamp set stamped with black ink. I used the new sequin mixes on the scallops of the center tag and around the tag on the right. Last I tied ribbon with twine to the top of each. I love using some of my ribbon collection up on these tags!
This was a fun post to create to give me a little break from the craziness of the holiday season. I love this Flower Love stamp set with matching dies so much and I could have made way more projects with them as the set is so versatile. Visit my blog for regular “one stamp, five ways” posts which will hopefully inspire you to get more use out of your stamp sets. Thanks for visiting today and I hope you all have a wonderful New Year! –Suzy
SUPPLIES:
|


Thanks so much for stopping by, and thanks to Suzy for being our guest! Happy New Year!
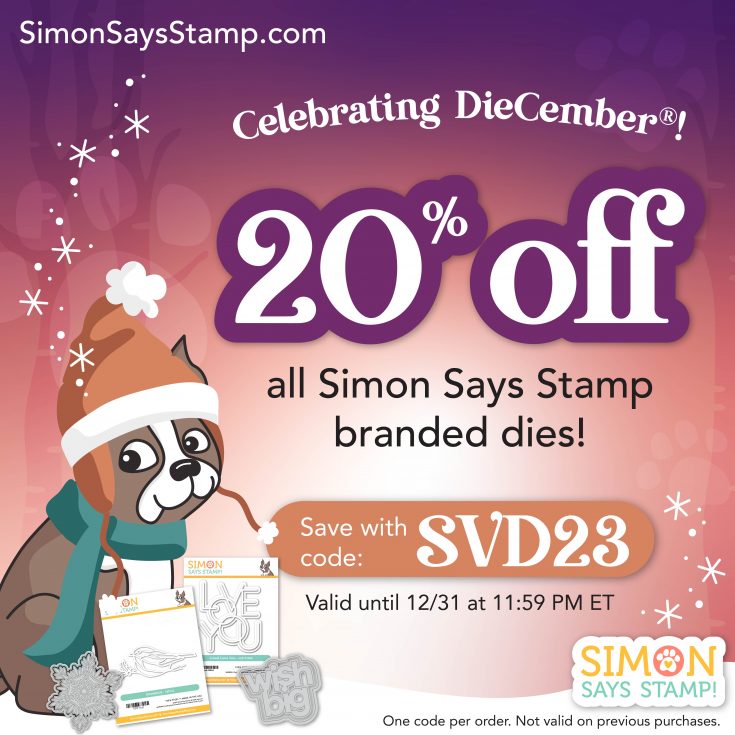
PSST! Don’t miss this great deal! Going on NOW!
2 Card Ideas with Distress Ink Watercoloring featuring Penny Black!
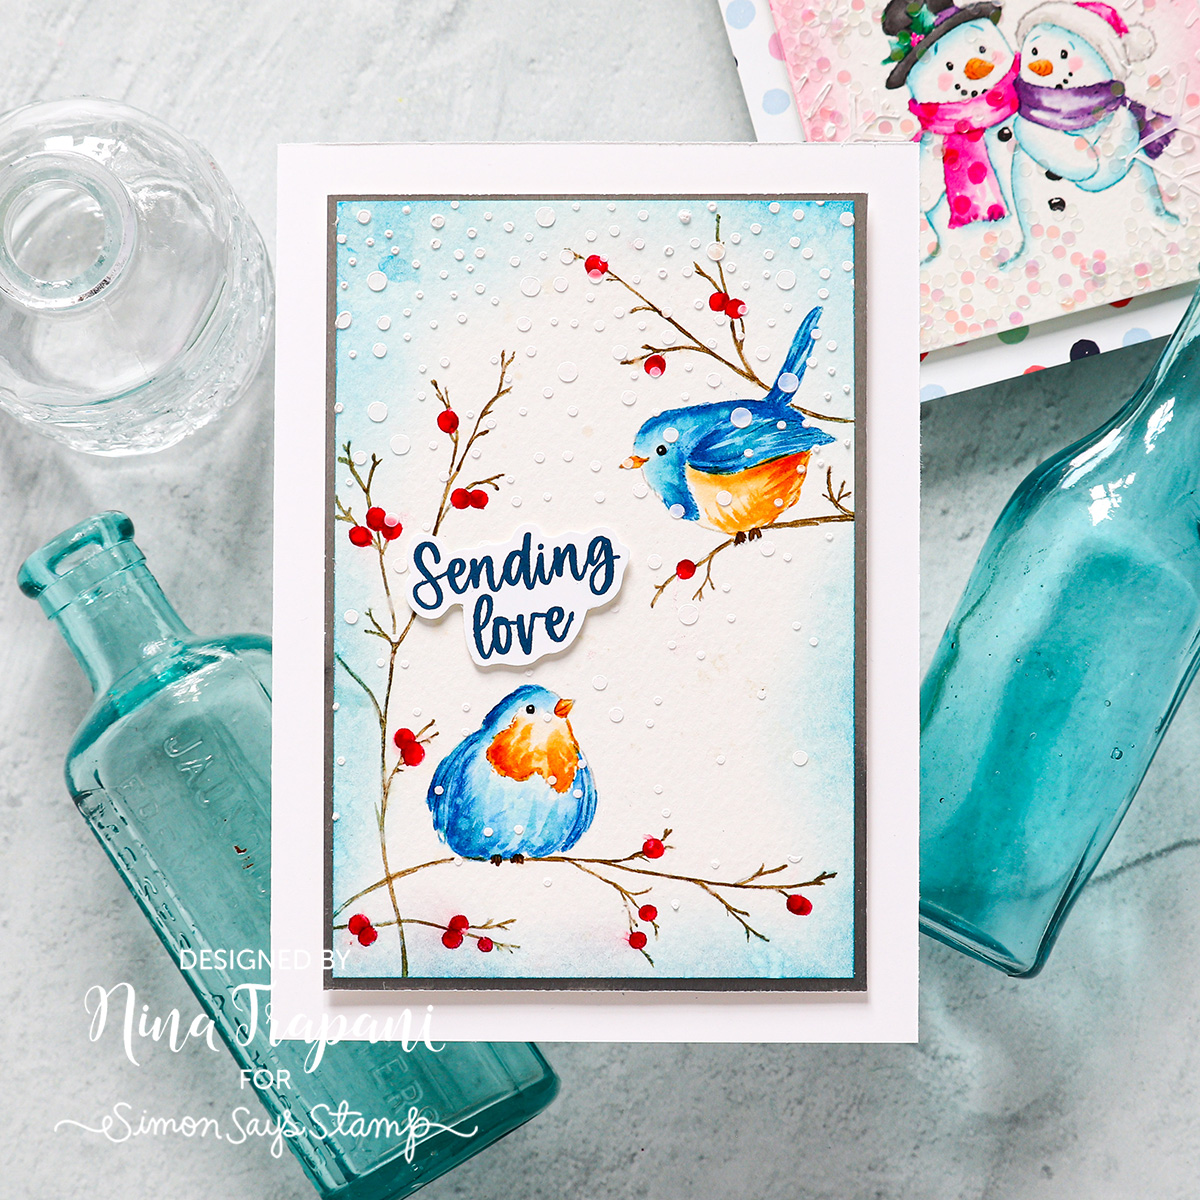
Hey friends! It’s Nina-Marie Trapani here with you and I am very excited to share 2 card ideas using Penny Black stamps with Tim Holtz Distress Inks to do a bit of watercoloring! In today’s video, I used the darling Feathered Friends and Chilly Days stamp sets. These are great for winter-themed cards of any sort—birthday, thinking of you, love, etc.
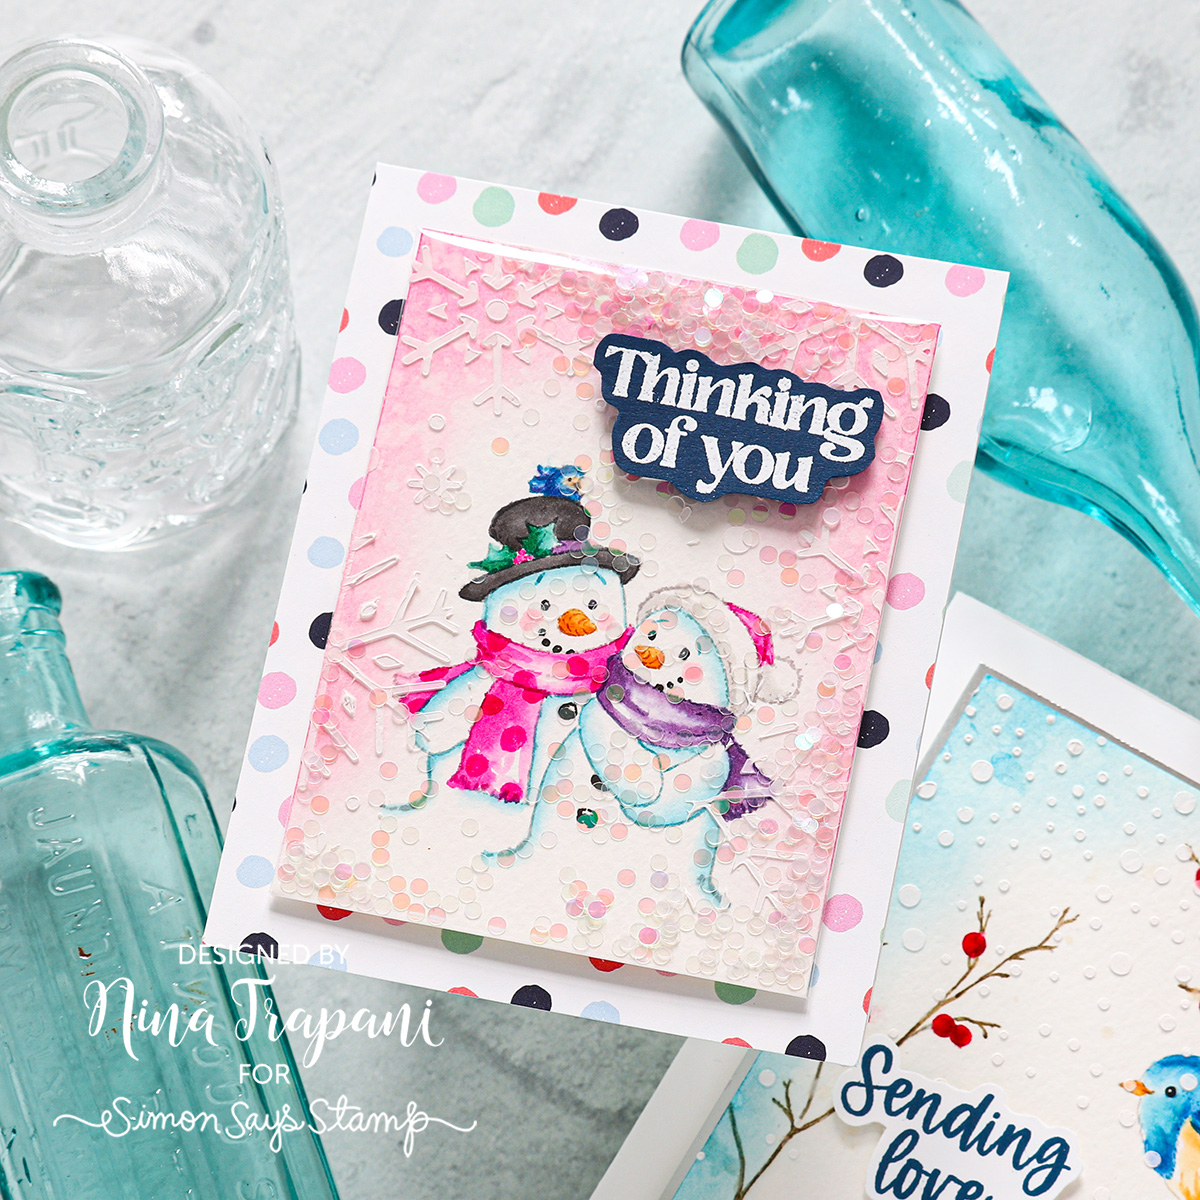
Both of these cards feature watercoloring, a bit of ink blending, and some stenciling with paste. You’ll want to watch the video below for all the details. I hope you enjoy watching as much as I did creating!
WATCH THE VIDEO
SUPPLIES
|


Psst! Don’t miss this GREAT SALE, going on NOW!


