One Stamp, Five Ways: Fresh Air Fall Flowers

Hi friends! Happy Wednesday, and happy last day of January! I know that when one sees the word “Fall” they understandably might tuck that item away for that particular season, but special guest Suzy Plantamura is showing that for this particular set, you can use it ALL YEAR LONG! Just look at this bright and happy goodness with our Fresh Air Fall Flowers set! Read on and enjoy!

Since it is the middle of winter and everyone is probably very cold right now (and possibly sick of the cold), I thought I would make some bright cards to add some sunshine to your day! I went back a way to a stamp set called Fresh Air Fall Flowers for my “one stamp, five ways” post today. Although this set was released in the fall, it only has one fall sentiment, so it works for lots of occasions as you will see. So let’s get started!

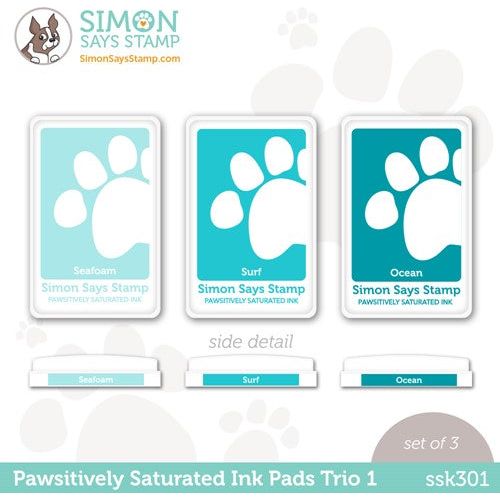
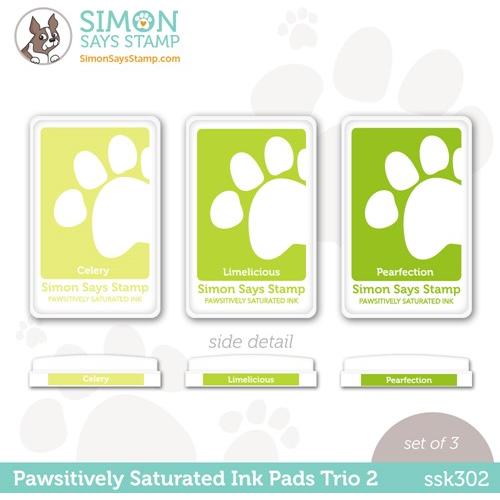
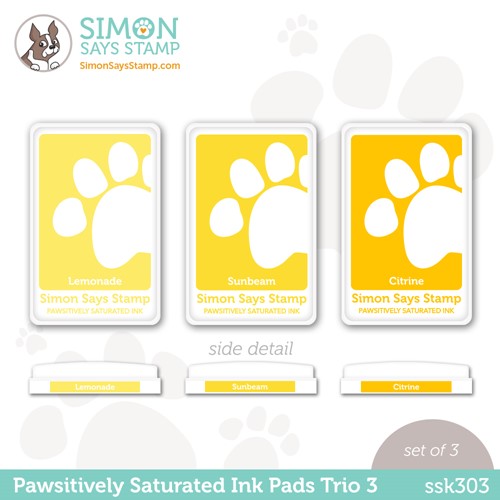
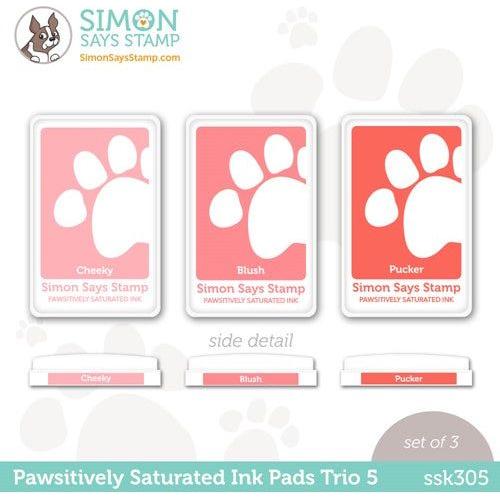
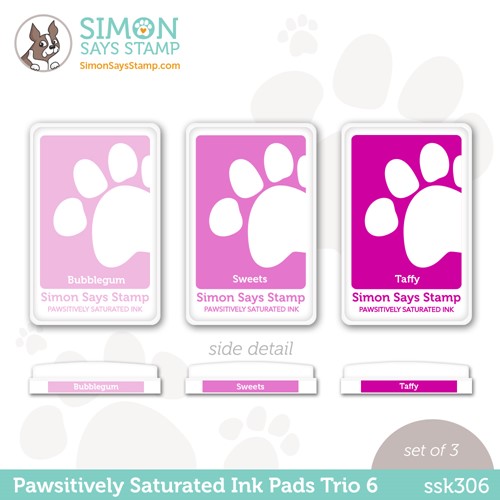
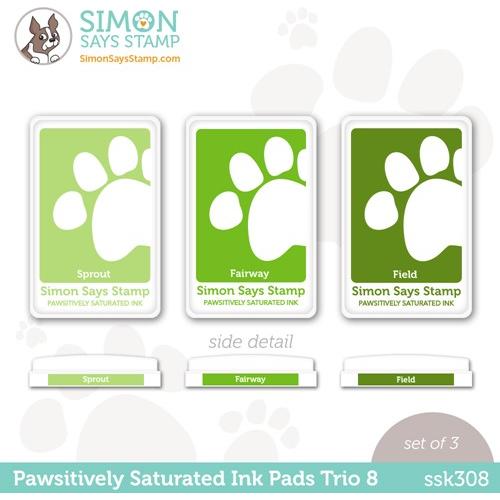
This card uses my “random stamping” technique I use a lot. I wanted to create a floral-patterned paper look. I stamped all the flowers and leaves in the stamp set with Pawsitively Saturated Inks in purples, pinks, and blues. I kept all the greens just one Trio so they would all match.

I die-cut my stamped piece with a rounded edge rectangle and mounted it on a pink cardstock card base. I stamped a sentiment from the new Flower Love Stamp on a Sentiment Label Die. I attached that to the top left with foam tape behind it. I added some Rainbow Splash Drops Assortment stickers around the sentiment.
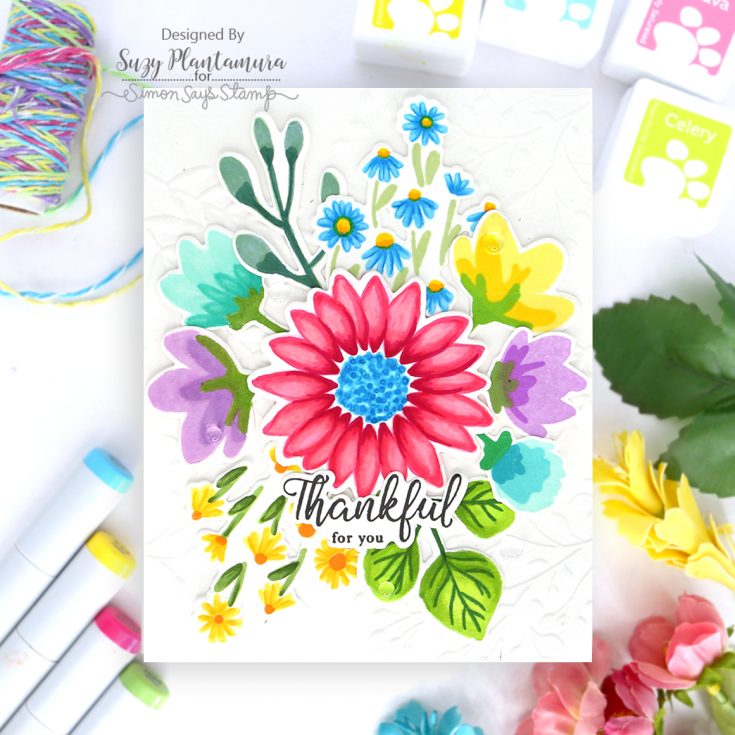
The background of this card is a piece of white cardstock embossed with the Wistful Leaves Embossing Folder. It is hard to see the details on it in the photo, but it looks really pretty in real life! I stamped the flowers I used in the bouquet with the lightest colors of PS Inks. I then colored over the inks with Copic Markers to add additional color and shading.

I die-cut all of the images out with the matching dies and arranged them in the center of the background. I attached it to a white card base. I stamped a sentiment from the stamp set with Intense Black Ink and die-cut it out with the matching dies (so love sentiment dies!). I attached that to the bottom center of the card. I finished it up with some Concord and 9th Dew Drops around the flowers (which you also can’t see in the photo!).
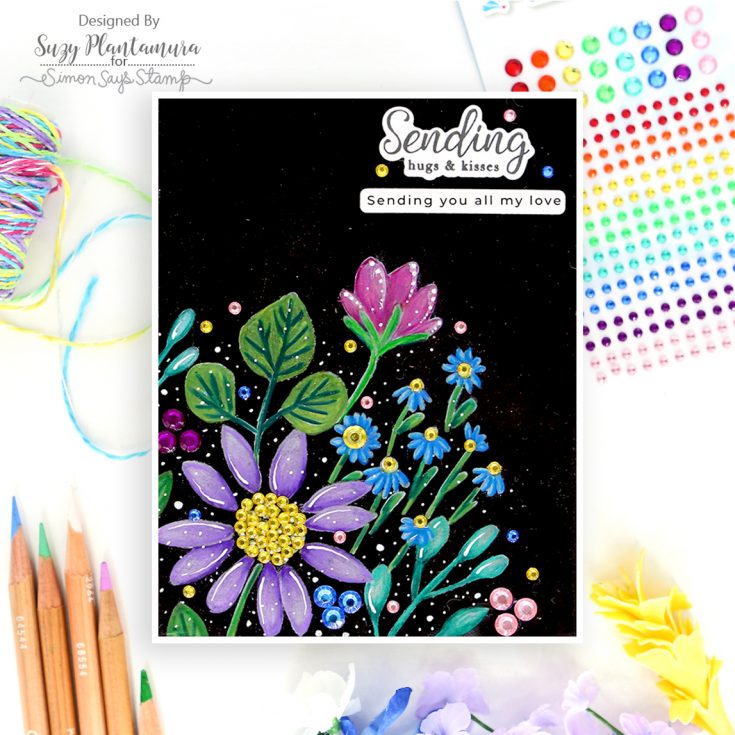
This card was a bit out of my comfort zone, but I kept going even though it felt like a fail at first! I used some Tim Holtz Black Heavy stock cardstock I had just purchased. I stamped the images with SSS White Ink and let them dry (not enough which is where I ran into problems!). If you try this, stamp them with very little ink and you are coloring over them anyway! I colored the flowers with Luminance colored pencils, but if you don’t have them, Prismacolor work just as well. You want a waxy pencil, so it blends well and covers over the black. I used a lot of white pencil to lighten the colors and a white Uniball gel pen for lines, so they stood out more against the black.

I die-cut this piece with the A2 Thin Frame die and attached it to a white card base. I also added a bunch of Rainbow Splash gem stickers in the center of the flowers and around the background. I stamped a sentiment from the stamp set with Intense Black Ink and die-cut it out with the matching die. I attached that to the top right side of the card. I die-cut a sentiment strip from the All the Love Sentiment Labels using a Honeybee Mini Message Banner Die. These dies are small and fit over the sentiment labels perfectly. I attached that below the first sentiment.

For the background, I die-cut the Whirl Diamond Plate out of white cardstock. I embossed another piece of white cardstock using the Tessellating Snowflakes embossing folder. I attached the Whirl Diamond Plate to the backside of the embossing folder to add additional texture. I stamped the flowers and leaves I used on this card with guest what? Pawsitively Saturated Inks because they are just SO good!

I die-cut the flowers out with the matching dies and arranged them on the top of the card. I added some yellow Nuvo drops to the center of the large flower. I die-cut the Bestie Die from white cardstock. I applied ink to the frame of the word using the same color of PS Ink I used on the darkest flower. I glued that to the bottom of the card. I stamped the “hello” from the stamp set in black and attached it above bestie. I die-cut a sentiment from the Bestie Sentiment Dies using the Honeybee Mini Message Banner Dies. I attached that one below the Bestie sentiment. I added some sparkling clear sequins around the flowers.
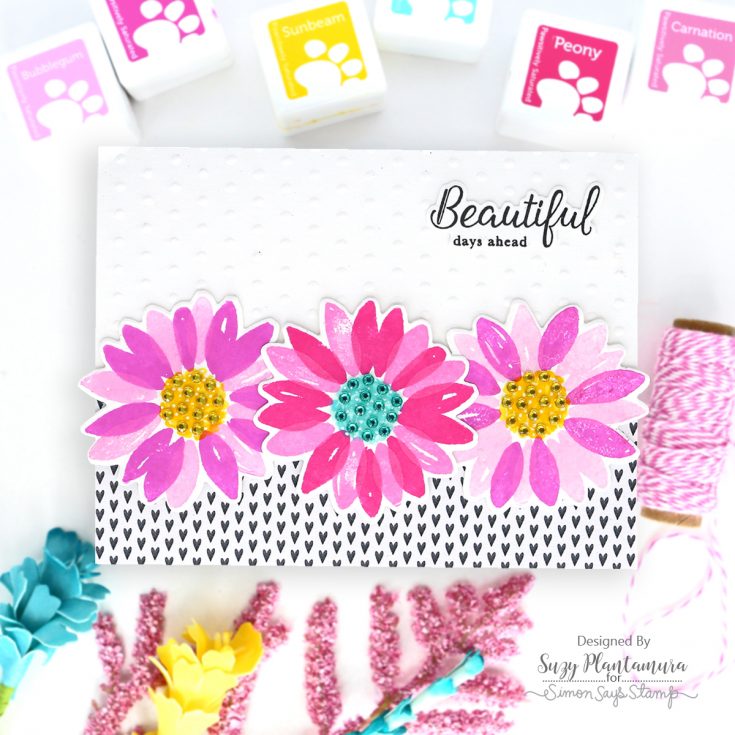
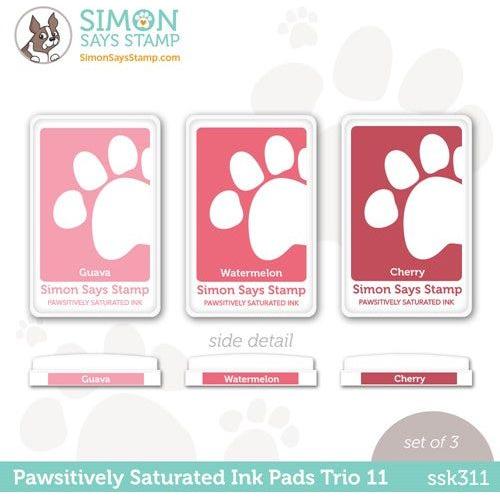
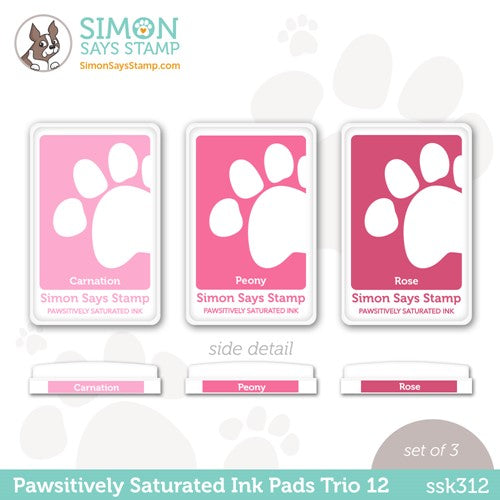
I stamped three of the daisies using different Trio’s of Pawsitively Saturated Ink in pinks. I used teal for the center of one and yellow for the center of the other two and die-cut them all out. I embossed some white cardstock with the Rainbow Splash Swiss Dot embossing folder. I had told Heidi I had to have a Swiss dot embossing folder some time ago and she told me there was one in the works, so I was so happy to get this and I use it all the time! I cut a piece of patterned paper I had in my stash and attached that over the bottom of the embossed piece.
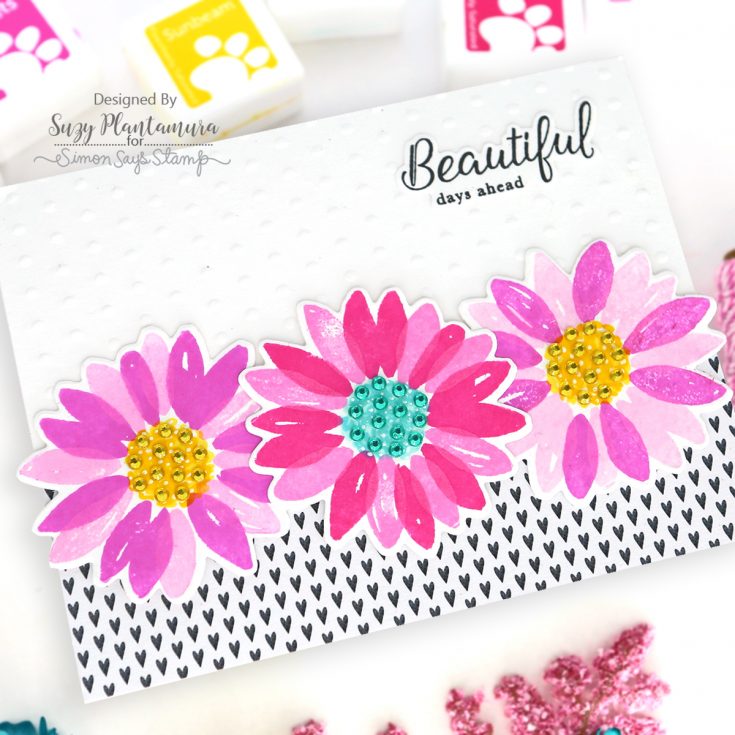
I added the three flowers where the paper overlapped the embossed background a little below the center of the card front (letting them hang over the edge a little). I stamped a sentiment from the stamp set with Intense Black Ink on white cardstock and die-cut it out. I attached that to the top of the card. I then added lots of Rainbow Splash Gem Stickers to the center of the flowers.
Have I adequately proven to you that this Fresh Air Fall Flowers stamp set works well for all occasions? With 5 greetings in the stamp set, you have lots of options and by adding other greetings in your stash, the skies the limit on how many times you can use flower stamps! I love the versatility of the set and making these cards added some colorful cheer to my day! I hope seeing them does the same for you! Thanks for visiting and have a great February friends! –Suzy
SUPPLIES:
|


Thanks so much for stopping by, and thanks to Suzy for being our guest!
Craft 4 Stunning, Easy Layered Cards Today with Our Exclusive February 2024 Kit!

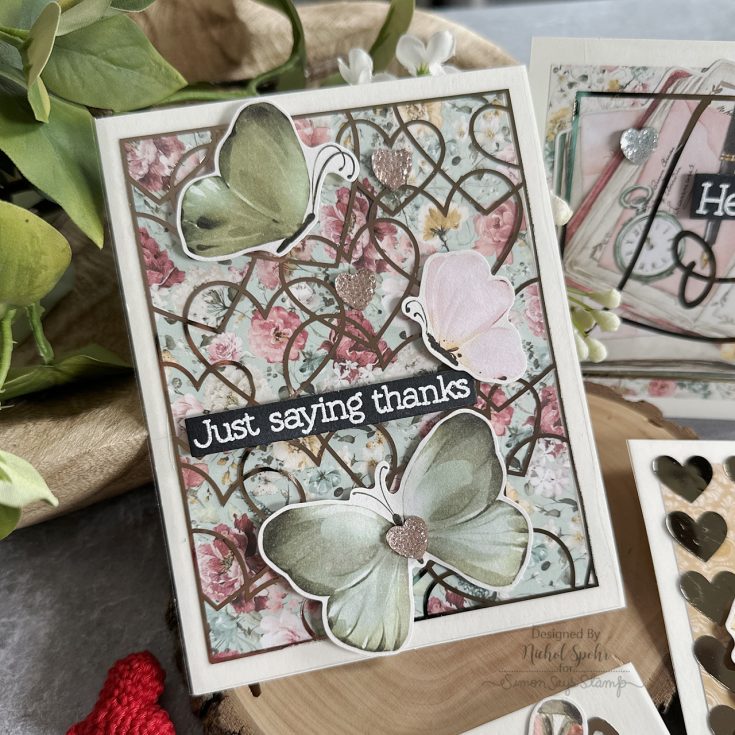
Hi friends! Happy Tuesday! We’re delighted you’ve stopped by the blog today and would love for you to join us in welcoming back special guest Nichol Sphor with four gorgeous card ideas she is sharing today using components of the February 2024 card kit! Did you know? We just upgraded our subscription for our monthly card kits and it’s better than ever! (more details and a video below!) Watch Nichol’s video for all the details on how to recreate these lovely cards, and enjoy!


WATCH THE VIDEO:
SUPPLIES:
|


Thanks so much for stopping by, and thanks to Nichol for being our guest!

We’ve upgraded our card subscription service!
Here’s why you’ll love the upgrade:
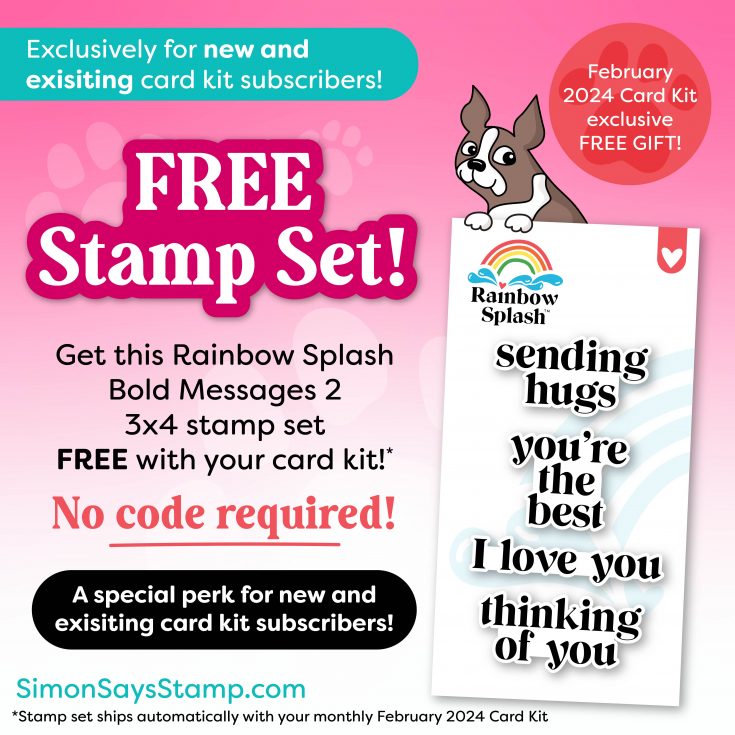
- FREE Stamp Set: All subscribers beginning the billing cycle for our February 2024 card kit will receive a FREE stamp set in their order (automatically, no code required!)
- Exclusive Shopping: Subscribers will now be emailed upon reveal of each monthly kit with the opportunity to add additional items to coordinate with the kit to their cart and/or replenishable items that will ship all together with the kit!
- No muss, no fuss payment: Automated billing! You will not have to pay a bill each month. Your chosen card will be automatically debited so you never have a pause in subscriptions unless you want to!
- $5 Discount: Enjoy an EXCLUSIVE $5 discount off the kit’s retail value – a treat just for our subscribers!
- Inspiration Galore: Dive into a world of inspiration as we send you monthly crafting ideas, all centered around your kit contents.
- No Strings Attached: Worried about commitment? Don’t be! Our subscription comes with no obligations. Pause or cancel anytime with ease.
Learn more to get the MOST out of your card kit subscription:
Mastering the Art of Pencil Techniques on Kraft Paper – Unlock Your Creative Potential
Hi friends! Happy Monday! We’ve pulled this “oldie but goodie” blog post from the vault from a series we had with the oh-so-inspiring Debby Hughes to share some awesome tips and tricks for coloring on kraft cardstock for an unexpected POP of color! Read on and be sure to watch the video for even more information! Enjoy!
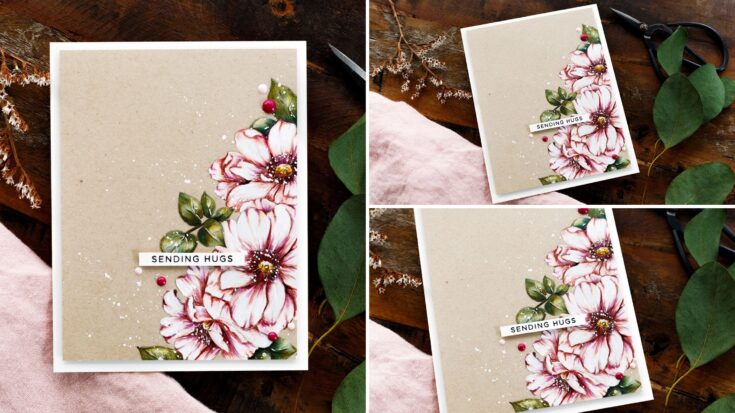
Hello, it’s Debby here with my Doodling With Debby series. Oh, it’s been a while since I got the colored pencils out! However, I really enjoyed painting the beautiful Mom’s Spring Flowers set the other day and wanted to use the pretty flowers again. And just so you know, all products used in my card today are listed and linked below for your convenience.
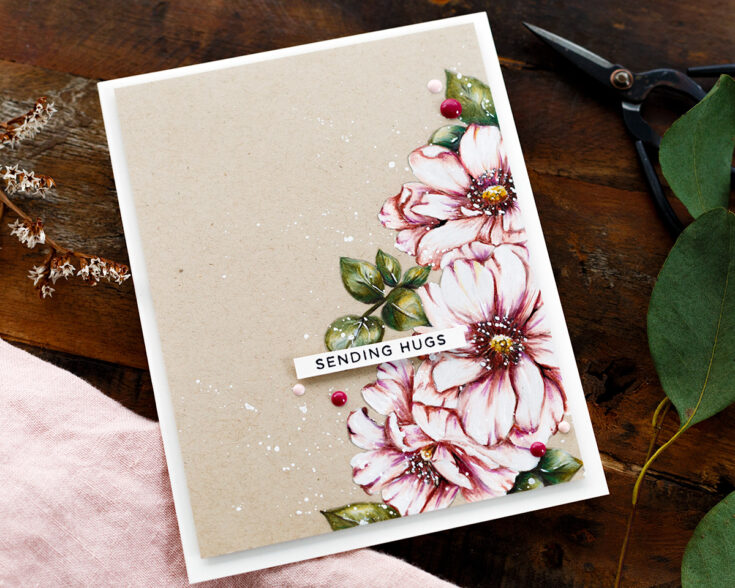
My previous card was all soft, muted watercolors and when I was thinking of how I could use the Mom’s Spring Flowers set again, I thought about the coloring medium and also the alignment of the stamp on the card. For today, I went for pencils on kraft and then offset the flowers to the right corner of the card front for a different perspective.
step by step how to
Stamp the flowers from the Mom’s Spring Flowers set in Pumice Stone Distress Ink on a piece of Neenah Desert Storm Card.
I find that fine details quickly lose definition when colored or painted and so I like to go over those lines with a black marker. Here I drew over the stamen of the flowers, but I would do the same, for example, with the features of the face of people or animals. It saves having to add those in at the end and try and guess where the original lines were.
Color with pencils, I used Faber Castell Polychromos, but there are a lot of options on the market – just use what you have.
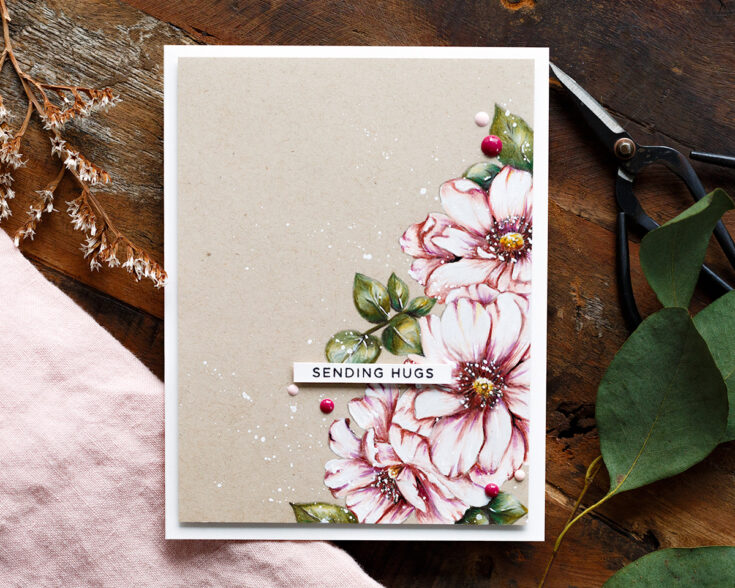
I wanted the flowers to appear like white blossoms. You could add lots and lots of white pencil when coloring the flowers, but a quick and easy tip is to paint the petal with white gouache first before coloring on top.
I used the gouache again to add highlight interests around the coloring. I added dots for the tops of the stamens, a few swooshes on the petals where the light would catch them and even a little to emphasize the veins on the leaves.
Finally, I pulled out the black pen again and drew in the outline in a few places which would’ve been in the deepest shadow. Essentially, adding the white gouache and then the pen work at the end emphasized the lightest highlights and darkest shadows, bringing in contrast and interest.
Back to the white gouache, I tell you, it is essential in my kit! Splatter lightly over the flowers and onto the untouched kraft card around them. This simple trick helps the flowers to become a part of the card as a whole rather than stuck on one edge.
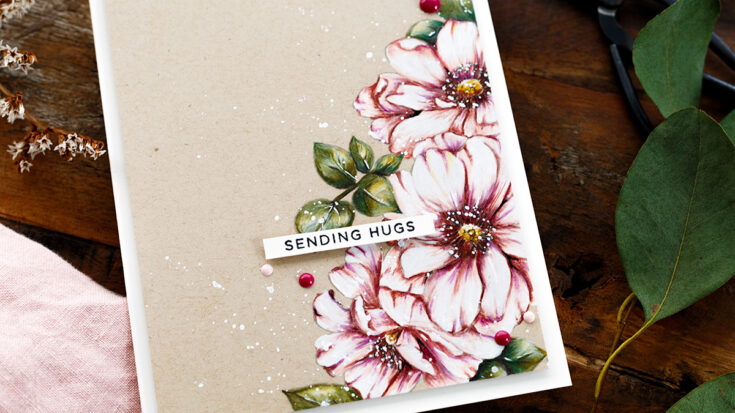
Stamp the ‘sending hugs’ greeting from the Clean Line Stacks set in Nocturne ink and trim out before adding to the colored panel with foam tape.
Use foam tape again to attach the panel to a card base cut and scored from Ivory card.
Embellish with enamel dots.
So, there you go, a pencil coloring on kraft of these lovely white flowers from the Mom’s Spring Flowers set and using white gouache as a base layer to get the white flowers really popping off the page.
Well, that’s me for this month. I hope you enjoyed this tutorial; you’ll find the video below. Thanks for joining me, and I hope to see you next time for Doodling With Debby.
WATCH THE VIDEO:
SUPPLIES:
|


Thanks so much for stopping by, and thanks to Debby for being our guest!


