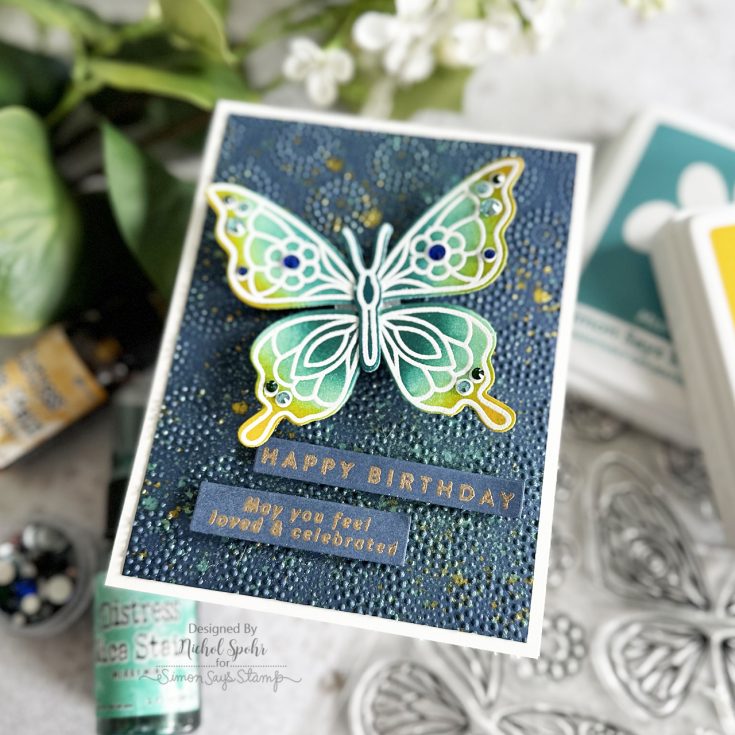
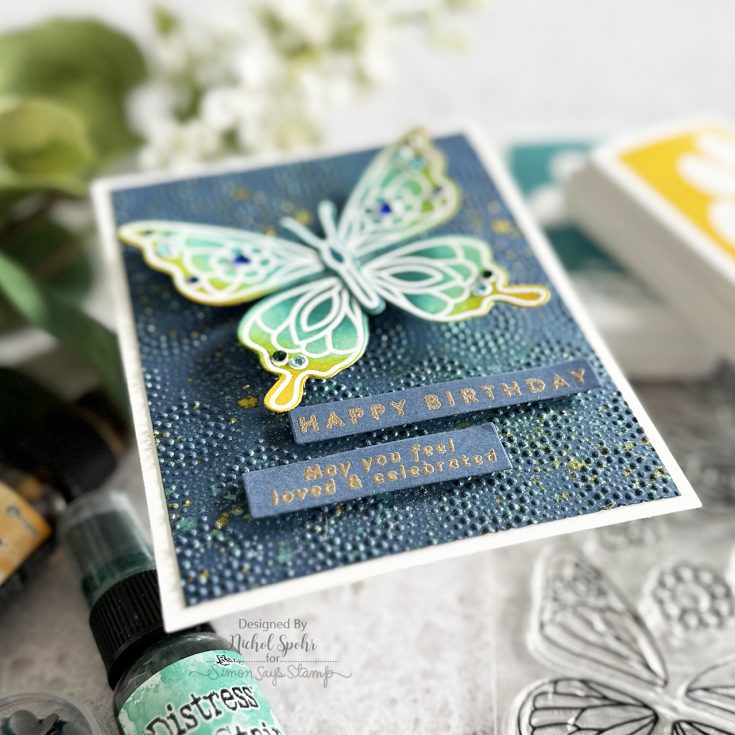
Flutter into Fun: Crafting a Bouncy Butterfly Birthday Card with our NEW Card Kit by Nichol Spohr

Hi friends! Happy Tuesday! We’re delighted to welcome back special guest Nichol Spohr with this gorgeous Butterfly action wobbler Birthday card showcasing tons of components from our brand new March 2024 card kit! Be sure to watch the video for all the details and enjoy! Psst! Did you know? We recently improved our card kit subscription program! Scroll to the bottom of this post to learn more!
WATCH THE VIDEO:
SUPPLIES:
|


Thanks so much for stopping by, and thanks to Nichol for being our guest!

We’ve upgraded our card subscription service!
Here’s why you’ll love the upgrade:
- Exclusive Shopping: Subscribers will now be emailed upon reveal of each monthly kit with the opportunity to add additional items to coordinate with the kit to their cart and/or replenishable items that will ship all together with the kit!
- No muss, no fuss payment: Automated billing! You will not have to pay a bill each month. Your chosen card will be automatically debited so you never have a pause in subscriptions unless you want to!
- $5 Discount: Enjoy an EXCLUSIVE $5 discount off the kit’s retail value – a treat just for our subscribers!
- Inspiration Galore: Dive into a world of inspiration as we send you monthly crafting ideas, all centered around your kit contents.
- No Strings Attached: Worried about commitment? Don’t be! Our subscription comes with no obligations. Pause or cancel anytime with ease.
Learn more to get the MOST out of your card kit subscription:
Discover the Magic of Coloring Die Cuts with Beautiful Rainbow Inks!

Hey there friends, it’s Nina-Marie Trapani here with you! Today I’m going to be sharing a rainbow card project using our brand new Splendor release!

Using our Simon exclusive Pawsitively Saturated Inks is a great way to color your die cuts. This card features the new Half Spring Floral Mandala die, which I colored with a rainbow of inks. I also added a sentiment from our new Fancy Lucky die set, and a greeting that I foiled from the Reverse Lucky Sentiment Strips. Those pretty gems are also brand new—the Clear set from our collection of Pawsitively Dazzling Gems.

Want to learn more about how I made this card? Watch the video below for all the details!
WATCH THE VIDEO
SUPPLIES
|


Crafting a Bright and Happy Bunny Easter Card: Yippee for Yana

Hi friends! Please join me in welcoming back the oh-so-talented and amazing Yana Smakula! (Please note: our dear friend Yana is Ukrainian. To show support to our brothers and sisters in Ukraine, please see Yana’s post HERE.)

Hello, crafters, this is Yana Smakula for Simon Says Stamp! Welcome back for another Yippee For Yana video!

I guess it is time to start making Easter cards! I always like to start early, so today I have an Easter card to share with the Simon Says Stamp Bunny Kisses stamp set. I use one of my go-to grid designs for this simple Spring card. I hope you’ll feel inspired to give this design a try!
Start by stamping 4 of the smaller bunny images in pink, green, teal, and yellow onto white cardstock. I used my mini MISTI and Simon’s Pawsitively Saturated inks in Carnation, Peony, Seafoam, Surf, Sunbeam, Citrine, Celery, and Limelicious.
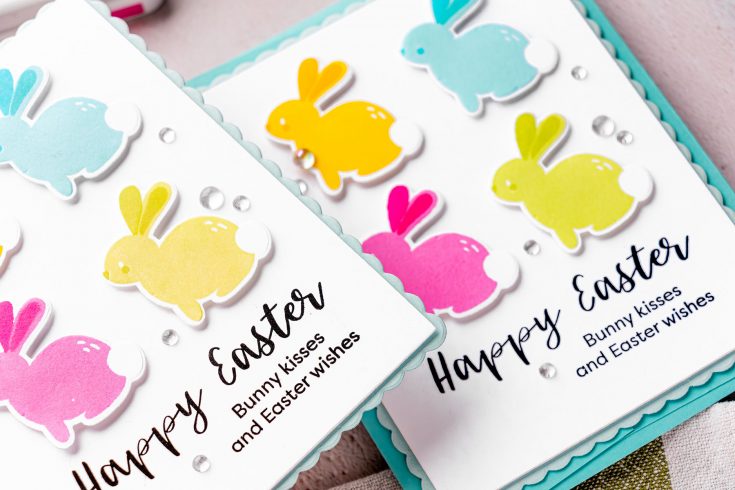
I didn’t stamp their tails (there is a stamp to do that), as I wanted to keep them white, and I was able to achieve that by using the white of the paper.
If you have pom poms in your stash (these would look fab!) consider adding them to the tail section to create a dimensional and fluffy tail.

I cut the bunnies out using a coordinating die and did a 2×2 grid layout with a sentiment stamped across the bottom – Happy Easter, Bunny Kisses & Easter Wishes.

I used foam adhesive to adhere my bunnies onto the white cardstock panel above the sentiment, I love to pop things up on my card! Next, I mounted my white panel onto a Sea Glass cardstock panel cut using a scalloped frame die from the Ornate Borders & Frames set (sometimes those coordinating dies can work beautifully alone, without using the matching stamp). I added that onto a top folding card base (watch my video to see exactly how I did that) and embellished my card with clear droplets.
Love the result and I hope you do too! Have fun stamping!
WATCH THE VIDEO:
SUPPLIES:
|


Thanks so much for stopping by, and thanks again to Yana for being our guest!
Ways to support Ukraine:
If you are looking for ways to support Ukraine, we encourage you to visit this page on Yana’s blog:


