Treat Yourself to a Sweet Birthday with Caly Person and the NEW Simon Says Stamp June Card Kit!
Hi friends! Happy Wednesday! Please join me in welcoming special guest Caly Person to our blog today to share a new (and gorgeous) card design she made using tons of components of our new June 2024 card kit! Read on and enjoy!

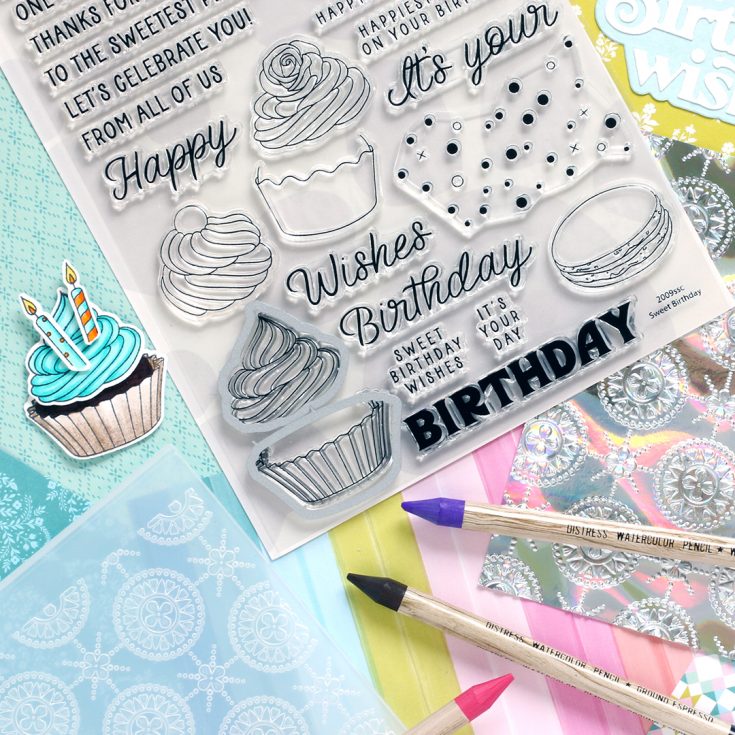
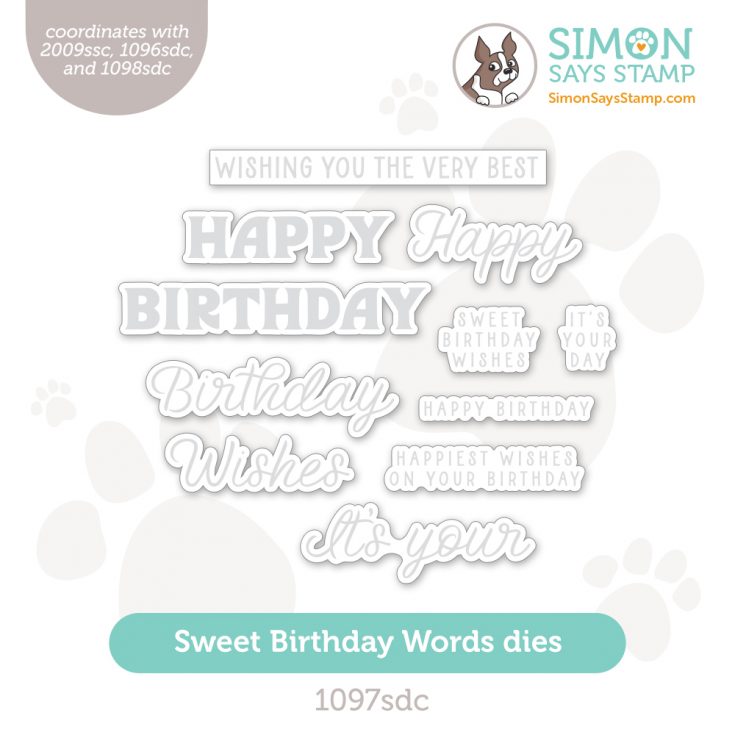
Hello! I have a fun and colorful card to share today, using products from the June 2024 Card Kit. The Sweet Birthday stamp and Sweet Birthday Single Cupcake die are a part of the kit, but if you want to complete the set with other coordinating dies (Sweet Birthday More Treats die and Sweet Birthday Words die), so be sure to add it to your cart with the kit, if you’re interested!
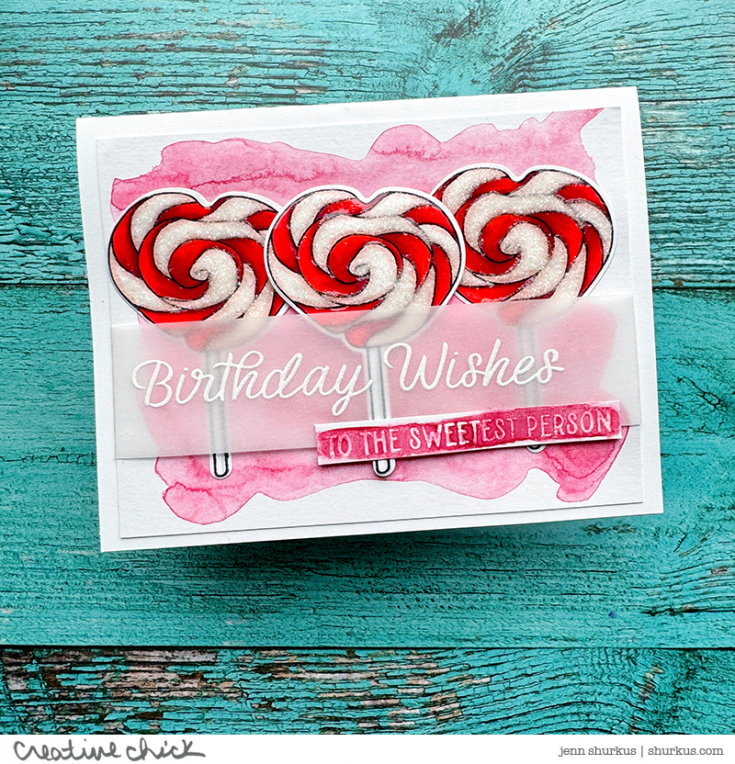
I also use the Birthday Wishes die and Pinkfresh Studio Picture Perfect patterned paper from the kit to make this card fun and colorful! Be sure to check out the full video below!
WATCH THE VIDEO:
I stamped and colored the Sweet Birthday images with Copic markers.
- Reds: R20, R21, R22, R24
- Oranges: YR000, YR01, YR02
- Yellows: Y00, Y11, Y17
- Greens: G40, YG06, YG09
- Blues: BG0000, BG01, BG05
- Purples: V000, V01, V04
- Pinks: R81, R83, R85
- Browns: YR30, YR21, E34

To give my background some texture, I stamped the confetti using the Distress Watercolor Pencils from the kit. I wet the tips and colored the confetti with different colors to get a variety of colors before stamping. You can see how this is done in the video.

After layering the background panels, I added the colored Sweet Birthday images and finished with the Birthday Wishes sentiment, die-cut from Holographic cardstock. There are 2 A2-sized panels of the Holographic in the kit and I was able to die-cut and make 3 Birthday Wishes sentiments. It’s so shiny and I absolutely love the lava texture!
I hope you enjoyed this card! Thank you so much for visiting today! ~Caly
SUPPLIES:
|


Thanks so much for stopping by, and thanks to Caly for being our guest!
Card Kit Reveal and Inspiration: Sweet Birthday!


Our June 2024 Card Kit—Sweet Birthday—is filled with sugary delights!
This carefully curated kit includes many exclusive products from SimonSaysStamp.com: the Sweet Birthday 6×8 stamp set, Sweet Birthday Treat coordinating die, Winslow Medallions embossing folder, and Birthday Wishes die set.
We’ve included 12 sheets of double-sided 6×6 patterned papers from Pinkfresh Studio in trendy and fresh colors and patterns. To enhance your creative experience, we’ve also included 3 Tim Holtz Ranger Distress Watercolor Pencils, 2 A2 sheets of Simon Holographic Lava cardstock, 1 sheet each of Simon Doll Pink and Surf Blue cardstock, as well as 1 sheet of Neenah Solar White cardstock!
WATCH THE VIDEO:
Ideas to INSPIRE!


Enhance your kit with these a la carte coordinating die sets (sold separately!)

Did you know?! We’ve made our card kit subscription BETTER THAN EVER!
Learn more:
Here’s what makes our new service a crafting paradise:
? Exclusive Access: As a subscriber, you get first dibs! Each month, you’ll get an exclusive sneak peek at our new kit, with the option to add more coordinating items to your cart, including handy replenishable supplies, all shipped together for your convenience.
? Hassle-Free Payments: Say goodbye to monthly billings! Our automated system smoothly charges your preferred card, ensuring an uninterrupted flow of crafty goodness – unless you decide to pause, of course!
? $5 Off Magic: Enjoy a special $5 discount off our kit’s retail price, exclusive to our beloved subscribers – no codes needed, just automatic savings!
? Crafting Inspirations: Dive into a sea of creative ideas monthly, all tailored around your kit, to keep your inspiration flowing endlessly.
? Flexibility First: Fear of commitment? Not here! Our subscription is as flexible as it gets – pause or cancel anytime, no strings attached.
Why wait? Step into the realm of our NEW Simon Says Stamp Monthly Card Kit service. Welcome a box full of crafting marvels, right to your doorstep. Craft with ease and let creativity come to you!
? Ready to elevate your craft? Subscribe Now and open the doors to boundless creativity!
We’re thrilled to have you in our crafting community and can’t wait to embark on this renewed creative adventure together! ?✂️?
NEW Everyday 2024 Tim Holtz Idea-ology

Oh happy day! The NEW Tim Holtz Everyday 2024 idea-ology collection is HERE and shipping now! Peruse the new collection and find a new favorite!


