SPRING into the Weekend with SAVINGS!

Hi friends! Happy Friday! Have you been eyeing a newly released crafty product? In need of more cardstock, ink, or more adhesive to keep your crafty stash going? Now is the time to grab those goodies! This weekend only, save $10 on any purchase* of $75 or more with code TNBKS at checkout! Enjoy and happy shopping!
*discount not applicable on already mega discounted card kits and card kit subscriptions :)
Colorful & Easy! Layered Stencil Ink Blending with Kristina Werner
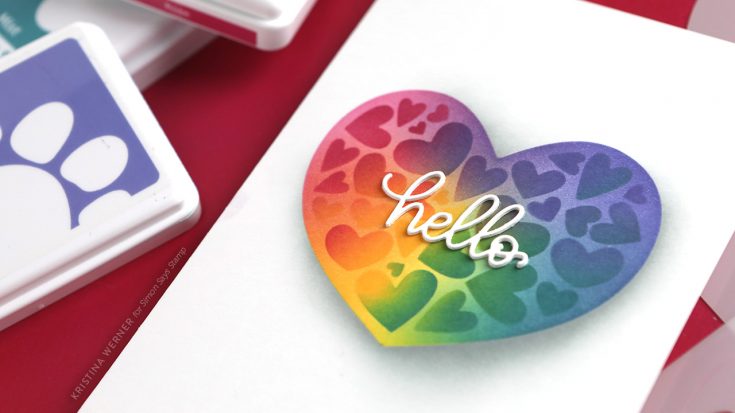
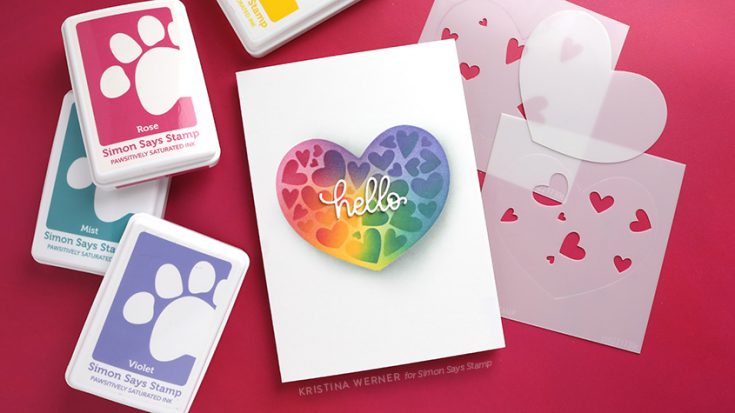
Hi all! Kristina here! Today I have an easy and simple card for you featuring the Hearts in a Heart layering stencil set. For this card I wanted to try out a slightly different style of ink blending. In the past I’ve loved to do tone-on-tone ink blending by increasing the ink intensity on the second blend through a stencil. However, for this card, I slightly altered the color placement to achieve a new look!
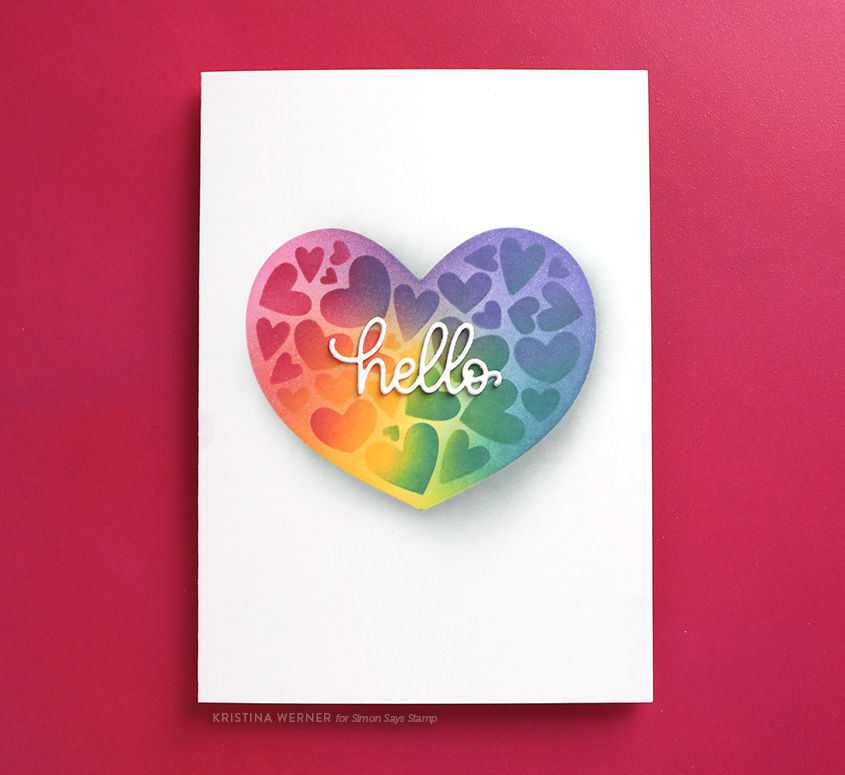
I used only four colors of ink for a full rainbow spectrum: Rose, Sunbeam, Mist, and Violet. I also used Flannel ink to add a shadow beneath the heart. I also finished off the card by stacking the “hello” diecut from the Hello Beautiful Gorgeous dies.
Thanks for stopping by! Be sure to watch the video to see how this colorful look came about!
Supplies
|


Celebrating the Altenew 10th Anniversary Blog Hop!

Hi friends! We’re delighted to join in the celebration of Altenew’s 10th anniversary with this special blog post! If you’ve come from CraftStash, you’re in the right place! Please join me in welcoming Caly Person as a guest writer on our blog today to share her special make in honor of Altenew’s milestone!
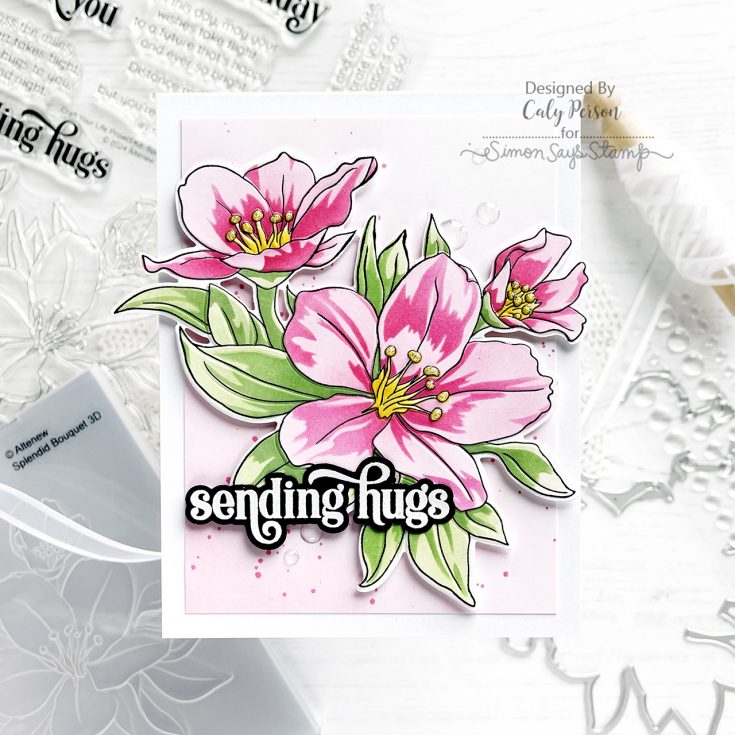
My card today uses the latest Craft Your Life Project Kit. The Splendid Bouquet project kit comes with a stamp, die, stencil set, and 3D embossing folder. I’m going to use it all! Anytime I stamp and stencil, I emboss the image. I stamp with a crisp black pigment ink and seal that ink by embossing it with a clear embossing powder. That keeps a crisp outline that won’t dull with ink-blending.
WATCH THE VIDEO:
Next, I ink-blended the image using the stencil set. There are 5 stencils so it took some time, but I love the thoughtful way each layer lends to details that bring this image to life.
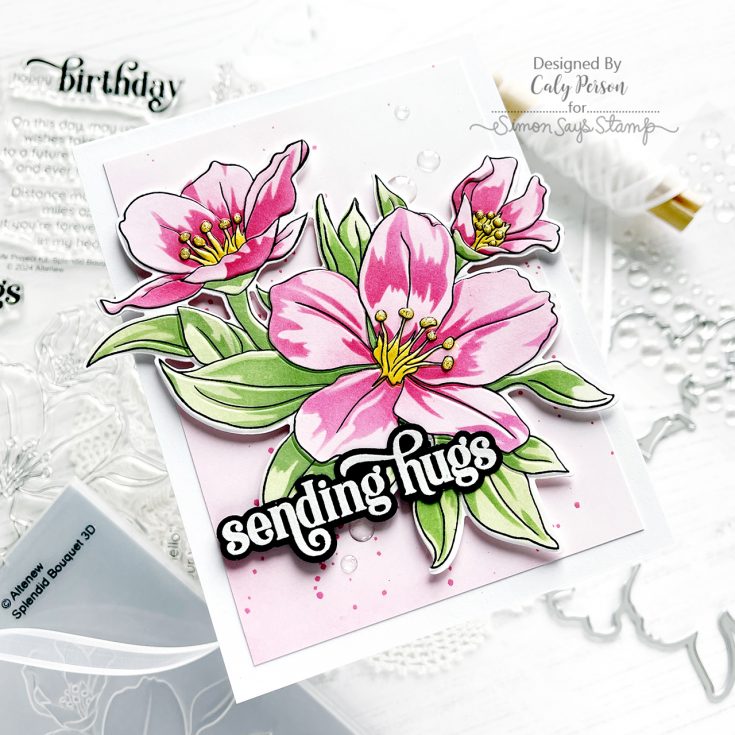
Since I die-cut the image before ink-blending, the next step was to use the embossing folder. I lined up the image, closed the embossing folder and ran it through my die-cutting machine. The 3D-embossed image just takes it up a notch with its wonderful texture.
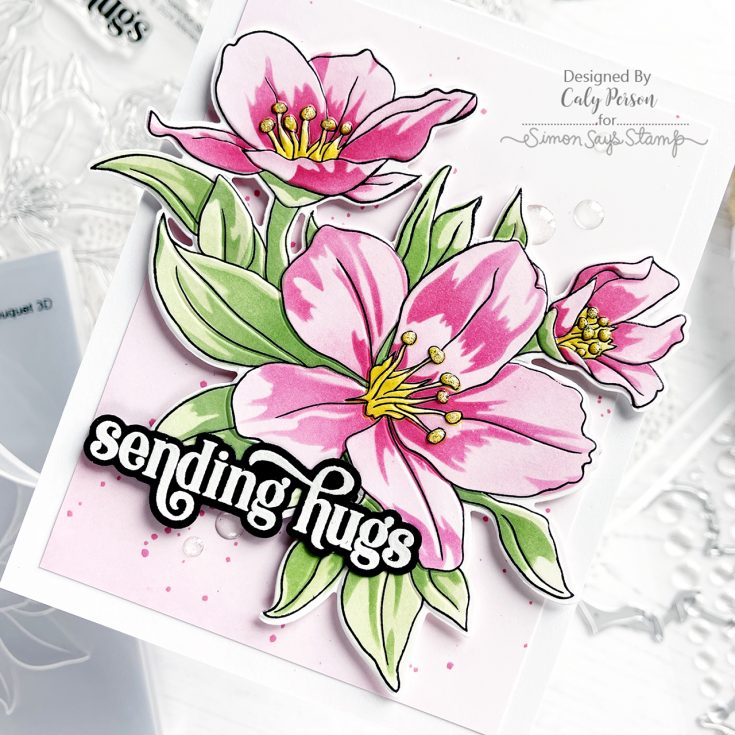
For the background, I used the same colors I used on my flowers to ink-blend a soft color gradient from corner to corner. I also splattered it with some watered-down pink dye ink. I smooshed the pink ink pad onto my glass mat, added a few droplets of water and mixed it with a brush to splatter. After attaching the image over the background, I added an embossed sentiment. To finish, I added a few Altenew Clear Enamel Dots. I hope you enjoyed this project! Thanks so much for visiting today! ~Caly
SUPPLIES:
|


Ready to hop along? Follow the links below:
Thanks for stopping by, and thanks to Caly for this gorgeous inspiration! Your next stop on the hop is the amazing SathyaKala Sankaran!


