Stretch Your Stash: 2 Card Designs with One Stamp: Amore Laurafadora
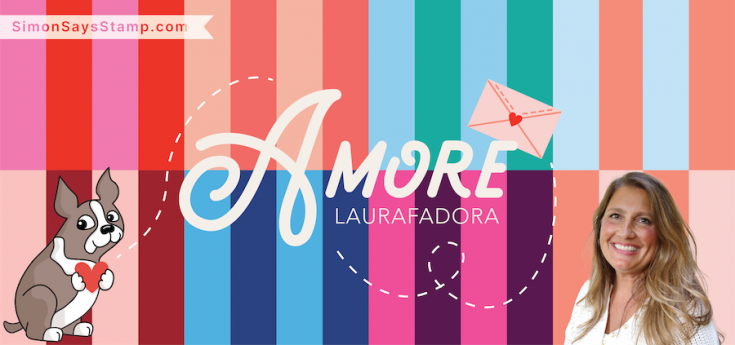
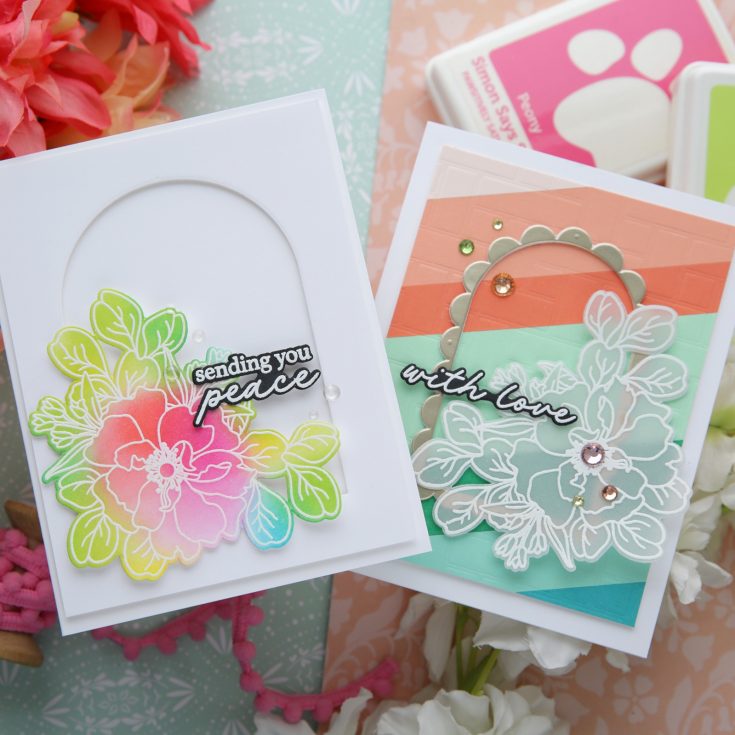
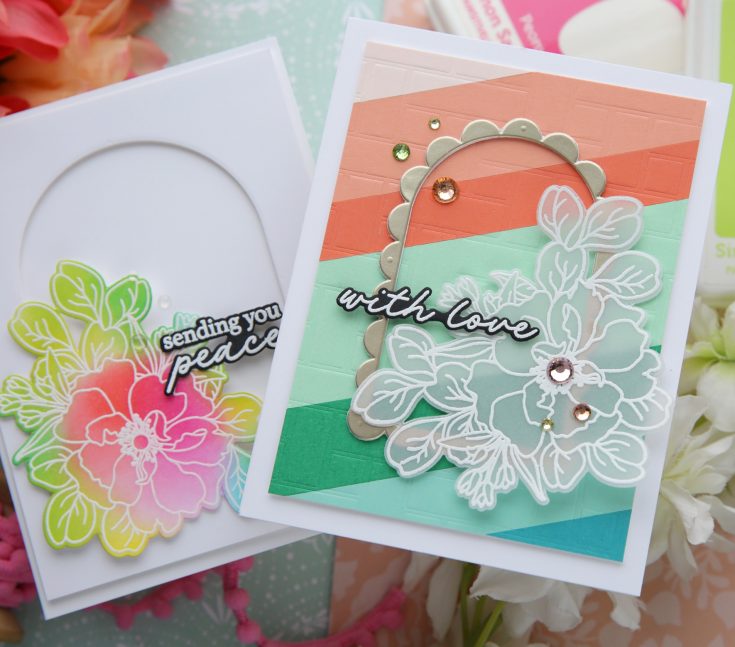
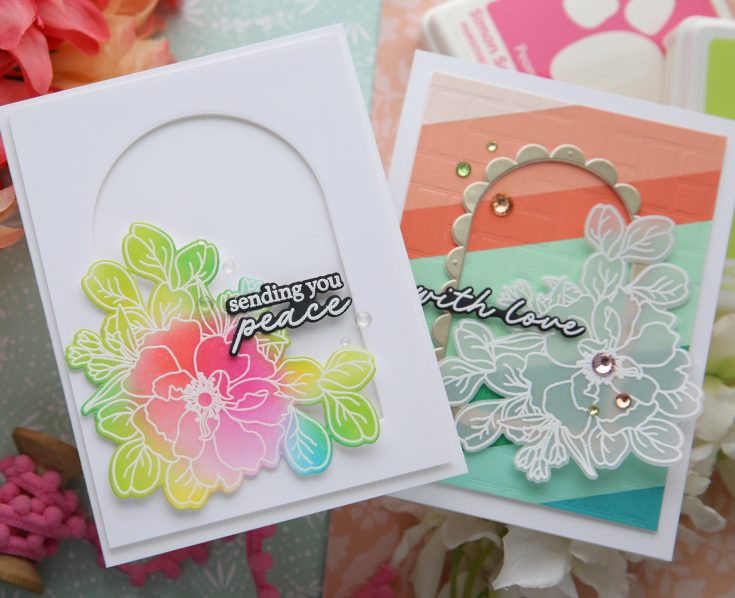
Hi friend! Happy Thursday! Please join me in welcoming back special guest Laura Bassen to showcase this super fun card showcasing our brand new released from our In My Heart collection: Wild Rose, Scalloped Arches Frames, and Big Basketweave! Be sure to watch the video for the details, and enjoy!
WATCH THE VIDEO:

SUPPLIES:
|


A big thank you to YOU, our reader — and to Laura Bassen for being our guest!
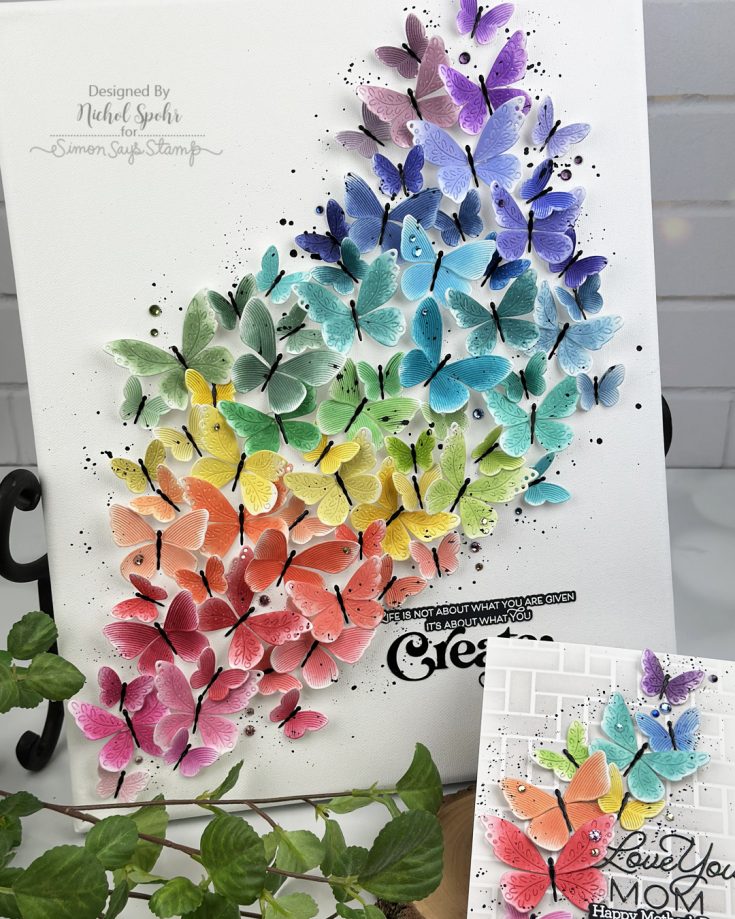
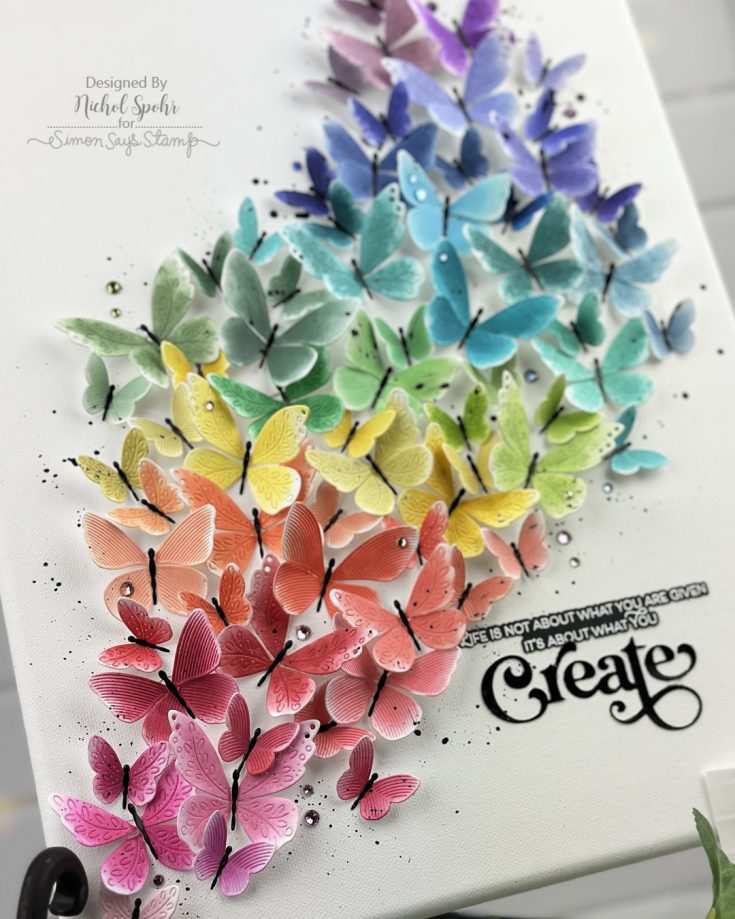
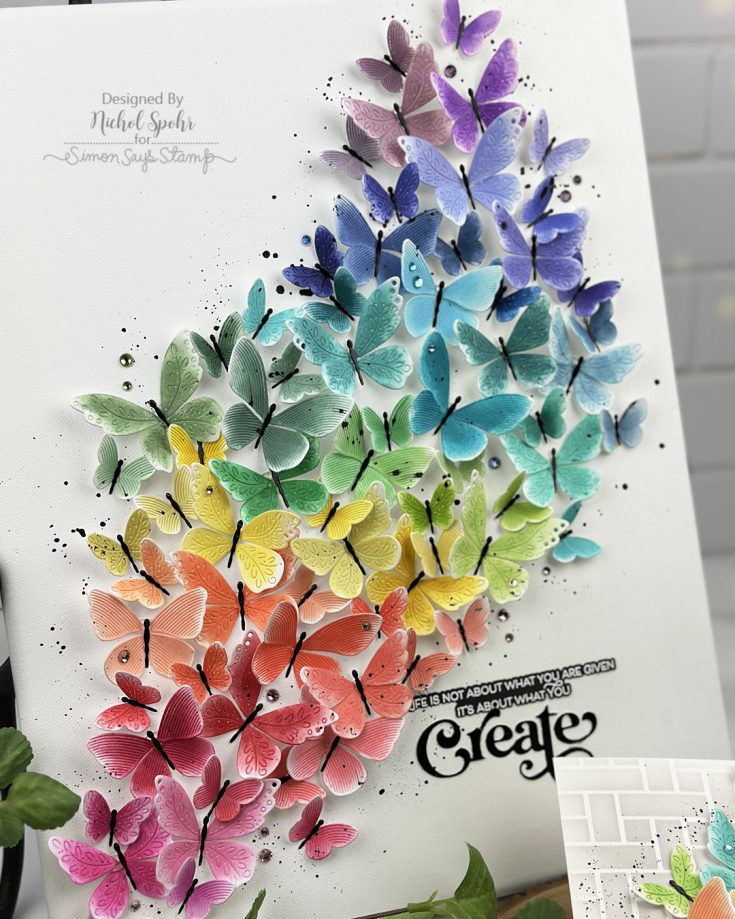
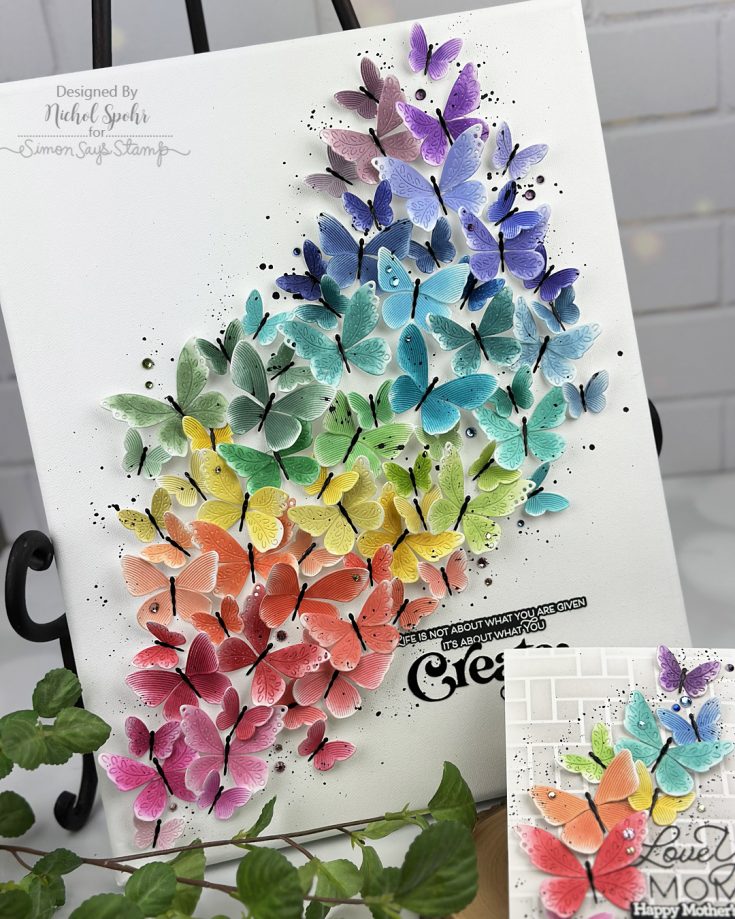
Turn Your Cards into Home Decor! 🦋 Butterfly Canvas + Matching Gift Card: Making the Cut

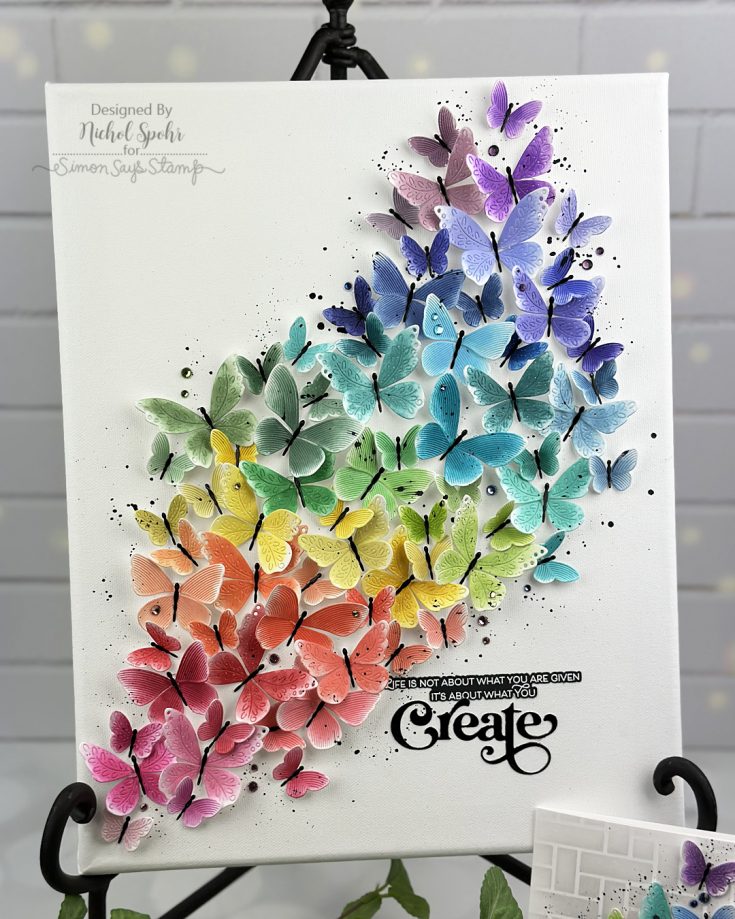
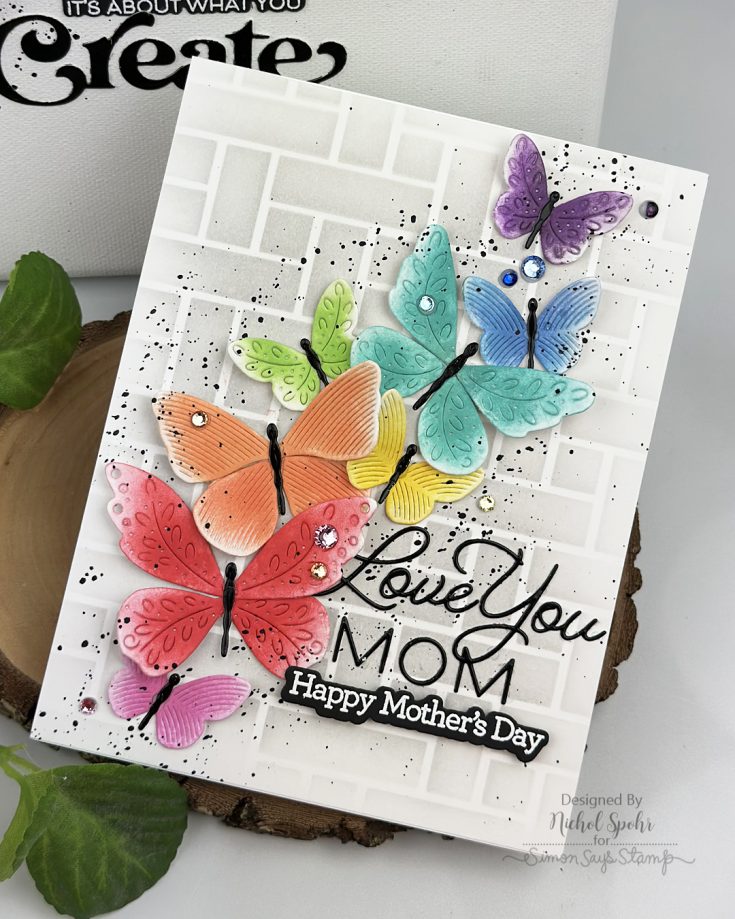
Hi friend! Happy Wednesday! Please join me in welcoming special guest Nichol Spohr to our blog back in our monthly installment of Making the Cut – our monthly blog series that celebrates the love of all things die cutting! Nichol is showcasing our new Flourish Butterfly Trio and our Whirl Butterflies as well as our Fancy Create Bundle, Love You Mom set, and more!! Be sure to watch the video for all the details and enjoy!
WATCH THE VIDEO:

SUPPLIES:
|


A big thank you to YOU, our reader — and to Nichol for being our guest!
Easy Card Making: Encouragement Cards in Minutes: Yippee for Yana

Hi friend! Please join me in welcoming back the oh-so-talented and amazing Yana Smakula! (Please note: our dear friend Yana is Ukrainian. To show support to our brothers and sisters in Ukraine, please see Yana’s post HERE.)
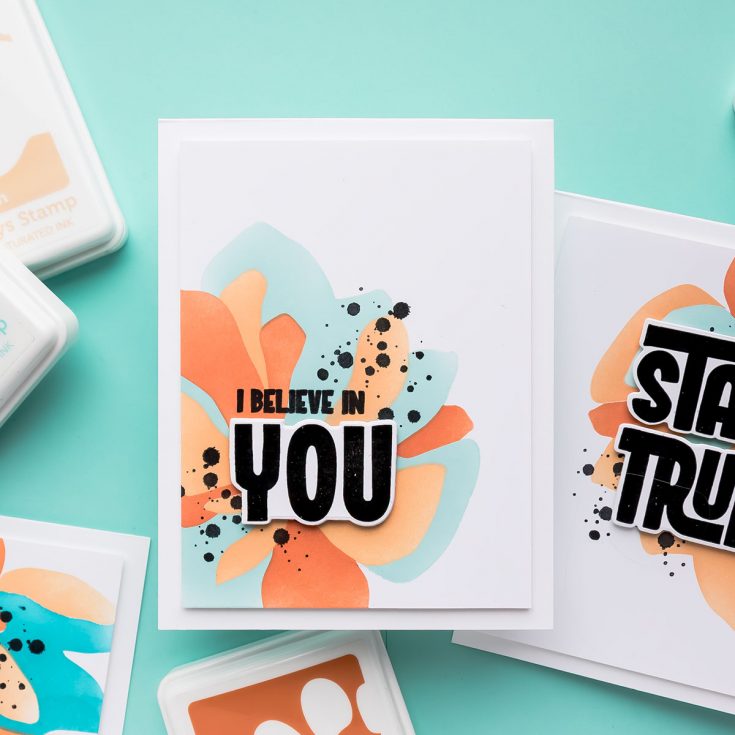
Hi everyone! Welcome back for another Yippee for Yana episode. Creating clean and simple cards is one of my favorite ways to let bold sentiments shine, and today’s project is exactly that – bright, encouraging, and surprisingly easy to recreate.
I’m using a mix of ink blending, stamping, and a touch of heat embossing to create motivational cards featuring some beautiful Simon Says Stamp products.
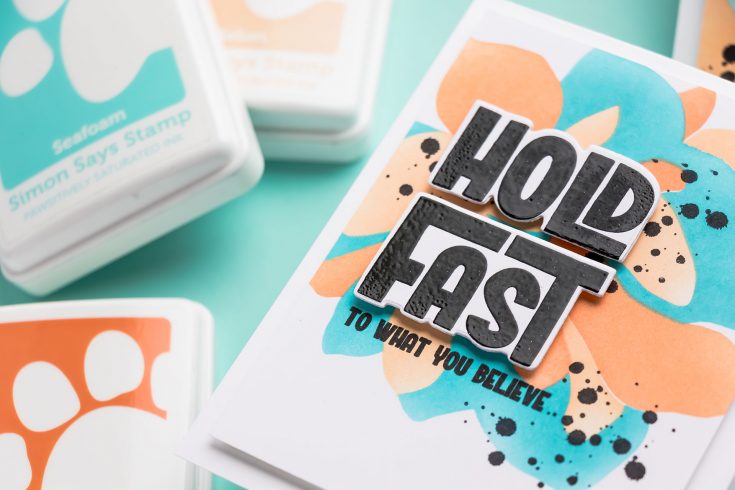
I started with the Simon Says Stamp 9×12 Pawsitively Perfect Craft Tacky Mat. This mat is fantastic for holding both cardstock and stencils in place while blending. I trimmed Hammermill cardstock to 4 ¼” x 5 ½” and placed it onto the mat, knowing I would cut it down later.
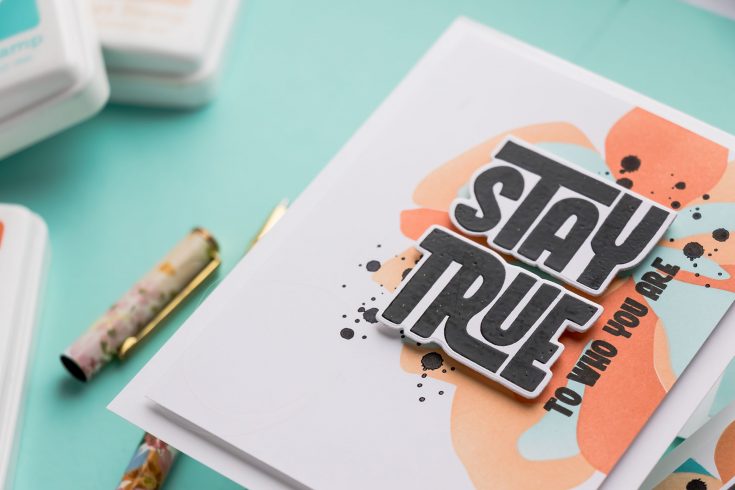
For the background, I wanted something abstract, colorful, and soft enough to support a bold sentiment without overpowering it. The Simon Says Stamp Impressionistic Flower Stencil Set was perfect for this. This is a layered stencil set, and instead of using all four layers, I chose just three to create a lighter, more airy look.
I positioned the stencil slightly off to the side and at an angle to give the design a more dynamic feel. For ink blending, I used Simon Says Stamp inks in Cantaloupe, Seafoam, and Sherbet. I applied the color using Simon Says Stamp Blending Brushes, keeping the application soft and even rather than focusing on heavy shading or gradients.
One tip I always follow is to protect my work surface and surrounding areas. I used scrap paper and acetate pieces to block off sections of the panel and keep unwanted ink off both the cardstock and my mat. It also helps the blending feel smoother.
Once the first layer was complete, I aligned the next stencil layer using corner guides and continued blending with the next color. Repeating this process with the third layer created a soft, layered floral background that feels vibrant but still subtle.
I created a second panel using a slightly different color combination, including Melon and Surf inks, for a bit more contrast.
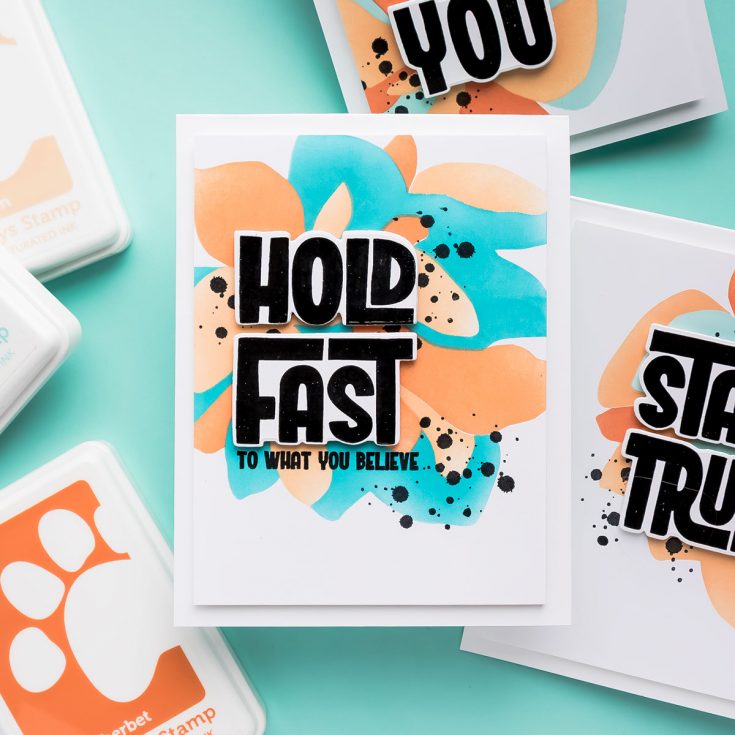
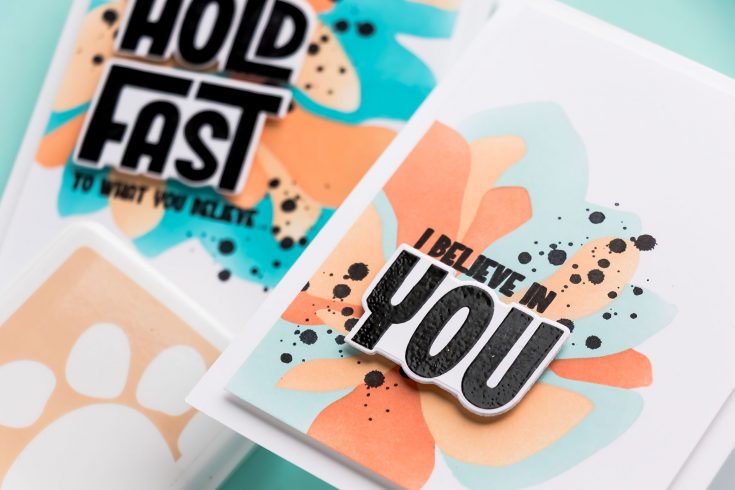
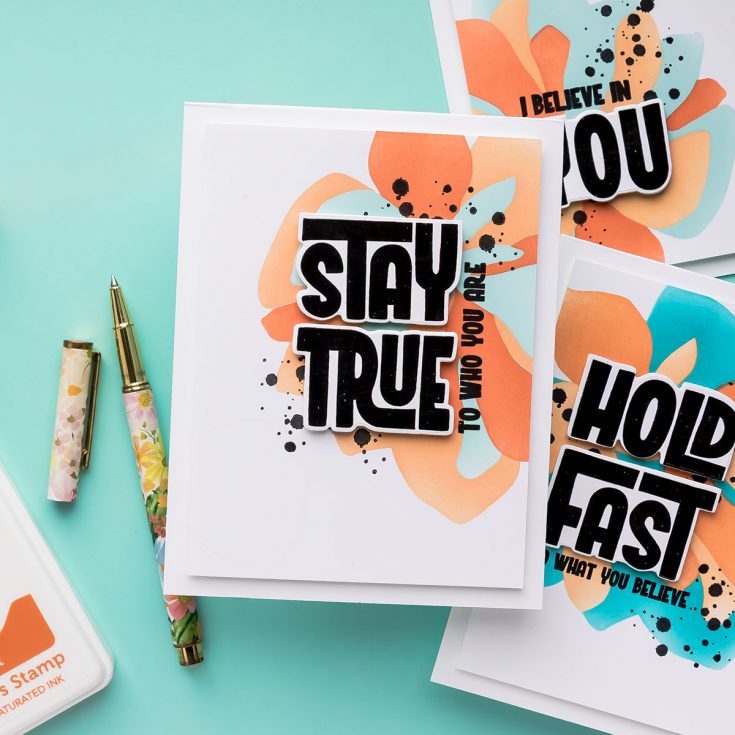
With the backgrounds done, I moved on to the sentiments. I used the Simon Says Stamp Stay True Stamp Set, which features large, bold, and very impactful messages. I stamped the sentiments onto the same Hammermill cardstock using VersaFine Clair Nocturne Ink to get a rich black impression.
Because these sentiments have a lot of solid surface area, I stamped them multiple times using my MISTI to build up a deep, even coverage. To prevent any smearing during die cutting, I added a layer of clear embossing powder and heat-set it. This step is optional, but it gives a beautiful glossy finish and locks the ink in place.
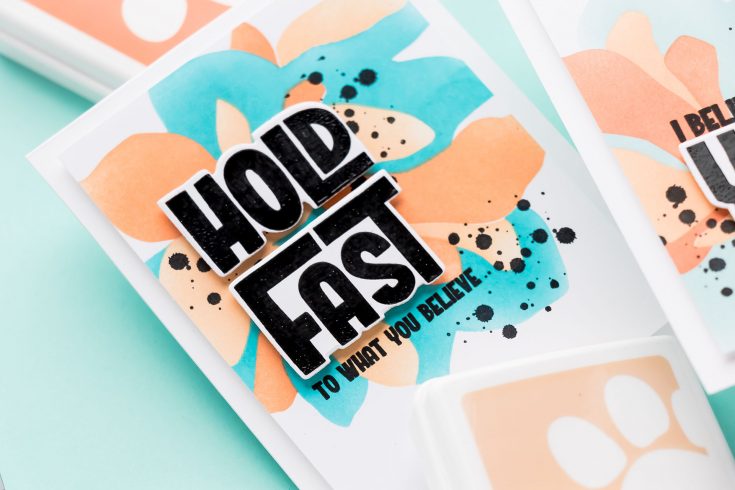
Next, I used the coordinating Stay True Dies to cut out the sentiments. I also die cut an extra layer from plain cardstock to back each sentiment, adding stability and a bit of dimension.
For additional detail, I stamped smaller sub-sentiments directly onto the backgrounds using the same black ink. Phrases like “hold fast to what you believe,” “I believe in you,” and “stay true to who you are” add a meaningful secondary message to each card.
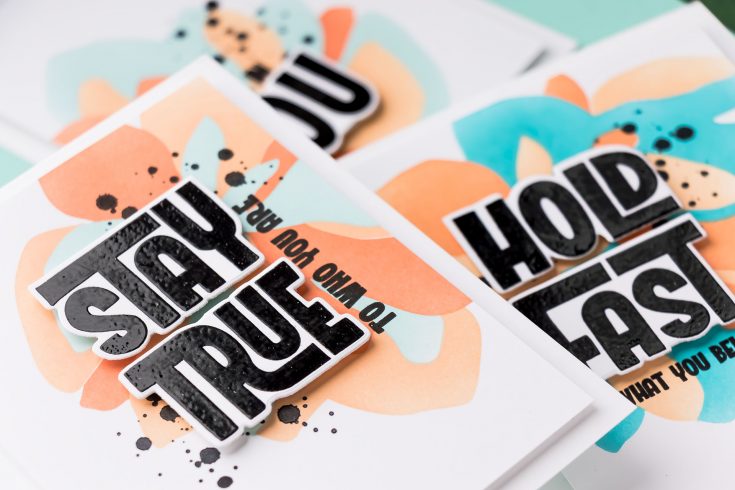
Instead of traditional splatter, I used a splatter stamp from the Simon Says Stamp Watercolor Bouquet Stamp Set. This gave me a controlled splatter effect, allowing me to place the detail exactly where I wanted it without the unpredictability of liquid splatter.
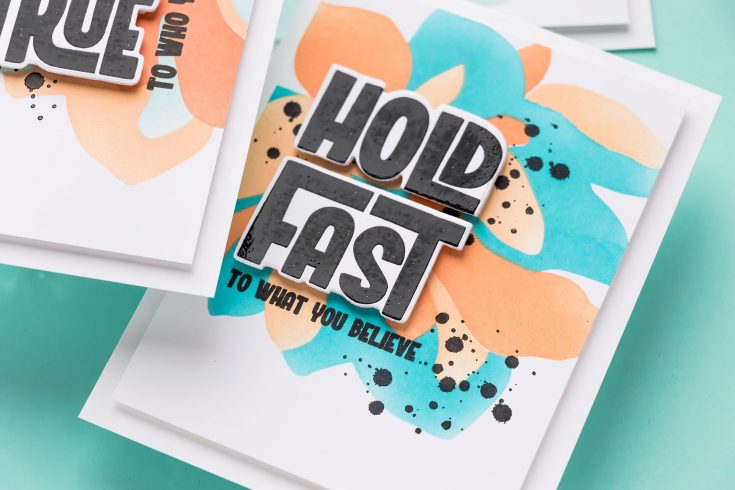
To assemble the cards, I trimmed the panels down to 3 ¾” x 5” and adhered them to A2 top-folding card bases using white fun foam for a smooth, even layer of dimension. I added adhesive to the foam using double-sided tape and then mounted the panels.
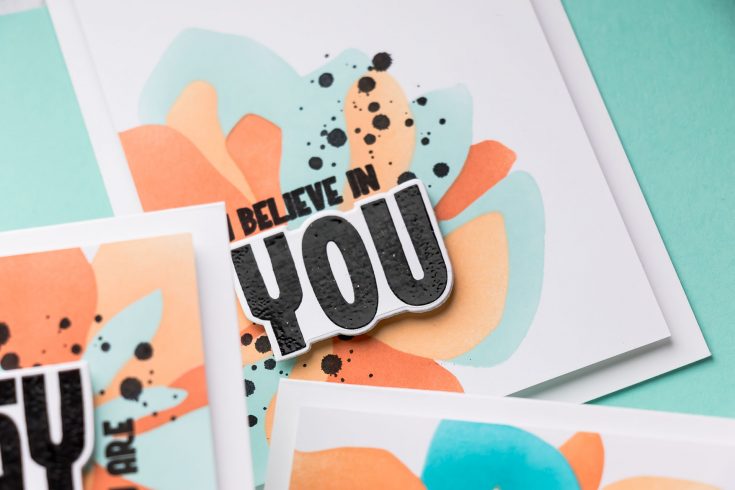
Finally, I foam-mounted the die-cut sentiments using foam adhesive squares to give them extra lift and presence.
These cards are simple in design but very impactful. The soft ink blended backgrounds, bold black sentiments, and subtle splatter details all work together to create cards that feel both modern and meaningful.
And honestly, these are the kinds of cards I reach for most often – quick to make, easy to customize with color, and perfect for sending a little encouragement when someone needs it.
Thanks so much for spending some time with me today. I’ll see you again soon.
WATCH THE VIDEO:

SUPPLIES:
|


Ways to support Ukraine:
If you are looking for ways to support Ukraine, we encourage you to visit this page on Yana’s blog:

A big thank you to YOU, our reader — and to Yana for being our guest!


