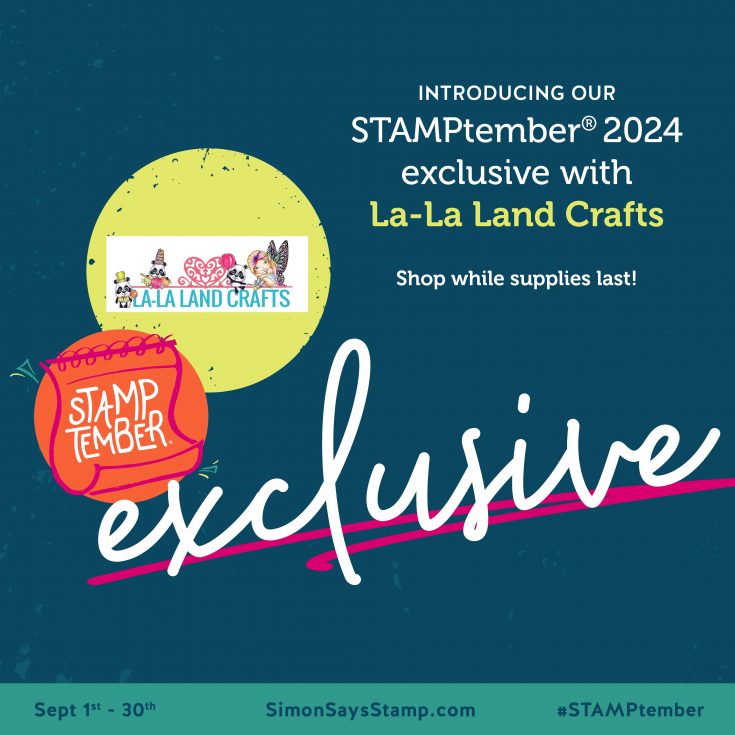
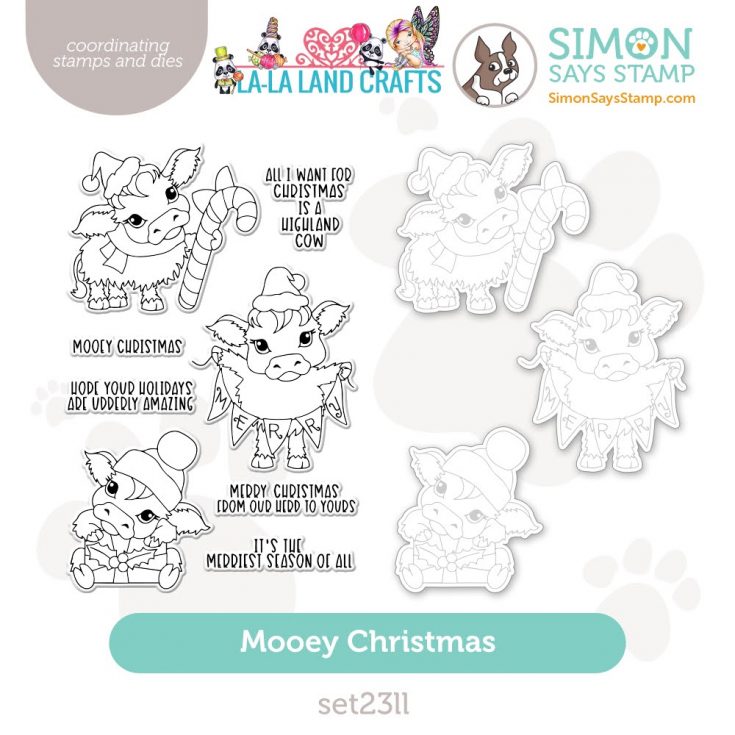
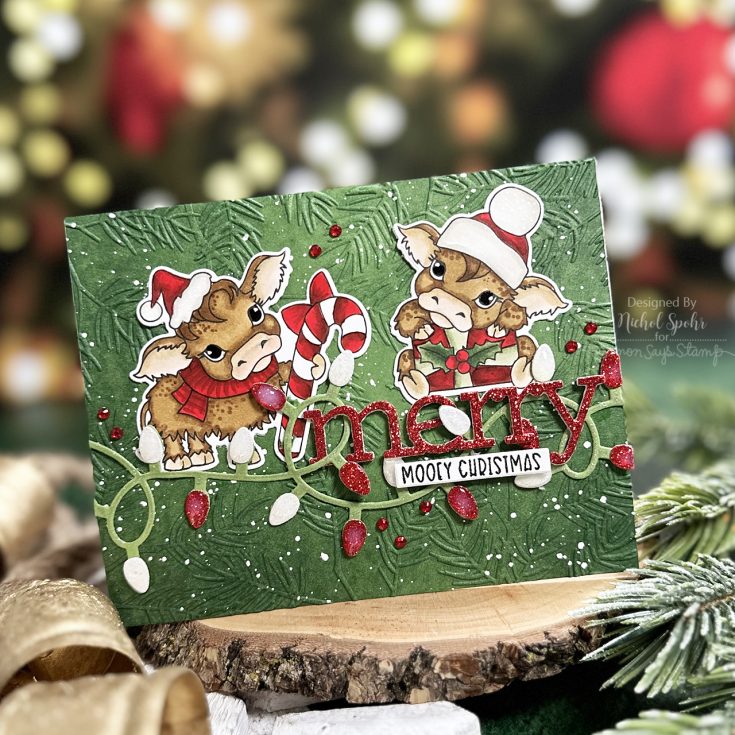
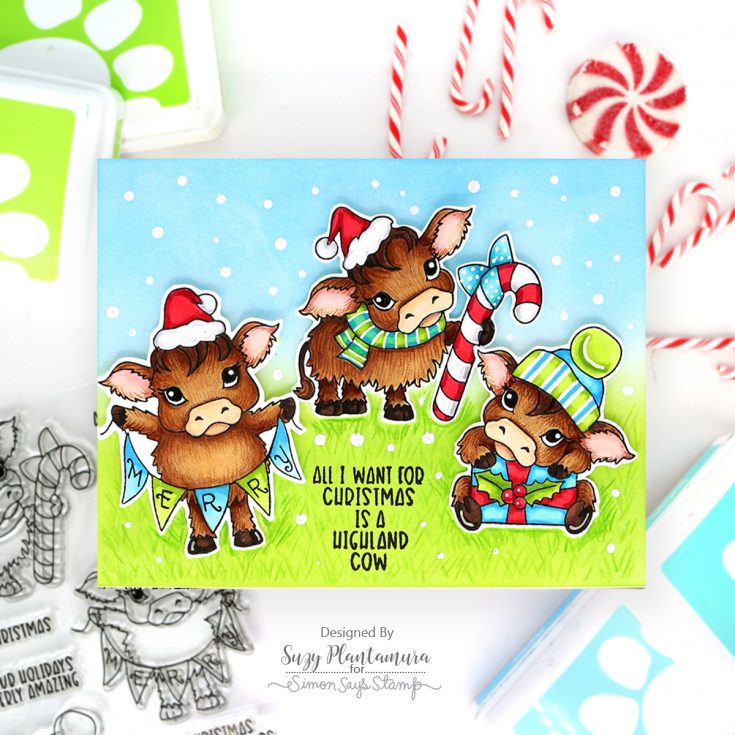
Creative Ribbon Background featuring components of our SOLD OUT August 2024 Card Kit!

Hi friends! Happy Tuesday! We are beyond delighted to say that our August 2024 Card kit, Graceful Flowers has SOLD OUT! We are so happy that you loved it as much as we loved putting it together! We hope that if you wanted you were able to get it, and this post will be a great inspiration for you! If you did not get the kit, the individual components are still available for purchase! Read on to learn more about this beautiful make by Keisha Charles (and please join us in welcoming her to our blog today as a special guest!) Enjoy!

I have a rainbow problem and if you give me 3 primary colors (I’m looking at you Distress Spritzes), 90% of the time you’ll get a rainbow.  With the white seam binding being so perfect for dying, I just got to Spritzing and then enhancing that color with a few dabs from my coordinating ink pads. Adding a bright, Copic-colored bloom from the Graceful Flowers Stamp Set, and then some more florals in the background (this time in a soft gray to tone down all that color) and my rainbow card was done!

  • Stamp the large flower arrangement in Distress Ink Lost Shadow vertically on both of the longer sides of a 4 1/4” x 5 1/2” piece of white card stock
  • Cut white seam binding into 5” strips and spray with the Distress Spritzes:
    • Overlapping the Picked Raspberry and Peacock Feathers to get purple
    • Overlapping Peacock Feathers and Fossilized Amber to get green
    • Let dry and dab ink pads in coordinating colors (see supply list)to enhance the color
    • Clean up with the Microfiber cloth as necessary 
  • Ink the edges of a 3 1/8” x 5 1/8” piece of white card stock using the Fossilized Amber Distress Spritz
  • Stamp the Graceful Flowers sentiment onto a piece of black cardstock with clear ink, dust with white embossing powder and heat-set.   Die-cut or fussy-cut the sentiment. 
  • Stamp the flower and stem from the Graceful Flowers Stamp Set using a Tsukineko Tuxedo Black Ink Pad. 
  • Color the flower and stem using Copics (see supply list) or similar alcohol ink markers. 
  • Adhere the stamped white background to a 4 1/4” x 5 1/2” Fog cardstock card base with craft glue
  • Wrap the smaller piece of white card stock with the dyed ribbons adhering with a Simon Says Stamp Tape Runner. 
  • Attach the “ribbon panel” to the white background with foam dots. 
  • Adhere the flower with craft glue and pop up the embossed sentiment with foam dots to finish.

SUPPLIES:

Simon Says Stamp Card Kit of the…
[ SSS ]
Simon Says Stamp Card Kit of the…
[ SSS ]
Simon Says Stamp Pawsitively Perfect…
[ SSS ]
Tim Holtz Picked Raspberry Distress…
[ SSS ]
Tim Holtz Fossilized Amber Distress…
[ SSS ]
Tim Holtz Peacock Feathers Distress…
[ SSS ]
May Arts WHITE Wrinkled Faux Silk…
[ SSS ]
May Arts Ivory Wrinkled Faux Silk…
[ SSS ]
May Arts Champagne Wrinkled Faux Silk…
[ SSS ]
Simon Says Stamp 3D Foam Squares…
[ SSS ]
Tsukineko Memento TUXEDO BLACK INK…
[ SSS ]
Tim Holtz Distress Ink Pad Picked…
[ SSS ]
Tim Holtz Distress Ink Pad Wilted…
[ SSS ]
Tim Holtz Distress Ink Pad Peacock…
[ SSS ]
Tim Holtz Distress Ink Pad Mowed Lawn…
[ SSS ]
Tim Holtz Distress Ink Pad Squeezed…
[ SSS ]
Tim Holtz Distress Ink Pad Lost…
[ SSS ]
Copic Sketch Marker RV02 SUGARED…
[ SSS ]
Copic Sketch Marker RV04 SHOCK PINK…
[ SSS ]
Copic Sketch Marker RV09 FUCHSIA…
[ SSS ]
Copic Sketch Marker Y26 MUSTARD Dark…
[ SSS ]
Copic Sketch Marker Y28 LIONET GOLD…
[ SSS ]
Copic Sketch Marker YG03 YELLOW GREEN
[ SSS ]
Copic Sketch Marker BG11 MOON WHITE
[ SSS ]
Copic Sketch Marker BG13 MINT GREEN
[ SSS ]
Copic Sketch Marker BG07 PETROLEUM BLUE
[ SSS ]
Bearly Art THE BUNDLE Precision Craft…
[ SSS ]
Simon Says Stamp Tape Dot Runner and…
[ SSS ]
Simon Says Stamp Cardstock 100lb Fog…
[ SSS ]

Thanks so much for stopping by, and thanks to Keisha for being our guest!

Did you know?! We’ve made our card kit subscription BETTER THAN EVER! Subscribe and secure your best value kit every month!

Learn more:

Here’s what makes our new service a crafting paradise:

Exclusive Access: As a subscriber, you get first dibs! Each month, you’ll get an exclusive sneak peek at our new kit, with the option to add more coordinating items to your cart, including handy replenishable supplies, all shipped together for your convenience.

Hassle-Free Payments: Say goodbye to monthly billings! Our automated system smoothly charges your preferred card, ensuring an uninterrupted flow of crafty goodness – unless you decide to pause, of course!

$5 Off Magic: Enjoy a special $5 discount off our kit’s retail price, exclusive to our beloved subscribers – no codes needed, just automatic savings!

Crafting Inspirations: Dive into a sea of creative ideas monthly, all tailored around your kit, to keep your inspiration flowing endlessly.

Flexibility First: Fear of commitment? Not here! Our subscription is as flexible as it gets – pause or cancel anytime, no strings attached.

Why wait? Step into the realm of our NEW Simon Says Stamp Monthly Card Kit service. Welcome a box full of crafting marvels, right to your doorstep. Craft with ease and let creativity come to you! Ready to elevate your craft? Subscribe Now and open the doors to boundless creativity!

NEW Tim Holtz Sizzix Halloween From the Vault Collection!

Hi friends! We’re excited to share the Fall/Halloween edition of super fun From the Vault Tim Holtz Sizzix dies! Shipping NOW! New to Tim’s Vault series? Learn more about the concept below!

Celebrating 15 years with Sizzix, Tim Holtz is bringing his favorite designs back from the vault and better than ever! The classics have been reimagined with Tim’s creative approach to combine different design elements that all work together. These curated sets feature new sizes and different die technology offering something new both to makers who have the original dies, or makers who missed them the first time around.-Sizzix Marketing Team

Created by Barbara Tarayao
Created by Heather Ruwe

One Stamp, Five Ways: Halloween Friends

Hi friends! Happy Sunday! We hope you’ve been enjoying our new Cheering For You collection and want to continue the gorgeous ideas with this fabulous new release today on our blog with special guest Suzy Plantamura! Read on and enjoy!

Halloween in July?!!! Based on many of the products in the Cheering for You release, I think it’s time to get our Halloween on! I decided to use the Halloween Friends stamp set as well as many of the Halloween dies in the release for my “one stamp, five ways” post today. Since I’m such a procrastinator, making Halloween cards can be the one thing I check off my list early this year! I hope my 5 cards get you in the mood for the dressing up, candy eating holiday of the year!

My first card was the most fun to make as I love making “custom” backgrounds with Copic markers. I started by stamping the haunted house from the Home Sweet Haunted Home stamp set (a couple years old, but one of my all-time favorites!) with black ink on an A2 sized piece of white cardstock. I then stamped a moon with yellow ink in the right-hand corner for placement. I took my Copics out in the summer sunshine and colored this spooky nighttime scene. By using a light blue and a light yellow Copic marker, I was able to blend them into a flame around the moon. I die-cut this piece with the A2 Thin Frame Die and attached it to a white card base.

I stamped all the images in the Halloween Friends stamp set with black ink and colored them all in with Copic Markers. I stamped the moon with Lemonade Ink and then added a border with Zest ink. I die-cut all the images out with the matching Halloween Friends dies. I attached them over my background using foam tape behind the top of the children and behind the Boo. I attached the moon and bats directly to the background. I then embossed the second sentiment from the stamp set with white embossing powder on the sky. I added some drops of white acrylic paint using the end of my paintbrush. Dip it once, then tap it on your background several times until the paint is gone and you get drops in all different sizes placed right where you want them!

I made the background of this card using the new Big Bat Die die-cut from white cardstock. I folded a piece of white cardstock using a scoring tool along the folded edge. I then placed the folded edge just inside the edge of the die so it wouldn’t cut through it and I was able to get a full sized bat! I then made a black card base using Tim Holtz black heavyweight cardstock, folding it in half and then placing the bat die just outside the fold so I had the same bat cut out of the inside of the card. I attached my card with a white bat inside a black background over a white cardstock card base. It’s fun how the bat is on the backside too!

I stamped some of the images in the Halloween Friends stamp set with Intense Black Ink and colored them with Copic Markers. I left the “boo!” sentiment white inside. I also die-cut the Bat Trio Die from the new release out of white cardstock. I colored one with a black Copic and attached those to the background and top of the bat. I attached the kids and the cat to the center of the bat. I embossed a sentient from the stamp set with white embossing powder on the bottom of the card and added the Boo sentiment above it. Last, I used white acrylic paint drops around the background in the same way I described on the last card directions.

I first die-cut a piece of white cardstock with the SSS Slimline Nested Rectangle Die. I then used several colors of PSInks in oranges and yellow to blend an orange background. I attached it to a white cardstock slimline card base. I die-cut two of the new Candy Corn Border dies from white cardstock. I colored the inside pieces of one with Copics and then attached the white frame from the other to frame the colors. I attached it to the bottom of the card front.

I stamped the moon with yellow PSInks and the other elements from the Halloween Friends stamp set with black ink on white cardstock. I colored them in with candy corn colors so they matched the background and border. I attached the moon first and then the sentiment over it with foam tape behind it. I added the pumpkin with foam tape behind him over the moon. I then attached the two kids with foam tape behind just their heads and glued their feet to the candy corn border. I added three small candy corn stamps and some more white acrylic paint drops to the background.

Let me start by saying it’s impossible (at least for me!) to get a good photo of foiled background cards straight on, so this card looks much better in person. It is just the color of purple on the top of my photo. I used the new Acetate Bats Foil Transfer for the background of the card. I ran it through my hot foil/laminating machine with purple foil and it covered perfectly! I attached this to a white cardstock card base.

I stamped three of the ghosts, a bat, and the boo with Intense Black Ink and colored them in with Copics. I stamped the moon with yellow ink and added some shading with Copics. I die-cut them all out with the matching dies. I attached the moon with the bat over it on the top left corner and the three ghosts around the bats. I used the Boo sentiment from the stamp set on the bottom of the card front. I used some yellow epoxy drops around the card background.

I used my “random stamping” technique for this card. I stamped the ghost stamp on a piece of A2 size Ranger Watercolor Paper using Intense Black Ink. I painted around the ghosts with Nuvo Shimmer Powder in Meteorite Shower. It’s the perfect color for a dark sky! I added pink cheeks and some gray shading to the ghosts with Copic Markers. I die-cut this piece with an A2 Thin Frame Die and attached it to a white card base.

I die-cut the new Hey, Boo die twice from white cardstock. I attached foam tape to the backside of one of these. I colored the letters of the other one with navy Copic markers. I glued the letters inside the solid one and attached it to the center of the card. I added LOTS of white acrylic paint drops around the background. I used the end of my paintbrush again dipping it in the paint and touching it to the paper multiple times to get different size drops.

Anyone in the mood for Halloween yet? I’m sure I got you in the mood for some candy at least! I hope you enjoyed this foray into fall using the Halloween Friends stamp set for my 5 cards. I love that this is a 4×6 “stamp set and I was still easily able to get 5 cards out of it! I also loved mixing in all the new Halloween dies with it for lots of unique designs. I hope you are enjoying the new Cheering For You release. Happy end of summer friends! –Suzy

SUPPLIES:

Simon Says Stamp SLIMLINE NESTED…
[ SSS ]
Simon Says Stamp A2 THIN FRAMES Wafer…
[ SSS ]
Simon Says Clear Stamps HOME SWEET…
[ SSS ]
Simon Says Stamp Premium Ink Pad…
[ SSS ]
Simon Says Stamp Embossing Ink Pad…
[ SSS ]
Simon Says Stamp Embossing Powder…
[ SSS ]
Popular Wagner Precision Heat Tool HT400
[ SSS ]
Simon Says Stamp Pawsitively…
[ SSS ]
Simon Says Stamp Pawsitively…
[ SSS ]
Simon Says Stamp Pawsitively…
[ SSS ]
Simon Says Stamp Pawsitively…
[ SSS ]
Simon Says Stamp Pawsitively…
[ SSS ]
Simon Says Stamp Pawsitively…
[ SSS ]
Simon Says Stamp Pawsitively…
[ SSS ]
Tim Holtz Distress 8.5 x 11 Black…
[ SSS ]
Tim Holtz Distress 8.5 x 11…
[ SSS ]
Neenah Cardstock Classic Crest Ultra…
[ SSS ]
Therm O Web Gina K Designs WILD LILAC…
[ SSS ]
Tonic METEORITE SHOWER Nuvo Shimmer…
[ SSS ]
Prismacolor PREMIER COLORED PENCILS…
[ SSS ]
Tim Holtz Flip Top Distress Paint…
[ SSS ]
https://www.simonsaysstamp.com/collec…
[ SSS ]

We use cookies to give you the best online experience. By agreeing, you accept the use of cookies in accordance with our cookie policy.