All New, Just In – Whimsy Stamps for Halloween!

Hi friends! We’re beyond delighted to welcome special guest Cari Scharping to showcase the BRAND NEW Whimsy Stamps Halloween collection with not just one, but two fabulous cards! Read on to learn more and enjoy!


Hello crafty peeps! It’s that time of year to begin your Halloween projects! This is my absolute favorite holiday, and I am super excited to be on Simon Says Stamp blog sharing two cards I made with some of the spooktacular products from Whimsy Stamps’ latest release.
My first card is a slimline card that features the new Primitive Halloween stamps and coordinating outline dies.

I started by die cutting several pieces of the short fence from the Slimline Fence die and distressed the edges with Black Soot. I adhered them to an 8 ½” x 3 ½” grey cardstock card base.

Once the entire base was lined with the fence pieces, I cut the base to 8 ¼” x 3 ¼” and again distressed the edges with Black Soot. I adhered the base to an 8 ½” x 3 ½” piece of black cardstock.
I die cut out Forever Cameo Frame set in both black cardstock (for the frame) and silver matte cardstock (for the mirror). I also stamped the select images from the Primitive Halloween stamp set. For the ghost, I used Whimsy Stamps’ Mirror Image stamp pad to create a second ‘reverse’ image as well. Color the images as you wish or use the colors I’ve noted at the end of the blog. Whimsy offers the coordinating outline dies for this set which make die cutting these images a breeze!

It was then simply a matter of layering the frames and images on the card base. I stamped the sentiments from the Primitive Halloween stamp set and die cut them out with Frame Labels dies. I adhered them with double sided foam tape. I adhered the card front to an 8 ½” x 3 1/2” card base I cut and scored from white cardstock.


SUPPLIES:
|


But wait, I’m not done! Because I was having so much fun with these new products, I made a second card using the new Primitive Candy Corn die. As much as I love with this new extra-large die set, I have to admit I am not fond of the actual candy. That gave me the idea for this card and the sentiment I would use.

The finished card is 5” x 6 ½ ”. Other than slimline cards, this is my preferred go-to size. So I started with a 5” x 6 ½” piece of white cardstock (I’ll cut it down later, after I color it, but I want the extra size to be able to tape it down to my work space). I ink blended the cardstock with Distress Oxide Inks (colors below)
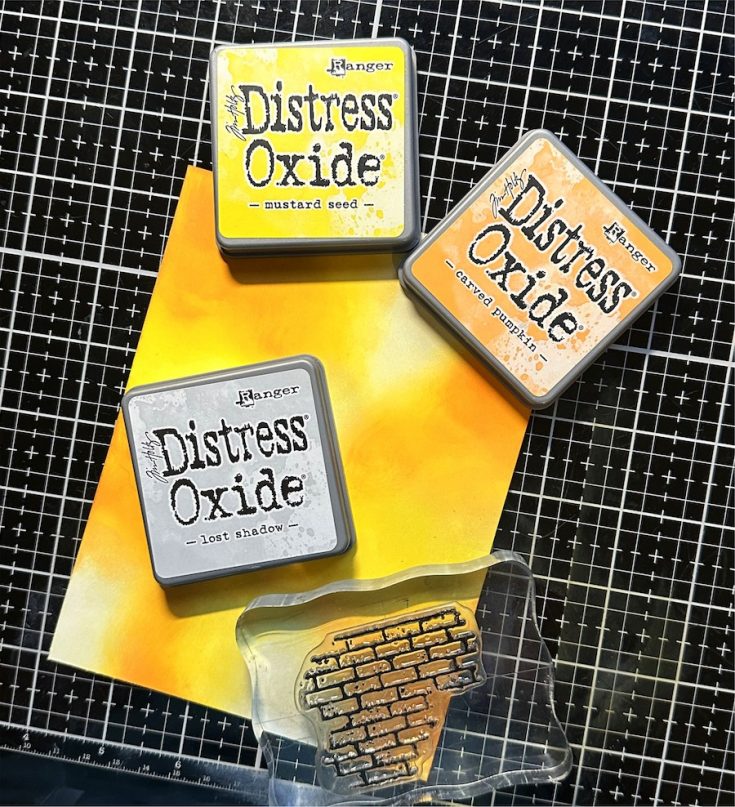
After letting it dry, I splattered it with orange, black and white paint. Once the paint dried, I cut the cardstock to 4 ½” x 6” and randomly stamped the brick pattern from Whimsy Stamps’ Mixed Media Bits stamp set.
Now it’s time to create your candy corn. I die cut the three sections of the candy with yellow, orange and white cardstock and die cut the outline base in black. I also cut the patch out in yellow and the patch outline and stitches in black. Assembling the candy corn is easy and you can place the patch and stitches as you would like.

I wanted a little something to go with the candy corn, so I stamped and colored the flowers from the Primitive Halloween stamp set I used for my first card. A list of the colors I used are noted below.

Using double sided tape, I adhered the ink blended cardstock to 4 ¾” x 6 ¼” black cardstock and then to a 5” x 6 ½” orange cardstock. This was then adhered to a standard 5” x 6 ½” scored card base. I used double sided foam tape to adhere the candy corn and flowerpot to the front of the card.
Lastly, I printed the sentiment from my computer (Font: DK Jambo) onto white cardstock and die cut it using Whimsy Stamps Quick Strips die set. I adhered it to black cardstock that I trimmed for the base and added it to the card as the final touch.


SUPPLIES:
|


Thanks so much for stopping by, and thanks to Cari for being our guest!
Card Kit Reveal and Inspiration: Chunky Thankful Greetings


Our September 2024 Card Kit—Chunky Thankful Greetings—is filled with soft beauty!
This delightful and carefully curated kit includes many amazing exclusive products from Simon Says Stamp: The Chunky Thankful Greetings 6×8 stamp set, Butterfly Burst embossing folder, and the delicate Rose-Winged Butterfly die, as well as the Northern Lights embellishment mix.
We’ve included 6 sheets of double-sided 6×6 patterned papers from Prima drenched in ethereal pastels. To enhance your creative experience, we’ve also included 6 Simon brand A2 Clear Acetate cards, 1 sheet of Tim Holtz Idea-ology Metallic Confections kraft cardstock, 3 white tags, and 1 Simon brand Craft glue stick.
Rounding out this fantastic kit are 1 half sheet of Simon vellum, 1 sheet each of Simon brand Lemon Chiffon and Cotton Candy cardstock, as well as 1 sheet of Neenah Solar White cardstock. The whole kit fits perfectly in the Mesh Zipper Bag provided!
WATCH THE VIDEO:

Ideas to INSPIRE!


Enhance your kit with these coordinating die sets that go perfectly with the theme and vibe of the kit (sold separately!)


Did you know?! We’ve made our card kit subscription BETTER THAN EVER!
Learn more:

Here’s what makes our new service a crafting paradise:
Exclusive Access: As a subscriber, you get first dibs! Each month, you’ll get an exclusive sneak peek at our new kit, with the option to add more coordinating items to your cart, including handy replenishable supplies, all shipped together for your convenience.
Hassle-Free Payments: Say goodbye to monthly billings! Our automated system smoothly charges your preferred card, ensuring an uninterrupted flow of crafty goodness – unless you decide to pause, of course!
$5 Off Magic: Enjoy a special $5 discount off our kit’s retail price, exclusive to our beloved subscribers – no codes needed, just automatic savings!
Crafting Inspirations: Dive into a sea of creative ideas monthly, all tailored around your kit, to keep your inspiration flowing endlessly.
Flexibility First: Fear of commitment? Not here! Our subscription is as flexible as it gets – pause or cancel anytime, no strings attached.
Why wait? Step into the realm of our NEW Simon Says Stamp Monthly Card Kit service. Welcome a box full of crafting marvels, right to your doorstep. Craft with ease and let creativity come to you!
Ready to elevate your craft? Subscribe Now and open the doors to boundless creativity!
We’re thrilled to have you in our crafting community and can’t wait to embark on this renewed creative adventure together!
Spooktacular Halloween Cards Featuring New Products From Pretty Pink Posh: Crafty with Caly!

Hi everyone! It’s Caly Person here today!
I’m so excited to share today’s cards with you! I’m a huge fan of Pretty Pink Posh products and their Halloween release is always a fun one! I have FIVE cards to share and hope you enjoy them!

There are so many great products in the Pretty Pink Posh August 2024 release and I have a longer video to share how each of them come together. I hope you’ll give it a watch!
WATCH THE VIDEO:

Pretty Pink Posh always has a wonderful selection of embellishments with each release that compliment their shaker dies, so there’s no surprise that two of my cards feature those products.

This card features the Candy Corn Shaker Dies, Stitched Ghosts Dies, and the Halloween Wreath Stencils. The shaker elements include candy corn images from the Halloween Icons set, Candy Corn Glass Beads, and Classic Halloween Glass Beads. The sentiment is from the Halloween Corners set.
Pawsitively Saturated Ink colors used: Lemonade, Cantaloupe, Carnation, Flannel, Charcoal, Latte, Seafoam.
Copic colors used:
Candy Corn: C0, C2, YR61, YR65, YR68, Y11, Y15, Y17
Blush: R30, R22

My second card is bat-themed! I paired the new Bat Shaker with images from the Batty About You set. The background is ink-blended with the Scattered Bats Stencil. The shaker mix is from the Halloween Magic Shaker Beads.
Pawsitively Saturated Ink colors used: Lemonade, Marine, Charcoal
Copic colors used:
Tree Branch: G40, YG06, E51, E31
Moon: Y0000, Y00, Y11
Bats: W0, W2, W4, R30, R22

This adorable card uses the Ghost Holder Die and the Layered Birch Tree Stencils. I ink-blended a white panel with blue ink before adding the first layer of the birch tree stencil with Tim Holtz Grit Paste. Once it was dry, I added the birch tree details from the second layer with brown ink. This sentiment is also from the Halloween Corners set.
Pawsitively Saturated Ink colors used: Cheeky, Cantaloupe, Sage, Royal, Amethyst, Latte, Mocha, Charcoal

This fourth card uses the Big Halloween Cupcake Dies and Spooky Mug Additions Dies, which coordinates with the Winter Mug set. I decorated the cupcake with candy corn images from the Halloween Icons set and used some clay confetti from the Spooktacular Mix. The sentiment is from the Upright Greetings: Halloween stamp. The background uses the Halloween Words Stencil.
Pawsitively Saturated Ink colors used: Carnation, Cantaloupe, Lemonade, Seafoam

My last card uses the adorable new Candy Bucket Dies and Build A Monster Dies. The sentiment on this card also uses the Halloween Corners set. I used the previously-released Candy Treats Dies to fill the bucket up with treats.

I hope you enjoyed all the fun inspiration from the Pretty Pink Posh Halloween release! The full release is now available at Simon Says Stamp!
~Caly
SUPPLIES:
|